Progress Report: Nismo V3 Kit Install on Roadster


 11-15-2011, 07:50 AM
#24
Registered User
Thread Starter
iTrader: (27)

Join Date: Feb 2008
Location: The OC, So Cal
Posts: 390
Likes: 0
Received 0 Likes
on
0 Posts
Like most Z owners, I have gone through a couple of sets. I do believe the wheels set the car off. After the kit has been installed, I will look into replacing the wheels. I look forward to your recommendation.
Last edited by John H.; 11-15-2011 at 08:05 AM.
11-15-2011, 08:49 AM
#25
The property has 2 F/T gardeners that make $25 per hr. I worked the armed EP detail as a private security contractor. Unfortunately, after 3 years, the contract ended. It was a nice run.
I see you are out in OH. Spent a few years in CLE, down the street from John Carroll. Man, I do not miss the cold weather.
I see you are out in OH. Spent a few years in CLE, down the street from John Carroll. Man, I do not miss the cold weather.
11-15-2011, 04:37 PM
#27
Registered User
Thread Starter
iTrader: (27)
Join Date: Feb 2008
Location: The OC, So Cal
Posts: 390
Likes: 0
Received 0 Likes
on
0 Posts
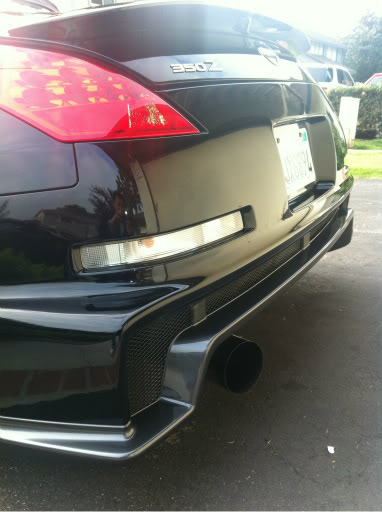
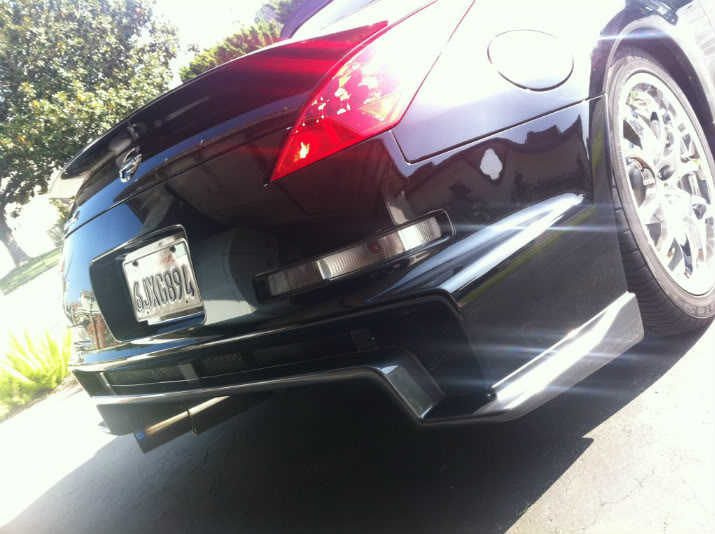
Bumper Redux
Lower Rear Diffuser Brackets, #85206 - The existing bumper did not have holes pre-drilled; thus, I mounted the bracket to the diffuser, and marked holes for drilling. Removed bumper cover, and drilled holes for rivets.
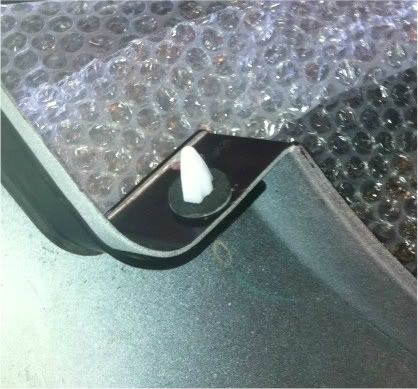
Awkward Bumper Fasteners, #85050EA - As I suspected, it is better to the mount these clips with the bumper cover off vehicle. Removing the old fasteners, I managed to salvage one. Purchased another at Tustin Nissan. Installed onto bumper cover. No problems with bumper cover install, the fasteners efficiently plugged into body.
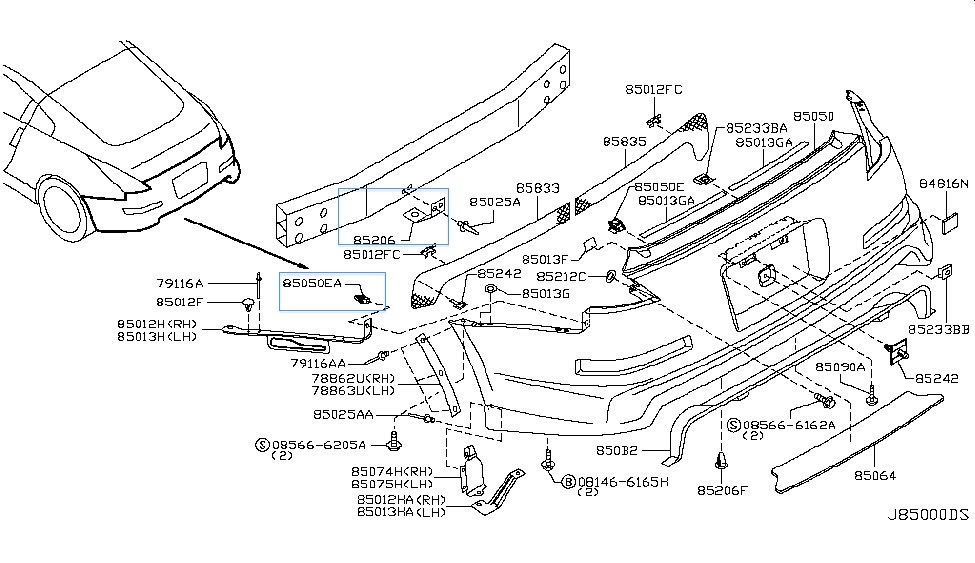
Lower Rear Diffuser Brackets, #85206 - The existing bumper did not have holes pre-drilled; thus, I mounted the bracket to the diffuser, and marked holes for drilling. Removed bumper cover, and drilled holes for rivets.
Awkward Bumper Fasteners, #85050EA - As I suspected, it is better to the mount these clips with the bumper cover off vehicle. Removing the old fasteners, I managed to salvage one. Purchased another at Tustin Nissan. Installed onto bumper cover. No problems with bumper cover install, the fasteners efficiently plugged into body.
Last edited by John H.; 11-15-2011 at 05:00 PM.
 11-15-2011, 05:21 PM
#30
Registered User
Thread Starter
iTrader: (27)
Join Date: Feb 2008
Location: The OC, So Cal
Posts: 390
Likes: 0
Received 0 Likes
on
0 Posts
Greddy Ti-C Single
As I mentioned previously, my Greddy hanger is hitting the lower diffuser. Via email and phone, I contacted Greddy, they advised the Ti-C single exhuast was not designed for the Nismo.
"Hello John I showed this to my tech and told him the situation you were
having with our product, after examining the bumper and even calling a local
Nissan dealer we are told the Nismo stock muffler is totally different from
the standard Z. the Nismo hangs lower to clear the bumper. My tech said that
since its not a manufacturing issue he will not be able to modify anything,
you will have to go to a muffler shop and have it re-welded for your specs."
I will heat up and bend (slightly) the OEM hanger (not pictured). It will pull the can down, and to left (drivers). This should allow me to clear the diffuser. Tomorrow, I will have this addressed.
Last edited by John H.; 11-15-2011 at 05:59 PM.


 11-16-2011, 05:21 PM
#38
Registered User
Thread Starter
iTrader: (27)
Join Date: Feb 2008
Location: The OC, So Cal
Posts: 390
Likes: 0
Received 0 Likes
on
0 Posts
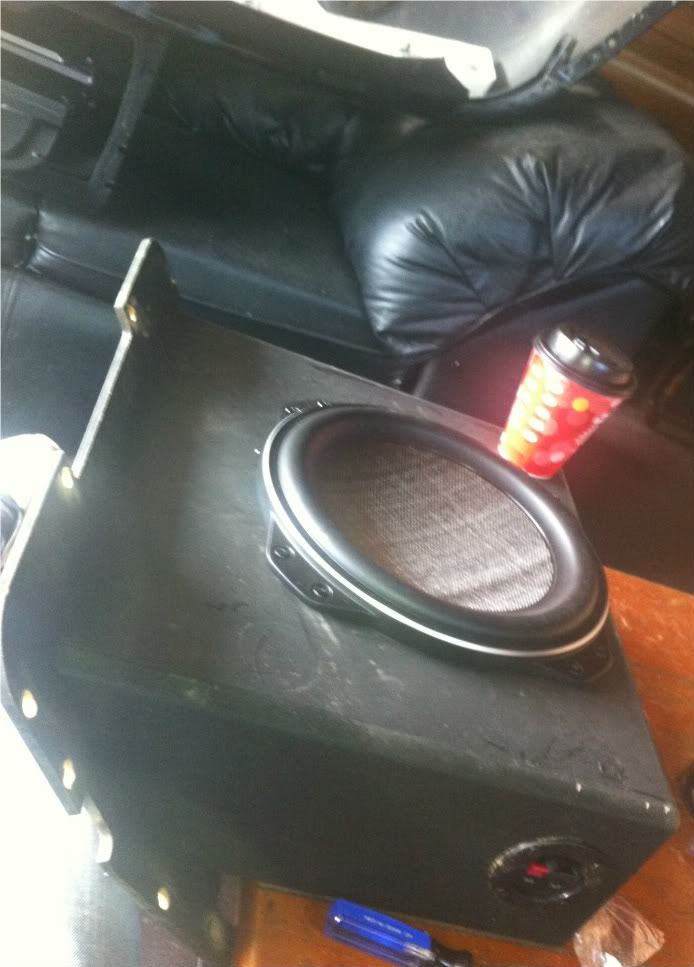
SIDETRACKED
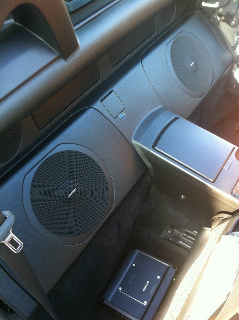
SRQ Sub Enclosure Install - Number 2
Today, I did not get a chance to address the Greddy hanger issue. Instead, I worked on installing my 2nd SRQ sub enclosure (which arrived, today). This was a previous project in progress. My glove box was already removed for enclosure install.
Please note that I relocated the trunk valet switch and emergency manual trunk release. The valet switch was mounted inside the passenger-side upper compartment. The emergency manual trunk release was moved, and secured, below the passenger-side upper compartment.
Also, the rear shelf panel was modified to fit a second OEM Bose subwoofer panel/cover.
John H.
Last edited by John H.; 11-16-2011 at 05:25 PM.