Project: Nismo roadster
 03-17-2015, 02:46 PM
#221

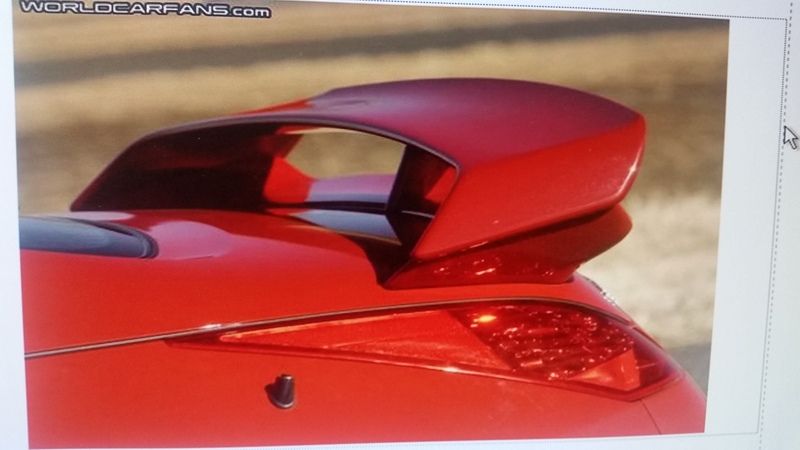
Im struggling a bit regarding setting the rear wing to the trunk. I have been studying pictures of nismo coops and looking at where the wind is a text with respect to the rest of the car. I found a picture that is a close up of the side rear and I positioned my wing according to the picture. I noticed that the leading edge of the spoiler is now flush with the trunk but the rear bottom part of the spoiler hangs off the trailing edge of the trunk.
Pic of Nismo coupe wing
Pic of my wing
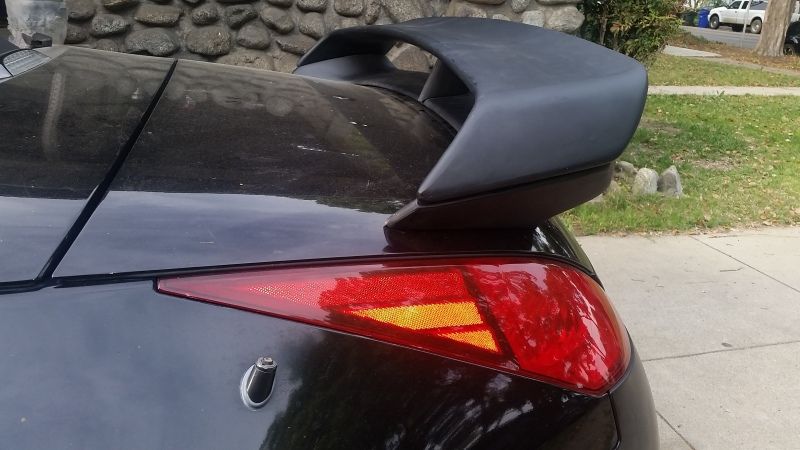
Leaing edge of wing:
Notice that it is slightly higher in the middle than on the edges. Perhaps if I grind down the edges I will be able to slide the wing forward slightly so that the trailing edge of the wing meets the trailing edge of the trunk
Pic of Nismo coupe wing

Pic of my wing

Leaing edge of wing:

Notice that it is slightly higher in the middle than on the edges. Perhaps if I grind down the edges I will be able to slide the wing forward slightly so that the trailing edge of the wing meets the trailing edge of the trunk
From those angles looks like a good fit?. Can you upload moar pics
My biggest gripe with most roadster wings is how far in towards the cabin people mount the wings. I always thought it would look better further back/ trailing even. I'd be interested to see a more side profile view
Last edited by Resmarted; 03-17-2015 at 02:50 PM.
 03-17-2015, 06:06 PM
#222

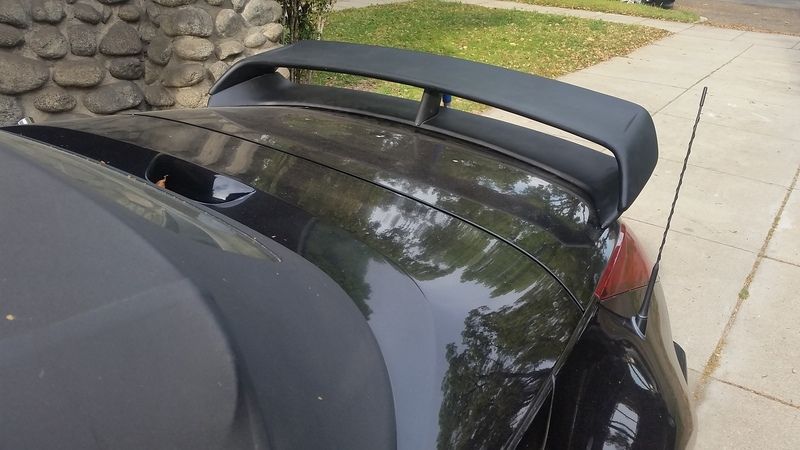
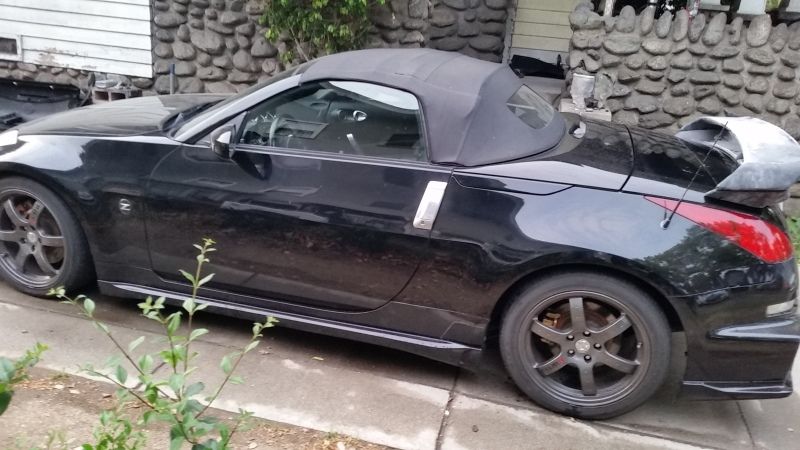
The wing hangs on the edge of the trunk and goes rearward past the bumper. It seems to follow the lines of the rear bumper.
Side view


I did some block sanding to smooth the top. I also did some shaping and now it fits good. Ill do some final smoothing and then prime and paint. Then the fun part.........mounting the beast.
Side view


I did some block sanding to smooth the top. I also did some shaping and now it fits good. Ill do some final smoothing and then prime and paint. Then the fun part.........mounting the beast.
Last edited by DeusExMaxima; 03-17-2015 at 06:32 PM.
03-17-2015, 08:35 PM
#223
The wing hangs on the edge of the trunk and goes rearward past the bumper. It seems to follow the lines of the rear bumper.
Side view
I did some block sanding to smooth the top. I also did some shaping and now it fits good. Ill do some final smoothing and then prime and paint. Then the fun part.........mounting the beast.
Side view
I did some block sanding to smooth the top. I also did some shaping and now it fits good. Ill do some final smoothing and then prime and paint. Then the fun part.........mounting the beast.
03-18-2015, 10:33 AM
#224
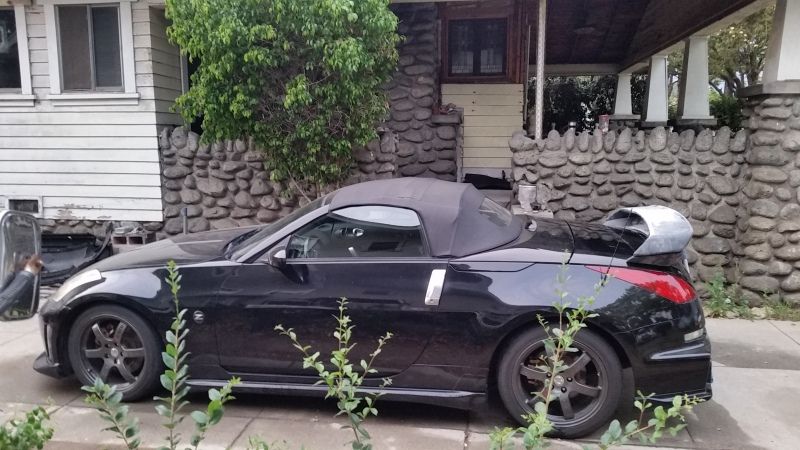
Another view, slightly forward:
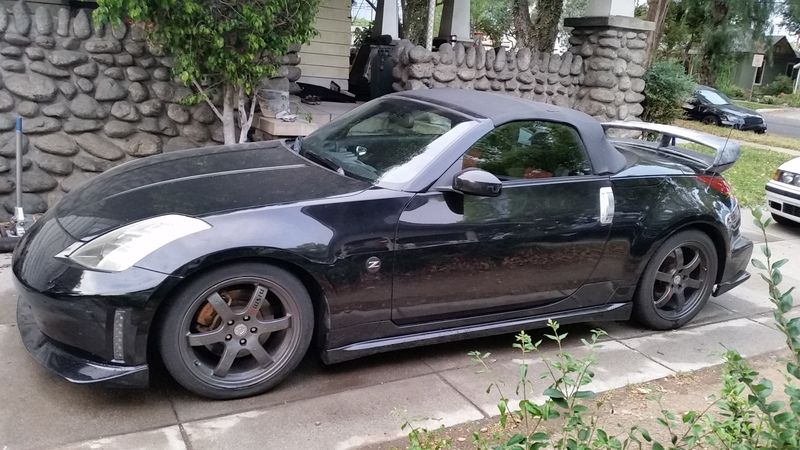
Im going to try to find time to mount it today. I think I will use the same technique I used to mount the OEM Nismo side skirt extensions. Ill get some studs and install two on each end and place it on the car and mark where the studs contact the trunk. Then Ill drill into the trunk. Next stud will be in the middle hole, and Ill mark that, and so on until all wing holes have corresponding holes in the trunk. I want a rubber gasket to seal the wing to the trunk. Ill look in Lowes/Home Depot for a thin rubber mat which will be between the wing and the trunk. Then Ill either use the fasteners that came with the wing, or get longer ones, and fasten the wing to the car.
After that, Ill remove the wing and prep and paint it.
Last edited by DeusExMaxima; 03-18-2015 at 10:39 AM.
03-20-2015, 10:05 AM
#225
Using my technique for fitting the lower side skirt extensions, I marked and drilled holes for the bolts to thread in to in order to bound the wing to the trunk. It was much more difficult than the side skirt extensions because the wing is not flexible and its fairly heavy (15 lbs!)
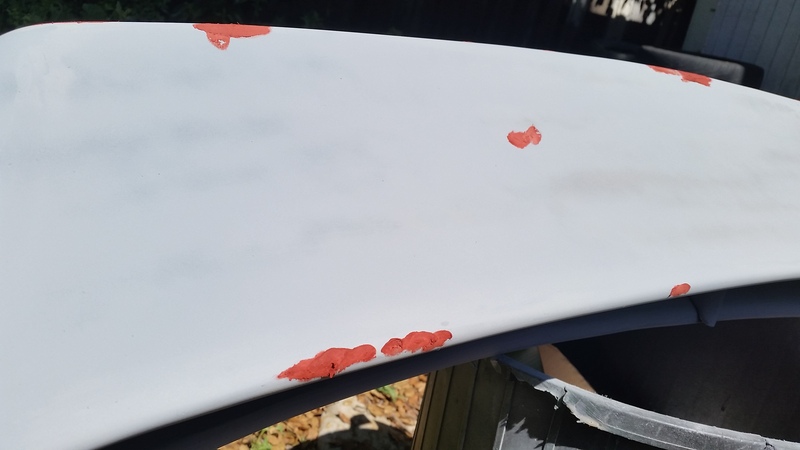
I got some Bondo to fill in some little flaws in the wing. Also, the top blade is a bit wavy in the middle, so I wanted to smooth it out a bit. While I was smooth the top out, I noticed the leading and trailing edges of the entire wing were not rounded smoothly. I turned my attention to these edges and used 80 grit, 120 grit, and 220 grit to smooth the edges so they were nice and round. This took most of the afternoon until the sun went down.
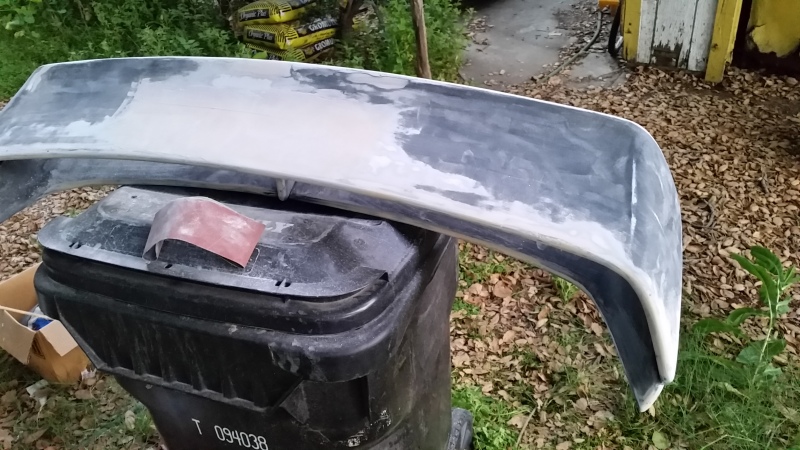
I also filled in the holes in the trunk from the V1 wing. That will need sanding and possibly more filling.
Today, I plan to finalize the sanding and then prime it.

 .
.

 03-21-2015, 11:44 AM
#230
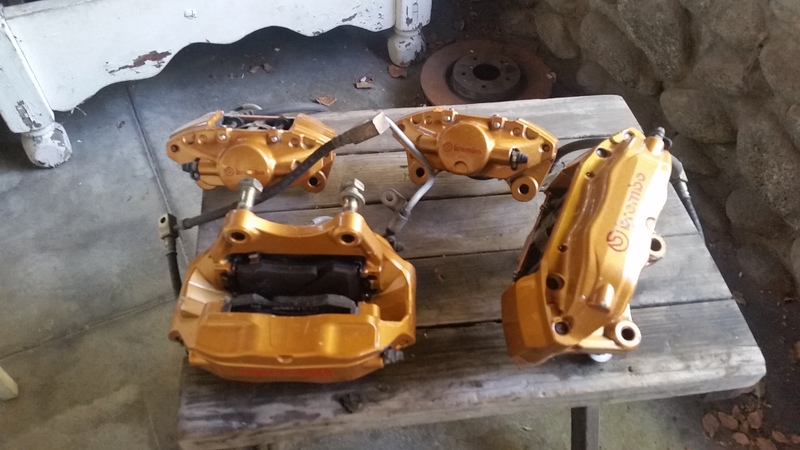
A couple of goodies arrived in the mail yesterday. My Brembo brakes came in and my shift bezel also came in. The first order of business was scrubbing the grubby Brembo brakes.
Pic of filthy brakes:
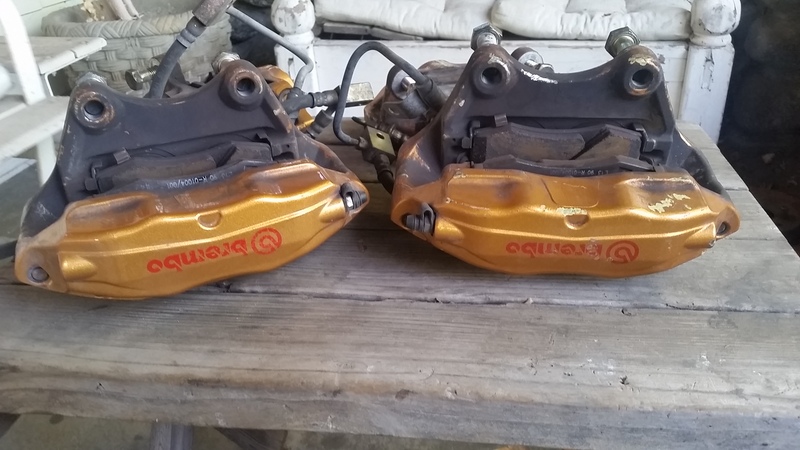
Brake all clean:
I sprayed a guide coat of primer to reveal lot of spots which need filling on the wing. I bought some KH3 and clear. Hopefully I can get the wing primed and ready for paint.
I also got an auto trans shift bezel. The problem is that I need the bezel or waterfall trim piece that goes around the three middle gauges, radio and the navigation unit from an 06 and up so I'm going to have to order that
Pic of filthy brakes:

Brake all clean:

I sprayed a guide coat of primer to reveal lot of spots which need filling on the wing. I bought some KH3 and clear. Hopefully I can get the wing primed and ready for paint.
I also got an auto trans shift bezel. The problem is that I need the bezel or waterfall trim piece that goes around the three middle gauges, radio and the navigation unit from an 06 and up so I'm going to have to order that
Last edited by DeusExMaxima; 03-21-2015 at 12:29 PM.
03-22-2015, 12:52 AM
#233
Ive been looking for Nismo wheels but cant find any.
I did more sanding and spot filling and priming. I think the wing will be ready for paint and maybe even painted tommorow...sunday. I drove down to san diego to look at the top center triple gauge trim but it was misrepresented by the seller as an 06 when it was actually for an 03-05 piece. Wasted trip
Im going to try to get the brembos installed sunday also.
03-22-2015, 08:57 PM
#234
I didnt feel well today so I did not progress as much as I had hoped. I remove the rear wheels to install the rear Brembo brakes but I discovered that one of the Brembo brakes was missing a brake line and they are different then the brake lines on the non Brembo brakes. So I put that all back together and got 1 front Brembo caliper and rotor on before I ran out of daylight.
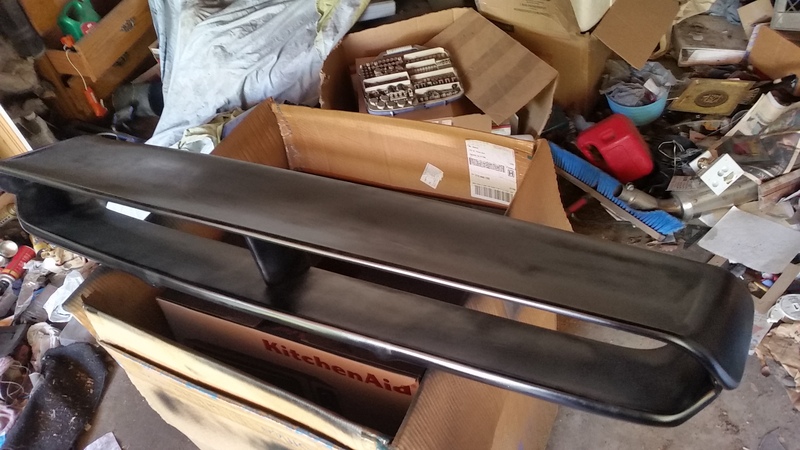
The wing is fully primed and ready for 800 grit sanding. then I will spray with filler primer and sand with 800 grit and it will be ready for paint. I will do all that in the next couple days as well as install the remaining Brembo calipers and I will get the missing brake line from the rear caliper.
Wing with spot filler:
Brembo brake installed:

I have an 06 upper center console on its way to finish the interior.
Still on the lookout for nismo rims.....
The wing is fully primed and ready for 800 grit sanding. then I will spray with filler primer and sand with 800 grit and it will be ready for paint. I will do all that in the next couple days as well as install the remaining Brembo calipers and I will get the missing brake line from the rear caliper.
Wing with spot filler:

Brembo brake installed:


I have an 06 upper center console on its way to finish the interior.
Still on the lookout for nismo rims.....
03-23-2015, 09:22 AM
#235

What Nismo wheels are you looking for? V3? There was a guy that posted some in the classifieds a while back. The images are blurry, so I'm not sure what kind of shape they're in or if they're even still for sale.
https://my350z.com/forum/wheels-tire...new-tires.html
I personally always liked the look of the V3 wheels, but it's not everyone's cup of tea.
I recognized your name from the maxima forums. I guess we have similar tastes. I still have my 00 SE that's my DD with 241K on the clock. I have an 05 ZR that's my weekend/fun car. I'm interested in seeing what you do with your ZR. Looks good so far!
03-23-2015, 02:04 PM
#236
What Nismo wheels are you looking for? V3? There was a guy that posted some in the classifieds a while back. The images are blurry, so I'm not sure what kind of shape they're in or if they're even still for sale.
https://my350z.com/forum/wheels-tire...new-tires.html
I personally always liked the look of the V3 wheels, but it's not everyone's cup of tea.
I recognized your name from the maxima forums. I guess we have similar tastes. I still have my 00 SE that's my DD with 241K on the clock. I have an 05 ZR that's my weekend/fun car. I'm interested in seeing what you do with your ZR. Looks good so far!
https://my350z.com/forum/wheels-tire...new-tires.html
I personally always liked the look of the V3 wheels, but it's not everyone's cup of tea.
I recognized your name from the maxima forums. I guess we have similar tastes. I still have my 00 SE that's my DD with 241K on the clock. I have an 05 ZR that's my weekend/fun car. I'm interested in seeing what you do with your ZR. Looks good so far!
I still have my 05 Maxima with about 140K on my clock, although its getting a bit tattered looking. When I complete this Z project, Ill turn my attention to restoring my Maxima (repair sun damaged clearcoat, fix problem areas, maintenance etc.)
Thanks for the kind words.
Today, before work, I installed the drivers side front Brembo caliper, after fiddling with the metal brake line. Just need to bleed it which I plan to do this afternoon. This afternoon, I also plan to install the rear Brembos when I get the brake hose in.
03-23-2015, 09:29 PM
#237
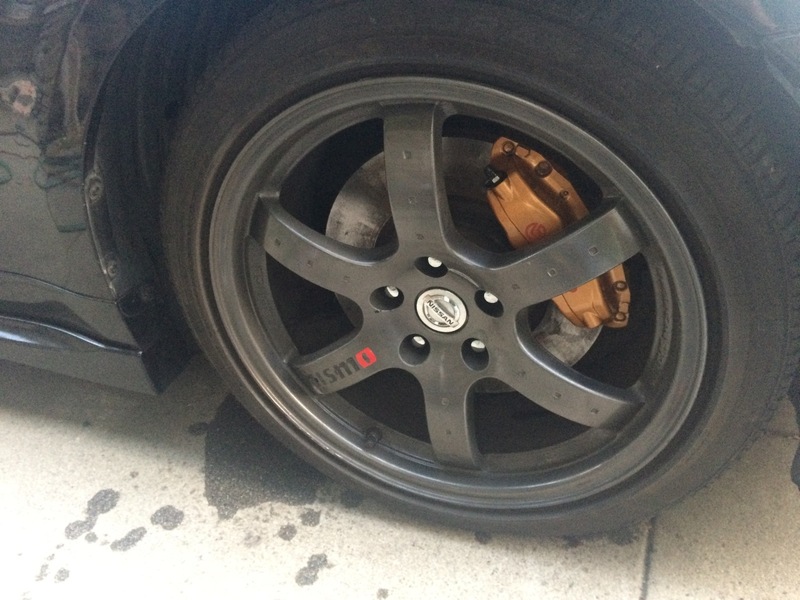
Brembos installed:
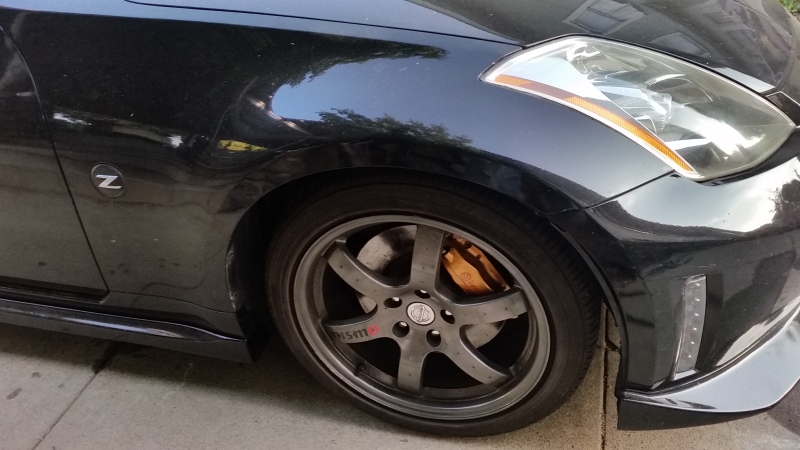 The rear brakes went on easily (once I took parking brake off
 ") ). They seemed a bit mushy but I think they need "braking" in....pun intended.
). They seemed a bit mushy but I think they need "braking" in....pun intended.
Rear brakes:
Its really starting to look like a REAL Nismo. Ive got my eye on a pretty lookin badge!!! Shshsh.....

 The rear brakes went on easily (once I took parking brake off ). They seemed a bit mushy but I think they need "braking" in....pun intended.
Rear brakes:

Its really starting to look like a REAL Nismo. Ive got my eye on a pretty lookin badge!!! Shshsh.....
Last edited by DeusExMaxima; 03-24-2015 at 12:52 AM.
 03-24-2015, 01:50 PM
#239
Thank you kindly!
I finished priming and lightly wet sanding with 800 grit. Then I aoplied basecoat of KH3 and clear coated it. The nooks and crannies were difficult to get to. I also filled in the holes in the trunk from the V1 wing and primed, block sanded, painted and cleared, doing my best to blend. I will need to wet sand the trunk and polish to blend it in well. This is clearly an art and I hope it turns out ok.
Pic of wing with very light tack coat
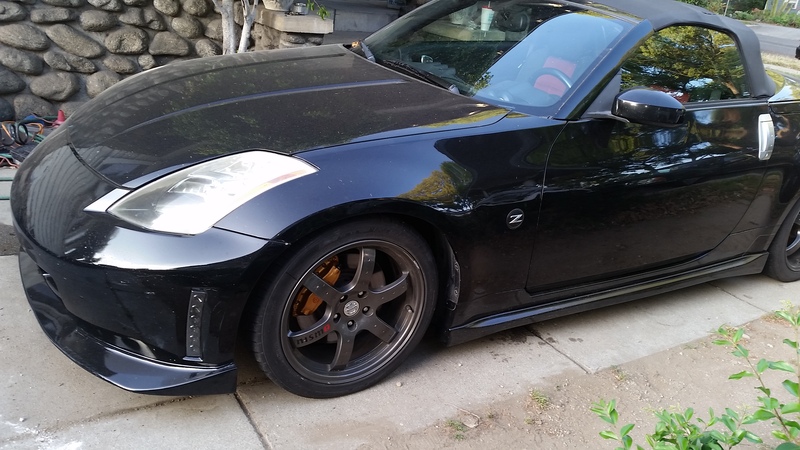
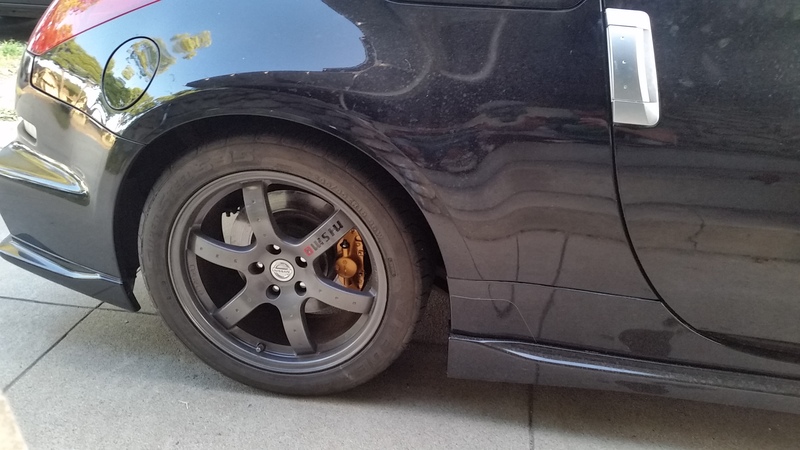
I drove around trunkless, to see how the brembos feel. You dont have to apply much pressure to stop the car. The pads cleaned off the rotors of residual rust. I may end up turning the rotors. Those brembos sure look sweet stuffed under the Track edition rims!
I finished priming and lightly wet sanding with 800 grit. Then I aoplied basecoat of KH3 and clear coated it. The nooks and crannies were difficult to get to. I also filled in the holes in the trunk from the V1 wing and primed, block sanded, painted and cleared, doing my best to blend. I will need to wet sand the trunk and polish to blend it in well. This is clearly an art and I hope it turns out ok.
Pic of wing with very light tack coat

I drove around trunkless, to see how the brembos feel. You dont have to apply much pressure to stop the car. The pads cleaned off the rotors of residual rust. I may end up turning the rotors. Those brembos sure look sweet stuffed under the Track edition rims!
03-24-2015, 10:07 PM
#240
Wing with fresh paint baking in the sun
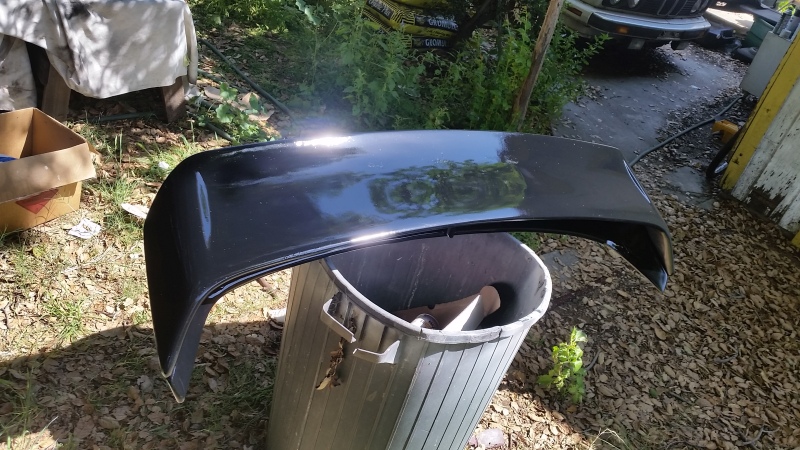
Theres a fair possibility ill have the wing mounted to the trunk and maybe even have the whole assembly installed on the car.
Still waiting on my waterfall trim to arrive from sacramento so I can finish the center console......cheers.

Theres a fair possibility ill have the wing mounted to the trunk and maybe even have the whole assembly installed on the car.
Still waiting on my waterfall trim to arrive from sacramento so I can finish the center console......cheers.