Project: Nismo roadster
 07-31-2015, 11:17 AM
#481

I removed the dragging undertray the other day so I can at least drive the car around. It looks like the drivers side fender liner is a bit thrashed too so Ill likely replace that as well, since it also attaches to the undertray. The Z speed bumper extension should provide enough rigidity until I get a proper undertray.
 08-19-2015, 11:13 AM
#482
I got distracted with a couple of other projects: I painted a couple of motorcycles; the hard bags on a Ducati Multistrada Dark (try matching THAT paint sometime!!!!), and a Suzuki SV650 (british racing green with tan seats).
I plan to fire up the GoPro and shoot a video explaining all that was done to the car and put it on Youtube and post the link on here.
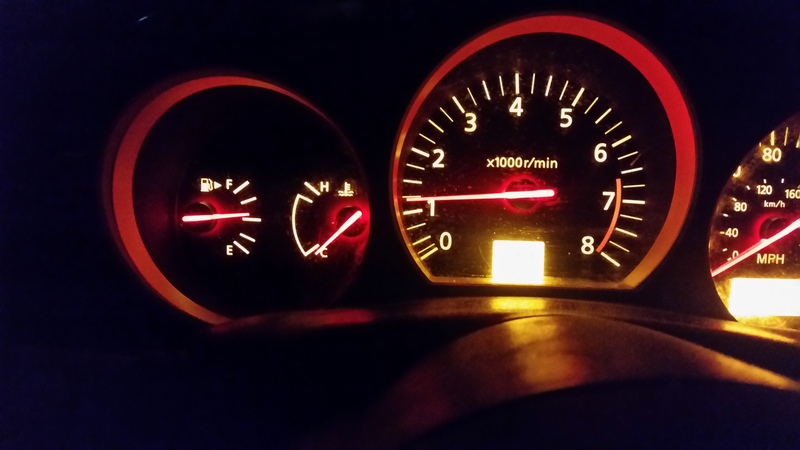
I still need to replace the undertray and get the front LED lights n the bumper working. I also need to get the top working, fix the faulty fuel tank sending units, and fix the oil gauge.
In the meantime, I have been driving the car and enjoying it. Someone asked me if it was a Skyline.
I plan to fire up the GoPro and shoot a video explaining all that was done to the car and put it on Youtube and post the link on here.
I still need to replace the undertray and get the front LED lights n the bumper working. I also need to get the top working, fix the faulty fuel tank sending units, and fix the oil gauge.
In the meantime, I have been driving the car and enjoying it. Someone asked me if it was a Skyline.
09-09-2015, 09:58 AM
#483
I think I got my top working. In order to raise the top manually, I had to disconnect two connectors and the little arms. I manually partially raised the top and reconnected the grey connectors and hooked up the arms. The top went up fine the rest of the way. The problem is the arms are held on to the top with a small clip and I cant find the clips. Anyone know a part number for the clips?
12-13-2015, 06:40 PM
#486
Registered User

I can't remember whether its this site or the UK site but someone does sell the parts that are the exact size so that you can build your own velocity stack. This is the only airbox/filter which actually offers power gains as proven on a dyno. Admittedly the gains aren't massive but they're gains all the same. The pop chargers and the like just give you a bit of induction noise which gives the impression of giving you more power. Nice Roadster.
01-07-2016, 12:42 AM
#487
I can't remember whether its this site or the UK site but someone does sell the parts that are the exact size so that you can build your own velocity stack. This is the only airbox/filter which actually offers power gains as proven on a dyno. Admittedly the gains aren't massive but they're gains all the same. The pop chargers and the like just give you a bit of induction noise which gives the impression of giving you more power. Nice Roadster.
01-23-2016, 09:54 PM
#488
I replaced the cam position sensor and all the lights pertaining to it are off. When I put the Nismo rims on I noticed that the TPMS sensors were there but I didn't know if they were good. I did the TPMS reset which is a complete pain in the *** but it was worth it because now the tire pressure sensors all work. Now all those warning lights are off. When I put in the Nismo Seats, the connectors to the airbags were different so my airbag lights are on. Well I should say were on because I put a 2.2 ohm resistor across the airbag connectors and now the airbags work except for the seat airbags which I could probably get to work by splicing in the connectors. I'm not really a big giant airbag fan because I really don't like having bombs going off in my face but at least all the other ones work and all my warning lights are gone.

Last edited by DeusExMaxima; 01-26-2016 at 08:46 AM.


 01-28-2016, 10:12 AM
#493
Even better take both of the bottom of passenger seats apart and switch them. Use the cushion with the old system on to the newer nismo seat.
My z came with the cloth seats and I switched them to the touring model leather seat off an 04 the plugs didn't match. After years of looking at that stupid blinking light I finally had it and tried the resistor diy method. I don't know what I did wrong but I nearly set my car on fire. There and then It occurred to me to use my long gone seats I had so bought the bottom portion of the seat and opened it to see the root of the plug. It was connected to a flexible circuit board thats glued to the whole surface of the cushion foam. There was no way to just take that part out so what I did was to to take the upholstery apart and switch the cushions. I put everything back together plugged it back together and did the airbag light reset. The light has been off every since.
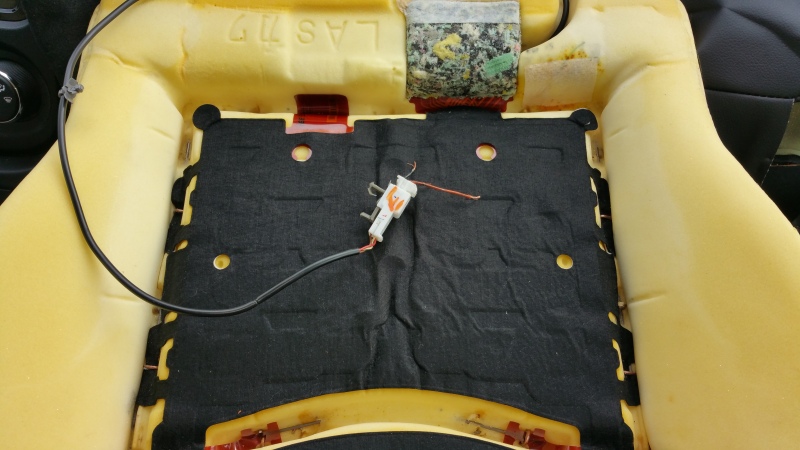
Unlike mine, your Z should have that abs plug connect to a bladder that sits on the cushion.
Last edited by kno; 01-28-2016 at 10:15 AM.
 04-04-2016, 11:47 AM
#495
My radiator started leaking so I replaced it. I had some difficulty wiggling the radiator out, but I could not seem to get the new one in. The roadster has a large weight on the front driver's side. The weight is held in by a thick bracket and some large mounting bolts. I discovered that when I removed the top mounting bolt, the radiator slid in fairly easily. I have not seen a reference to this weight on any radiator installation threads. Another helpful tip is to remove the coolant reservoir bracket bolted to the side of the frame. This will minimize the risk of damaging the new radiator's delicate fins when installing it.
True to other threads, the cooling system is difficult to bleed. The best way to bleed the cooling system is as follows:
After new radiator is installed, keep radiator cap off, remove the heater hose bleed plug at the passenger side rear of the engine compartment, fill the coolant reservoir to "maximum" and parking the car on an incline. Sloooooooowly, fill the radiator with half coolant and half DISTILLED water (not tap water, unless you want to do this again in five years!). If coolant comes out of the heater hose bleed, then carefully screw the plug in (do NOT cross thread it - be careful). Typically, the radiator seems to fill up first. In this case, put the radiator cap back on and massage the upper radiator hose. This forces air and some coolant out the heater hose bleed. This in turn drops the coolant level. Remove the radiator cap and fill to the top and repeat this until most coolant comes out of the heater hose bleed.
I followed this procedure, but I noticed that the heater cools off some at idle. It still stays warm, but it clearly cools off, indicating some air in the system. The car, however, did not run hot after warming it up to operating temperature and driving a couple of miles to work this morning.
I read threads where you have to let car cool down and remove radiator cap and top off the coolant level, and repaeat this four or five times. Also, make sure the coolant reservoir is at maximum level. This does not mean fill it to the top. It means fill it to where it says "maximum" on the bottle. If you cant see it, remove the single 10mm bolt and remove the reservoir to see the coolant level.
The following users liked this post:
350zchad (04-04-2016)
04-06-2016, 09:55 AM
#496
I discovered another helpful hint in bleeding the cooling system. If you can add fluid at the rear heater hose bleeder, you will speed up the bleeding process. I have a funnel with a tube on the end (I have NO idea where I got it from!) thats the perfect size for fitting in the bleeder. I removed the bleeder plug and poured coolant very very slowly...almost a trickle. I got it so I could see fluid at the top of the bleeder. I screwed in the plug and started the car. Even at idle, the heater blows hot. Success!
04-06-2016, 10:47 AM
#497

I discovered another helpful hint in bleeding the cooling system. If you can add fluid at the rear heater hose bleeder, you will speed up the bleeding process. I have a funnel with a tube on the end (I have NO idea where I got it from!) thats the perfect size for fitting in the bleeder. I removed the bleeder plug and poured coolant very very slowly...almost a trickle. I got it so I could see fluid at the top of the bleeder. I screwed in the plug and started the car. Even at idle, the heater blows hot. Success!


