Just ordered a Kenwood DDX470!!
#61
New Member
Thread Starter
Join Date: May 2013
Location: Charles Town, WV
Posts: 58
Likes: 0
Received 0 Likes
on
0 Posts
Those are outside dimensions for the box. There is a vertical crossmember between those 2 rear compartments, and the strap goes around that. When I first posted a pic of that setup a few years ago, I caught some heat for using a strap to fasten the box, but hell if I care. It holds the box securely, with no movement or vibrations, and it saved me from drilling into any body panels and struggling to reach the screws.
You'll have to ask someone else about that Bose wiring, but you want to find the end of the speaker wires downstream of any amp, whether it's inside or outside the head unit. I don't know if there is an adapter made for that, but I'd call or email Crutchfield, as they know their stuff. With the non-Bose you simply crimp one end of the adapter to the harness supplied with the Kenwood (maybe a dozen connections), and then plug the other end of the adapter into the harnesses on the car. The car's wiring remains unmolested.
You're correct about wiring the sub/amp. You need a short set of speaker cables between the amp and sub, and also a set of RCA cables and an amp turn-on wire between the amp and headunit. You can ground the amp in the rear compartment, but probably want to run an amp power wire directly from the battery:
http://liljerk.morpheus.net/350Z/firewall/
If I go with running the 6.5s off the DDX470, I was thinking of getting a non-Bose harness that has all the independent speaker connections from the DDX470 and that way run all new wires to the 6.5s, front and rear. I'm still undecided on going that route or getting a 5 channel for all of it.
I plan to have the seats and whatever plastic interior panels out to run the wires neatly. This car is way too small to try and work around the seats (IMHO).
Thanks again for taking the time to reply.
#62
Registered User
iTrader: (15)
Gotcha. Thanks. I like the tie down strap as well. Not interested in drilling unless absolutely necessary. You wouldn't believe some of the stuff I saw when I worked as a Honda technician from "professional installers". They drilled through wire harnesses, fuel lines, brake lines, you name it, the "pros" found ways to drill into/through it.
If I go with running the 6.5s off the DDX470, I was thinking of getting a non-Bose harness that has all the independent speaker connections from the DDX470 and that way run all new wires to the 6.5s, front and rear. I'm still undecided on going that route or getting a 5 channel for all of it.
I plan to have the seats and whatever plastic interior panels out to run the wires neatly. This car is way too small to try and work around the seats (IMHO).
Thanks again for taking the time to reply.
I'm about 5' 10" and 185 pounds, and I didn't pull the seats out while working on those rear interior panels. I slid the seats all the way forward, flipped the backs forward and sort of sat and leaned on the backs of the seats, I had to get out and stretch my legs every once in a while, but it wasn't bad. It was also July here in FL, in a non-A/C garage, but I like to work through the middle of the night, so the conditions were tolerable.
BTW, if you need to buy a dash kit for the Kenwood, buy the Metra. I had an American International kit, but because of the way the trim ring is designed, it causes the entire waterfall to not mount flush to either side of the main dash, by almost 1/8". Took me a while to figure out, as I initially thought the back of the radio was interfering with the dash internally. No issues with the Metra kit.
Here's a pic of the harness adapter. The black connector is from the Kenwood, and the 2 white connectors mate with the car harness:

#63
New Member
Thread Starter
Join Date: May 2013
Location: Charles Town, WV
Posts: 58
Likes: 0
Received 0 Likes
on
0 Posts
Pulled the trigger and bought the following + 2 wire kits and a distribution block (one 4 Gauge in and four 8 Gauge out). Kept it under budget, too!!
- Alpine SPS-610 Type-S, 6 1/2", 230W, 2 Way Speakers
- Alpine SPS610C Type-S, 6 1/2", 230W, Component Speakers
- Alpine SWS10D4 Type-S, 10", Car Subwoofer
- Alpine MRV-F300 4-channel car amplifier - 50 watts RMS x 4
- Alpine MRV-M500 Mono subwoofer amplifier - 500 watts RMS x 1 at 2 ohms
Last edited by 350xhilaration; 11-30-2013 at 04:36 AM.
#64
New Member
Thread Starter
Join Date: May 2013
Location: Charles Town, WV
Posts: 58
Likes: 0
Received 0 Likes
on
0 Posts
Box dimensions.
dcains, are these pretty much the same dimensions and sizes of boards you used to get the 18" x 12.5" x 6.5" box?
2 panels each:
6.5" x 18"
5" x 11"
11 x 18"
After building this box virtually, it looks as if I'll need a little more space inside the box. Do you think there is room in the sub compartment for increasing the box height another inch? My sub depth is 5.5625" and that doesn't include allowing for some air between the magnet and the box.
#65
Registered User
iTrader: (15)
I made my box with the top and bottom pieces 18 x 12.5", with the sides as a frame between those 2 pieces, simply because it involved less changing of the settings on the saw at Lowe's. But, you're still OK with your design, because you've got 5.75" inside depth, since the sub sits on top of the box. The box really can't be any taller because it will hit the back roof of the compartment. Don't forget the fiberfill, caulk the seams, and use plenty of screws.
#66
New Member
Thread Starter
Join Date: May 2013
Location: Charles Town, WV
Posts: 58
Likes: 0
Received 0 Likes
on
0 Posts
I made my box with the top and bottom pieces 18 x 12.5", with the sides as a frame between those 2 pieces, simply because it involved less changing of the settings on the saw at Lowe's. But, you're still OK with your design, because you've got 5.75" inside depth, since the sub sits on top of the box. The box really can't be any taller because it will hit the back roof of the compartment. Don't forget the fiberfill, caulk the seams, and use plenty of screws.
Oh my goodness...I just tweaked the design by an inch not thinking the speaker would be sitting on top of the box. I wasn't allowing for the .75" of the top panel!!! See attached.

That'll take a while to re-do in sketch-up...or just scratch the drawings and know that my original plan will work.
Last edited by 350xhilaration; 11-30-2013 at 03:00 PM.
#67
New Member
Thread Starter
Join Date: May 2013
Location: Charles Town, WV
Posts: 58
Likes: 0
Received 0 Likes
on
0 Posts
I redrew my sketches.
I was also doing some reading on spacing between the magnet and box. If there's a solid magnet, no problems with the magnet touching the back wall, but if it's a vented cone (like mine), it should have about 3/4"-1" of space for cooling.
I know dcains you said the box couldn't be much higher than 6.5" due to the "ceiling" in the rear of the compartment. So, I was thinking, what if I made a solid 3/4" MDF spacer under the sub? That would give me 15/16" total space under the magnet instead of only 3/16".
So, my question is: Directly above the speaker, do you think there is enough room to raise the speaker by 3/4" as in my new sketch?
#68
Registered User
iTrader: (15)
Clearance is tightest at the rear top edge of the box, but you may be able to use a spacer around the sub. I'm not sure overheating the sub is a real issue, or not. I've got no way to tell, except that mine has been fine for a few years with minimal clearance.
I should also tell you that I have two vertical braces inside my box. Each is maybe 3" wide, and placed about halfway between each side of the sub and the corresponding side panel, screwed into the top and bottom of the box. Minimal internal volume is sacrificed, but I wanted the box to be as stiff as possible, so it seemed like a good idea.
I should also tell you that I have two vertical braces inside my box. Each is maybe 3" wide, and placed about halfway between each side of the sub and the corresponding side panel, screwed into the top and bottom of the box. Minimal internal volume is sacrificed, but I wanted the box to be as stiff as possible, so it seemed like a good idea.
#69
New Member
Thread Starter
Join Date: May 2013
Location: Charles Town, WV
Posts: 58
Likes: 0
Received 0 Likes
on
0 Posts
From the specs of your JL sub, it looks like you have 13/16" clearance under your magnet. Wonder if that could be part of the reason you've not had any overheating issues.
Thanks for the brace info. How thick were the braces? Did you make small 'pillars' inside for braces? Any pics?
Thanks for the brace info. How thick were the braces? Did you make small 'pillars' inside for braces? Any pics?
#70
Registered User
iTrader: (15)
I don't recall the depth of my sub, but I remember worrying about the clearance, so I'm sure it's much tighter than 13/16", maybe more like 3/8"?. I don't recall if the voice coil is vented, either, as it's been ~3 years.
I made the braces out of some scraps of the 3/4" MDF. As you said, like "pillars" on either side of the sub. Approx 3" wide X 5" tall. by Sorry, no pics.
I made the braces out of some scraps of the 3/4" MDF. As you said, like "pillars" on either side of the sub. Approx 3" wide X 5" tall. by Sorry, no pics.
#71
Registered User
iTrader: (6)
I know these aren't the highest quality pieces, but I'm not going for a serious audio system. Those days are long behind me. I'm just looking for an upgrade over the Bose system on a budget.
I just priced for $395 the following:
I can either build a suitable box for the sub and tuck it in the stock sub location or get an under-strut box for $75-$100.
I considered driving the doors and rears off the DDX470 and getting a sub amp and a single 10", but that's a lot of interior panel removal to do it that way to eventually tear apart and do again.
I'm not dead set on any of the listed components of this system. I just did some quick browsing and added stuff to the cart based on sizes & features. There are plenty of options for speakers, amps and subs that come in around the same price.
Feel free to chime in on experience (good or bad) with any of the listed components.
I just priced for $395 the following:
- Kenwood 5 channel amp for $199
- Wiring kit (with purch of amp) for $37.49
- Sony 6.5" components for $54.99
- Sony 6.5" 3-way for $46.99
- Alpine 10" sub for $54.95
I can either build a suitable box for the sub and tuck it in the stock sub location or get an under-strut box for $75-$100.
I considered driving the doors and rears off the DDX470 and getting a sub amp and a single 10", but that's a lot of interior panel removal to do it that way to eventually tear apart and do again.
I'm not dead set on any of the listed components of this system. I just did some quick browsing and added stuff to the cart based on sizes & features. There are plenty of options for speakers, amps and subs that come in around the same price.
Feel free to chime in on experience (good or bad) with any of the listed components.
You could have spent more money on some good quality components and coaxials, amplified them, and realized that a subwoofer is almost not necessary. With proper acoustic treatment to the doors and rear compartments, you could have easily achieved deep bass and clear highs without having to cut corners on speakers alone.
Just my $.02. I used to have a need for subwoofers, but then, after experimenting with high quality stuff, 4x 6.5" speakers properly amped and tuned became more than enough to enjoy low bass, subtle mids, and clear highs.
In a nutshell... Buy a headunit for it's features, ignore the power output. Buy good speakers with a nice power rating, response curve, and true HZ range. Amplify those speakers while utilizing LPs and HPs. If you don't need to feel the bass in your body, and feeling it in your eardrums is more than enough, skip the subwoofer. If you truly need one, a nice 8" or 10", as you've been looking at, will do.
I'm tired, so I apologize if some of this was redundant or didn't make sense.
My old Z install, using a 4-channel and mono amp. Most times, the subwoofer wasn't needed, and I'd turn it off utilizing an in-line switch I spliced into the amplifier remote turn-on wire.
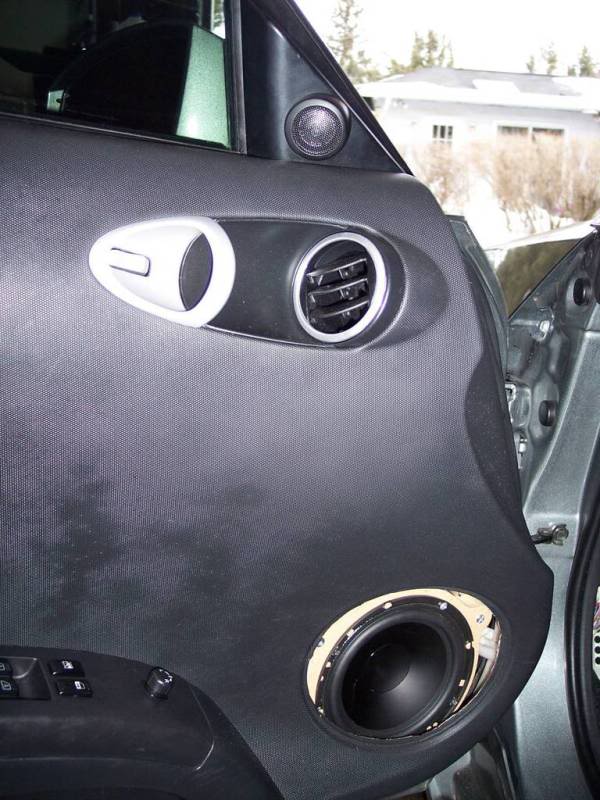
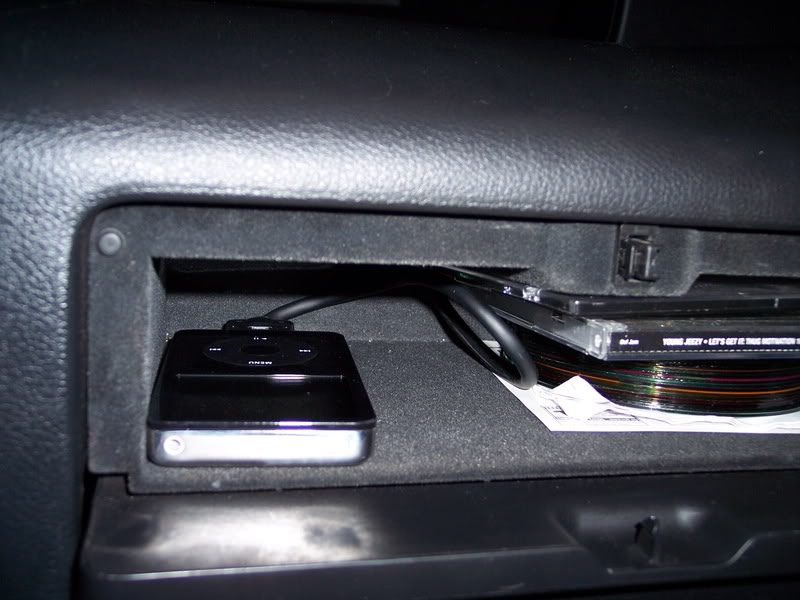
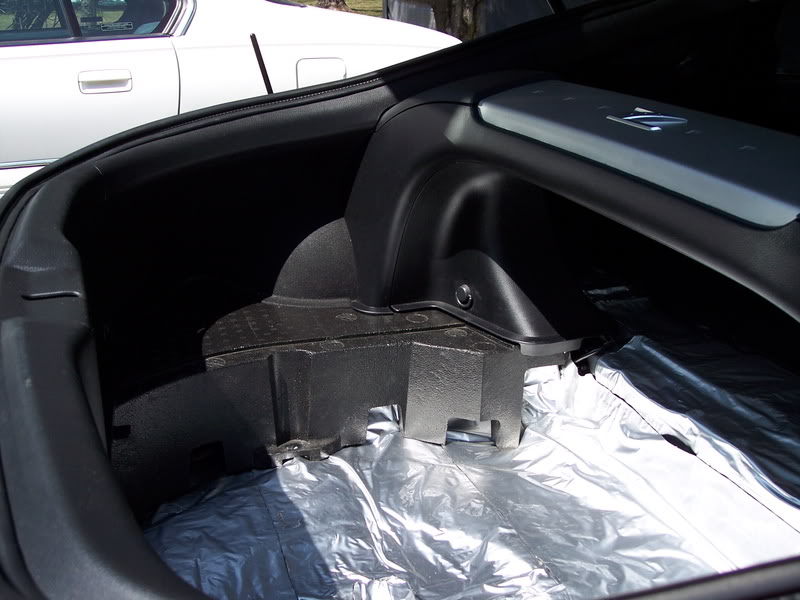
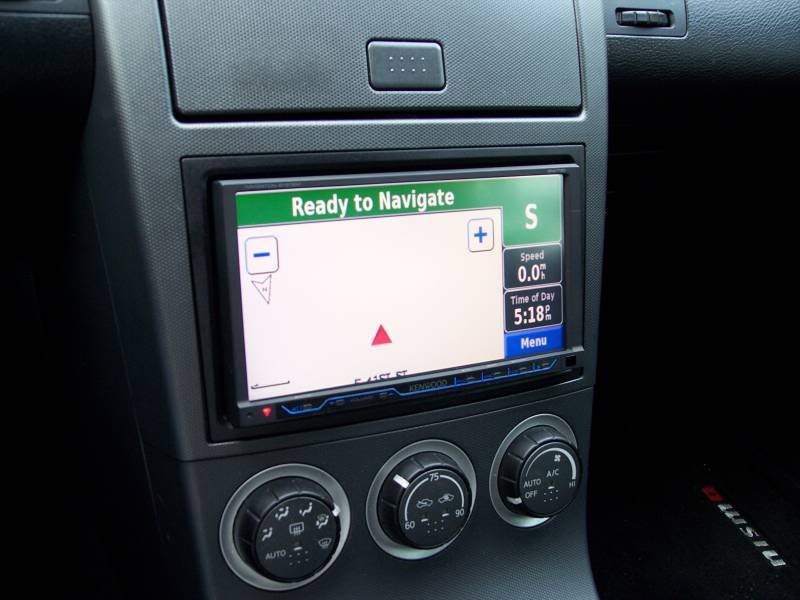
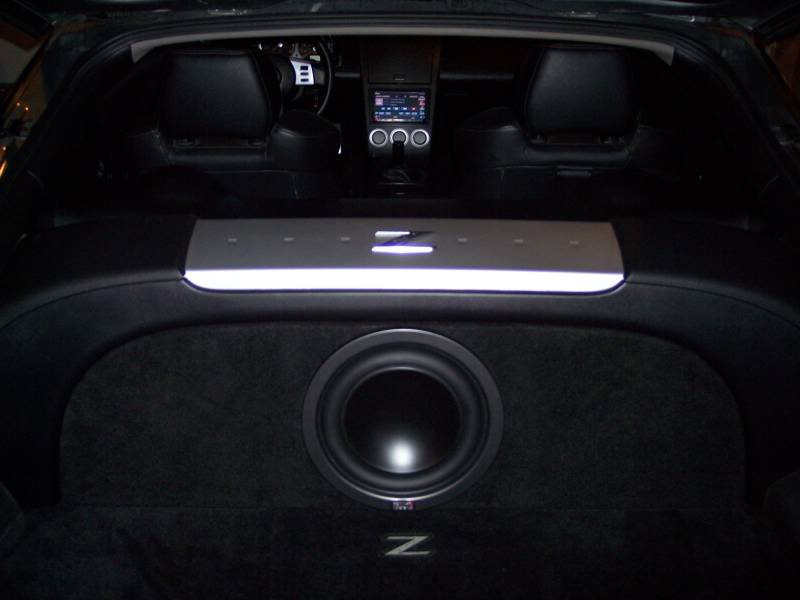
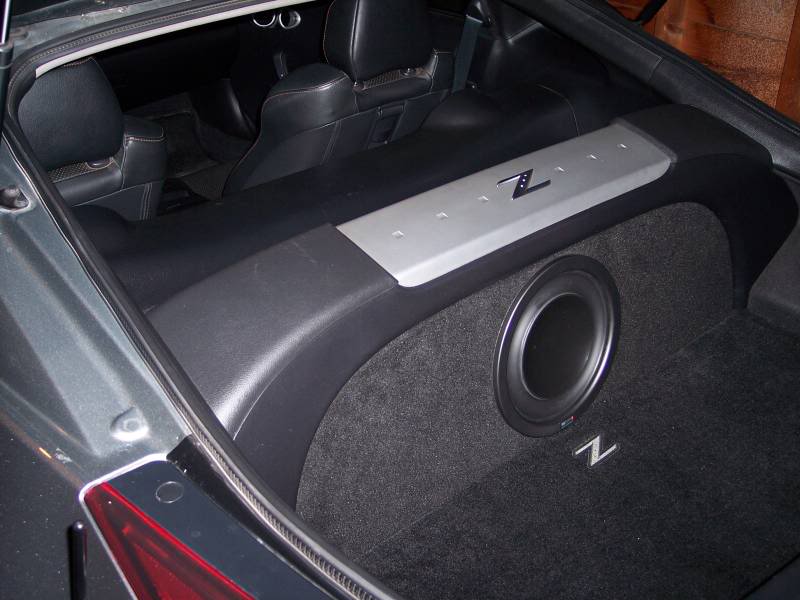
Last edited by Spork; 12-01-2013 at 06:06 PM.
#72
New Member
Thread Starter
Join Date: May 2013
Location: Charles Town, WV
Posts: 58
Likes: 0
Received 0 Likes
on
0 Posts
Thanks for the input. I switched my equipment list along the way. All Alpine amps and speakers now. Go back a couple pages to see if you'd like.
In your opinion (or fact), the new gear may be sub par as well, but I feel confident the (new) setup I chose will suit my needs.
Your input is appreciated, though.
In your opinion (or fact), the new gear may be sub par as well, but I feel confident the (new) setup I chose will suit my needs.
Your input is appreciated, though.
#73
New Member
Thread Starter
Join Date: May 2013
Location: Charles Town, WV
Posts: 58
Likes: 0
Received 0 Likes
on
0 Posts
#74
Registered User
iTrader: (4)
Sort of pulling this thread that is about a month old back up.
I just put in a complete system, and went with the Kenwood DDX470 headunit. Great unit!
First annoyance is that my iphone doesn't play my Garmin navigation, video, etc through the USB and aux I ran from back. So I ordered a genuine Kenwood Kenwood KCA-IP202 iPodŽ cable,.. Hoping Kenwood just made something proprietary in this "special "cable that allows video to transmit through the 30pin from my Iphone 4.. cause the regular Iphone cable won't transmit video.
Anyhow.
I'm interested in the topic of the thread,.. The backup camera.
I looked around and the Kenwood cameras are $300.00+ -- Wow.. that's as much as the headunit!
Then I see you can get this one that removes a tag light for $15-$30 -- It seems too good to be true to be 10 times cheaper? But, is it really a good camera?
If so.. I'll order one today.
Few questions if you don't mind.
1) How does the tag look with only one side lit up at night?
2) Is there anyway to modify/fabricate this thing to keep both lights going so it won't look funny at night? Or does the left side light alone cover the whole tag at night without looking "off" ?
3) Is there anyway to wire this up so I could turn on the rear view camera when I'm not in reverse as well? (Just be neat,.. if you can't,.. then it's no big deal.)
4) Any specific vendor/seller you would recommend buying from .. I know how this cheaper stuff goes on Ebay,.. some sellers are crap, some are much better.
I think that's about all the questions I have.
Thanks!
Last edited by Chromatic; 01-18-2014 at 10:25 AM.
#75
Registered User
iTrader: (15)
The backup cam has a socket for the OEM bulb, so both tag lights still illuminate. You can mount it on either side, but I think it works better on the passengar side, since that's more of a blind area.
The camera is supposed to be powered by the backup light circuit, but you can also rig up a secondary manual switch, if you like. You'll have to use a diode to isolate the two circuits, though, otherwise when you manually switch on the cam, the backup lights will also come on.
I don't think there's much difference between the different cams available on eBay, as I've tried a few. They were so cheap, I bought from 2 different sources.
Here's one:
http://www.ebay.com/itm/ETO-Nissan-Tiida-350Z-Qashqai-Xtrail-Rear-View-Camera-Reverse-Backup-Parking-Cam-/281032336885?pt=LH_DefaultDomain_0&hash=item416ed525f5
Here are a few installed pics:


I might also suggest some brighter LED backup lights:
http://www.ebay.com/itm/2x-T20-7440-7743-992-White-68-SMD-Reverse-Stop-Brake-LED-Light-Lamp-Bulb-12V-US-/360837505613?pt=Motors_Car_Truck_Parts_Accessories&hash=item540397624d&vxp=mtr
And, tag lights:
http://www.ebay.com/itm/2x-Canbus-T1...-/161183353341
The camera is supposed to be powered by the backup light circuit, but you can also rig up a secondary manual switch, if you like. You'll have to use a diode to isolate the two circuits, though, otherwise when you manually switch on the cam, the backup lights will also come on.
I don't think there's much difference between the different cams available on eBay, as I've tried a few. They were so cheap, I bought from 2 different sources.
Here's one:
http://www.ebay.com/itm/ETO-Nissan-Tiida-350Z-Qashqai-Xtrail-Rear-View-Camera-Reverse-Backup-Parking-Cam-/281032336885?pt=LH_DefaultDomain_0&hash=item416ed525f5
Here are a few installed pics:


I might also suggest some brighter LED backup lights:
http://www.ebay.com/itm/2x-T20-7440-7743-992-White-68-SMD-Reverse-Stop-Brake-LED-Light-Lamp-Bulb-12V-US-/360837505613?pt=Motors_Car_Truck_Parts_Accessories&hash=item540397624d&vxp=mtr
And, tag lights:
http://www.ebay.com/itm/2x-Canbus-T1...-/161183353341
#76
Registered User
iTrader: (4)
The camera is supposed to be powered by the backup light circuit, but you can also rig up a secondary manual switch, if you like. You'll have to use a diode to isolate the two circuits, though, otherwise when you manually switch on the cam, the backup lights will also come on.
Hardest part of this seems like just running the single video input to the back of the headunit. That would be the only wire that would go through the car I'd imagine?
The power and ground would just come straight off the factory wiring to the passenger Tail light. I imagine given these replace the whole light section.. they are designed to wire directly into (power/ground) and then that is already hooked up to a light socket that powers the light on the camera for tag.
Am I making this too easy?
I just tore my car completely apart.. every inside and rear panel, seats.. only thing left in the car was the steering wheel and dash (minus the center where the radio/gauges etc are). So I've gotten pretty familiar, and faster at taking it apart. Seems like I can route a video RCA up the panel going over the wheel well in rear.. that leads to carpet (door seal)..then by kick panel and up into the back of the headunit. Sound about right? That isn't too bad to pull apart. Literally just ripping panels.. all of those are clipped.. aside from the two plastic holders on the kick panel.
I don't think there's much difference between the different cams available on eBay, as I've tried a few. They were so cheap, I bought from 2 different sources.
Here's one:
ETO Nissan Tiida 350Z QASHQAI Xtrail Rear View Camera Reverse Backup Parking Cam | eBay
I might also suggest some brighter LED backup lights:
2X T20 7440 7743 992 White 68 SMD Reverse Stop Brake LED Light Lamp Bulb 12V US | eBay
And, tag lights:
http://www.ebay.com/itm/2x-Canbus-T1...-/161183353341
http://www.ebay.com/itm/Nissan-350Z-370Z-CMOS-NTSC-Car-Park-Rear-View-Backup-Reverse-Camera-Night-Vision-/281201911421?pt=Motors_Car_Truck_Parts_Accessories&fits=Make%3ANissan&hash=item4178f0a67d&vxp=mtr
Are the cords that come with these cameras amply long enough to run to front?
Also.. looking at the cording for this camera,.. It seems you wire as I suspected at the light for power.. then run a Video single rca and the "reverse light" wire that hooks to back of headunit/harness -- Though, Since the power is going to get switched on wiring to the reverse lights (right?) -- what's the point of the wire going to the head unit called the "reversing wire" ?
If you think that camera is just as good as the one you use.. then I'll go ahead and order it now.
Still.. your picture shows very good quality,.. I don't get how these guys can sell backup cameras like this for $23, and Kenwood sells their camera(s) for $300+. I'm sure the kenwood looks a bit better,.. but the picture you posted looks just fine.
You got two different ones -- Did one break? When you tried them both.. were they both essentially the same picture/quality ?
Thanks,
#79
Registered User
iTrader: (15)
Here's the deal with the cam install -
The backup wire on the Kenwood needs power from the backup light circuit to tell the headunit the camera is on - just the video output from the cam isn't enough. So, you need to run that wire to the rear of the car, along with an RCA cable, whcih comes with the camera.
The camera gets power from the backup light ciruit, too, which IIRC is a green wire in that harness across the back of the trunk compartment. And, there is a ground wire for the cam, which you can easily find back there. The signal wire from the cam can be passed through a rubber grommet you'll see in the rear of the trunk wall.
The only difference in the two cams I had was that one had a blue grid on the screen, and the other was yellow. I gave away the spare when I sold my previous DDX516 headunit. All the cams have "night vision" and gradually fade to black and white as the light dims, thus upgraded backup lights (the LED's I linked) are nice to have. The cheap cam I have is just as good, maybe a bit better, than the OEM cam on my wife's Acura TL-S.
Shipping from China can be variable, but the last cam I bought showed up in a week, so no complaints, but I might have bought from a US seller if I had seen one. Same with the LED's.
As an aside, a guy I work with bought a similar rear cam for his Dodge Charger a few weeks back. Rather than take apart his interior to run wires, a much bigger job in that big 4-door, he found a wireless cam transmitter on eBay. I think he said it was ~$15.
#80
Registered User
iTrader: (4)
Here's the deal with the cam install -
The backup wire on the Kenwood needs power from the backup light circuit to tell the headunit the camera is on - just the video output from the cam isn't enough. So, you need to run that wire to the rear of the car, along with an RCA cable, whcih comes with the camera.
The backup wire on the Kenwood needs power from the backup light circuit to tell the headunit the camera is on - just the video output from the cam isn't enough. So, you need to run that wire to the rear of the car, along with an RCA cable, whcih comes with the camera.
I just did a huge 40 hour install on this car,.. I know exactly how I 'll run it as I've taken all those panels apart.. and I can remove the panels over the wheel wells (that go over the edges of the rear speakers (next to seatbelts).. then remove weather stripping, panel, and door seal and run under carpet.. remove kick panel and route around there and up into back of headunit -- Not a bad install at all.
I bet the most difficult part of this is going to be getting the camera wire into the car

The camera gets power from the backup light ciruit, too, which IIRC is a green wire in that harness across the back of the trunk compartment. And, there is a ground wire for the cam, which you can easily find back there. The signal wire from the cam can be passed through a rubber grommet you'll see in the rear of the trunk wall.
The only difference in the two cams I had was that one had a blue grid on the screen, and the other was yellow. I gave away the spare when I sold my previous DDX516 headunit. All the cams have "night vision" and gradually fade to black and white as the light dims, thus upgraded backup lights (the LED's I linked) are nice to have. The cheap cam I have is just as good, maybe a bit better, than the OEM cam on my wife's Acura TL-S.
Shipping from China can be variable, but the last cam I bought showed up in a week, so no complaints, but I might have bought from a US seller if I had seen one. Same with the LED's.
As an aside, a guy I work with bought a similar rear cam for his Dodge Charger a few weeks back. Rather than take apart his interior to run wires, a much bigger job in that big 4-door, he found a wireless cam transmitter on eBay. I think he said it was ~$15.
As an aside, a guy I work with bought a similar rear cam for his Dodge Charger a few weeks back. Rather than take apart his interior to run wires, a much bigger job in that big 4-door, he found a wireless cam transmitter on eBay. I think he said it was ~$15.
http://www.ebay.com/itm/Nissan-350Z-370Z-CMOS-NTSC-Car-Park-Rear-View-Backup-Reverse-Camera-Night-Vision-/281201911421?pt=Motors_Car_Truck_Parts_Accessories&fits=Make%3ANissan&hash=item4178f0a67d&vxp=mtr
Is going to be just fine to buy? I know it's not much money.. but I don't want to waste $25 on some camera that for some reason is a piece of junk. So, if I'm understanding you right.. any of these cameras are going to be excellent, so just pick the one with the best price.
Considering this one is $23, and ships from the US.. I don't really see it getting much better than that.
Oh, and the wireless would be nice... but like I said.. the panels to run the wires down the driver or passenger "Edge" of the vehicle are incredibly easy to deal with (Especially now that I've removed and replaced them half a dozen times.. so routing these wires doesn't bother me any. ) -- It's nothing like having to remove the seats, the cubby/glovebox, outer panel, rear speaker panels, door panels, and so on.. Aside from 2 plastic screw ons all of those panels pull off.
So,.. I should go ahead and grab the camera I just linked?
And.. grab those LED reverse lights and tag lights.. and I'll be good to go?
Thanks

