Show Off Your System!!!
 11-11-2007, 01:12 PM
#41

Originally Posted by 1sickVeilsideZ
Yes it's my car, but dont let the color fool you, it's still a panty dropper. Besides its a show car and DTM Autobody sponsored me for the paint, and it's a HIN tour car. I'm currently working on the motor. To each his own fellas.
 11-11-2007, 01:13 PM
#42

Originally Posted by doug
i have 8 pink dress shirts that i wear to work.. however.. i wouldn't paint anything in my car pink.. there are limits to your pink usage
you got heels and ,lip stick to match those shirts ??
just playing Doug
yes it is an excessive use of pink , slightly over the top
but i do like
and i only messing with you brother
11-11-2007, 02:49 PM
#43
New Member
iTrader: (23)
Join Date: Aug 2005
Location: Highland, CA
Posts: 874
Likes: 0
Received 0 Likes
on
0 Posts
It's just a saying I like to use, but believe me bro even without the car they drop. Don't get me wrong the paint was a sponsorship, but it was all my design and idea, DTM executed it flawless, so much detail and prep work was put into it, a good combo of pink and enough black to not overkill. As much as people like to flame me for it I don't mind because come show time it gets more attention and respect than a lot of others do. Even the guys from HIN couldn't help but to jump on board with this project and that means a lot to me since i've had the car since Feb. of 2003. Even then when it was DB blue it got attention, but not in the way I wanted. Now it has pictures in Super Street mag, Import Tuner mag and some other ones people have brought to my attention. Like I say to each his own.
Rick
Rick
11-11-2007, 08:37 PM
#44
Registered User

Originally Posted by 350zspl
Tacket who ever hates your set is straight fool
i love what you've done
i love what you've done
Thanks man. I posted it a while ago and didnt get very many positive comments. I appreciate the good word.
 11-12-2007, 04:26 AM
#45
Registered User
iTrader: (34)
Join Date: Mar 2007
Location: oklahoma city
Posts: 7,908
Likes: 0
Received 0 Likes
on
0 Posts
Originally Posted by Tackett
Thanks man. I posted it a while ago and didnt get very many positive comments. I appreciate the good word.
11-12-2007, 05:05 AM
#46
Originally Posted by 2006350zSA
i think your set up looks great man anybody who hates on that is obviously stupid. What exact coler are your interior pieces Im thinking about painting my window control covers that color cause they get scratched up.
Originally Posted by doug
I find that on this site alot of people don't like critism .. they get bent out of shape and call you a hater.. but since you don't mind.. i will share my ideas and thoughts..
Head Unit - i am a fan of Double Din's.. the single din isn't that bad.. but it leaves the tray under... just doesn't look as uniformed.. if you had a single din eq under it it would compliment it better
Sub Box - should make it all one level... make it more uniformed.. or go with the dual 12 sub box (no trunk space) or the Under the strut bar sub box
Rear Speakers - i am not feeling those grills.. look out of place.. a bit too flashy for the system.. if you had fiberglass everywhere with the same color.. then yeah.. ok.. but just go with a simple black grill
Amp Rack - clean it up a bit.. i would get rid of the cross overs in the middle.. but if you really want to keep them.. look into little black plastic clips to the wires in place.. right now they are just all over
here is a shot if the back of my amp rack so you know what the black pieces i am talking about
Originally Posted by doug
HU - what voltage where you looking at? my eclipse deck is 5V
SubBox - you could even keep it the same way.. just get a flat baseboard so it looks like 1 level
Rear - if it doesn't bother you.. you could even paint those grils black.. make it a little more uniform
Amp Rack - Crossovers look nice up there.. keep them up there.. just clean up the wiring
...........
I hear you on the work done.. time to rest.. i feel the same way.. i want to switch my RCA's to a better set.. but i am too lazy right now to pull the rear panel off and run the wires under the carpet again.. sometimes you just want to enjoy your music for a while.. i hear you.
Last edited by doug; 11-12-2007 at 05:08 AM.
11-12-2007, 06:52 PM
#47
Registered User
i wasnt referring to you doug, you gave me constructive critisism which was much appreciated. There were other small posts of negative feedback with no explanations, and the majority of people it seemed did not like it at all.
Please dont think I was badmouthing you for trying to help me buddy!
Please dont think I was badmouthing you for trying to help me buddy!
Last edited by Tackett; 11-12-2007 at 06:55 PM.
11-12-2007, 06:56 PM
#48
Registered User
and to answer your question, 350zsa. I looked up the color code for the silver paint on the interior door handles, and that was the color I used.
www.paintscratch.com
when you paint it, you dont even have to sand it. I would buy some sandable primer, and bulldog adhesive promoter from advance auto. (bout 4bucks a can. 1 can of each should do you). spray 3 coats of bulldog, let that dry for a few hours, then spray a lot of primer in multiple coats, (wait about 19-30 min between coats, i had like 6 coats of primer on all of my pieces) let them dry for a day or so. sand the primer smooth. ( I used 500 grit paper, then 800 grit paper, then 1000 grit paper progressively.) Make sure that puppy is SMOOOOOTH. the better the foundation, the better the house type philosophy. Buy 1 can of silver paint from paintscratch. I cant remember the silver paintcode....but call them, they can help you out. Buy 1 can of the catalyzed clear coat, some 2000 grit sandpaper, and some rubbing compound from the site as well. After you spray about 3 coats of silver paint on the primer and it has dried completely...run the pieces under some water and sand them again with 500 grit paper, then two more coats of paint sanding both times in between. Finally lay down the last coat of paint slightly heavier than the previous coats and let it dry overnight. The next day, take your can of clearcoat and activate it by punching the button on the bottom of the can....align your pieces so that they are fairly level and spray a good amount of clearcoat on them. (more than you think you will need for 1 coat.) wait a few hours (2-3) for that to dry and do it again...slightly smaller amount. Do this ABUNCH of times, I used a whole can on both of my pieces in this fashion. Finally when all is said and done...let dry overnight, then take your 2k grit sandpaper, wet your pieces and sand the pee-pee out of them. (my arm was in dire pain after this.) DONT run into the base coat! (if you put enough clearcoat like i said earlier you wont have this problem.) after that is done, it will look like crap...scuff marks everywhere and dirty. Get a clean cloth and put some rubbing compound on it......rub the pieces down from head to toe untill your arm is about to fall off. (I did this for 3 straight hours to get results.) untill it shines like a mirrior. Wait a day or so before waxing...boom
Last edited by Tackett; 11-12-2007 at 07:12 PM.
11-20-2007, 10:56 PM
#49
Registered User
iTrader: (1)

Join Date: Sep 2005
Location: Fort Lauderdale, FL.
Posts: 51
Likes: 0
Received 0 Likes
on
0 Posts
JL Audio Stealthbox with two 10W3v3-8's.

view from the top

JL Audio 500/1v2 amplifier

Bass **** in center console

pictures of the entire installation and stuff:
https://my350z.com/forum/audio-and-video/314219-installing-a-jl-audio-stealthbox-and-a-500-1v2.html
view from the top
JL Audio 500/1v2 amplifier
Bass **** in center console
pictures of the entire installation and stuff:
https://my350z.com/forum/audio-and-video/314219-installing-a-jl-audio-stealthbox-and-a-500-1v2.html
11-24-2007, 01:25 PM
#50
New Member
iTrader: (23)
Join Date: Aug 2005
Location: Highland, CA
Posts: 874
Likes: 0
Received 0 Likes
on
0 Posts
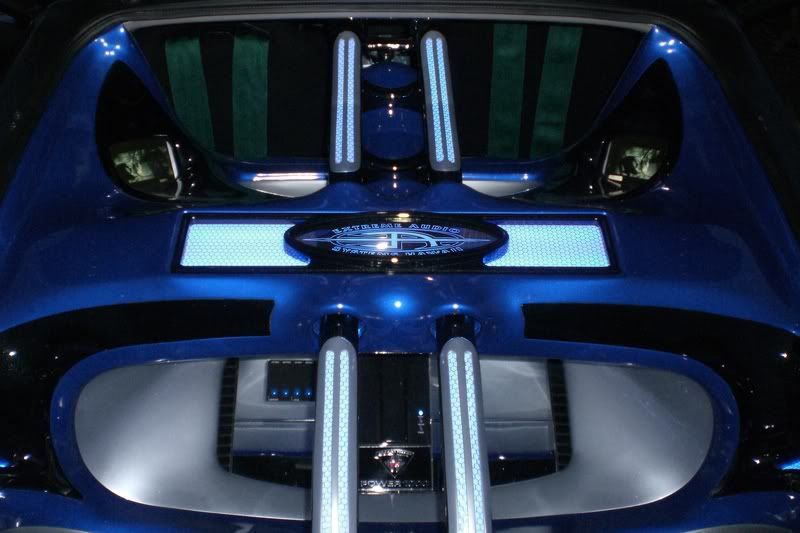
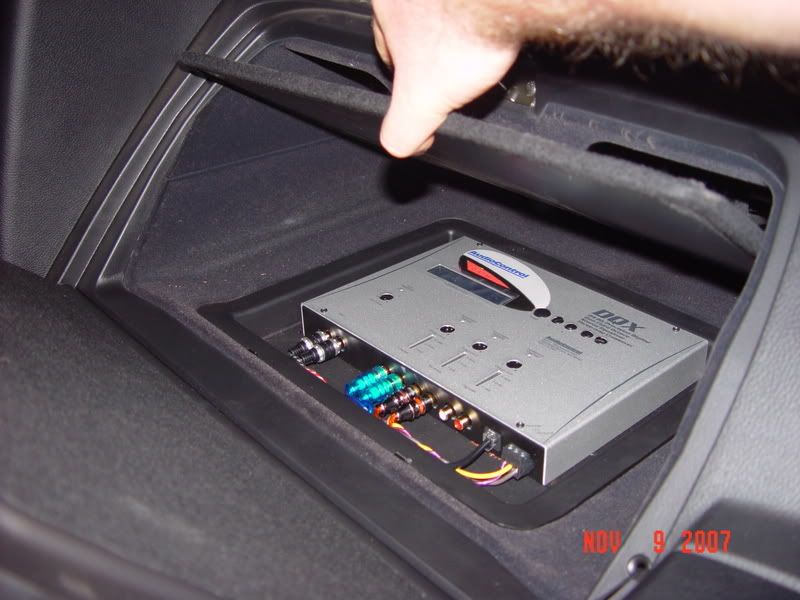
Here are some shots I took the other day of my setup enjoy.
[IMG] [/IMG]
[IMG]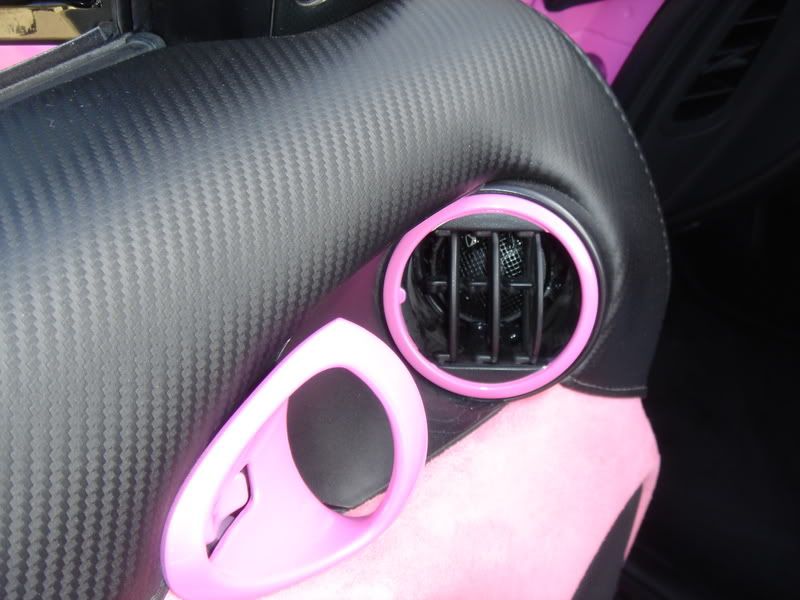 [/IMG]
[IMG]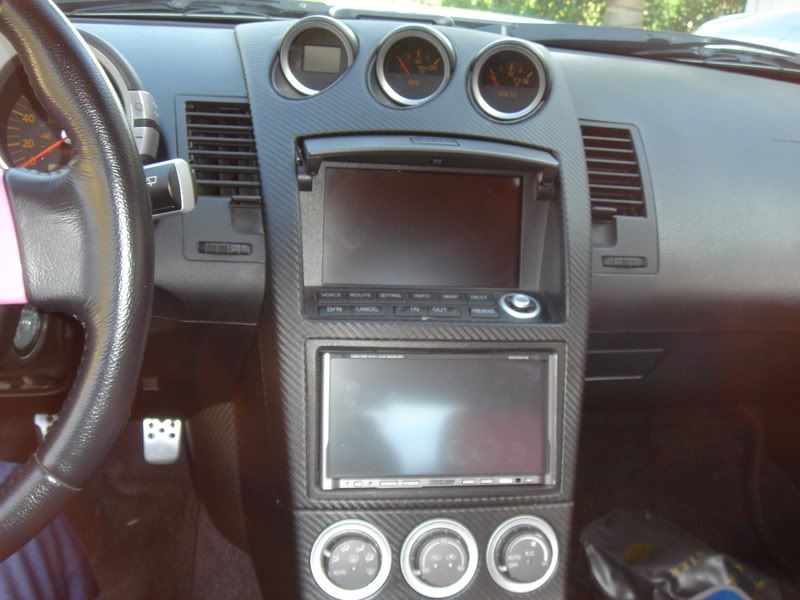 [/IMG]
[IMG]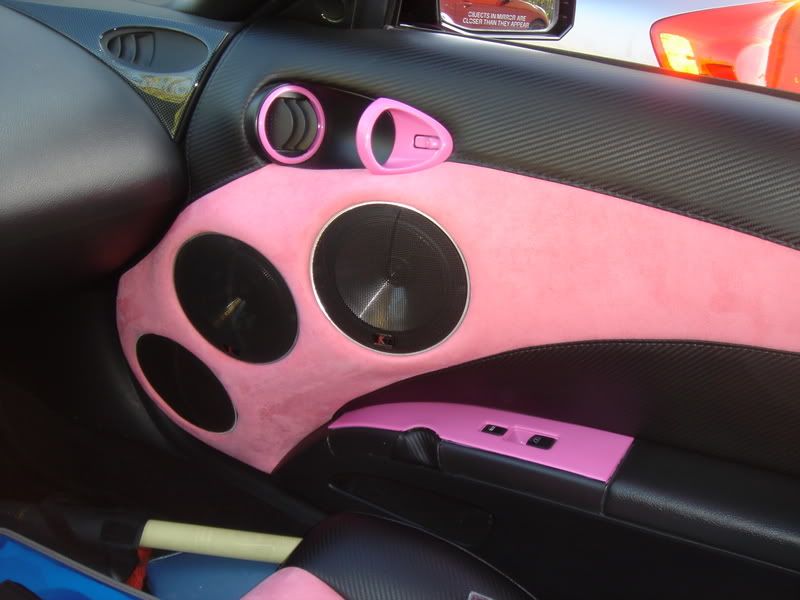 [/IMG]
[IMG]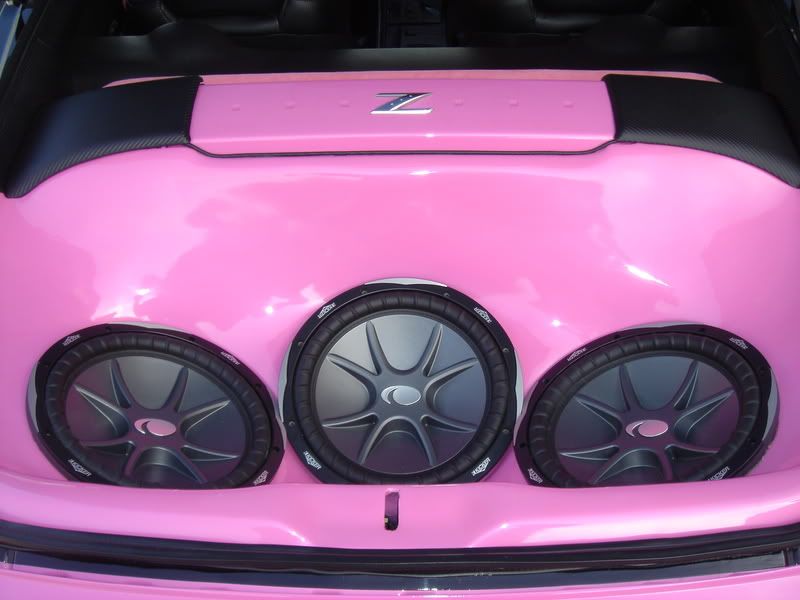 [/IMG]
[IMG]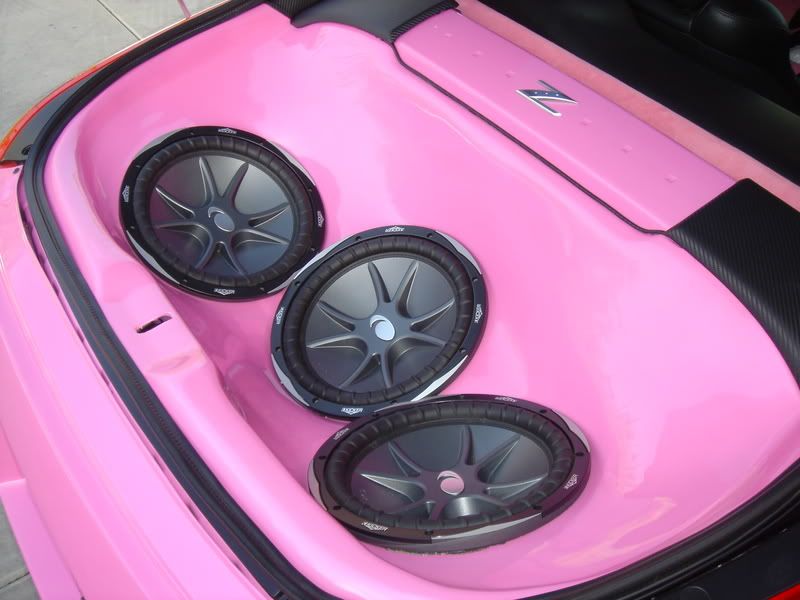 [/IMG]
[IMG]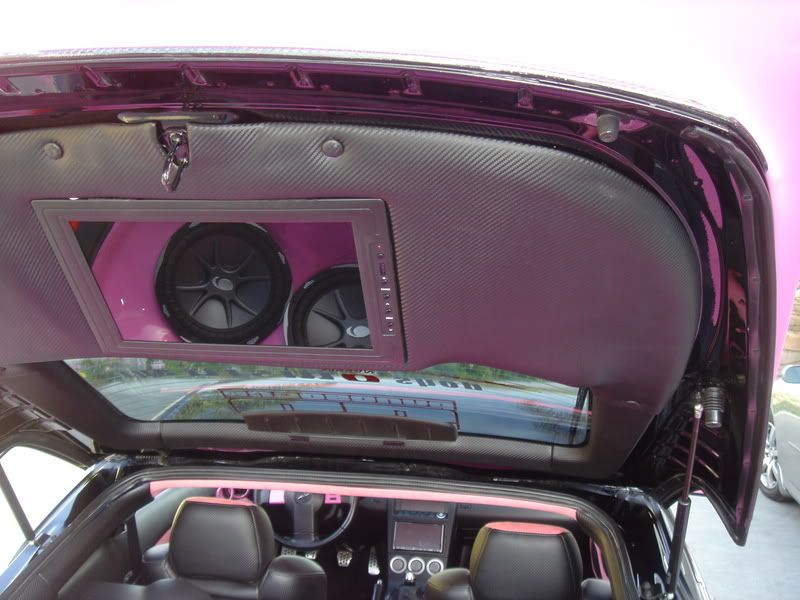 [/IMG]
[IMG]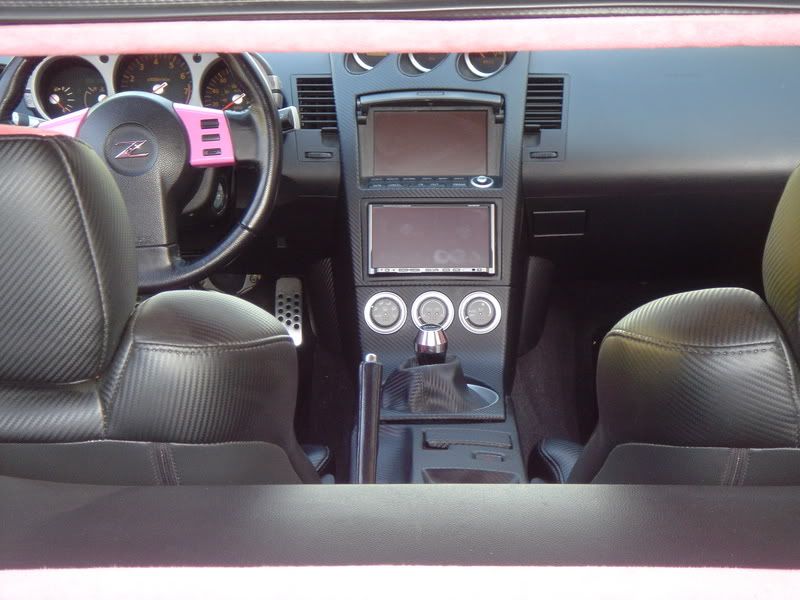 [/IMG]
[IMG]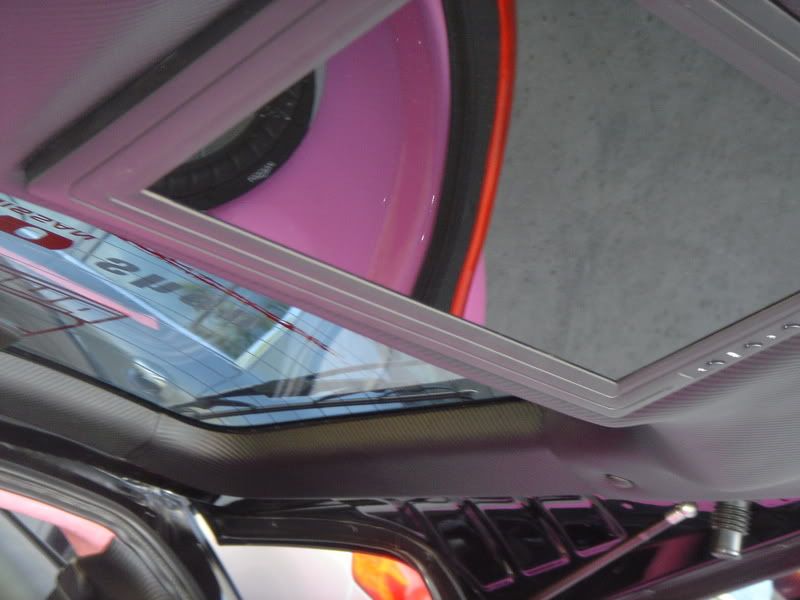 [/IMG]
[IMG]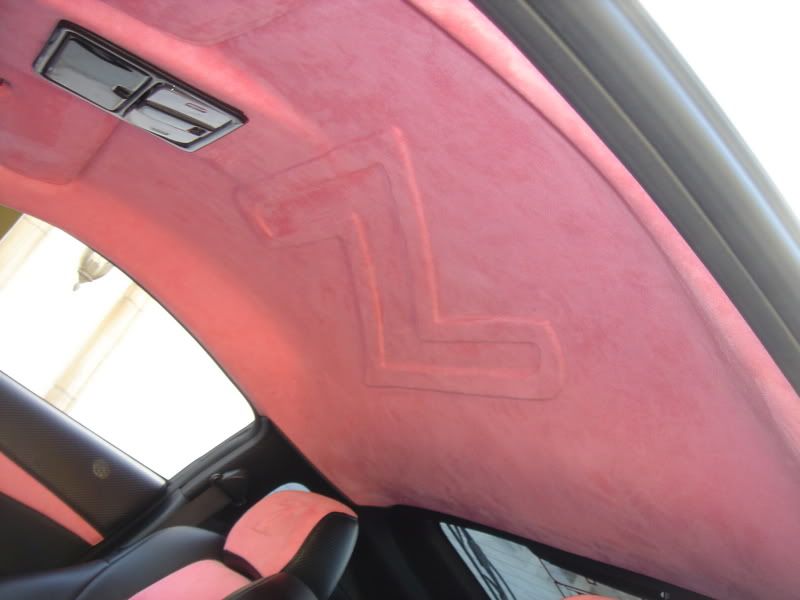 [/IMG]
[IMG]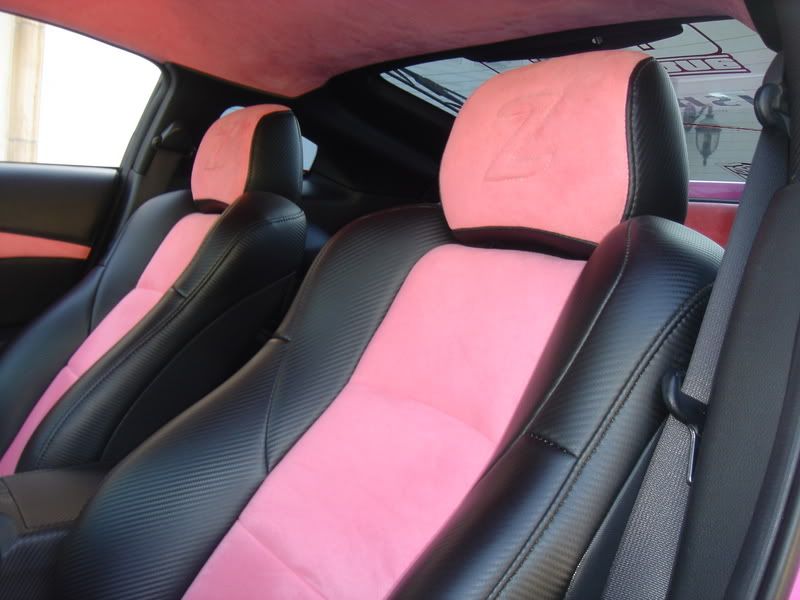 [/IMG]
[IMG] [/IMG]
[IMG]
[/IMG][IMG]
[/IMG][IMG]
[/IMG][IMG]
[/IMG][IMG]
[/IMG][IMG]
[/IMG][IMG]
[/IMG][IMG]
[/IMG][IMG]
[/IMG][IMG]
[/IMG][IMG]
[/IMG][IMG]
[/IMG]