sintaxeror's build log - tons of PICS/No 56k!
 03-05-2008, 02:08 PM
#41
Registered User
Thread Starter
iTrader: (3)

Join Date: Jun 2005
Location: St. Petersburg, FL
Posts: 670
Likes: 0
Received 0 Likes
on
0 Posts
So I trimmed and cleaned the mold (pictures later).. and while I'm waiting for it to dry off I take a shower. So I'm in the shower thinking about what I am going to do if it doesn't fit, and how I can make the process go smoother if I have to redo... and I come up with an idea that I want to try so badly that now I am actually hoping it doesn't fit. I think the whole thing would be a lot easier and come out way nicer too... hmm... if this thing isnt perfect...
 03-05-2008, 02:39 PM
#42
Registered User
Thread Starter
iTrader: (3)
Join Date: Jun 2005
Location: St. Petersburg, FL
Posts: 670
Likes: 0
Received 0 Likes
on
0 Posts
UPDATE 3/5/08 Evening
So it doesnt fit. here's the proof.
Trimmed it up again..

Washed.. drying off
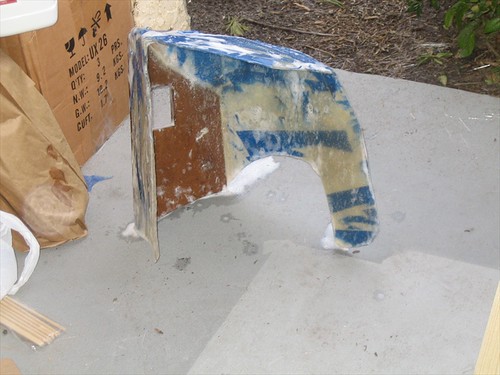
Test fit.. MUCH better than last time..
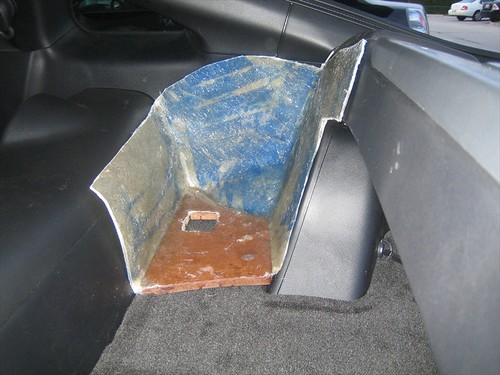
There is still a gap..although its must smaller now..

The moral of the story boys and girls, is to put as many layers as you can inside the car.. otherwise you get the warpage.
This is still unacceptable.. I can't have all of the weight of this thing vibrating against the plastics. Most of the weight really needs to be straight down on the carpet.
So I have a better idea where I can go back to the wood pieces I wanted to use in the first place.... hopefully I will get to experiment tomorrow evening there isn't enough day light left today. We'll see
So it doesnt fit. here's the proof.
Trimmed it up again..
Washed.. drying off
Test fit.. MUCH better than last time..
There is still a gap..although its must smaller now..
The moral of the story boys and girls, is to put as many layers as you can inside the car.. otherwise you get the warpage.
This is still unacceptable.. I can't have all of the weight of this thing vibrating against the plastics. Most of the weight really needs to be straight down on the carpet.
So I have a better idea where I can go back to the wood pieces I wanted to use in the first place.... hopefully I will get to experiment tomorrow evening there isn't enough day light left today. We'll see
03-05-2008, 03:14 PM
#44
Registered User
Thread Starter
iTrader: (3)
Join Date: Jun 2005
Location: St. Petersburg, FL
Posts: 670
Likes: 0
Received 0 Likes
on
0 Posts
Originally Posted by Crom
It would still vibrate even if it was a flush fit...a thin layer of acoustic mat between the 2 surfaces might be a good idea and then re-adjust for the new size....
03-06-2008, 03:38 AM
#46
Registered User
Thread Starter
iTrader: (3)
Join Date: Jun 2005
Location: St. Petersburg, FL
Posts: 670
Likes: 0
Received 0 Likes
on
0 Posts
Originally Posted by 16psibrick
ahem didnt i tell you do it all inside the car and only remove it after its all dried overnight? i guess the other layers you put on outside the car huh?
i always put every layer on inthe car and only remove it after
i guess the other layers you put on outside the car huh?i always put every layer on inthe car and only remove it after
03-06-2008, 09:14 AM
#48
Registered User
Thread Starter
iTrader: (3)
Join Date: Jun 2005
Location: St. Petersburg, FL
Posts: 670
Likes: 0
Received 0 Likes
on
0 Posts
Originally Posted by 16psibrick
its okay, we all have done it, try try again  thats how you get it right...maybe this time, you can put down the foam first, tape over it so when you glass, it already accomodates the foam thickness?
thats how you get it right...maybe this time, you can put down the foam first, tape over it so when you glass, it already accomodates the foam thickness?I don't think we have discussed foam.. .but I do believe you might be reading my mind...
03-06-2008, 09:30 AM
#49
Administrator

iTrader: (25)
Keep up the good work....
03-06-2008, 04:46 PM
#50
Registered User
Thread Starter
iTrader: (3)
Join Date: Jun 2005
Location: St. Petersburg, FL
Posts: 670
Likes: 0
Received 0 Likes
on
0 Posts
UPDATE 3/6/08 Evening
Well it was raining when I got off work.. so I originally planned to find something else to do with my evening..but then lo and behold, the rain stopped.. not too much daylight left but i figure what the hey, lets see what I can finish.
So now what am I going to do, since the mold doesn't fit?
Recognize these?
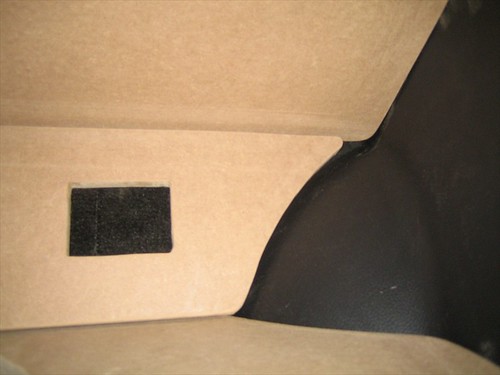
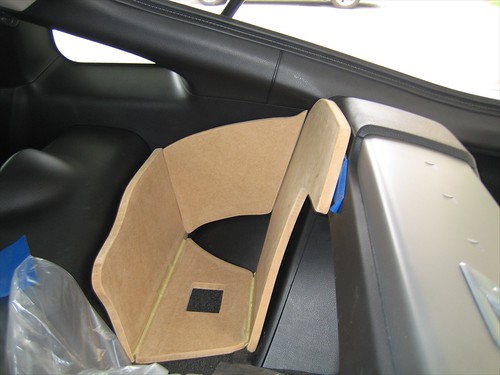
Thats right boys and girls, BACK to plan A! This time I have some ideas on how to fill the gaps without adding 40lbs. I scavenged the pieces out from the pile of crap and soften the edges with sandpaper, and made a cut out for the terminal cup in the base.
This is them test fitted in the car so I could remember what I doing exactly.

Hmm... I don't remember the front side sitting on top of the base...Or that edge not fitting at all... *consults "sintaxeror's build log - tons of PICS/No 56k!"*... I wonder what happened here.. this must have been an earlier test piece. Thats okay.. I'll just mark them...
And cut them..

Show there with the edges softened down with sandpaper.
Ahh much better..

Looks good!
At this point I am running out of light.... but I do this.. ridiculous stunt... for you, my adoring public.
Oh lord.. Why did the newspaper I picked up have to have this headline

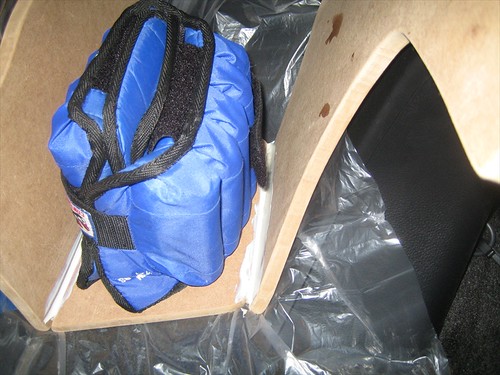
Why do I need newspaper? To make some little spacers of course.. to make room for some gap filler and carpet, etc...
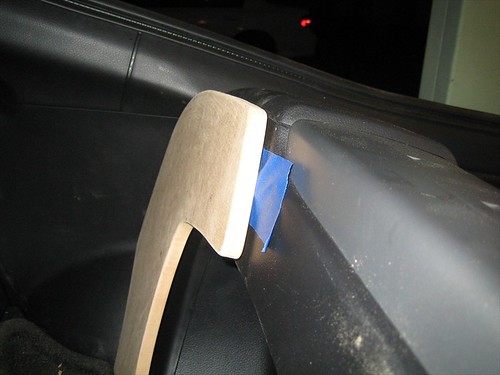
Pardon the sawdust.. tape the spacer in place...
Seems to work!
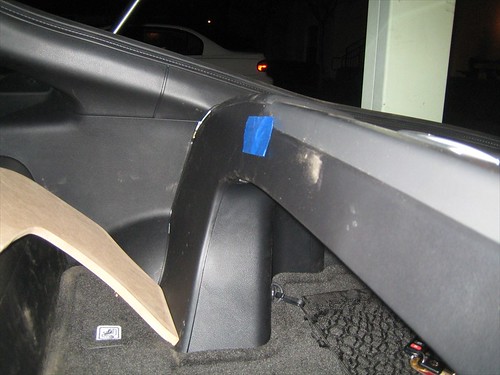
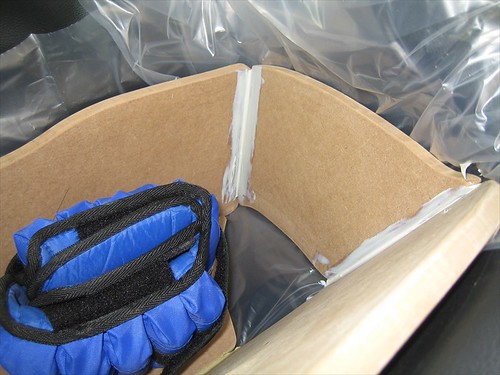
Placed in some key spots..

Whats with the drop cloth under the test fit?

And why do I need this 20lb weight?

Chill, I'm not going to glue the weight to anything.
That makes a LITTLE more sense...
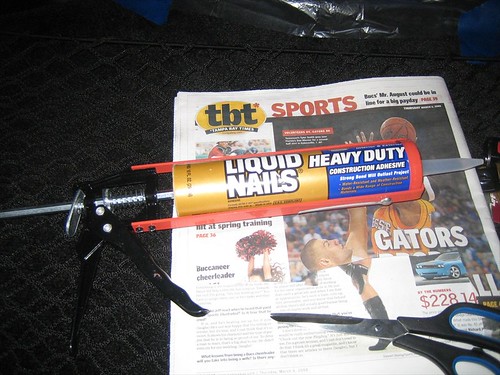
Now I know what you're screaming so just stop. "But JAY!!! There is now WAY liquid nails will hold that together OMG WTF !!!!111!11!!!11!1one!1one!oneone!1!!"
Yes, I know... I'm just keeping it together right now while I build the frame... All those seems will be glassed over for both strength and seal.
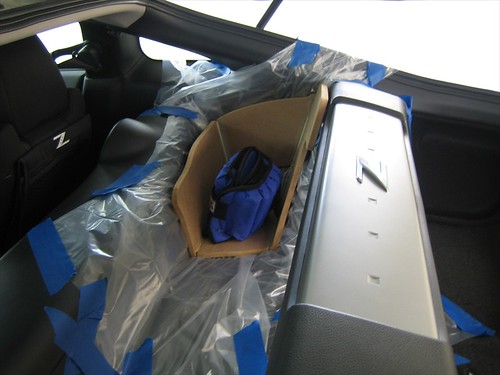
Now here is where the weight comes in...
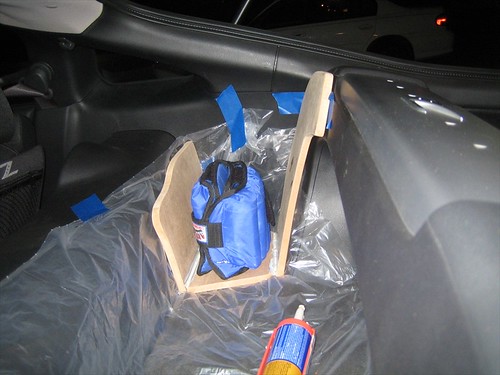
It pushes the base down to about where it would be with the sub in place.. i dont want to risk gluing this down in a position where the base is "floating" again, although with the spacers in place there is no way it will be leaning against the sides this time. Either way, this will set much more accurately.
Another shot..
There now we will let that cure tonight... but we have just a little more work to do before we call it a night.
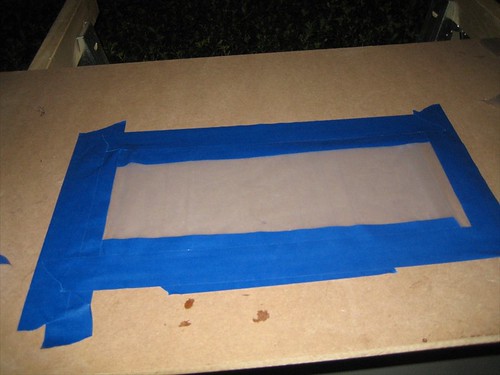
Went out a bought a thicker drop cloth..
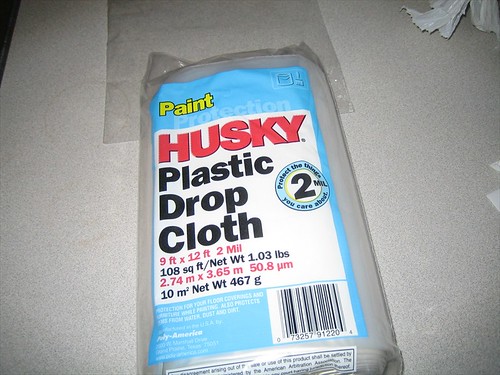
Taped 4 layers down to my "work bench"
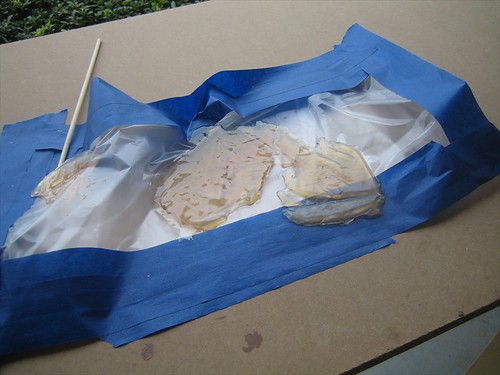
Making a small, relatively hot batch of resin..


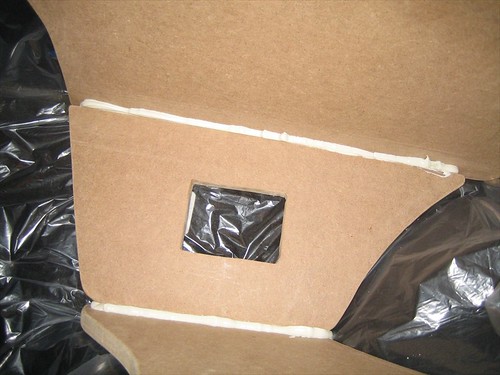
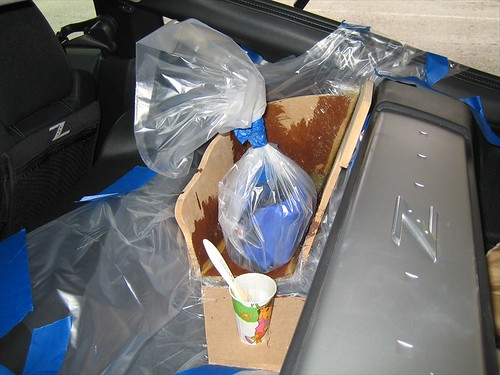
In case you haven't noticed the cups I've been using...

Dora FTW?
I want to see if the resin will eat through the plastic.. I am pretty sure it won't, but I would rather check before I potentially resin a corner of car to hell.

There is a method to my madness here. This time around I will only need to glass over that little hump in the back, so it would be much easier to just cover the area with the drop cloth.. will save me more than an hour in masking time if it works.
Well thats it for tonight! I need to clean up a little around here...
Well it was raining when I got off work.. so I originally planned to find something else to do with my evening..but then lo and behold, the rain stopped.. not too much daylight left but i figure what the hey, lets see what I can finish.
So now what am I going to do, since the mold doesn't fit?
Recognize these?
Thats right boys and girls, BACK to plan A! This time I have some ideas on how to fill the gaps without adding 40lbs. I scavenged the pieces out from the pile of crap and soften the edges with sandpaper, and made a cut out for the terminal cup in the base.
This is them test fitted in the car so I could remember what I doing exactly.
Hmm... I don't remember the front side sitting on top of the base...Or that edge not fitting at all... *consults "sintaxeror's build log - tons of PICS/No 56k!"*... I wonder what happened here.. this must have been an earlier test piece. Thats okay.. I'll just mark them...
And cut them..
Show there with the edges softened down with sandpaper.
Ahh much better..
Looks good!
At this point I am running out of light.... but I do this.. ridiculous stunt... for you, my adoring public.
Oh lord.. Why did the newspaper I picked up have to have this headline
Why do I need newspaper? To make some little spacers of course.. to make room for some gap filler and carpet, etc...
Pardon the sawdust.. tape the spacer in place...
Seems to work!
Placed in some key spots..
Whats with the drop cloth under the test fit?
And why do I need this 20lb weight?
Chill, I'm not going to glue the weight to anything.
That makes a LITTLE more sense...
Now I know what you're screaming so just stop. "But JAY!!! There is now WAY liquid nails will hold that together OMG WTF !!!!111!11!!!11!1one!1one!oneone!1!!"
Yes, I know... I'm just keeping it together right now while I build the frame... All those seems will be glassed over for both strength and seal.
Now here is where the weight comes in...
It pushes the base down to about where it would be with the sub in place.. i dont want to risk gluing this down in a position where the base is "floating" again, although with the spacers in place there is no way it will be leaning against the sides this time. Either way, this will set much more accurately.
Another shot..
There now we will let that cure tonight... but we have just a little more work to do before we call it a night.
Went out a bought a thicker drop cloth..
Taped 4 layers down to my "work bench"
Making a small, relatively hot batch of resin..
In case you haven't noticed the cups I've been using...
Dora FTW?
I want to see if the resin will eat through the plastic.. I am pretty sure it won't, but I would rather check before I potentially resin a corner of car to hell.
There is a method to my madness here. This time around I will only need to glass over that little hump in the back, so it would be much easier to just cover the area with the drop cloth.. will save me more than an hour in masking time if it works.
Well thats it for tonight! I need to clean up a little around here...
Last edited by sintaxeror; 03-06-2008 at 06:01 PM.
03-06-2008, 05:33 PM
#52
Registered User
Thread Starter
iTrader: (3)
Join Date: Jun 2005
Location: St. Petersburg, FL
Posts: 670
Likes: 0
Received 0 Likes
on
0 Posts
Originally Posted by StreetOC192
interesting direction you are taking this........
03-06-2008, 05:46 PM
#53
Registered User
iTrader: (7)

Join Date: Aug 2006
Location: NJ
Posts: 2,136
Likes: 0
Received 0 Likes
on
0 Posts
Originally Posted by sintaxeror
Don't rule out the possibility of me effing up. I think I've already proven that is a possibility. =)
 great work
03-07-2008, 07:51 PM
great work
03-07-2008, 07:51 PM
#55
Registered User
Thread Starter
iTrader: (3)
Join Date: Jun 2005
Location: St. Petersburg, FL
Posts: 670
Likes: 0
Received 0 Likes
on
0 Posts
UPDATE 3/7/08 Night
Great news.. not only did the resin not eat into the drop cloth.. it peeled right off.
liquid nails dried... its a little wobbly but it will stay together enough for me to add the last piece...
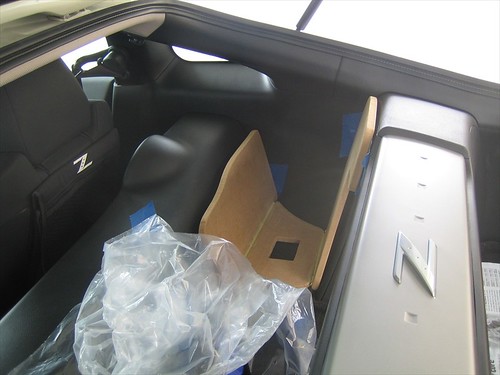
Mocking up with paper...

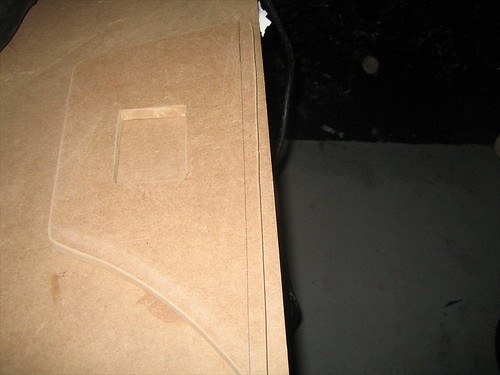
This picture came out bad but I cut out some cardboard...

Need to blend the top a little better but I think that will work!
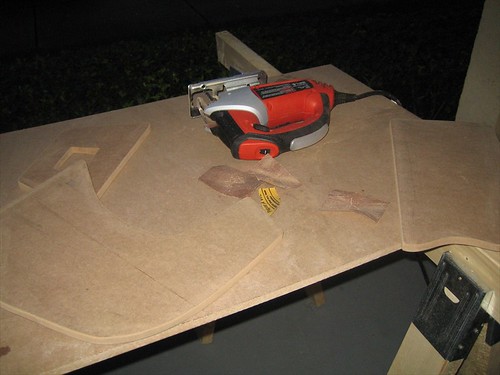
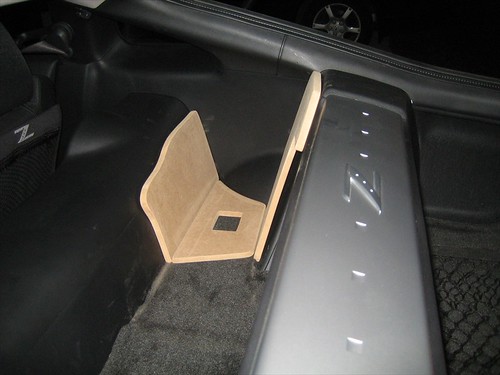
Cut it out of MDF...
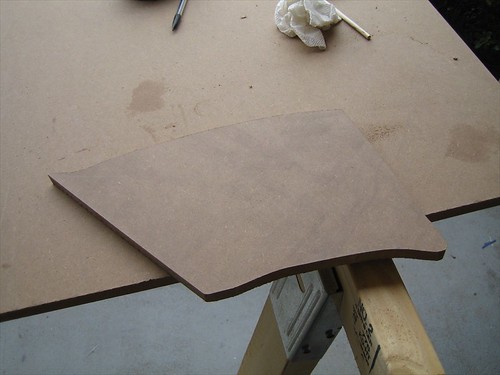
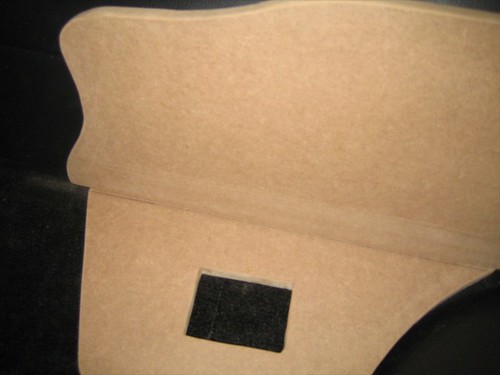
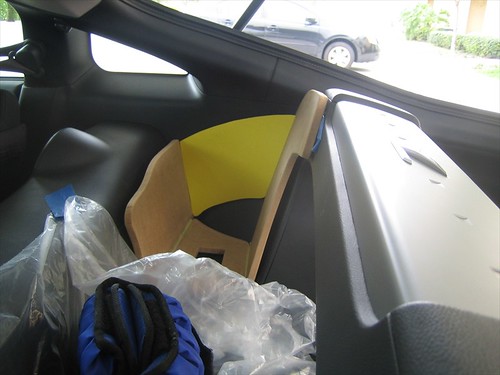
Test fit.. looks good enough for me.
A little liquid nails to hold it into place...
Add the weight so it drys in proper position...
Some more drop cloths...

Fiberglassed with the weight... I put down two layers of plastic down just to be safe.. has been in there all day I will remove it tomorrow.
Get out of my house! You're no child of mine!
With that curing... and the weather coming in, something else has gotten my attention.. Thanks Nazar!

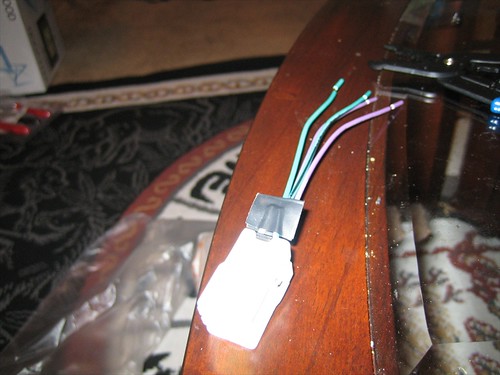
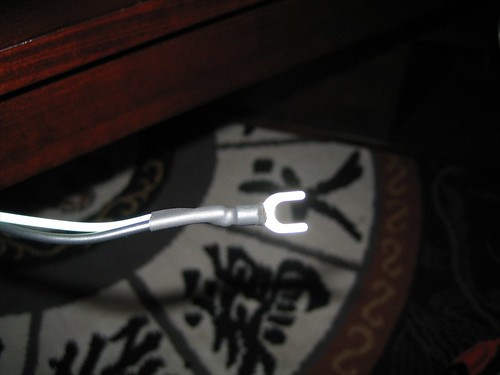
Cut off the Bose amp wires from one of the harnesses.
Soldered a connector to the ground and the e-brake wire -- by accident? I would never intentionally ground the e-brake wire.
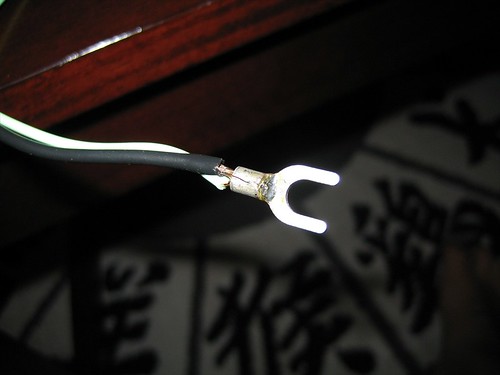
A little heat shrink to clean it up..
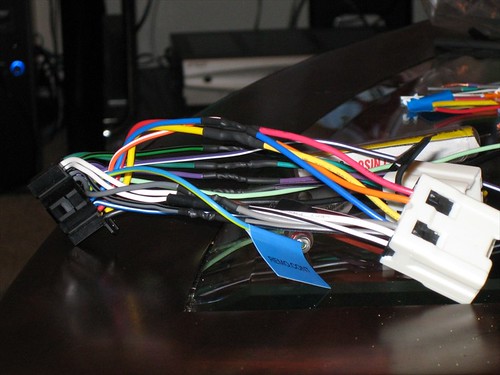
the rest of the wires cut, stripped, soldered, and heat shrunk... One of connections has tape over it because the heat shrink got poked through a little by a stray strand.
Taking apart the console.. I'm going to go ahead and install the deck before I get my amps in.. I am just too excited not to.
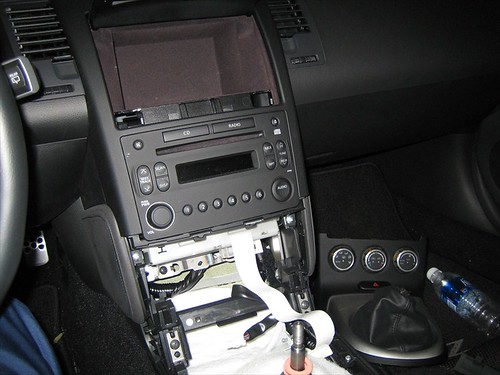
That little f*cker was a pain to get out..

Ahh finally... You may notice my shift **** is back on... when I was leaning the piece back i was afraid it might scrape against the shifter threads so I put the **** back on and covered it with a cloth.

Hah! I win suckah'!
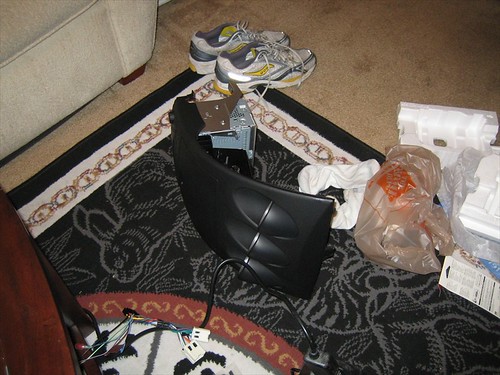
Another shot of the defeated...

I have to use my stock brackets because inexplicably the ones provided with my AI kit don't actually snap into place or connect in anyway, despite the instructions telling you to 'connect them'...even though that is not possible.
However.. the stock brackets aren't adjustable in terms depth and the deck doesn't as flush as I would like.. don't get me wrong, it fits, but not perfect...
So I need to modify the stock brackets... here they are with some center punches so the drill doesn't walk all over the place.
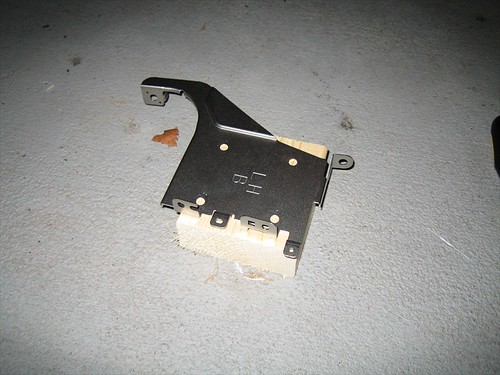
I drilled holes to the extent of adjustability I need...yes those red splotches are blood.
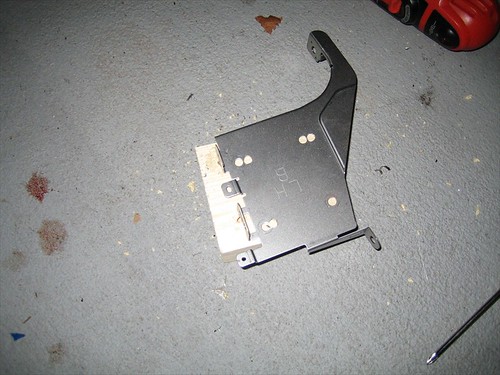
Damn thing won't stop bleeding.
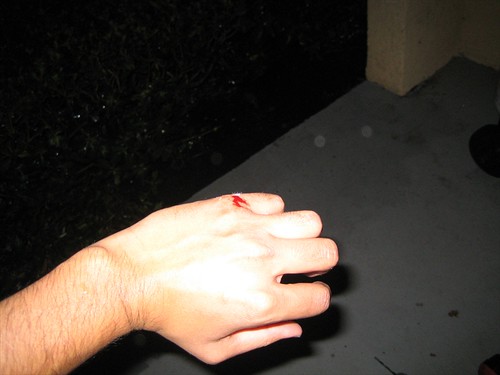
What happened was, I didn't secure the bracket to the wood before drilling, so when the bit cut through it grabbed and swung around and nicked me.
I still need to dremel out the area in between, but its too loud and I don't want to disturb the neighbors after dark, and my hand is only now slowing with the bleeding.... See you kids tomorrow.
Great news.. not only did the resin not eat into the drop cloth.. it peeled right off.
liquid nails dried... its a little wobbly but it will stay together enough for me to add the last piece...
Mocking up with paper...
This picture came out bad but I cut out some cardboard...
Need to blend the top a little better but I think that will work!
Cut it out of MDF...
Test fit.. looks good enough for me.
A little liquid nails to hold it into place...
Add the weight so it drys in proper position...
Some more drop cloths...
Fiberglassed with the weight... I put down two layers of plastic down just to be safe.. has been in there all day I will remove it tomorrow.
Get out of my house! You're no child of mine!
With that curing... and the weather coming in, something else has gotten my attention.. Thanks Nazar!
Cut off the Bose amp wires from one of the harnesses.
Soldered a connector to the ground and the e-brake wire -- by accident? I would never intentionally ground the e-brake wire.
A little heat shrink to clean it up..
the rest of the wires cut, stripped, soldered, and heat shrunk... One of connections has tape over it because the heat shrink got poked through a little by a stray strand.
Taking apart the console.. I'm going to go ahead and install the deck before I get my amps in.. I am just too excited not to.
That little f*cker was a pain to get out..
Ahh finally... You may notice my shift **** is back on... when I was leaning the piece back i was afraid it might scrape against the shifter threads so I put the **** back on and covered it with a cloth.
Hah! I win suckah'!
Another shot of the defeated...
I have to use my stock brackets because inexplicably the ones provided with my AI kit don't actually snap into place or connect in anyway, despite the instructions telling you to 'connect them'...even though that is not possible.
However.. the stock brackets aren't adjustable in terms depth and the deck doesn't as flush as I would like.. don't get me wrong, it fits, but not perfect...
So I need to modify the stock brackets... here they are with some center punches so the drill doesn't walk all over the place.
I drilled holes to the extent of adjustability I need...yes those red splotches are blood.
Damn thing won't stop bleeding.
What happened was, I didn't secure the bracket to the wood before drilling, so when the bit cut through it grabbed and swung around and nicked me.
I still need to dremel out the area in between, but its too loud and I don't want to disturb the neighbors after dark, and my hand is only now slowing with the bleeding.... See you kids tomorrow.
03-07-2008, 09:50 PM
#57
Registered User
iTrader: (4)
Join Date: Mar 2006
Location: Lafayette LA
Posts: 3,804
Likes: 0
Received 0 Likes
on
0 Posts
I had to modify my brackets too to get it perfectly flush on my dnx7100. I drilled holes a 1/4" inch up and back. BTW for spilcing the harness together i found these butt splices that have heat shrink over them. Made the job real quick, easy, and water proof.
Last edited by cbr900son; 03-07-2008 at 09:56 PM.
03-08-2008, 04:21 AM
#58
Registered User
Thread Starter
iTrader: (3)
Join Date: Jun 2005
Location: St. Petersburg, FL
Posts: 670
Likes: 0
Received 0 Likes
on
0 Posts
Originally Posted by cbr900son
I had to modify my brackets too to get it perfectly flush on my dnx7100. I drilled holes a 1/4" inch up and back. BTW for spilcing the harness together i found these butt splices that have heat shrink over them. Made the job real quick, easy, and water proof.
As an electrical engineer, I can't in good conscience use butt connectors =)


