sintaxeror's build log - tons of PICS/No 56k!
 03-15-2008, 08:59 PM
#161
Registered User
Thread Starter
iTrader: (3)

Join Date: Jun 2005
Location: St. Petersburg, FL
Posts: 670
Likes: 0
Received 0 Likes
on
0 Posts
Originally Posted by hiz-n-herz
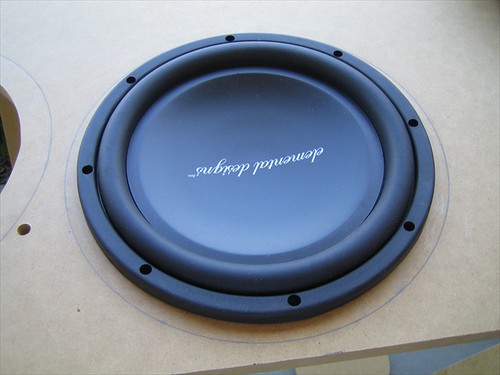
Looking good! Are you using an 8" or 10" sub?
I would be tempted to use a box like that because I have a suitcase that fits under the strut bar nice and snugly. It slides all the way up and i can still use my net and get to my spare. It's great for weekend trips and it does not slide around at all in the corners.
I need a sub box that's out of the way like that...
Yeah I think its a good place for the enclosure.. that spot is basically useless space as far as I can tell.
 03-16-2008, 09:03 AM
#162
Registered User
Thread Starter
iTrader: (3)
Join Date: Jun 2005
Location: St. Petersburg, FL
Posts: 670
Likes: 0
Received 0 Likes
on
0 Posts
UPDATE 3/16/08 Afternoon
Thought I would give you guys a little early update to see how it looked today...
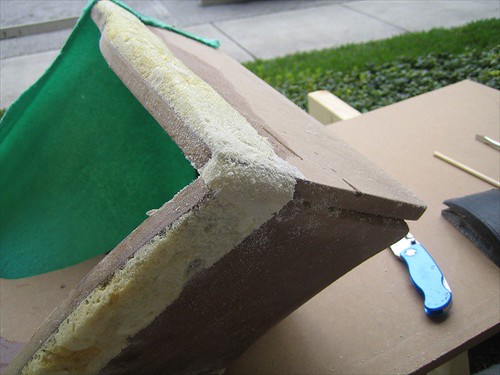
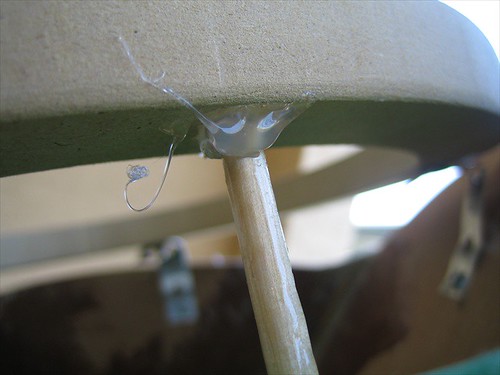
But before that.. last night after I got home from the bar, i patched up that little corner where the foam broke... here it is right after i added the foam..
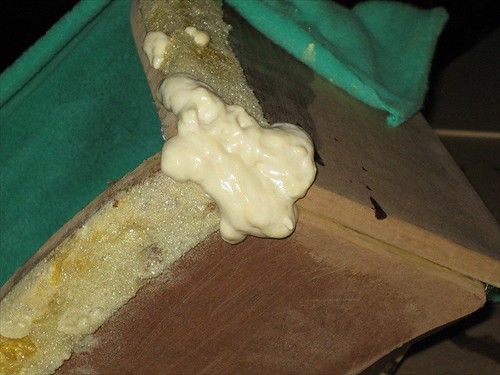
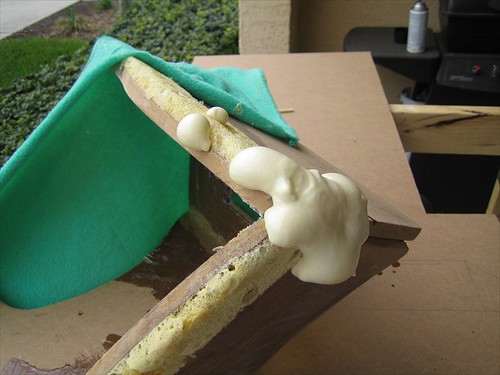
And this is what it looks like this morning.. This stuff is so easy to work with...
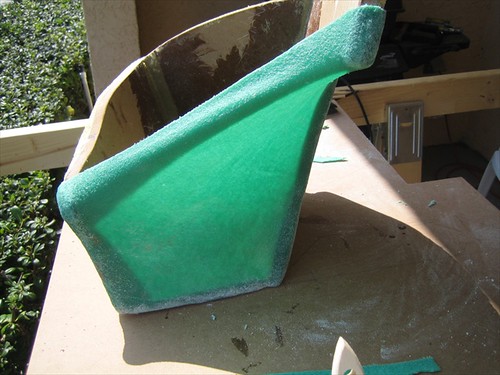
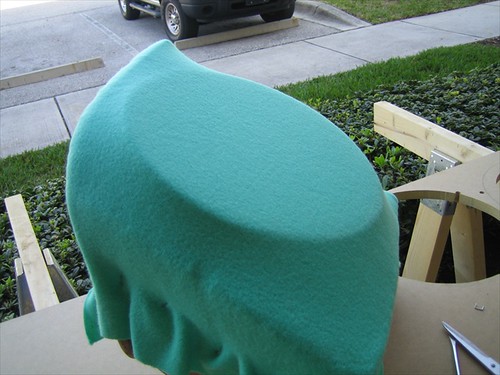
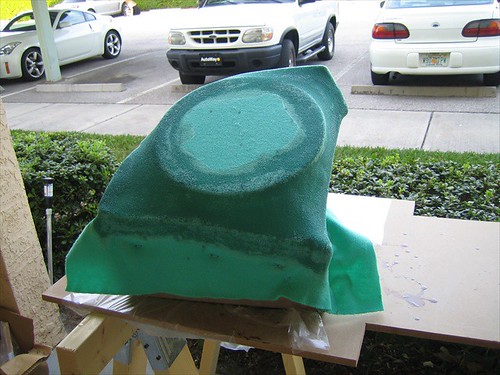
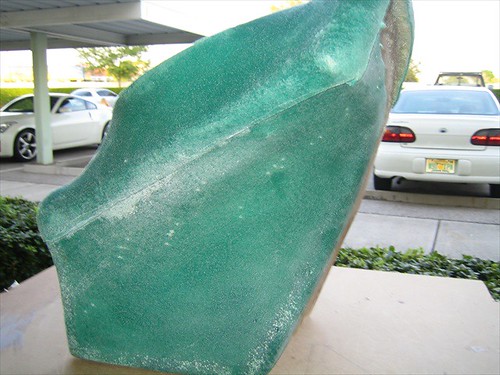
And here is the fleece, I took all the staples out..
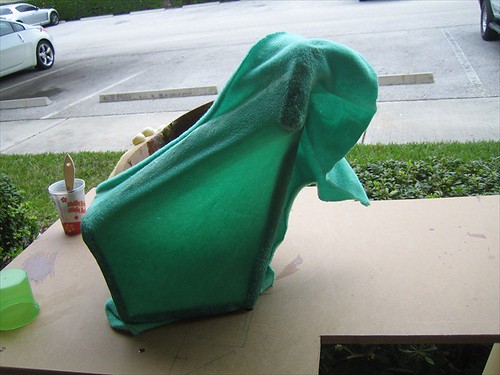
I guess I didn't soak it enough.. its still soft and fuzzy on the inside... but very stiff so I'm not concerned..

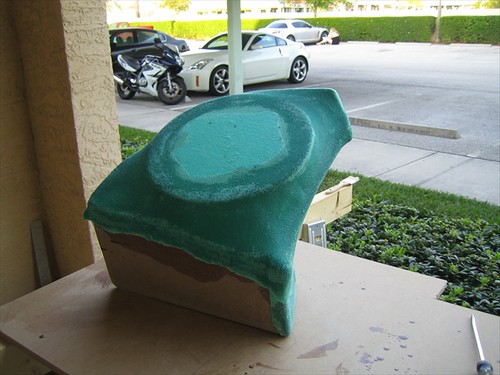
Did some preliminary trimming with the utility knife, just to get the fluff out of my way..
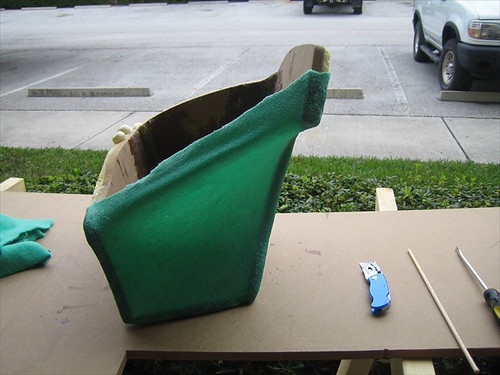
starting to shape that corner..

Corner is all patched up..
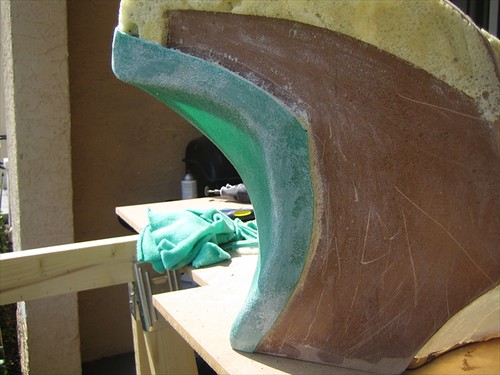
Trimmed off all the fleece from the bottom to get rid of any added thickness.
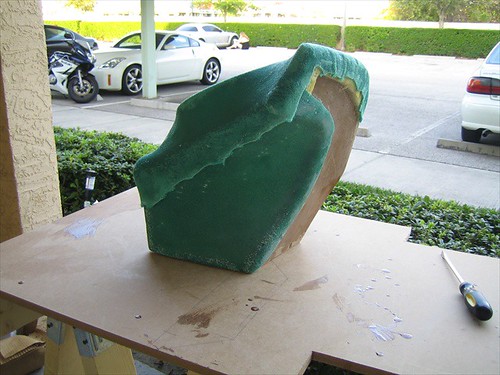
Did some precision trimming with the dremel..
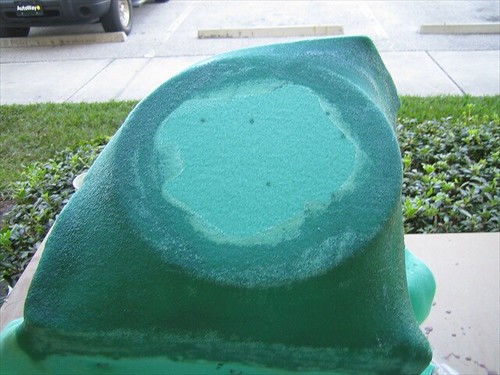
Another shot.. trimmed the top..
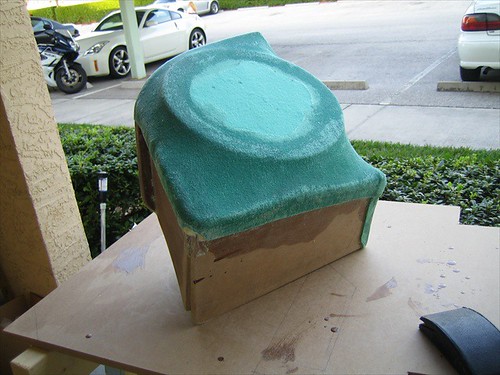
One in the sun..
side cut...

The fleece dries a little rough so I sanded the roughness out so I can test fit without scratching anything..
It kind of hurts to be this good
More to come later today.. I am taking a break to get some lunch and to hit home depot.. I need 3/4" MDF for the mounting ring =) This thing is really coming together.
Thought I would give you guys a little early update to see how it looked today...
But before that.. last night after I got home from the bar, i patched up that little corner where the foam broke... here it is right after i added the foam..
And this is what it looks like this morning.. This stuff is so easy to work with...
And here is the fleece, I took all the staples out..
I guess I didn't soak it enough.. its still soft and fuzzy on the inside... but very stiff so I'm not concerned..
Did some preliminary trimming with the utility knife, just to get the fluff out of my way..
starting to shape that corner..
Corner is all patched up..
Trimmed off all the fleece from the bottom to get rid of any added thickness.
Did some precision trimming with the dremel..
Another shot.. trimmed the top..
One in the sun..
side cut...
The fleece dries a little rough so I sanded the roughness out so I can test fit without scratching anything..
It kind of hurts to be this good
More to come later today.. I am taking a break to get some lunch and to hit home depot.. I need 3/4" MDF for the mounting ring =) This thing is really coming together.
Last edited by sintaxeror; 03-16-2008 at 10:11 AM.
03-16-2008, 02:46 PM
#163
Registered User
Thread Starter
iTrader: (3)
Join Date: Jun 2005
Location: St. Petersburg, FL
Posts: 670
Likes: 0
Received 0 Likes
on
0 Posts
UPDATE 3/16/08 Evening
Wow this thing is really starting to shape up.... It's too bad that I won't hear my Florida Gators called today during this NCAA Selection Show.. Kind of kills my resin fumes buzz.
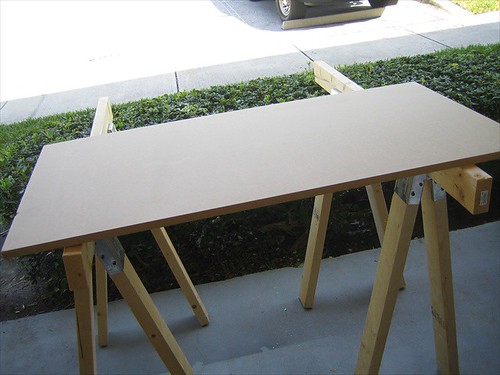
Lets get started! Here is a nice fresh piece of 3/4" MDF...
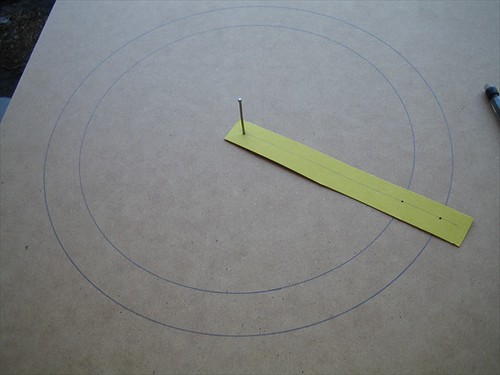
For those of us who are not router+circle jig inclined, this is the best way I've found to draw out circles to cut... measure out the radii on a piece of card board, and punch some little holes.. I used a small finishing nail.

Use that nail to hold the center of your cardboard cutout in place, and then trace around the other holes with a pencil.. It's pretty much idiot proof.
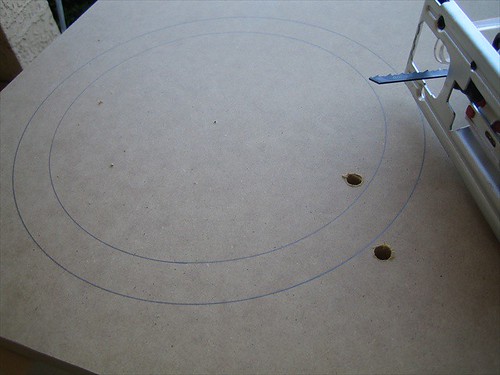
Drilled some holes to get the jigsaw started..
Cut out and sanded a bit.. the jigsaw doesn't leave a great cut so a little sanding smooths it out.

Test fit... not as snug as I would like... it will work though....

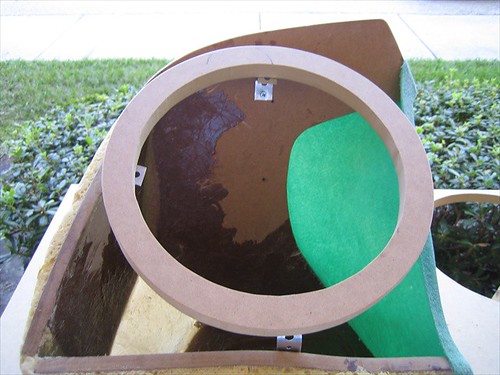
"will work" however is not going to work for me.. besides I have plenty of time and wood.. New ring drawn out, a little tighter this time.
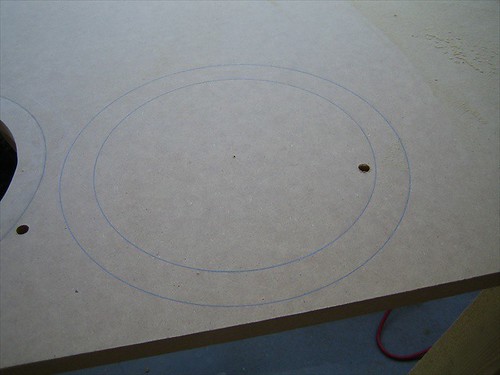
Cut and smoothed..
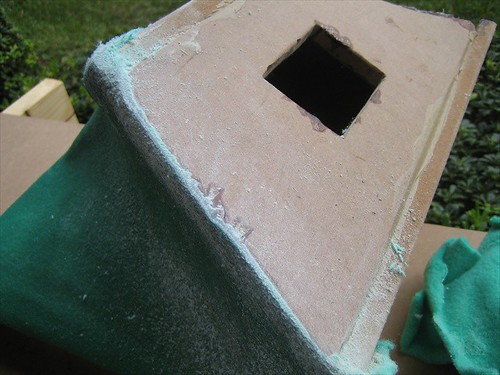
This time it dropped right in but doesn't move at all... perfect.
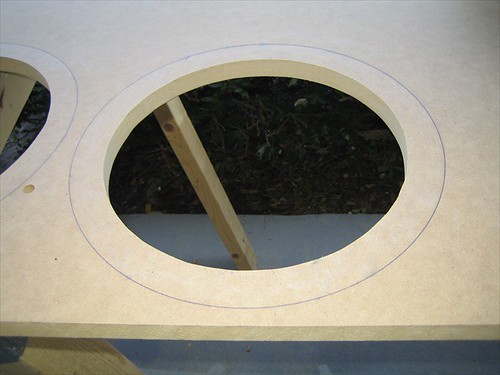
Cut out..
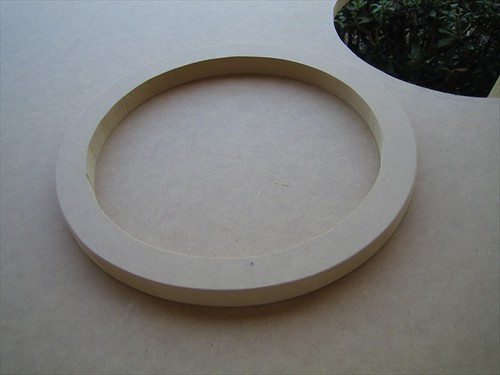
Looks just about right...
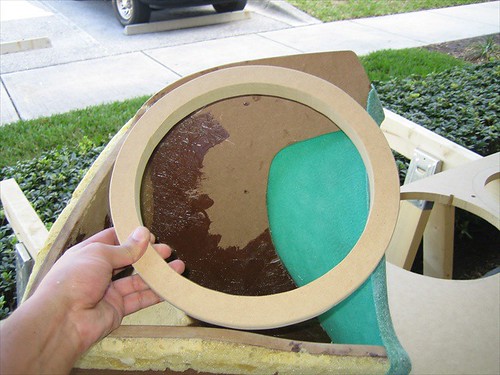
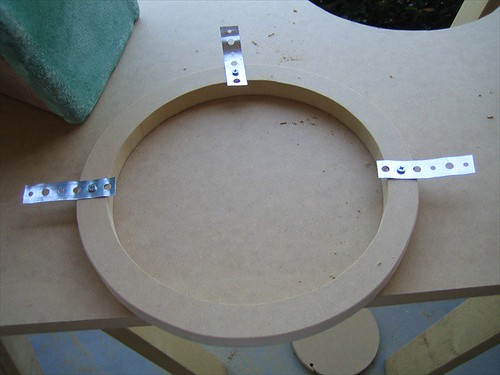
Going to try to use some plumbing straps to hold the ring into place...
Put into place..
Gotta eye-ball it...
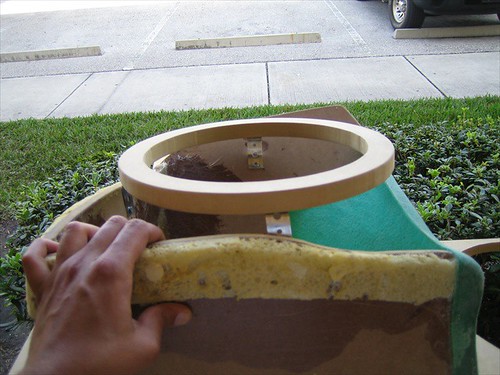
Make sure there is clearance for the sub...
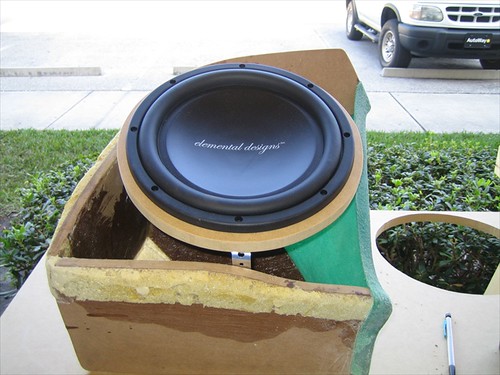
Couldn't resist a little test fit.. Jay is pleased...
Different angle..
Back to business.. wanted to add a little more support to the ring before fleecing..
It stays put just wedged in there, but we'll secure it a little better..
We'll just use some hot glue to keep it from jumping out of place..
Glued in..
Added another support here..
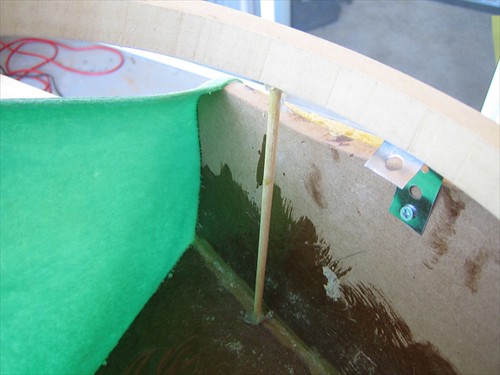
Hmmmm.. Yeah something like that.
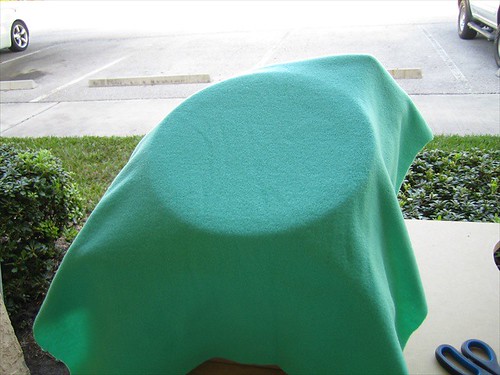
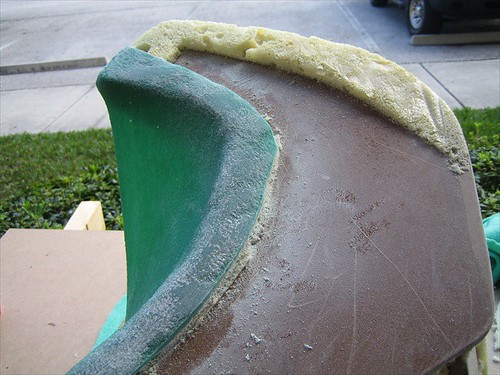
Fleece stapled and stretched..
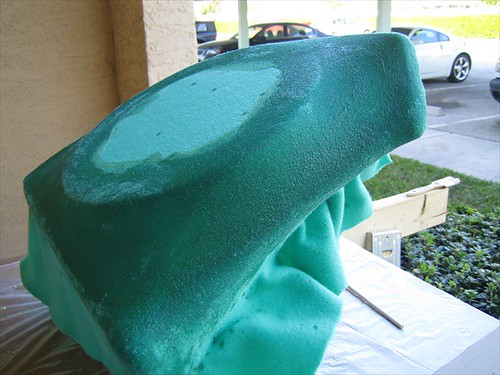
Another angle.. you can see a little foam imperfection showing through, but that can easily be fixed later on.
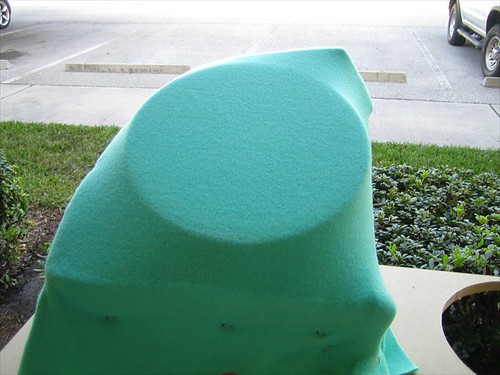
Fleece wet down with resin..
Another shot..
Celebrate my progress? Upset my team didn't make the NCAA tournament? Either one is a good reason for this...
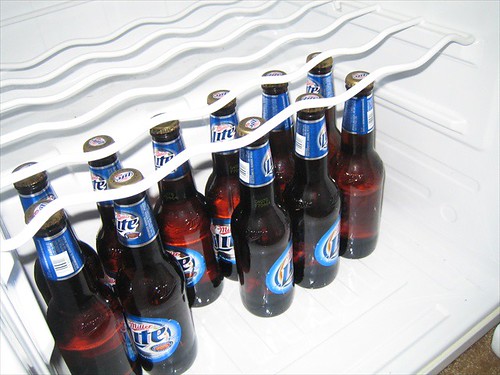
You may notice one of them is missing.
Wow this thing is really starting to shape up.... It's too bad that I won't hear my Florida Gators called today during this NCAA Selection Show.. Kind of kills my resin fumes buzz.
Lets get started! Here is a nice fresh piece of 3/4" MDF...
For those of us who are not router+circle jig inclined, this is the best way I've found to draw out circles to cut... measure out the radii on a piece of card board, and punch some little holes.. I used a small finishing nail.
Use that nail to hold the center of your cardboard cutout in place, and then trace around the other holes with a pencil.. It's pretty much idiot proof.
Drilled some holes to get the jigsaw started..
Cut out and sanded a bit.. the jigsaw doesn't leave a great cut so a little sanding smooths it out.
Test fit... not as snug as I would like... it will work though....
"will work" however is not going to work for me.. besides I have plenty of time and wood.. New ring drawn out, a little tighter this time.
Cut and smoothed..
This time it dropped right in but doesn't move at all... perfect.
Cut out..
Looks just about right...
Going to try to use some plumbing straps to hold the ring into place...
Put into place..
Gotta eye-ball it...
Make sure there is clearance for the sub...
Couldn't resist a little test fit.. Jay is pleased...
Different angle..
Back to business.. wanted to add a little more support to the ring before fleecing..
It stays put just wedged in there, but we'll secure it a little better..
We'll just use some hot glue to keep it from jumping out of place..
Glued in..
Added another support here..
Hmmmm.. Yeah something like that.
Fleece stapled and stretched..
Another angle.. you can see a little foam imperfection showing through, but that can easily be fixed later on.
Fleece wet down with resin..
Another shot..
Celebrate my progress? Upset my team didn't make the NCAA tournament? Either one is a good reason for this...
You may notice one of them is missing.
 03-17-2008, 07:40 AM
#166
Speed of White

iTrader: (18)
Join Date: Oct 2006
Location: San Diego
Posts: 1,568
Likes: 0
Received 0 Likes
on
0 Posts
Do you think you'll need more support for the ring? I don't know how much rigidity the fleece adds to the ring, but you might want to glue some wood braces in around the underside of the edges of the ring when you cut out the hole.
03-17-2008, 08:02 AM
#167
Registered User
Thread Starter
iTrader: (3)
Join Date: Jun 2005
Location: St. Petersburg, FL
Posts: 670
Likes: 0
Received 0 Likes
on
0 Posts
Originally Posted by cbr900son
BTW everyone should be real thankful for such a detail write up and pics. I can only imagine how much time it adds to take pics, uplaod, post etc etc
Originally Posted by DVFlyer
Do you think you'll need more support for the ring? I don't know how much rigidity the fleece adds to the ring, but you might want to glue some wood braces in around the underside of the edges of the ring when you cut out the hole.
PS: 5000+ views now! I wonder if I can catch the Avic D3 install guide.
Last edited by sintaxeror; 03-17-2008 at 08:05 AM.
03-17-2008, 08:20 AM
#168
Administrator

iTrader: (25)
 03-17-2008, 10:39 AM
#169
Registered User
Join Date: Jul 2007
Location: Corpus Christi, TX
Posts: 519
Likes: 0
Received 0 Likes
on
0 Posts
Originally Posted by sintaxeror
So keep the comments coming!

 I've been TRYING to resist. This thread... upgrading my own system. Just say no! But I keep coming back... like a junkie, just ONE more time and I'll stop after that. I really will. I can quit ANY time I want. I can! Yet... Here I am? *bangs head on desk, repeatedly*
Originally Posted by sintaxerror
PS: 5000+ views now! I wonder if I can catch the Avic D3 install guide. ;-)
Seriously though, awesome thread and it does inspire me to get back out in the garage (and break out the Credit Cards... *groan*).
Wait! Keep posting pics, perhaps I can upgrade vicariously through you and my wife won't give me "that" look
 when she finds yet another delivery from UPS waiting at home.


 03-17-2008, 03:33 PM
#172
Registered User
Thread Starter
iTrader: (3)
Join Date: Jun 2005
Location: St. Petersburg, FL
Posts: 670
Likes: 0
Received 0 Likes
on
0 Posts
Originally Posted by Rob_Quads
Thought I would post a couple of pics of my install as it looks like your aiming to do something very similar
03-17-2008, 03:51 PM
#173
Registered User
Thread Starter
iTrader: (3)
Join Date: Jun 2005
Location: St. Petersburg, FL
Posts: 670
Likes: 0
Received 0 Likes
on
0 Posts
UPDATE 3/17/08 Evening
Just a short St. Patty's Day update... Needed to devote a little time to the green beer and guinness tonight
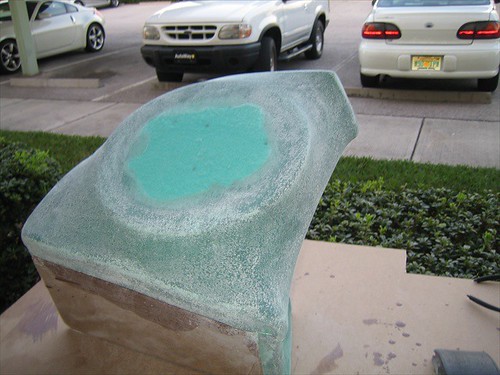
Here it is today, with the resin cured..
Staples removed..

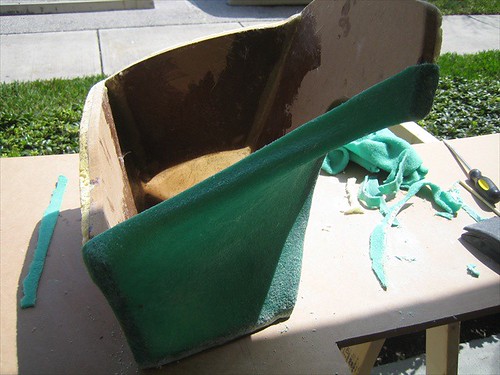
Loose fleece trimmed away..
Another shot..
Trimmed up a little more precisely with the dremel..
Here is where the too fleece parts meet..
Sanded and smoothed over..
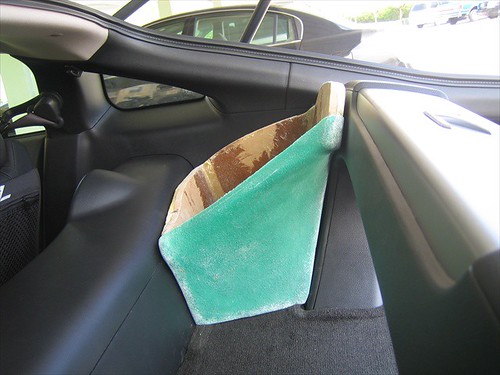
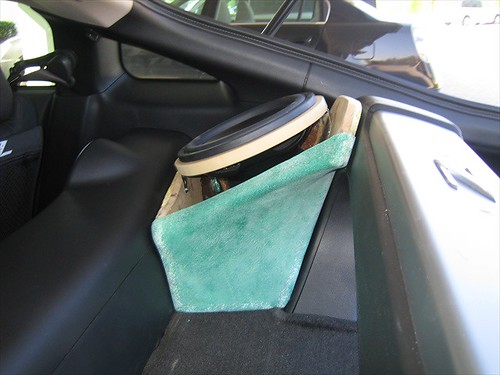
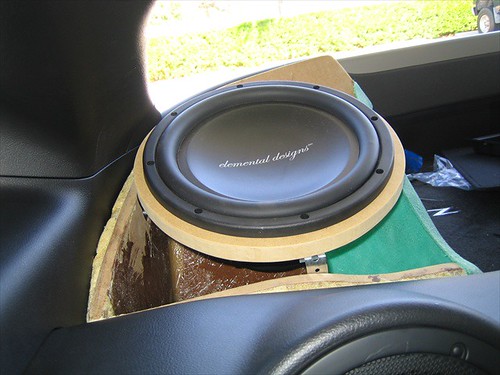
Test fit in the car.. looks perfect.
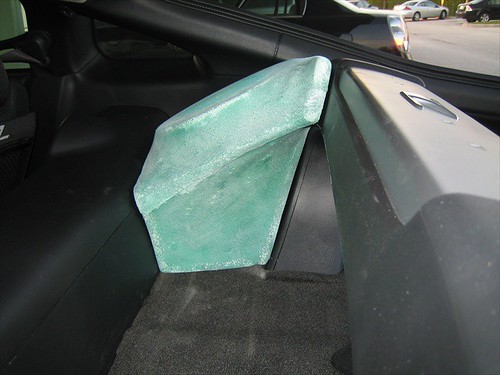
View from behind the passenger seat..

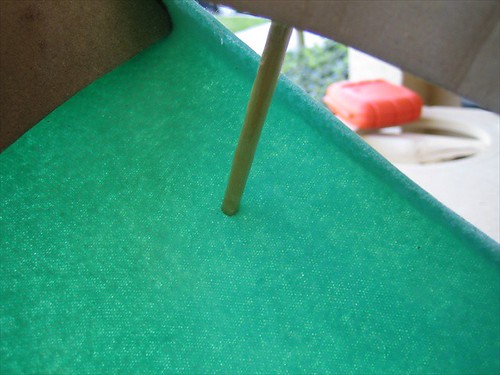
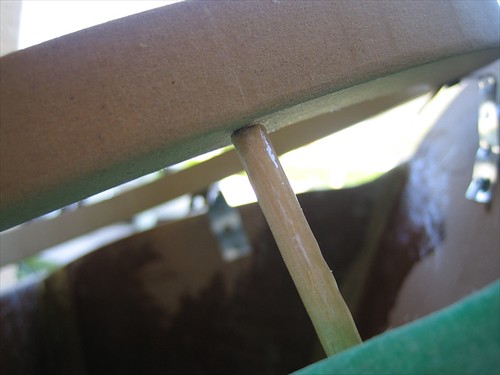
I want to smooth over this edge before glassing...
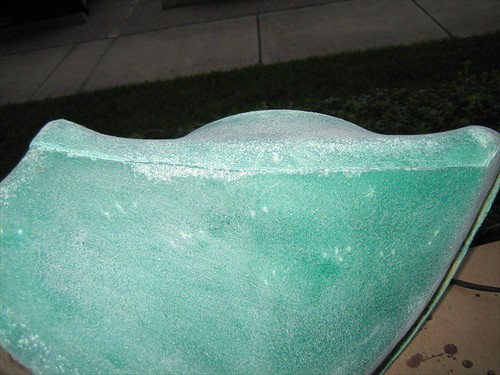
A closer look..
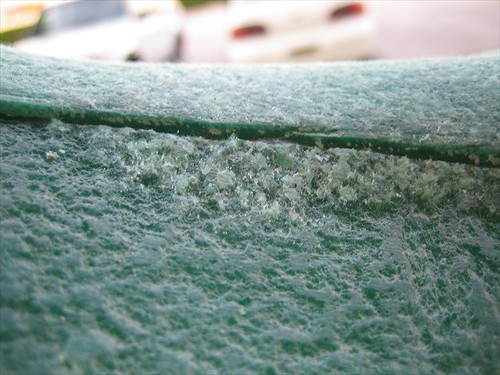
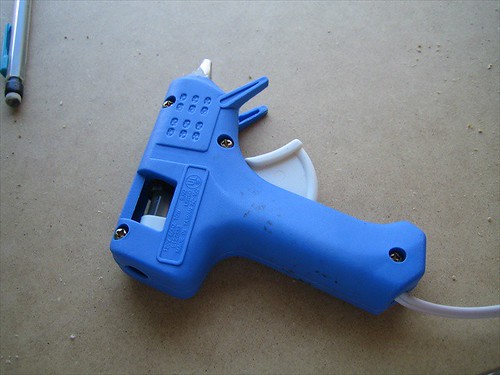
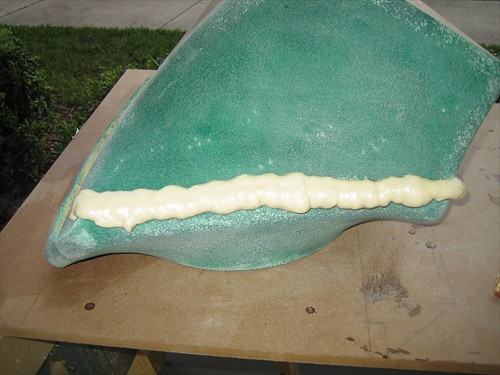
How do I fill this? The same way I've filled everything so far..
A couple of notes...
- I know I could have just glassed over that little part and been fine, and I also know I probably should have used body filler.. but the foam is just so easy to work with and it was available.
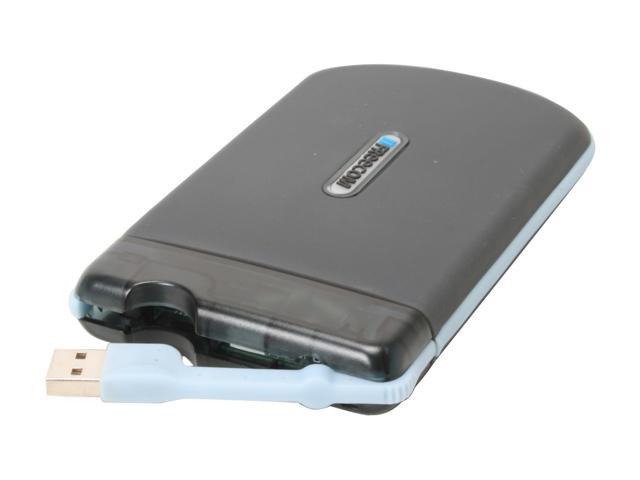
- I got the kenwood 5120 playing music off of a USB stick today.. AWESOME. Who needs an iPod? I think I will just add a USB hard drive and call it a day. Anyone know if the 5120 can supply enough power for one of those 2.5" USB drives which runs of power supplied by the USB port?
- There is a chance I will be too hung over to update tomorrow
Happy St. Patrick's!
Just a short St. Patty's Day update... Needed to devote a little time to the green beer and guinness tonight
Here it is today, with the resin cured..
Staples removed..
Loose fleece trimmed away..
Another shot..
Trimmed up a little more precisely with the dremel..
Here is where the too fleece parts meet..
Sanded and smoothed over..
Test fit in the car.. looks perfect.
View from behind the passenger seat..
I want to smooth over this edge before glassing...
A closer look..
How do I fill this? The same way I've filled everything so far..
A couple of notes...
- I know I could have just glassed over that little part and been fine, and I also know I probably should have used body filler.. but the foam is just so easy to work with and it was available.
- I got the kenwood 5120 playing music off of a USB stick today.. AWESOME. Who needs an iPod? I think I will just add a USB hard drive and call it a day. Anyone know if the 5120 can supply enough power for one of those 2.5" USB drives which runs of power supplied by the USB port?
- There is a chance I will be too hung over to update tomorrow
Happy St. Patrick's!
03-17-2008, 05:29 PM
#174
Registered User
iTrader: (1)

Join Date: Feb 2008
Location: New England
Posts: 588
Likes: 0
Received 0 Likes
on
0 Posts
Originally Posted by sintaxeror
UPDATE 3/17/08 Evening
A couple of notes...
- I know I could have just glassed over that little part and been fine, and I also know I probably should have used body filler.. but the foam is just so easy to work with and it was available.
- I got the kenwood 5120 playing music off of a USB stick today.. AWESOME. Who needs an iPod? I think I will just add a USB hard drive and call it a day. Anyone know if the 5120 can supply enough power for one of those 2.5" USB drives which runs of power supplied by the USB port?
- There is a chance I will be too hung over to update tomorrow
Happy St. Patrick's!
http://www.newegg.com/Product/Produc...82E16822241009
 03-18-2008, 04:29 AM
#176
Registered User

Join Date: Aug 2006
Location: Atlanta, GA
Posts: 613
Likes: 0
Received 0 Likes
on
0 Posts
Hey Jay,,,how is your head feeling this morning! Too much "green" beer? LOL. I will miss your updates today, unless you take a few tylenol and feel sorry for us. J/king
03-18-2008, 10:38 AM
#178
Registered User
Originally Posted by Rob_Quads
If I were you I would do an extra bit of fibreglassing insides on all the joins - As you say Expanding foam is easy but it does not produce the best seal.
03-18-2008, 10:46 AM
#179
Registered User

Join Date: Jul 2006
Location: Southampton
Posts: 46
Likes: 0
Received 0 Likes
on
0 Posts
A skim of filler is fairly week - also the fact its on the outside it make it easier for the pressure to push it off. By putting layers on the inside you make a much more stronger box machanically
03-18-2008, 11:12 AM
#180
Registered User
Thread Starter
iTrader: (3)
Join Date: Jun 2005
Location: St. Petersburg, FL
Posts: 670
Likes: 0
Received 0 Likes
on
0 Posts
Originally Posted by Lsmith9523
Hey Jay,,,how is your head feeling this morning! Too much "green" beer? LOL. I will miss your updates today, unless you take a few tylenol and feel sorry for us. J/king
Originally Posted by Rob_Quads
If I were you I would do an extra bit of fibreglassing insides on all the joins - As you say Expanding foam is easy but it does not produce the best seal.
Originally Posted by SlideFox
I would assume he plans on using a body filler on the exterior of the box, and then sand to his final finish. That should provide a strong enough seal, IMO.