Focal / Mosconi Show SQ Build
 07-11-2016, 11:43 AM
#1
Registered User
Thread Starter

Figured I'd start a build thread specifically for the audio setup I'm in the middle of doing.
Full car build thread is here if you want to check out the rest of the build: https://my350z.com/forum/exterior-an...l#post10781946
Head Unit:
Pioneer DEH-80PRS (will probably change, maybe just do a big Windows tablet instead)
In Car Entertainment:
Samsung Galaxy Tab 8" in dash currently (again, will probably change)
Front Stage:
Focal Utopia Be No 7 Active
Processor:
Mosconi 6to8V8
Mosconi DSP-RC-Mini Controller
Front Stage Amps:
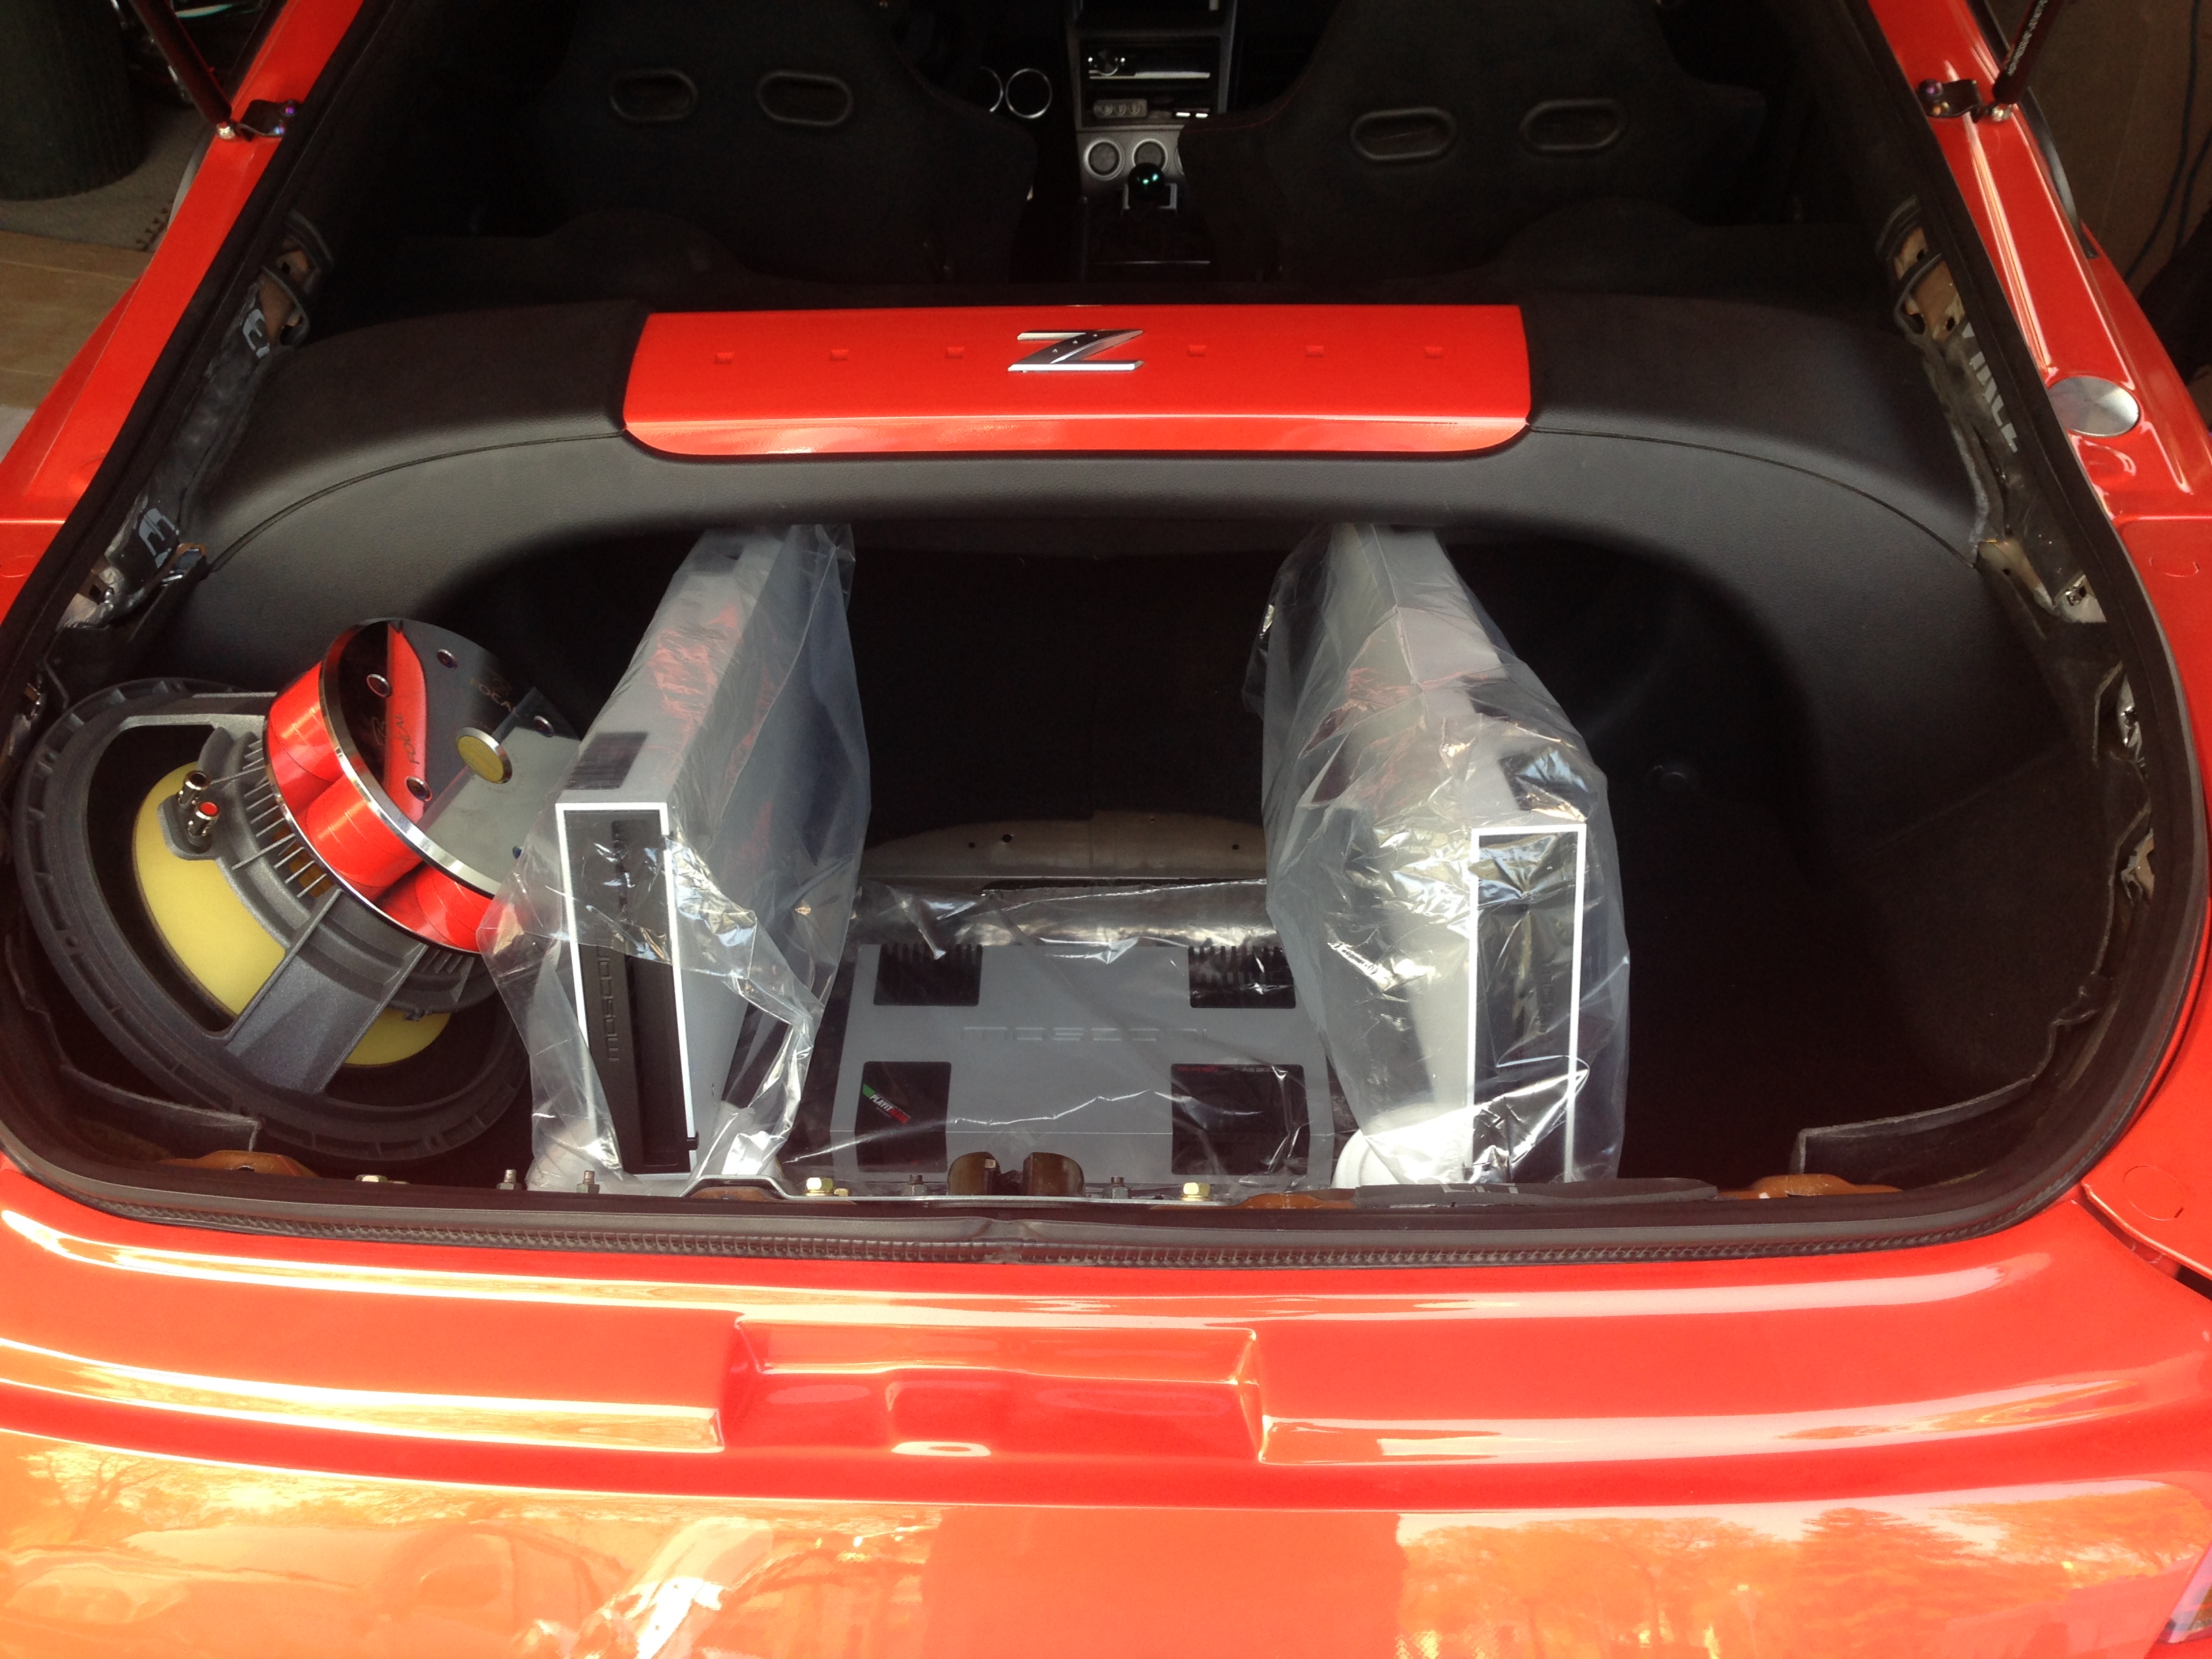
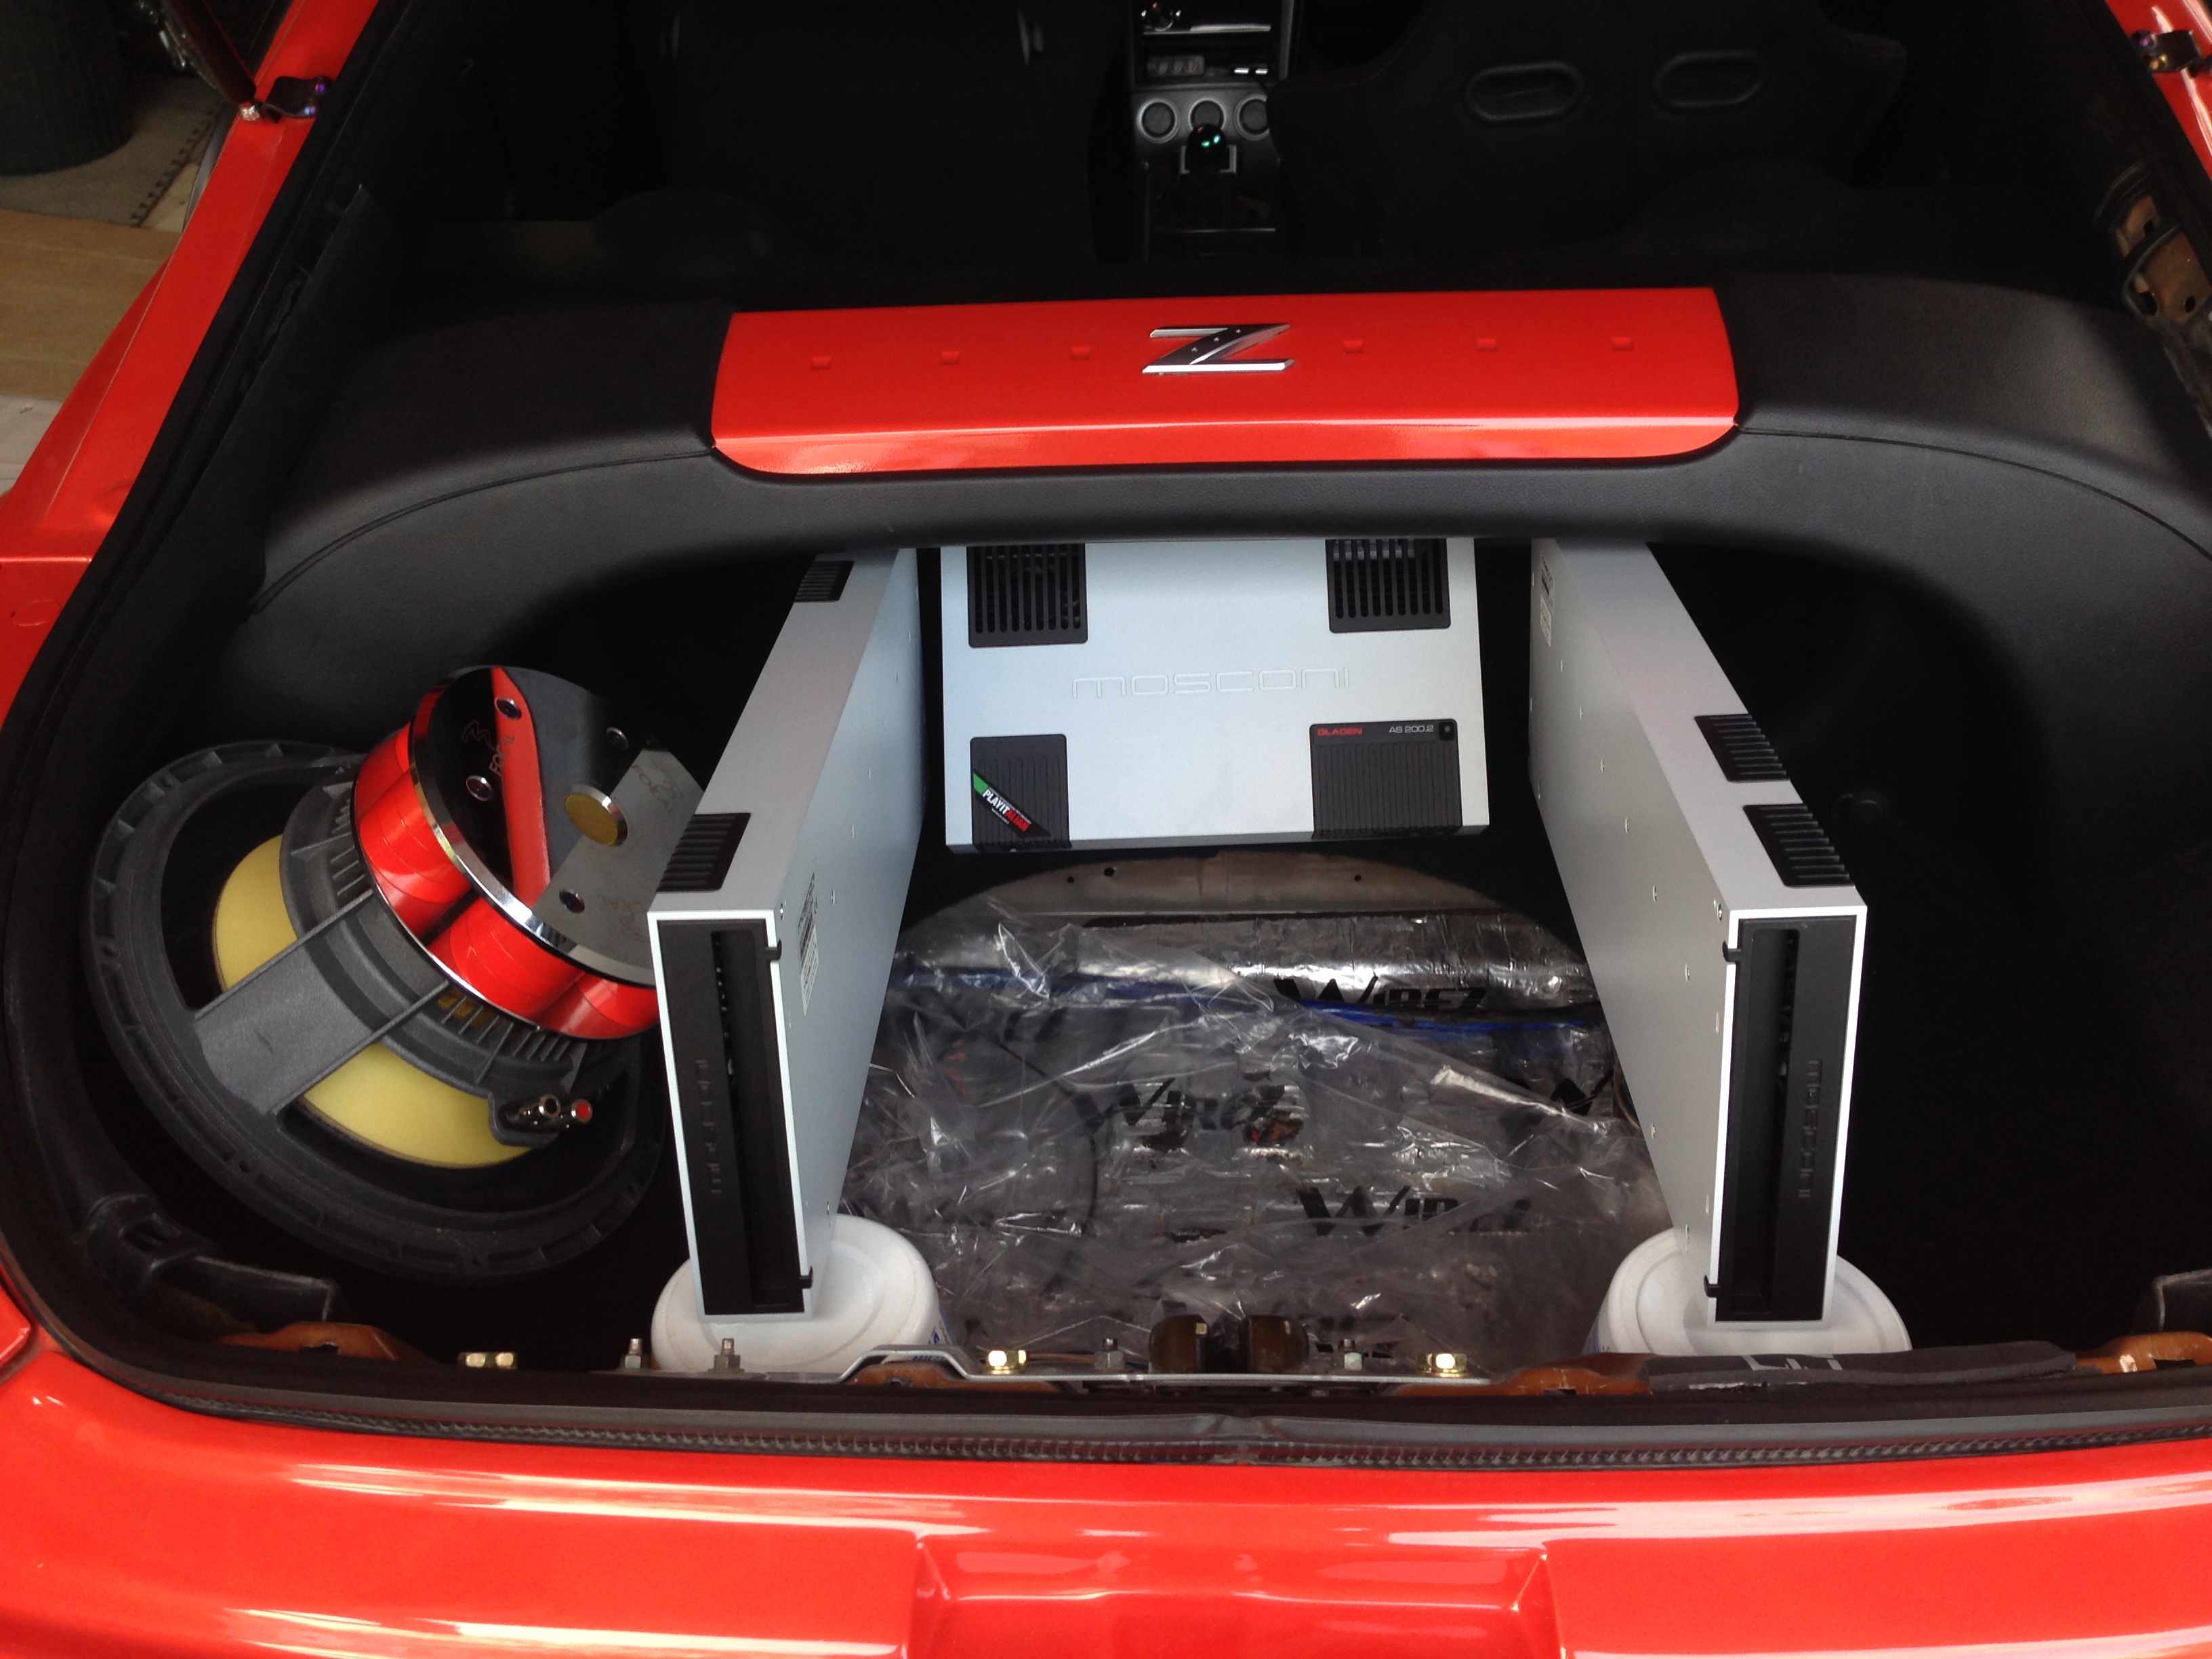
Mosconi AS200.4
Mosconi AS200.2
Sub:
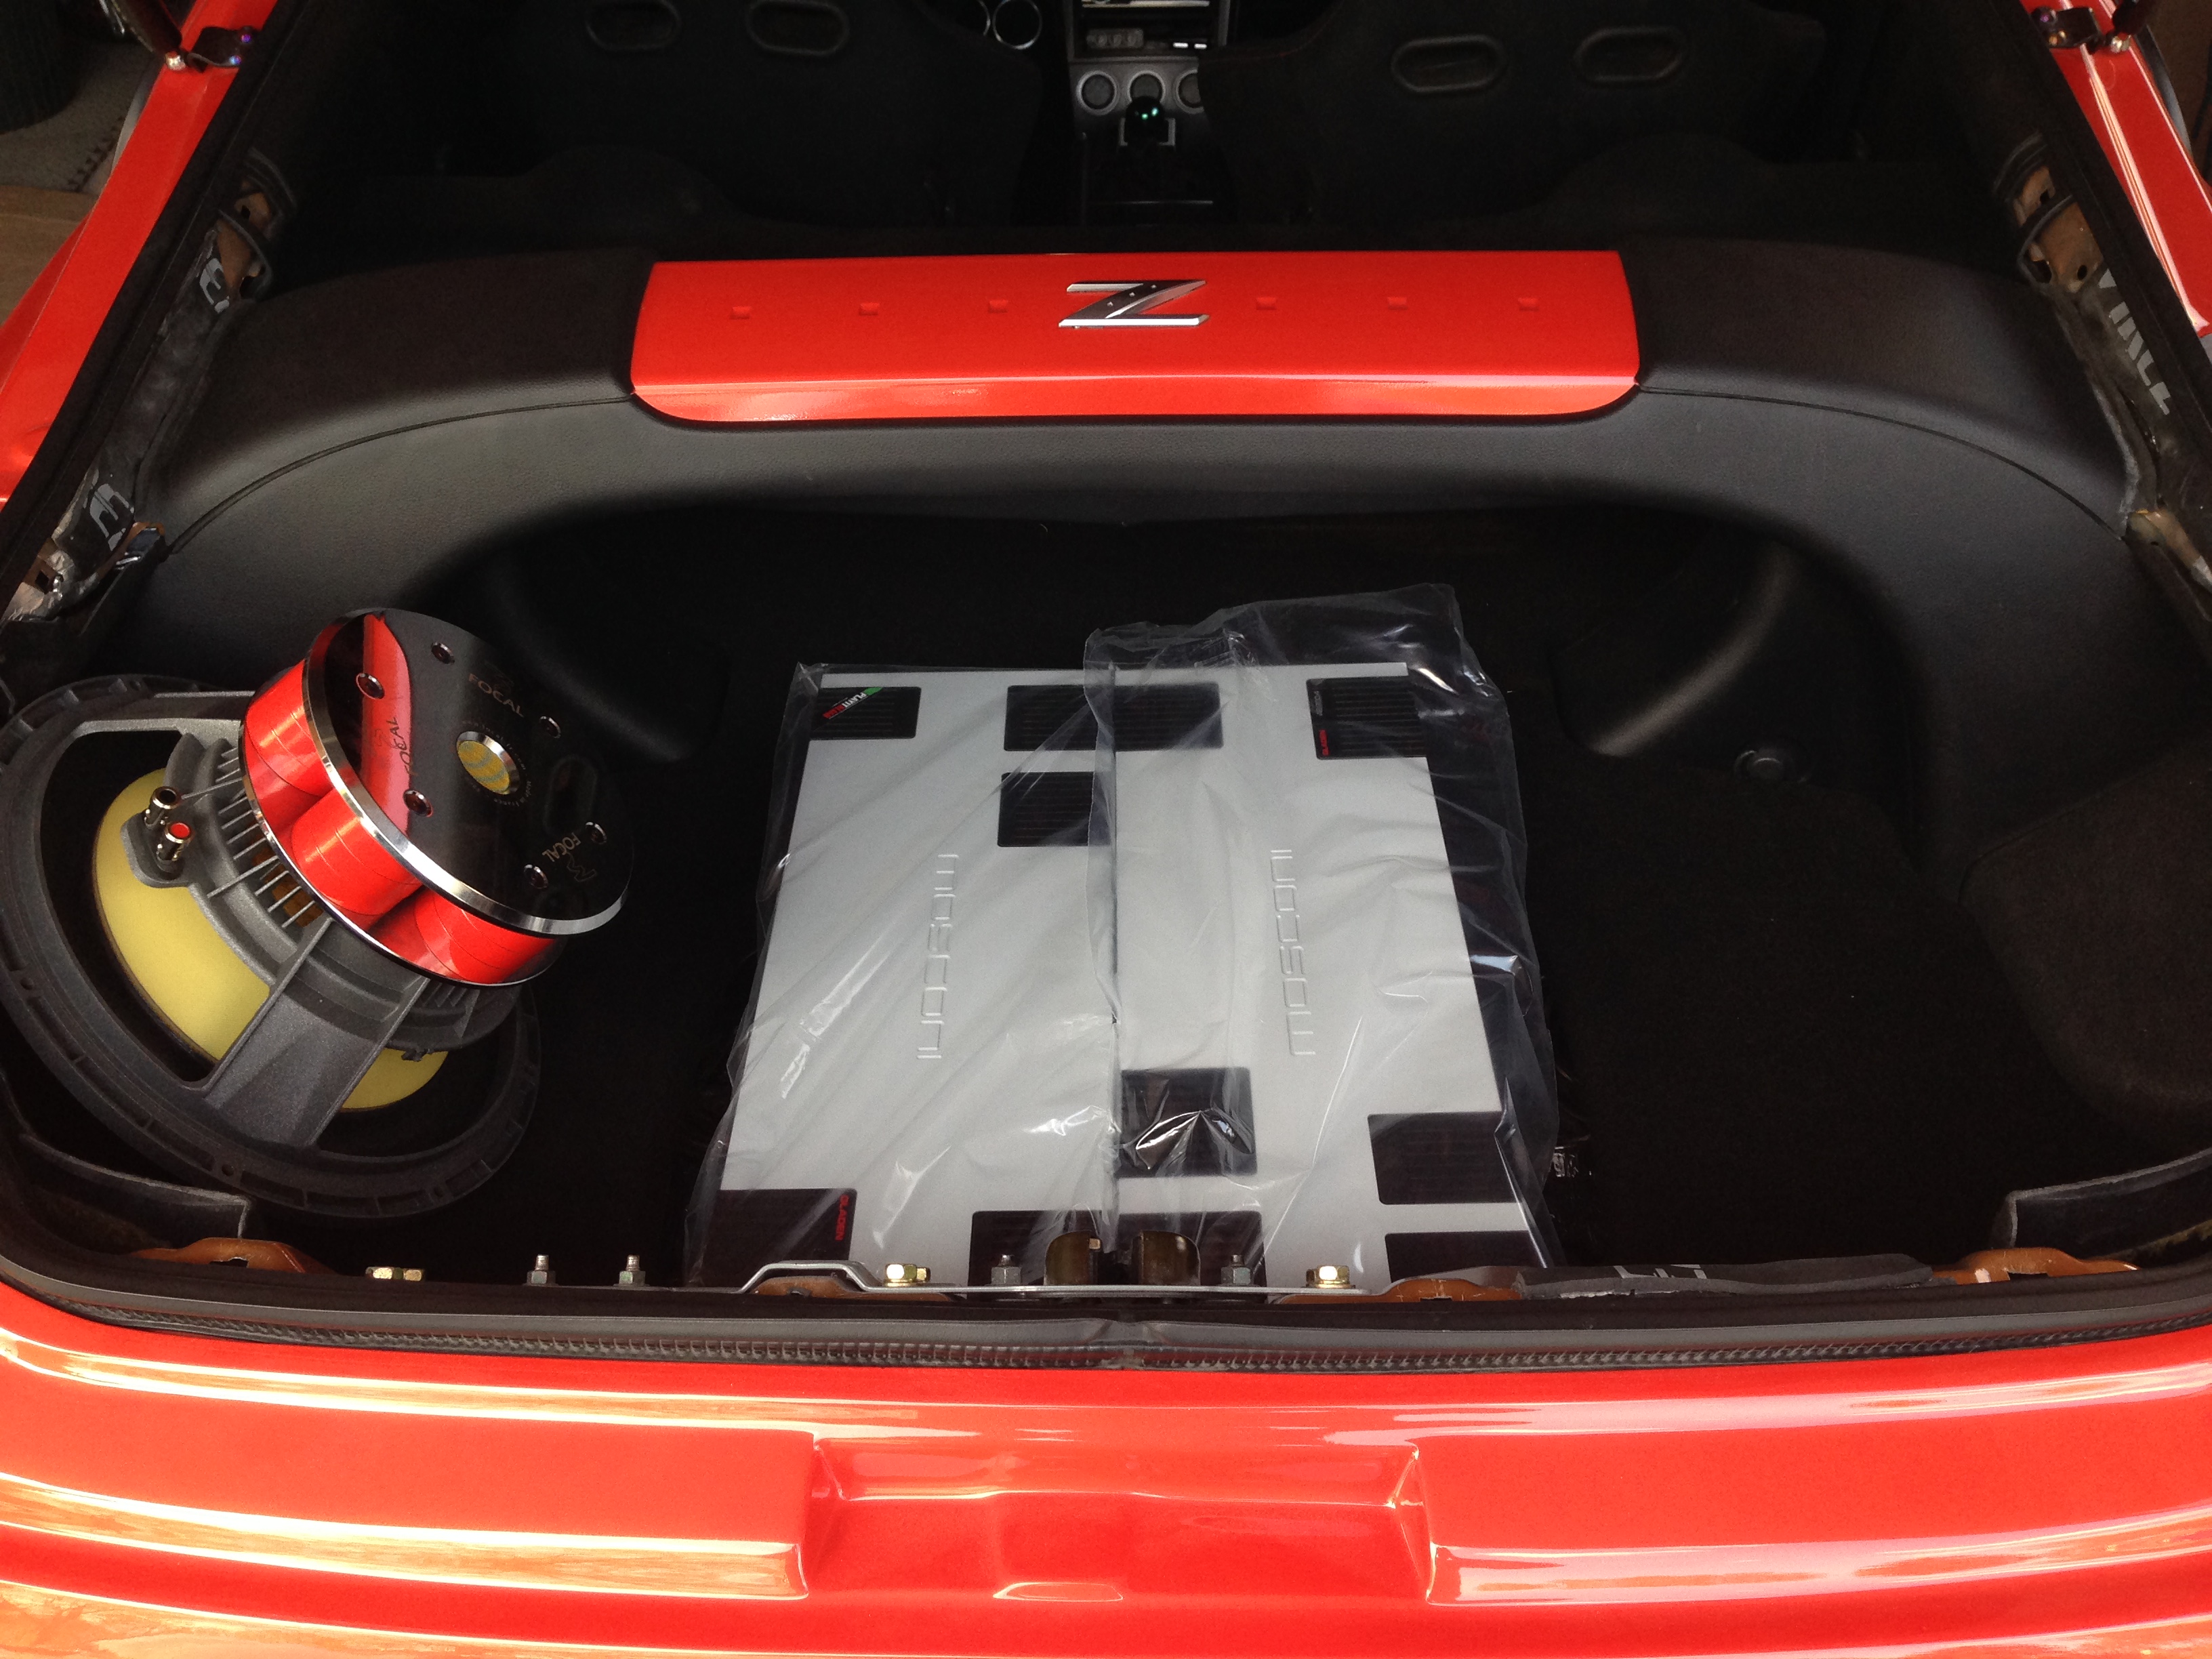
Focal 33KX (I wanted to do two, but space constraints and cost constraints )
)
Sub Amp:
Mosconi AS300.2
Power:
2 XS Power Batteries
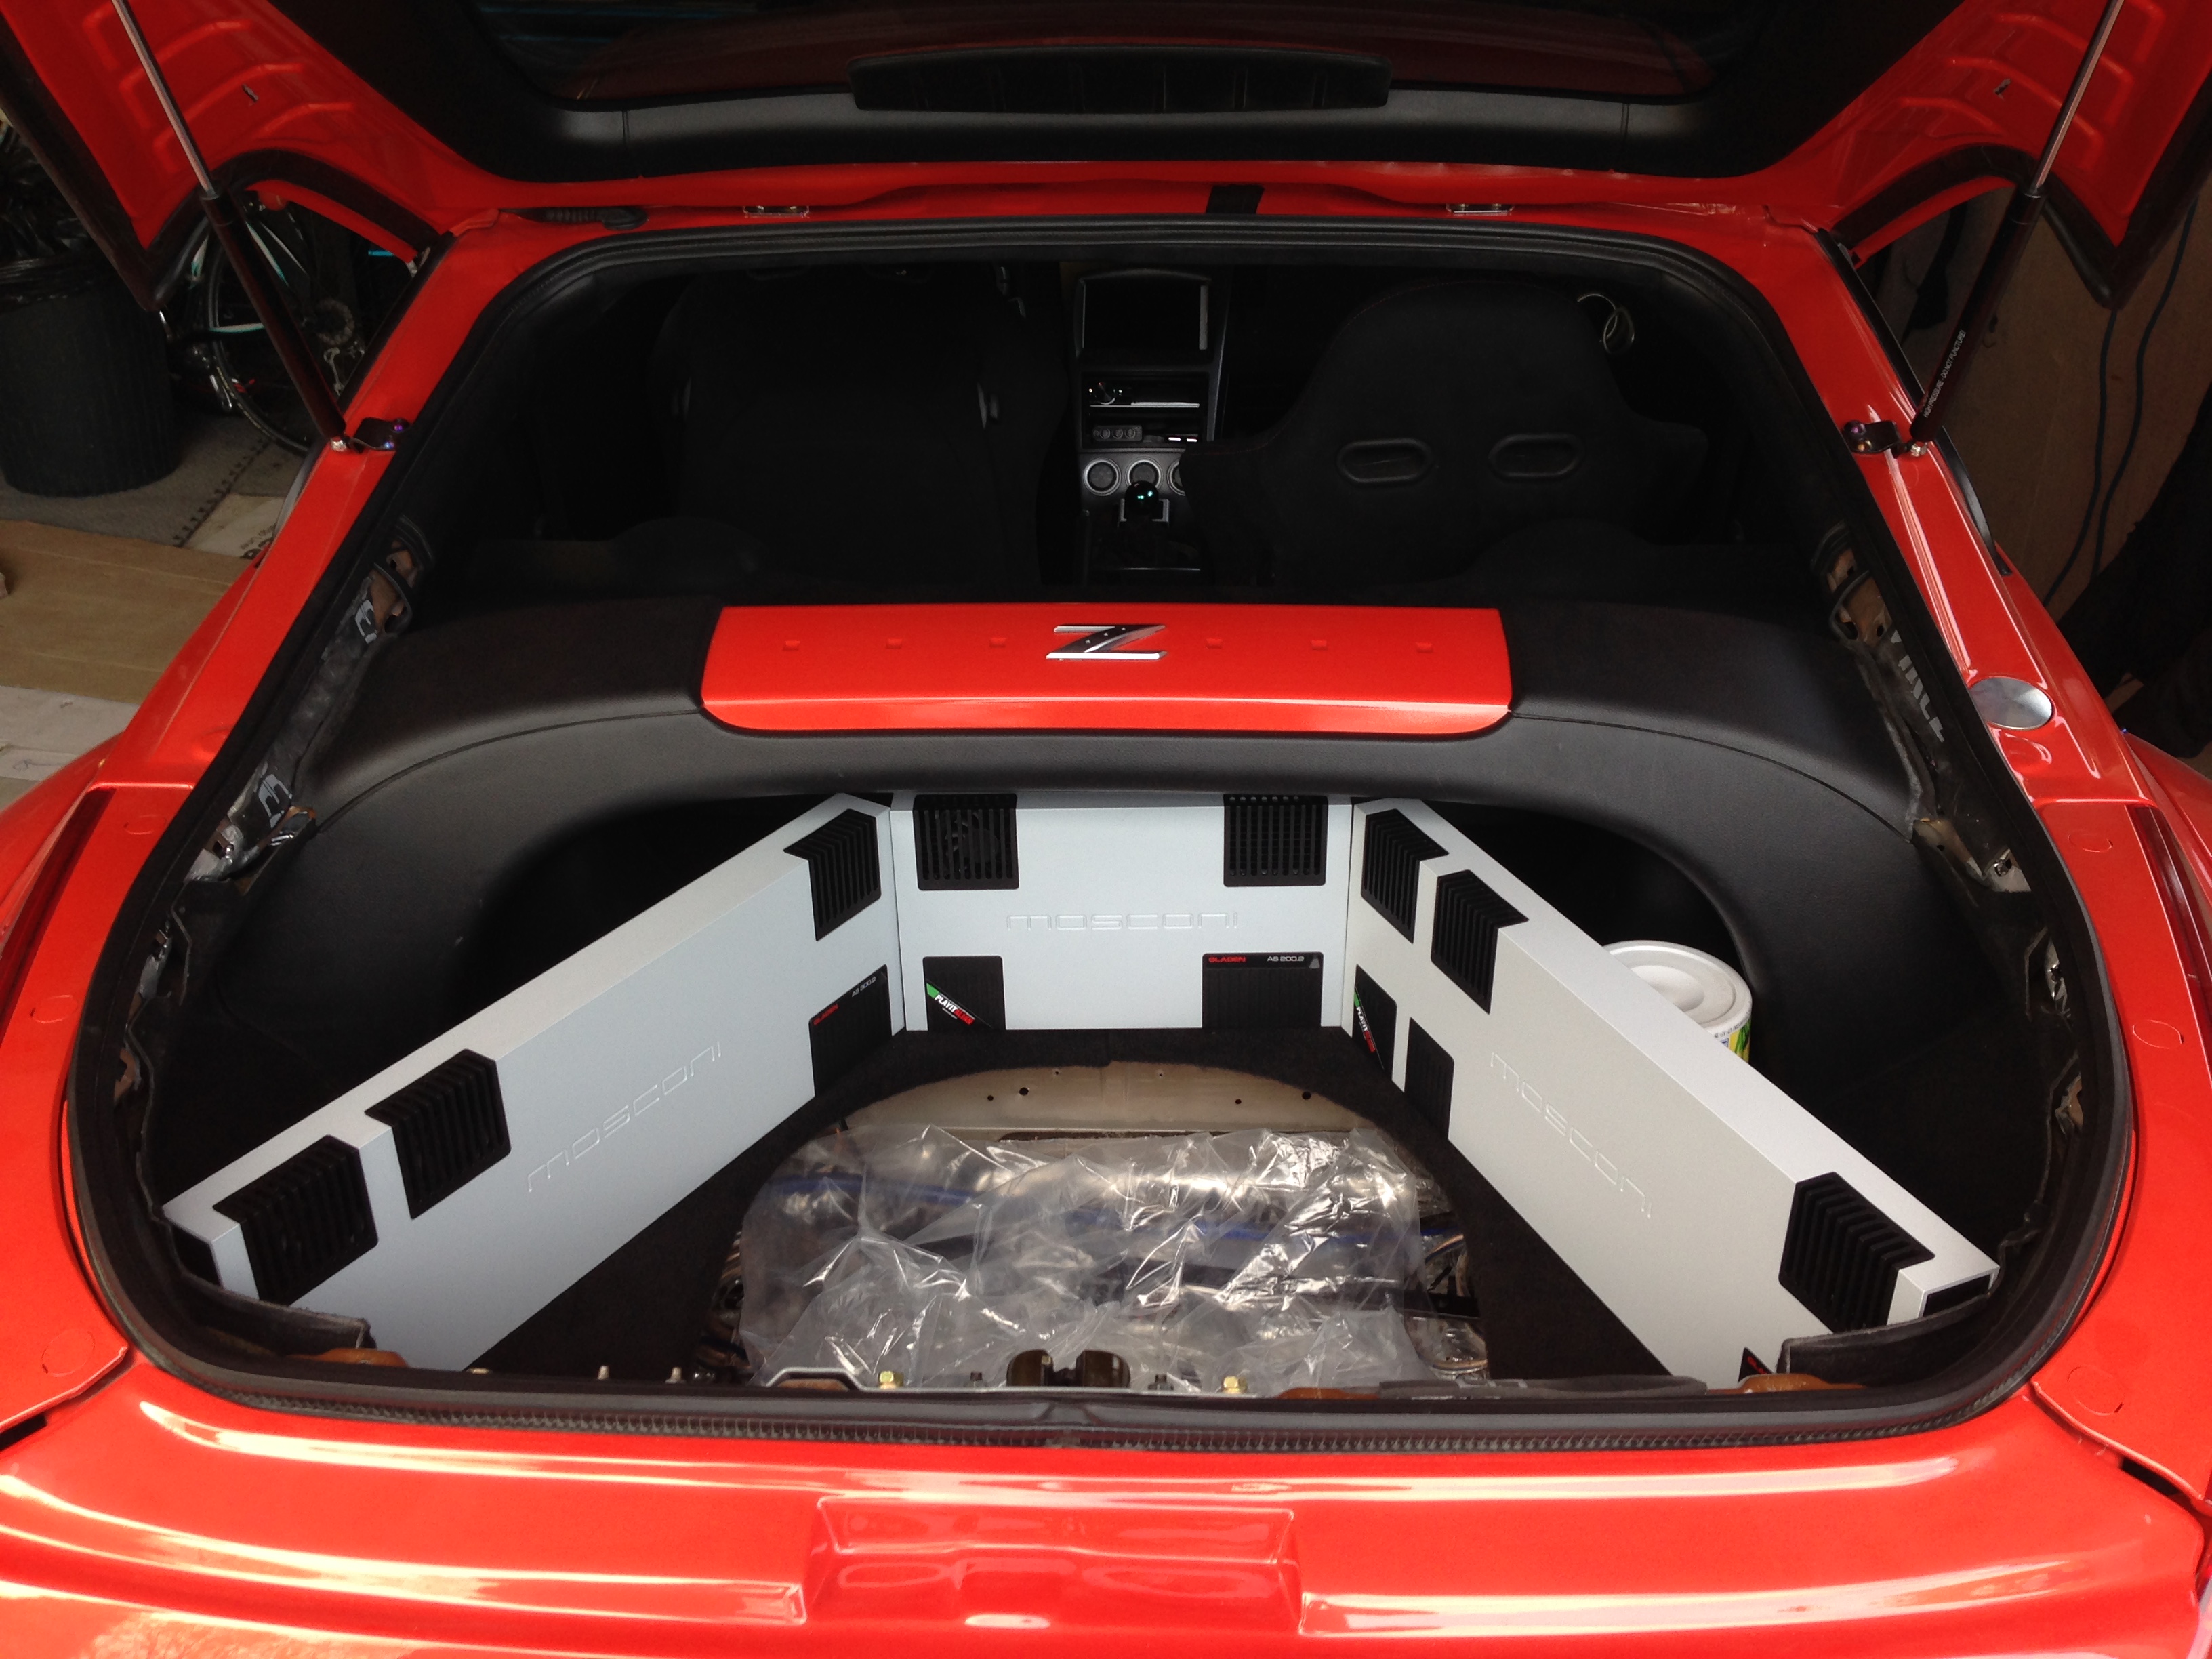
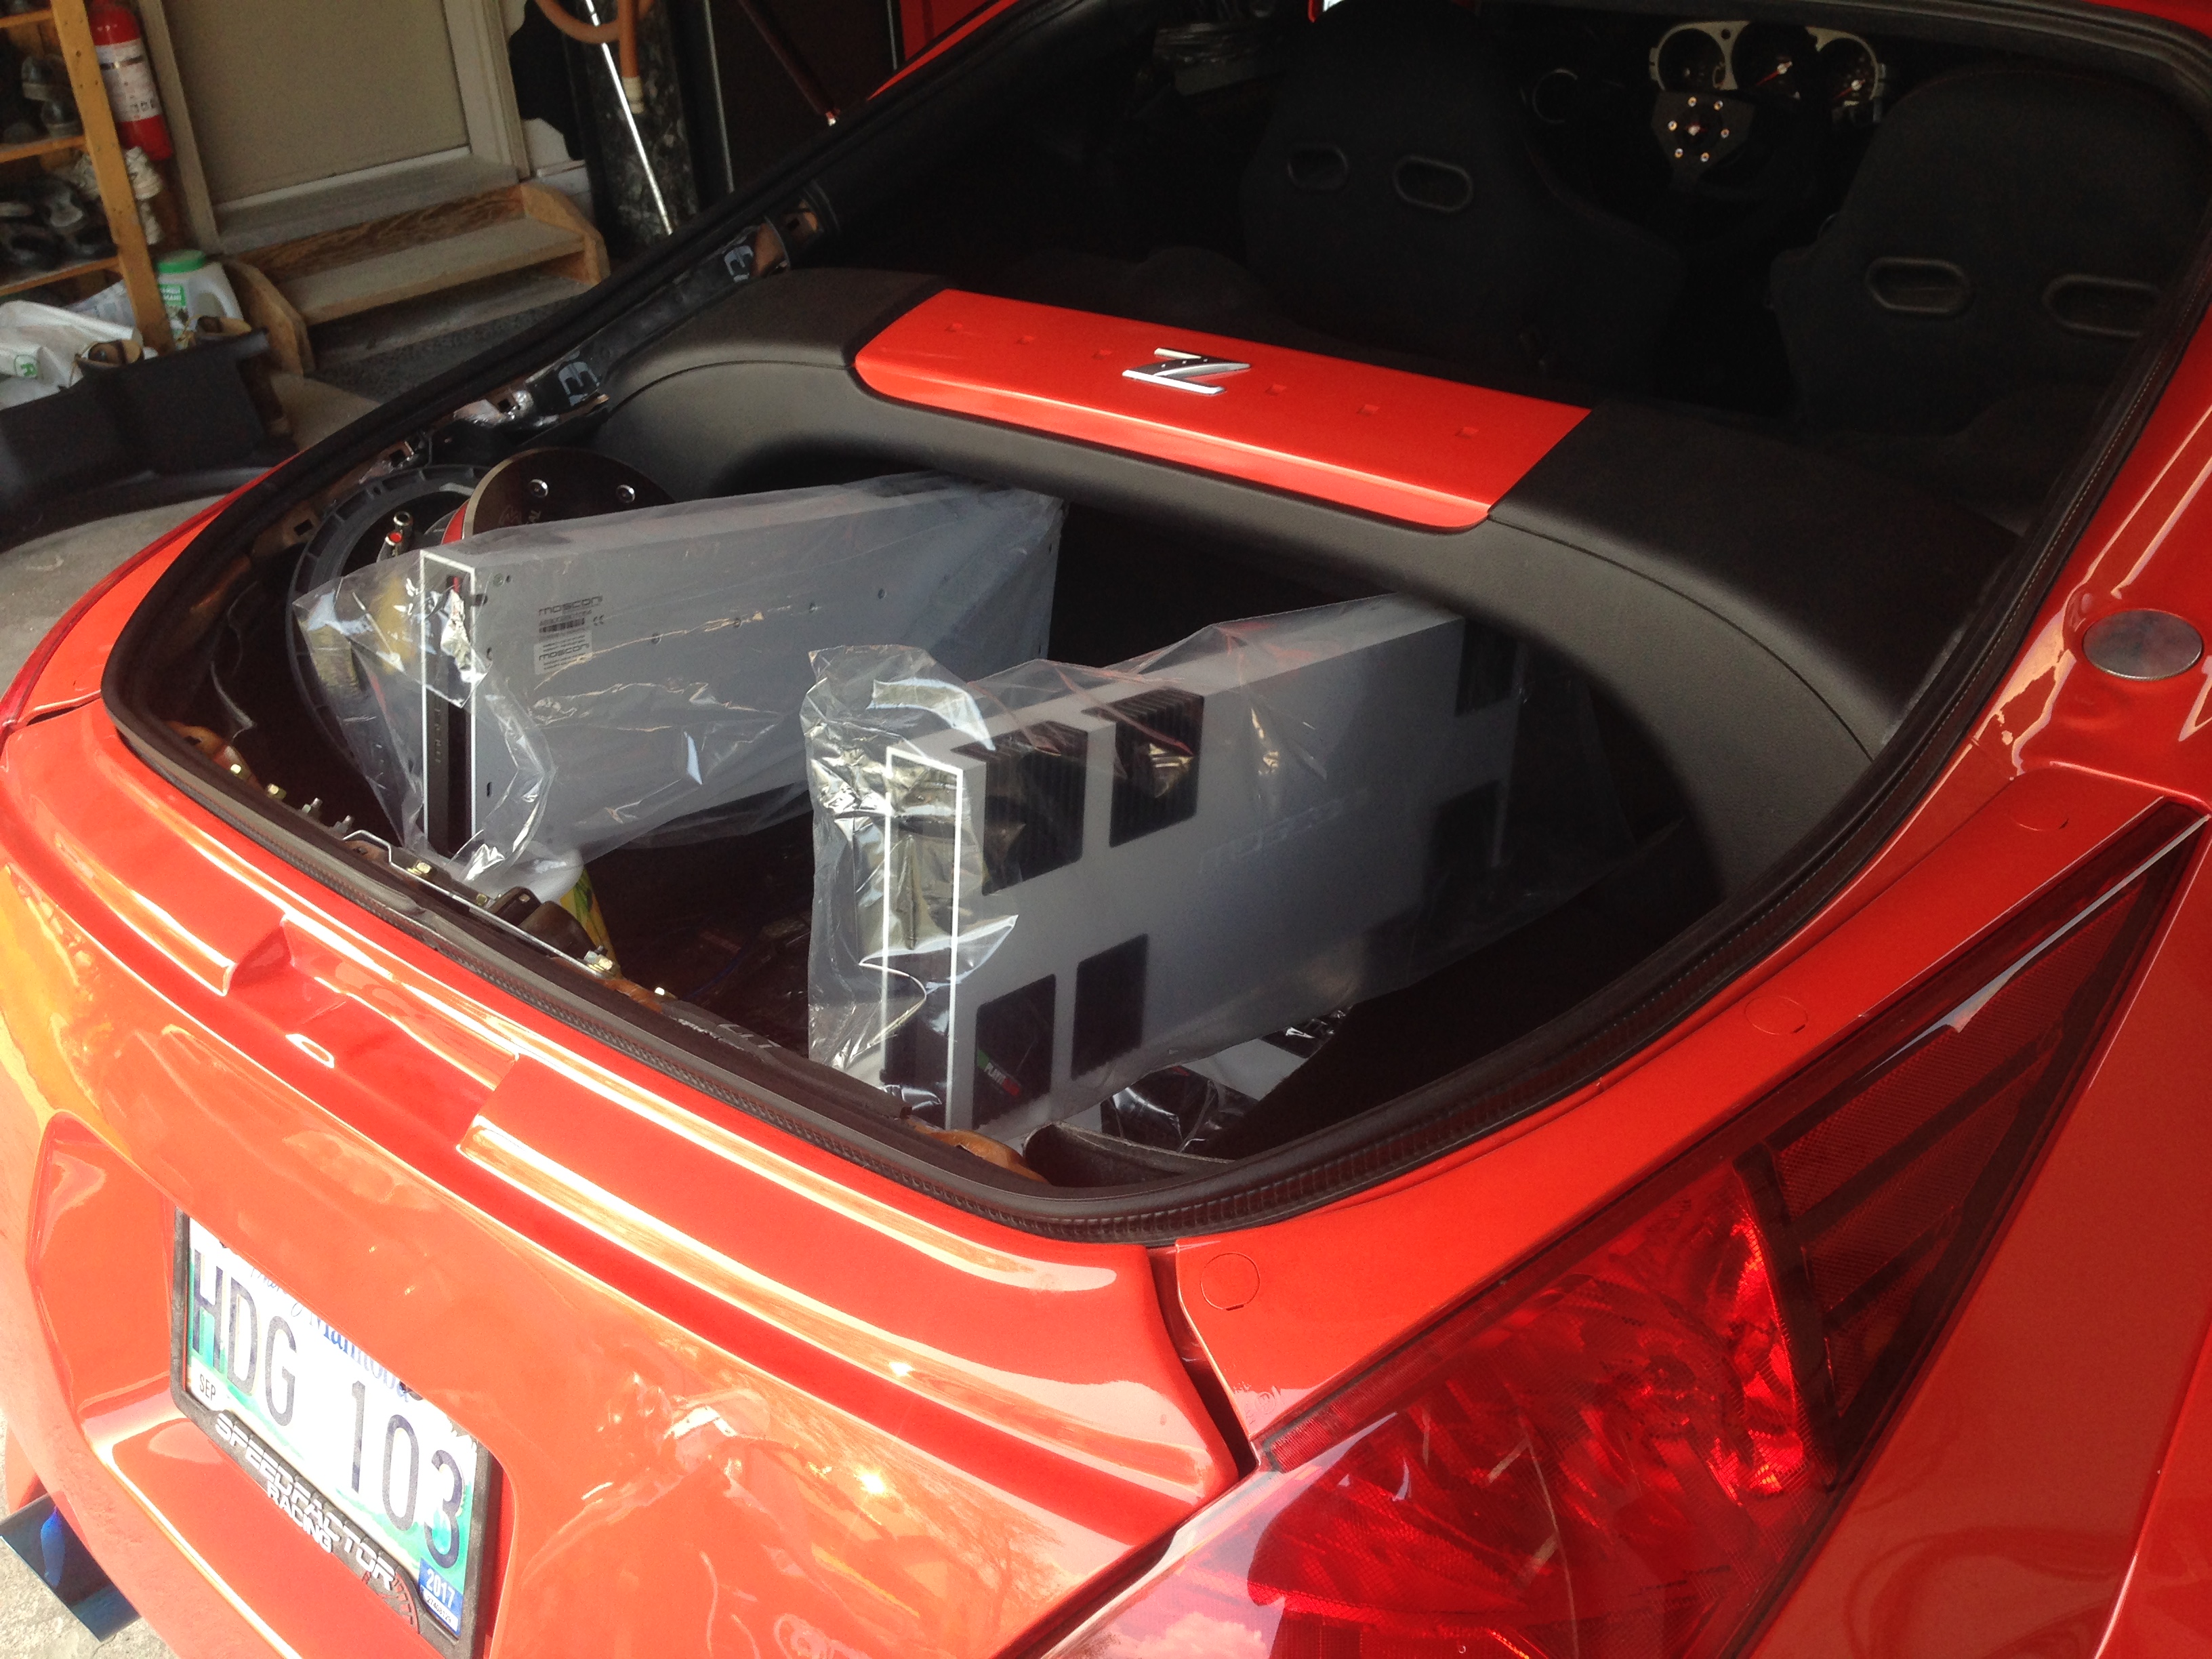
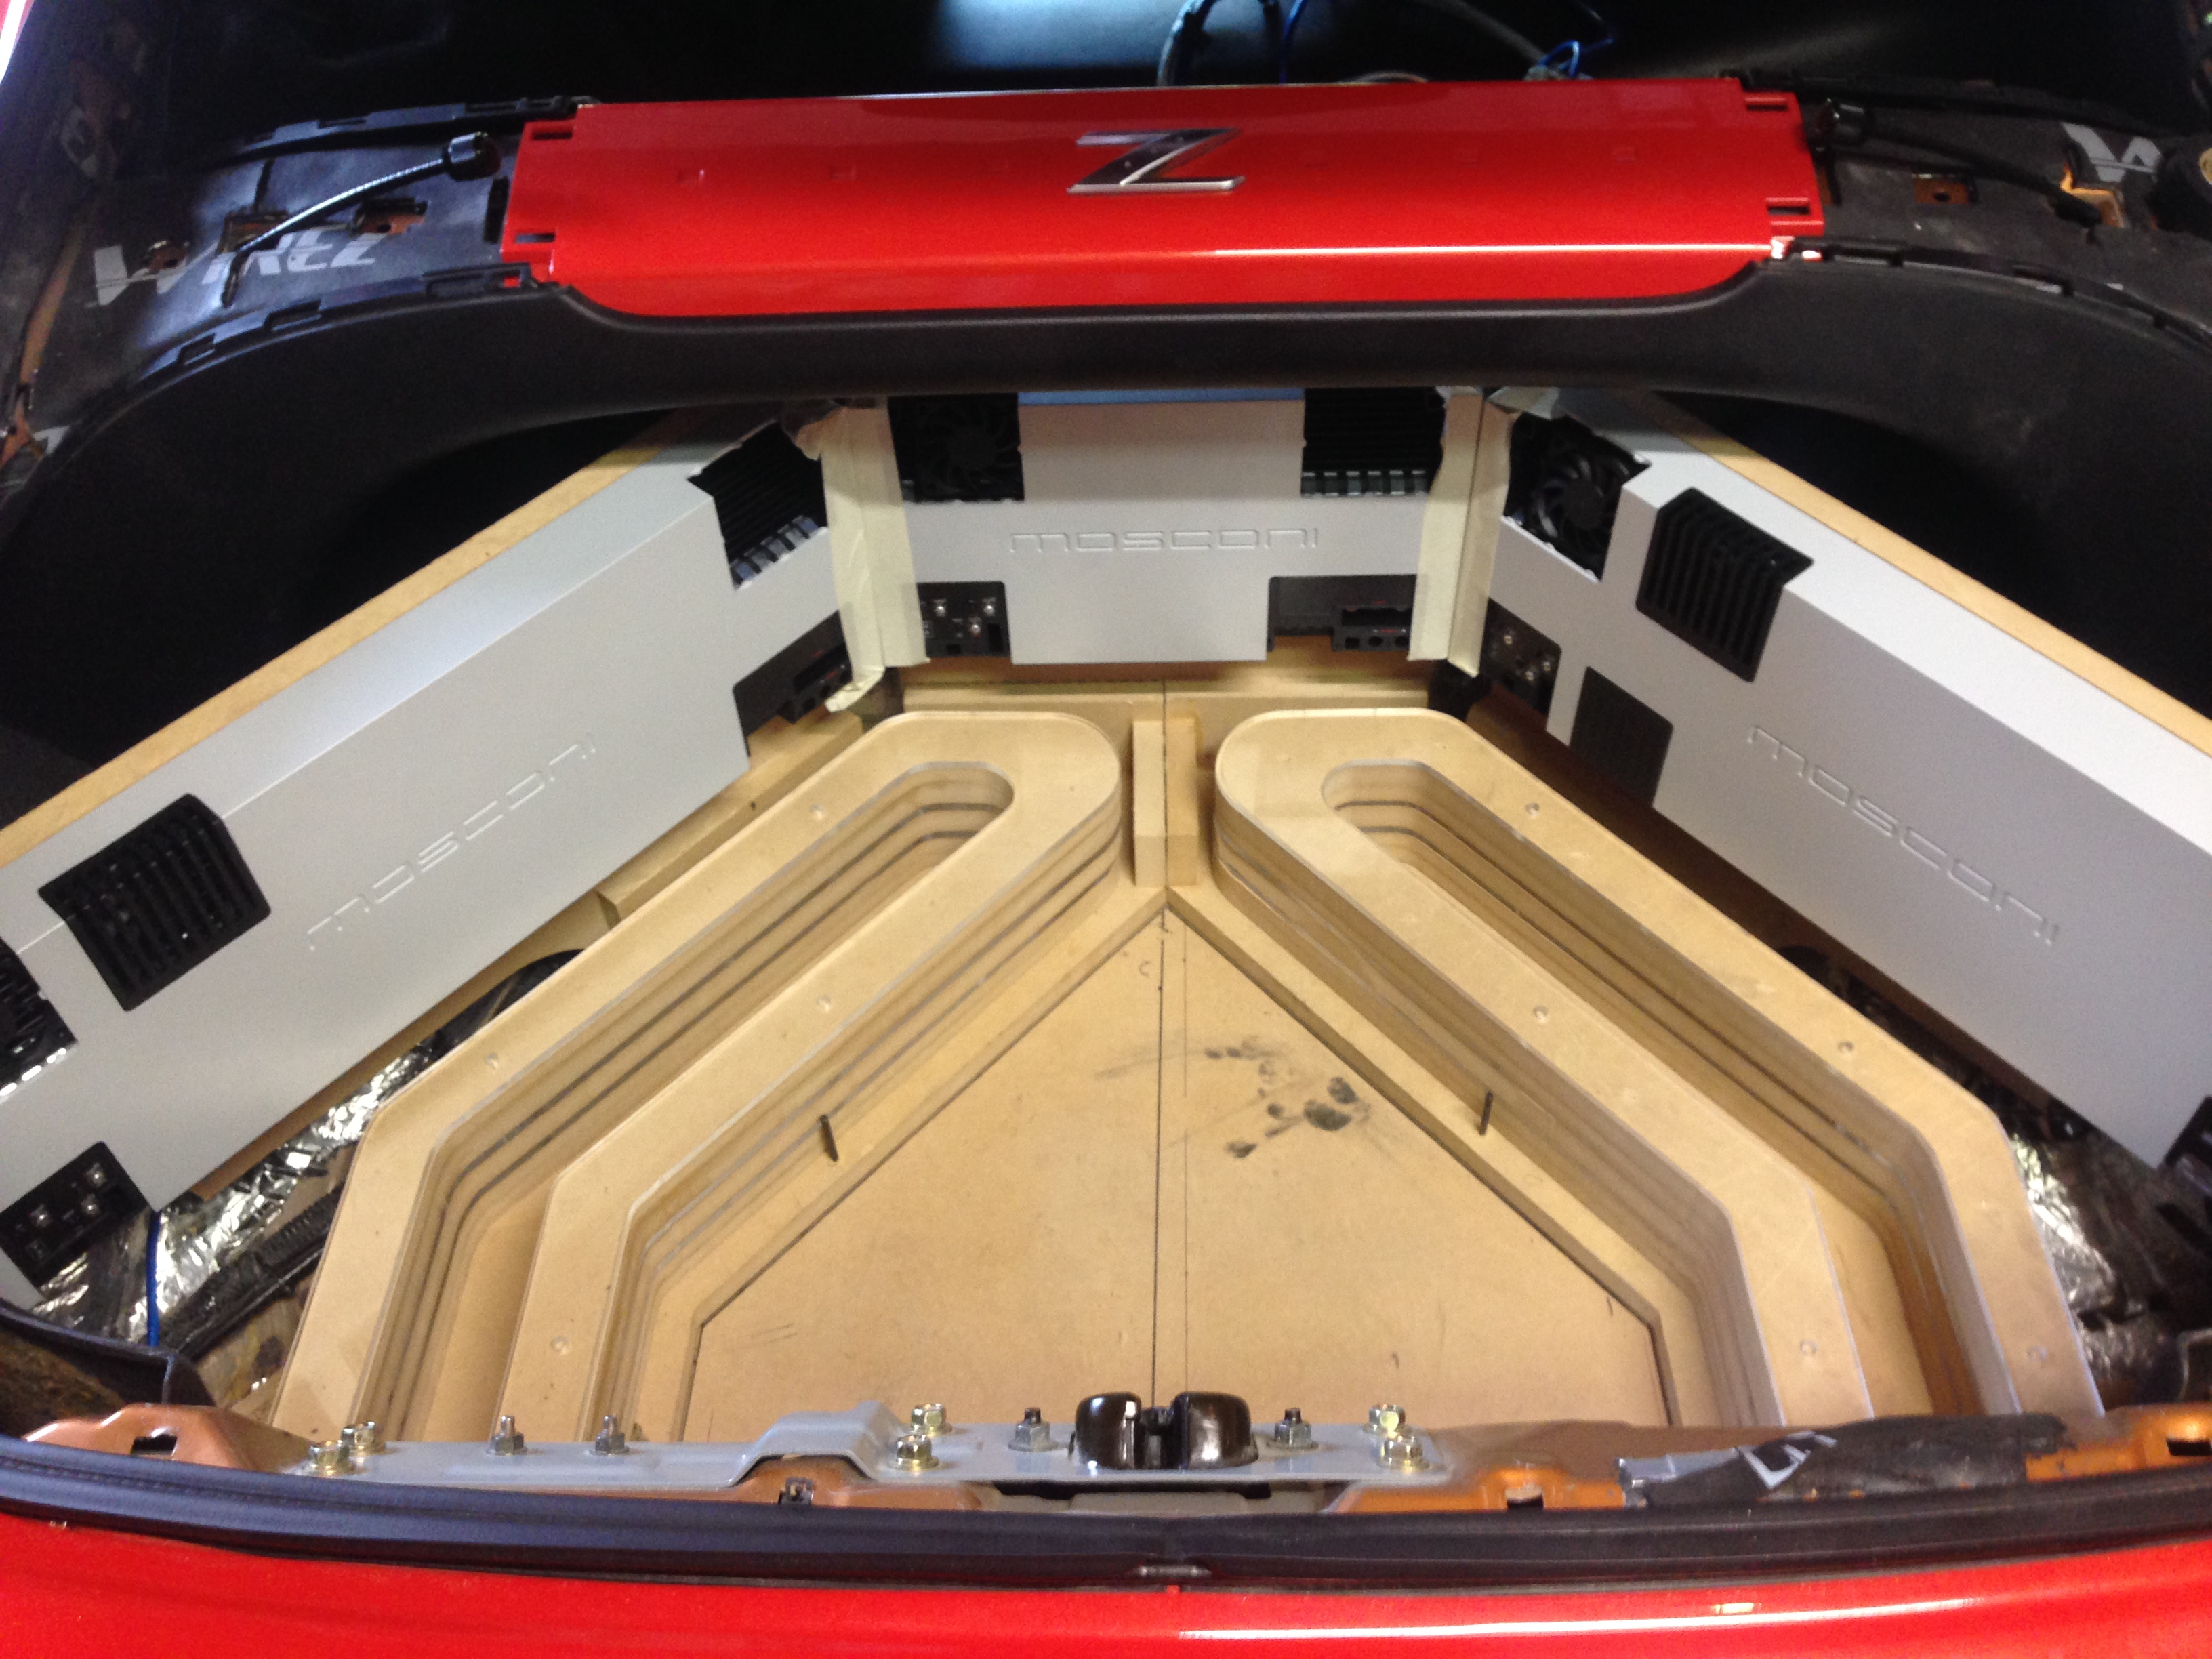
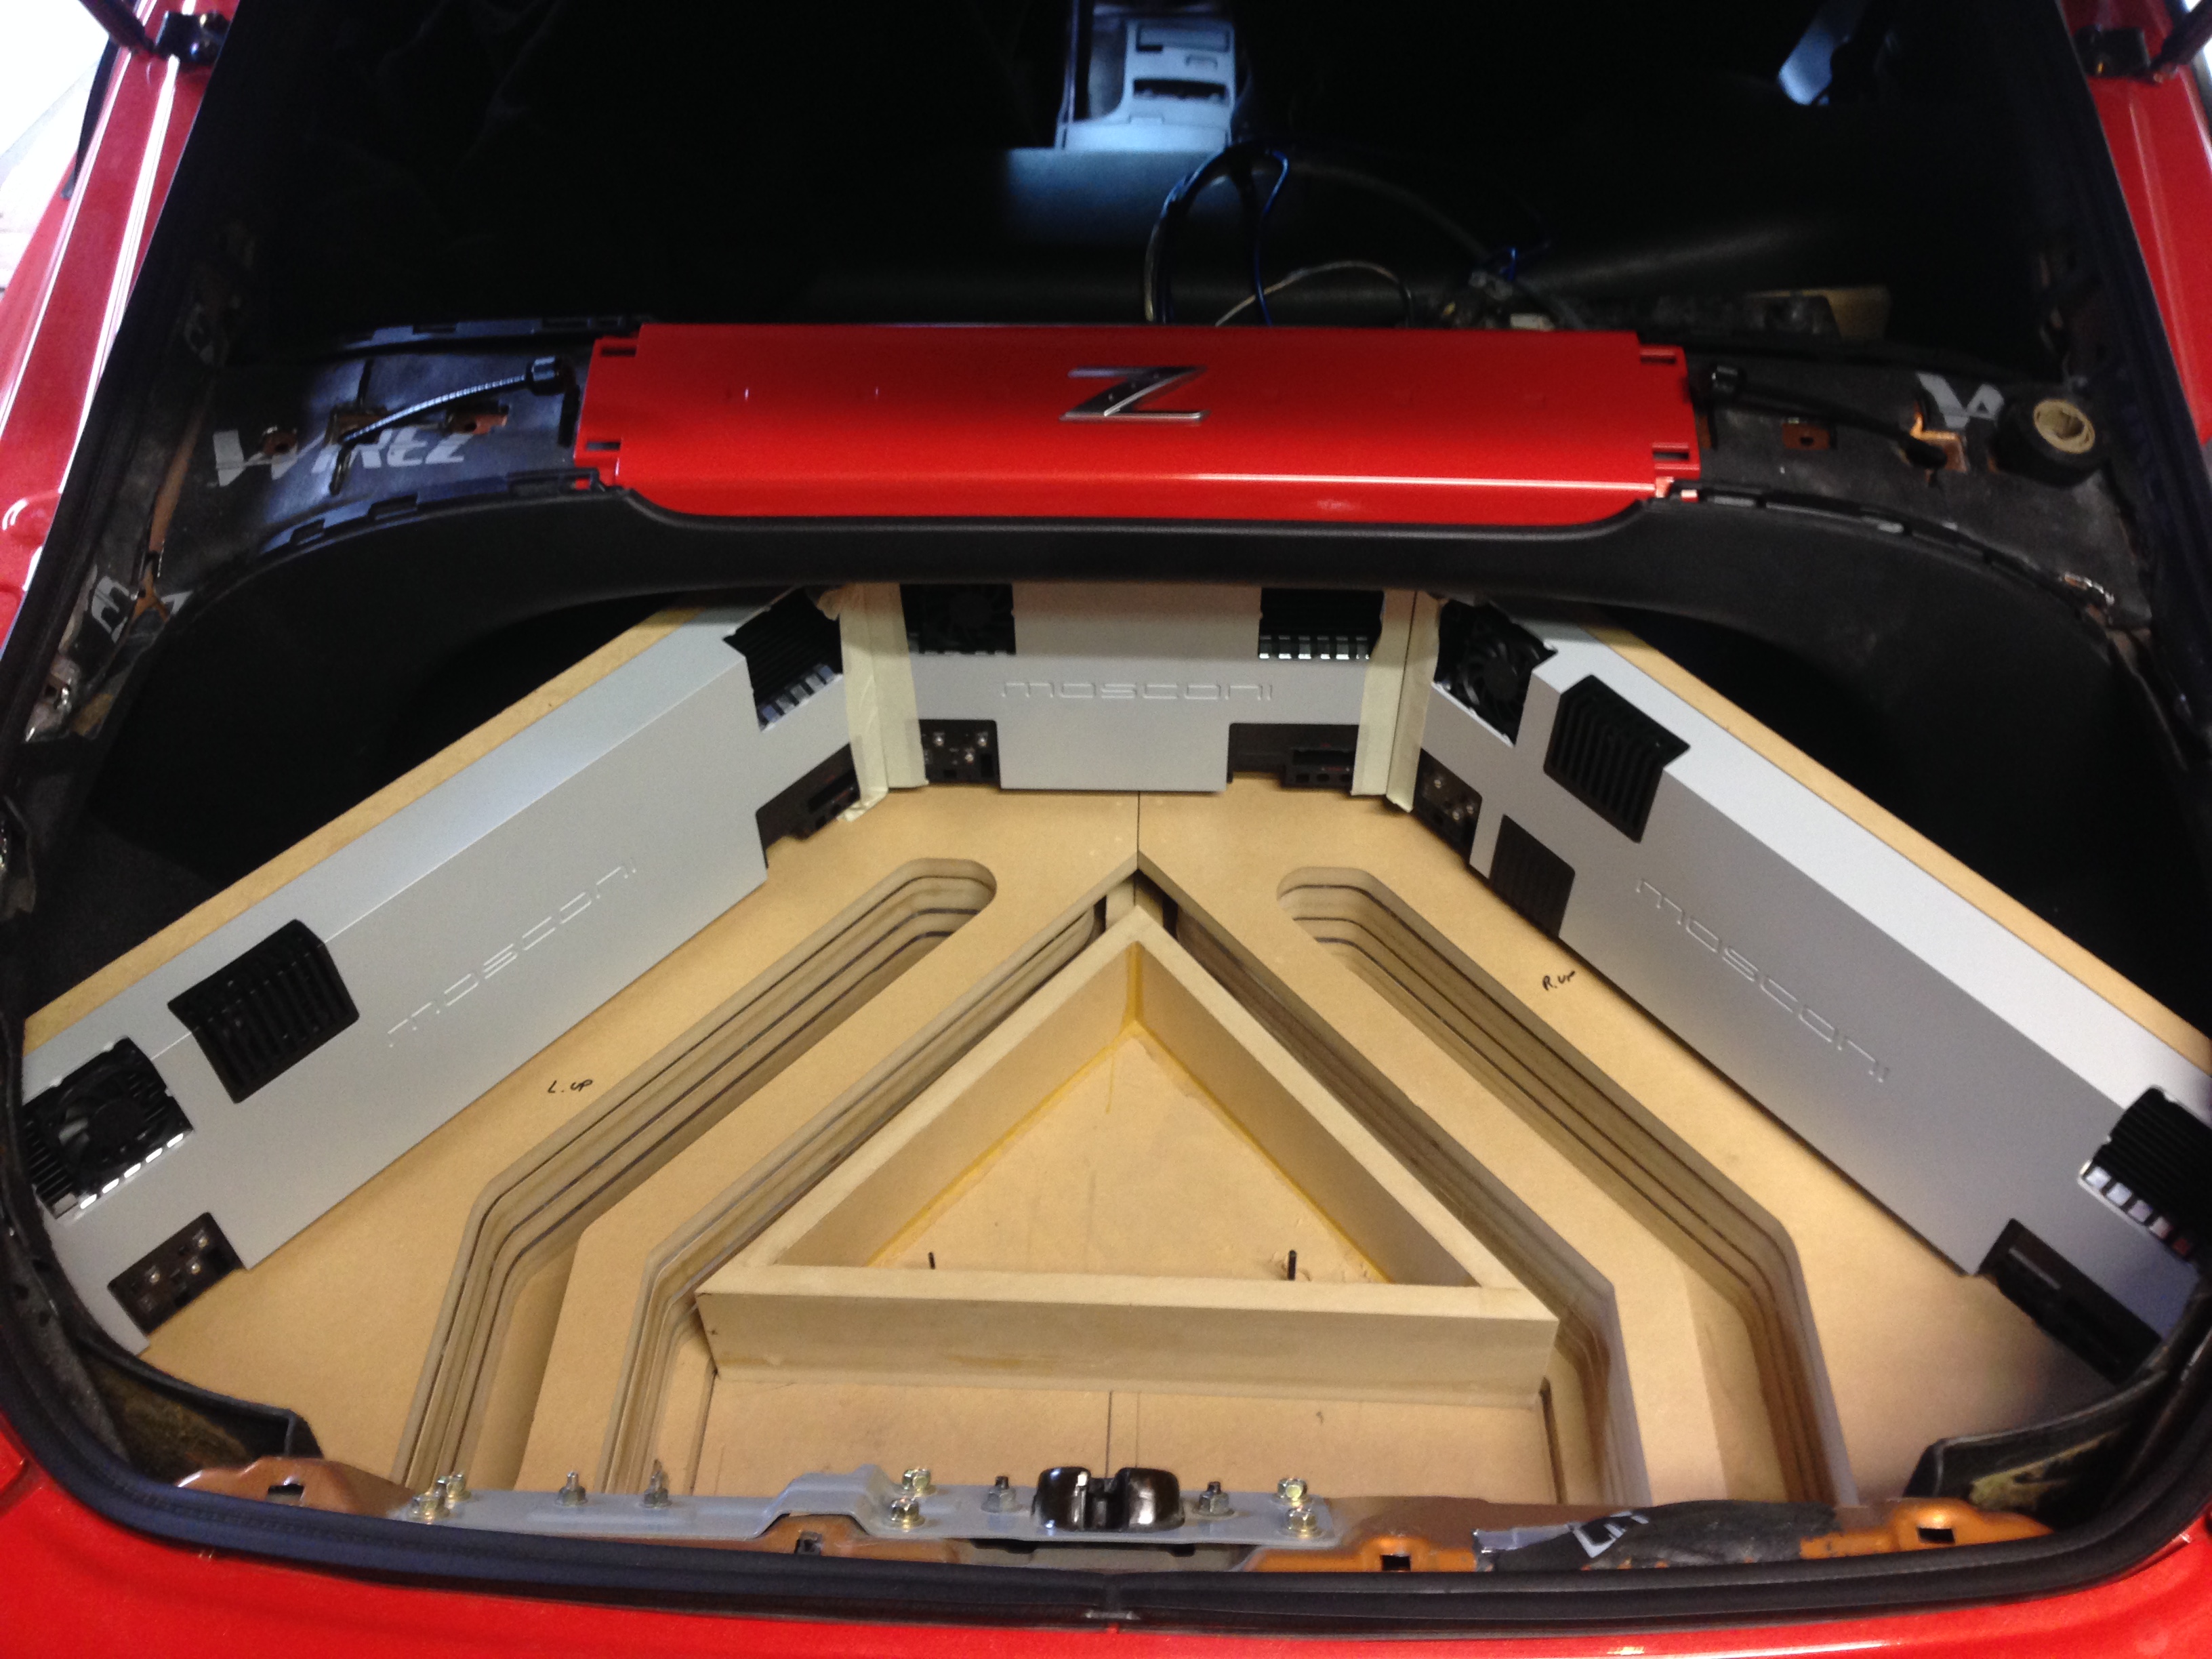
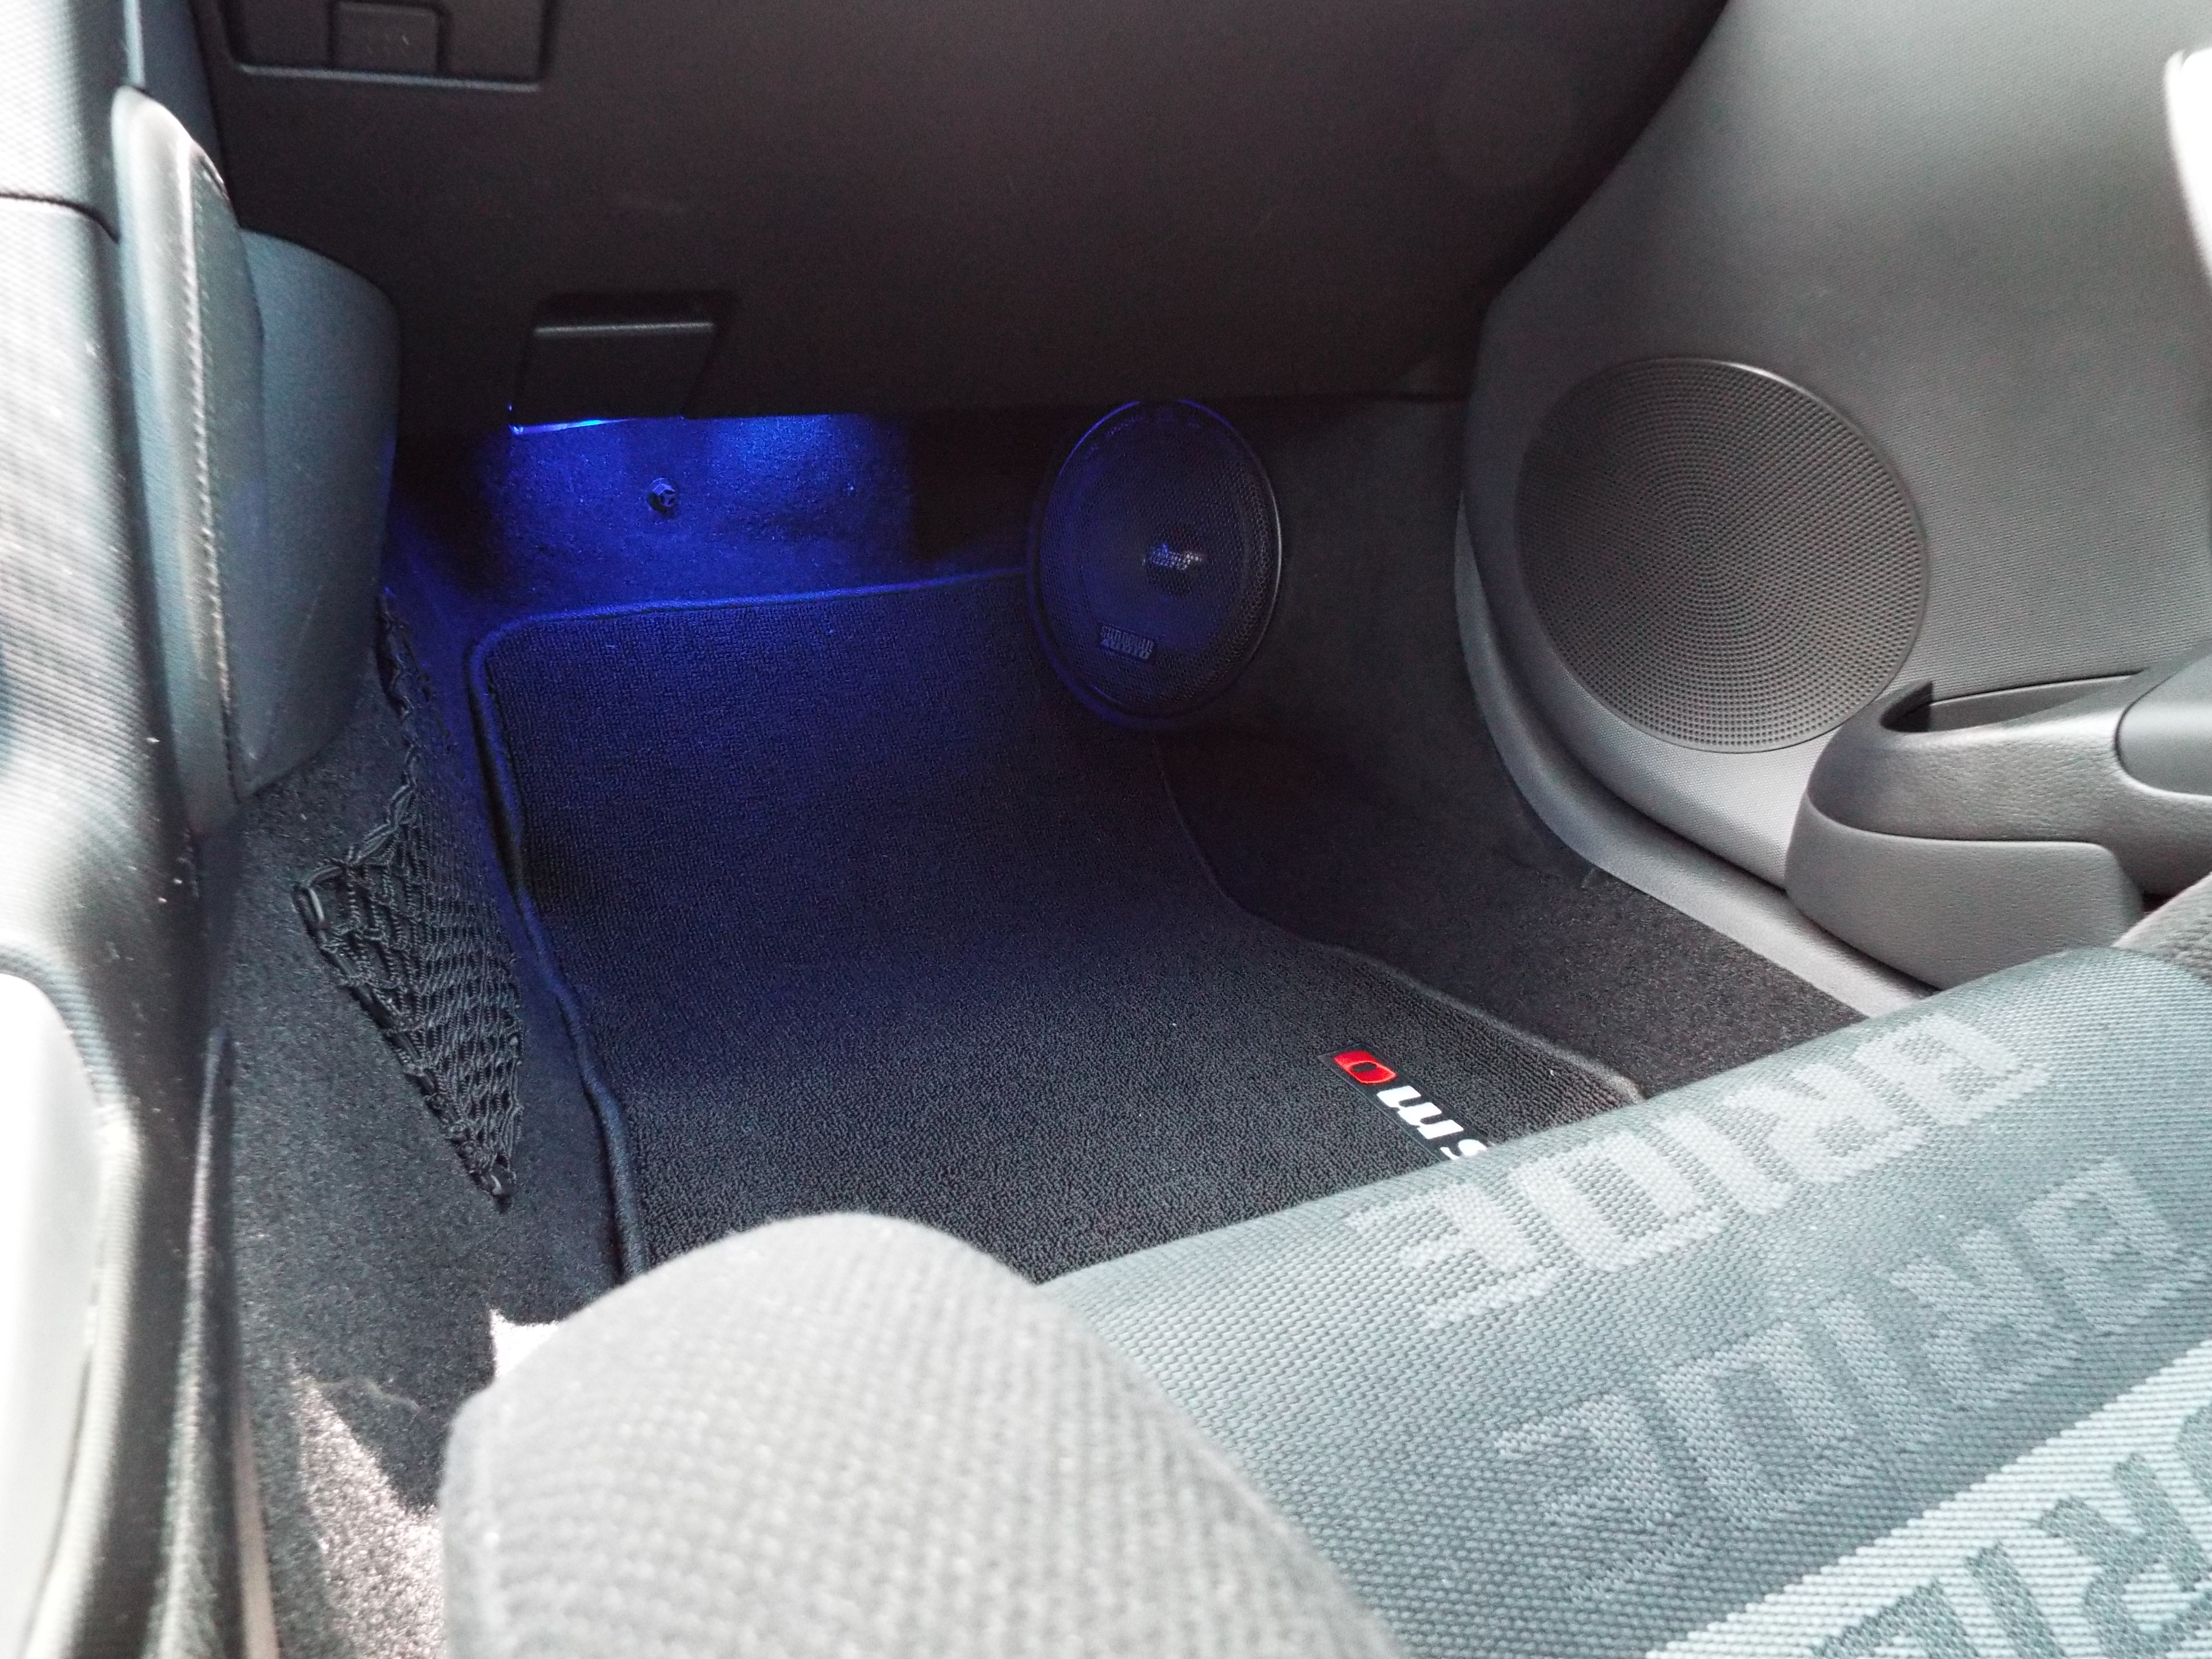
I rushed to finish the trunk last week for a show, this is the result:

Trunk isn't 100%, I'm going to re-do the sub box top half, get some more volume, maybe some fiberglass and paint, not sure yet.
Also the LED strip around the base of the sub box doesn't put out nearly as much light as the ones that go through plexi, so I'm going to add a 1/4" plexi ring around the base of the sub box to focus the light a bit.
Then I'll be moving the wiring into the bottom of the trenches to show of some nice clean wiring and fusing that I'm in the process of working out a sponsorship for.
And of course, I still have to get the Utopia BE's in the front for speakers. Lots to go still!
I'll post build pics up to this point in the next couple days.
I've done a good amount of sound deadener as well, but still want to add more.
Full car build thread is here if you want to check out the rest of the build: https://my350z.com/forum/exterior-an...l#post10781946
Head Unit:
Pioneer DEH-80PRS (will probably change, maybe just do a big Windows tablet instead)
In Car Entertainment:
Samsung Galaxy Tab 8" in dash currently (again, will probably change)
Front Stage:
Focal Utopia Be No 7 Active
Processor:
Mosconi 6to8V8
Mosconi DSP-RC-Mini Controller
Front Stage Amps:
Mosconi AS200.4
Mosconi AS200.2
Sub:
Focal 33KX (I wanted to do two, but space constraints and cost constraints
)Sub Amp:
Mosconi AS300.2
Power:
2 XS Power Batteries
I rushed to finish the trunk last week for a show, this is the result:

Trunk isn't 100%, I'm going to re-do the sub box top half, get some more volume, maybe some fiberglass and paint, not sure yet.
Also the LED strip around the base of the sub box doesn't put out nearly as much light as the ones that go through plexi, so I'm going to add a 1/4" plexi ring around the base of the sub box to focus the light a bit.
Then I'll be moving the wiring into the bottom of the trenches to show of some nice clean wiring and fusing that I'm in the process of working out a sponsorship for.
And of course, I still have to get the Utopia BE's in the front for speakers. Lots to go still!
I'll post build pics up to this point in the next couple days.
I've done a good amount of sound deadener as well, but still want to add more.
Last edited by 350Z_Al; 07-11-2016 at 11:46 AM.

 07-12-2016, 06:02 AM
#3
Registered User
Thread Starter
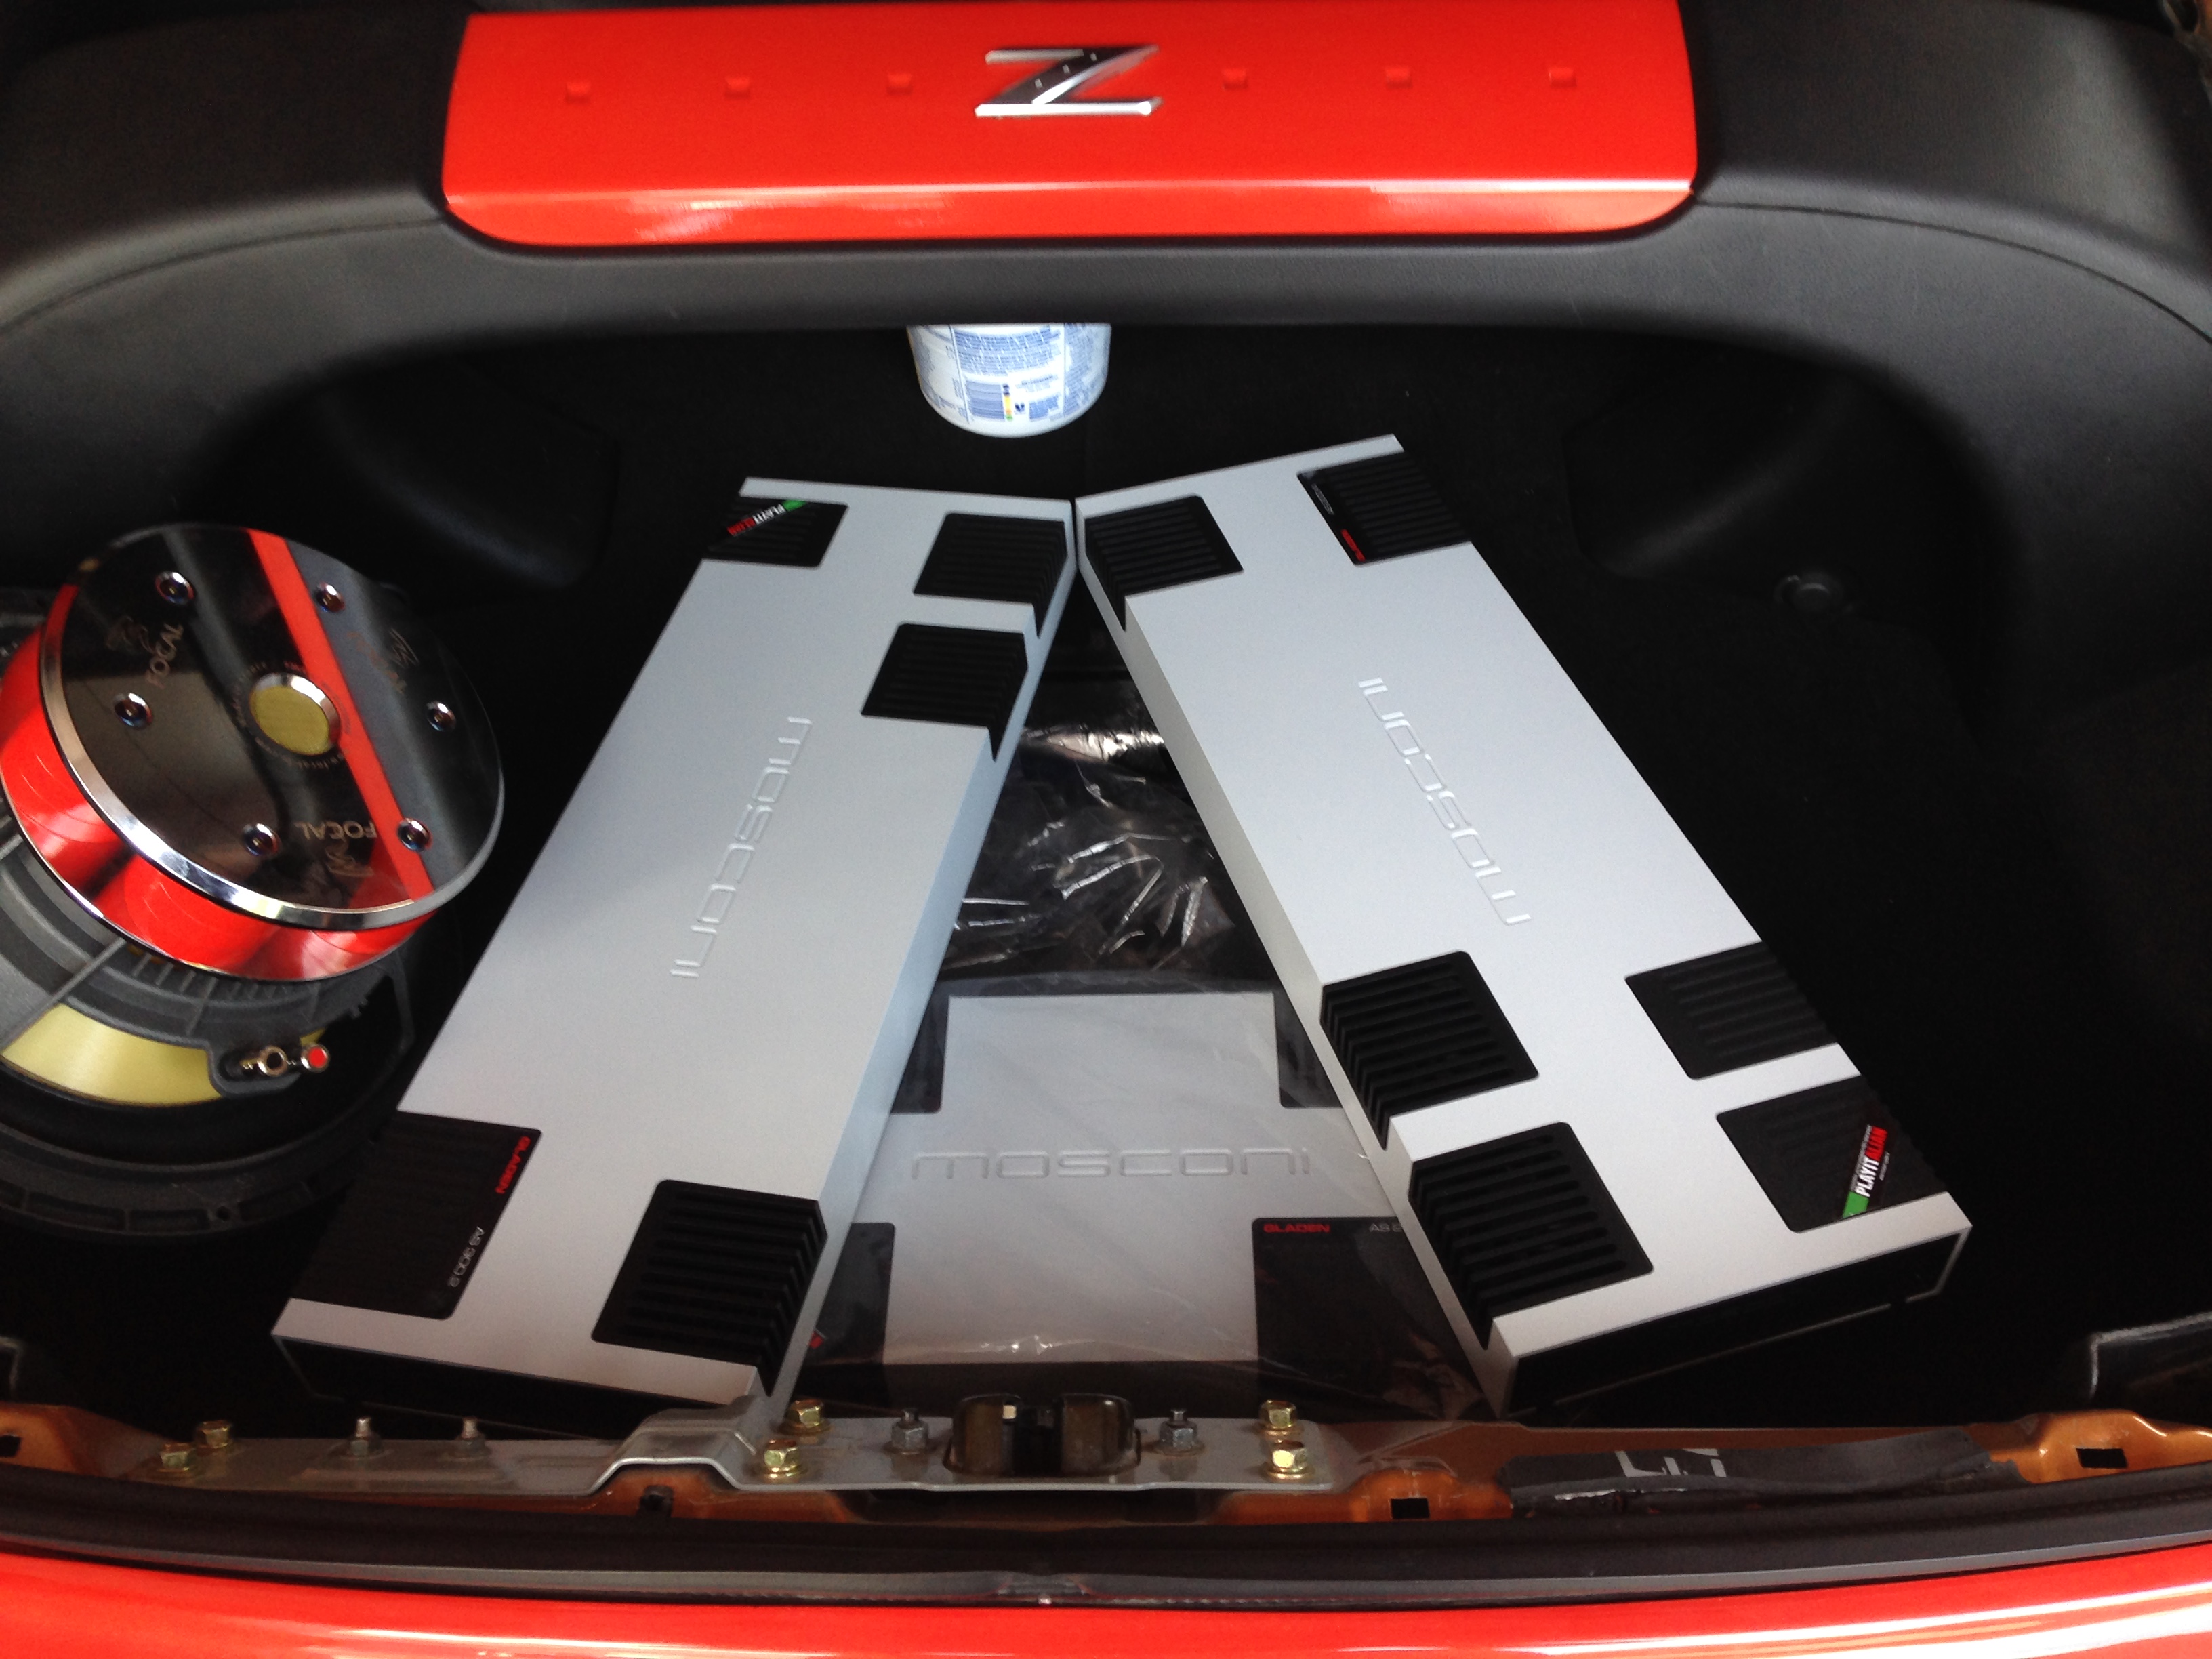
First thing it to figure out how the hell I want layout these monster amps... They make my old Hertz HDP amps look like toys lol.
Me and a buddy spend a couple hours tonight tossing layout ideas around.
I'd love to hear some opinions on layouts!!
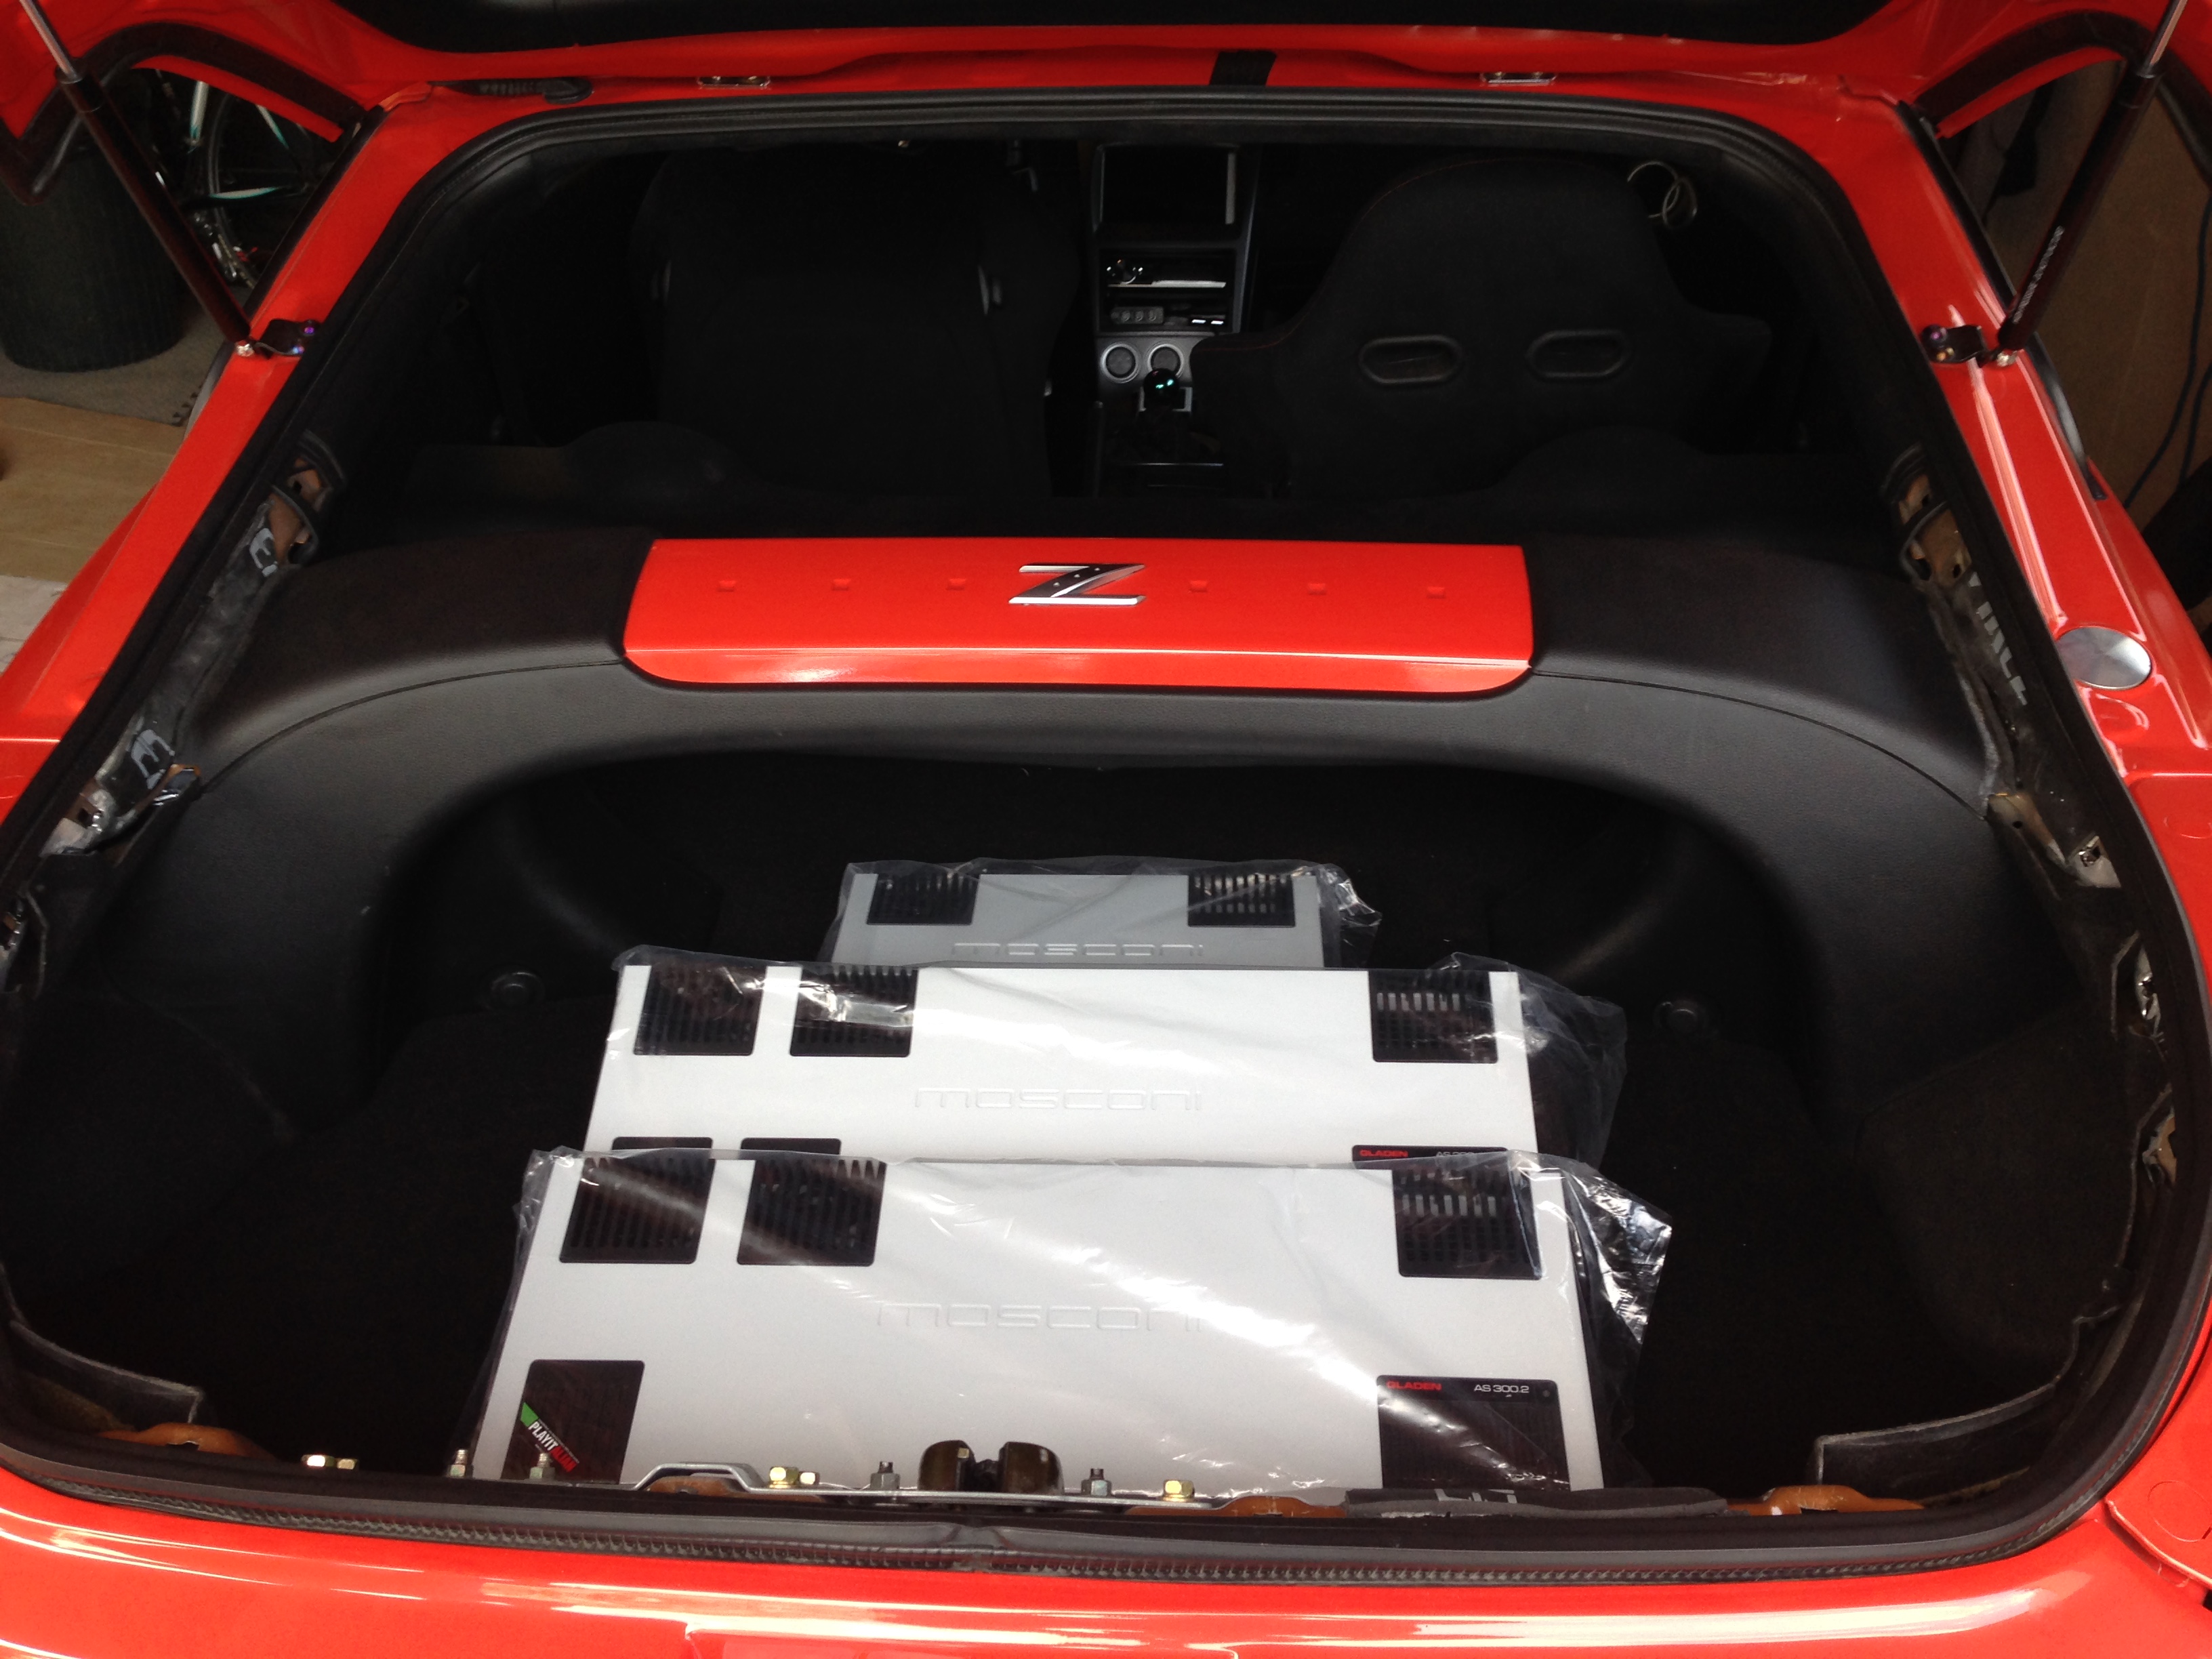
One of the big issues with this trunk is it is very deep... At shows I like to rope the car off so it doesn't get scratched. The bad part about this is people are kept a few feet away at a minimum. With my old false floor with the inverted 33KX from behind the ropes at a show you could barely see the top half of the sub, everything below that point was out of sight.
Option 1:
Single sub (or maybe two) would go inverted in the center.
Pros:
- Super clean and sexy looking. Love the continuity and from one amp to the next.
- I feel like this layout would photograph very well. Even my crappy iphone pics of just the amps sitting on the old false floor look amazing lol
Cons:
- Somewhat simple layout
- I feel like the area behind the two side amps between the amp and strut bar would be a bit awkward looking.
- I still need to stuff a couple batteries under the floor as well, with the sub in the center the batteries would be tight.

Me and a buddy spend a couple hours tonight tossing layout ideas around.
I'd love to hear some opinions on layouts!!
One of the big issues with this trunk is it is very deep... At shows I like to rope the car off so it doesn't get scratched. The bad part about this is people are kept a few feet away at a minimum. With my old false floor with the inverted 33KX from behind the ropes at a show you could barely see the top half of the sub, everything below that point was out of sight.
Option 1:
Single sub (or maybe two) would go inverted in the center.
Pros:
- Super clean and sexy looking. Love the continuity and from one amp to the next.
- I feel like this layout would photograph very well. Even my crappy iphone pics of just the amps sitting on the old false floor look amazing lol
Cons:
- Somewhat simple layout
- I feel like the area behind the two side amps between the amp and strut bar would be a bit awkward looking.
- I still need to stuff a couple batteries under the floor as well, with the sub in the center the batteries would be tight.

 07-12-2016, 06:03 AM
#4
Registered User
Thread Starter
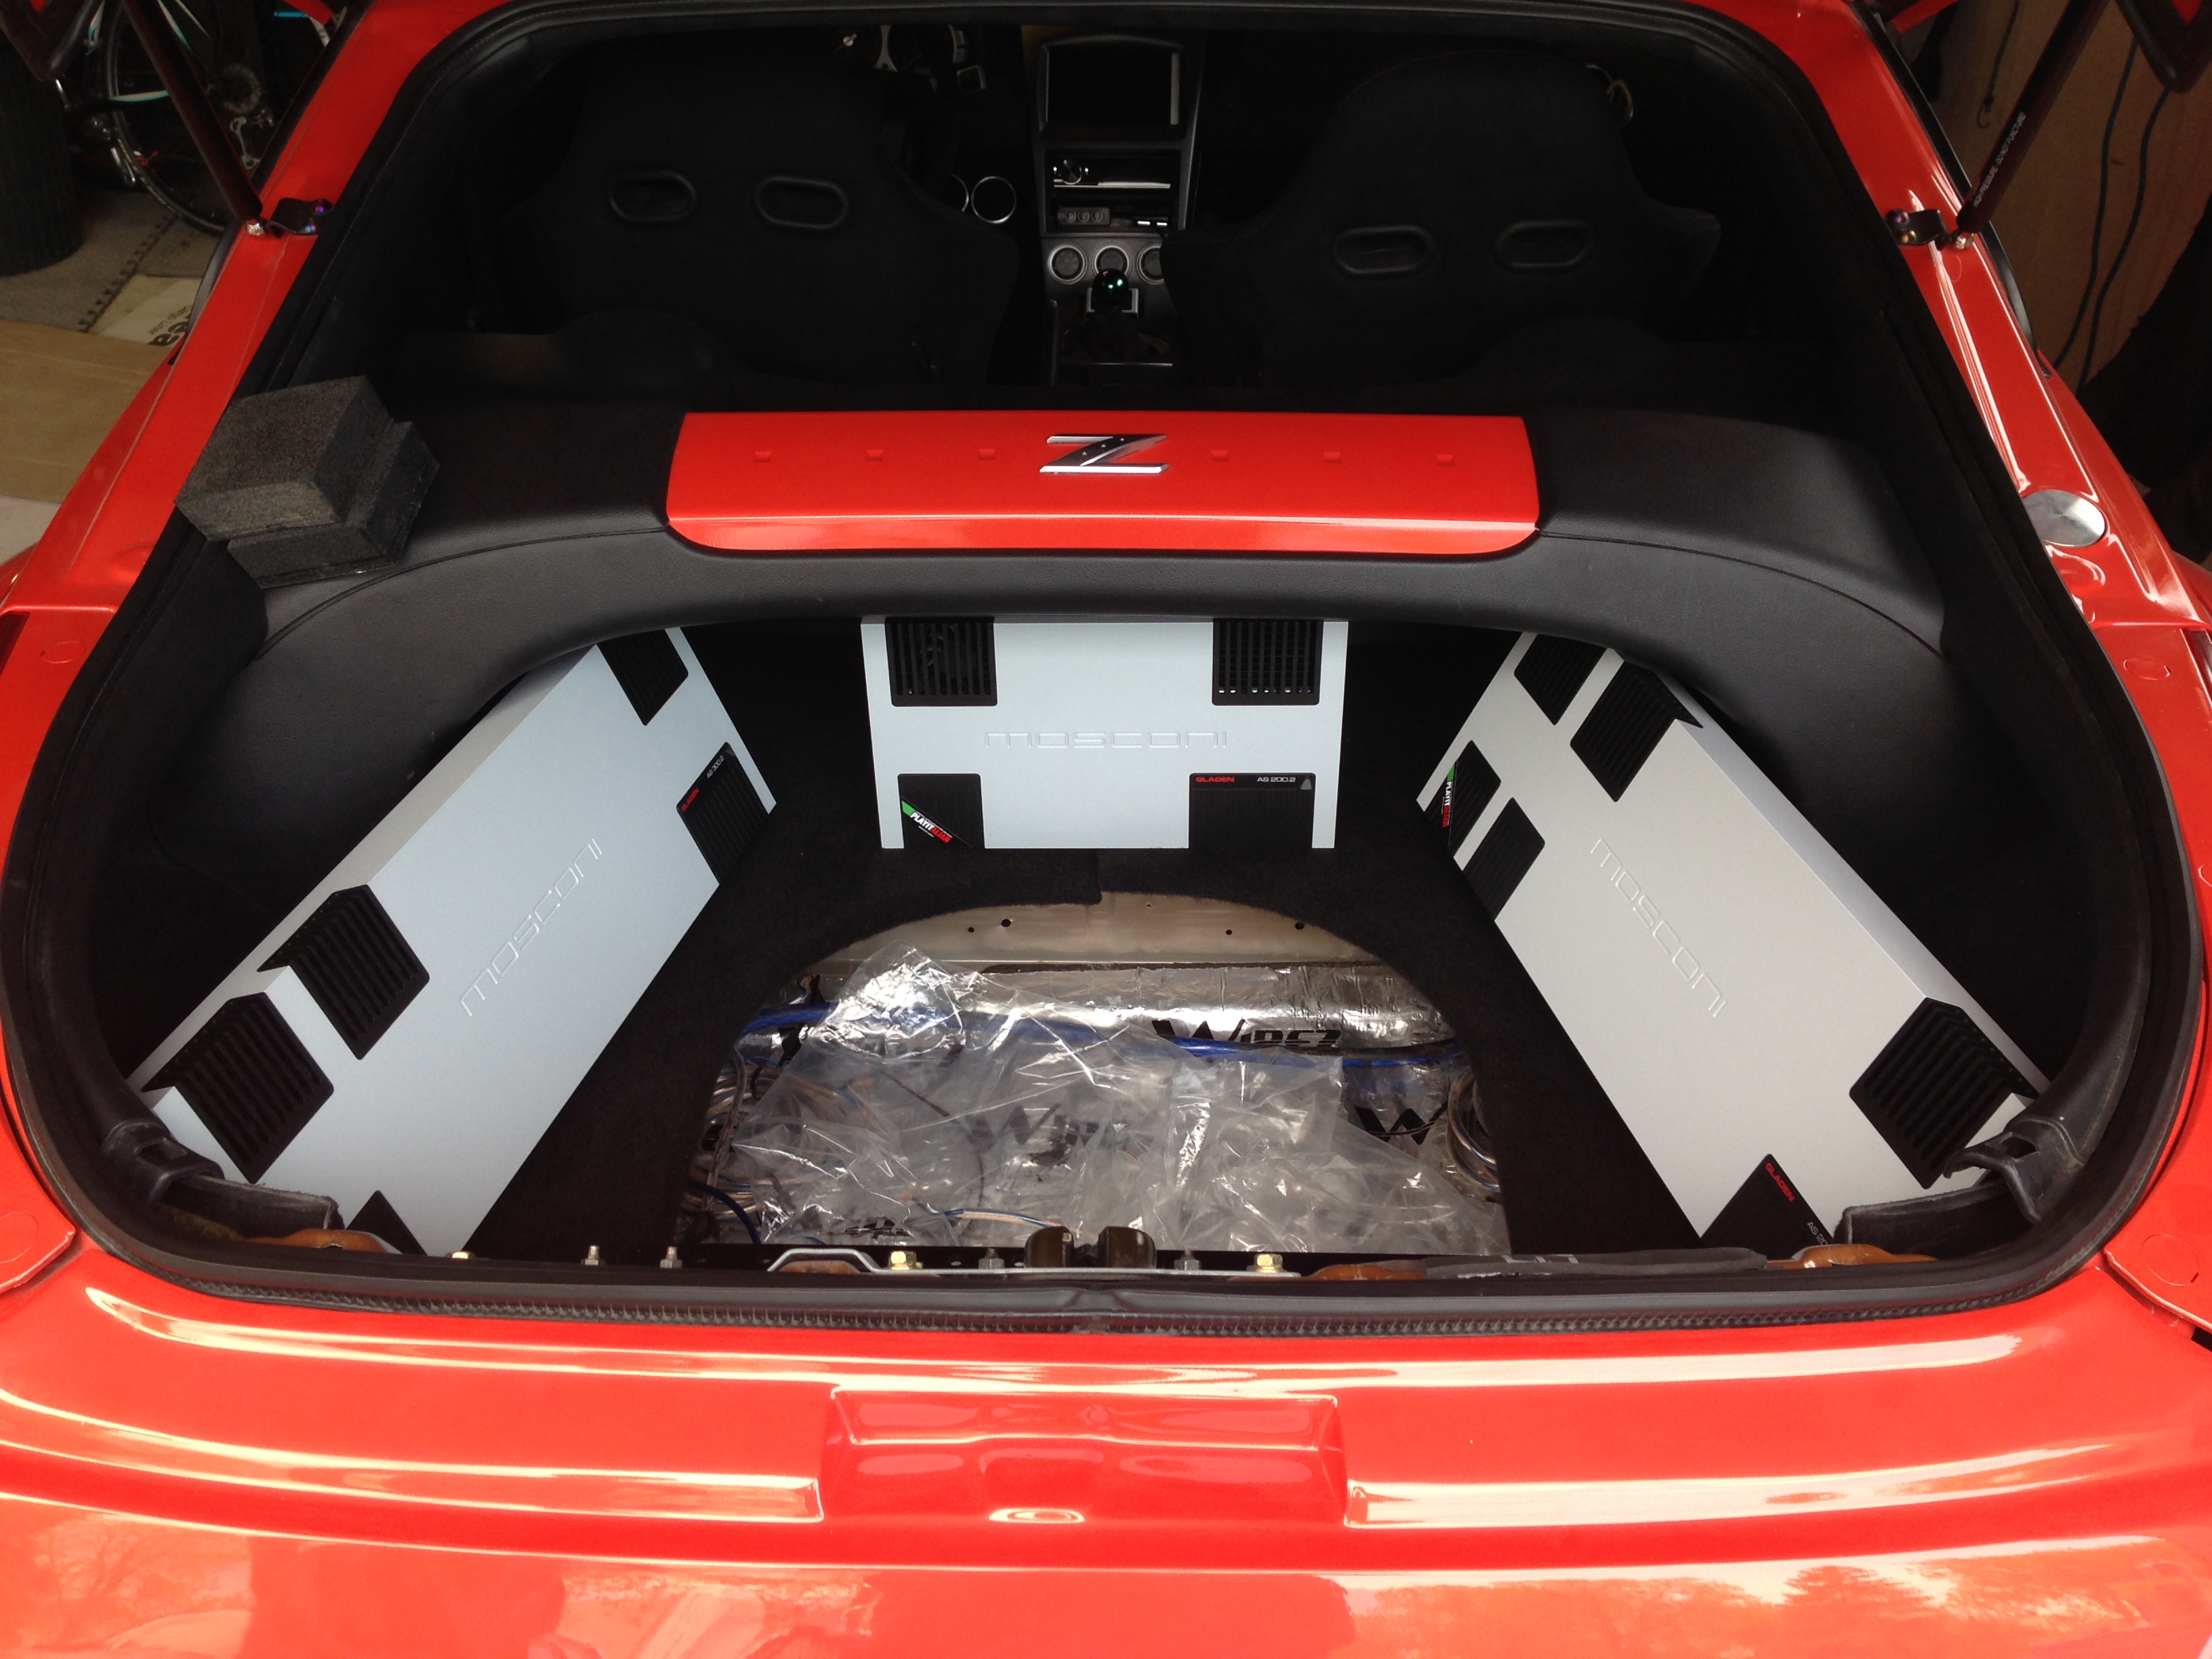
Option two
This option would have some motorization. The two top amps would sit flat as in the first pic. They would be motorized to rotate open as seen in the second pic (I would likely normally stop at a 45 degree angle, but have the option to go the full 90 degrees).
The third amp would sit below, under the floor and would be exposed when the top amps rotate open. The third amp could potentially motorize up.
Below the false floor I would have a bunch of nicely done and detailed wiring and power distribution to show off.
I would have to also make some trim panels for the bottoms of the amps. Perhaps backlit logos or something like that.
I would also have to buy a second sub to satisfy my OCD symmetry requirement lol
Pros:
- Cool install with motorization
- Lots of space below floor for batteries, power distribution, etc.
- High equipment visibility because it's all mounted higher in the trunk
Cons:
- Amps look a bit awkward when at 90 degrees.
- More difficult and time consuming install (really not too concerned about that)
- Would have to buy another sub
Some side views

This option would have some motorization. The two top amps would sit flat as in the first pic. They would be motorized to rotate open as seen in the second pic (I would likely normally stop at a 45 degree angle, but have the option to go the full 90 degrees).
The third amp would sit below, under the floor and would be exposed when the top amps rotate open. The third amp could potentially motorize up.
Below the false floor I would have a bunch of nicely done and detailed wiring and power distribution to show off.
I would have to also make some trim panels for the bottoms of the amps. Perhaps backlit logos or something like that.
I would also have to buy a second sub to satisfy my OCD symmetry requirement lol
Pros:
- Cool install with motorization
- Lots of space below floor for batteries, power distribution, etc.
- High equipment visibility because it's all mounted higher in the trunk
Cons:
- Amps look a bit awkward when at 90 degrees.
- More difficult and time consuming install (really not too concerned about that)
- Would have to buy another sub


Some side views

 07-12-2016, 06:04 AM
#5
Registered User
Thread Starter
Option three
Amps would sit together normally, then open in a V to show the amp below.
Would have to buy second sub for symmetry
Pros:
- Simple, clean.
Cons:
- Amps do not open very far which does not allow access to planned location for power distribution below floor.

Amps would sit together normally, then open in a V to show the amp below.
Would have to buy second sub for symmetry
Pros:
- Simple, clean.
Cons:
- Amps do not open very far which does not allow access to planned location for power distribution below floor.
 07-12-2016, 06:07 AM
#6
Registered User
Thread Starter
And a few more layouts we tried..
Also, I would really like to keep the area forward of the strut bar empty and available to haul bags, luggage, groceries, etc.


Also, I would really like to keep the area forward of the strut bar empty and available to haul bags, luggage, groceries, etc.
07-12-2016, 06:09 AM
#7
Registered User
Thread Starter
So, I'm about 80% settled on the first option. I have to give credit to Colin at Brian Reimer Audio though, it was actually his layout idea not mine!
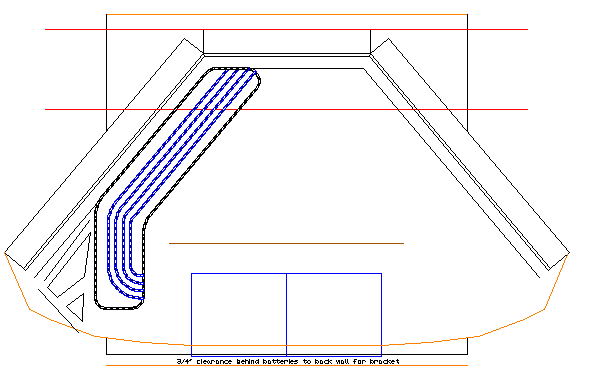
I spent a bit of time taking measurements in the trunk and playing with AutoCAD. I'm working on the trunk layout just getting everything to fit. This allows me to visualize the clearances needed for wiring, placement for batteries, sub box shape and size below the floor etc etc.
I know the drawings below probably don't make sense to anyone at all besides me, but here they are lol... They're nowhere near complete, but the idea is coming together.
I remember back when I was installing years ago I always had a hard time visualizing the finished design before I started and I would just kind of wing it as I went. This caused me to have to re-do some parts, or make changes as I went. I'm hoping this method will help me plan the build a bit better and reduce if not eliminate re-doing of things.
I actually drew up the previous trunk in AutoCAD before building it. It worked fairly well, I built the entire sub box and false floor without even having the car here, it was 2 hours away! Everything fit great yet. Kind of cool lol
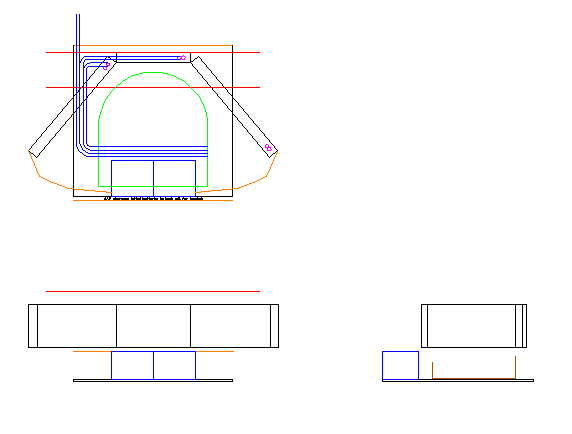


Trending Topics
07-12-2016, 06:10 AM
#8
Registered User
Thread Starter
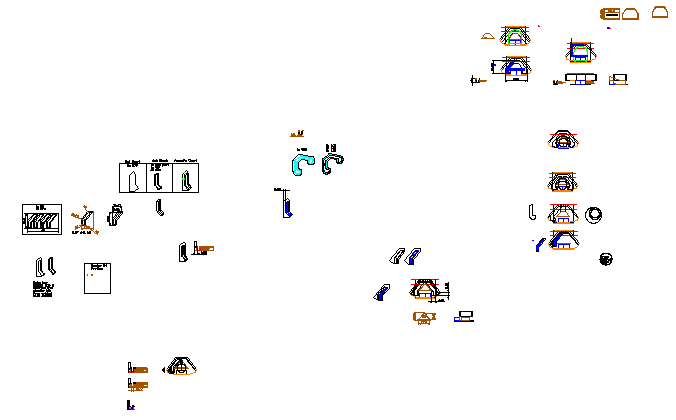
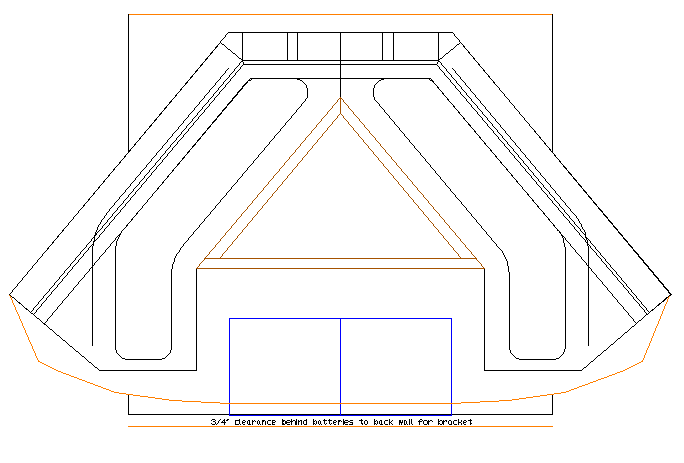
Some more autocad. I find it really helps me visualize how all the shapes will fit together without just cutting wood and seeing if it works...


 07-12-2016, 06:13 AM
#9
Registered User
Thread Starter
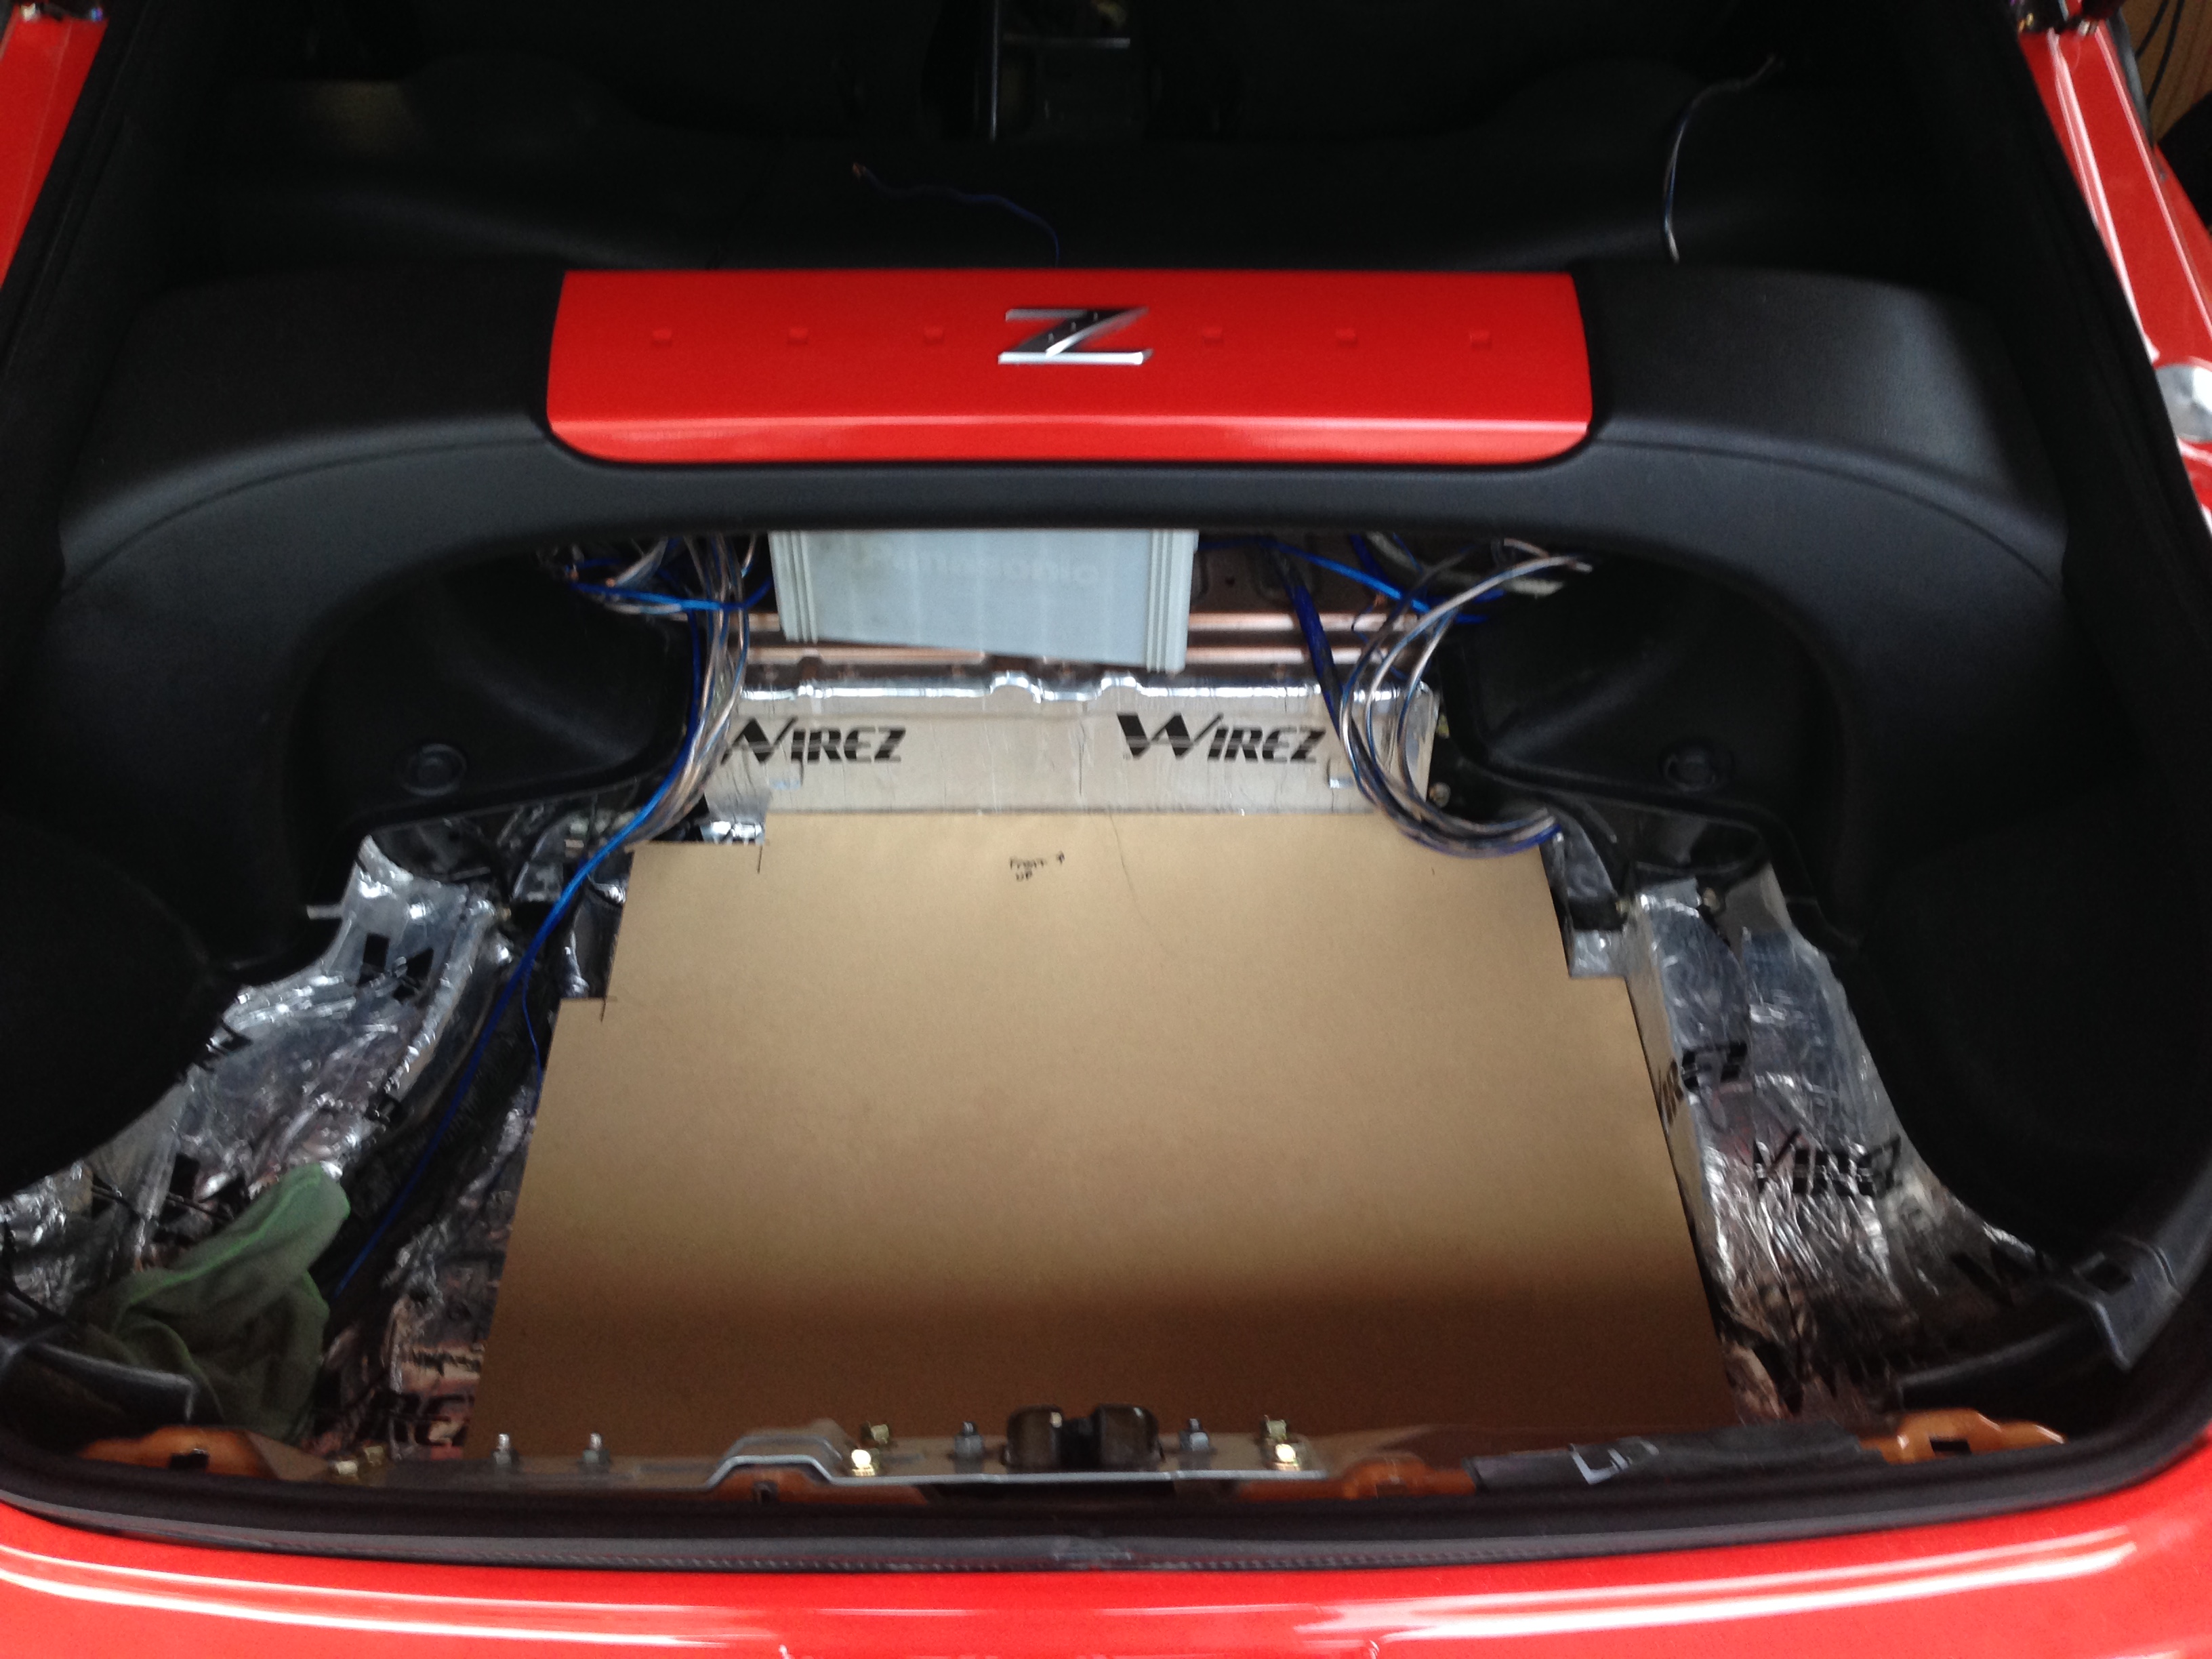
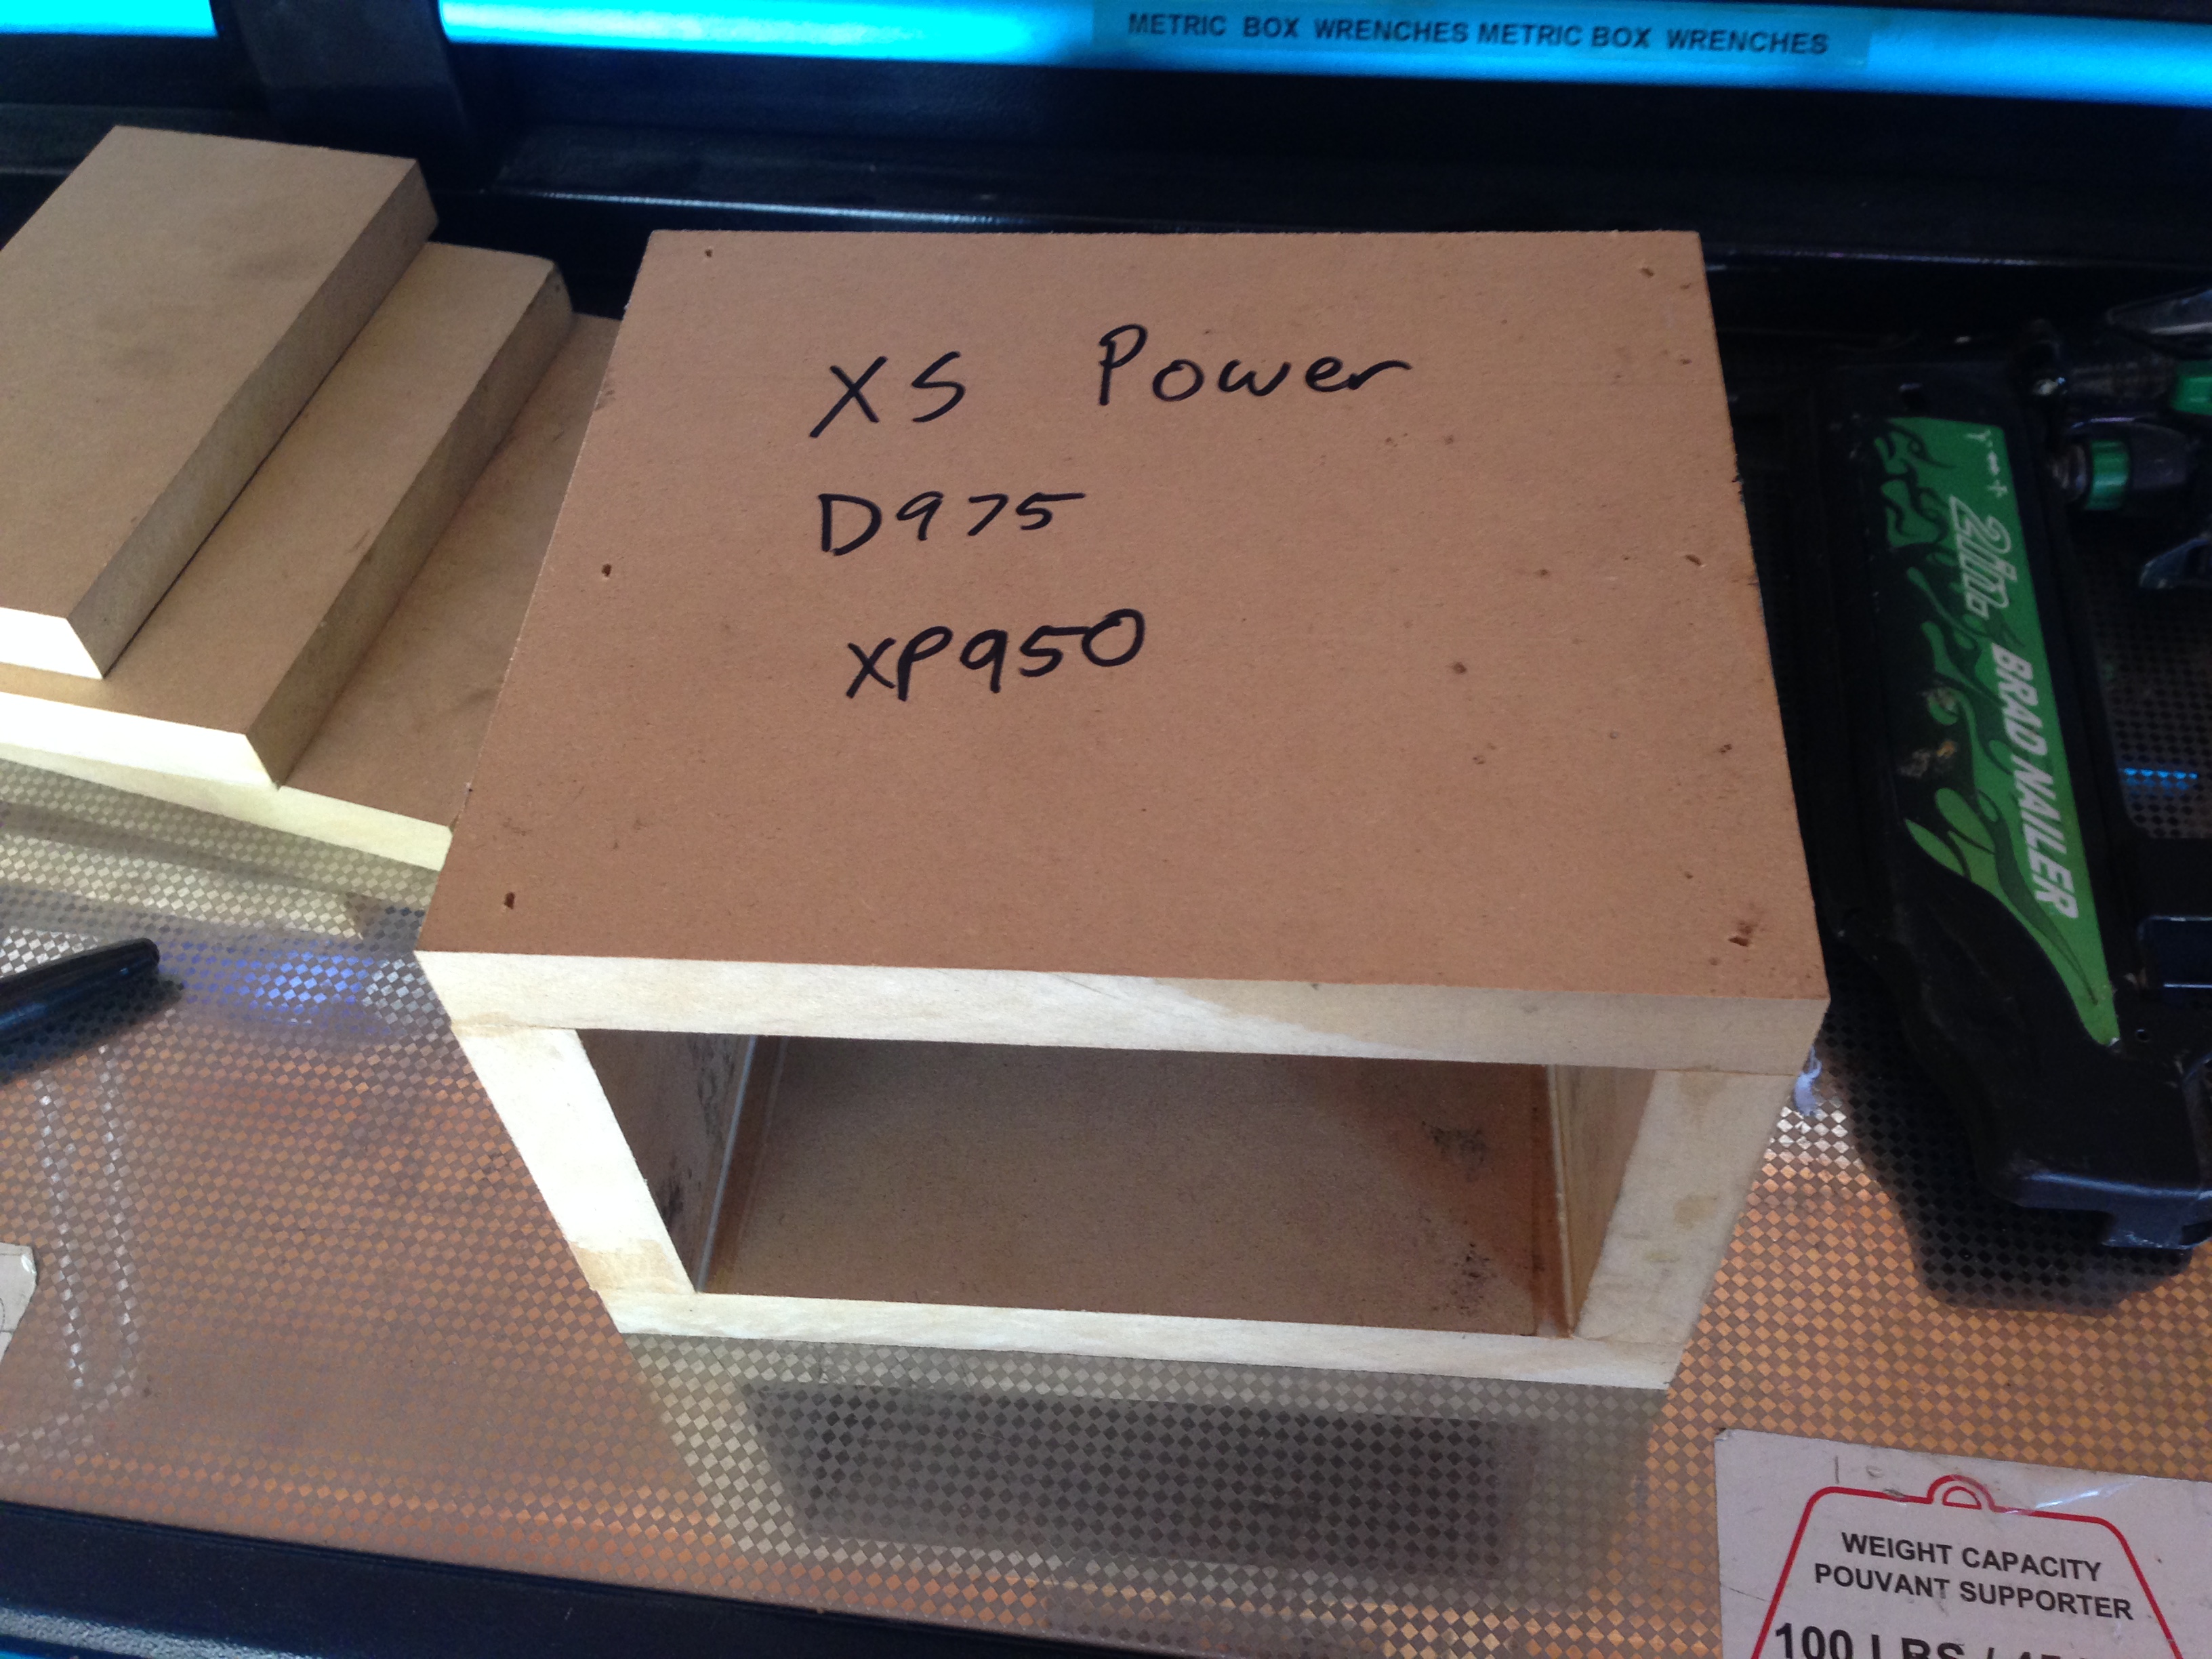
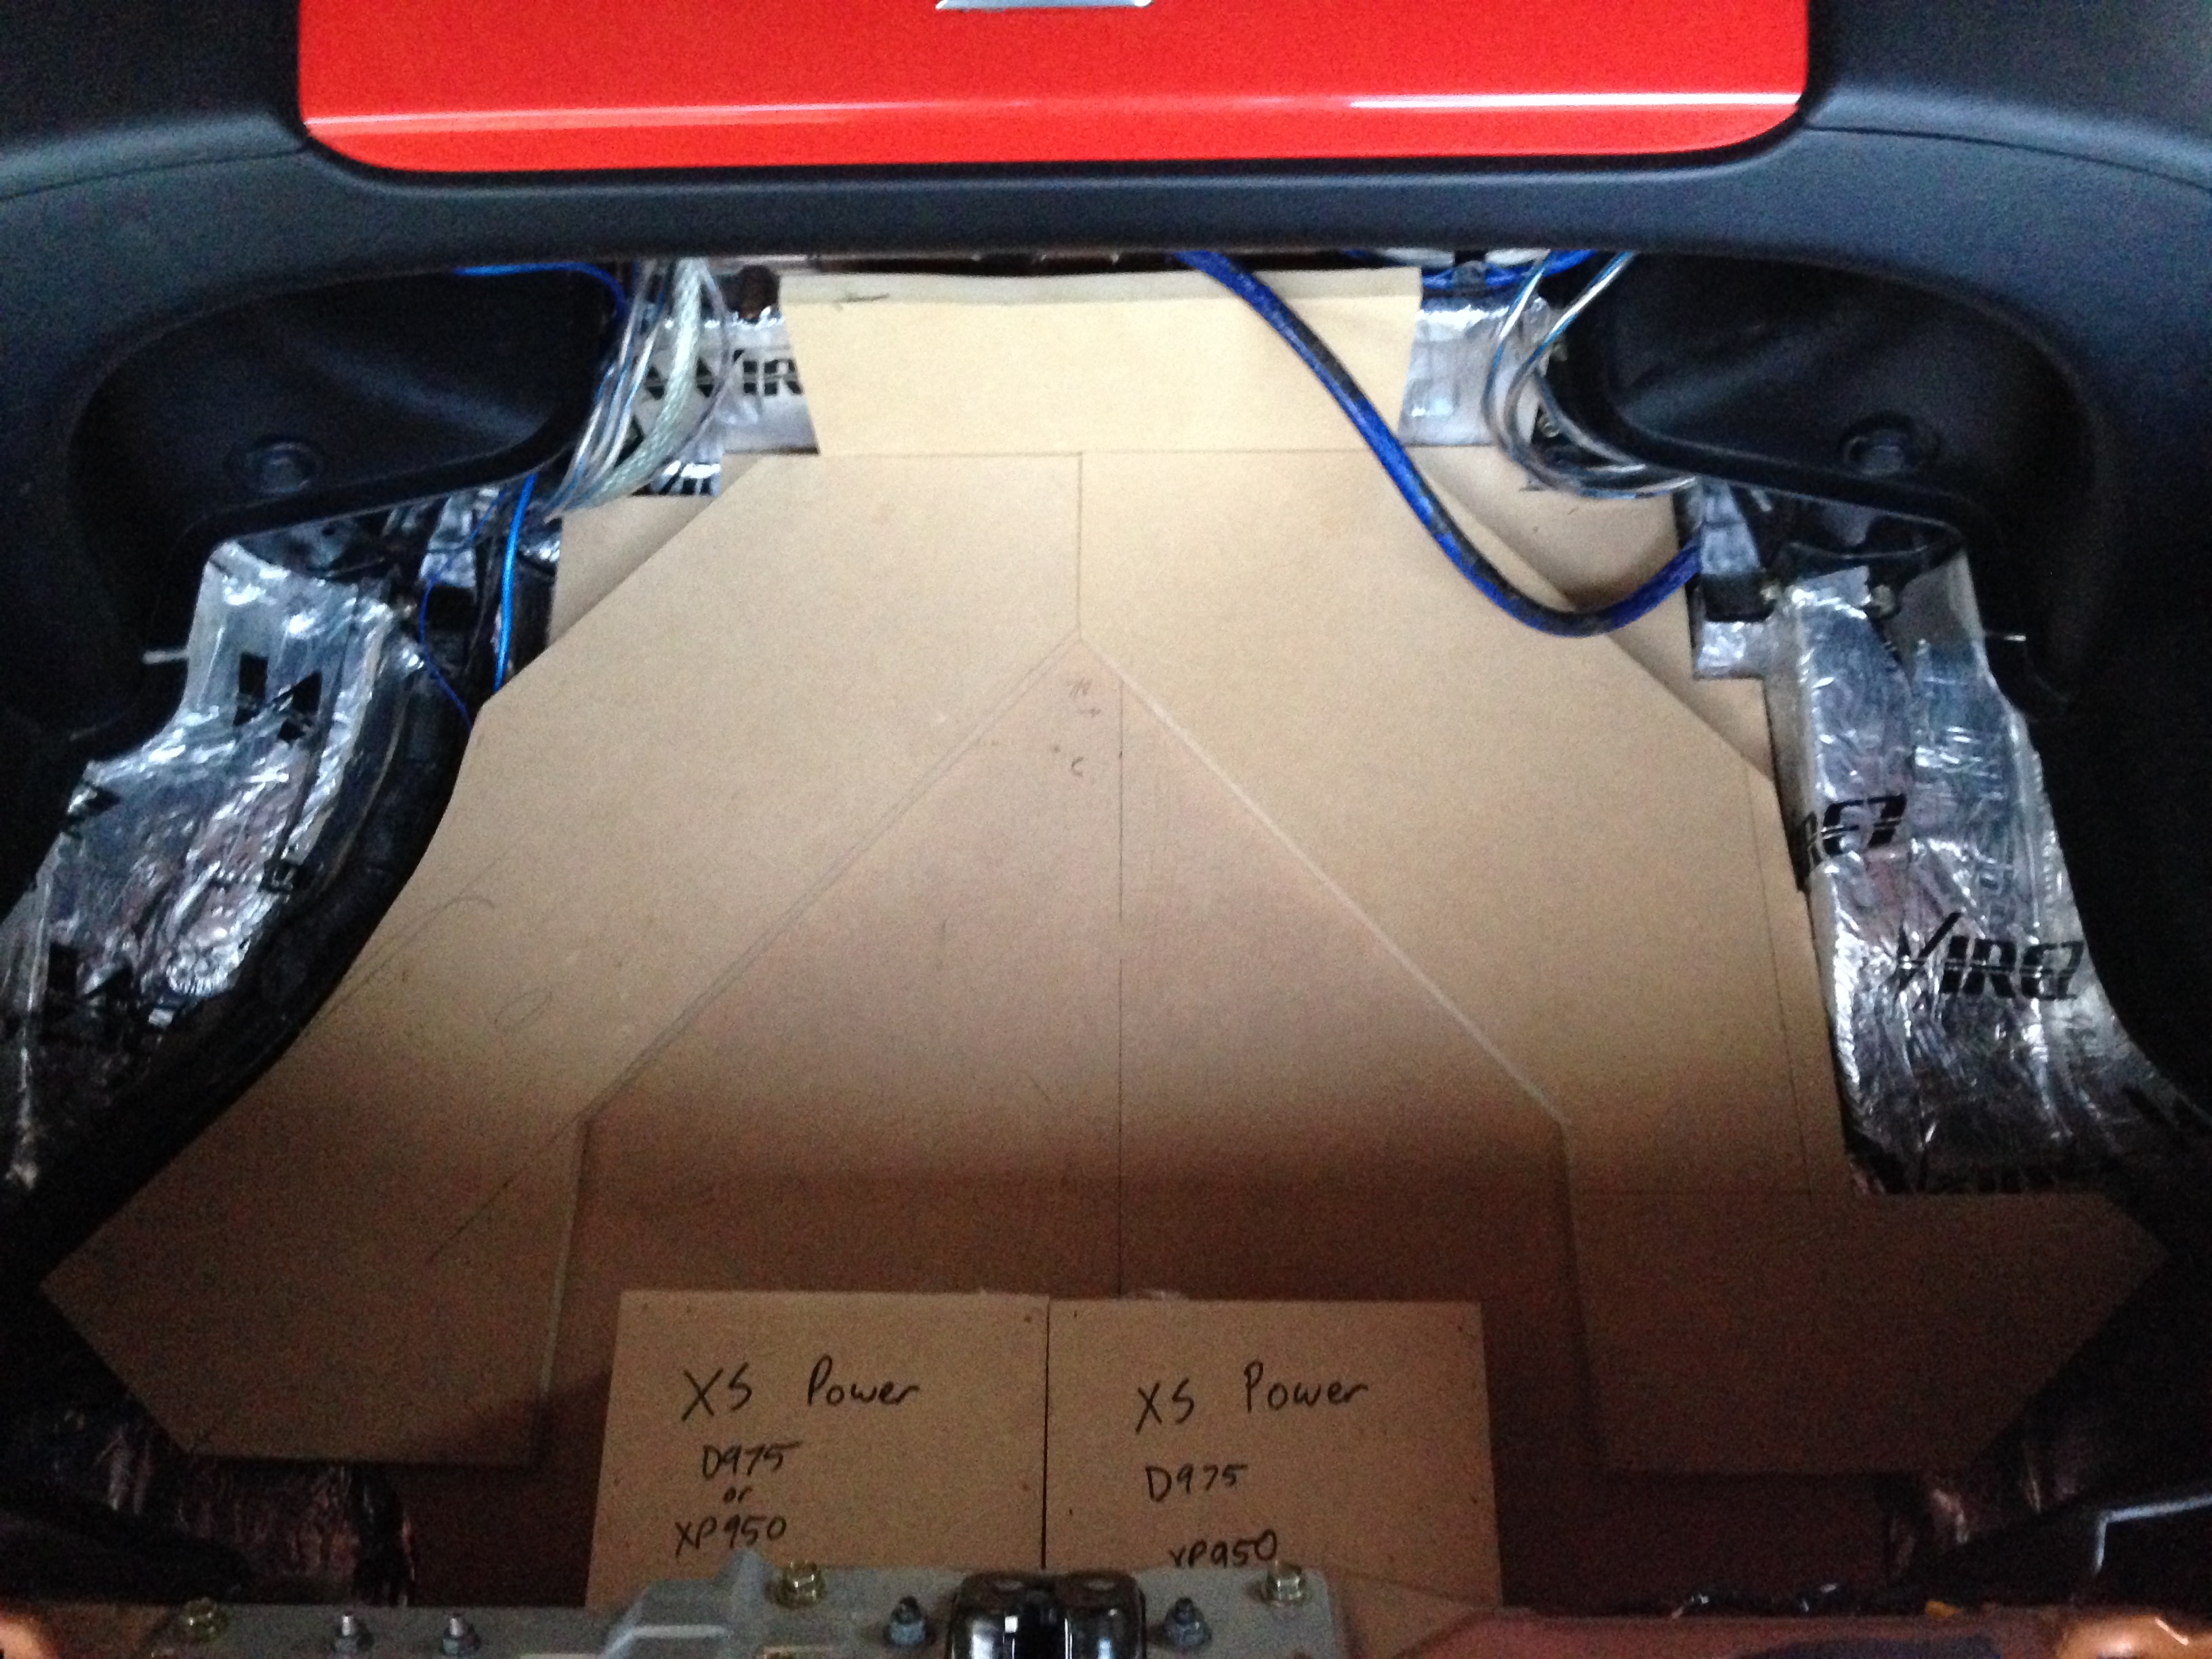
Base trunk piece and a couple mock-up batteries. I got sponsored by XS Power for a couple batteries and a power supply for this build. The batteries should be here in a couple weeks.


 07-12-2016, 06:15 AM
#10
Registered User
Thread Starter
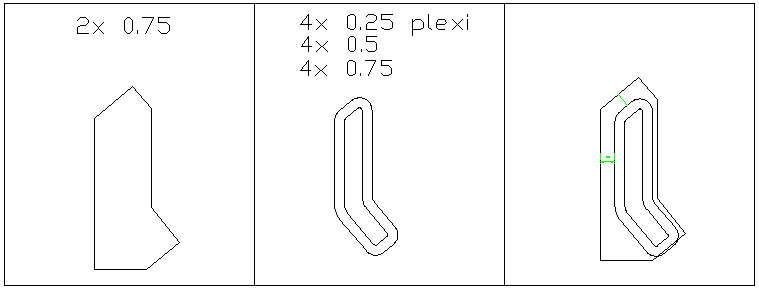
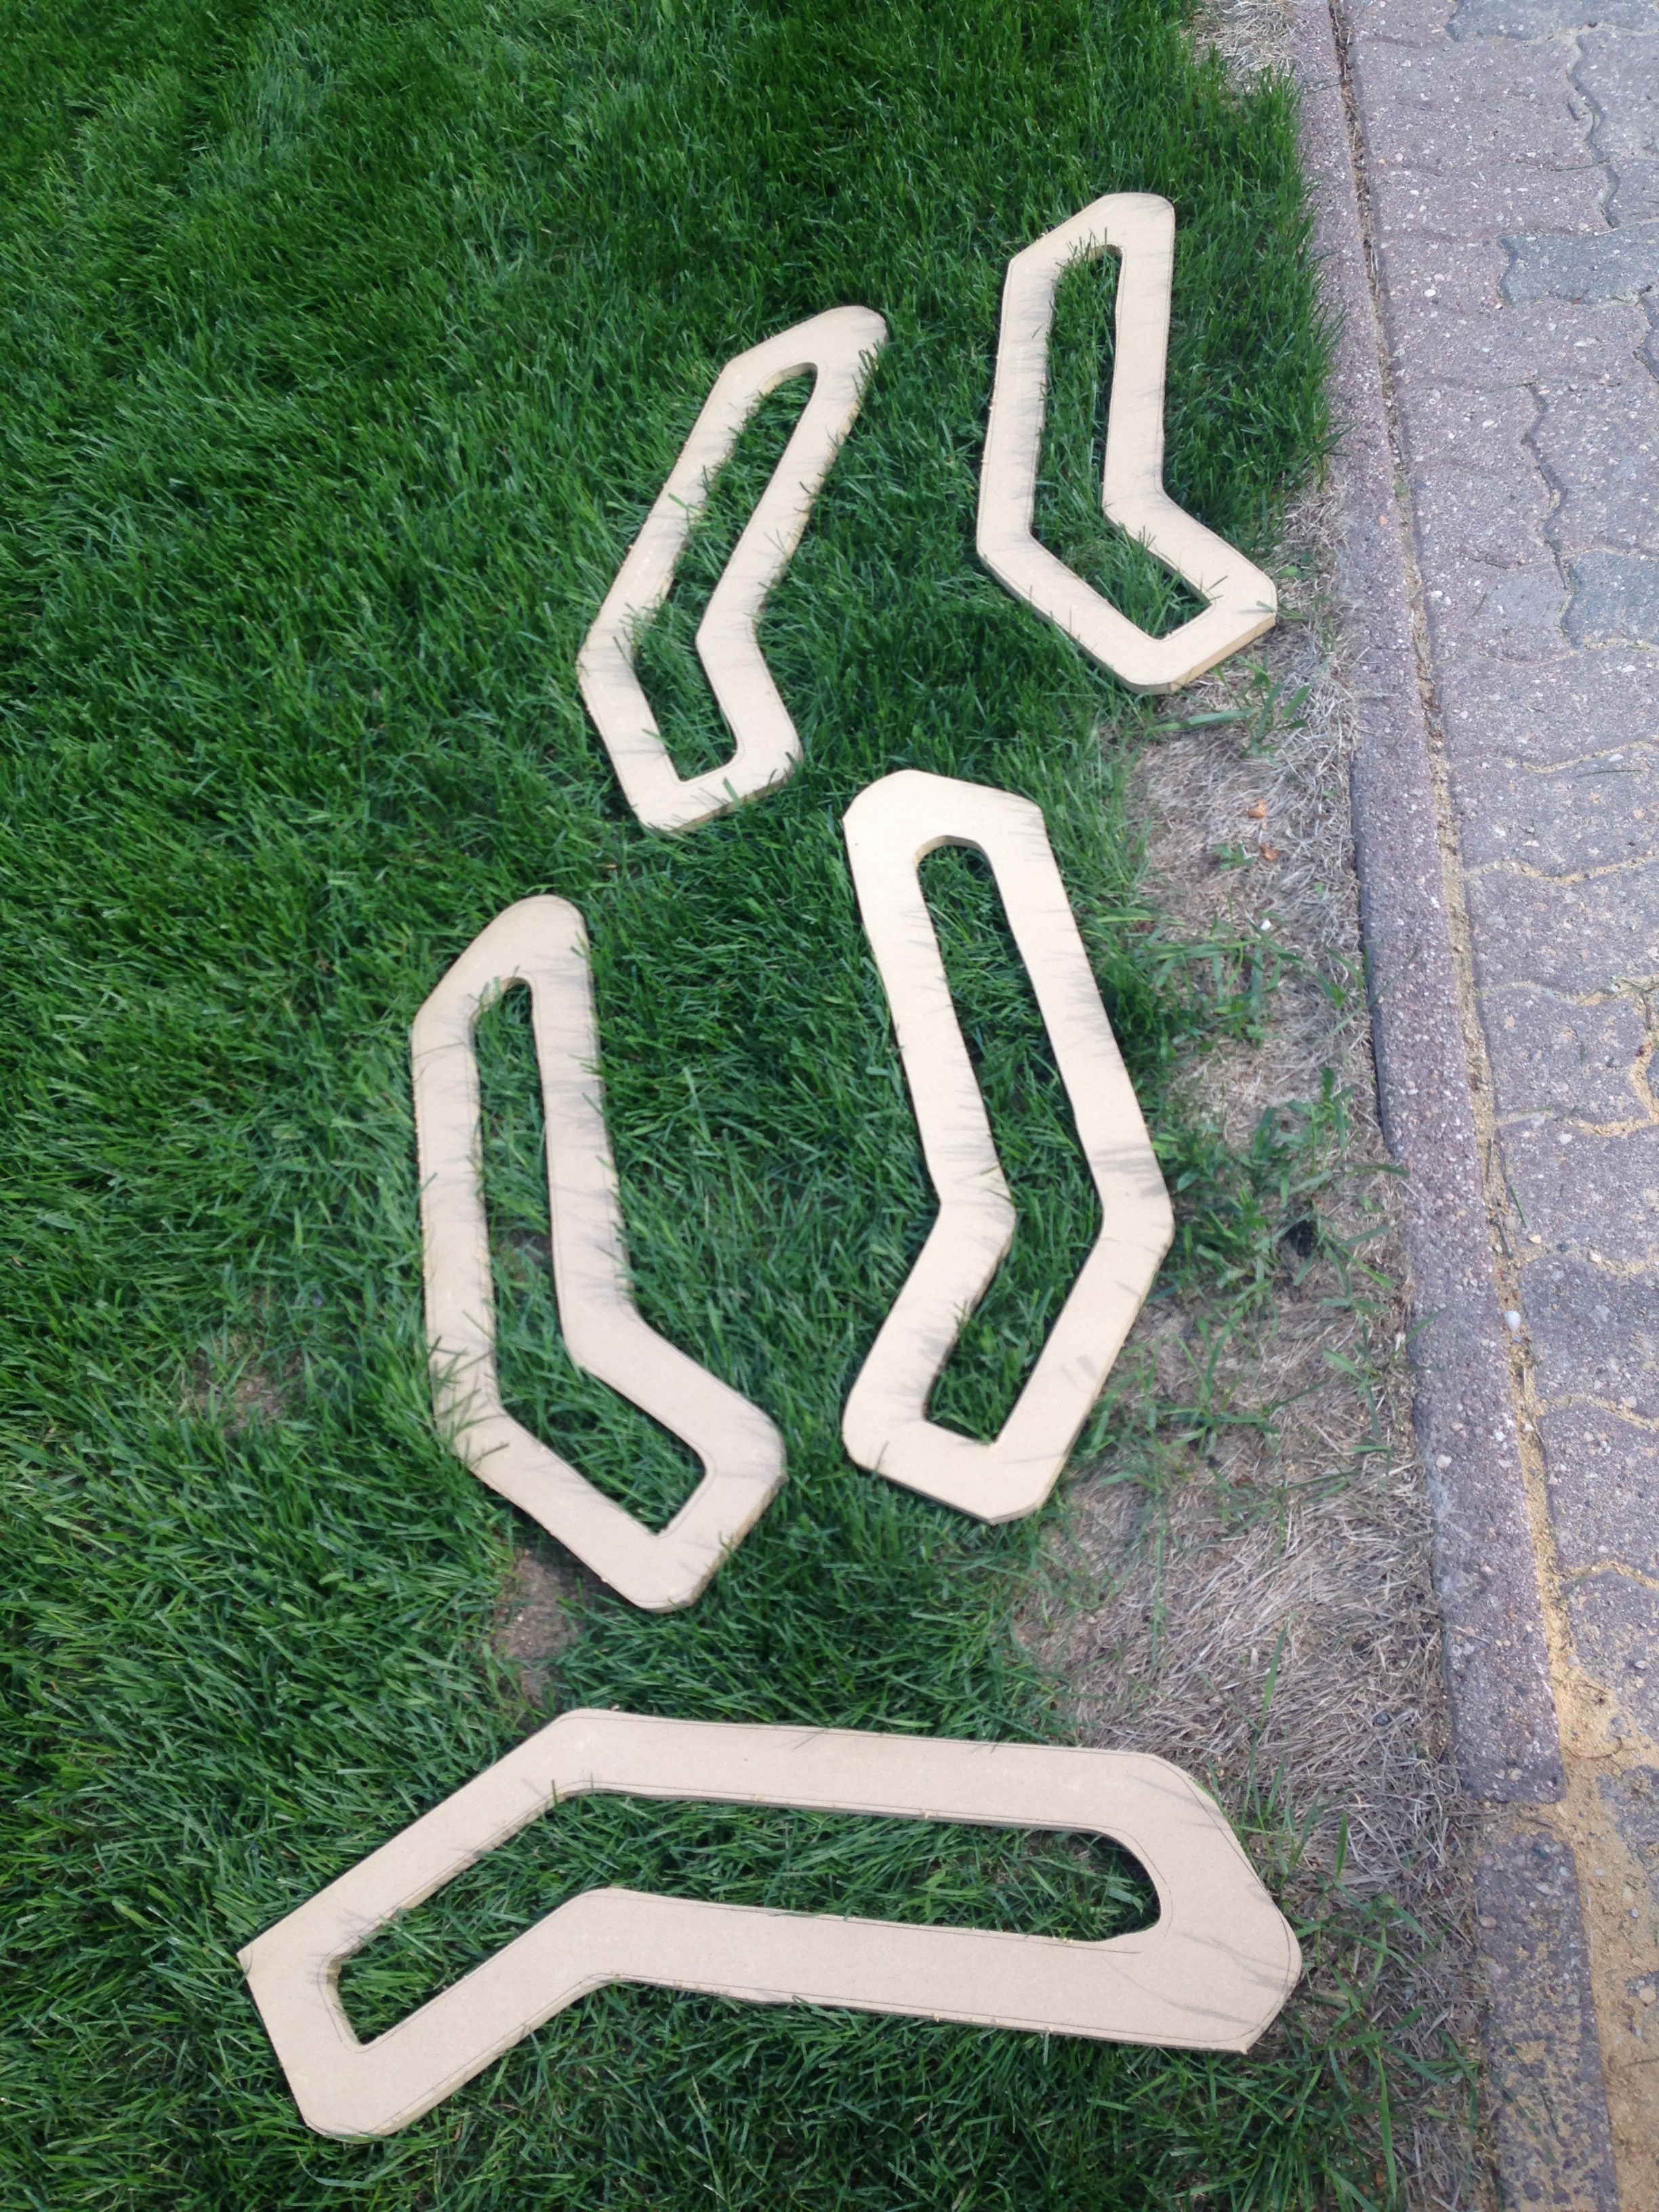
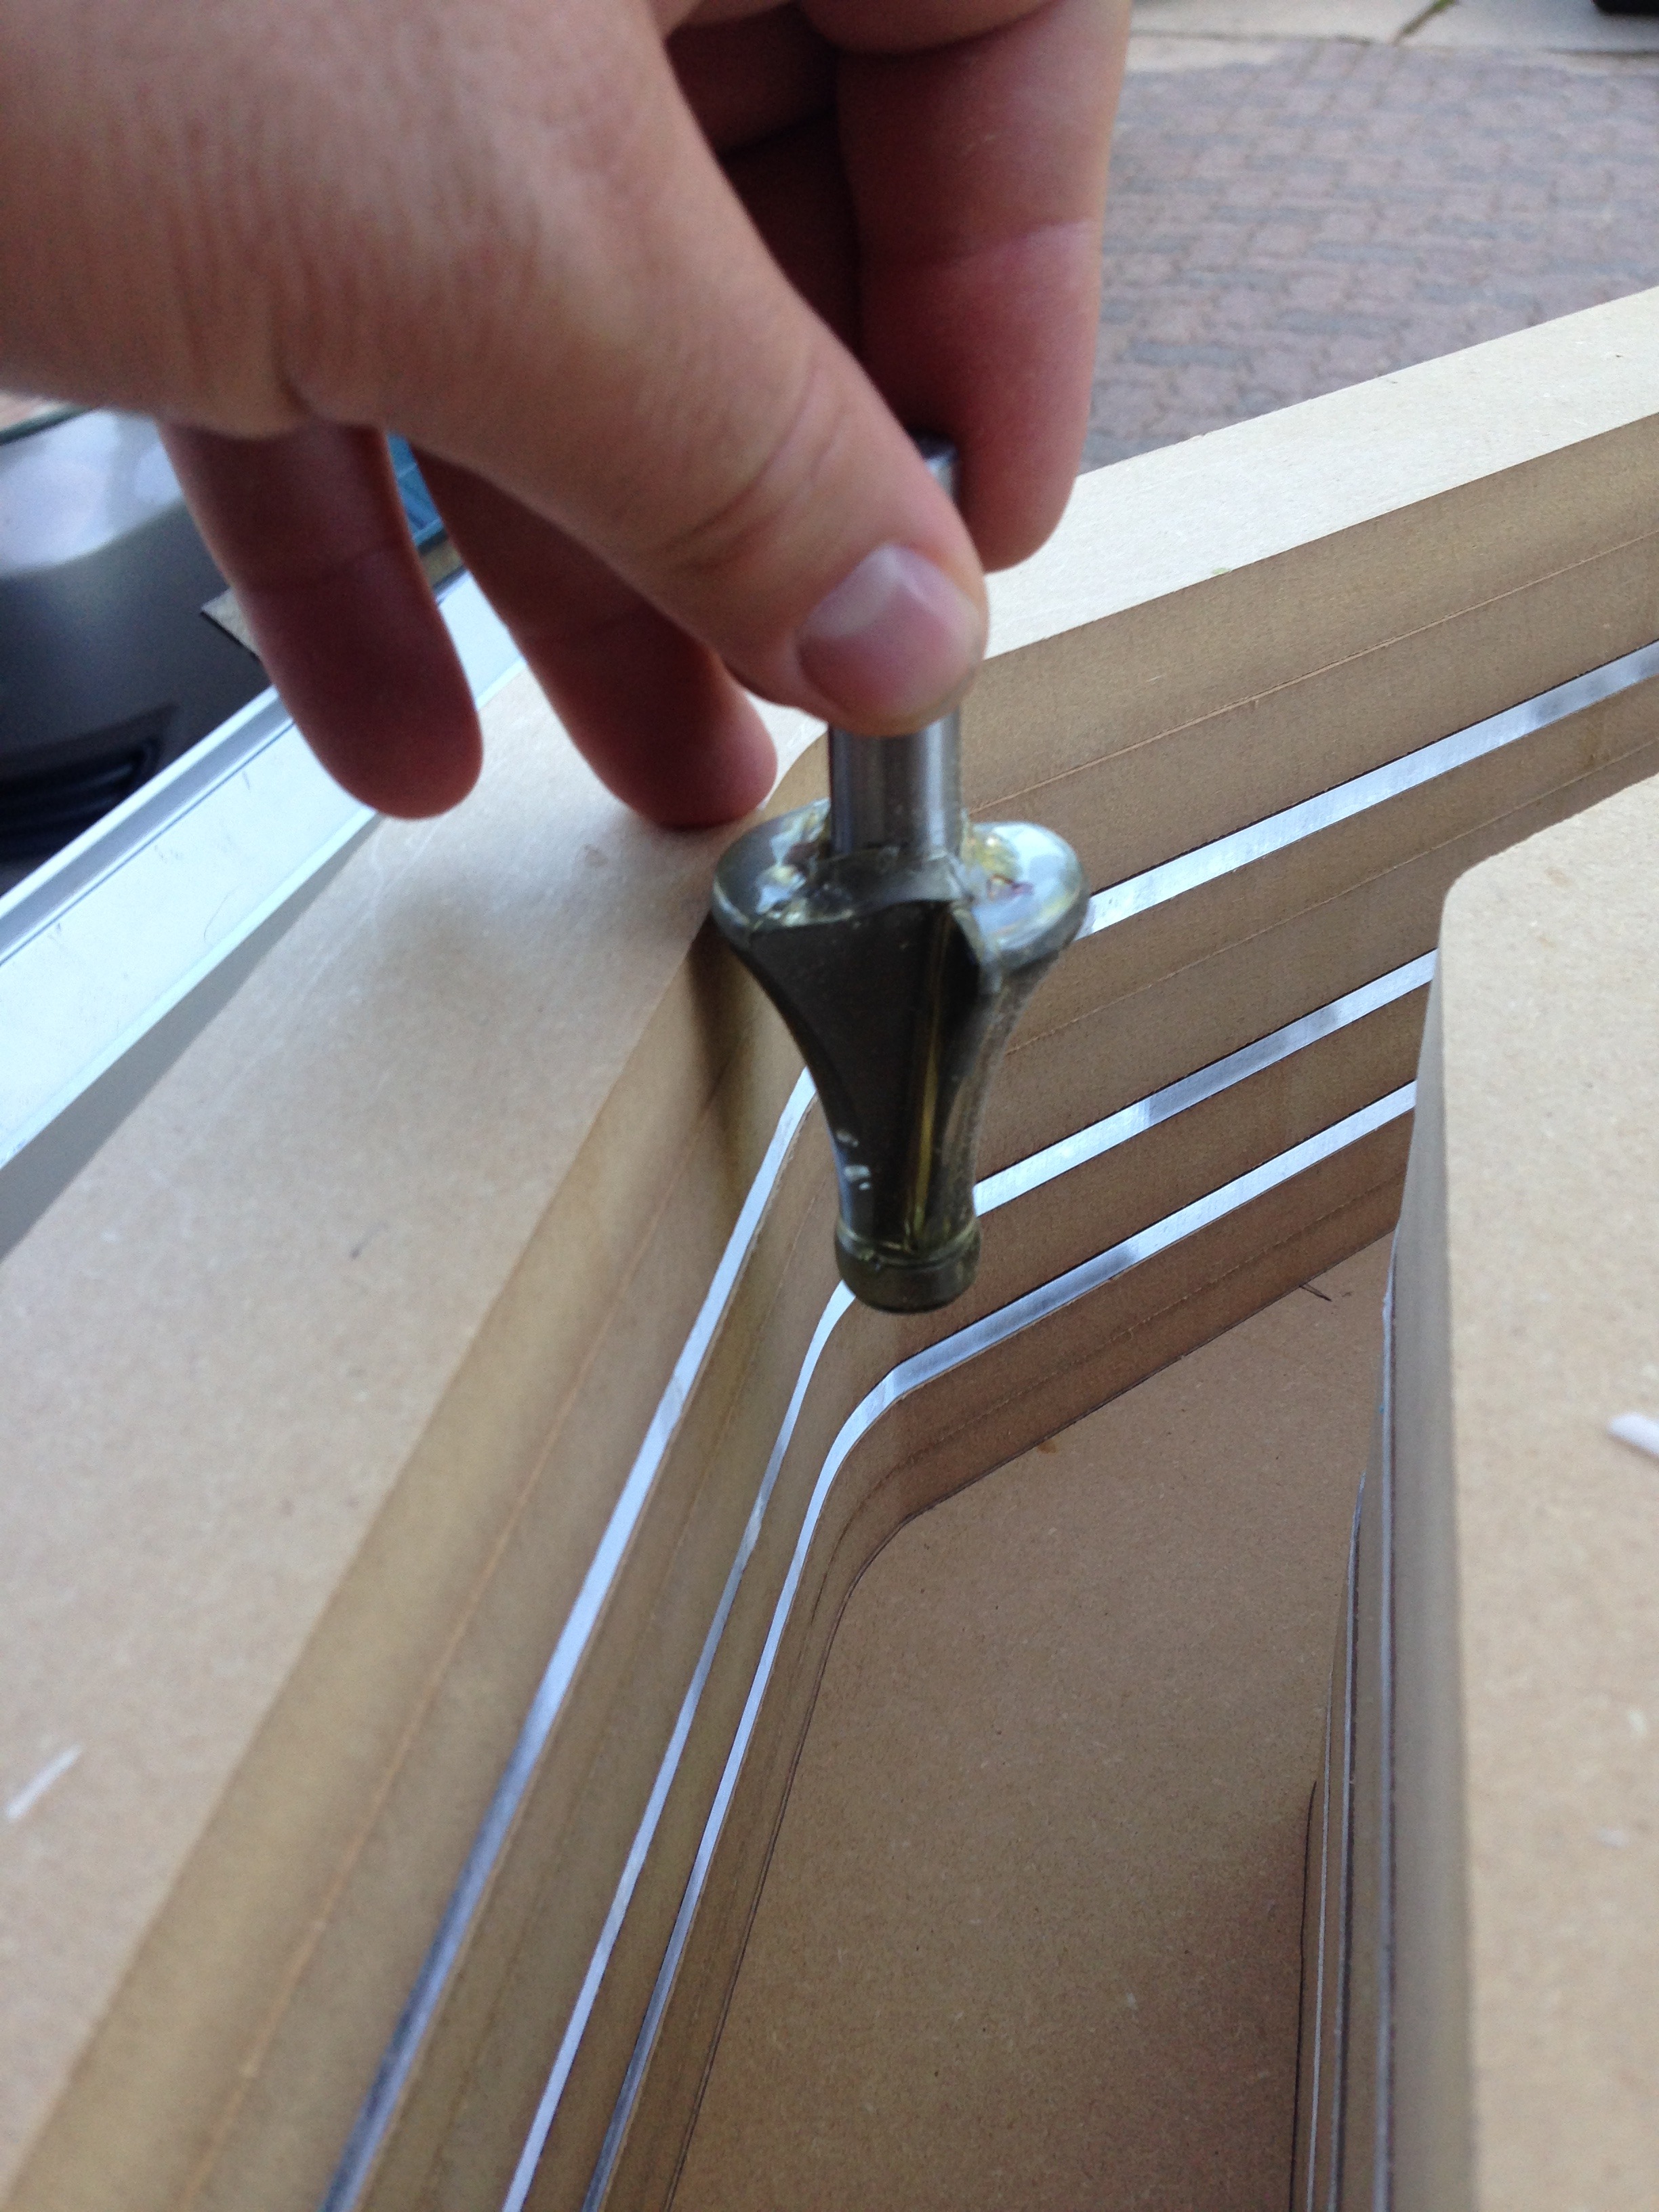
The slots in the floor look pretty simple, but they were a ton of labour.. I put some serious miles on a 15 year old Craftsman router making each piece lol


 07-12-2016, 06:16 AM
#11
Registered User
Thread Starter
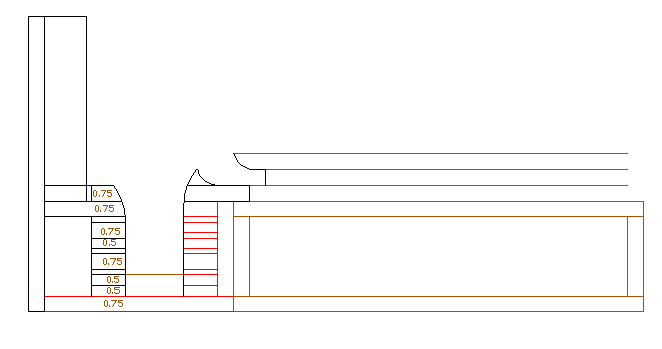
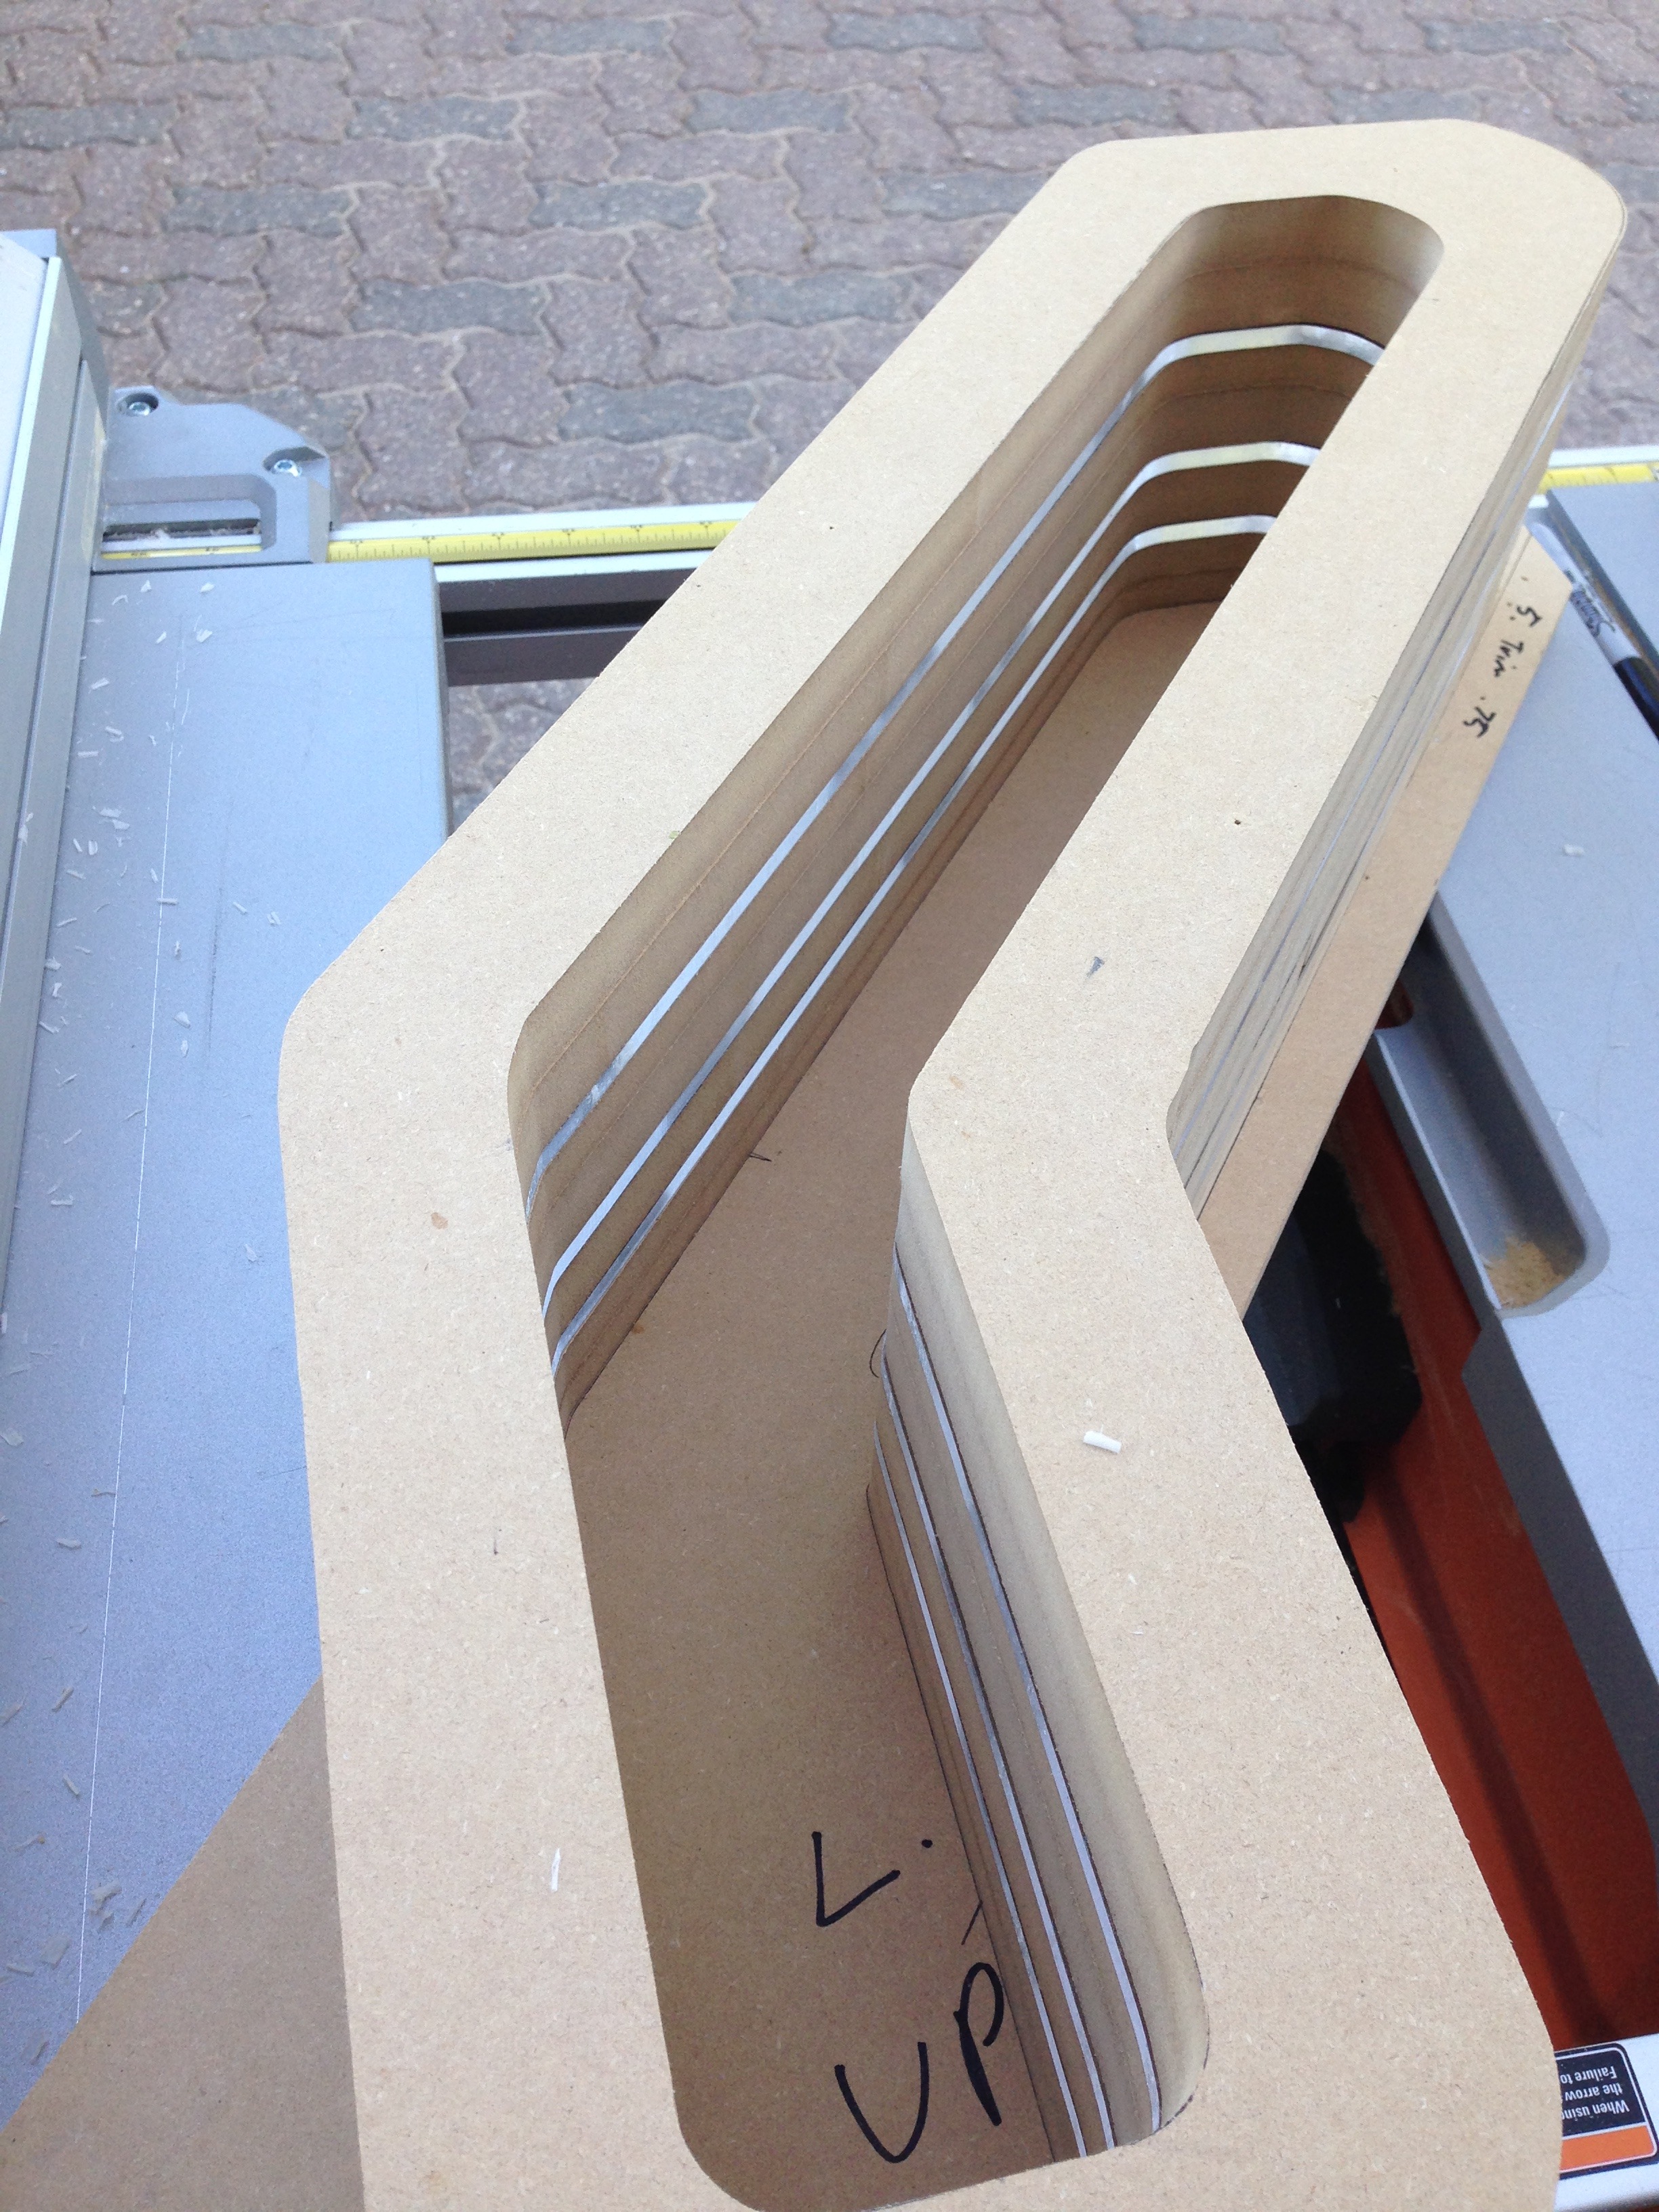
I have to credit Simplicityinsound.. The idea for the trench (that's what I call it anyways) came from this thread:
http://www.diymobileaudio.com/forum/...-illusion.html

I sized mine up quite a bit from the looks of it, but I also plan to run a bunch of wiring through it so it's visible and put my fusing in it so it is easily accessible.
http://www.diymobileaudio.com/forum/...-illusion.html
I sized mine up quite a bit from the looks of it, but I also plan to run a bunch of wiring through it so it's visible and put my fusing in it so it is easily accessible.
07-12-2016, 06:19 AM
#12
Registered User
Thread Starter
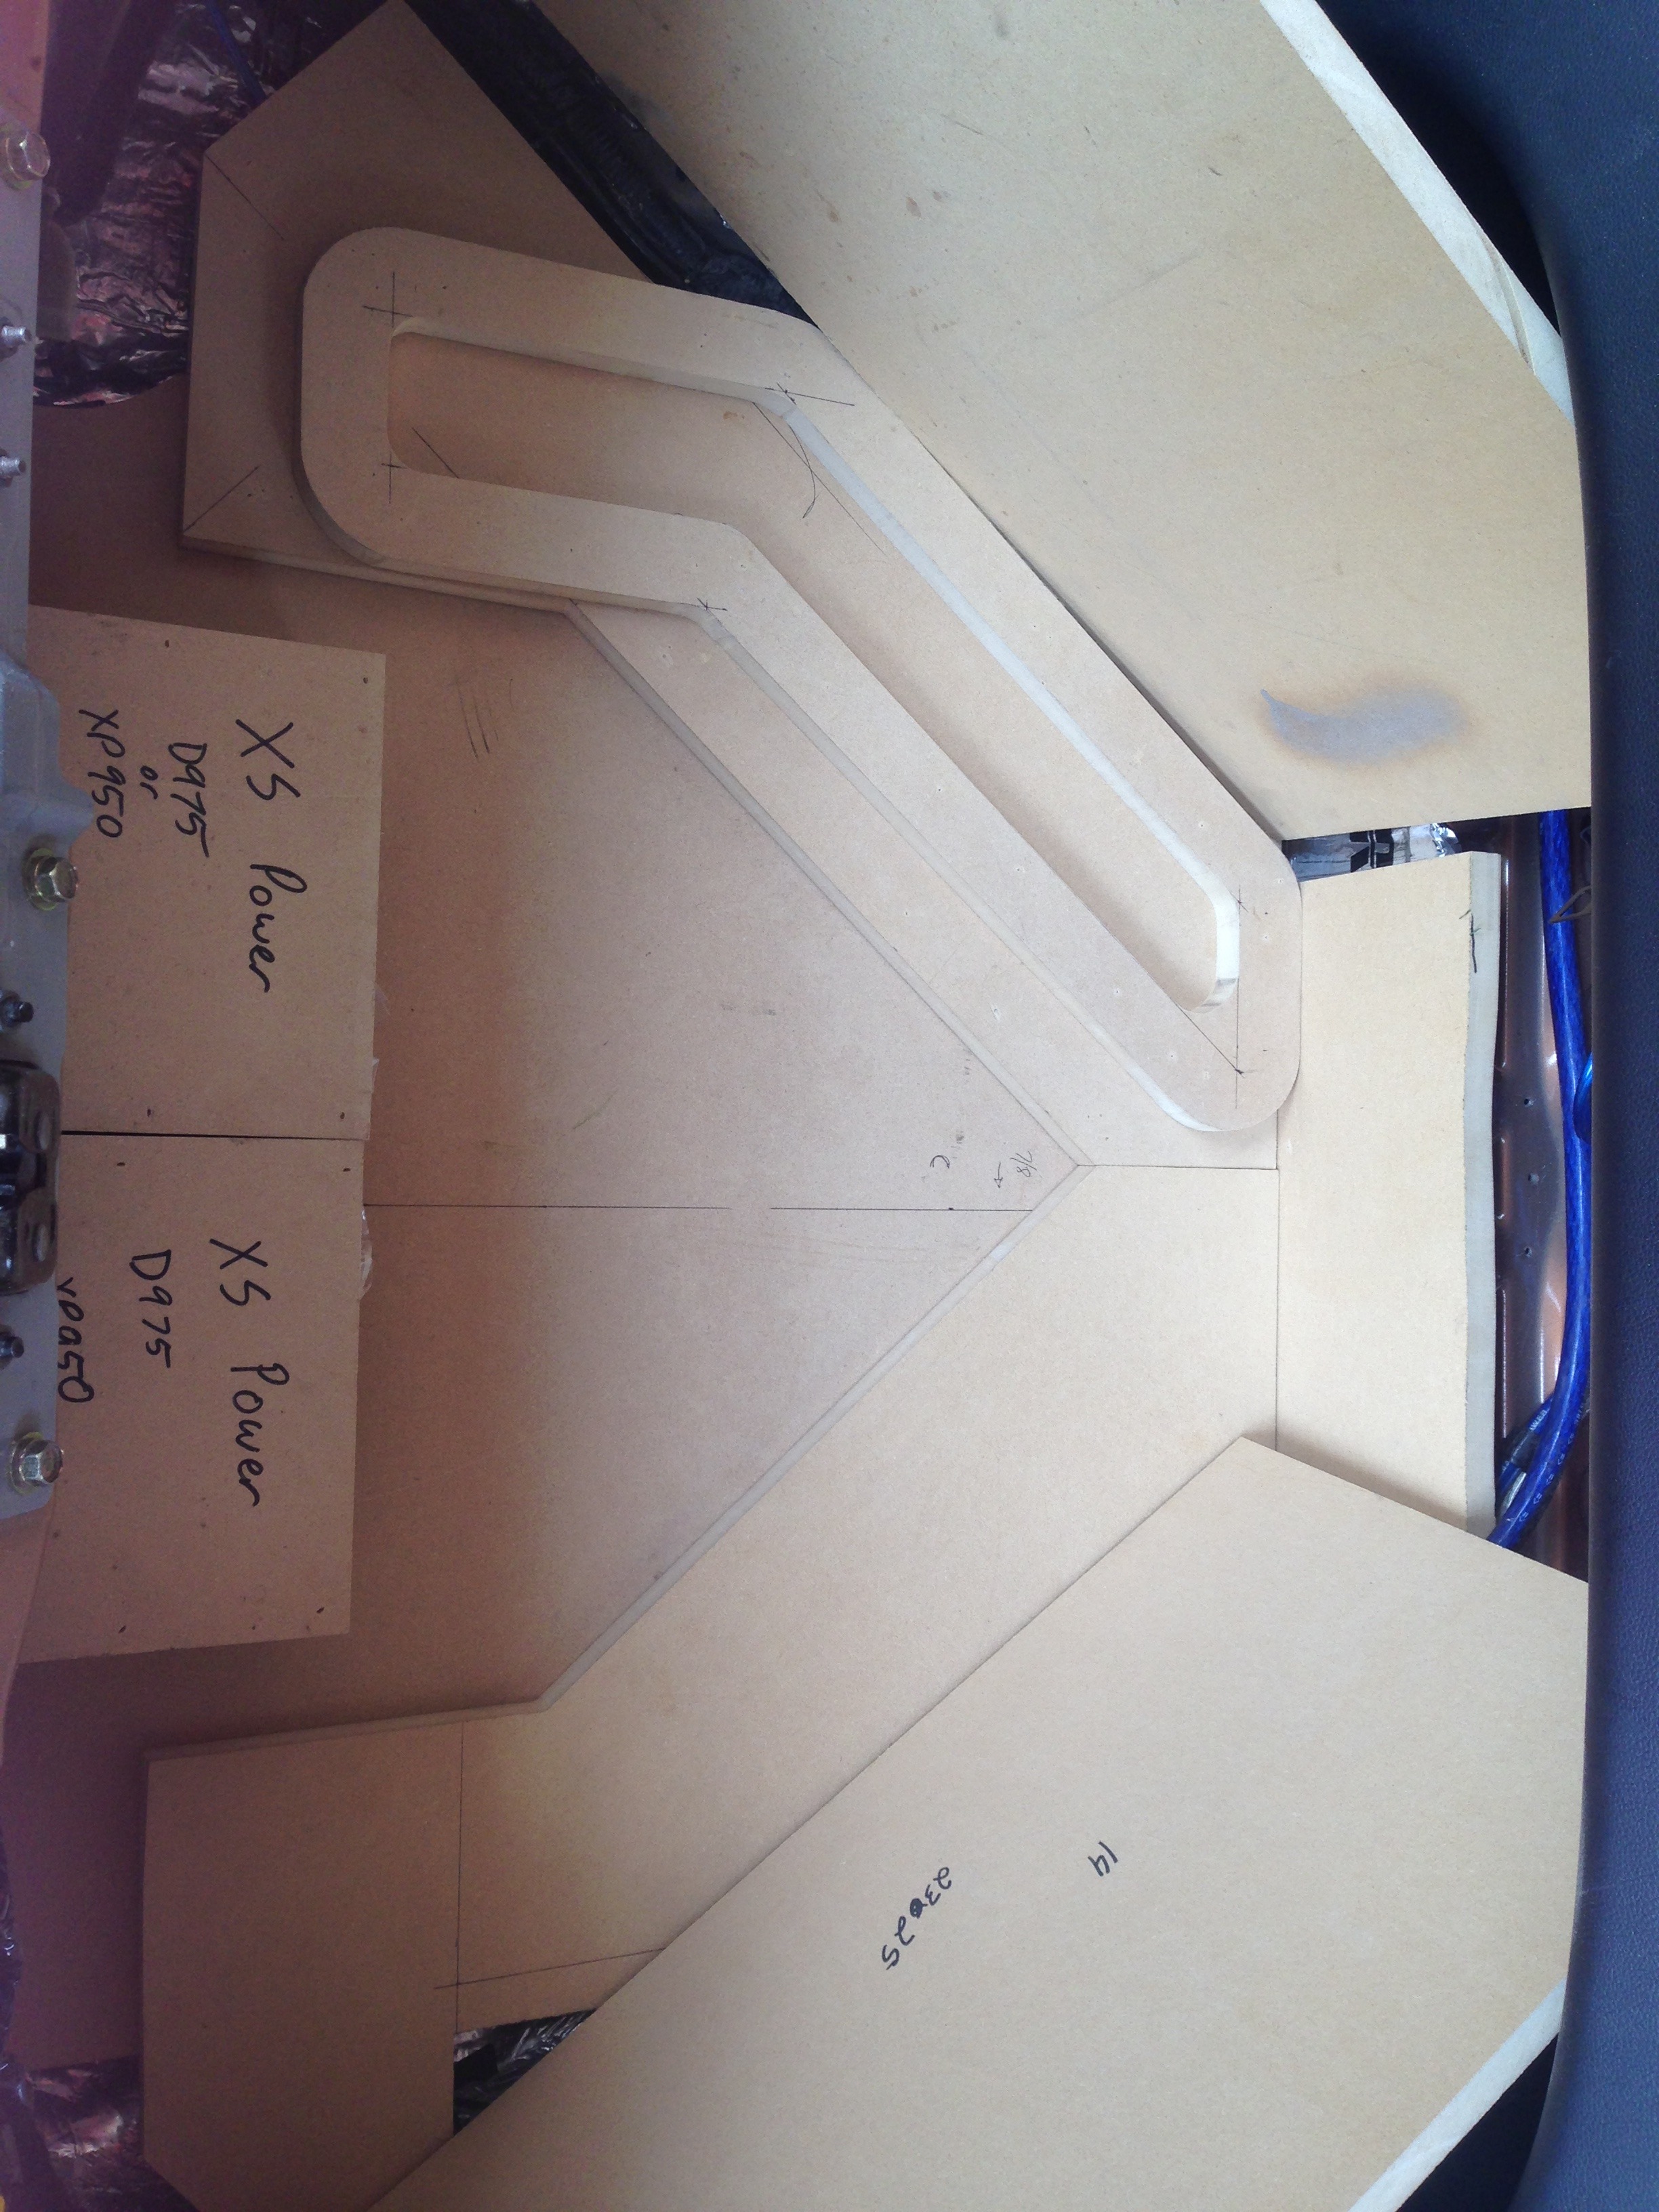
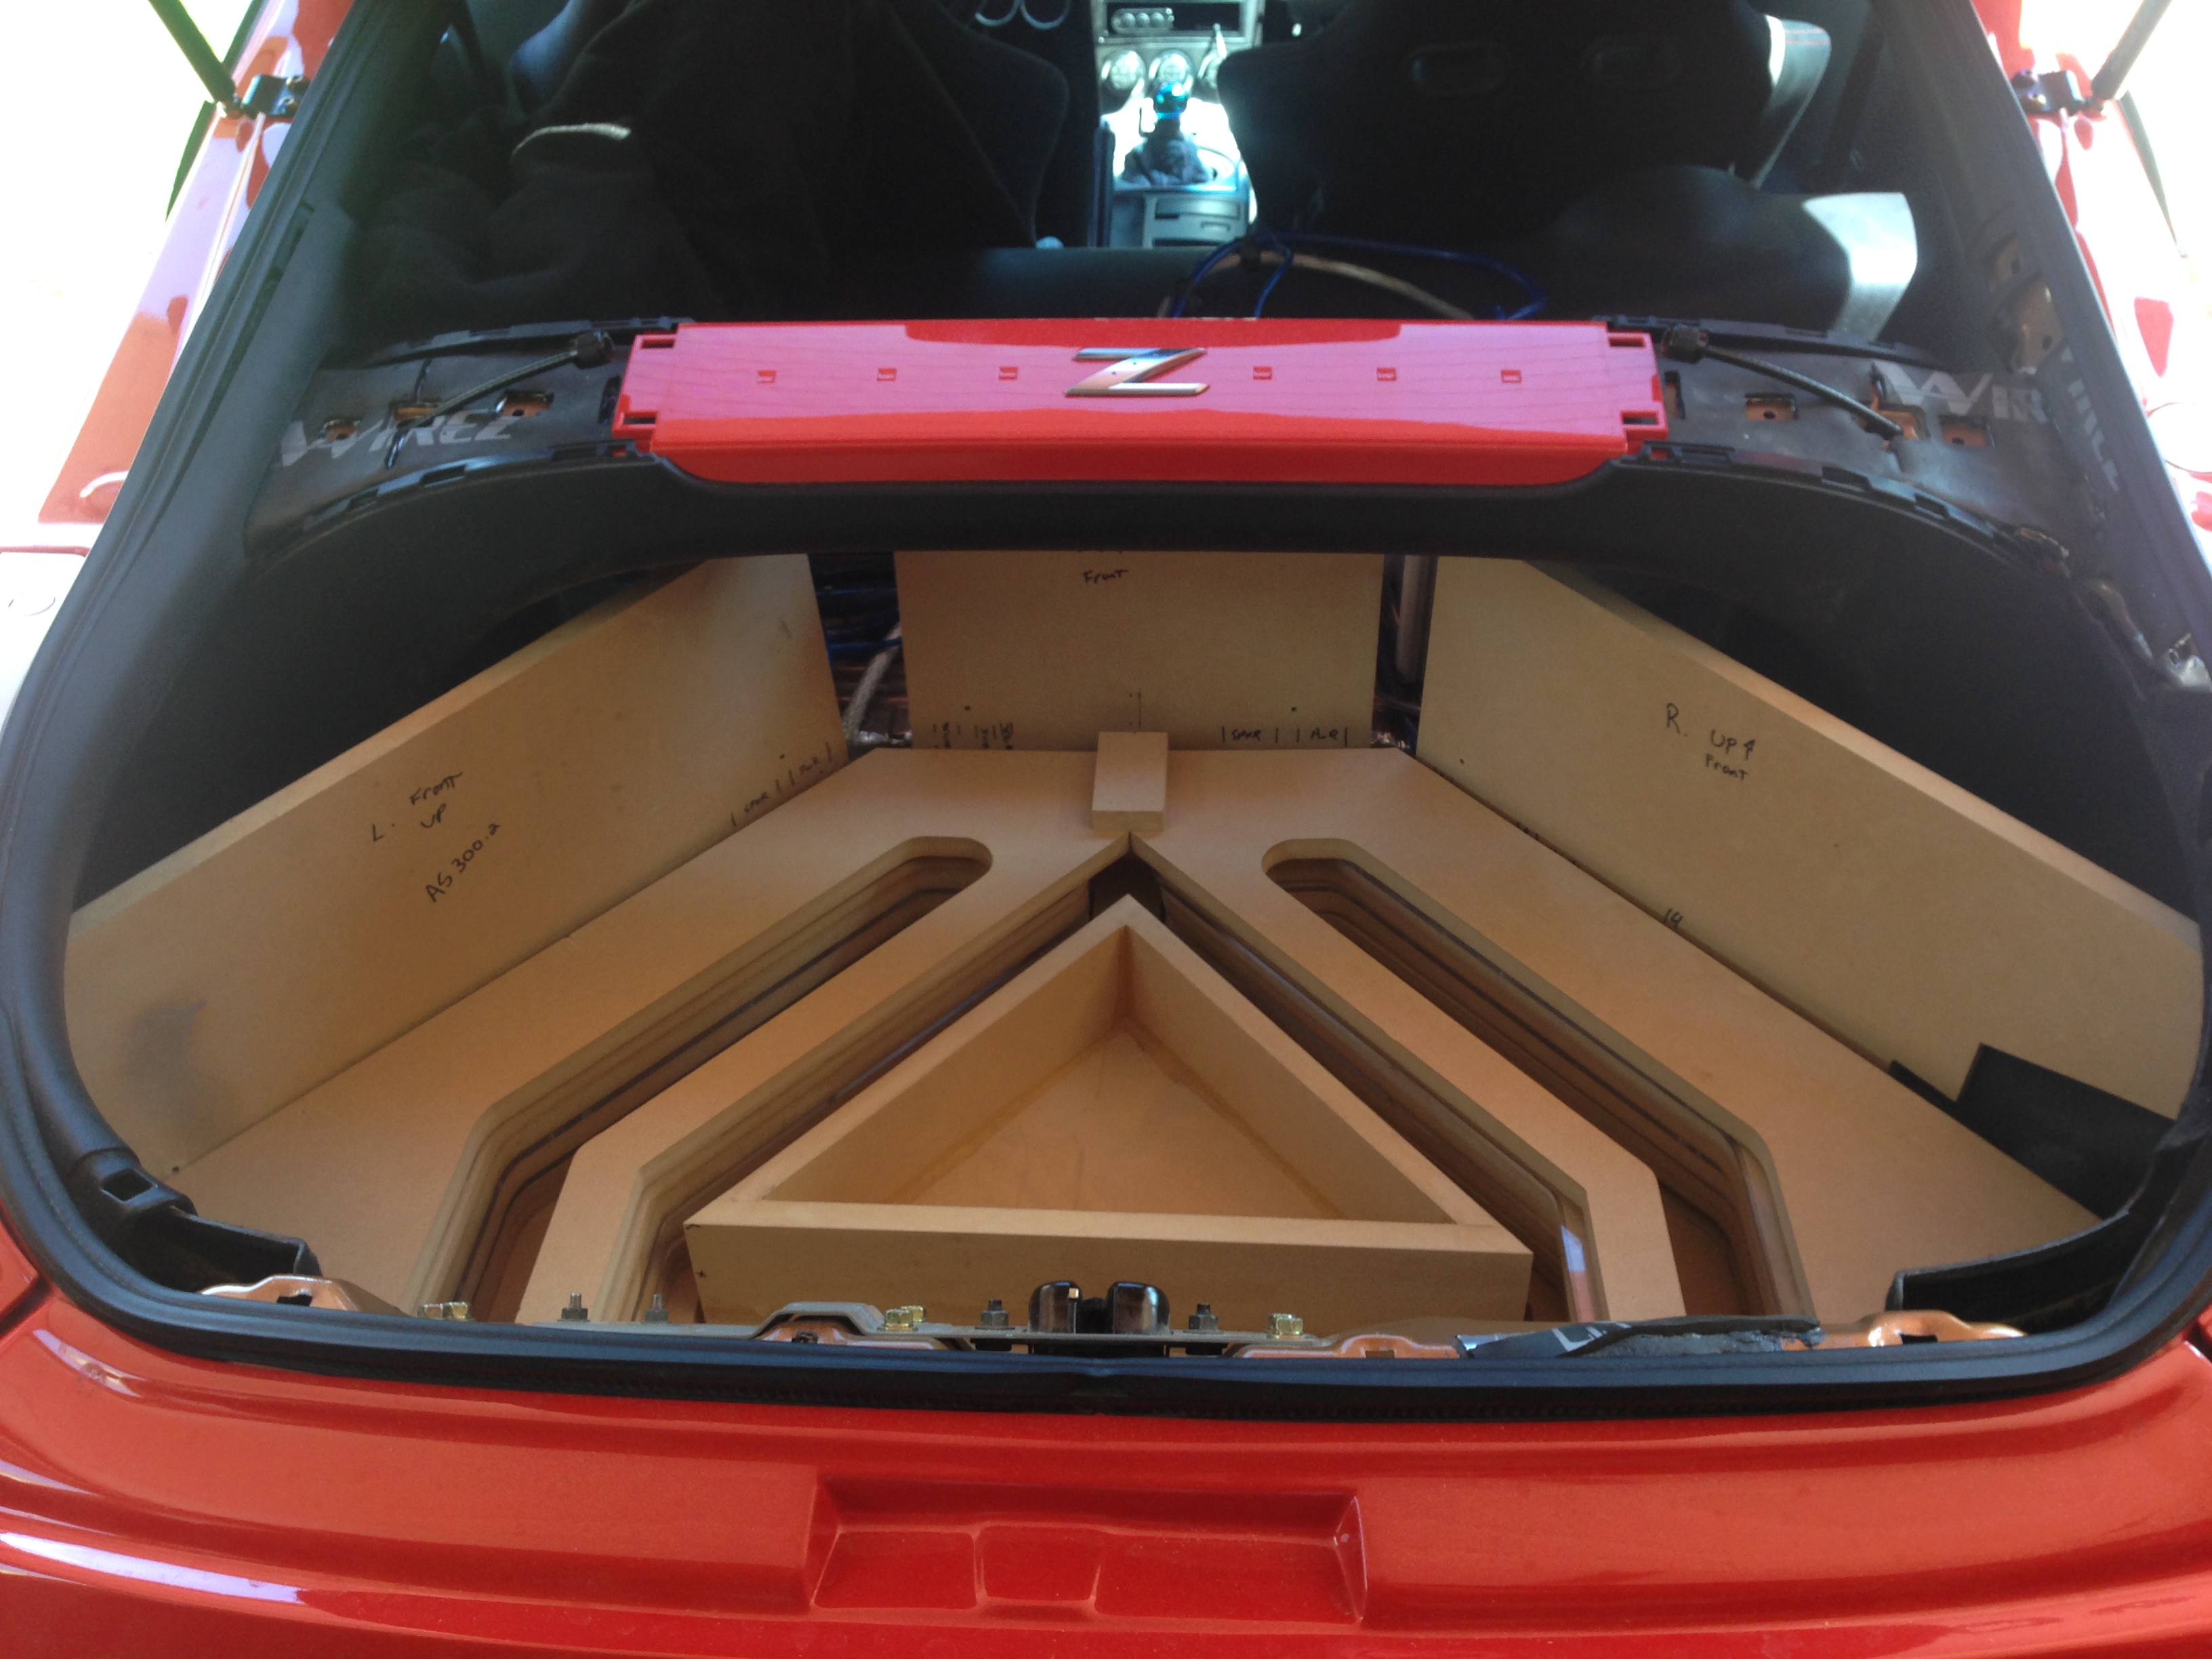
At this point everything's just sitting together, nothing is bolted in yet so the alignment everywhere isn't bang on..
I had a bit of time a couple nights ago and my impatience got the best of me. I wanted to see how the plexi looked with an LED string. The string is the wrong color, I'll be doing RGB and it's also too short, but the idea is there. There will be three runs of 0 gauge power wire run through this open channel that will be visible from above. If I can find fuse holders I like I'm thinking of locating the fuse holders in here as well.
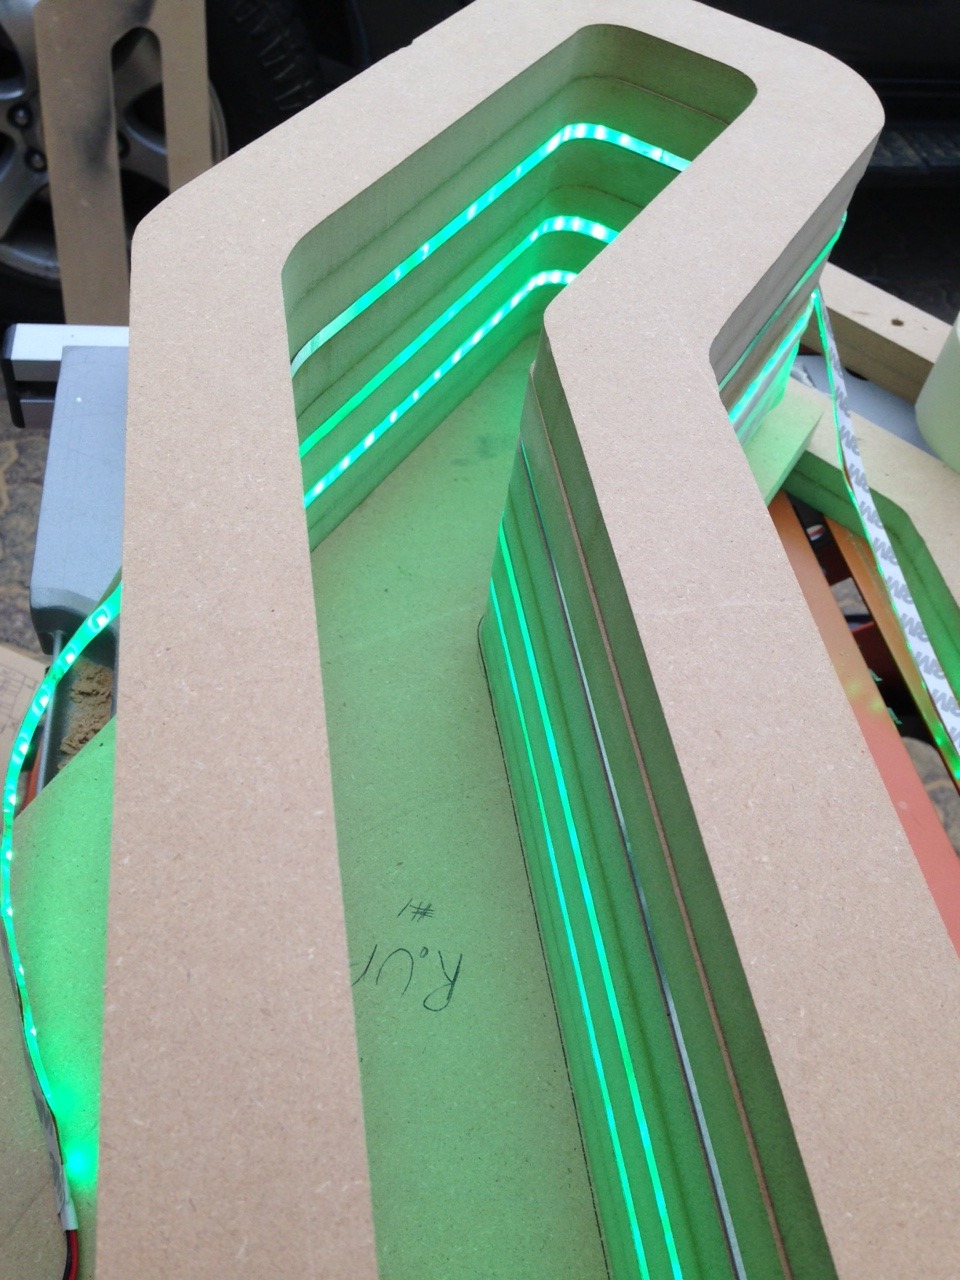
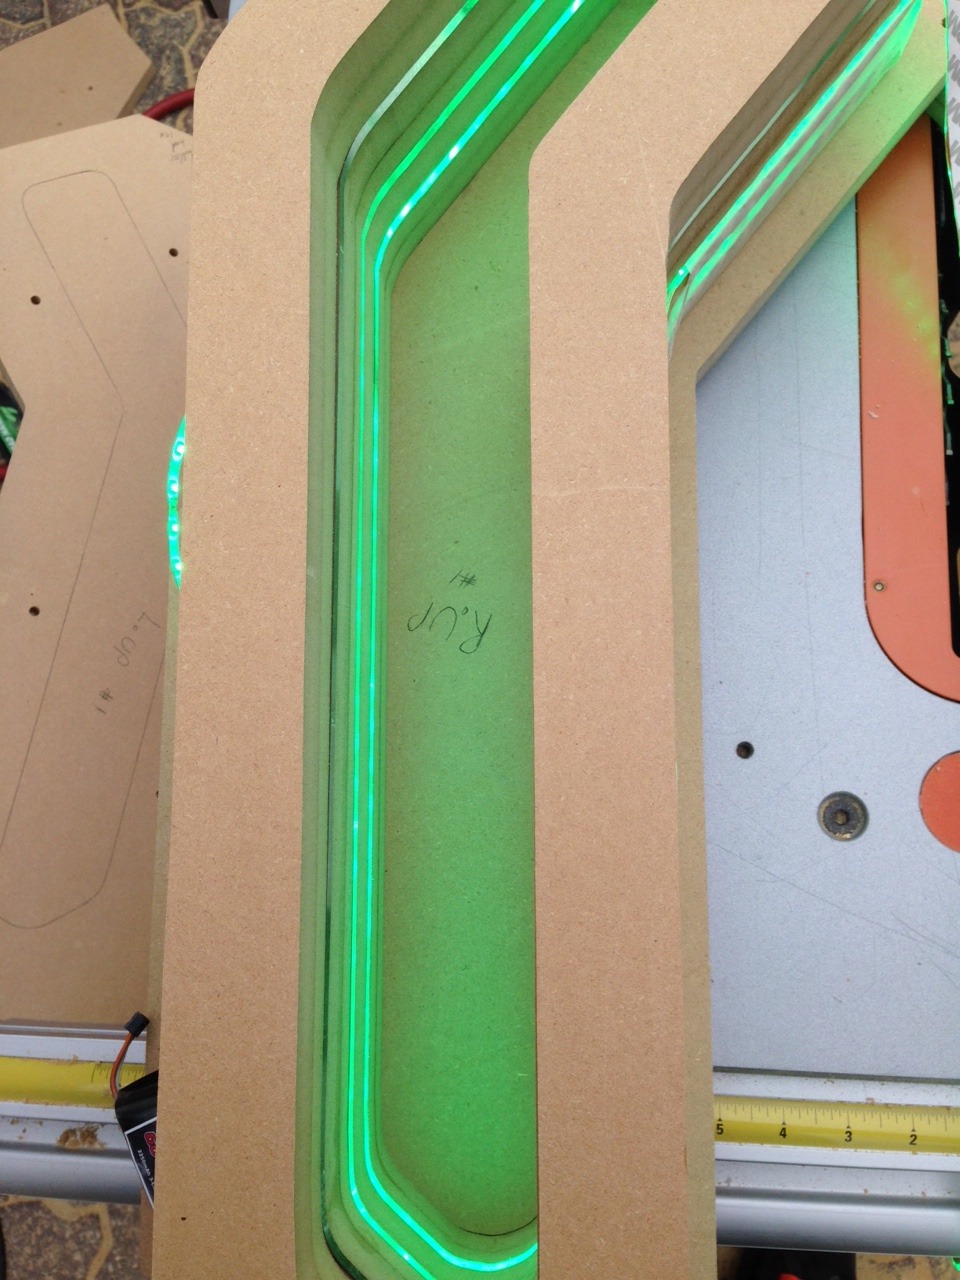
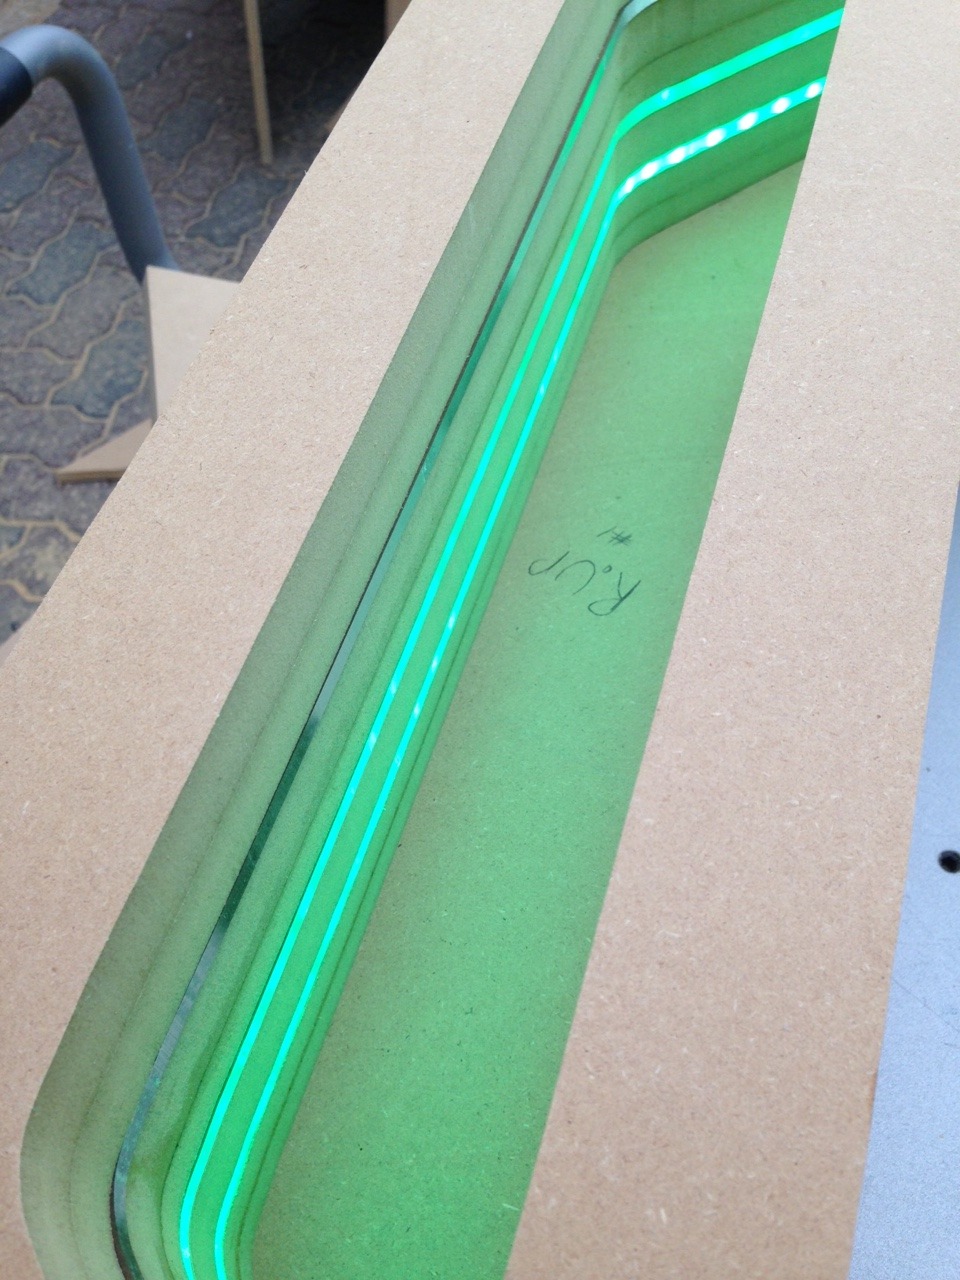
I had a bit of time a couple nights ago and my impatience got the best of me. I wanted to see how the plexi looked with an LED string. The string is the wrong color, I'll be doing RGB and it's also too short, but the idea is there. There will be three runs of 0 gauge power wire run through this open channel that will be visible from above. If I can find fuse holders I like I'm thinking of locating the fuse holders in here as well.


 07-12-2016, 06:20 AM
#13
Registered User
Thread Starter
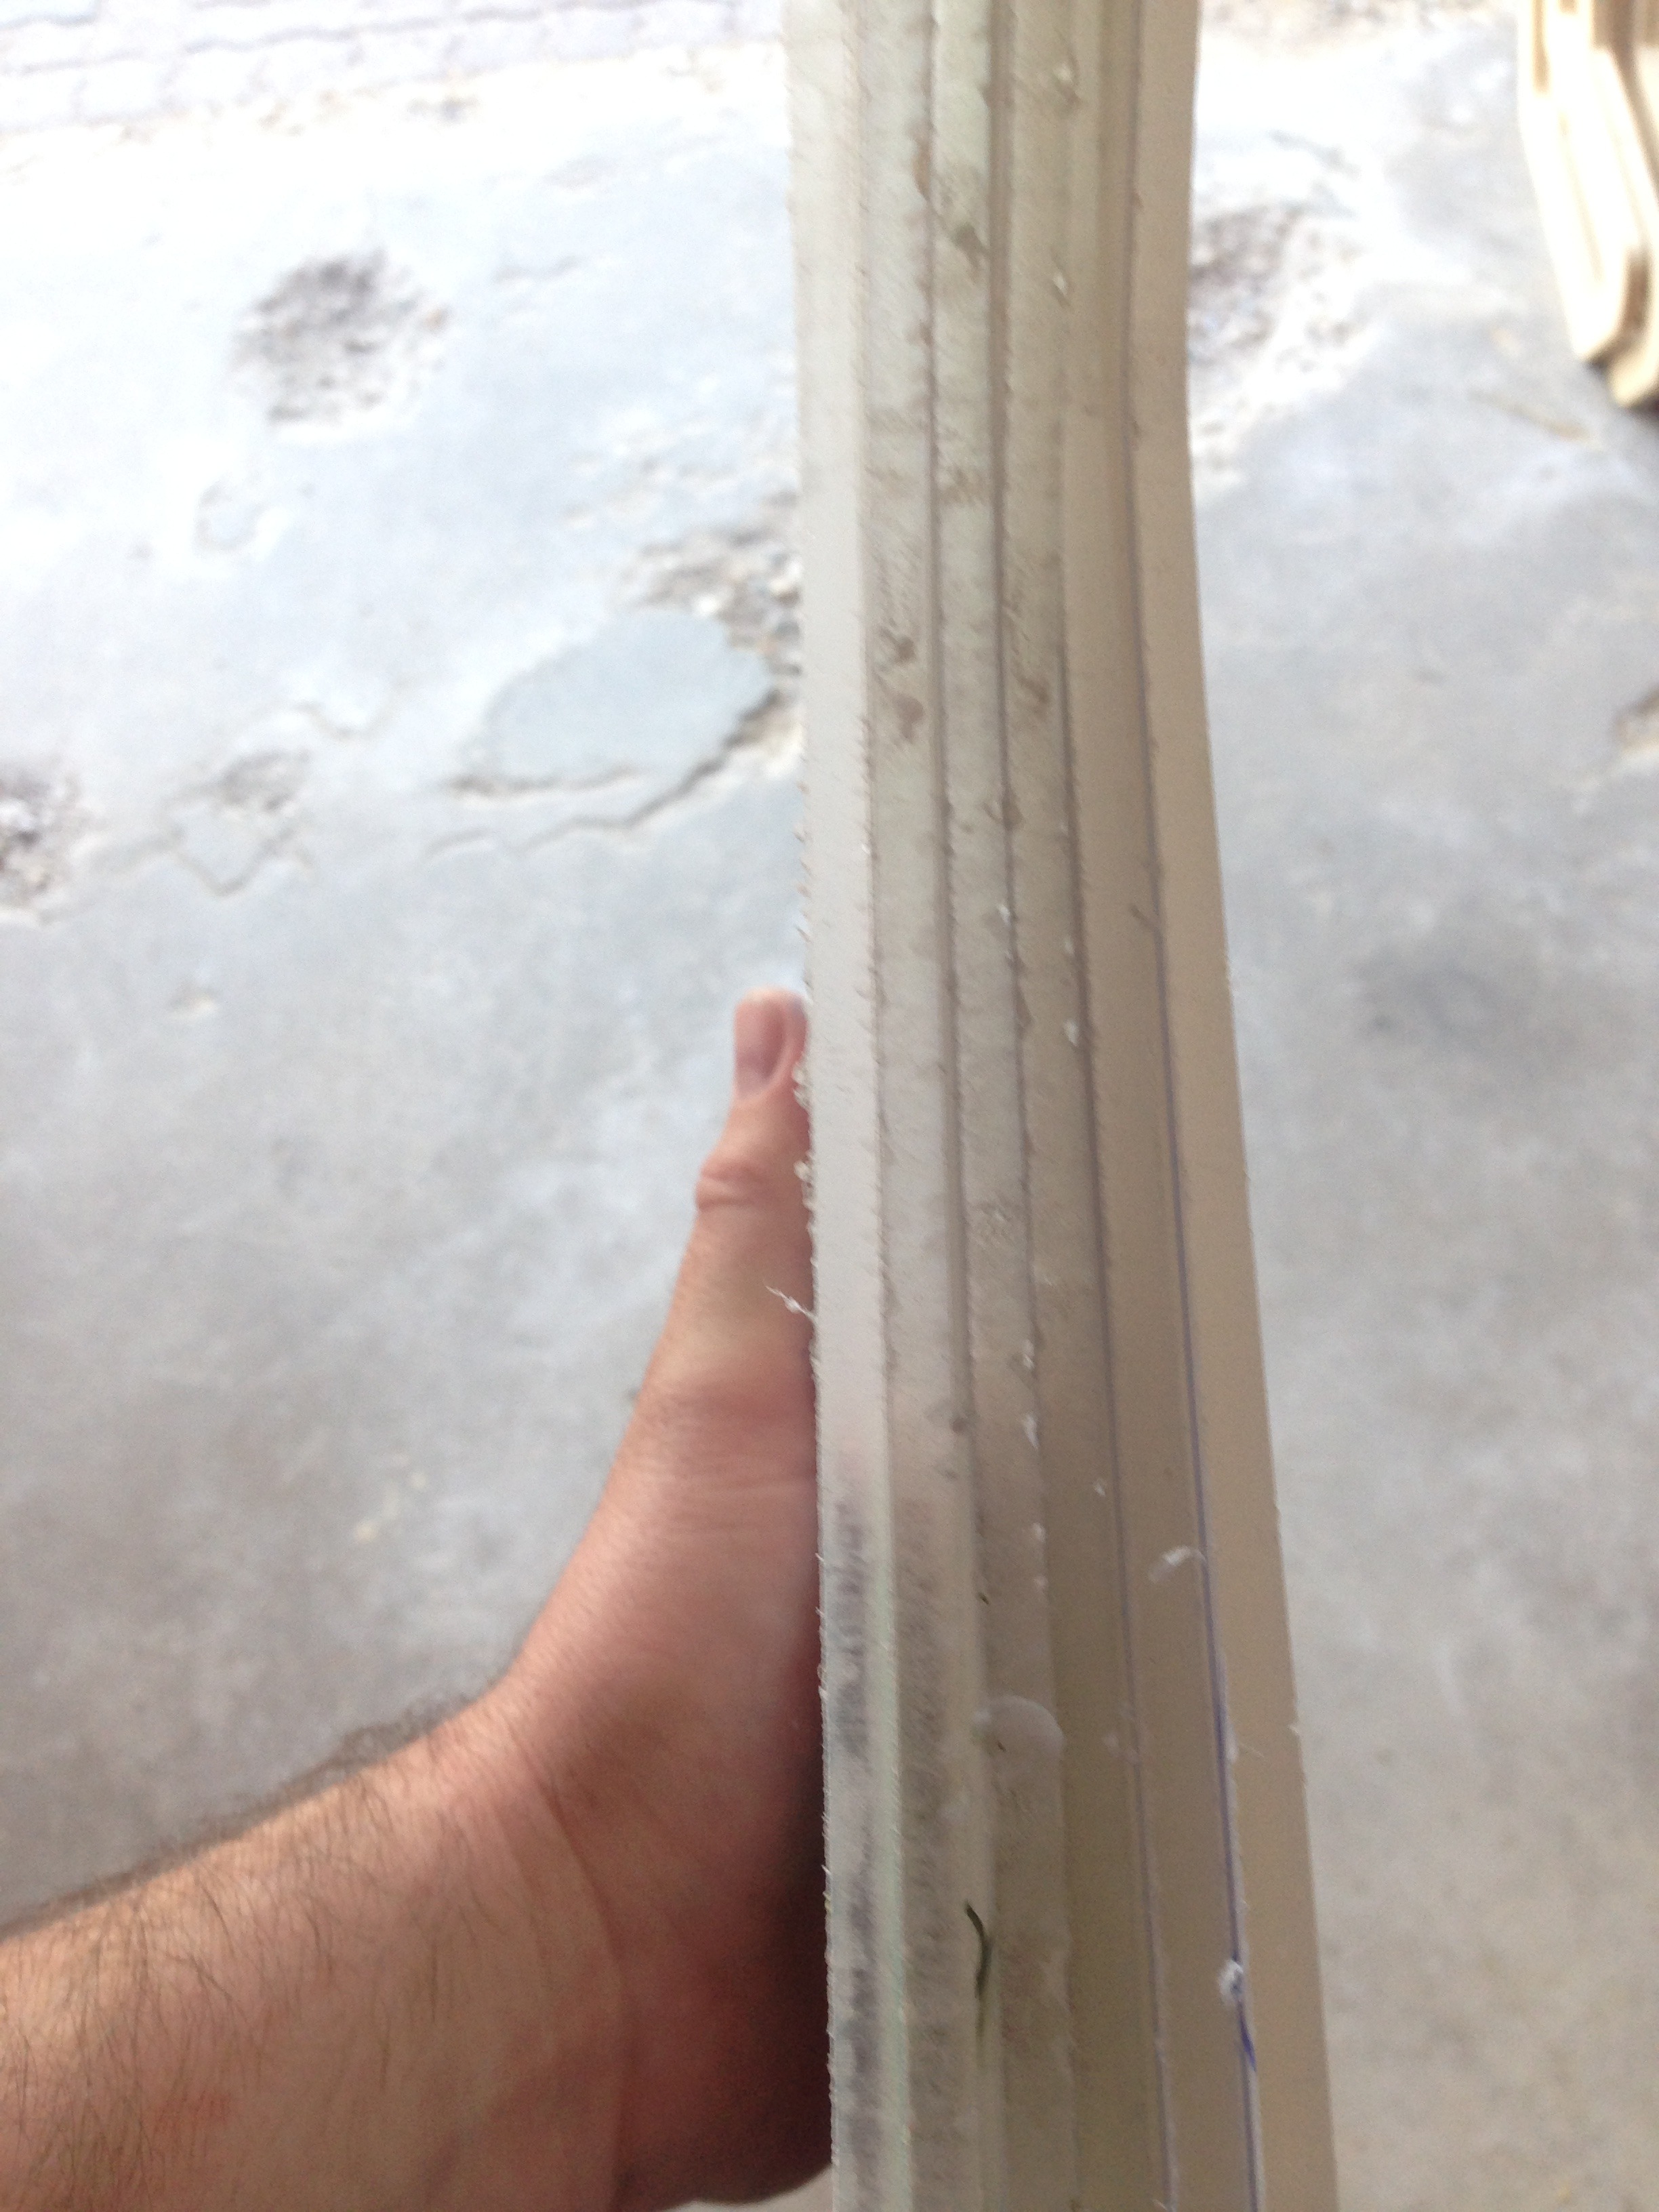
I used a ton of threaded inserts into the MDF and riv-nuts into the sheet metal of the car. No wood screws at all, everything uses a metric thread. Either M4 for most of the wood to wood and amp mounting and then M6 for mounting to the body of the car.
I need to go get some longer M6 screws for the stacks for the trenches tomorrow.
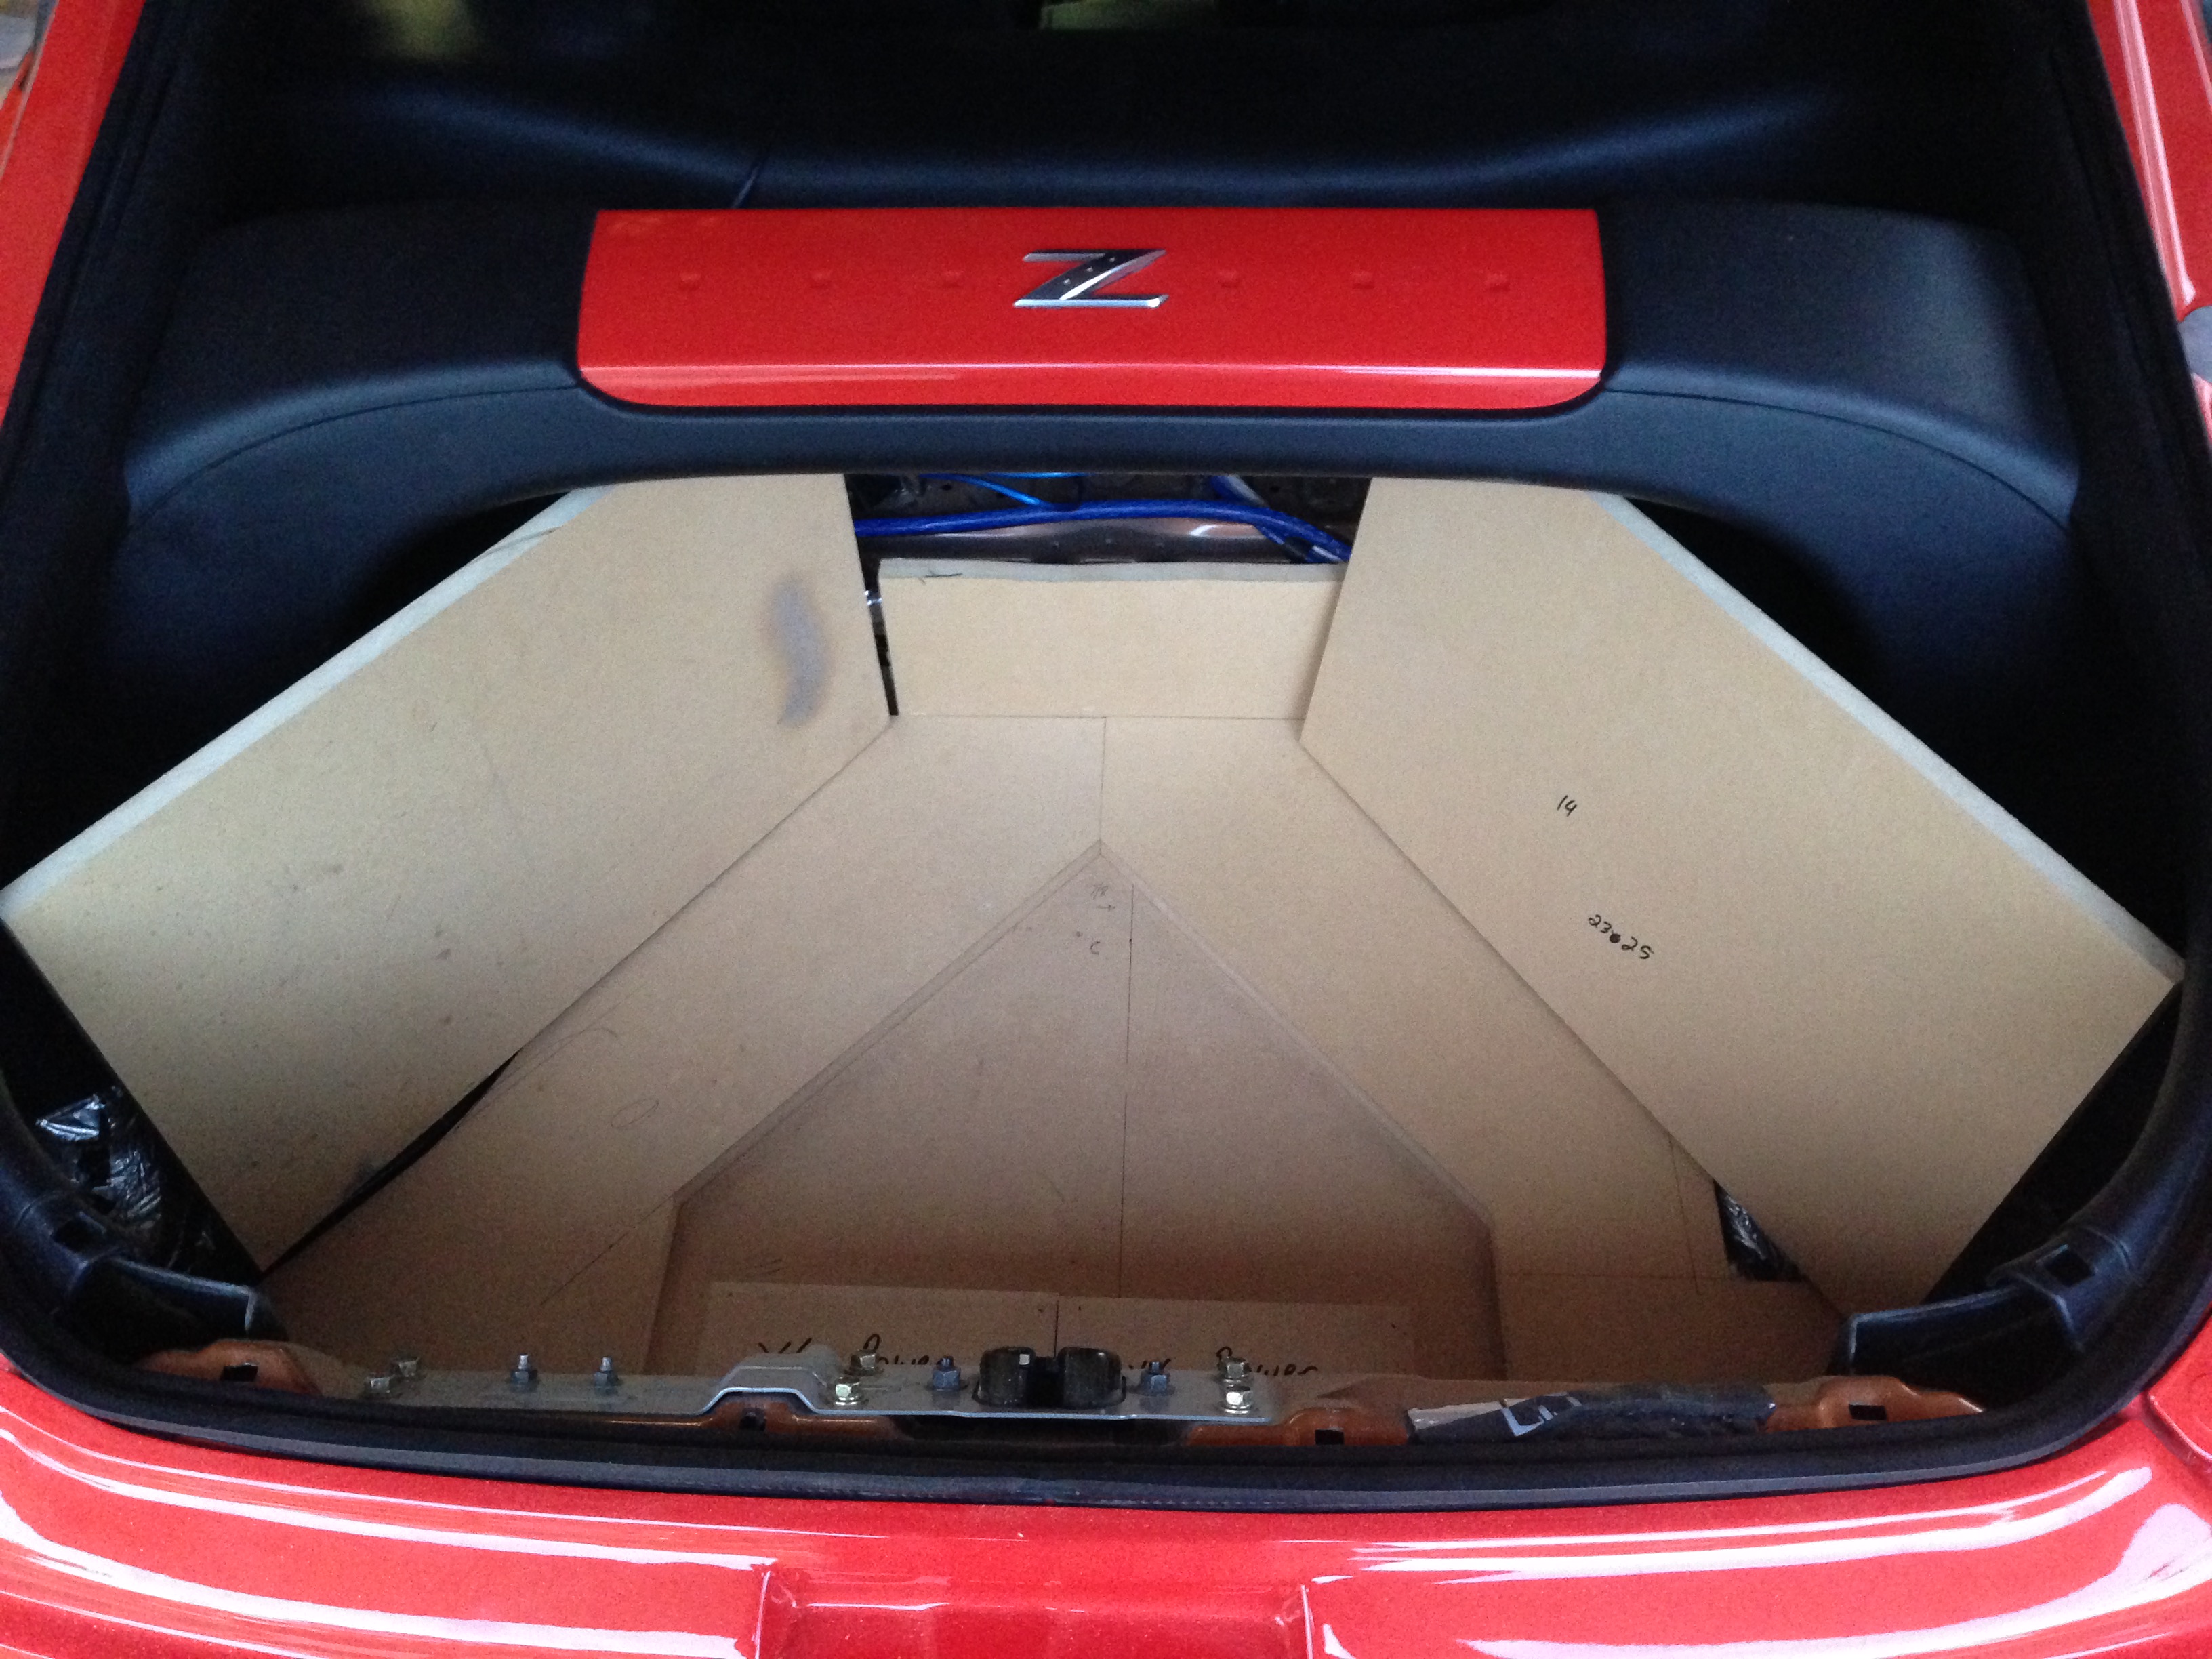
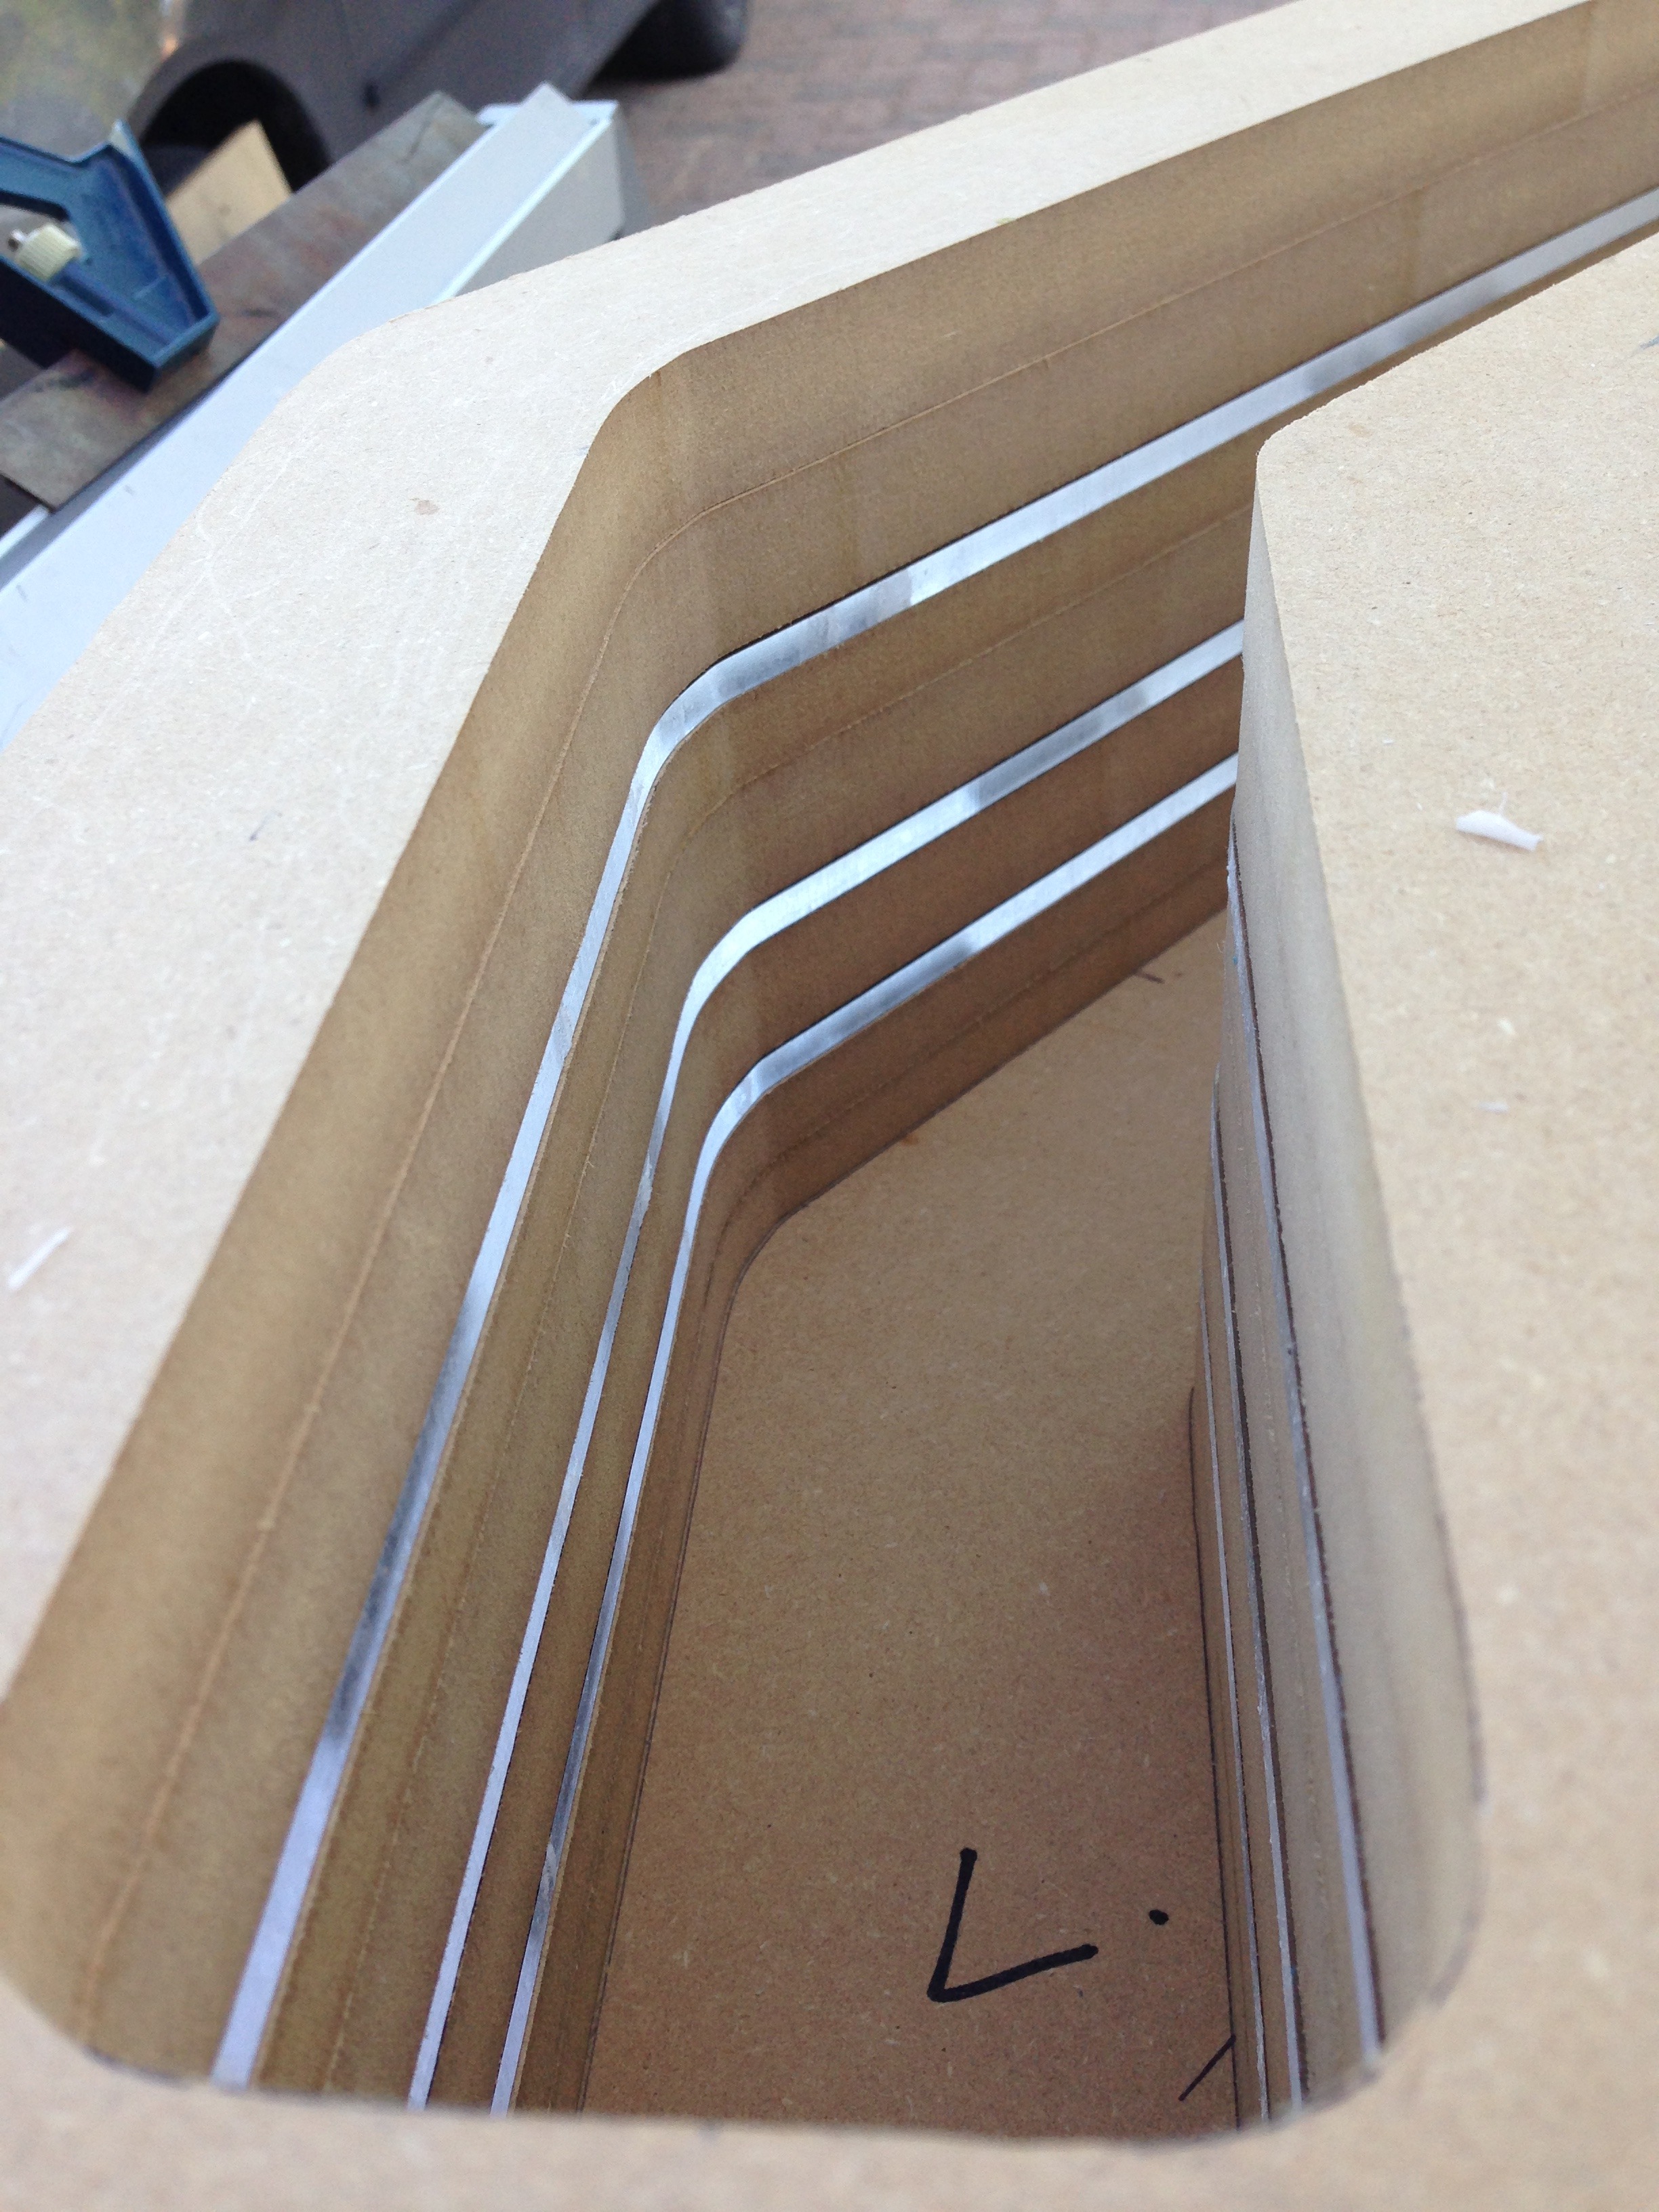
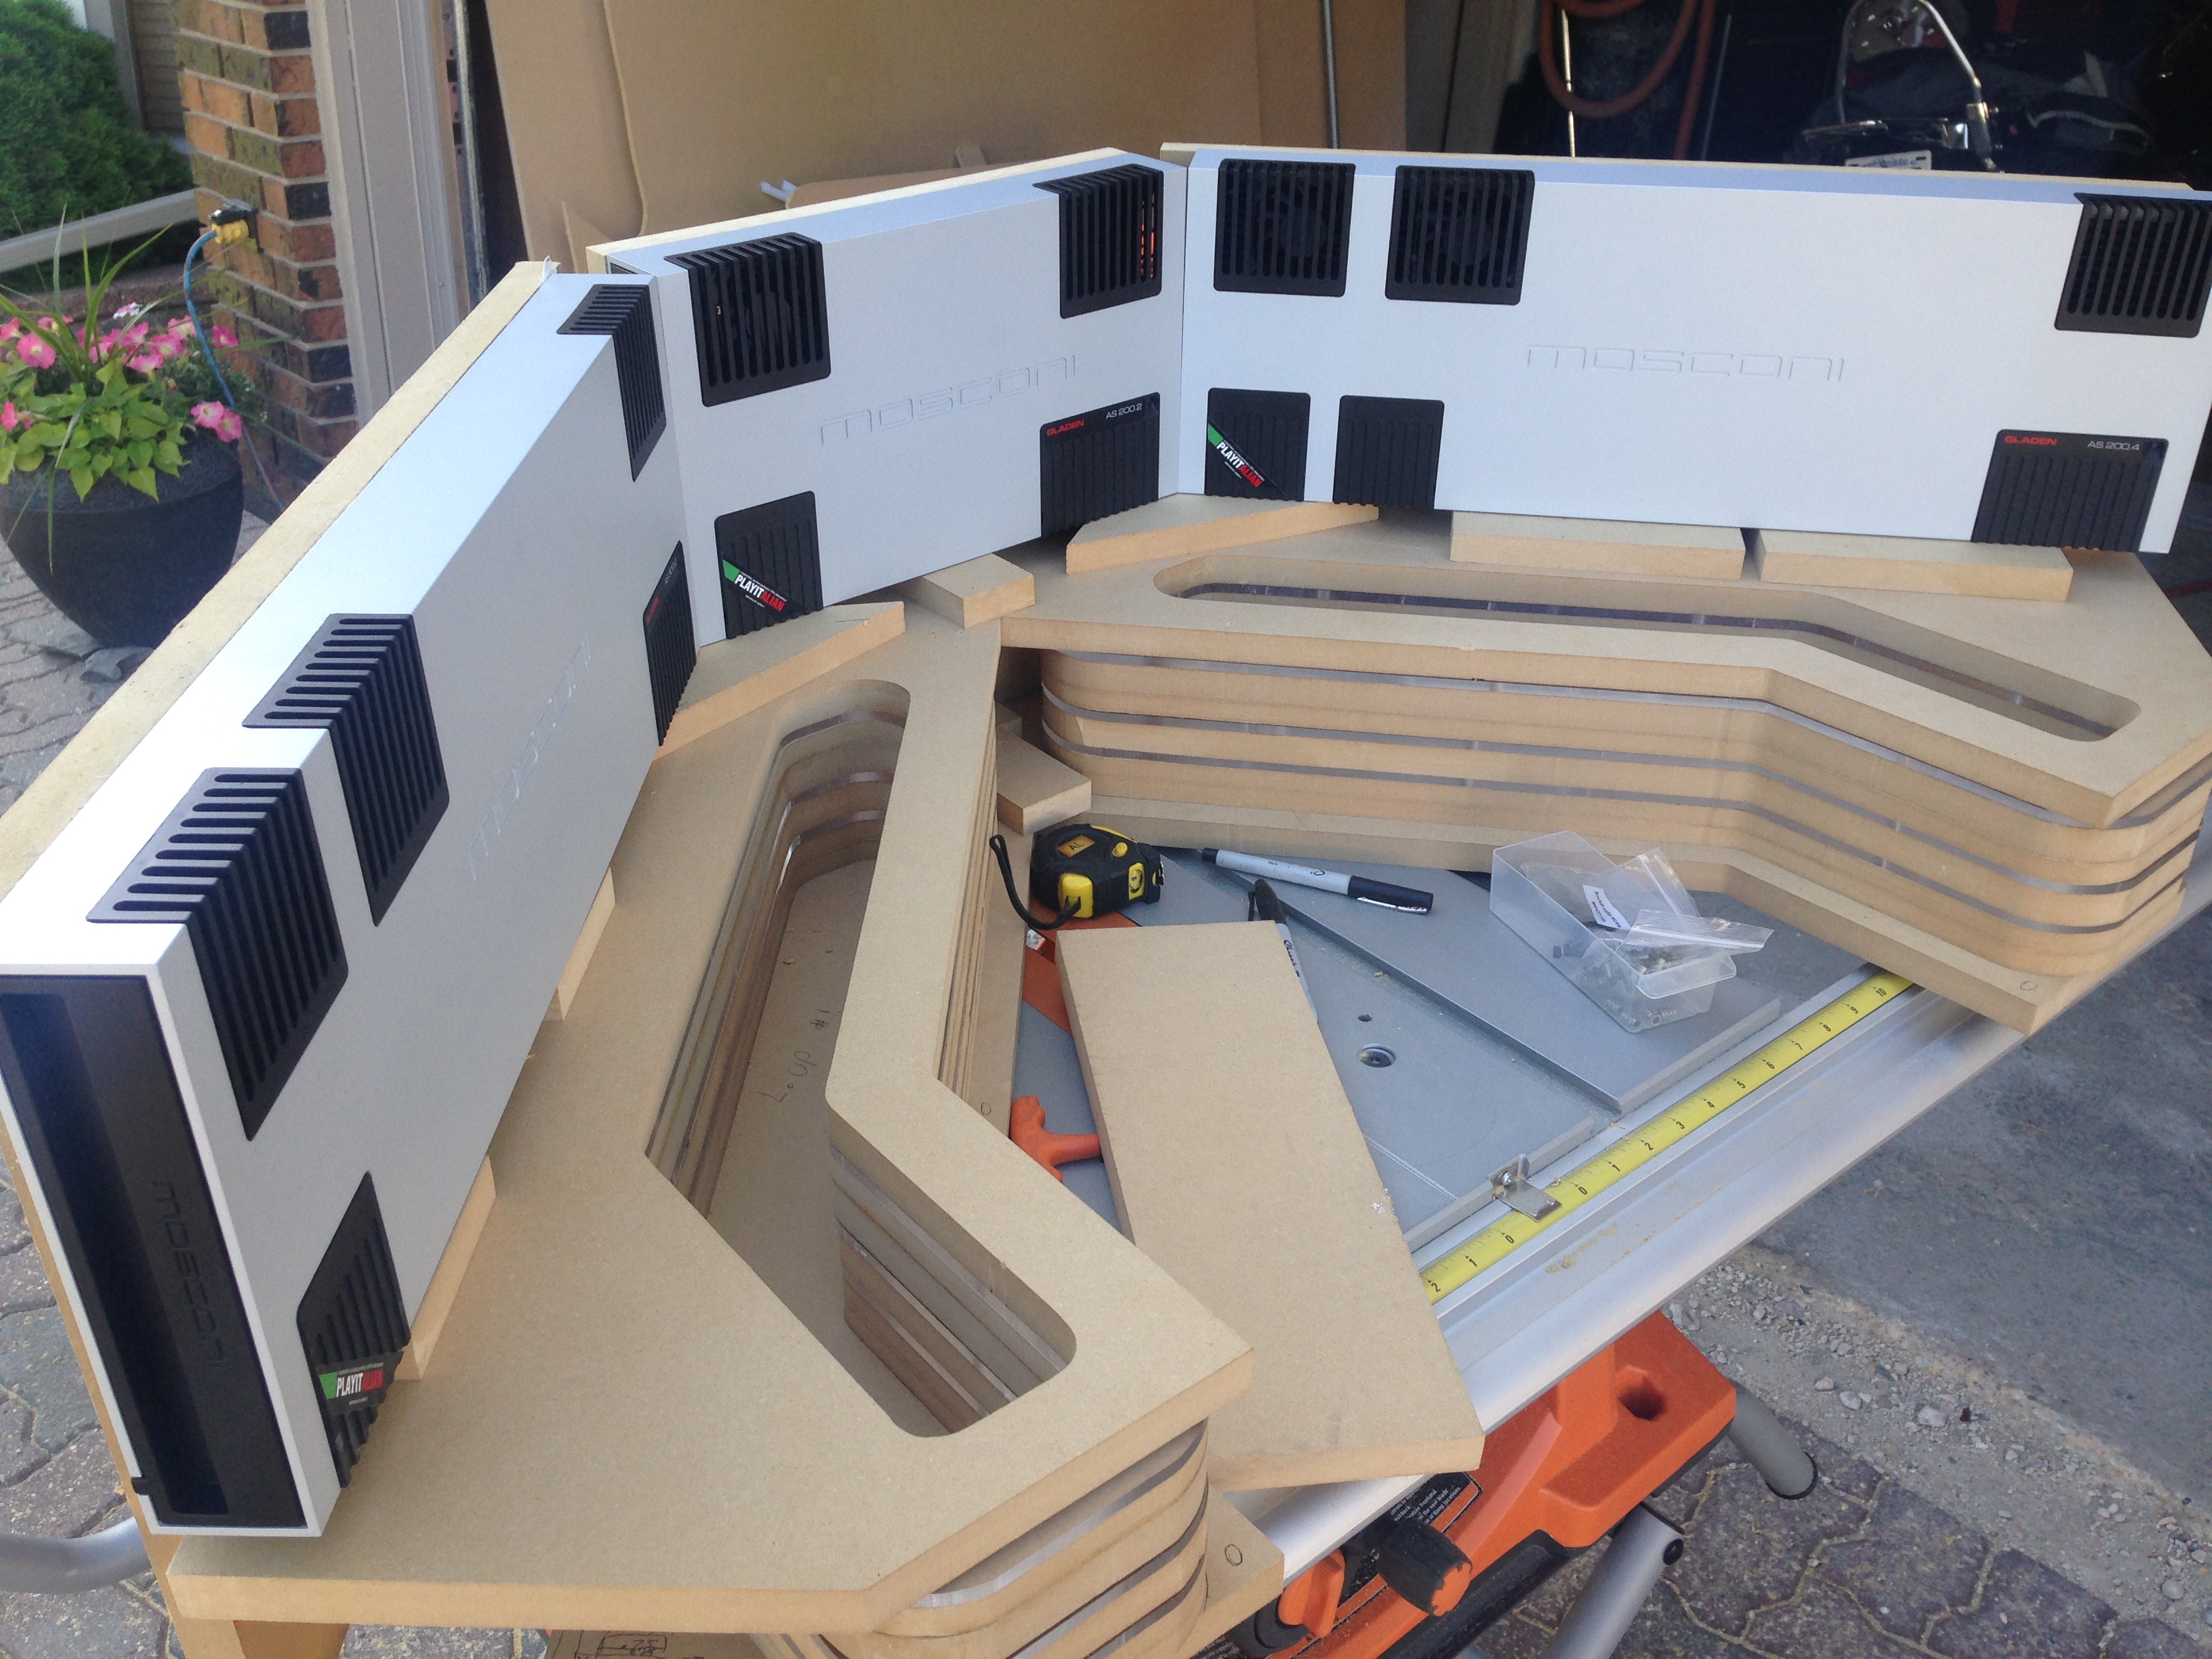
This is the two bases of the trenches. The two scraps of wood holding them together is just temporary to make things easier to work with. The amp back boards aren't bolted on yet in this pic.
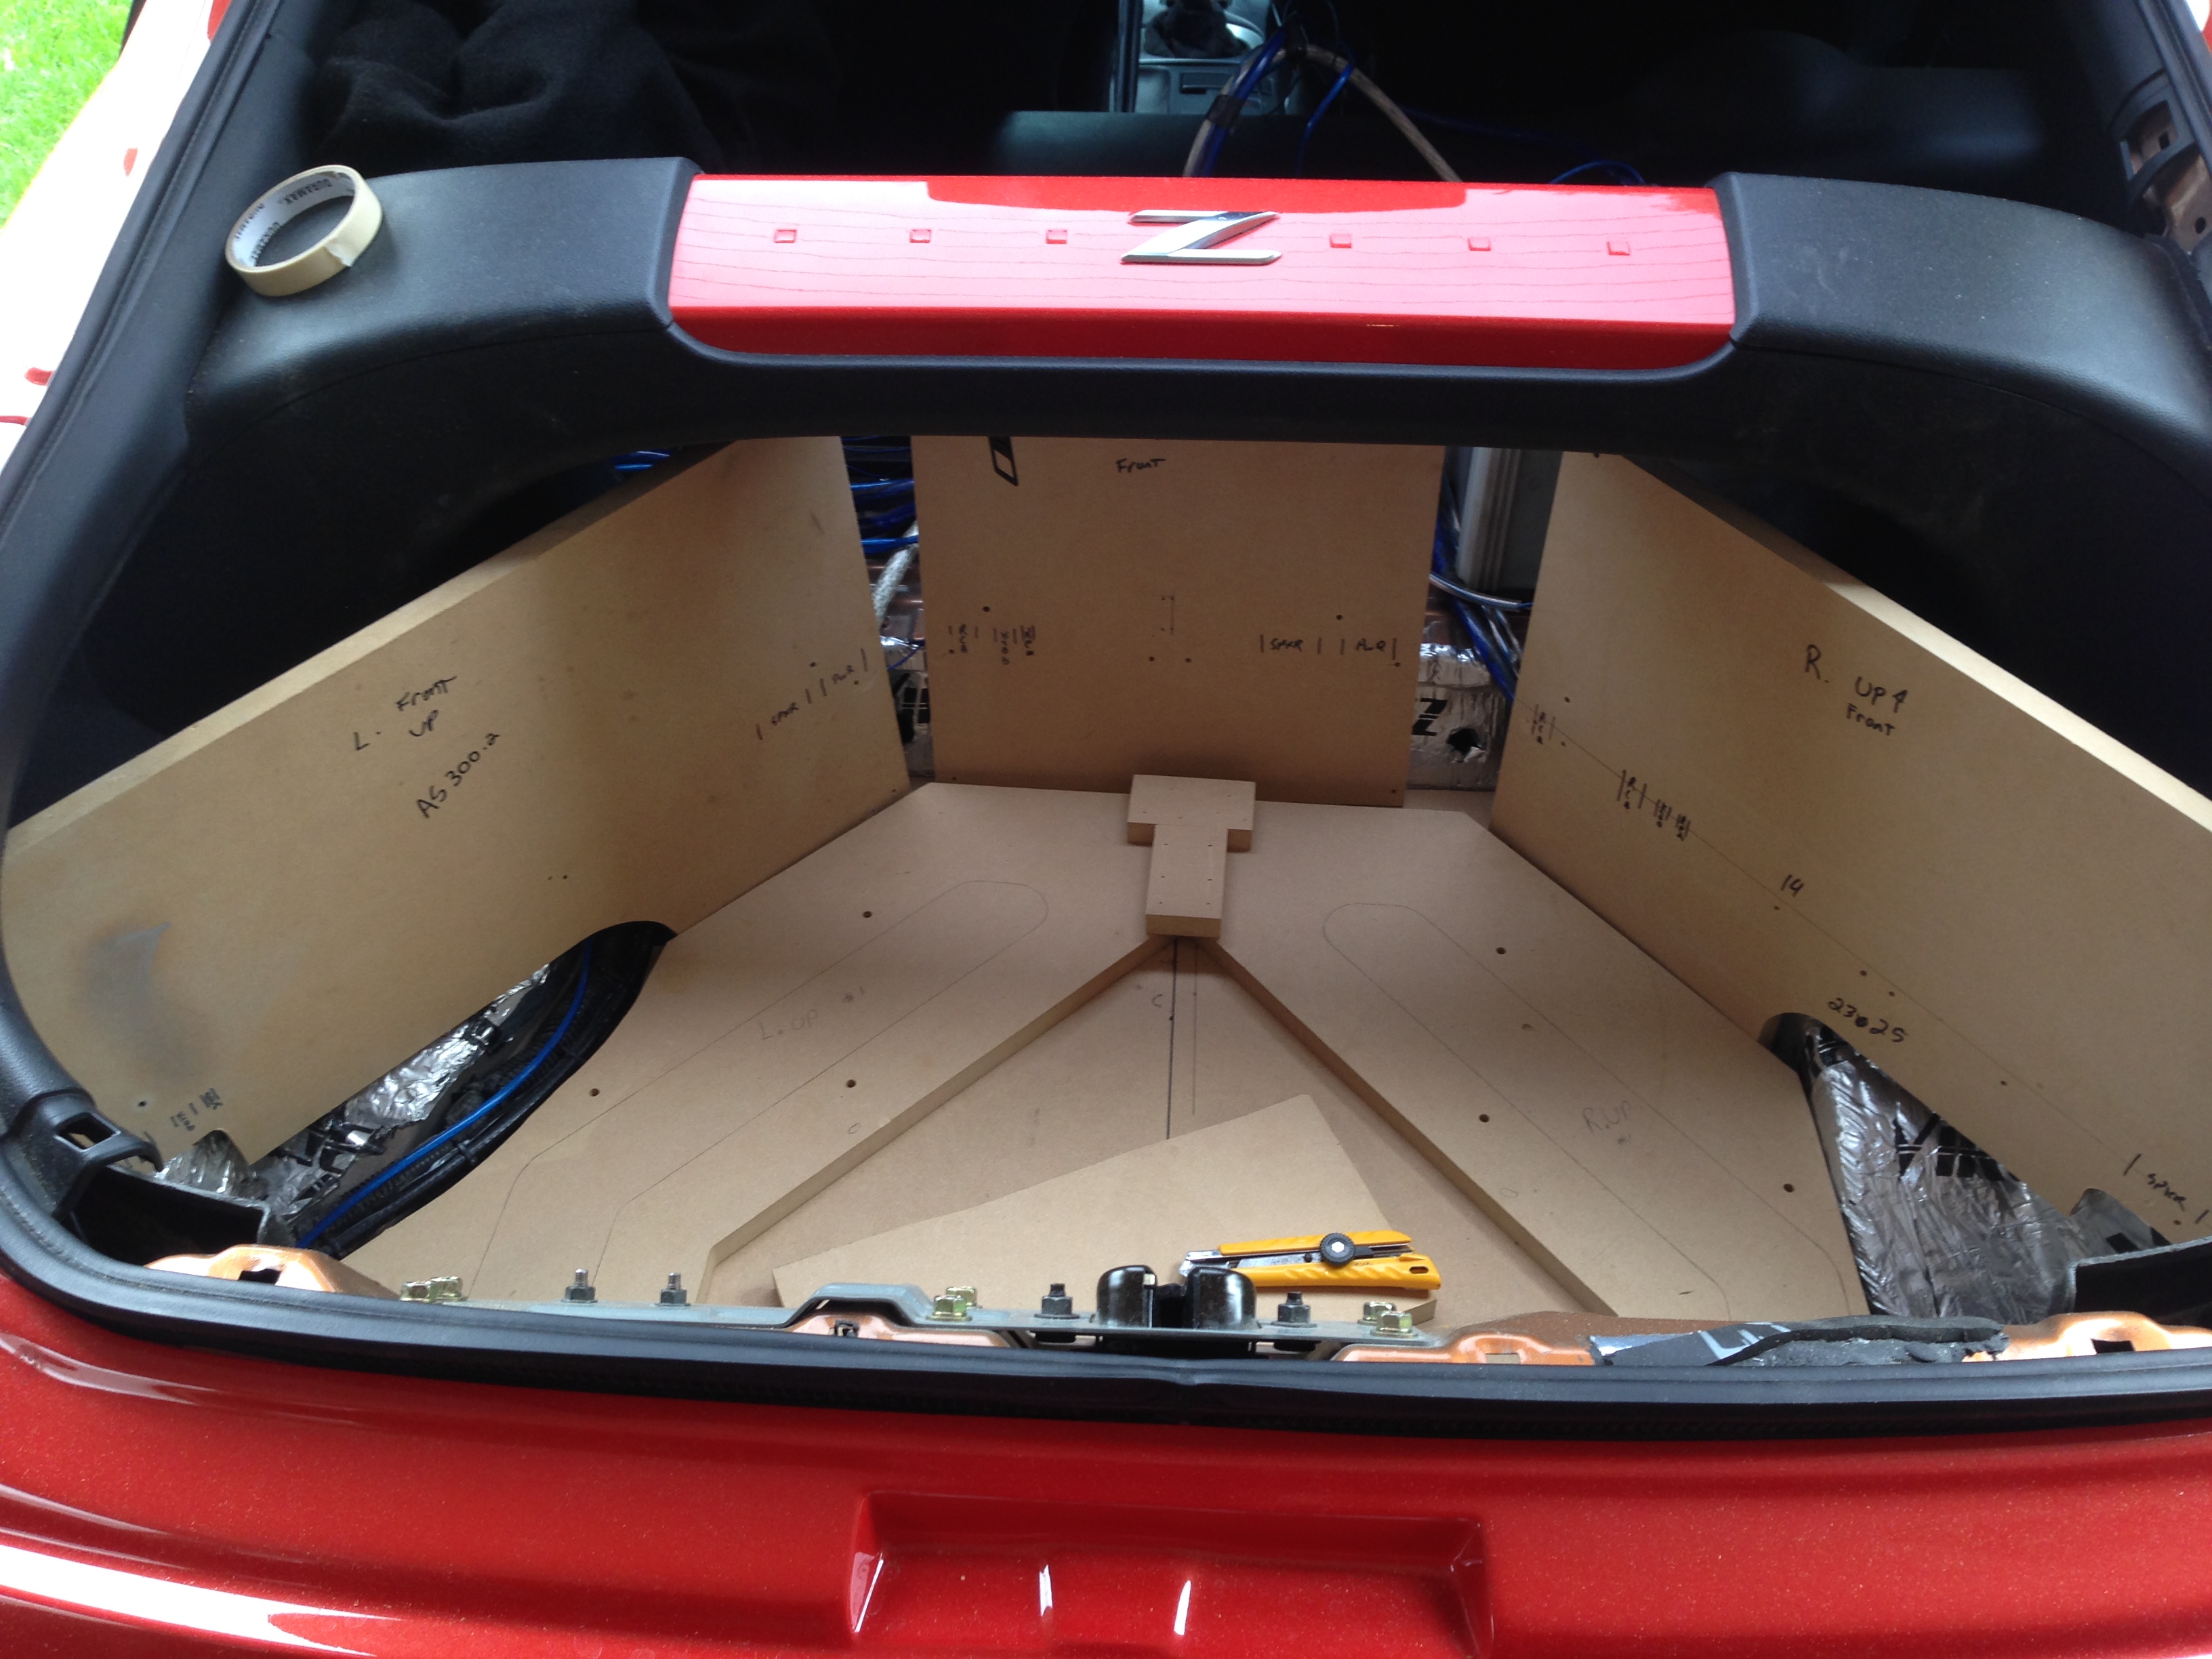
Pulled out and stacked with the amps sitting on top.

Getting everything centered in the car before I bolt it onto the base plate and to the car.
I need to go get some longer M6 screws for the stacks for the trenches tomorrow.
This is the two bases of the trenches. The two scraps of wood holding them together is just temporary to make things easier to work with. The amp back boards aren't bolted on yet in this pic.

Pulled out and stacked with the amps sitting on top.


Getting everything centered in the car before I bolt it onto the base plate and to the car.
 07-12-2016, 06:22 AM
#14
Registered User
Thread Starter
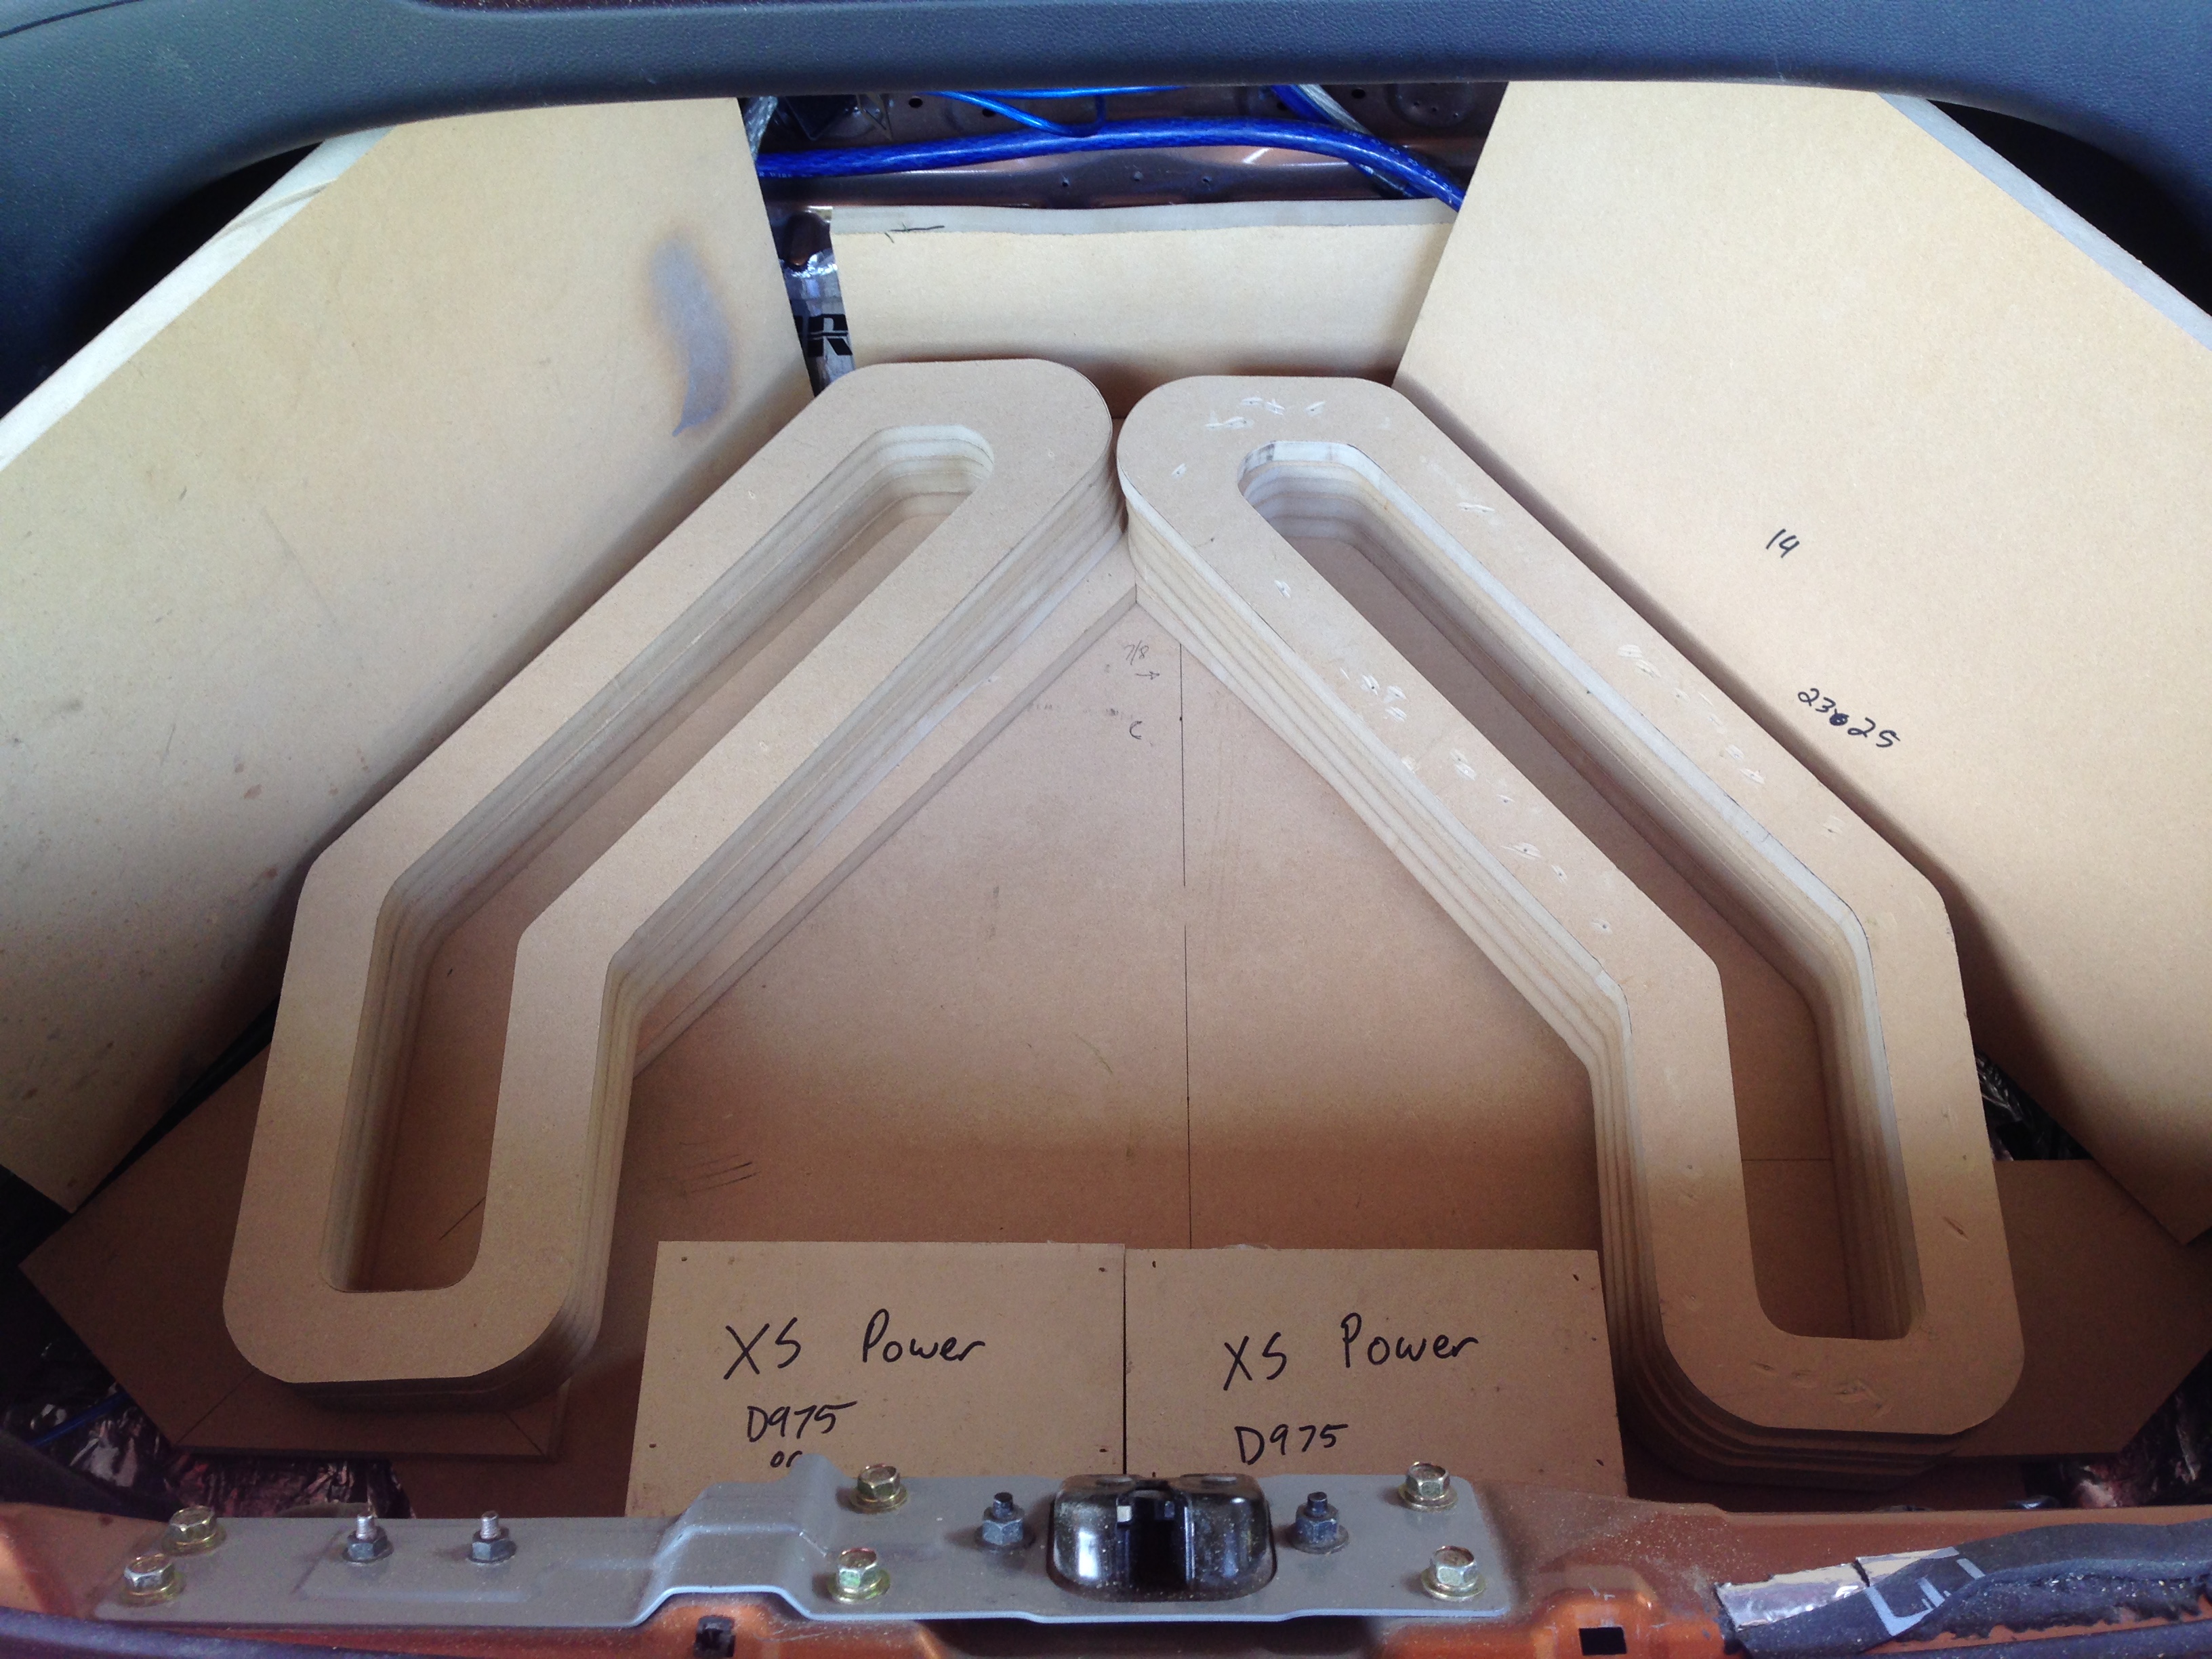
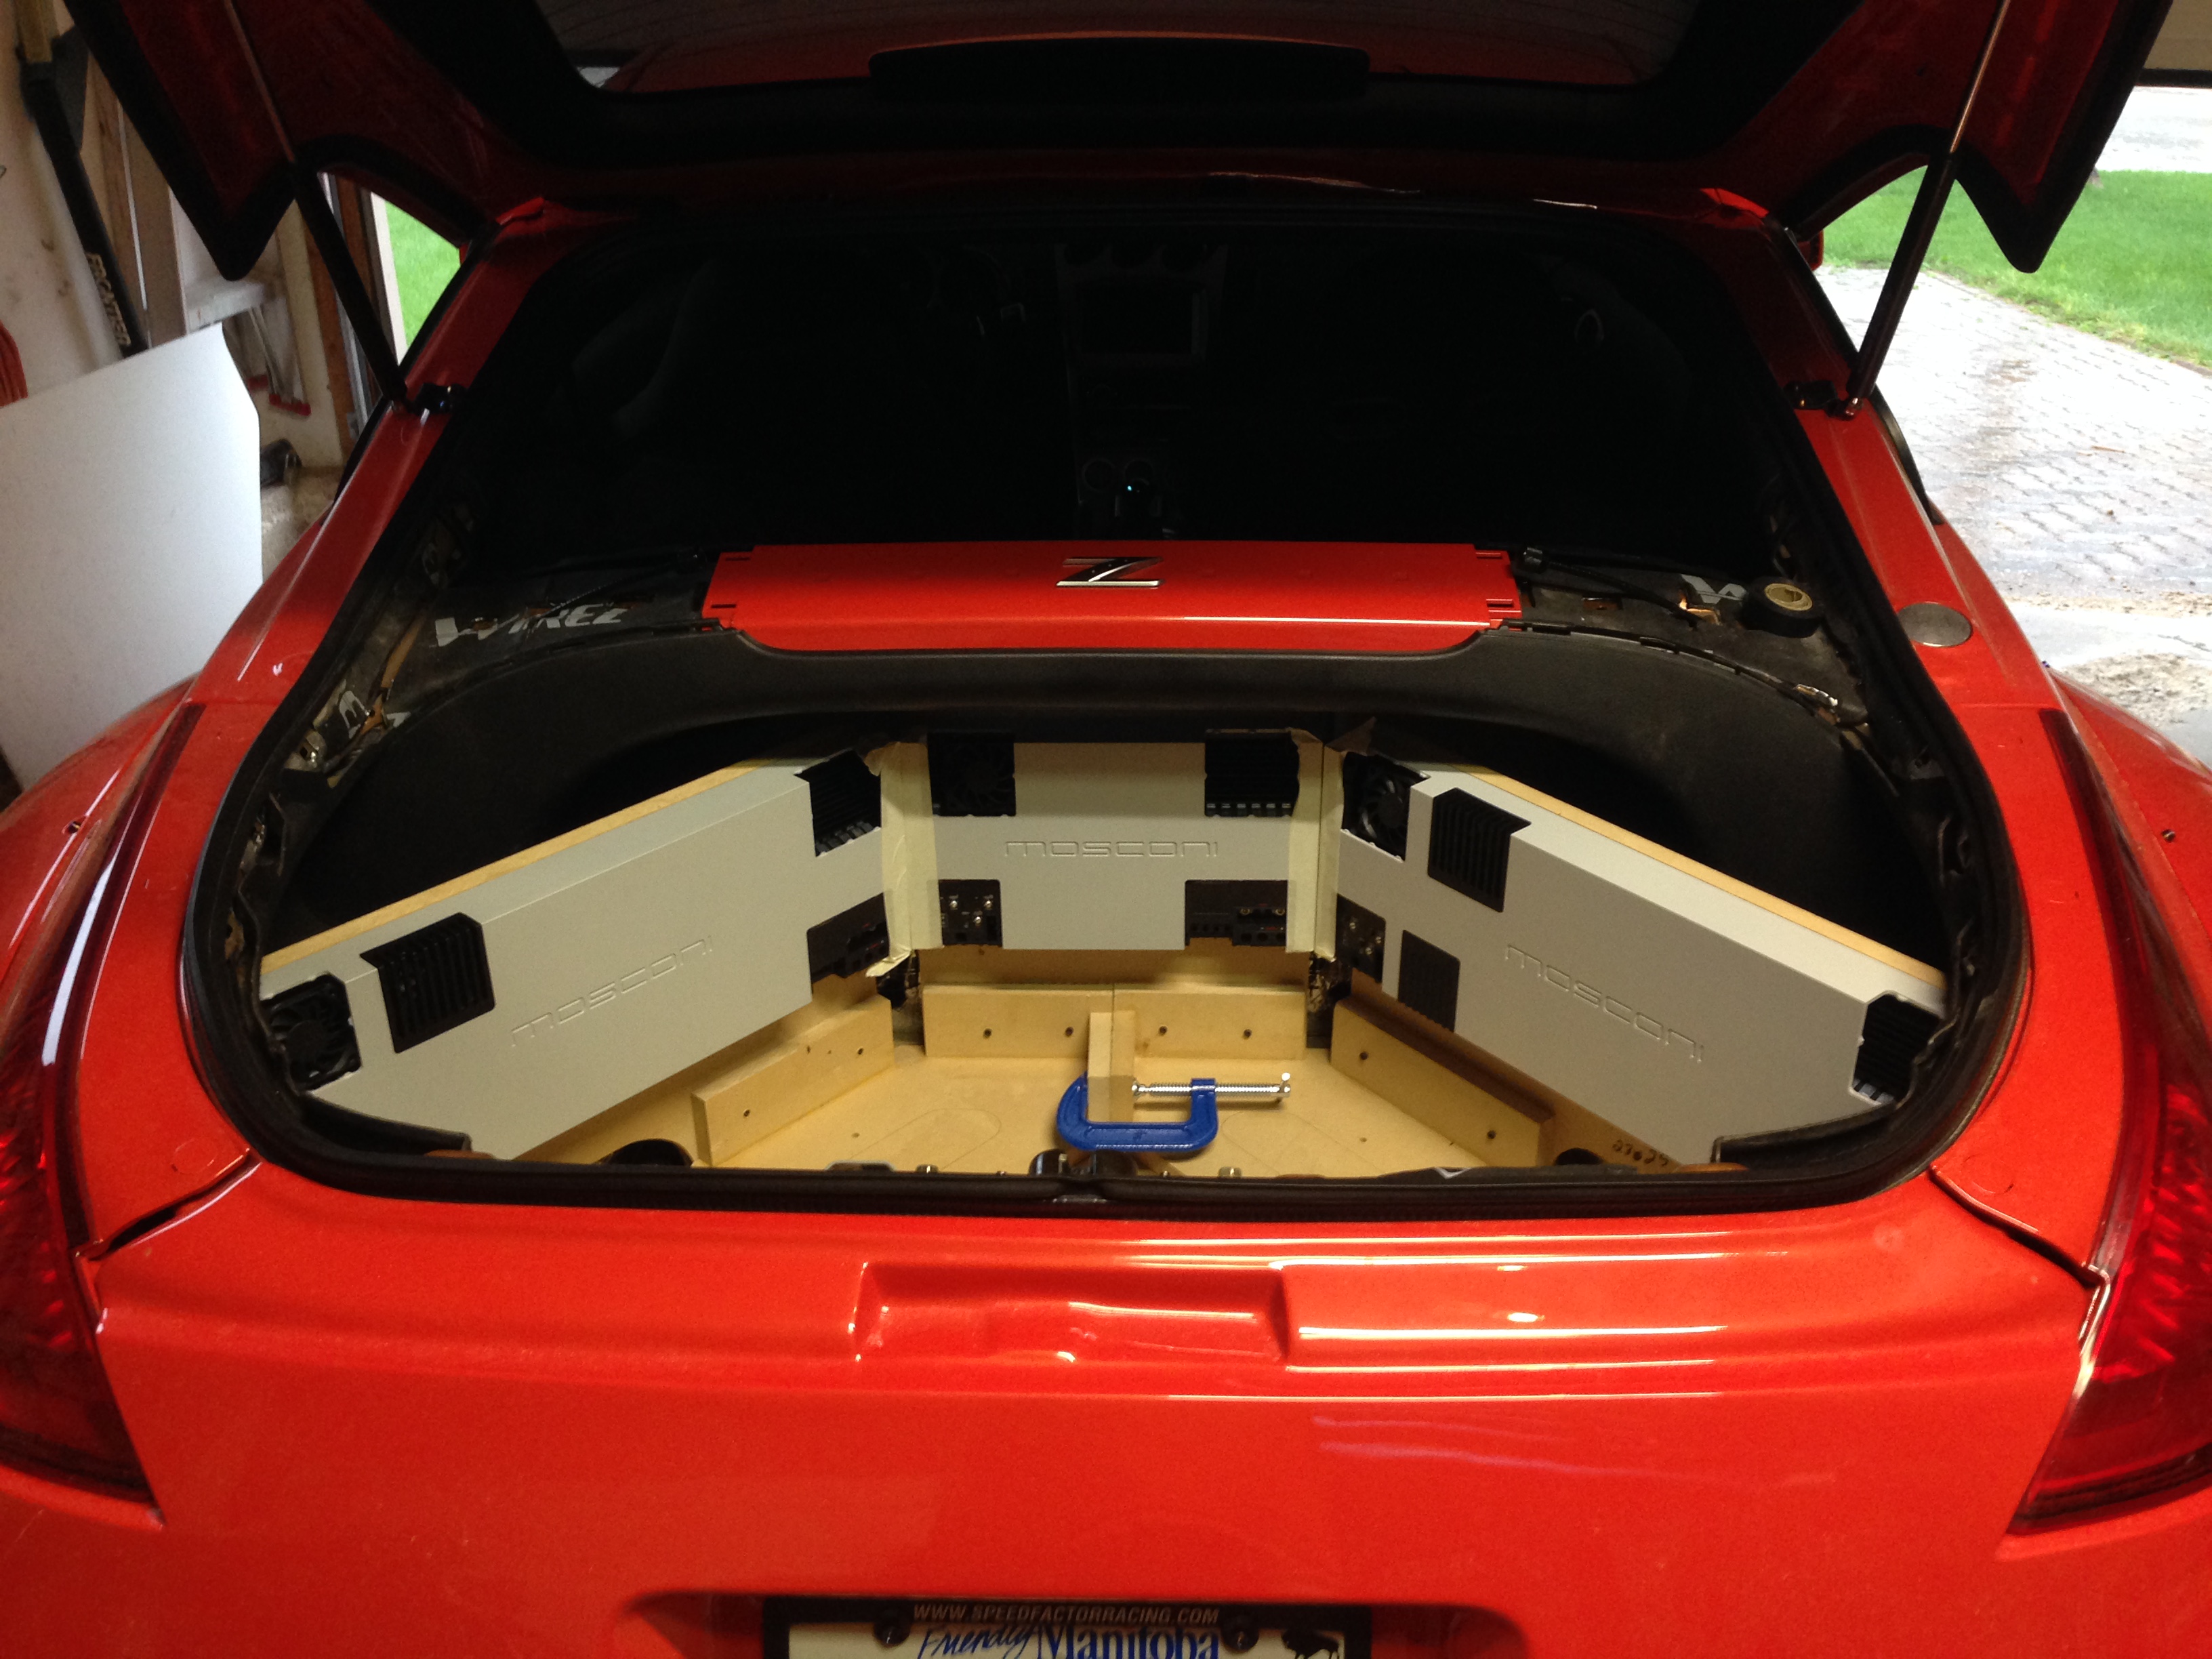
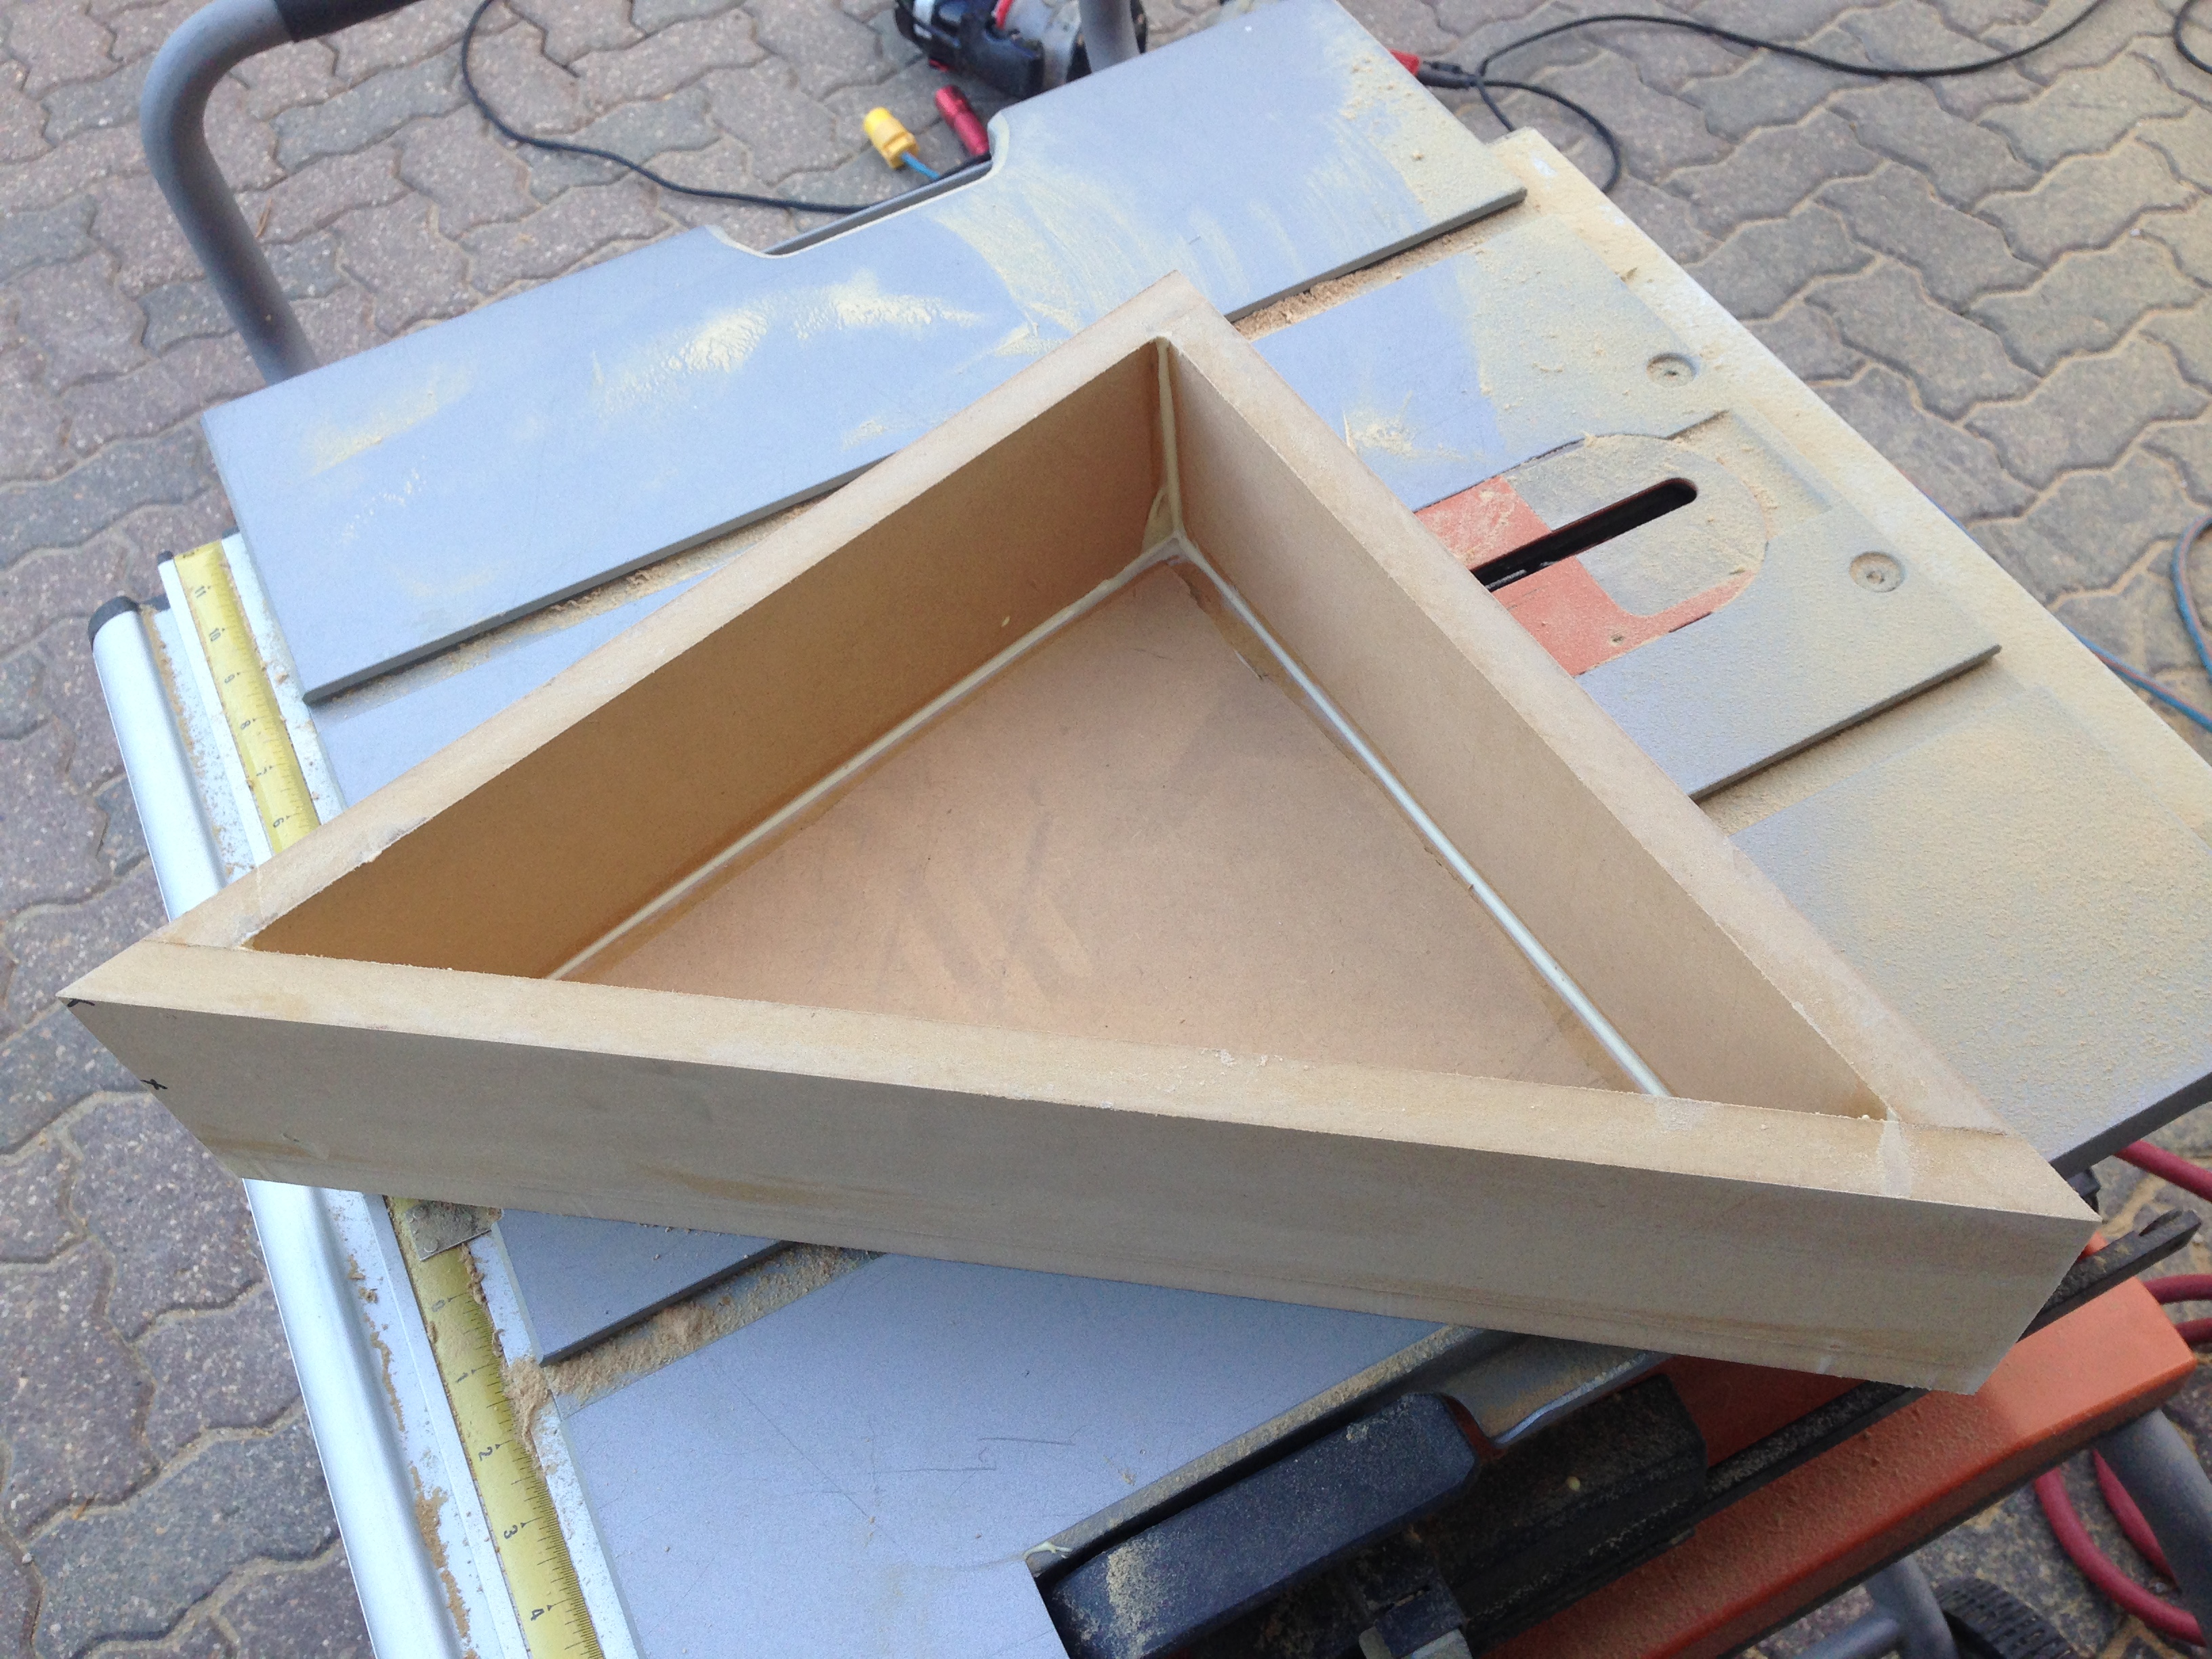
Starting to assemble the stack with the amps bolted in. The top piece of the stack will bolt to the amp's back plates as well to help support them.
Top pieces in place, as well as the bottom part of the sub enclosure. The space to the rear of the sub enclosure is for two XS Power batteries which are unfortunately on backorder but should be in in a couple weeks.
Loose fit without the amps:
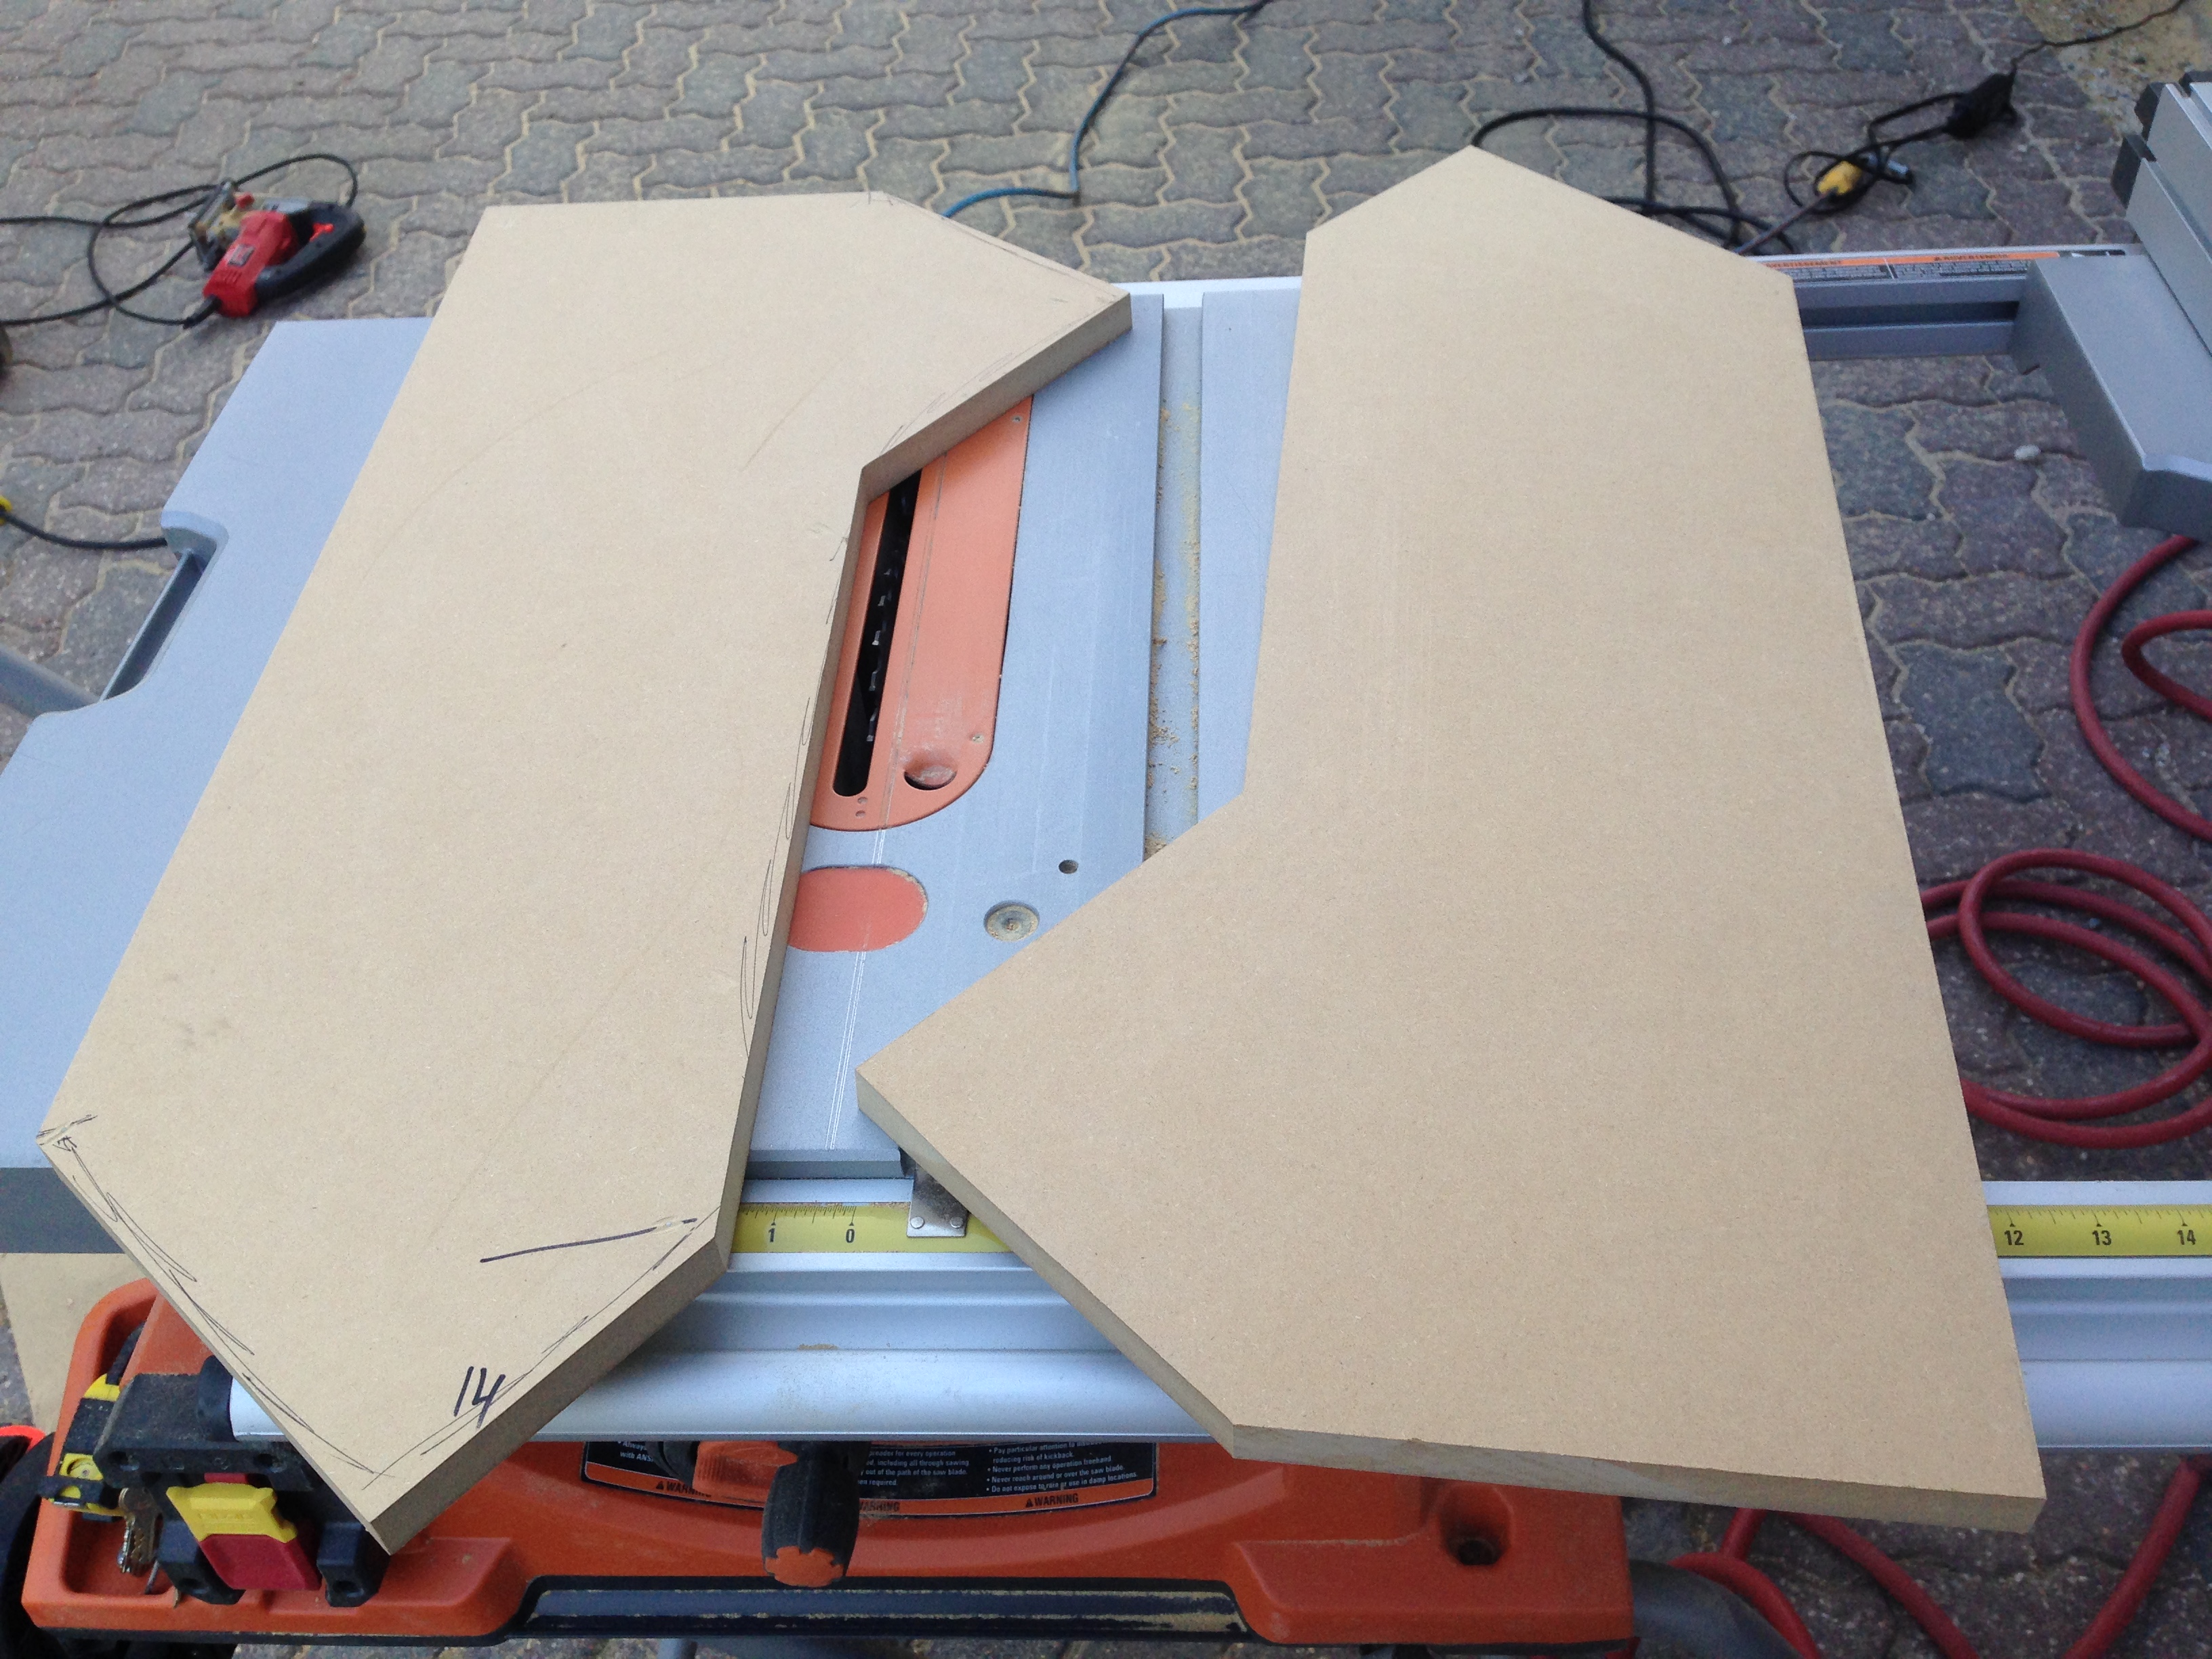
I haven't cut angles on a table saw in probably 12 years, and I never was good at it before... Got this one perfect first try!

Top pieces in place, as well as the bottom part of the sub enclosure. The space to the rear of the sub enclosure is for two XS Power batteries which are unfortunately on backorder but should be in in a couple weeks.

Loose fit without the amps:

I haven't cut angles on a table saw in probably 12 years, and I never was good at it before... Got this one perfect first try!
 07-12-2016, 11:07 AM
#16
Registered User
Thread Starter
07-13-2016, 07:05 AM
#18
Registered User
Thread Starter
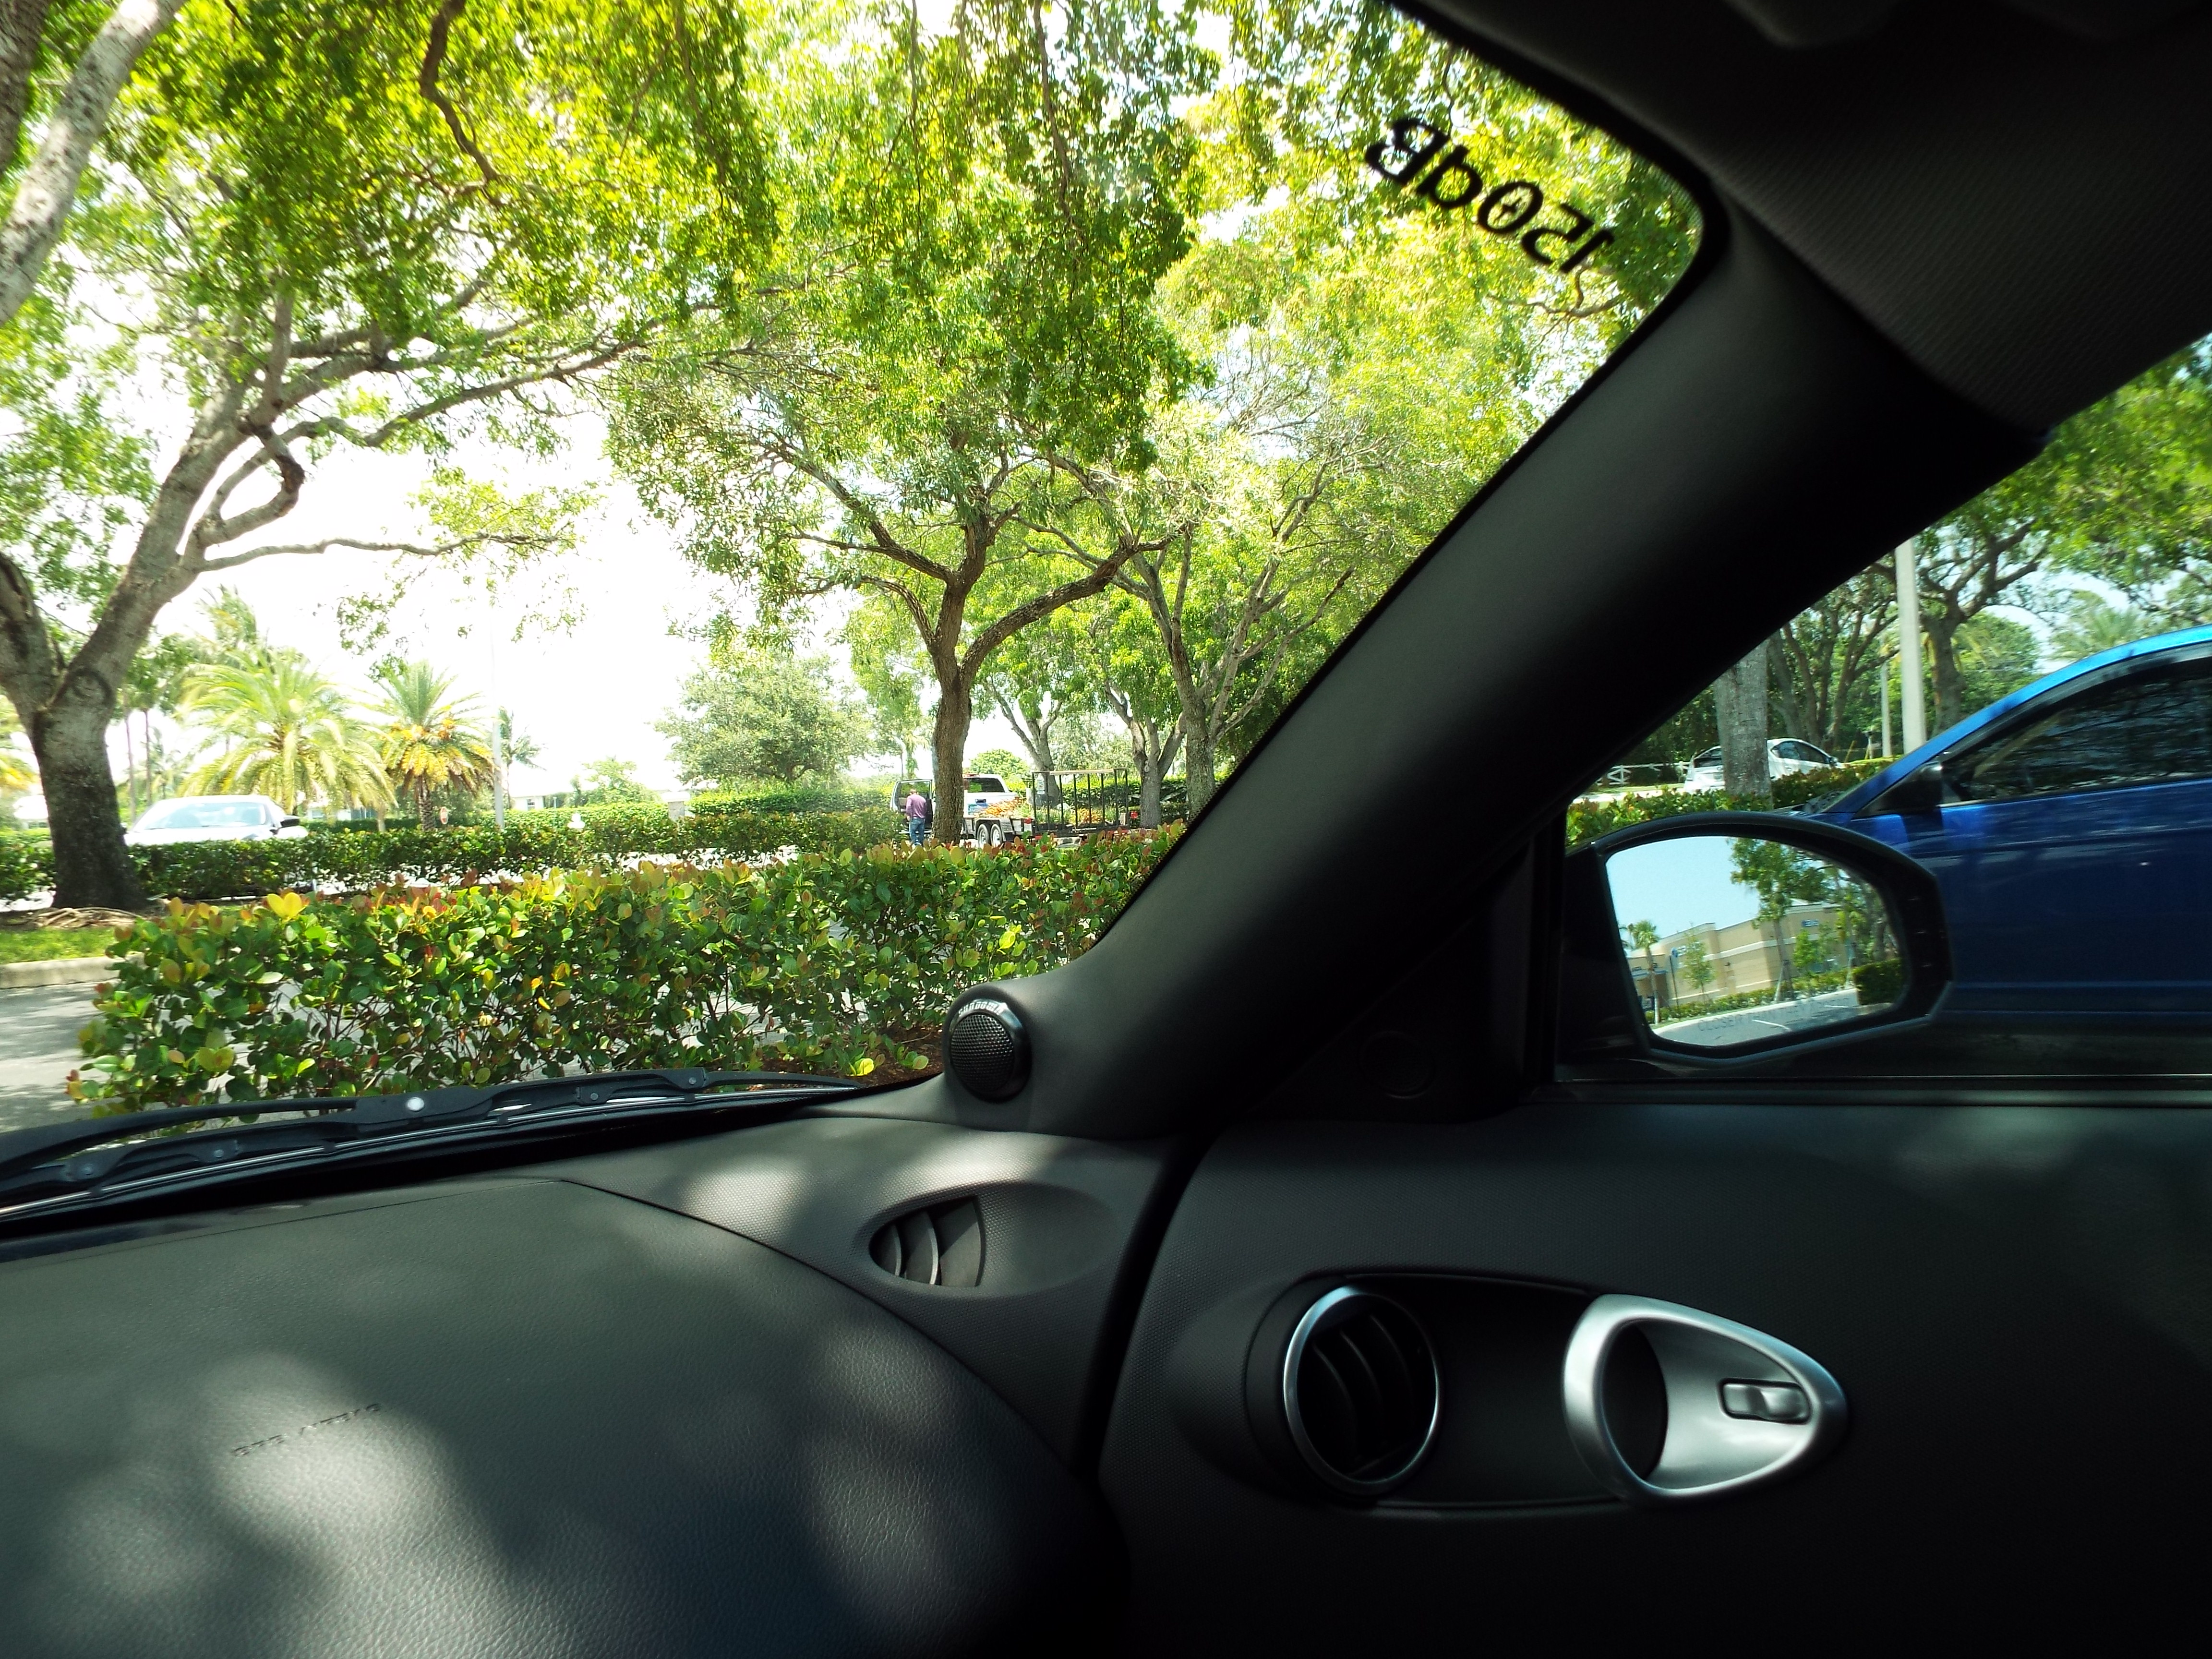
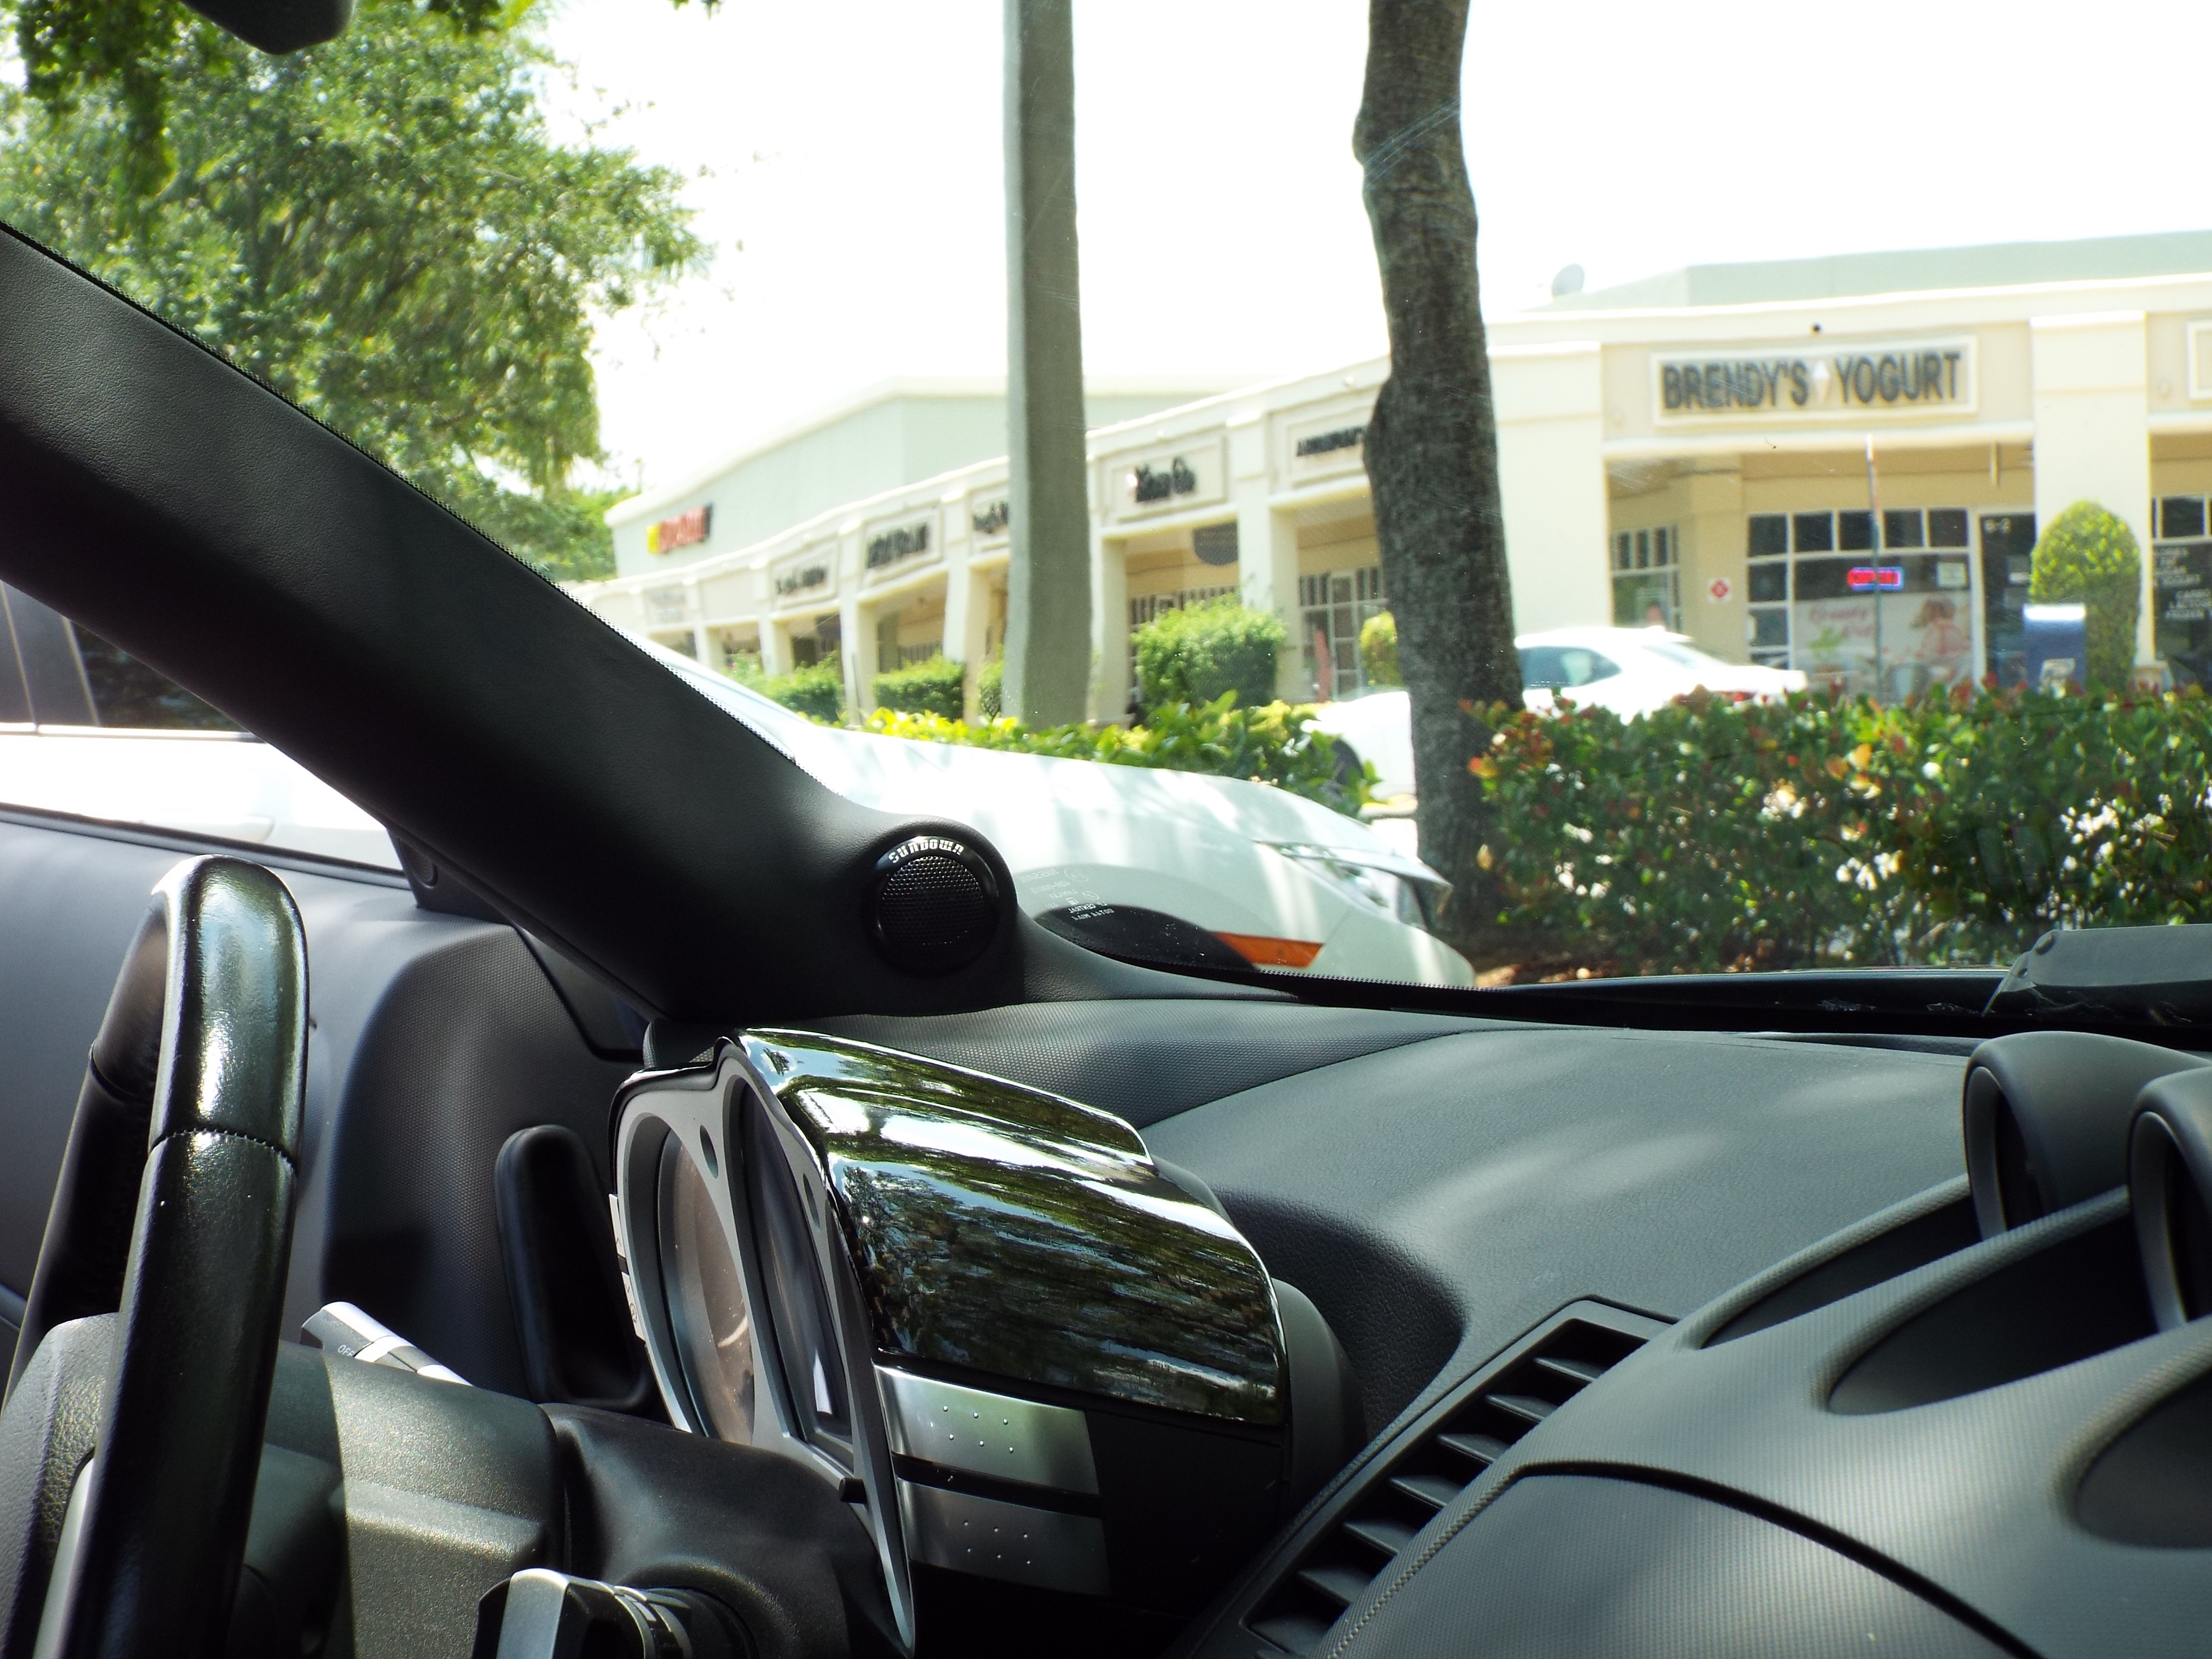
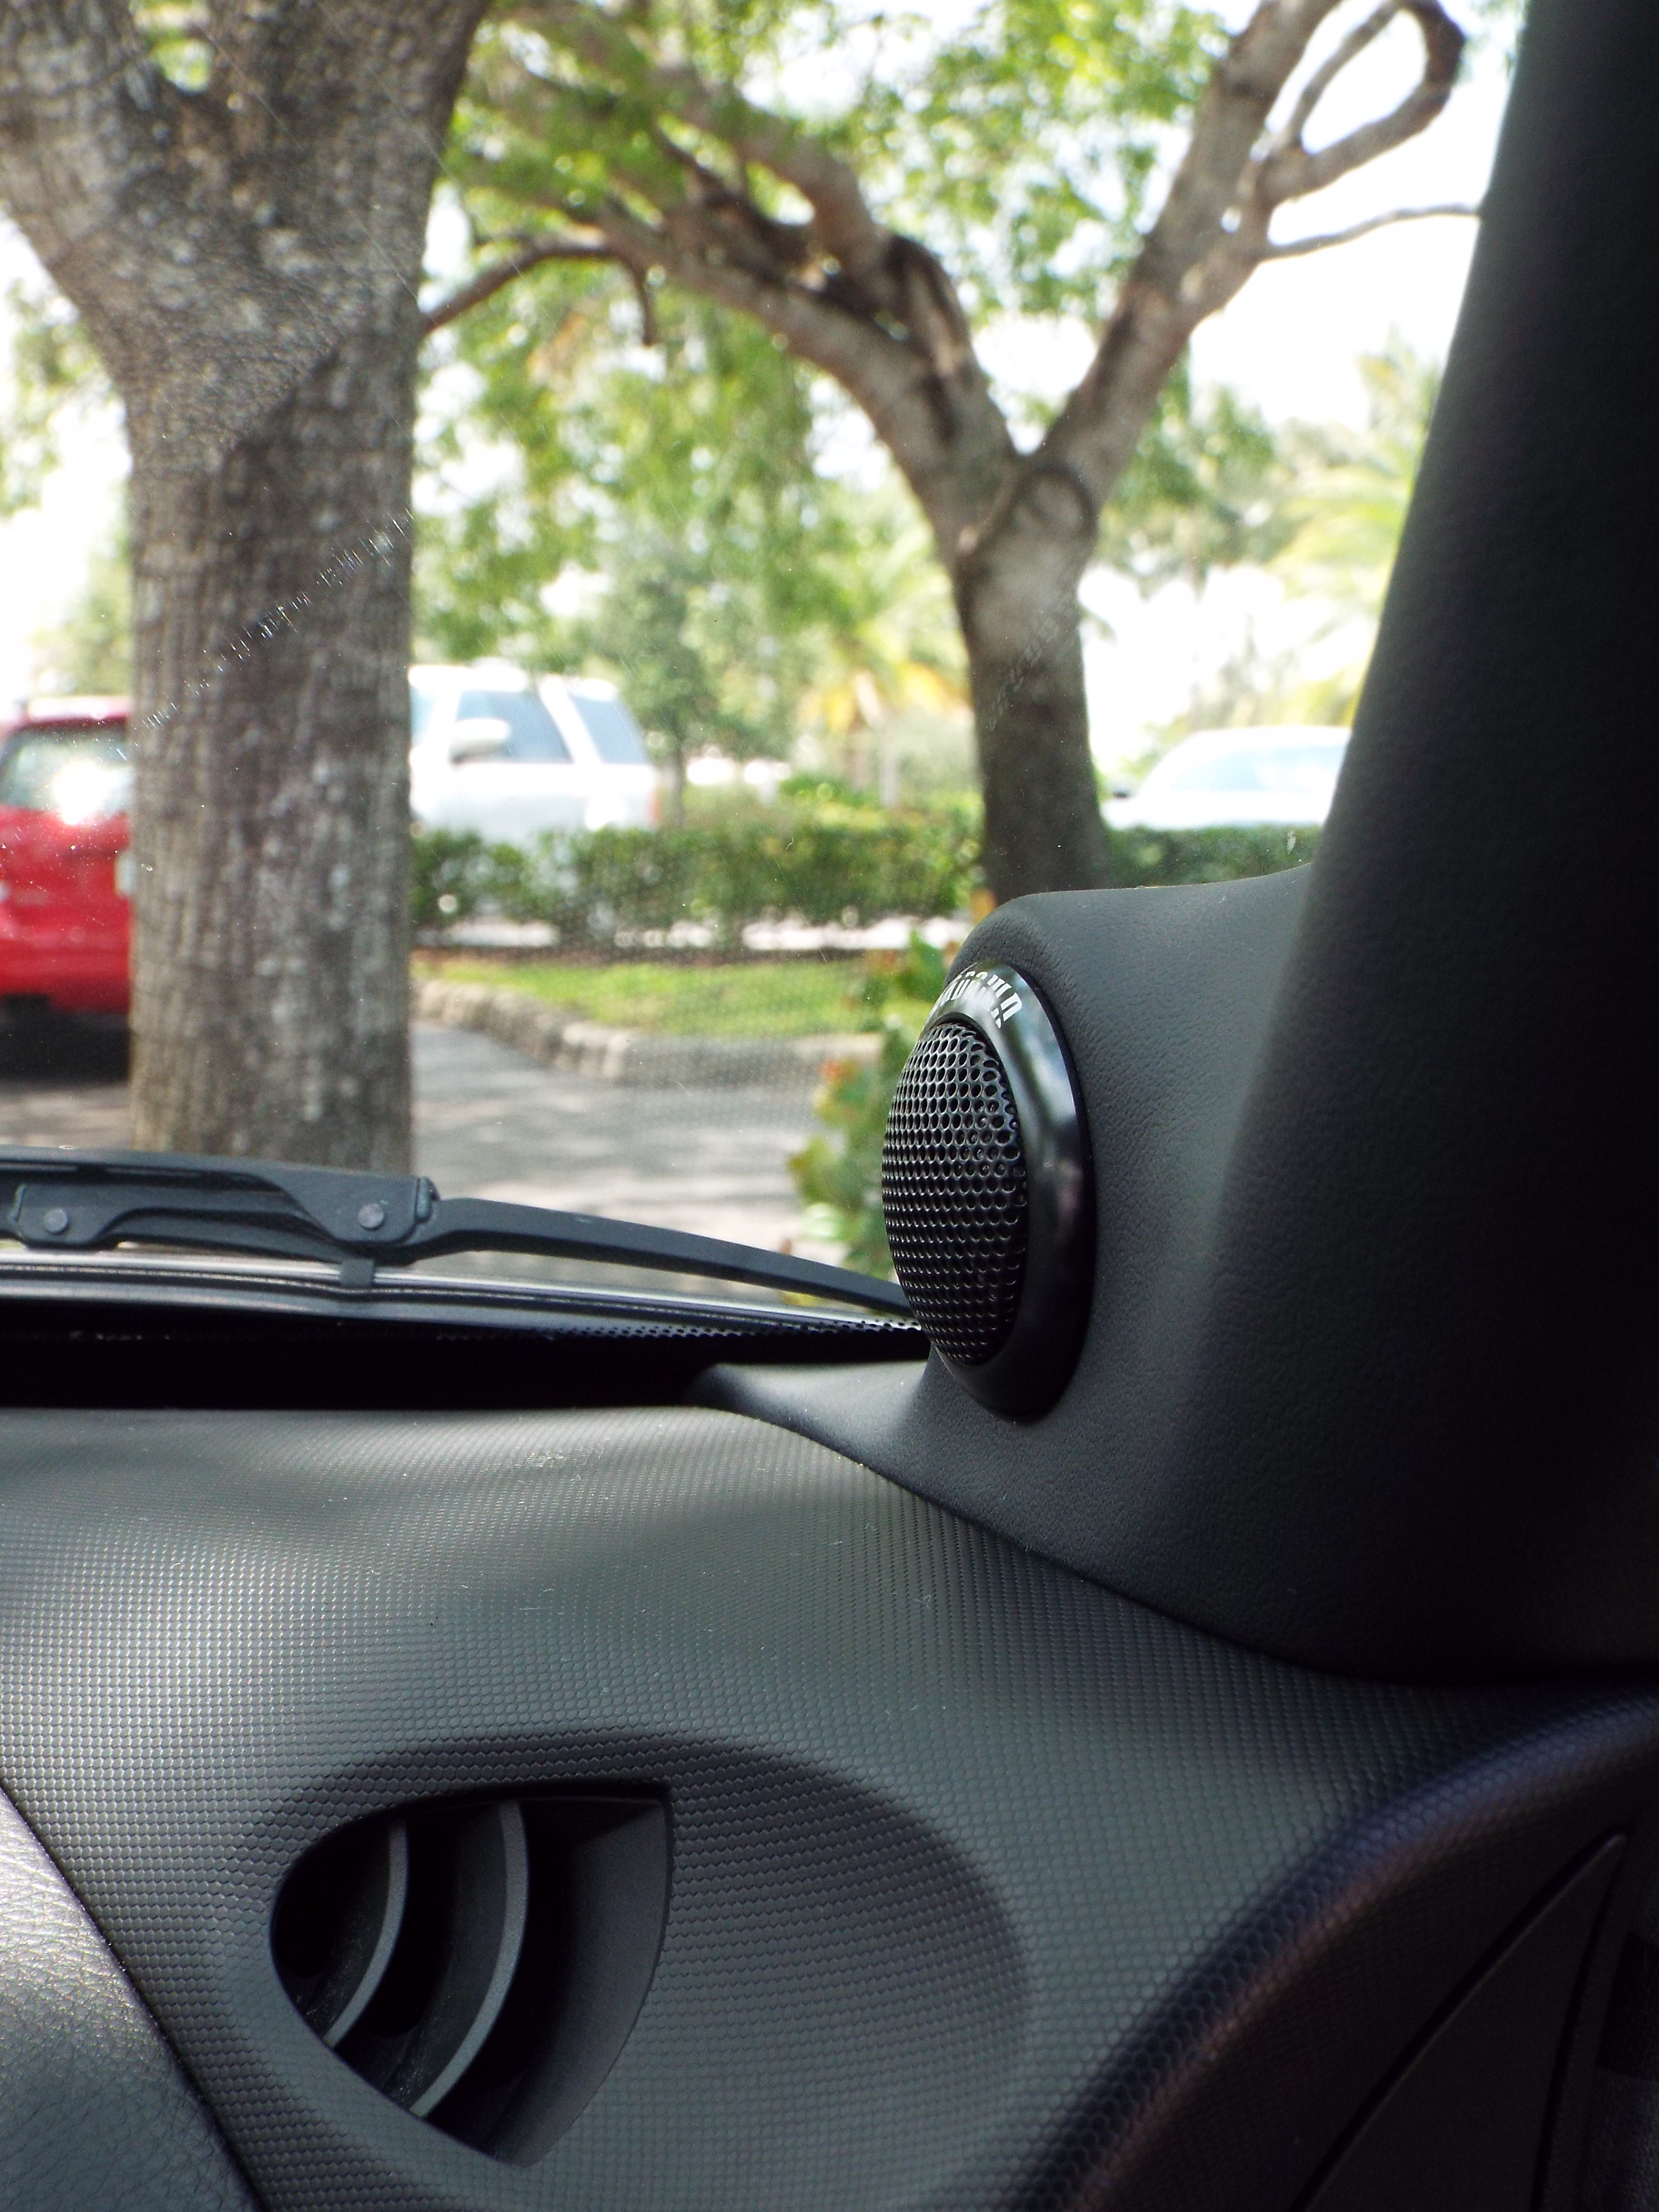
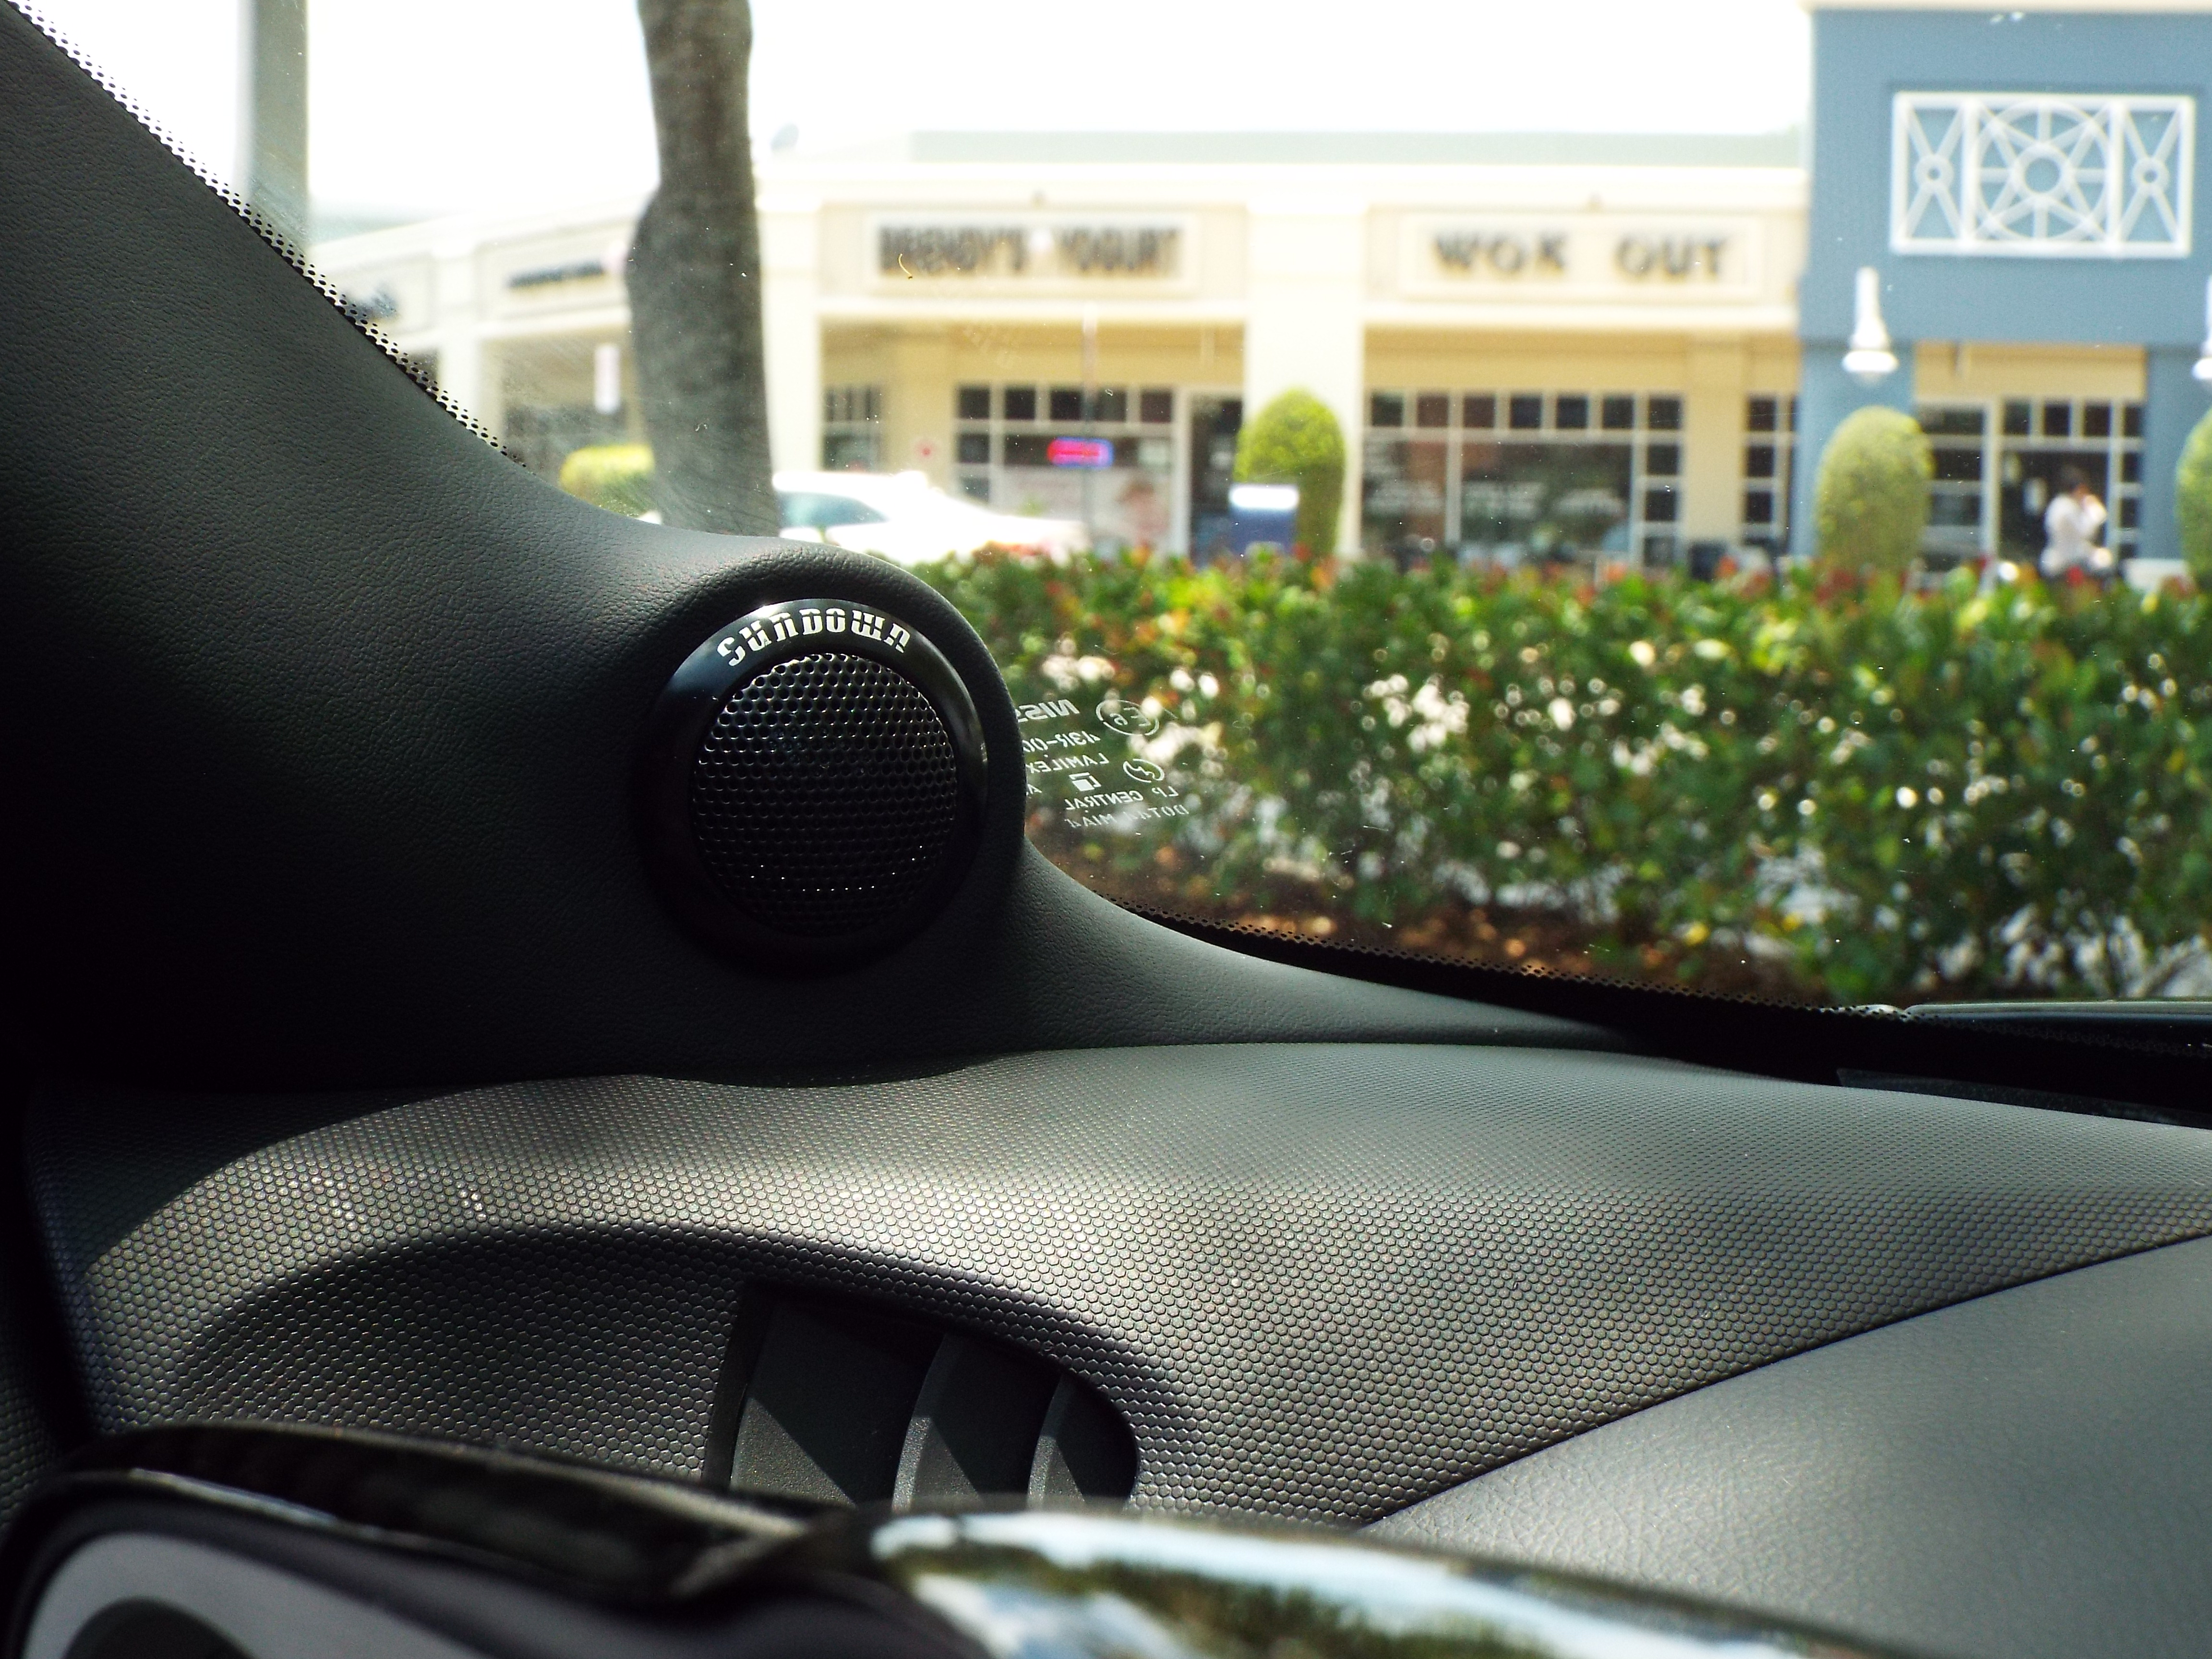
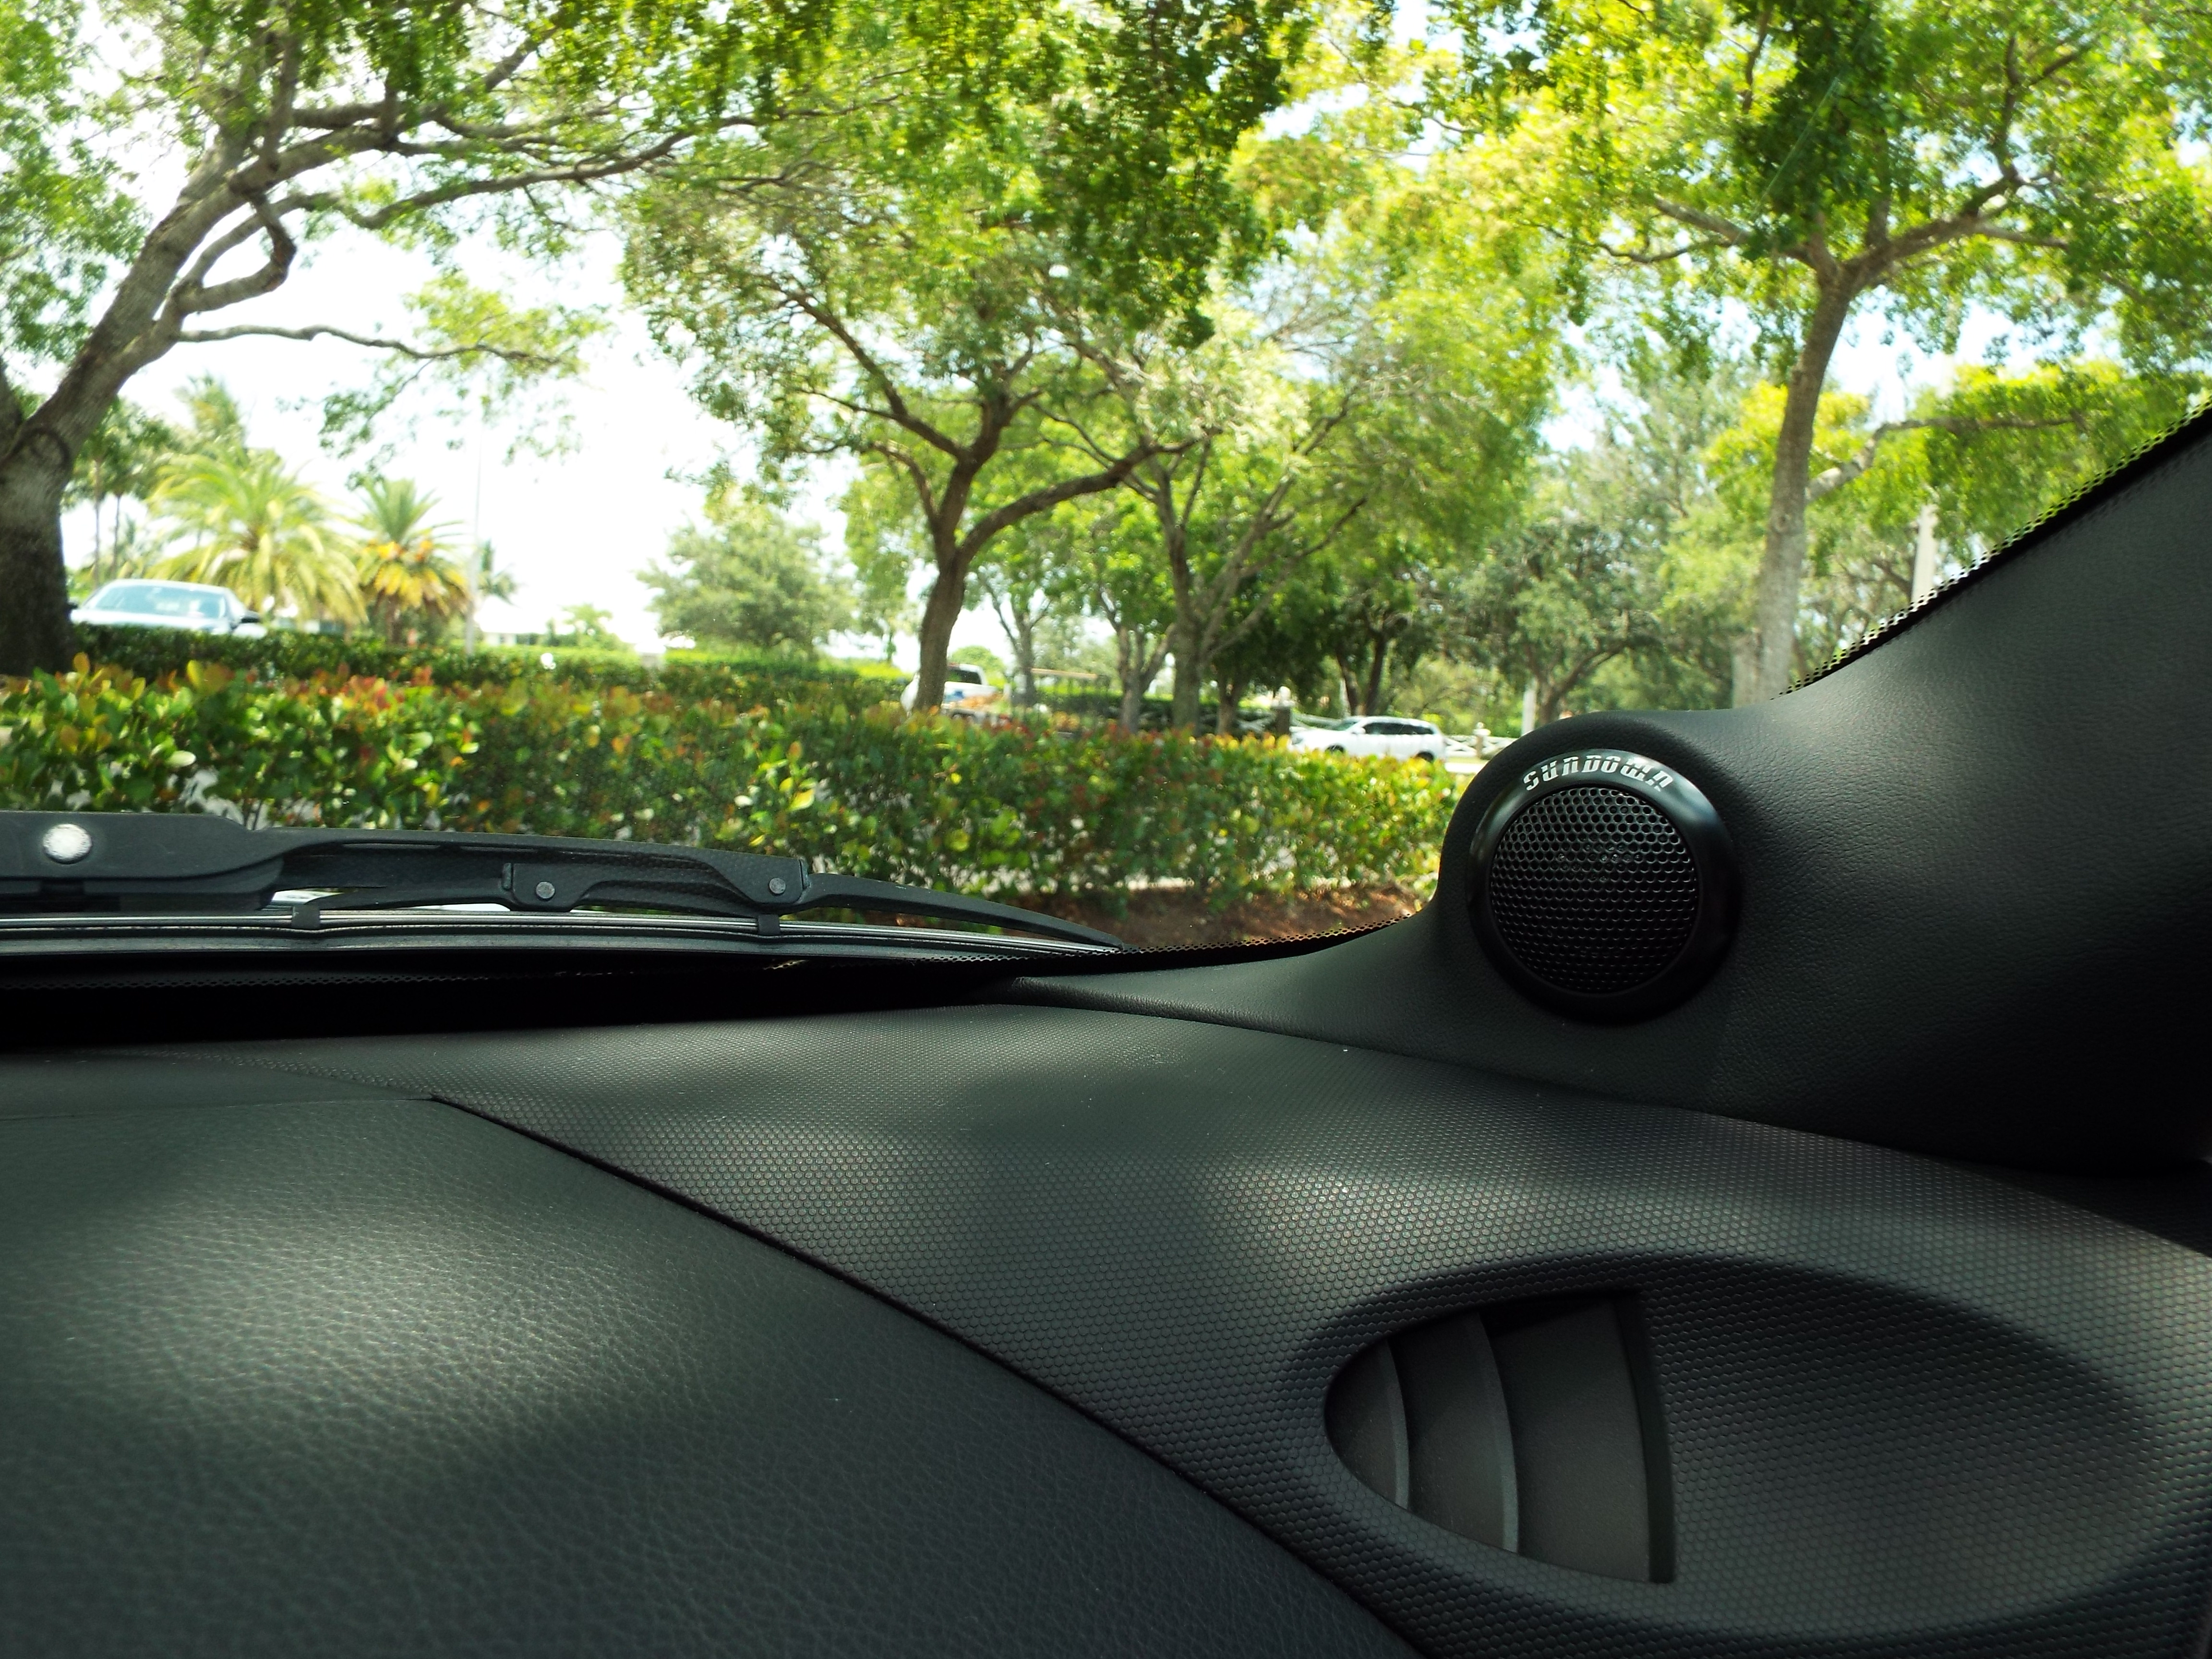
I was doing a bit of reading, I'll have to refresh my memory before I do the install.. I think on a 3 way setup like that you want the midrange as far forward as possible (it's more important than the tweeter)... I was thinking maybe midrange in the pillar forward, tweeter in the stock location (but in a new pod) and mid in the door.
Still not 100%..
07-13-2016, 07:48 AM
#19
well Bing did mine , its only 2 way , i would bounce that question off him
afaik , tweeters base of the a pillars molded, far forward, your 6.5 in the door, and your 3 or 4 " in the kick panel molded , would be my choice , if i was you
my oem locations are empty


afaik , tweeters base of the a pillars molded, far forward, your 6.5 in the door, and your 3 or 4 " in the kick panel molded , would be my choice , if i was you
my oem locations are empty

Thread
Thread Starter
Forum
Replies
Last Post