S2K Engine Start Button install write-up
 10-19-2006, 08:06 AM
#41
Yes, when you're sitting in the car, you can't see the gap at all. Once I get my CF in, I think I'm going to use a thick, clear RTV silicone to fill the gaps, then wipe the edges so that it is flush. I just don't think modelling clay will stay put long term. Once the RTV sets, I'll either paint it black or silver. I think when I take the button back out for the CF install, I'll also paint the trim ring a matte silver to match the rest of the interior trim.
 10-19-2006, 11:12 AM
#42
Registered User
iTrader: (6)

Join Date: Feb 2006
Location: Boise, ID
Posts: 733
Likes: 0
Received 0 Likes
on
0 Posts
Originally Posted by MustGoFastR
I think I'm going to use a thick, clear RTV silicone to fill the gaps, then wipe the edges so that it is flush.
 10-19-2006, 04:32 PM
#44
Yep, that'll work. You just have to get it in the gap and wipe off the excess. I don't know how well it'll wipe off the OEM dash piece, though, since it is textured. I'll be using it on a smooth, clearcoated CF overlay and it'll clean up easy off of that.
10-20-2006, 10:05 AM
#45
Registered User
iTrader: (6)
Join Date: Feb 2006
Location: Boise, ID
Posts: 733
Likes: 0
Received 0 Likes
on
0 Posts
Originally Posted by MustGoFastR
Yep, that'll work. You just have to get it in the gap and wipe off the excess. I don't know how well it'll wipe off the OEM dash piece, though, since it is textured. I'll be using it on a smooth, clearcoated CF overlay and it'll clean up easy off of that.
10-22-2006, 10:52 AM
#47
New Member
iTrader: (12)
Join Date: Sep 2006
Location: Sic Semper Tyrannis
Posts: 760
Likes: 0
Received 0 Likes
on
0 Posts
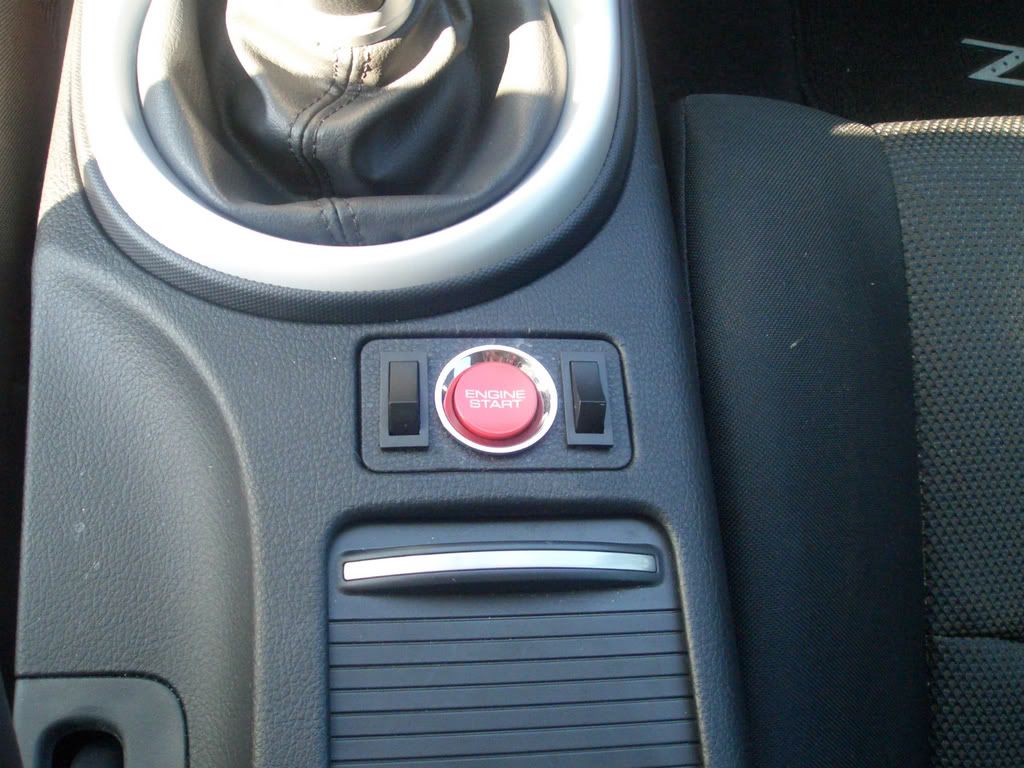
Well I just finished the install of this on my 06 MT and here is some pics. I have two swithces with the button as well. The switch on the left is for starting the car with the button and the switch on the left is to start it with the key. Install took about an hour and a half. Would have been shorter but I wasnt prepared for everything that I would need and it was getting dark. Kinda hard to see under the dash with a flash light.
here are the pics...
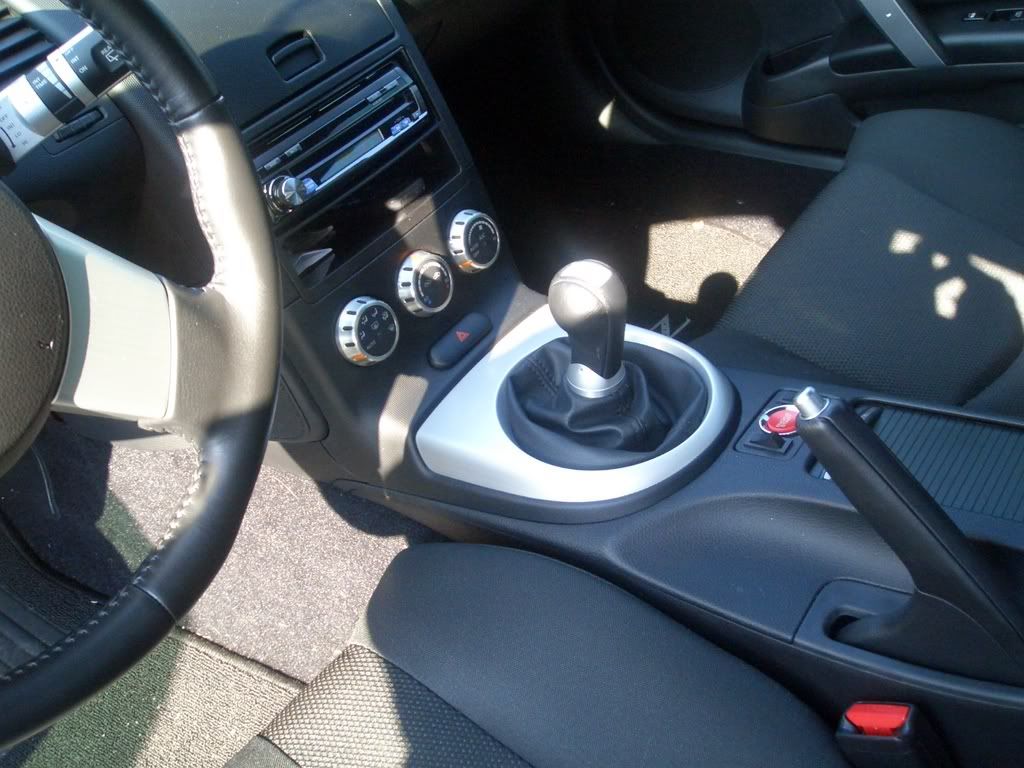
here are the pics...
10-22-2006, 01:07 PM
#48
Registered User

Join Date: Dec 2004
Location: dallas, texas
Posts: 425
Likes: 0
Received 0 Likes
on
0 Posts
Originally Posted by rwalton1129
Well I just finished the install of this on my 06 MT and here is some pics. I have two swithces with the button as well. The switch on the left is for starting the car with the button and the switch on the left is to start it with the key.
Can you please re-explain why you have three switches and what they do. Install looks sweet, but trying to understand what the he11 you did....
10-22-2006, 01:35 PM
#49
Looks good!
Yeah, +1 on the switch explanation, though... You should only need one switch in-line with the starter wire to enable/disable key start... Oh... is the second switch to disable the button? Interesting. Why did you feel the need to switch the button?
Yeah, +1 on the switch explanation, though... You should only need one switch in-line with the starter wire to enable/disable key start... Oh... is the second switch to disable the button? Interesting. Why did you feel the need to switch the button?
Last edited by MustGoFastR; 10-22-2006 at 02:21 PM.
10-22-2006, 04:32 PM
#50
New Member
iTrader: (12)
Join Date: Sep 2006
Location: Sic Semper Tyrannis
Posts: 760
Likes: 0
Received 0 Likes
on
0 Posts
Yes one button is to start the car with the key and one to start the car with the key. I was trying to wire it where one switch would allow the acc or positon 2 and one for the button and power or position 3. I was doing that trying to find a way to not use the key at all. I have a few ideas. So instead when switch on left is open the car will not start with key or button. Kind of a safety measure for when I figure out how to bypass the key altogether.
 10-22-2006, 09:02 PM
#54

Originally Posted by rwalton1129
I was thinking of getting another key made and cutting the chip part off and taping/glueing it inside the stering wheel cover...
I want to tackle the push button start next spring, but with heated seats, my issue is figuing out a neat install point.
10-22-2006, 10:40 PM
#55
Registered User
iTrader: (9)

Join Date: Sep 2005
Location: Socal.
Posts: 188
Likes: 0
Received 0 Likes
on
0 Posts
Originally Posted by rwalton1129
Well I just finished the install of this on my 06 MT and here is some pics. I have two swithces with the button as well. The switch on the left is for starting the car with the button and the switch on the left is to start it with the key. Install took about an hour and a half. Would have been shorter but I wasnt prepared for everything that I would need and it was getting dark. Kinda hard to see under the dash with a flash light.
here are the pics...
here are the pics...
10-23-2006, 03:57 AM
#56
New Member
iTrader: (12)
Join Date: Sep 2006
Location: Sic Semper Tyrannis
Posts: 760
Likes: 0
Received 0 Likes
on
0 Posts
^^^^^^ Look at page one. This thread is the write up. I just posted the pics of how mine went..
Yes here is a way around...
The switchs have to be in a certain positon for the car to start. I was also thinking of installing these two swiches with the oem VDC and TCS buttons. I have the base model and neither of these systems just a blank panel. I was thinking when I figure out the keyless part I will order some of these buttons so that I can incorporate the switches to that so no one would know how to get the car to start via the button...
Originally Posted by usmanasif
Err...doesn't that beat the entire purpose of having the chip in the first place? All a thief will have to do is to break into the car and it's his.
I want to tackle the push button start next spring, but with heated seats, my issue is figuing out a neat install point.
I want to tackle the push button start next spring, but with heated seats, my issue is figuing out a neat install point.
Yes here is a way around...
The switchs have to be in a certain positon for the car to start. I was also thinking of installing these two swiches with the oem VDC and TCS buttons. I have the base model and neither of these systems just a blank panel. I was thinking when I figure out the keyless part I will order some of these buttons so that I can incorporate the switches to that so no one would know how to get the car to start via the button...
10-23-2006, 06:02 AM
#57
Registered User
iTrader: (154)
Join Date: Jun 2003
Location: Hills of Anaheim
Posts: 10,735
Likes: 0
Received 0 Likes
on
0 Posts
Originally Posted by rwalton1129
I was thinking of getting another key made and cutting the chip part off and taping/glueing it inside the stering wheel cover...
10-24-2006, 06:37 AM
#58
Registered User
iTrader: (6)
Join Date: Feb 2006
Location: Boise, ID
Posts: 733
Likes: 0
Received 0 Likes
on
0 Posts
It's too bad that there isnt a cigarette lighter closer to the dash, I've seen a lot of people install this same button in there, and it fits perfectly 
Last edited by TurboSteve; 10-26-2006 at 06:23 AM.
