From Stance to Track - 06' 350z Log/Build

 08-24-2014, 03:35 PM
#42

Check your lca bushings and your compression rod bushings, willing to bet if it was that low then those bushings are all shot. whiteline and SPL can get those all back to better than stock. also check the tightness of the compression rod bolts, if they are loose they will pop, especially when reversing and turning at low speed
08-27-2014, 06:53 AM
#43
Registered User
Thread Starter
iTrader: (2)

Join Date: Nov 2008
Location: Tennessee
Posts: 101
Likes: 0
Received 0 Likes
on
0 Posts
Check your lca bushings and your compression rod bushings, willing to bet if it was that low then those bushings are all shot. whiteline and SPL can get those all back to better than stock. also check the tightness of the compression rod bolts, if they are loose they will pop, especially when reversing and turning at low speed
08-27-2014, 06:11 PM
#44
Registered User
iTrader: (1)

Join Date: Aug 2014
Location: California
Posts: 23
Likes: 0
Received 0 Likes
on
0 Posts
more pistons and greater surface area doesnt mean the car will stop any quicker. Aside from acting as a greater heat sink to help prevent brake fade, your braking performance definitely diminished with that switch. there is a reason brembo is the #1 brake manufacturer on earth 
08-29-2014, 05:08 AM
#45
Registered User
Thread Starter
iTrader: (2)
Join Date: Nov 2008
Location: Tennessee
Posts: 101
Likes: 0
Received 0 Likes
on
0 Posts
more pistons and greater surface area doesnt mean the car will stop any quicker. Aside from acting as a greater heat sink to help prevent brake fade, your braking performance definitely diminished with that switch. there is a reason brembo is the #1 brake manufacturer on earth
Could you please provide data that back up your claims of:
A. "...your braking performance definitely diminished with that switch."
B. "There is a reason Brembo is the #1 brake manufacturer on earth
"Also, remember I do not daily drive the car with factory tires or suspension.
Don't get me wrong, Brembos are great brakes - but if they are the best on earth as you claim, why did Porsche just drop them?
(for your reading enjoyment)
http://www.ogracing.com/blog/2014/01...fc-should-you/
Last edited by Carfreak70852; 08-29-2014 at 05:28 AM.
08-29-2014, 11:33 AM
#46

watch those rotors. Ive seen a few and had a lot of people tell me about cross drilled rotors cracking between holes on the track.
I've ran my Brembos with slotted Stoptechs pretty hard on the track and never had any fade. Now that I'm boosted I'm curious to see if I get any this next weekend.
I've ran my Brembos with slotted Stoptechs pretty hard on the track and never had any fade. Now that I'm boosted I'm curious to see if I get any this next weekend.


 09-03-2014, 05:31 AM
#51
Registered User
Thread Starter
iTrader: (2)
Join Date: Nov 2008
Location: Tennessee
Posts: 101
Likes: 0
Received 0 Likes
on
0 Posts
watch those rotors. Ive seen a few and had a lot of people tell me about cross drilled rotors cracking between holes on the track.
I've ran my Brembos with slotted Stoptechs pretty hard on the track and never had any fade. Now that I'm boosted I'm curious to see if I get any this next weekend.
I've ran my Brembos with slotted Stoptechs pretty hard on the track and never had any fade. Now that I'm boosted I'm curious to see if I get any this next weekend.

Boosted car on the track will be interesting. Update with how everything went. Boost + Track = a lot of heat! When I managed to boil my fluid in the Akebonos, I was on a very small course with a lot of sharp turns - so I am sure that had a lot to do with it. Good luck and please update!
Thanks! Definitely having a lot of fun. Can't wait for the next event!
Thanks for the kind words. I don't really have any big plans to make it a dedicated track car *at this moment.* It is still currently my DD and until that changes, it won't get any cage or weight reduction. I have some plans for the car, but they are on the back burner. I would rather go out and have fun while getting student loan debt under control than go out there with a full race car and a lot of debt.
I am actually still using the OEM VLSD. How well it is working is a different story. I know that is one thing everyone complains about with these cars on the track. I did flush the fluid with Redline fluid before going to the track, so I am thinking that helped, but so far, it seems like it is doing its job.
Finding pads and such for the Rotoras is extremely easy. There is a guy named Ben (Benson) at Rotora that I e-mail quite frequently. Also, Hawk and Carbotech make pads for the Rotoras (same as Brembo kits) so that helps, too.
Last edited by Carfreak70852; 09-03-2014 at 05:32 AM.
09-03-2014, 08:27 AM
#52
Registered User
Thread Starter
iTrader: (2)
Join Date: Nov 2008
Location: Tennessee
Posts: 101
Likes: 0
Received 0 Likes
on
0 Posts
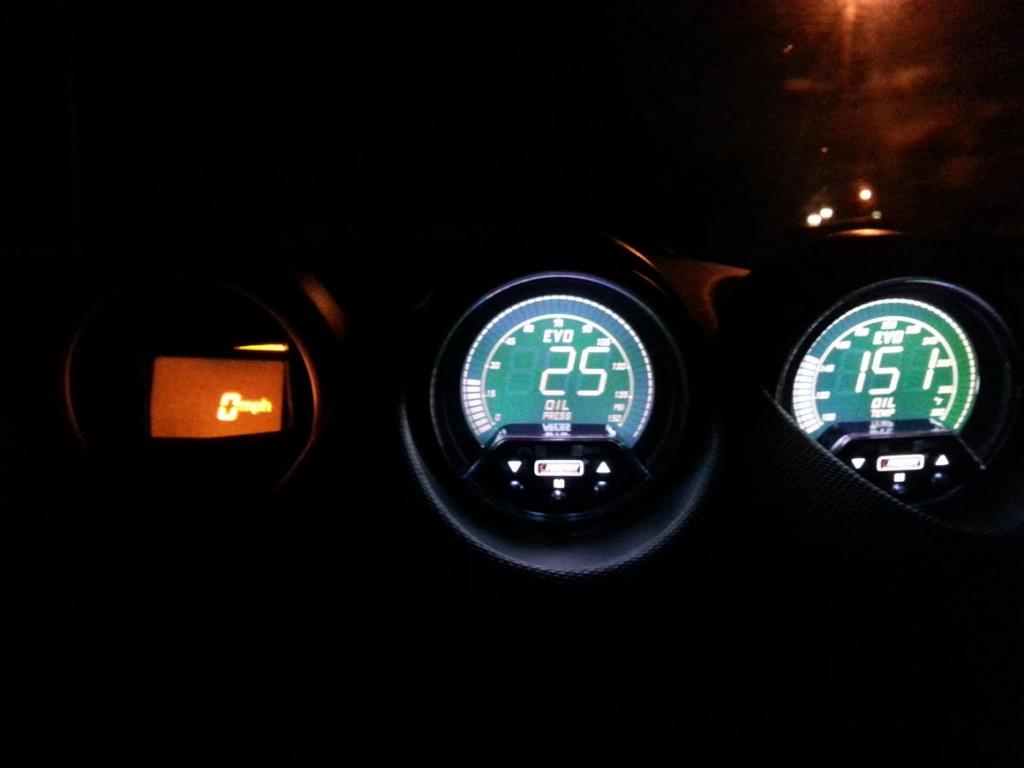
I forgot to mention I changed gauge setups. I went with the digital series now instead of the ones I had before. I like them a lot more.
This is after I clay barred the front end of the car. Had tire and bugs all over it!
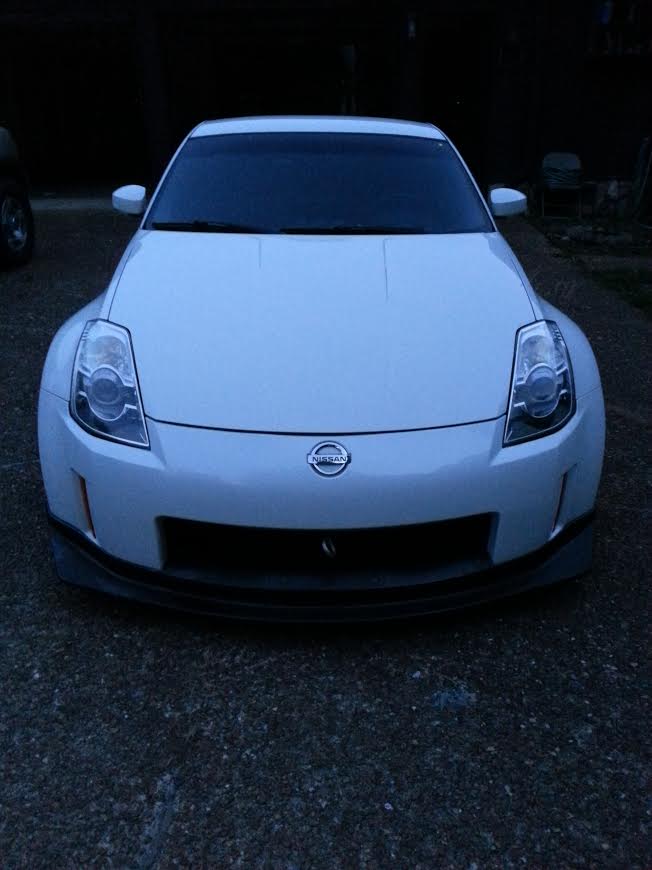

This is after I clay barred the front end of the car. Had tire and bugs all over it!

 09-03-2014, 01:51 PM
#54
Registered User
Thread Starter
iTrader: (2)
Join Date: Nov 2008
Location: Tennessee
Posts: 101
Likes: 0
Received 0 Likes
on
0 Posts
First, you can remove the volt meter as it is a completely separate gauge (just cut the wires) now, remove the needle on the oil pressure gauge and remove the face. Then bend the needle until it breaks (the metal part that is protruding from the electric motor). Once broken, all is good. You can then slide the gauges in and they clear. The electric board goes behind the gauges. It looks like crap right now because the brackets and all are broken so it just sits behind there. I had to wrap the circuit board in electrical tape because I had one short out and catch on fire (first adventure doing this). If I take it out again I will take pics.
The gauges are 60mm Prosport EVO gauges. They aren't very deep and that is important. Another reason why I switched. The regular Prosports are too deep and don't fit properly.
As far as wiring goes, I tapped into the stereo harness for switched 12v, constant 12v and illumination. The sensor wiring is really easy and comes in the instructions.
Let me know if any of that helped.
09-03-2014, 06:59 PM
#55
Sure. I really need to take pictures of it. As you can see, it isn't perfect and I need to go back and straighten up the multi gauge.
First, you can remove the volt meter as it is a completely separate gauge (just cut the wires) now, remove the needle on the oil pressure gauge and remove the face. Then bend the needle until it breaks (the metal part that is protruding from the electric motor). Once broken, all is good. You can then slide the gauges in and they clear. The electric board goes behind the gauges. It looks like crap right now because the brackets and all are broken so it just sits behind there. I had to wrap the circuit board in electrical tape because I had one short out and catch on fire (first adventure doing this). If I take it out again I will take pics.
The gauges are 60mm Prosport EVO gauges. They aren't very deep and that is important. Another reason why I switched. The regular Prosports are too deep and don't fit properly.
As far as wiring goes, I tapped into the stereo harness for switched 12v, constant 12v and illumination. The sensor wiring is really easy and comes in the instructions.
Let me know if any of that helped.
About the sensors though where did you tap into the stock oil pressure location? Both temp and pressure?
09-05-2014, 07:50 AM
#56
Registered User
Thread Starter
iTrader: (2)
Join Date: Nov 2008
Location: Tennessee
Posts: 101
Likes: 0
Received 0 Likes
on
0 Posts
No, I used an oil sandwich plate. I believe the link to it is on the second page of this thread. Someone asked about it. It has 2 ports for Oil temp/Oil Pressure. Also has 2 -10an ports for oil cooler.
09-07-2014, 09:06 PM
#57
Registered User
 09-12-2014, 12:59 PM
#58
I am definitely keeping an eye on them. They're expensive to replace so I am hoping they last quite a while! Because they are 2-piece, I think I am going to have less cracks, but I am definitely looking for them. I will just be sad when they eventually do come
Boosted car on the track will be interesting. Update with how everything went. Boost + Track = a lot of heat! When I managed to boil my fluid in the Akebonos, I was on a very small course with a lot of sharp turns - so I am sure that had a lot to do with it. Good luck and please update!
Boosted car on the track will be interesting. Update with how everything went. Boost + Track = a lot of heat! When I managed to boil my fluid in the Akebonos, I was on a very small course with a lot of sharp turns - so I am sure that had a lot to do with it. Good luck and please update!

Thread
Thread Starter
Forum
Replies
Last Post
etkms
Engine & Drivetrain
29
06-19-2022 06:30 PM
hardkicks
Zs & Gs For Sale
0
09-20-2015 12:28 PM
VQA33
Wheels Tires
8
09-08-2015 08:30 PM