Home Fabricated License Plate Bracket
 01-13-2008, 12:59 PM
#1
Registered User
Thread Starter
iTrader: (3)

Join Date: Oct 2007
Location: Queens, NY
Posts: 581
Likes: 0
Received 0 Likes
on
0 Posts
This is an alternative to the Z-Bracket/zipties/drilling your bumper. I was running zipties since I bought the car and was not satisfied with the appearance, so I decided to make this. This mod is cheap, easy, gets the job done, and looks clean. It's worth mentioning that this DIY is meant for 06+ bumpers. 05's and under may have to drop their bumper, but I don't know how much clearance you guys have. Let's begin...
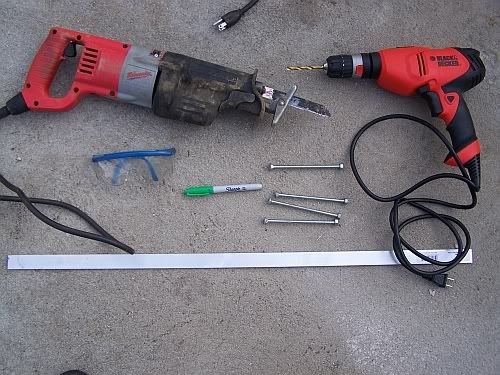
Tools:
-Drill with 1/4inch drill bit intended for metal drilling
-Saws-all[you can substitute this with a hacksaw, dremel tool, chopsaw(easiest), or any other tool that can cut through metal; a metal file can even be used]
-Four 8inch by 1/4inch bolts with their matching 1/4inch nuts (try to find galvanized ones to prevent corrosion); You could get away with using slightly shorter bolts if you can't find 8inchers. I didn't pre-measure, so I went with the longest bolts I could find with a 1/4inch diameter
-A piece of aluminum(no shorter that 1 1/2feet and no thinner than 1/8inch. I found a 4foot by 1/8inch piece as I was walking through Home Depot. You can substitute the aluminum with another metal or plastic, but this may create more difficulty. Aluminum doesn't corrode and is a very soft metal, so it's easy to work with.)
-Safety glasses
-A marker
-Your license plate.
Here is a picture of the materials.
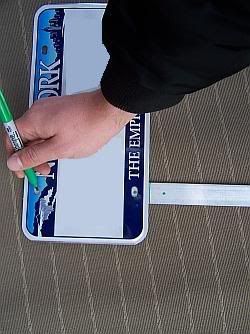
Step 1 : Use your license plate as a template to mark off the holes(that you will drill) and end points(where you will cut) on the aluminum like this
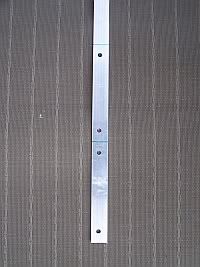
Step 2: Drill the holes with your 1/4inch drill bit. When you are done your aluminum piece will look like this
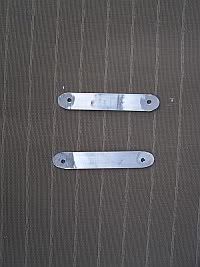
Step 3 : Cut the aluminum into two pieces across the lines that you marked off with your saws-all/cutting device. Optional step - grind or file the pieces to clean up the sharp edges. This is what you will end up with
Step 4 : Test fit your parts by assembling them off of the car. Back view
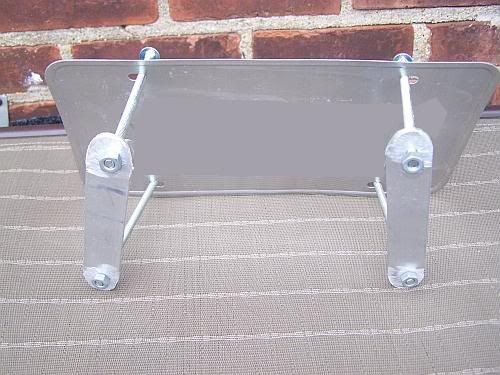
Front view
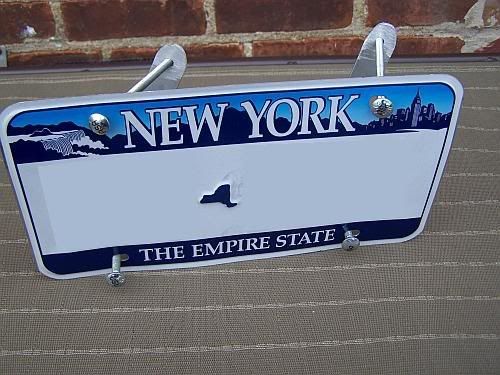
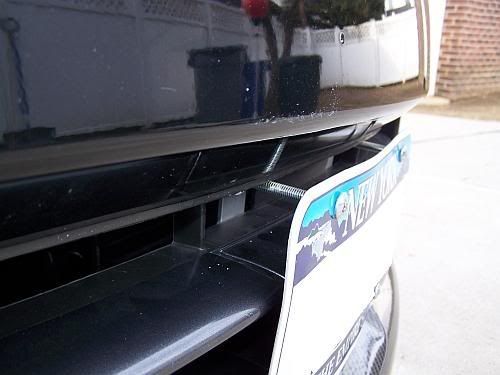
Step 5 : Put one of the 8inch bolts through either one of the top corner holes in the license plate. Now take one of your aluminum pieces that you drilled/cut and slide it through the middle gap between the two bars in the bumper(don't let it drop!) and push the bolt through the hole that you drilled. Once you have done this, take your nut and secure it from the back side. (Optional step : if you're worried about scratching your bumper where the license plate touches it, you can lay down a bead of silicon caulking or rubber weather stripping on the two bars to act as a cushion) It will look like this
Step 6 : Do the same for the bottom corner. It will look like this
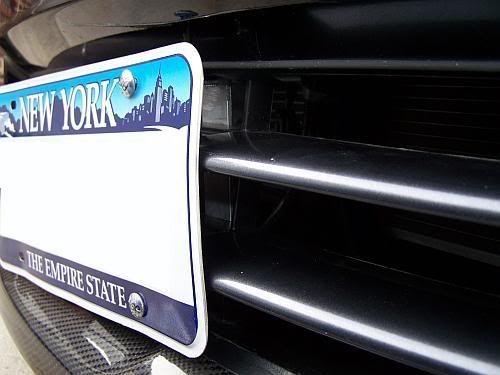
Step 7/8: Repeat step 5 and step 6 on the opposite side. You're done! Admire your work
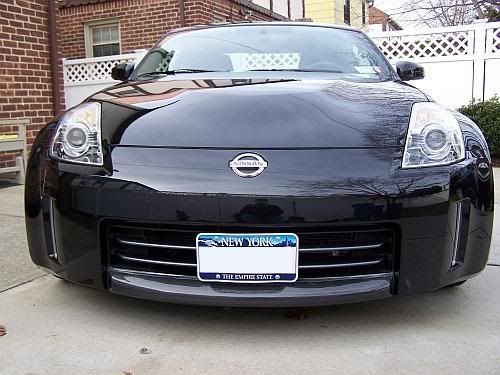
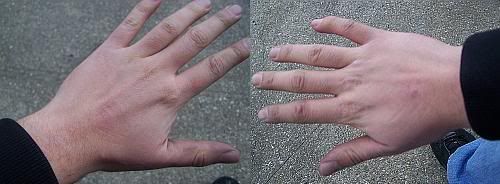
I wear a men's size large glove, and my hands endured only minor scuffs. You can do it!

Tools:
-Drill with 1/4inch drill bit intended for metal drilling
-Saws-all[you can substitute this with a hacksaw, dremel tool, chopsaw(easiest), or any other tool that can cut through metal; a metal file can even be used]
-Four 8inch by 1/4inch bolts with their matching 1/4inch nuts (try to find galvanized ones to prevent corrosion); You could get away with using slightly shorter bolts if you can't find 8inchers. I didn't pre-measure, so I went with the longest bolts I could find with a 1/4inch diameter
-A piece of aluminum(no shorter that 1 1/2feet and no thinner than 1/8inch. I found a 4foot by 1/8inch piece as I was walking through Home Depot. You can substitute the aluminum with another metal or plastic, but this may create more difficulty. Aluminum doesn't corrode and is a very soft metal, so it's easy to work with.)
-Safety glasses
-A marker
-Your license plate.
Here is a picture of the materials.
Step 1 : Use your license plate as a template to mark off the holes(that you will drill) and end points(where you will cut) on the aluminum like this
Step 2: Drill the holes with your 1/4inch drill bit. When you are done your aluminum piece will look like this
Step 3 : Cut the aluminum into two pieces across the lines that you marked off with your saws-all/cutting device. Optional step - grind or file the pieces to clean up the sharp edges. This is what you will end up with
Step 4 : Test fit your parts by assembling them off of the car. Back view
Front view
Step 5 : Put one of the 8inch bolts through either one of the top corner holes in the license plate. Now take one of your aluminum pieces that you drilled/cut and slide it through the middle gap between the two bars in the bumper(don't let it drop!) and push the bolt through the hole that you drilled. Once you have done this, take your nut and secure it from the back side. (Optional step : if you're worried about scratching your bumper where the license plate touches it, you can lay down a bead of silicon caulking or rubber weather stripping on the two bars to act as a cushion) It will look like this
Step 6 : Do the same for the bottom corner. It will look like this
Step 7/8: Repeat step 5 and step 6 on the opposite side. You're done! Admire your work
I wear a men's size large glove, and my hands endured only minor scuffs. You can do it!
Last edited by Mr.; 01-14-2008 at 12:20 PM.

 01-14-2008, 08:52 AM
#3
Registered User
Thread Starter
iTrader: (3)
Join Date: Oct 2007
Location: Queens, NY
Posts: 581
Likes: 0
Received 0 Likes
on
0 Posts
Originally Posted by DaveZ06
nice project, but maybe consider putting some eletrical tape on the screws?? looks like you could be scratching your bumper.
Last edited by Mr.; 01-23-2008 at 02:48 PM.

 01-23-2008, 02:46 PM
#6
Registered User
Thread Starter
iTrader: (3)
Join Date: Oct 2007
Location: Queens, NY
Posts: 581
Likes: 0
Received 0 Likes
on
0 Posts
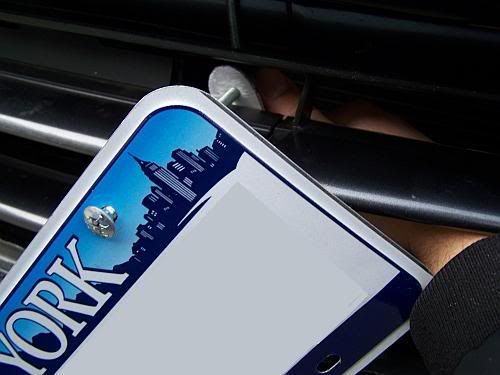
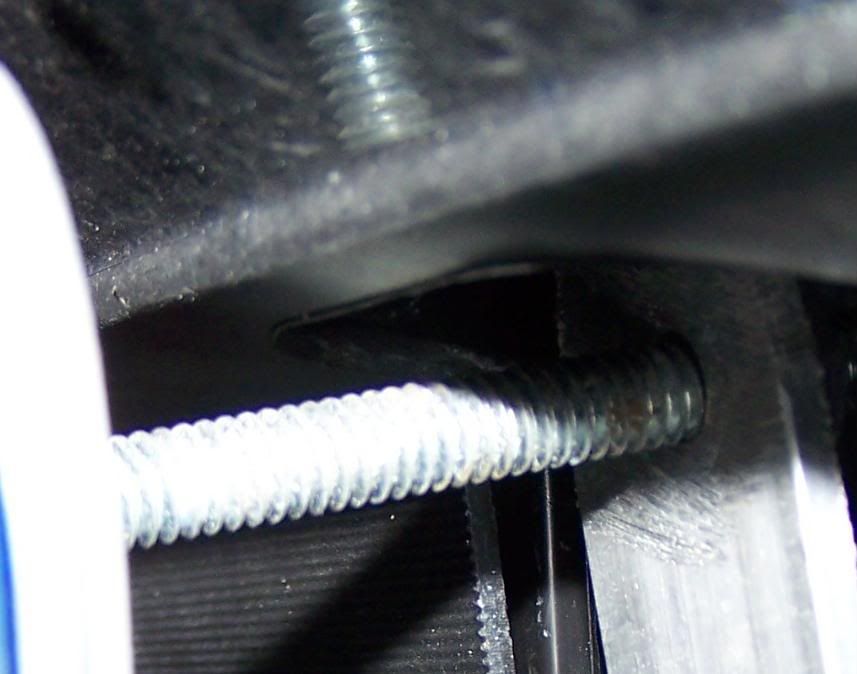
I made a mistake when I said that the bolt touches the top. It doesn't. There is about 1/4 inch of space between the the bolt and bumper. The picture was taken at an angle that doesn't show the gap. Here is a close-up view

Trending Topics
03-14-2008, 05:03 PM
#8
Registered User
Thread Starter
iTrader: (3)
Join Date: Oct 2007
Location: Queens, NY
Posts: 581
Likes: 0
Received 0 Likes
on
0 Posts
Originally Posted by SA Z-boi
I did this DIY with my Euro plate it it came out awesome, Ill post pictures when I get them. thanks for a good write up
 03-29-2008, 05:30 PM
#10
Registered User
Thread Starter
iTrader: (3)
Join Date: Oct 2007
Location: Queens, NY
Posts: 581
Likes: 0
Received 0 Likes
on
0 Posts
Originally Posted by krnzzang84
LOL never got pulled over because of no front license plate/tint.


 02-28-2009, 09:39 PM
#14
New Member

I just registered my car in Texas yesterday. It's amazing that I made the same thing today for my Z and came on the site to see that someone had the same great idea.
My Z is going to benifit from it because I mounted in front of my INJEN cai. This will shield some of the rain.
Nice write up. The only difference is with mine, I put the brackets the long way behind the plates and cut some rubber the same shape as the plate to prevent the plate from scratching the bumper.
If someone else tries this, go to Home Depot and you'll find some metal braces for the backing in the area where the wood is. It has pre-drilled holes for $.89.

Thread
Thread Starter
Forum
Replies
Last Post
Colombo
Forced Induction
35
11-09-2020 10:27 AM