Painted door handles, removal and installation

 03-01-2011, 02:31 PM
#43
Registered User
iTrader: (27)

Join Date: Feb 2008
Location: The OC, So Cal
Posts: 390
Likes: 0
Received 0 Likes
on
0 Posts
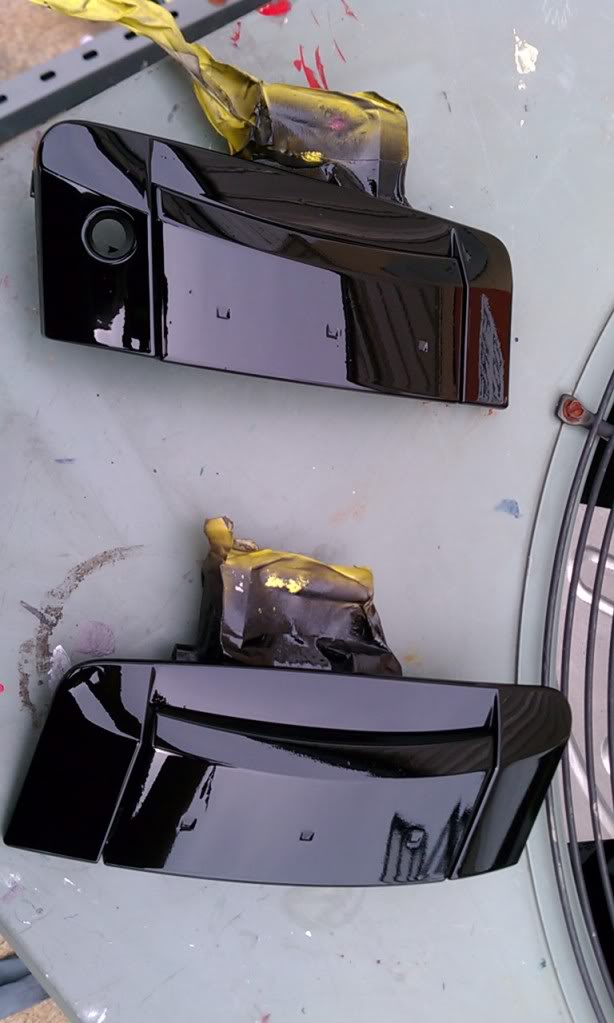
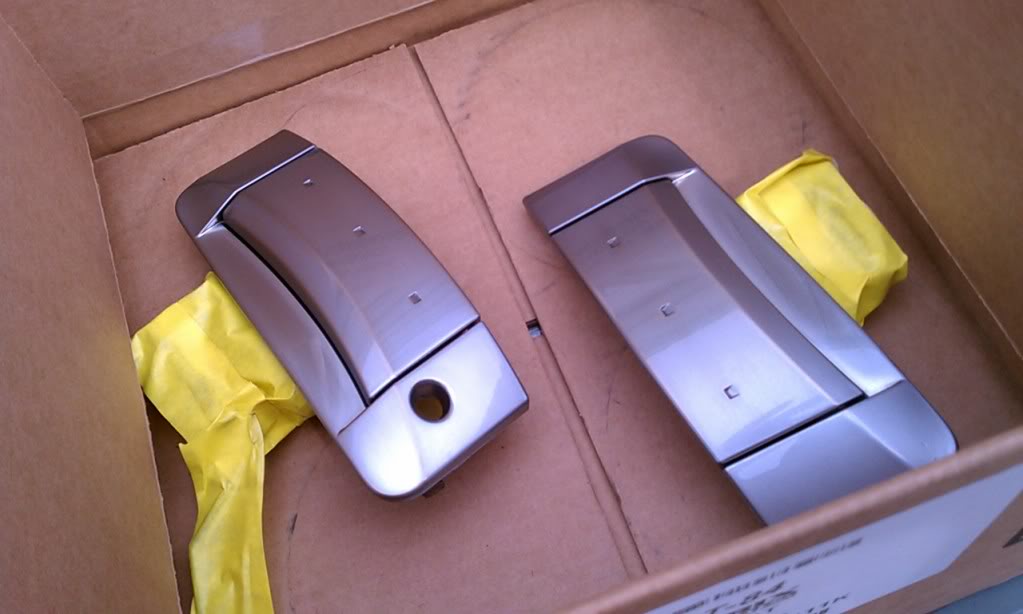
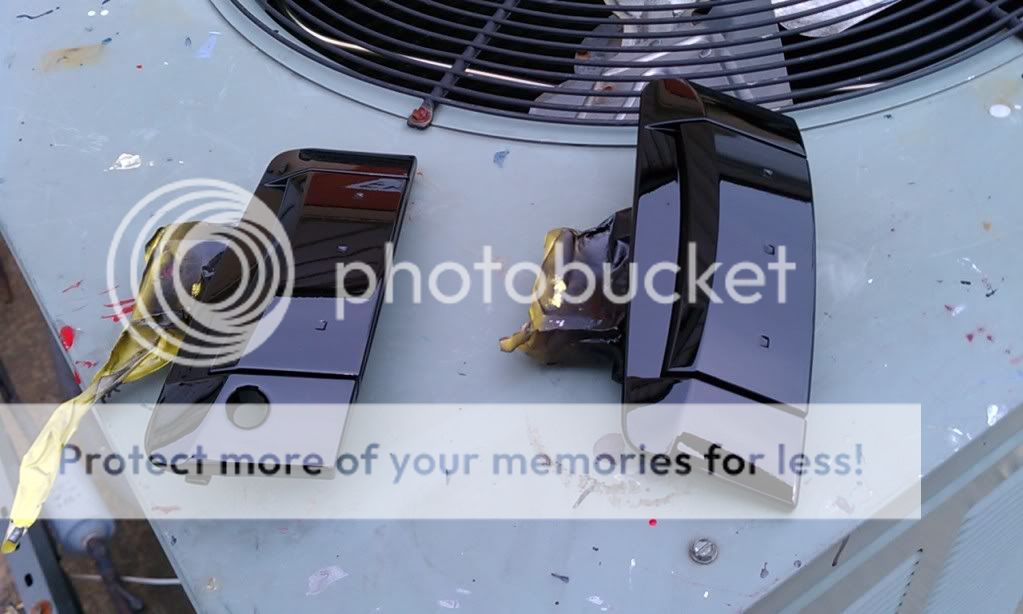
Painting the handles is a PITA, especially with gloss black paint. Prepared a handle for paint. Duplicolor DS100, suggested for Super Black, was not avail. at any store, it has been discontinued. Instead, I used Krylon Fusion in Gloss Black, and shot a clear coat. Results were excellent. However, compared to Z, the handle did not match color.
I will likely strip the paint, and reshoot with a better matching paint or matte black. Ordering a can of Super Black spray paint online is about $20 a can. Will keep you posted.
I will likely strip the paint, and reshoot with a better matching paint or matte black. Ordering a can of Super Black spray paint online is about $20 a can. Will keep you posted.
03-01-2011, 03:00 PM
#44
Painting the handles is a PITA, especially with gloss black paint. Prepared a handle for paint. Duplicolor DS100, suggested for Super Black, was not avail. at any store, it has been discontinued. Instead, I used Krylon Fusion in Gloss Black, and shot a clear coat. Results were excellent. However, compared to Z, the handle did not match color.
I will likely strip the paint, and reshoot with a better matching paint or matte black. Ordering a can of Super Black spray paint online is about $20 a can. Will keep you posted.
I will likely strip the paint, and reshoot with a better matching paint or matte black. Ordering a can of Super Black spray paint online is about $20 a can. Will keep you posted.
 My whole set up is black on white though..
 What you COULD do is send me your painted ones... and I will send you my unpainted so you have a fresh canvass to start with all Picasso-like
Ehhh?????
03-30-2011, 07:35 AM
#45
Registered User
iTrader: (30)

Join Date: Jan 2009
Location: 15 mins from white house
Posts: 8,236
Likes: 0
Received 4 Likes
on
4 Posts
guys this was actually a piece of cake. what i suggest is not to rattle can them please!!!
thats the issue the rattle can doesnt shoot as even as a gun would.
i have access to automotive paint supplies and i have a gun...if you guys want to have it doen ship me youre door handles and i will paint them and ship back for a fair price.
thats the issue the rattle can doesnt shoot as even as a gun would.
i have access to automotive paint supplies and i have a gun...if you guys want to have it doen ship me youre door handles and i will paint them and ship back for a fair price.


 04-09-2011, 09:28 PM
#49
Registered User

I think I'm gonna try this tomorrow. I'm finishing my back wheels with graphite wheel coat from duplicolor and now deciding that I'm gonna remove the handles and spray them at the same time. I'll add pictures when I'm done.
10-16-2011, 11:31 AM
#51

great pics guys, i have a solar orange 350z and i want to do this as well. I have some questions:
1. I am coming into this thread months later. Has there been any chips or defects in the paint in the meantime?
2. What prep work was done? I dont know all that much about paint so I need things spelled out for me. Wetsand, prime, wetsand, apply 2 coats of glossy black plastic paint, then clear?
3. Any other lessons learned?
10-16-2011, 01:48 PM
#52
Registered User
iTrader: (3)

Join Date: Oct 2010
Location: DFW Texas
Posts: 250
Likes: 0
Received 0 Likes
on
0 Posts
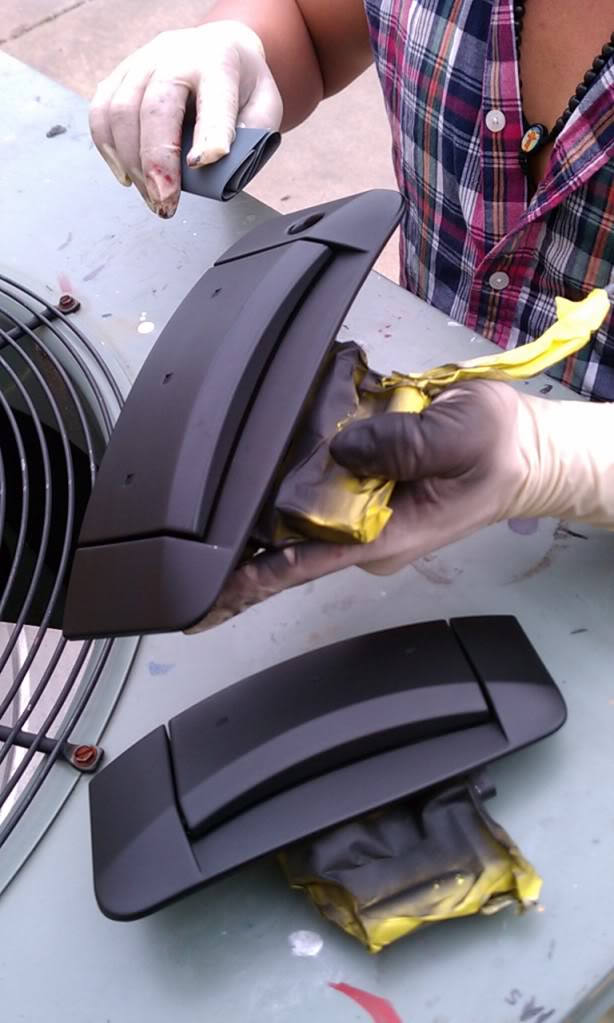
I just scuffed mine up really good with a grey scuff pad and then cleaned it really good. I put two coats of my factory black from paintscratch.com and then used three coats of flat clear so they wouldn't be shiny
10-16-2011, 04:55 PM
#54
Registered User
iTrader: (3)
Join Date: Oct 2010
Location: DFW Texas
Posts: 250
Likes: 0
Received 0 Likes
on
0 Posts
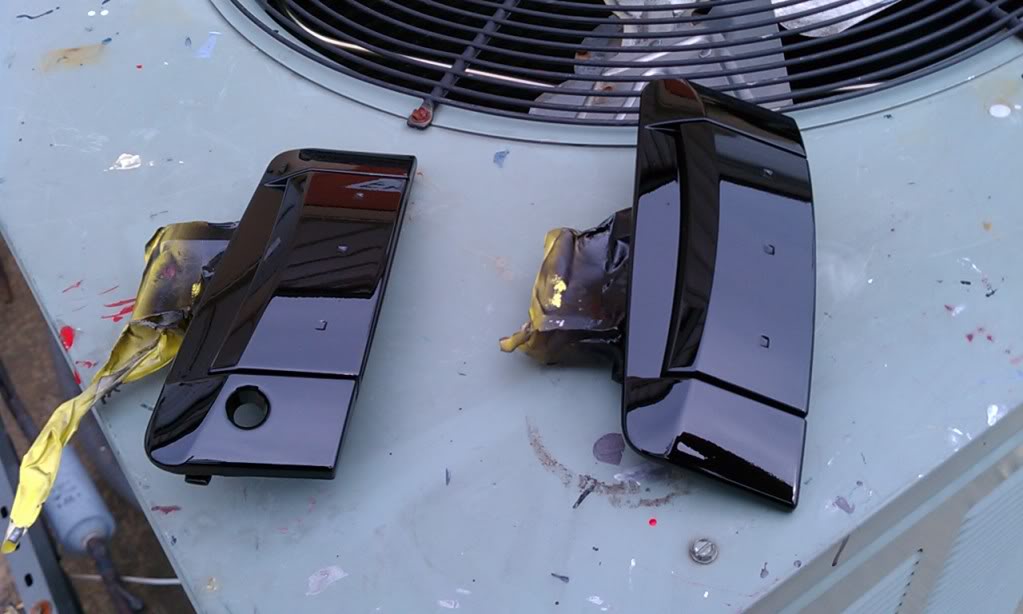
No mine came out really good I didn't even have to buff them. I do have to re-do my driver handle because someone opened their door and hit mine and chipped the paint on the edge of it.
10-16-2011, 04:58 PM
#55
Registered User
iTrader: (3)
Join Date: Oct 2010
Location: DFW Texas
Posts: 250
Likes: 0
Received 0 Likes
on
0 Posts
great pics guys, i have a solar orange 350z and i want to do this as well. I have some questions:
1. I am coming into this thread months later. Has there been any chips or defects in the paint in the meantime?
2. What prep work was done? I dont know all that much about paint so I need things spelled out for me. Wetsand, prime, wetsand, apply 2 coats of glossy black plastic paint, then clear?
3. Any other lessons learned?
1. I am coming into this thread months later. Has there been any chips or defects in the paint in the meantime?
2. What prep work was done? I dont know all that much about paint so I need things spelled out for me. Wetsand, prime, wetsand, apply 2 coats of glossy black plastic paint, then clear?
3. Any other lessons learned?

 10-27-2011, 12:49 PM
#59
Registered User
iTrader: (3)
Join Date: Oct 2010
Location: DFW Texas
Posts: 250
Likes: 0
Received 0 Likes
on
0 Posts
The headlights are my next thing to do on my to do list.. I just put my Brembo brakes on last weekend after they sat in my garage for about 7 months LOL, but headlights and then coilovers are next in line.
