DIY Installing a Stillen Splitter on a stock bumper
 05-25-2011, 01:07 PM
#1
New Member
Thread Starter

Okay, so this isn't the hardest thing in the world, I'm just saying this out of the gate. Can you figure out how to do this on your own and/or with the included instructions? Most likely. However, as much searching as I did online and in the forums I never really found any good pictures of what the Stillen Splitter looked like before it was mounted (full under-tray? Just a thin lip? etc), nor did I see a DIY about it, so here we go!
My front bumper is the 06+ version (Part #: 1035030SP). The 03-05 version will install in nearly the same manner, but it will require a different splitter (Part #: 1035011SP). They are not interchangeable.
As usual, this is my disclaimer. This is simply me sharing my personal experience in the hopes of helping you out in the future. I'm in no way responsible for what you do if you mess something up or it doesn't turn out for you, like it did for me.
Car: 2008 Nissan 350z with VQ35HR
Difficulty rating from 1(Stickers) - 10(Engine Rebuild): 3
Time: 1 hour (maybe less if you've got access to a lift and have a buddy to help)
What to expect: You're going to be crawling around on the ground to get this done, unless you have access to a lift. You will be putting permanent holes in your front bumper... so measure twice, drill/screw once!
Reason: To add visual aesthetics and increase handling by reducing front end lift and creating an area of low pressure under the front lip, causing the vehicle to, at speed, be "pulled" downward towards the area of low pressure.
Tools you need:
Optional:
Parts List:
Total Cost: About $236.19 (purchased directly from Stillen, shipped, with insurance and handling)
I apologize for the pictures up front, I was in a hurry and had to resort to a cellphone for the first set of pictures. Let's get to it! Shipping was pretty nice. Large box, lots of stickers and warnings on it.


Item inside was reasonably well packed. It could shift back and forth in the box, which I wasn't a fan of, but there was absolutely zero damage to the item, so I guess it did it's job!

Attached to the splitter's wrapping is a zip-lock bag with your instructions, the turnbuckles/rods, 8 large screws, and 8 small screws. Keep these for later!

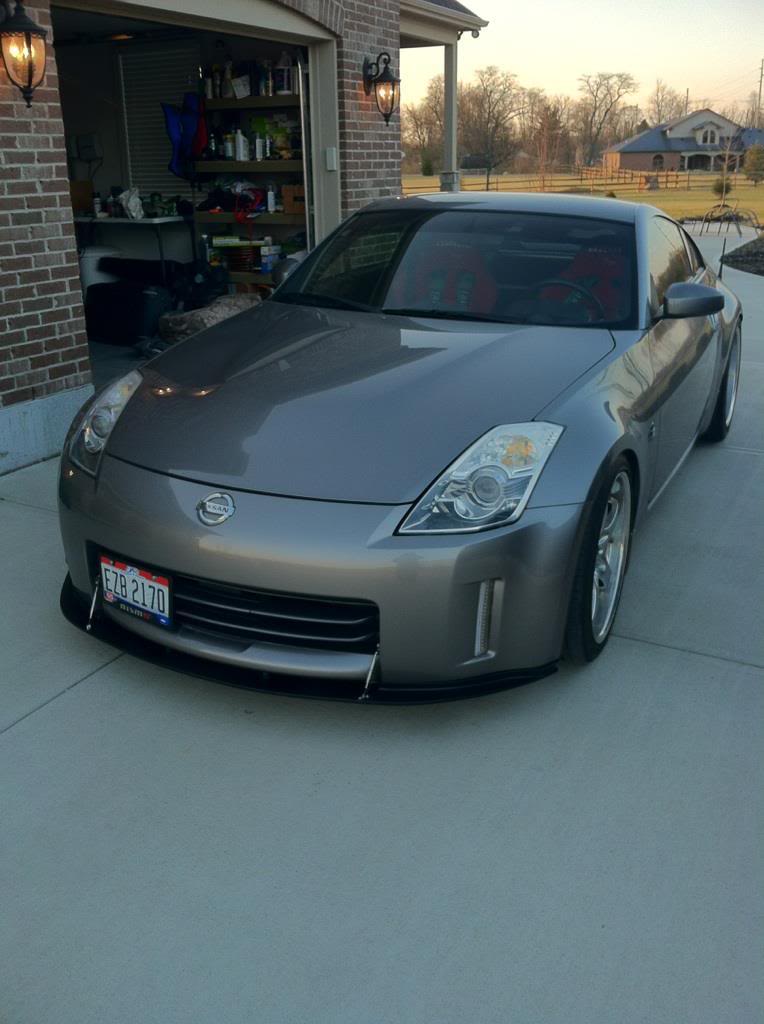
Next up... unwrap the splitter and go out to your car. I didn't use jack stands (the instructions say you should) as my car is not lowered. I had room to do everything while laying on the floor. However, I would recommend you jack the car up or use a lift for leverage reasons. I'll explain why in a second. For now, here's a pic of the lip laying in front of the car so we can start getting an idea of how it's going to fit!

Now, climb underneath your car and remove the front 10 bolts that hold the under tray to the front bumper. These should be a 10mm size, so grab your ratchet and socket and have at it. There will be 8 in the center, and 2 on each side that hold the bumper to the inner wheel well. I'm assuming you know how to do this, or are at least capable of looking at and removing fairly obvious bolts on the front of your car once you look and/or feel underneath it. As such, I do not have a picture of these bolts. However, if your car is like mine, it has a front "lip" of black plastic that's underneath it. The Stillen directions make no mention of this, but it will need to be removed and will not be put back on. It looks like this...

Now... the Stillen Splitter does NOT have pre-drilled holes. It has very obvious places where the holes will go, but you need to do the drilling yourself. They recommend using a 1/2" drill bit. I thought I'd be clever and, since I didn't own a 1/2" drill bit, would use a 3/8" bit instead. While this may be possible, I found that the splitter has "dimples" where the holes are supposed to go. These "dimples" are raised and make for a relatively tight fit with the stock undercarriage bolts. The larger the hole, the less these dimples got in my way. So, after struggling for a while, I went and got a 1/2" drill bit and all was well. Save yourself the trouble and just go get you one if you don't have one.

After we have our holes drilled, grab your 10 bolts and cleaning supplies then get back under the car with your splitter. You need to clean off your bumper. Use a non-residue-leaving cleaner... I used a glass cleaner and paper towels.
Once you're done... on the right and left sides of the splitter you'll notice some 3M adhesive tape, covered with a plastic cover. If you're reading this along with the included instructions, you'll know that right now is where you peel that red plastic cover off the tape a little and tuck the tabs out where you will be able to pull on them once the splitter is in place.
Now, take your OEM bolts and put the splitter in place. Install your bolts, but leave them loose! Check your fitment and once you're satisfied, peel the tabs you left for yourself off the tape and press firmly. Grab your 8 long screws from your installation kit and your Phillips screwdriver. You're going to screw these screws into the bottom of the splitter and into the bottom of your bumper. 3 will go through the left section where the tape is, and 3 on the right. The last 2 screws go through the 2 center "humps". Screwing in these screws takes very firm pressure so they will "bite" through the plastic and start. I gave myself blisters on both thumbs doing this due to my lack of leverage.

When you're done with this, the splitter will be snug against the bumper. Tighten down your 10 OEM bolts and check fit one last time. Some people like to stop here. I've heard some people like this look. Considering it has 8 screws and 10 bolts holding it in place, I can see why a lot of people haven't had any issues. That being said, I've heard hearsay about them still ripping loose at high speeds (this is supposed to be a functional part, after all) if the turnbuckles/support rods aren't installed. Personally, I like the way they look, so I put them on!
After picking a length I liked and making the rods match, I used a white colored pencil to mark where I was going to drill my holes for the smaller screws. The drill really isn't required, as the screws have a drill bit style tip on them, and easily cut into plastic.
Now... here's where I screwed up!!!!
After marking my holes, I drilled them out in the splitter. Shortly afterwards I went to put in these included screws and I realized 2 things.
1. The Stillen instructions suggest you place the turnbuckles end that goes onto the splitter horizontally with the edge of the splitter. I wasn't paying attention and did mine vertically. This doesn't seem to be too big of a deal, it's just not what they suggested. Considering the turnbuckles, even on Stillen's website, are installed in 2 different ways, nobody would even know I'd messed this up unless I pointed it out. Here's what it's "supposed" to look like (taken from Stillen's website)...
Look 1:
.jpg)
Look 2:

2. I did not give myself enough room for the head of the screw on the underside of the turnbuckles top section where it attaches to your bumper. The rod came in too close when I tried to line it up with my holes I'd drilled in my splitter. CRAP! So please, please, please double and triple check yourself. Line up how you want the holes in your bumper, screw the screws in, *then* position the turnbuckle on the splitter and lock it down. I spent almost an hour in Ace Hardware looking for a bolt (which I finally found) that was big enough, with a course enough thread, that was also shallow enough that the turnbuckle cleared it.

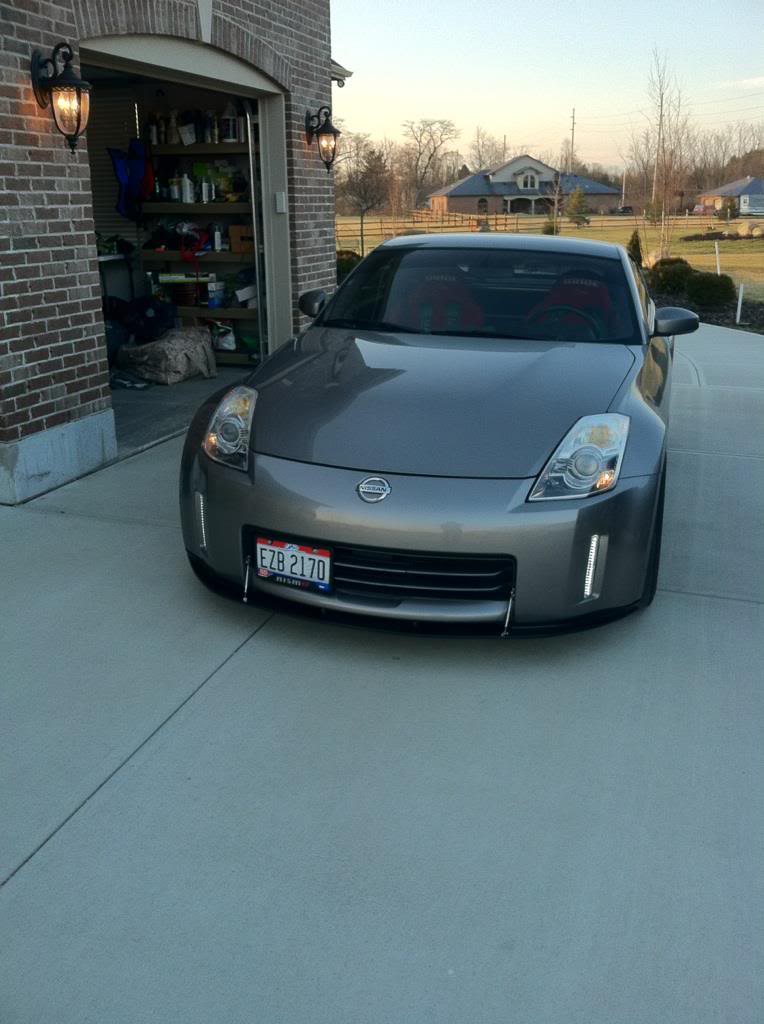
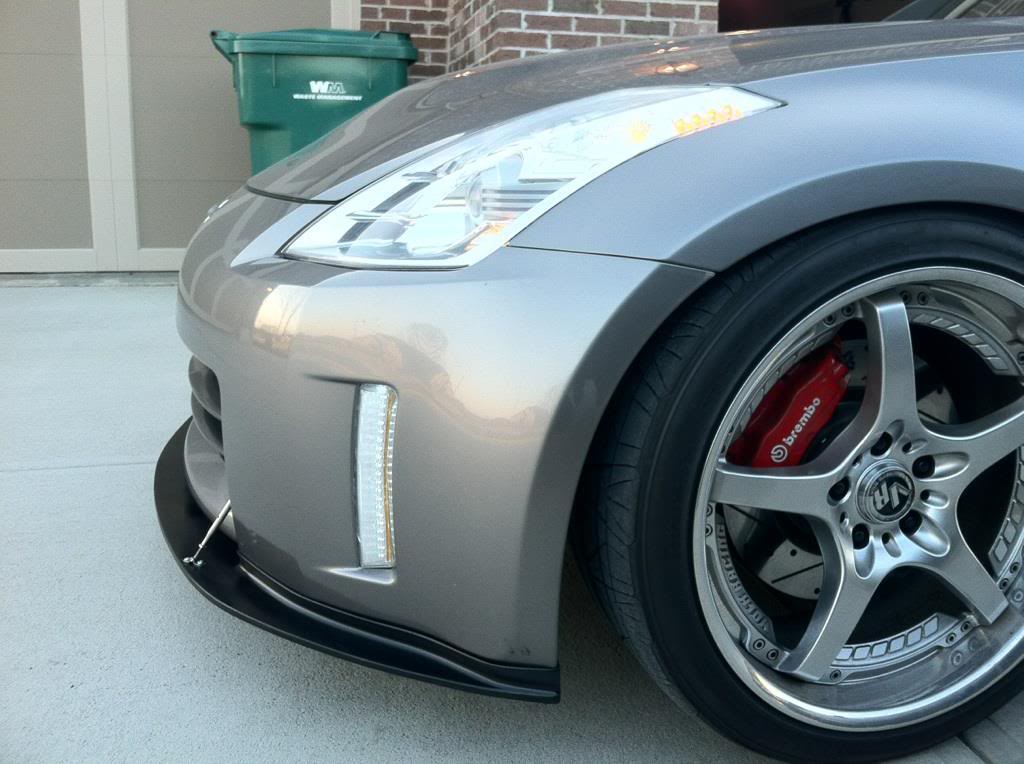
Anyway... here's some final pictures!


My front bumper is the 06+ version (Part #: 1035030SP). The 03-05 version will install in nearly the same manner, but it will require a different splitter (Part #: 1035011SP). They are not interchangeable.
As usual, this is my disclaimer. This is simply me sharing my personal experience in the hopes of helping you out in the future. I'm in no way responsible for what you do if you mess something up or it doesn't turn out for you, like it did for me.
Car: 2008 Nissan 350z with VQ35HR
Difficulty rating from 1(Stickers) - 10(Engine Rebuild): 3
Time: 1 hour (maybe less if you've got access to a lift and have a buddy to help)
What to expect: You're going to be crawling around on the ground to get this done, unless you have access to a lift. You will be putting permanent holes in your front bumper... so measure twice, drill/screw once!
Reason: To add visual aesthetics and increase handling by reducing front end lift and creating an area of low pressure under the front lip, causing the vehicle to, at speed, be "pulled" downward towards the area of low pressure.
Tools you need:
- Screw Driver (phillips)
- 10mm Socket
- 1/4" or 1/2" Ratchet
- Drill
- 1/2" Drill Bit
- Cleaning Supplies (Windex, paper towels, etc)
Optional:
- Gloves
- Adhesion promoter
Parts List:
- Stillen Splitter
- 8 Self-Tapping Screws (included)
- 8 Small Screws for Turnbuckles (included)
Total Cost: About $236.19 (purchased directly from Stillen, shipped, with insurance and handling)
I apologize for the pictures up front, I was in a hurry and had to resort to a cellphone for the first set of pictures. Let's get to it! Shipping was pretty nice. Large box, lots of stickers and warnings on it.
Item inside was reasonably well packed. It could shift back and forth in the box, which I wasn't a fan of, but there was absolutely zero damage to the item, so I guess it did it's job!
Attached to the splitter's wrapping is a zip-lock bag with your instructions, the turnbuckles/rods, 8 large screws, and 8 small screws. Keep these for later!
Next up... unwrap the splitter and go out to your car. I didn't use jack stands (the instructions say you should) as my car is not lowered. I had room to do everything while laying on the floor. However, I would recommend you jack the car up or use a lift for leverage reasons. I'll explain why in a second. For now, here's a pic of the lip laying in front of the car so we can start getting an idea of how it's going to fit!
Now, climb underneath your car and remove the front 10 bolts that hold the under tray to the front bumper. These should be a 10mm size, so grab your ratchet and socket and have at it. There will be 8 in the center, and 2 on each side that hold the bumper to the inner wheel well. I'm assuming you know how to do this, or are at least capable of looking at and removing fairly obvious bolts on the front of your car once you look and/or feel underneath it. As such, I do not have a picture of these bolts. However, if your car is like mine, it has a front "lip" of black plastic that's underneath it. The Stillen directions make no mention of this, but it will need to be removed and will not be put back on. It looks like this...
Now... the Stillen Splitter does NOT have pre-drilled holes. It has very obvious places where the holes will go, but you need to do the drilling yourself. They recommend using a 1/2" drill bit. I thought I'd be clever and, since I didn't own a 1/2" drill bit, would use a 3/8" bit instead. While this may be possible, I found that the splitter has "dimples" where the holes are supposed to go. These "dimples" are raised and make for a relatively tight fit with the stock undercarriage bolts. The larger the hole, the less these dimples got in my way. So, after struggling for a while, I went and got a 1/2" drill bit and all was well. Save yourself the trouble and just go get you one if you don't have one.
After we have our holes drilled, grab your 10 bolts and cleaning supplies then get back under the car with your splitter. You need to clean off your bumper. Use a non-residue-leaving cleaner... I used a glass cleaner and paper towels.
Once you're done... on the right and left sides of the splitter you'll notice some 3M adhesive tape, covered with a plastic cover. If you're reading this along with the included instructions, you'll know that right now is where you peel that red plastic cover off the tape a little and tuck the tabs out where you will be able to pull on them once the splitter is in place.
Now, take your OEM bolts and put the splitter in place. Install your bolts, but leave them loose! Check your fitment and once you're satisfied, peel the tabs you left for yourself off the tape and press firmly. Grab your 8 long screws from your installation kit and your Phillips screwdriver. You're going to screw these screws into the bottom of the splitter and into the bottom of your bumper. 3 will go through the left section where the tape is, and 3 on the right. The last 2 screws go through the 2 center "humps". Screwing in these screws takes very firm pressure so they will "bite" through the plastic and start. I gave myself blisters on both thumbs doing this due to my lack of leverage.
When you're done with this, the splitter will be snug against the bumper. Tighten down your 10 OEM bolts and check fit one last time. Some people like to stop here. I've heard some people like this look. Considering it has 8 screws and 10 bolts holding it in place, I can see why a lot of people haven't had any issues. That being said, I've heard hearsay about them still ripping loose at high speeds (this is supposed to be a functional part, after all) if the turnbuckles/support rods aren't installed. Personally, I like the way they look, so I put them on!
After picking a length I liked and making the rods match, I used a white colored pencil to mark where I was going to drill my holes for the smaller screws. The drill really isn't required, as the screws have a drill bit style tip on them, and easily cut into plastic.
Now... here's where I screwed up!!!!
After marking my holes, I drilled them out in the splitter. Shortly afterwards I went to put in these included screws and I realized 2 things.
1. The Stillen instructions suggest you place the turnbuckles end that goes onto the splitter horizontally with the edge of the splitter. I wasn't paying attention and did mine vertically. This doesn't seem to be too big of a deal, it's just not what they suggested. Considering the turnbuckles, even on Stillen's website, are installed in 2 different ways, nobody would even know I'd messed this up unless I pointed it out. Here's what it's "supposed" to look like (taken from Stillen's website)...
Look 1:
Look 2:
2. I did not give myself enough room for the head of the screw on the underside of the turnbuckles top section where it attaches to your bumper. The rod came in too close when I tried to line it up with my holes I'd drilled in my splitter. CRAP! So please, please, please double and triple check yourself. Line up how you want the holes in your bumper, screw the screws in, *then* position the turnbuckle on the splitter and lock it down. I spent almost an hour in Ace Hardware looking for a bolt (which I finally found) that was big enough, with a course enough thread, that was also shallow enough that the turnbuckle cleared it.
Anyway... here's some final pictures!
Last edited by Lrn2Go; 05-26-2011 at 05:40 AM. Reason: Added more pictures.


 05-26-2011, 09:56 AM
#6
Excellent DIY! Thank you!
Question: How much further can the turnbuckles be extended? If I were to install this, I wouldn't want to put holes into the painted suface of my bumper. Would they be able to reach back into the black area behind where you mounted them?
Question: How much further can the turnbuckles be extended? If I were to install this, I wouldn't want to put holes into the painted suface of my bumper. Would they be able to reach back into the black area behind where you mounted them?
05-26-2011, 10:33 AM
#7
New Member
Thread Starter
Due to time restraints, I DID drive with the Splitter bolted up WITHOUT turnbuckles, on the highway at about 70mph to get to a place I had to go. There was no damage or signs of problems that I saw. I DID install one turnbuckle before heading back out on the highway and home, and then the other one I installed the following day after I'd found the screws I needed. I mention this mainly to let you know that, once everything else is installed, you can take your time and make sure you get the turnbuckles/rods how you want them.
Last edited by Lrn2Go; 05-26-2011 at 10:34 AM.
Trending Topics

 05-27-2011, 11:29 AM
#10
New Member
Thread Starter
Totally your call. The carbon fiber lip will run you a bit more, but be a little more substantial in the "looks" department. The Splitter will be a little bit less, but have a slightly less substantial "look", since it's a bit smaller and plastic, instead of carbon fiber. The splitter, in theory, will be more functional.
Last edited by Lrn2Go; 05-27-2011 at 11:51 AM.
 08-07-2011, 11:15 PM
#14
New Member
Thread Starter
Originally Posted by Lrn2Go
When you're done with this, the splitter will be snug against the bumper. Tighten down your 10 OEM bolts and check fit one last time. Some people like to stop here. I've heard some people like this look. Considering it has 8 screws and 10 bolts holding it in place, I can see why a lot of people haven't had any issues. That being said, I've heard hearsay about them still ripping loose at high speeds (this is supposed to be a functional part, after all) if the turnbuckles/support rods aren't installed. Personally, I like the way they look, so I put them on!
Due to time restraints, I DID drive with the Splitter bolted up WITHOUT turnbuckles, on the highway at about 70mph to get to a place I had to go. There was no damage or signs of problems that I saw. I DID install one turnbuckle before heading back out on the highway and home, and then the other one I installed the following day after I'd found the screws I needed. I mention this mainly to let you know that, once everything else is installed, you can take your time and make sure you get the turnbuckles/rods how you want them.

 12-27-2012, 07:40 PM
#19
Registered User

You changed my mind about not getting it.. I have an 07 HR that's red and I have to do it now... but cutting out the grill and replacing with mesh for a more custom stock look thanks for the DIY ill post a pic when its all done
04-29-2014, 04:01 PM
#20

I installed mine yesterday. I really feel fitment was an 8 out of 10, 10 being oem. I found the install kit to be inadequate. You really need to use speed clips on the backside of the bumber with the additional screws that come with the kit. This allows the lip to hold much closer to the bumper and give an oem look. Stillen really should pre-drill the holes for the oem bolts. I think they do not to pin improper fitment on the installer and not the poor mould. Overall, its a decent splitter, no regrets, but know you will be doing a little more than simply drilling holes and bolting it on with the supplied hardware.
I used some spares i had in an old speaker box....you can also get them at autoparts stores.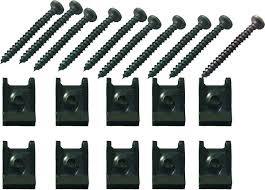
Installed:

I used some spares i had in an old speaker box....you can also get them at autoparts stores.

Installed:
