DIY: Akebono BBK Installation on 03-07 G/Z
 05-03-2009, 02:27 PM
#1
New Member
Thread Starter
iTrader: (3)

Join Date: Feb 2008
Location: Tulsa, OK
Posts: 250
Likes: 0
Received 0 Likes
on
0 Posts
This DIY will take you through the basic steps to remove the existing brake components (calipers, rotors, lines) in order to install the Akebono brake kit that is standard on the G37S and the 370Z Track model (I think it's called "Track"..can't remember).
First, I weighed the Akebono kit at work.
Adapter Brackets, front left and right: 1.8lbs
Hardware, front: 2 lbs (reuse existing rear hardware)
Front Calipers: 10 lbs each
Rear Calipers: 5 lbs each
Front Rotors (14" Stoptech Slotted): 27lbs each ( )
)
Rear Rotors (13.8" OEM blanks, vented): 18lbs each ()
I will weigh the existing components next week and update this thread to show the delta in both unsprung and rotating mass.
Some tools needed for the install:
Floor jack and jack stands. I used stands for the front of the car and my floor jack to raise the rear via the rear differential.
Basic set of sockets, wrenches. A 7/8" socket was required to remove the bolts on the front caliper.
Tin snips, dremel, cutoff wheel or equivalent to remove/cut dust shields.
Vice grips
10mm open ended wrench (Akebono calliper bleeders)
Flathead screwdriver
Rubber mallet
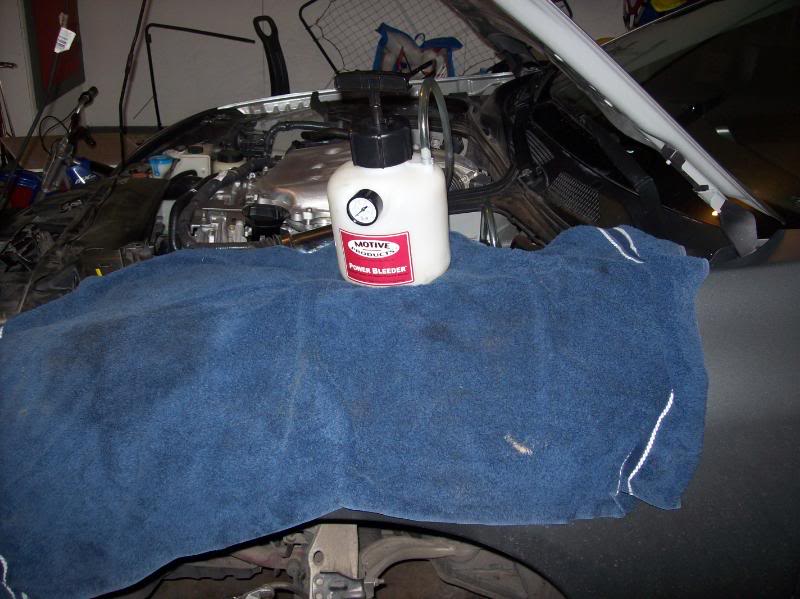
Bowls and tubing to bleed brake system (I used 1/8� aquarium line)
Onto the install:
Break all lug nuts loose, raise car, remove wheels and set aside. You will have access to the existing rotor and caliper now.
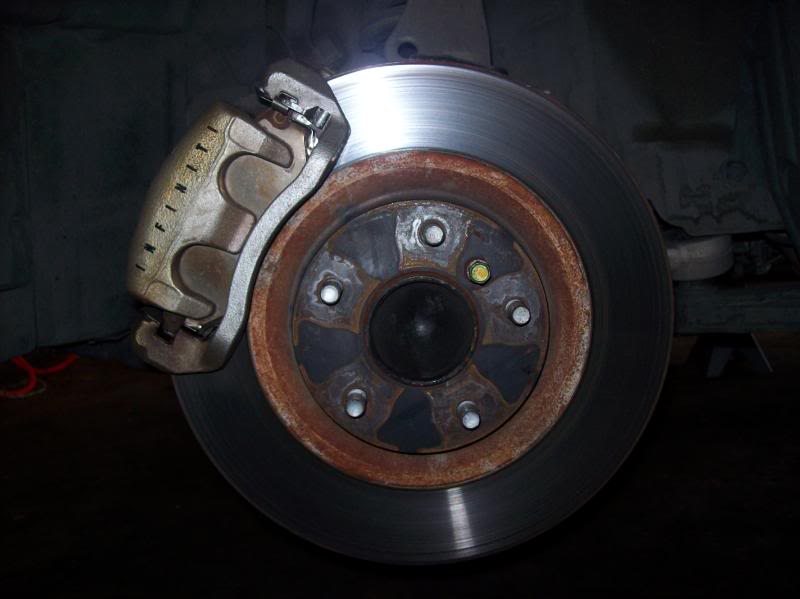
Front rotor/caliper
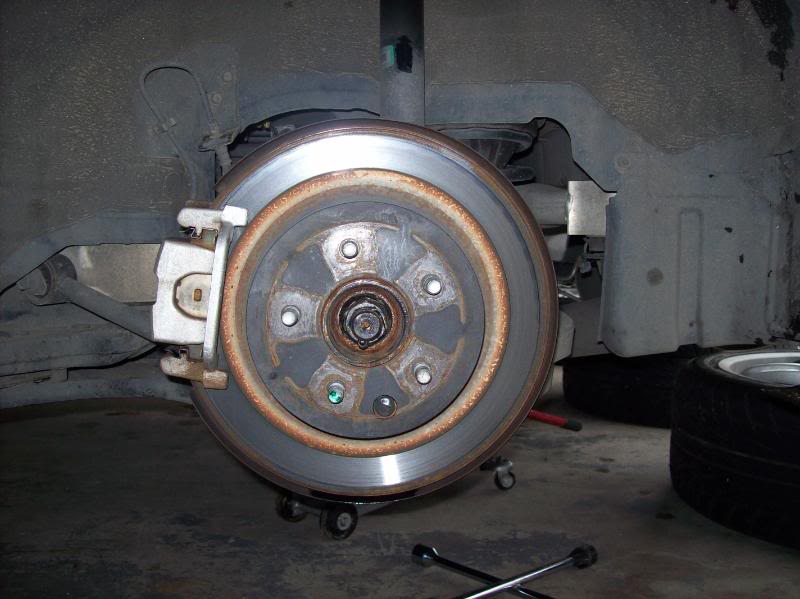
Rear rotor/caliper
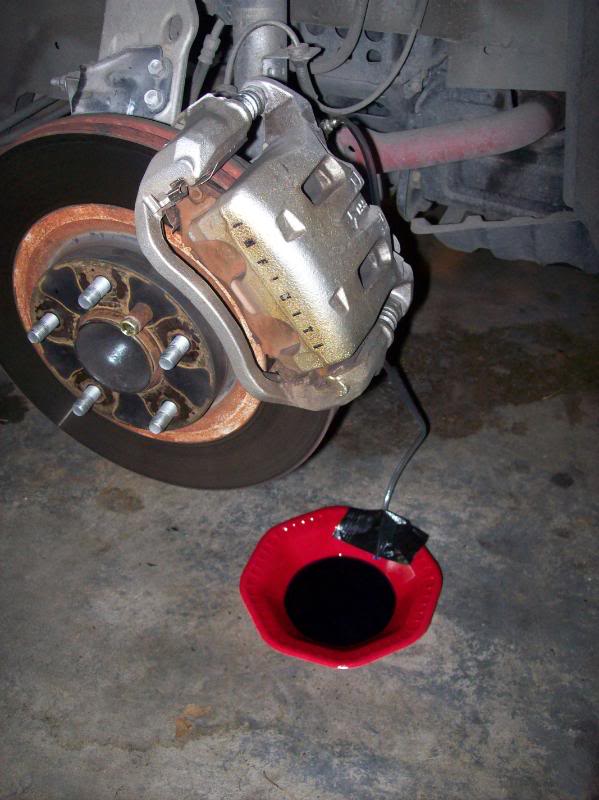
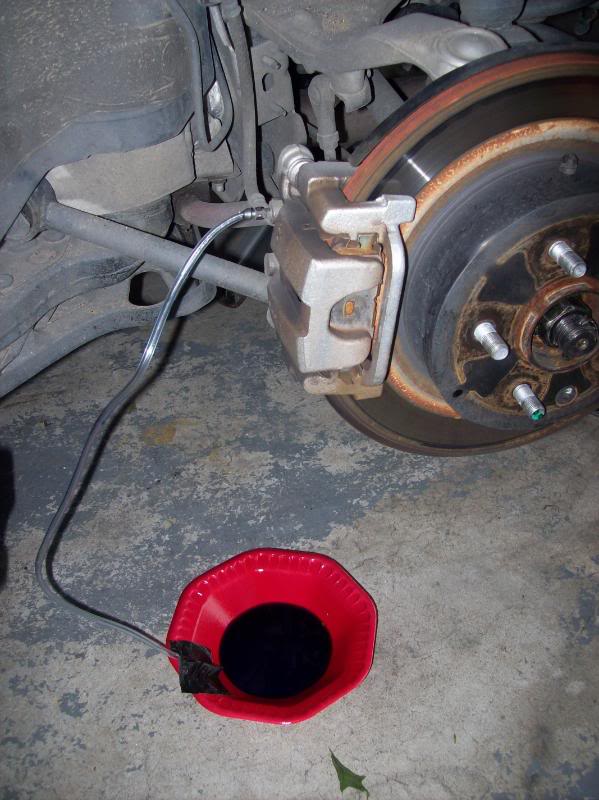
Set up some bowls/cups (whatever works for you) under each caliper and drain brake fluid. Attach the tubing to the bleeder screw and slowly open the screw.
Rear drain setup
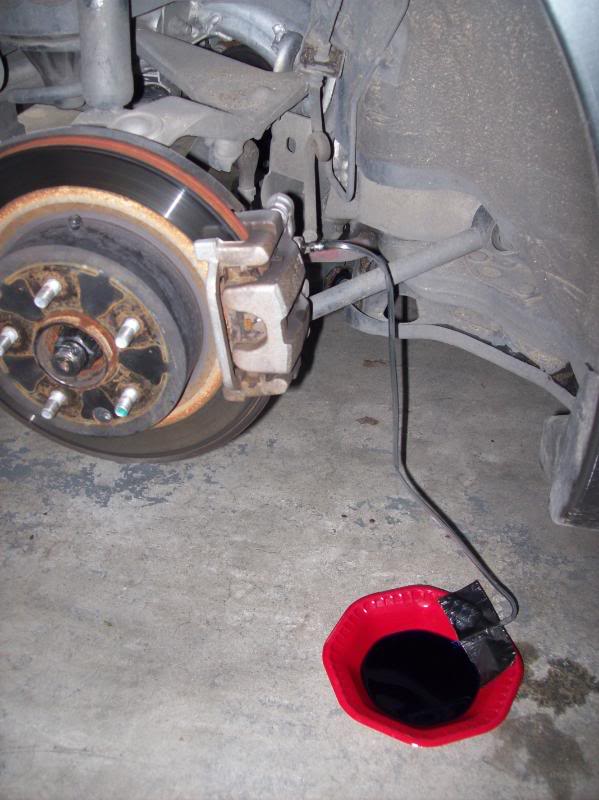
Front drain setup,
I used the Motive 0107 bleeder to flush the brake system,
Be very careful with brake fluid, it is highly corrosive and will eat through your clear coat and paint in a short amount of time.
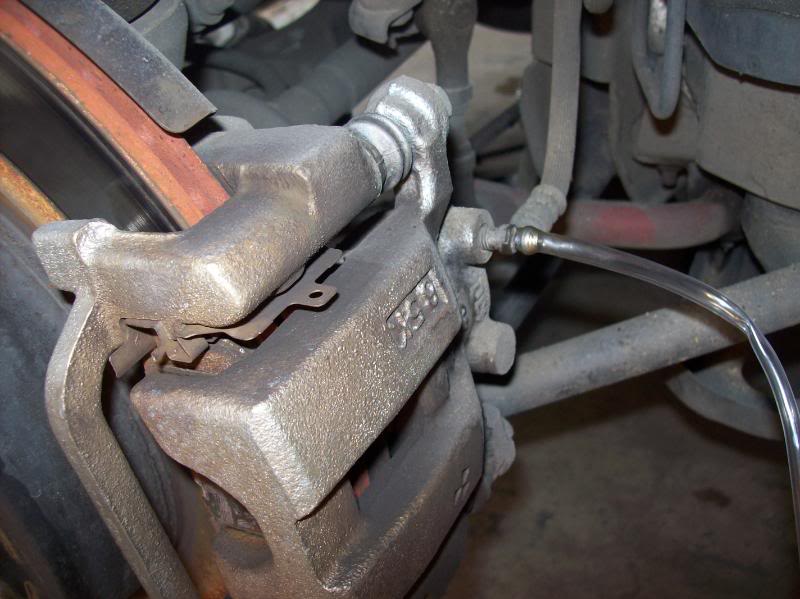
Tubing on front caliper bleeder valve,

Front caliper fluid drained.
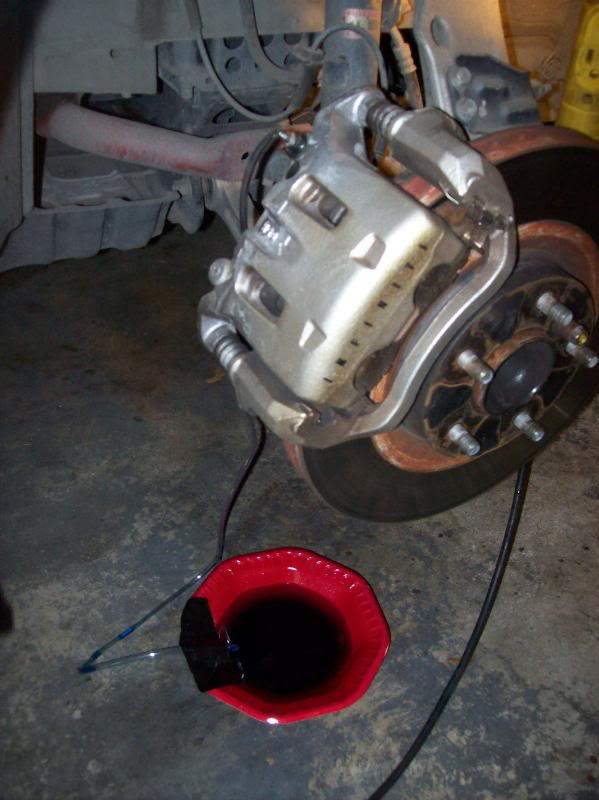
Rear caliper tubing,
Rear caliper drained.
Do this to all four corners. I started passenger rear, drivers rear, passenger front, then drivers front until all the fluid was evacuated from the system.
I bought stainless steel brake line with my kit, if you are using the OEM lines then ignore the next few steps.
Break loose the two bolts attaching the caliper. I used a 7/8� socket for these. If you have never removed these then it would help to spray some PB Blaster/WD40 on them and let them sit for a while.
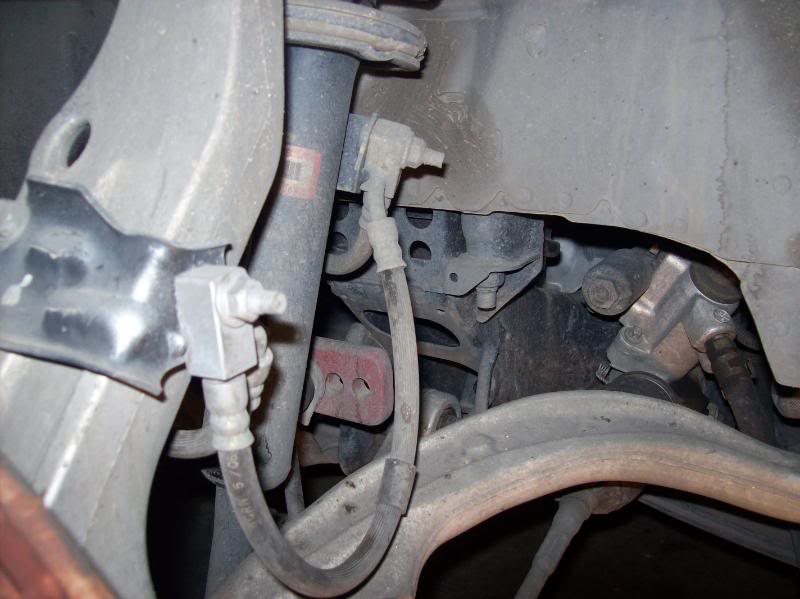
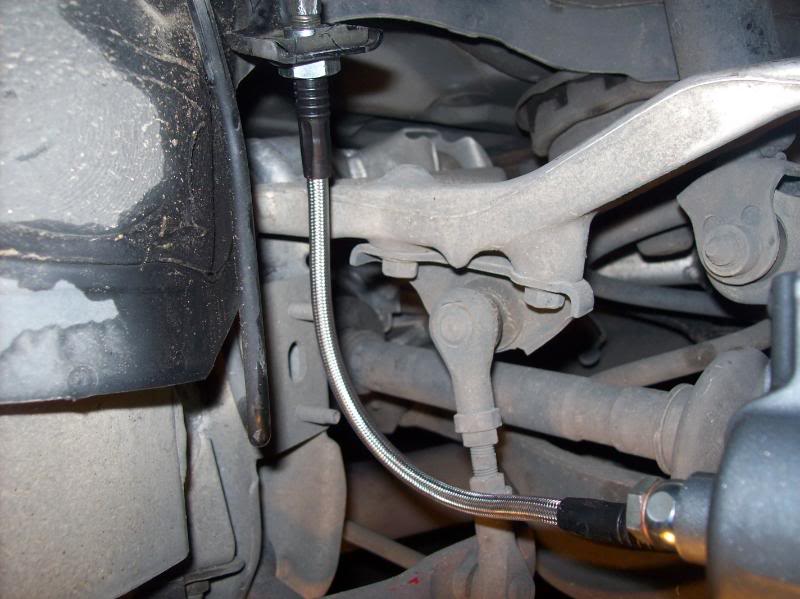
Remove the two 12mm bolts securing the OEM lines to the strut.
First, I weighed the Akebono kit at work.
Adapter Brackets, front left and right: 1.8lbs
Hardware, front: 2 lbs (reuse existing rear hardware)
Front Calipers: 10 lbs each
Rear Calipers: 5 lbs each
Front Rotors (14" Stoptech Slotted): 27lbs each (
)Rear Rotors (13.8" OEM blanks, vented): 18lbs each (
)I will weigh the existing components next week and update this thread to show the delta in both unsprung and rotating mass.
Some tools needed for the install:
Floor jack and jack stands. I used stands for the front of the car and my floor jack to raise the rear via the rear differential.
Basic set of sockets, wrenches. A 7/8" socket was required to remove the bolts on the front caliper.
Tin snips, dremel, cutoff wheel or equivalent to remove/cut dust shields.
Vice grips
10mm open ended wrench (Akebono calliper bleeders)
Flathead screwdriver
Rubber mallet
Bowls and tubing to bleed brake system (I used 1/8� aquarium line)
Onto the install:
Break all lug nuts loose, raise car, remove wheels and set aside. You will have access to the existing rotor and caliper now.
Front rotor/caliper
Rear rotor/caliper
Set up some bowls/cups (whatever works for you) under each caliper and drain brake fluid. Attach the tubing to the bleeder screw and slowly open the screw.
Rear drain setup
Front drain setup,
I used the Motive 0107 bleeder to flush the brake system,
Be very careful with brake fluid, it is highly corrosive and will eat through your clear coat and paint in a short amount of time.
Tubing on front caliper bleeder valve,
Front caliper fluid drained.
Rear caliper tubing,
Rear caliper drained.
Do this to all four corners. I started passenger rear, drivers rear, passenger front, then drivers front until all the fluid was evacuated from the system.
I bought stainless steel brake line with my kit, if you are using the OEM lines then ignore the next few steps.
Break loose the two bolts attaching the caliper. I used a 7/8� socket for these. If you have never removed these then it would help to spray some PB Blaster/WD40 on them and let them sit for a while.
Remove the two 12mm bolts securing the OEM lines to the strut.
 05-03-2009, 02:28 PM
#2
New Member
Thread Starter
iTrader: (3)
Join Date: Feb 2008
Location: Tulsa, OK
Posts: 250
Likes: 0
Received 0 Likes
on
0 Posts
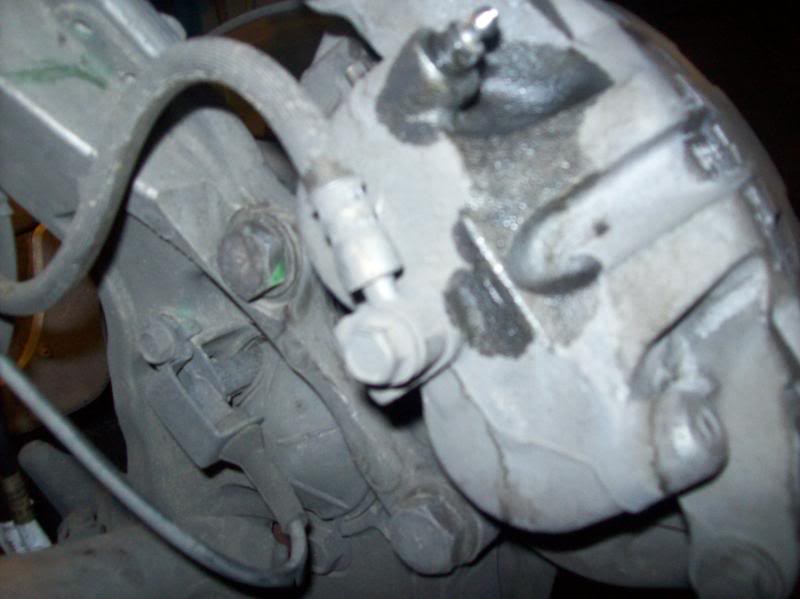
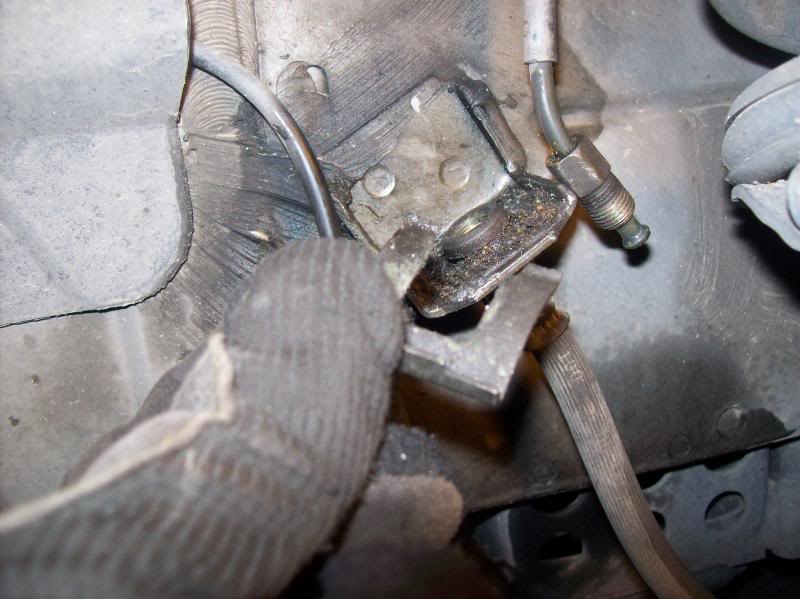
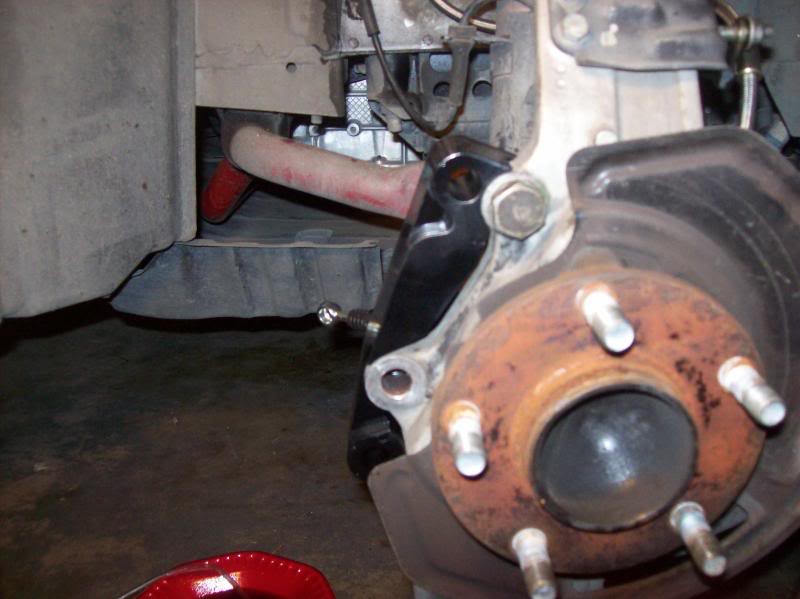
This is a tricky step, remove the clip that holds the OEM brake line to this bracket. There was quite a bit of dirt and debris in there, I used a small flathead and worked around the clip until it came out. I used a small pair of vice grips to loosen the nut.
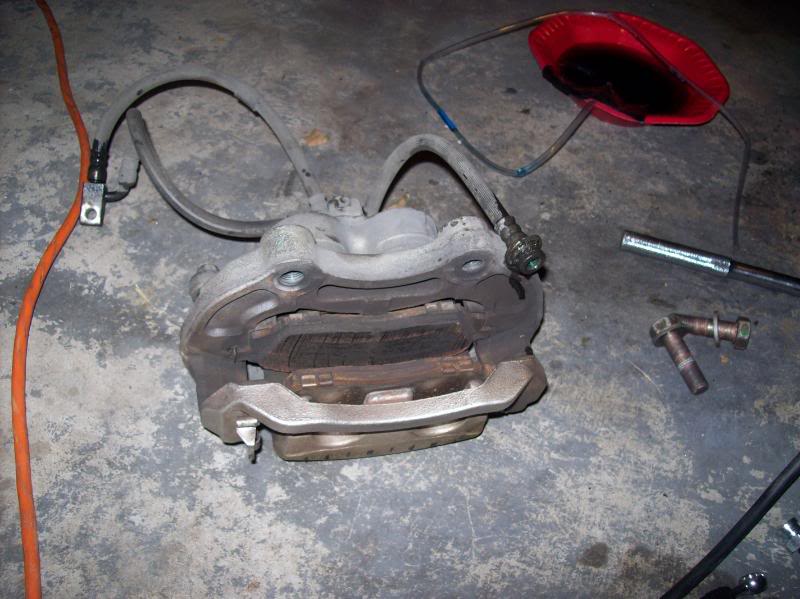
Now that the two caliper attach bolts are broken loose and the lines are unhooked, simply slide the caliper off the rotor. You may need to rock it back and forth a few times for it to come loose. Here�s one of the front calipers off the car,
Now it�s time to remove the rotor. You may need to break out the rubber mallet for this one. Nothing like banging loudly on your car at midnight! Rotor removed and off the car,
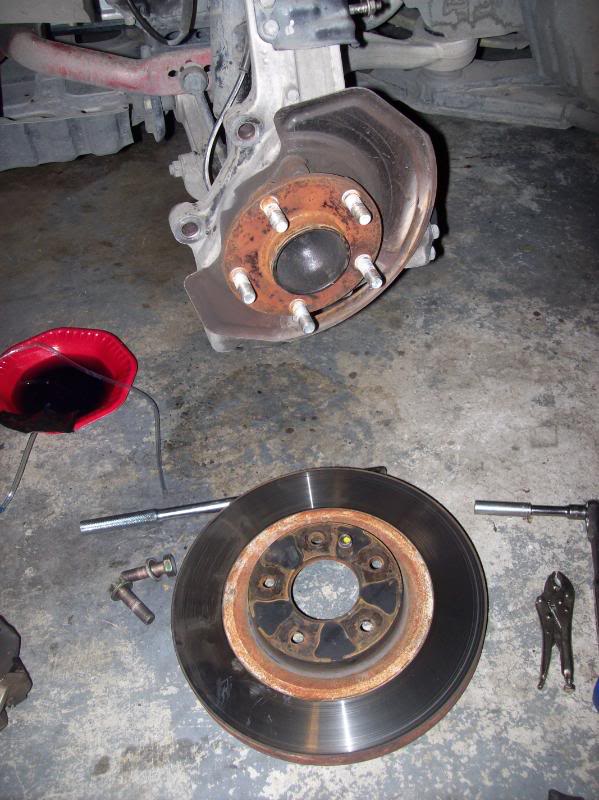
Now we have a clear shot of the dust shield. You MUST trim or remove the shields to get the new BBK to fit. I initially wanted to remove the shields but they are sandwiched in between the spindle and the main suspension components. I was able to remove 4 of the 5 17mm (I think) bolts, the last one I could not remove. This said, it was time to start hacking as much of the dust shield off as possible! You can get by with trimming a little, but I wanted that thing gone! If dirt or debris gets into the rotor it should be able to find its way out pretty easily.
This is one of the tabs that will get in the way (lower front)
Closeup of dust shield on
Dust shield trimmed to my liking,
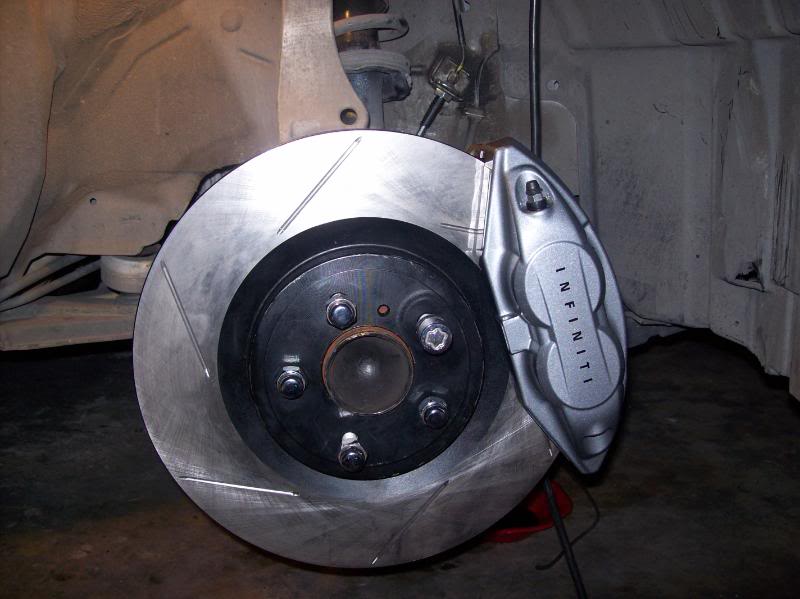
Here�s the OEM front rotor next to the Stoptech rotor.

Do this for both front brakes. Now it�s time to go work on the rear brakes!
Again, if you are re-using your existing lines then skip this step. Loosen the nut attaching the flexible brake line to the hard line using a flared wrench or vice grips (same as front, except there are no attachments to the strut�.much easier!)
Remove two 19mm bolts attaching the rear caliper to the car. Again, if you have never removed them then let them soak in PB Blaster or WD40. (Sorry, no good pics of this.)
Here�s where you get to bang on the car VERY violently. Make sure you release the parking brake first. The rear rotors seem to get stuck harder than the front rotors. I sprayed around the 5 bolts and hub with PB Blaster and let it sit a few minutes then started hitting it with the mallet. Hit the rotor along the back side, actually the dust shield. Also hit it along the outer perimeter of the rotor. Eventually (after a good 15 minutes for me) the rotor broke loose.
With the rotor removed we can start hacking away at the rear dust shield. The rear dust shield has an out ring that must be trimmed for the new larger rotors to fit. Again, I cut as much of the shield off as I could.
Rear dust shield hacked to pieces!

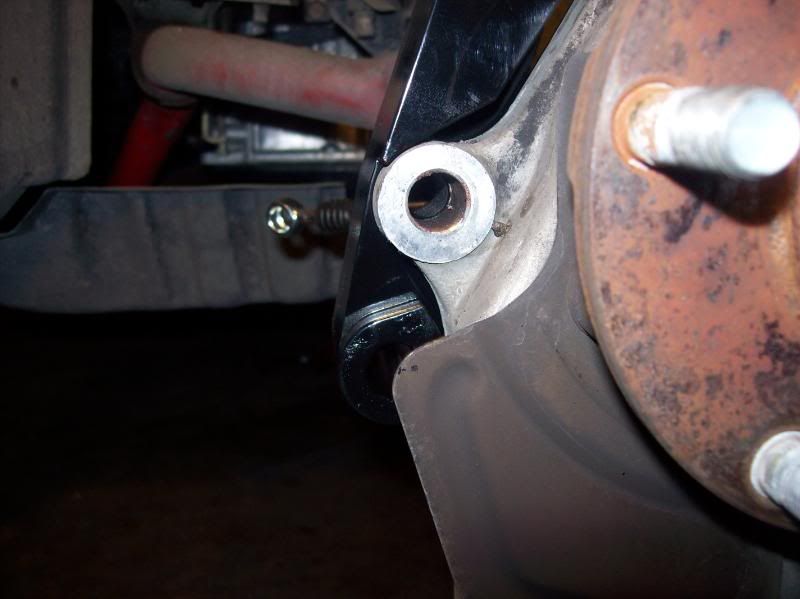
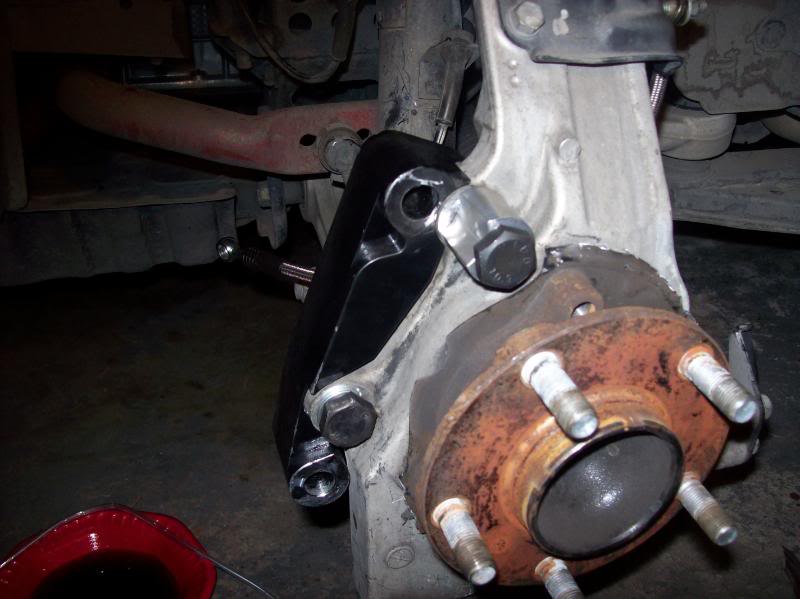
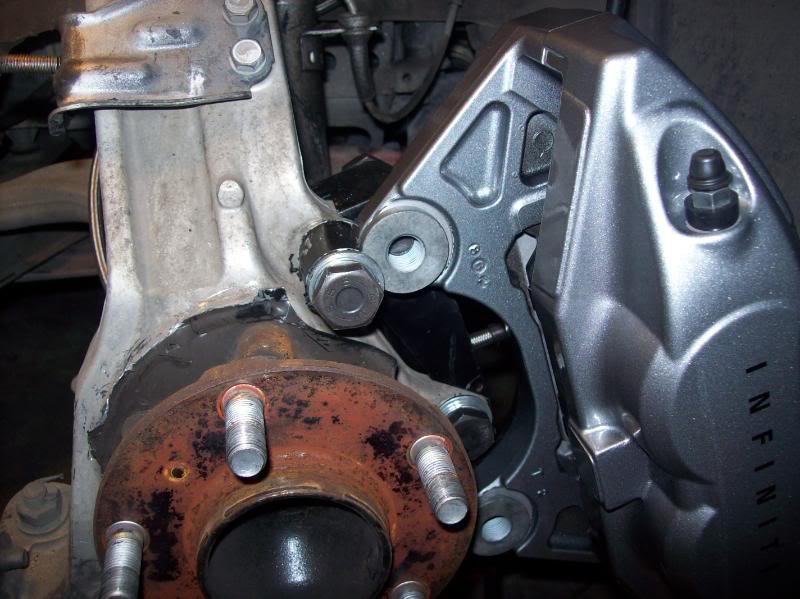
Now it�s time to look at the front brackets to attach the Akebono calipers. Unfortunately there were no instructions on how to install these. I looked at some pics online and it helped a little. The COZ bracket kit comes with four machined parts, two large brackets and two moon shaped pieces. After trying different combo to fit here is what works:
(picture shown above also)
Now, the tricky part of this is to get the moon shaped piece aligned just right�there isn�t much room for error on this. If it is not aligned right then the upper caliper bolt holes will not line up. Here is what I eventually did after a few failures. With the rotor off the car, attach the large bracket as show. Then attach the moon piece, but do not tighten down. Attach the Akebono caliper to the bracket. Now, align the moon spacer so that the upper caliper bolt hole aligns with the caliper bracket and install bolt to secure calipers. Now that the caliper is secure and in place, go ahead and tighten down the moon shaped spacer. Remove the caliper and install the rotor.
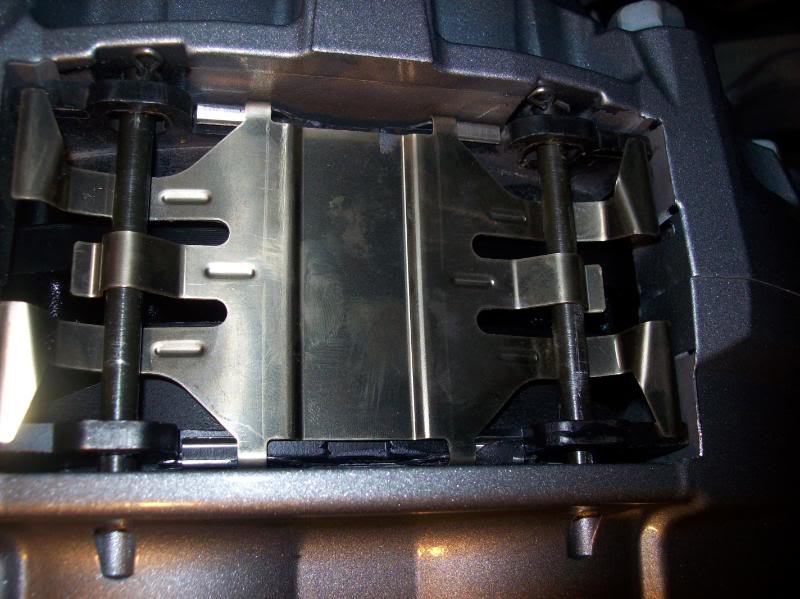
Now that the front rotors are on it�s time to build up the calipers. The kit comes with grease, pads, shims, pins, clips, cotter pins�.everything you need. I didn�t take pics of
Now that the two caliper attach bolts are broken loose and the lines are unhooked, simply slide the caliper off the rotor. You may need to rock it back and forth a few times for it to come loose. Here�s one of the front calipers off the car,
Now it�s time to remove the rotor. You may need to break out the rubber mallet for this one. Nothing like banging loudly on your car at midnight! Rotor removed and off the car,
Now we have a clear shot of the dust shield. You MUST trim or remove the shields to get the new BBK to fit. I initially wanted to remove the shields but they are sandwiched in between the spindle and the main suspension components. I was able to remove 4 of the 5 17mm (I think) bolts, the last one I could not remove. This said, it was time to start hacking as much of the dust shield off as possible! You can get by with trimming a little, but I wanted that thing gone! If dirt or debris gets into the rotor it should be able to find its way out pretty easily.
This is one of the tabs that will get in the way (lower front)
Closeup of dust shield on
Dust shield trimmed to my liking,
Here�s the OEM front rotor next to the Stoptech rotor.
Do this for both front brakes. Now it�s time to go work on the rear brakes!
Again, if you are re-using your existing lines then skip this step. Loosen the nut attaching the flexible brake line to the hard line using a flared wrench or vice grips (same as front, except there are no attachments to the strut�.much easier!)
Remove two 19mm bolts attaching the rear caliper to the car. Again, if you have never removed them then let them soak in PB Blaster or WD40. (Sorry, no good pics of this.)
Here�s where you get to bang on the car VERY violently. Make sure you release the parking brake first. The rear rotors seem to get stuck harder than the front rotors. I sprayed around the 5 bolts and hub with PB Blaster and let it sit a few minutes then started hitting it with the mallet. Hit the rotor along the back side, actually the dust shield. Also hit it along the outer perimeter of the rotor. Eventually (after a good 15 minutes for me) the rotor broke loose.
With the rotor removed we can start hacking away at the rear dust shield. The rear dust shield has an out ring that must be trimmed for the new larger rotors to fit. Again, I cut as much of the shield off as I could.
Rear dust shield hacked to pieces!
Now it�s time to look at the front brackets to attach the Akebono calipers. Unfortunately there were no instructions on how to install these. I looked at some pics online and it helped a little. The COZ bracket kit comes with four machined parts, two large brackets and two moon shaped pieces. After trying different combo to fit here is what works:
(picture shown above also)
Now, the tricky part of this is to get the moon shaped piece aligned just right�there isn�t much room for error on this. If it is not aligned right then the upper caliper bolt holes will not line up. Here is what I eventually did after a few failures. With the rotor off the car, attach the large bracket as show. Then attach the moon piece, but do not tighten down. Attach the Akebono caliper to the bracket. Now, align the moon spacer so that the upper caliper bolt hole aligns with the caliper bracket and install bolt to secure calipers. Now that the caliper is secure and in place, go ahead and tighten down the moon shaped spacer. Remove the caliper and install the rotor.
Now that the front rotors are on it�s time to build up the calipers. The kit comes with grease, pads, shims, pins, clips, cotter pins�.everything you need. I didn�t take pics of
05-03-2009, 02:29 PM
#3
New Member
Thread Starter
iTrader: (3)
Join Date: Feb 2008
Location: Tulsa, OK
Posts: 250
Likes: 0
Received 0 Likes
on
0 Posts
the build up because everyone was asleep and my hands had shim grease all over them. Here�s the front caliper on the car,
The front was a tight fit, hopefully it will loosen up a little after some driving. Now, install the caliper to the adapter bracket.
Attach the new brake lines to the caliper, 14mm bolt. No pics, but it�s pretty much error free.
The rear calipers are much easier to install. Build up the brake pad/shim/clip assembly and put in the caliper. Reuse the existing 17mm bolts to attach the caliper to the car.
Caliper/rotor on car,
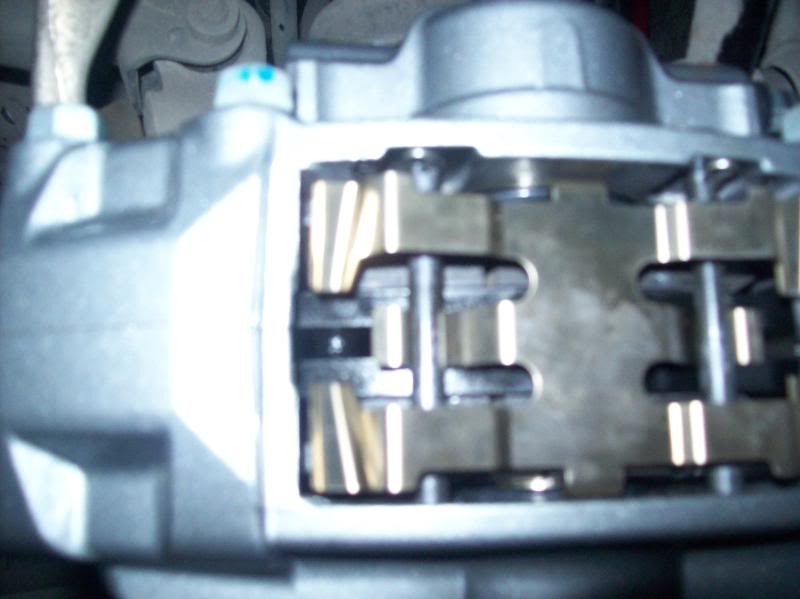
Pad build up,
Brake line installation,
Now that everything is installed it�s now time to refill the system with brake fluid, reinstall the wheels, lower the car and brake in the pads. Make sure to lower the rear of the car first and put some tire chucks behind the tires before you lower the front so the car won�t roll back.
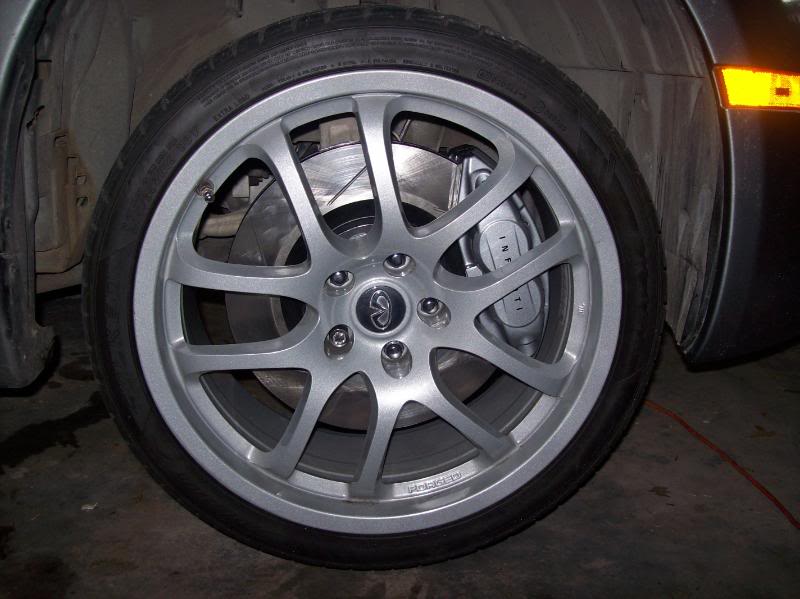
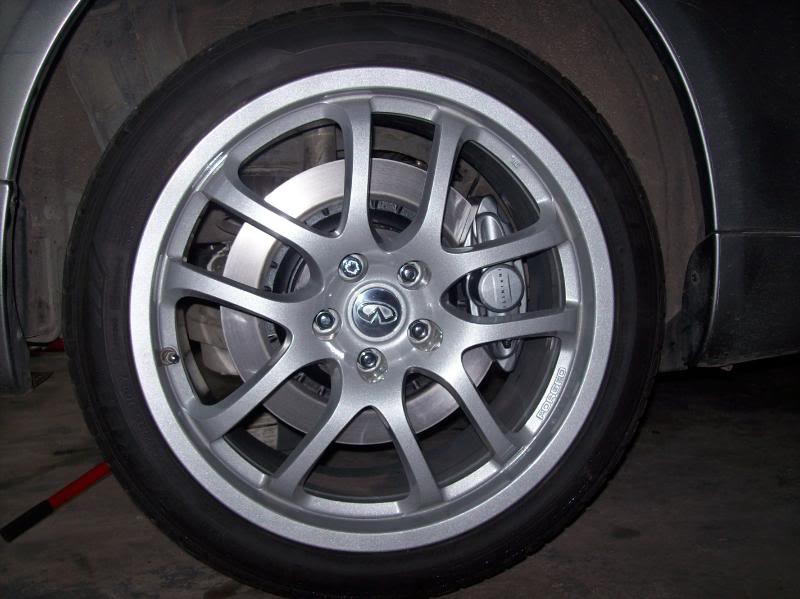
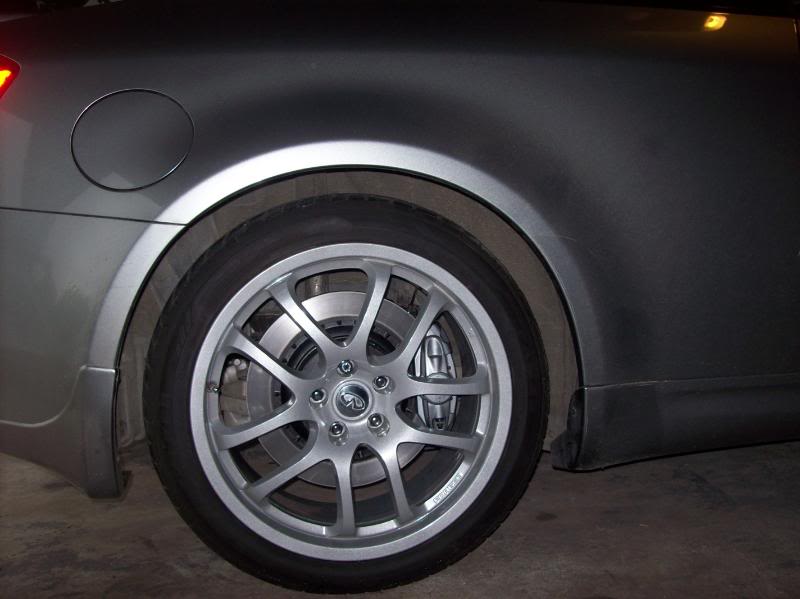
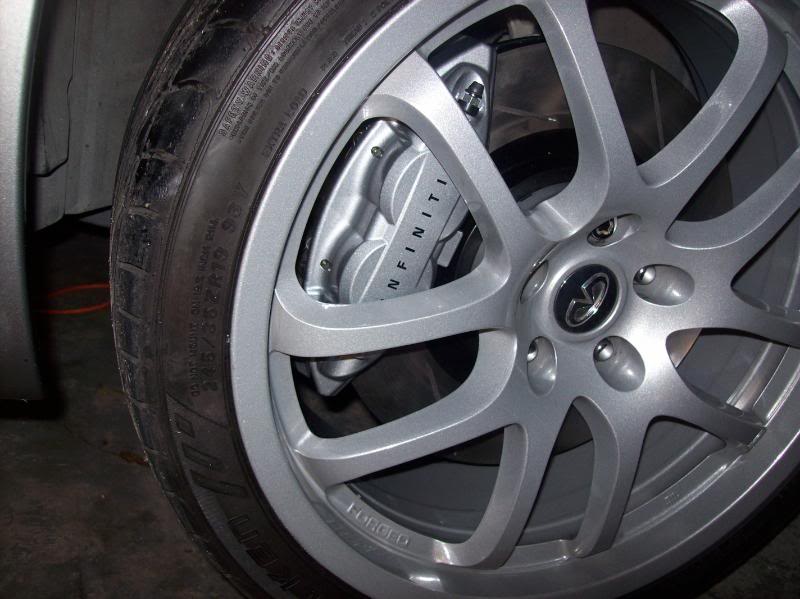
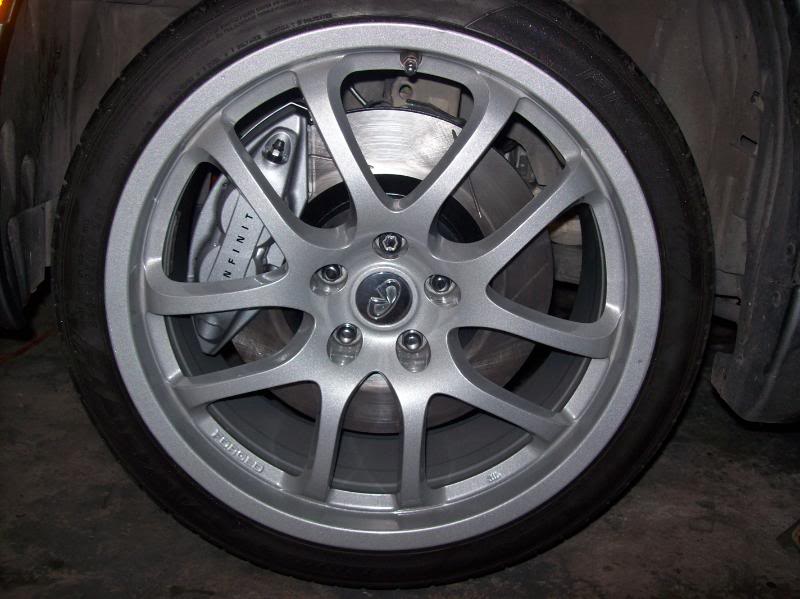
Here�s a few pics of mine installed.
I could have sworn I took more pics of the install, let me dig around my memory card to see if they are somewhere on there.
I haven�t had a chance to drive the car yet though! It�s been raining for the past week and I�m waiting for it to dry up so I can brake in the pads.
The front was a tight fit, hopefully it will loosen up a little after some driving. Now, install the caliper to the adapter bracket.
Attach the new brake lines to the caliper, 14mm bolt. No pics, but it�s pretty much error free.
The rear calipers are much easier to install. Build up the brake pad/shim/clip assembly and put in the caliper. Reuse the existing 17mm bolts to attach the caliper to the car.
Caliper/rotor on car,
Pad build up,
Brake line installation,
Now that everything is installed it�s now time to refill the system with brake fluid, reinstall the wheels, lower the car and brake in the pads. Make sure to lower the rear of the car first and put some tire chucks behind the tires before you lower the front so the car won�t roll back.
Here�s a few pics of mine installed.
I could have sworn I took more pics of the install, let me dig around my memory card to see if they are somewhere on there.
I haven�t had a chance to drive the car yet though! It�s been raining for the past week and I�m waiting for it to dry up so I can brake in the pads.
05-03-2009, 02:36 PM
#4
New Member
Thread Starter
iTrader: (3)
Join Date: Feb 2008
Location: Tulsa, OK
Posts: 250
Likes: 0
Received 0 Likes
on
0 Posts
I had a chance to drive a little today, tried to bed in the pads but it was still raining pretty hard. I don't care to do 70-10 stops in that weather. I will say though, the brakes feel great and stop well. I'm waiting for our next track event to see how they hold up with repeated usage.
Also, one more thing to note. When I was putting the brakes on late at night I messed up and had the rear calipers on the wrong side. I installed everything late at night and filled/bled the system the next morning and noticed the pedal was very squishy (air in the system). I went to bleed the brakes again and stupid me noticed the bleeder screws were facing down on the rear calipers. MAKE SURE ALL BLEEDER SCREWS ARE FACING UP!!!!! This is so when you bleed the system the fluid fills the caliper chamber starting at the bottom, forcing the air out the top.
Also, one more thing to note. When I was putting the brakes on late at night I messed up and had the rear calipers on the wrong side. I installed everything late at night and filled/bled the system the next morning and noticed the pedal was very squishy (air in the system). I went to bleed the brakes again and stupid me noticed the bleeder screws were facing down on the rear calipers. MAKE SURE ALL BLEEDER SCREWS ARE FACING UP!!!!! This is so when you bleed the system the fluid fills the caliper chamber starting at the bottom, forcing the air out the top.
05-13-2009, 04:36 AM
#7
New Member
Thread Starter
iTrader: (3)
Join Date: Feb 2008
Location: Tulsa, OK
Posts: 250
Likes: 0
Received 0 Likes
on
0 Posts
Thanks for the compliments! I am still gauging interest for making the adapter brackets. I also thinking about making brackets that will allow the OEM Brembo calipers to accept larger 14" rotors....I'm going to test that out soon.
Trending Topics
05-13-2009, 06:06 AM
#8

Great DIY. Though one big warning to others.
Draining your system completely is a big NO NO. Close off the lines, do not drain them, then bleed them once they are reconnected to the new calipers. ABS systems have a lot of passages and your Master Cylinder and draining it completely you could get air the system and never be able to get it out without professional equipment.
Also the front Dust shields can be unbolted (4 bolts if I recall). No need to cut them off.
Last edited by SOLO-350Z; 05-13-2009 at 06:10 AM.
05-13-2009, 07:47 AM
#9
New Member
Thread Starter
iTrader: (3)
Join Date: Feb 2008
Location: Tulsa, OK
Posts: 250
Likes: 0
Received 0 Likes
on
0 Posts
Great DIY. Though one big warning to others.
Draining your system completely is a big NO NO. Close off the lines, do not drain them, then bleed them once they are reconnected to the new calipers. ABS systems have a lot of passages and your Master Cylinder and draining it completely you could get air the system and never be able to get it out without professional equipment.
Also the front Dust shields can be unbolted (4 bolts if I recall). No need to cut them off.
Draining your system completely is a big NO NO. Close off the lines, do not drain them, then bleed them once they are reconnected to the new calipers. ABS systems have a lot of passages and your Master Cylinder and draining it completely you could get air the system and never be able to get it out without professional equipment.
Also the front Dust shields can be unbolted (4 bolts if I recall). No need to cut them off.
05-13-2009, 10:33 AM
#11
New Member
Thread Starter
iTrader: (3)
Join Date: Feb 2008
Location: Tulsa, OK
Posts: 250
Likes: 0
Received 0 Likes
on
0 Posts
I'll try to turn the wheels tonight to get a little more access to the lower bolt. If I can get access to that then yes, it is a quick job, otherwise it is b*tch. Thanks for the tip,
05-19-2009, 10:23 PM
#12

Nice write up, Looks Good!
Did you end up weighing the stock stuff to compare net gain? usually the gain in the rotors is mostly offset by the reduced caliper weight
also any plans for the infinite --> nissan script change, stickers etc?
The oem brembo's are designed for the ~13in rotor - on a 14" rotor the curve of the caliper will make the 2 ends hit before the complete pad will contact the rotor - [the pads will overhang over the top of the rotor...]
the brembo BBK calipers are larger than OEM brembos calipers to accomodate larger rotors
- sorry
 05-19-2009, 11:51 PM
#13
Banned
iTrader: (22)

Join Date: Mar 2006
Location: Hawaii
Posts: 1,462
Likes: 0
Received 0 Likes
on
0 Posts
Nice write up, Looks Good!
Did you end up weighing the stock stuff to compare net gain? usually the gain in the rotors is mostly offset by the reduced caliper weight
also any plans for the infinite --> nissan script change, stickers etc?
The oem brembo's are designed for the ~13in rotor - on a 14" rotor the curve of the caliper will make the 2 ends hit before the complete pad will contact the rotor - [the pads will overhang over the top of the rotor...]
the brembo BBK calipers are larger than OEM brembos calipers to accomodate larger rotors
- sorry
05-31-2009, 03:45 PM
#14

Was looking on the site that sells these kits and it looked like in the pics that the calipers were not left and right specific.
Guess I was wrong but I thought bleeder screws were suppose to be in the up/top position, instead of pointing downward, as to not allow air into the caliper when bleeding by any method.
Guess I was wrong but I thought bleeder screws were suppose to be in the up/top position, instead of pointing downward, as to not allow air into the caliper when bleeding by any method.
 06-01-2009, 06:43 PM
#16
New Member
Thread Starter
iTrader: (3)
Join Date: Feb 2008
Location: Tulsa, OK
Posts: 250
Likes: 0
Received 0 Likes
on
0 Posts
Was looking on the site that sells these kits and it looked like in the pics that the calipers were not left and right specific.
Guess I was wrong but I thought bleeder screws were suppose to be in the up/top position, instead of pointing downward, as to not allow air into the caliper when bleeding by any method.
Guess I was wrong but I thought bleeder screws were suppose to be in the up/top position, instead of pointing downward, as to not allow air into the caliper when bleeding by any method.
That was fixed and updated in the original post.
07-17-2009, 02:25 PM
#17
Registered User
iTrader: (9)

Join Date: Jun 2007
Location: CT/MA
Posts: 2,449
Likes: 0
Received 0 Likes
on
0 Posts
I just installed this onto my 06 Z and the rear bolt that connects the brake line to the rear caliper isnt the right size??? What can I do, I went to the dealer and no one has that bolt that screws in!!! Help ;(
07-17-2009, 06:15 PM
#18
New Member
Thread Starter
iTrader: (3)
Join Date: Feb 2008
Location: Tulsa, OK
Posts: 250
Likes: 0
Received 0 Likes
on
0 Posts
Really? wow, mine was a direct fit. Put the OEM rears back on and go to auto parts stores to see if they have a banjo bolt to fit the rear caliper. You will need to bring the Akebono caliper with you to the store of course. You might also have to visit plenty of stores too. I don't know what size it is off hand, but it shouldn't be that difficult to find. Did you buy stainless brake lines also or are you reusing your old lines?
Good luck,


