DIY - SPL Upper Control Arm Install - Extra shims made!
#41
350Z-holic

Thread Starter
iTrader: (60)
Join Date: Jan 2006
Location: San Antonio/I miss DFW, TX
Posts: 11,204
Likes: 0
Received 28 Likes
on
19 Posts
Thanks for this write up. I was seriously considering buying the SPL arms to fix the caster.
However you made me aware of the fact that some of the bushings might be torn, and that's whats giving me the caster differences.
FL is 8.3
FR is 7.8
That's .5 difference. Do you think this is caused only by bushings or could it be a compound effect by damaged body control arm mounts? (was in a small curbing incident where most of the right side arms were replaced)
as for the damage - who knows..that also can be part of the reason...after you get new bushings in, and if the numbers are still OFF then look to replacing arms/components.
for you, i WOULD recommend SPL upper control arms, because with them you CAN dial in both camber and caster incrementally.........
see, in the end, you don't know whats bent, tweaked or torn that can be causing your mis-alignment.....so, if changing bushings along doesnt fix it, then i would get spl arms and dial it in, cause who knows, your unibody mounting points can be tweeked, the K member can be tweaked at the transverse arm mounting, or the pin at the compression arm to body mount point...
after a wreck, i would remove, inspect and check alignment on everything...
i myself own digital angle gauges, etc....my car itself has a level mounted on it by the mirror (like a RV bubble level).....
from there, only other thing you can do is lazer shoot the car at a auto repair shop that has lazer repair alignment machine and the 350z data in their system..
-J
#42
350Z-holic

Thread Starter
iTrader: (60)
Join Date: Jan 2006
Location: San Antonio/I miss DFW, TX
Posts: 11,204
Likes: 0
Received 28 Likes
on
19 Posts
Another add if I may. A buddy of mine and I were discussing the SPL arms about 4 months ago and lamenting the fact they didn't offer more positive camber adjustment. I've had mine on a G for almost 2 years and I'm dropped 3" but the best front camber I could get with all the shims was -2.2*. So he called Kuah and was told that by rotating the heim joints at the end of each arm equi-distant to each other another 1.5* positive camber adjustment was possible. You pull them out 1" to achieve this and Kuah said that leaves plenty of the bolt seated in the arm to be safe, even for tracking and heavy driving.
So I tried it and glory halleluja, it freaking worked like a charm. So now I'm running stock camber and toe and sitting pretty. Life is good and so is tire wear.
BTW I'm local to SPL in Austin and the last time I was at the shop Kuah gave me a free upgrade kit with the V3 heads, heim joints, and bushings to replace my V2 parts. I believe he's still offering that to original V2 owners that can prove purchase from an authorized vendor. You guys might want to hit him up if you have the V2s and see if he's still offering that. Great guy IMO.
So I tried it and glory halleluja, it freaking worked like a charm. So now I'm running stock camber and toe and sitting pretty. Life is good and so is tire wear.

BTW I'm local to SPL in Austin and the last time I was at the shop Kuah gave me a free upgrade kit with the V3 heads, heim joints, and bushings to replace my V2 parts. I believe he's still offering that to original V2 owners that can prove purchase from an authorized vendor. You guys might want to hit him up if you have the V2s and see if he's still offering that. Great guy IMO.
i should have noted that, but i left it to obvious....sorry..
-J
#43
New Member
iTrader: (1)
Join Date: Jul 2011
Location: Houston
Posts: 174
Likes: 0
Received 0 Likes
on
0 Posts
yes, it could be bushings alone...as i myself would have .5 or greater difference before changing out to the spl compression arm bushing.
as for the damage - who knows..that also can be part of the reason...after you get new bushings in, and if the numbers are still OFF then look to replacing arms/components.
as for the damage - who knows..that also can be part of the reason...after you get new bushings in, and if the numbers are still OFF then look to replacing arms/components.
As well as the front suspension bushings, I think I will also do the differential mounts and the subframe sets.
Not sure if rear arm bushings will help much, my alignment is within spec in the rear and I am not sure how the ride will suffer. Yes I plan to start tracking now that I have a second car, but I still want it to be usable on the street.
YES, you would need adjustable camber arms....
for you, i WOULD recommend SPL upper control arms, because with them you CAN dial in both camber and caster incrementally.........
see, in the end, you don't know whats bent, tweaked or torn that can be causing your mis-alignment.....so, if changing bushings along doesnt fix it, then i would get spl arms and dial it in, cause who knows, your unibody mounting points can be tweeked, the K member can be tweaked at the transverse arm mounting, or the pin at the compression arm to body mount point...
After the wreck (low speed curbing incident with drunk driver road rage) the insurance collision repairs replaced:
rear R camber toe and control arm and shock; wheel
front L+R compression rods (worn), lower control arm, and shock; wheel
Only the right side was impacted. If by K member you mean part # 54400M in the attachment, that part is undamaged.
What methods are there to detect any damage to the mounting points?
after a wreck, i would remove, inspect and check alignment on everything...
i myself own digital angle gauges, etc....my car itself has a level mounted on it by the mirror (like a RV bubble level).....
from there, only other thing you can do is lazer shoot the car at a auto repair shop that has lazer repair alignment machine and the 350z data in their system..
i myself own digital angle gauges, etc....my car itself has a level mounted on it by the mirror (like a RV bubble level).....
from there, only other thing you can do is lazer shoot the car at a auto repair shop that has lazer repair alignment machine and the 350z data in their system..
#45
Super Moderator
MY350Z.COM
MY350Z.COM


iTrader: (8)
FYI, extra shims can easily be made, precision is not that important. I just grabbed some 1/8 aluminum from Home Depot and cut the pieces out , a little filing and dremel work. I made 8 in about 30 minutes.
#47
Registered User
iTrader: (5)
Install looks simple and straight forward. I'm currently at -2.3 and -2.1 up front.
So would I just install the medium & thin shims and call it good? I took care of my rear camber, but never purchased the front upper control arms. I got 13,000 miles out of the tires and just purchased replacements. So I am now looking to correct this issue. Hoping to avoid an alignment this year. Tires, SPL control arms, new TPMS sensors is enough $$$$ for this year.
So would I just install the medium & thin shims and call it good? I took care of my rear camber, but never purchased the front upper control arms. I got 13,000 miles out of the tires and just purchased replacements. So I am now looking to correct this issue. Hoping to avoid an alignment this year. Tires, SPL control arms, new TPMS sensors is enough $$$$ for this year.
#52
New Member
iTrader: (18)
Any tips for getting the shim bucket to open up for adding shims back in? Removing them is easy, but now that I've got the car up and want to add a shim back in.. there isn't room and that thing won't budge. I've obviously loosened the back nuts quite a bit and the little jam nuts. Pulling and some rubber mallet pounding isn't really helping.
edit - i went around to the other side and it opened up - no problem - gave the arma tug and it opened right up to added the shims back in.. passenger side won't budge.
edit/edit - nevermind.. i used a little pb blaster on it and let it soak for 10mins.. was able to pull the slide out in make room for the shim.
Last edited by thekinn; 06-15-2014 at 10:04 AM.
#53
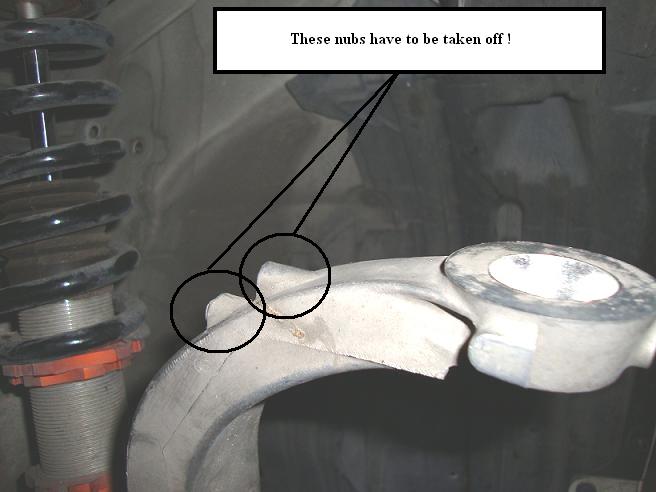
Okay so I just got the V3's in and im doing this install today, with ease I might add to this awesome write up thanks J. But as I went through it only thing that confused me is why is it actually neccesary to remove/grind away those nubs??
Last edited by ReNo350; 08-09-2014 at 12:18 PM.
#54
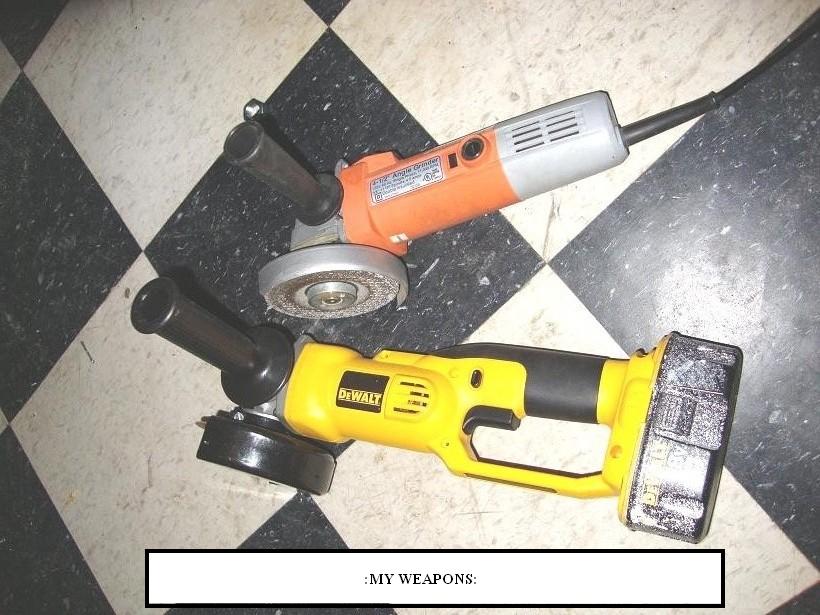
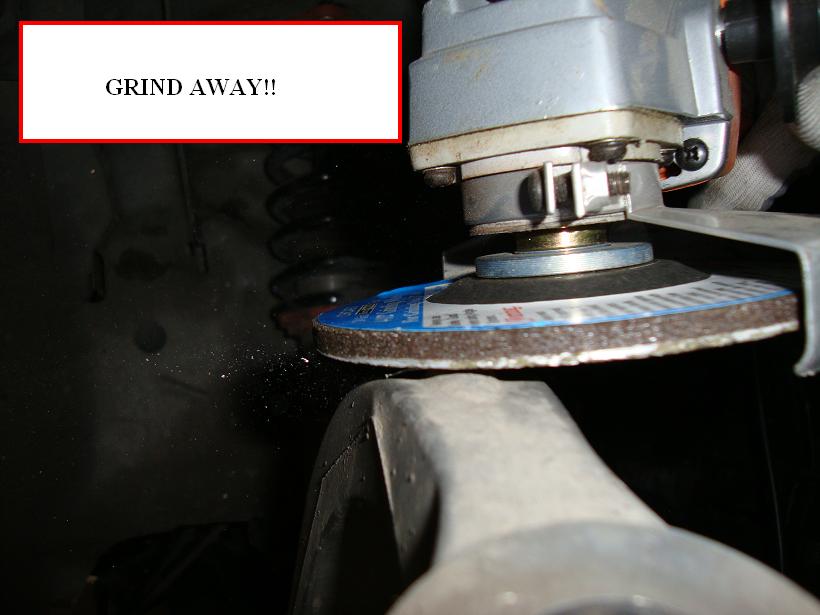
Did the the install this weekend.. And came up with a few things to make it easier. As I read some peeps were having a few issues/challenges. If you have the whole front of the car up on jack stands it relives the pressure and allows you to spin the springs on your coilovers to pull the bolts out from the control arm. I noticed this when I tried to jack up just one side of the car to pull the new arm off to make adjustments and I couldn't spin the coil over, jacked both sides up and had no problem spinning it. And for the grinding if you take off your caliper and un bolt the brake line holder from the arm you can move your caliper entirely out of the way allowing a full range of motion of the arm. I tied a rope around it so I could pull the arm into place for easy grinding I also used an oversize sanding wheel to have even more range. Its was a Diablo Steel Demon grinding and polishing wheel with a 7' diameter and 60 grit from home Depot $13 sanded it down like butter took 2 mins. Hope this helps and makes things easier for those in the future
Last edited by ReNo350; 08-10-2014 at 07:06 PM. Reason: Photo added
#56
New Member
No but you can find it yourself
Thread
Thread Starter
Forum
Replies
Last Post
Lt_Ballzacki
Brakes & Suspension
39
08-06-2021 06:19 AM


