Spent time with a GT-R (120 pics)
 10-17-2015, 05:55 PM
#61
Registered User
Thread Starter

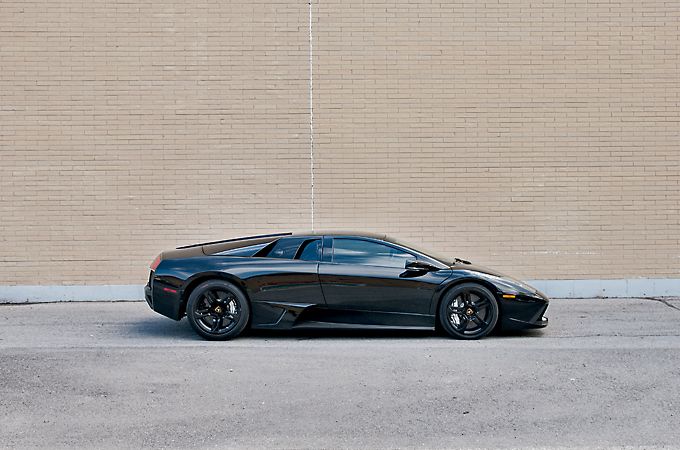
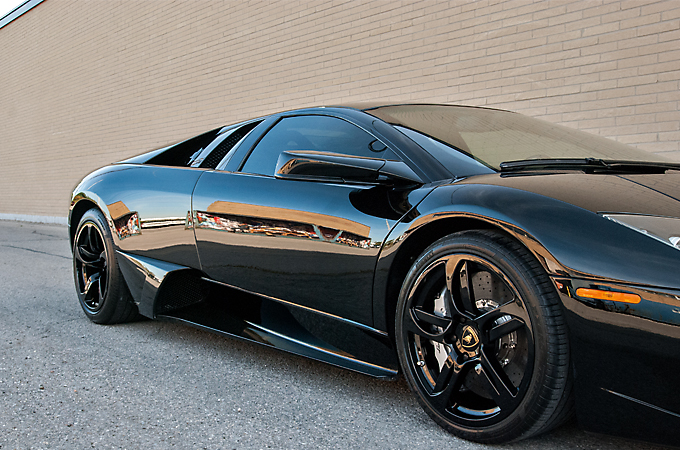
Very good client contacted me regarding a 2 stage polish + Opti Coat Pro on his recently purchased Lp640.
We had tried to schedule an appointment prior to this one but due to rainy weather we had to reschedule and he mentioned that maybe he was considering postponing the detail until the springtime, which is understandable. Luckily ... he had a change of heart and we were able to schedule a date where the weather worked in our favour!
So in to the shop it came!
As usual, the arrival pic
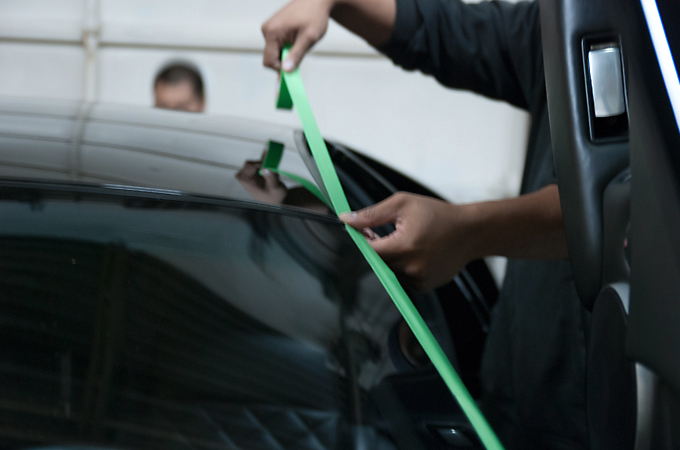
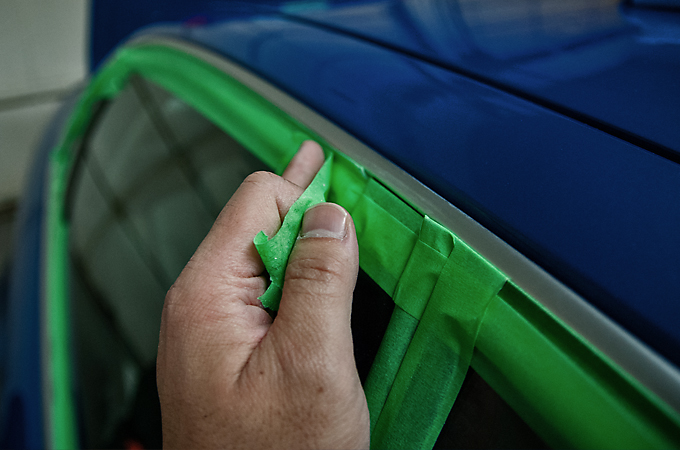
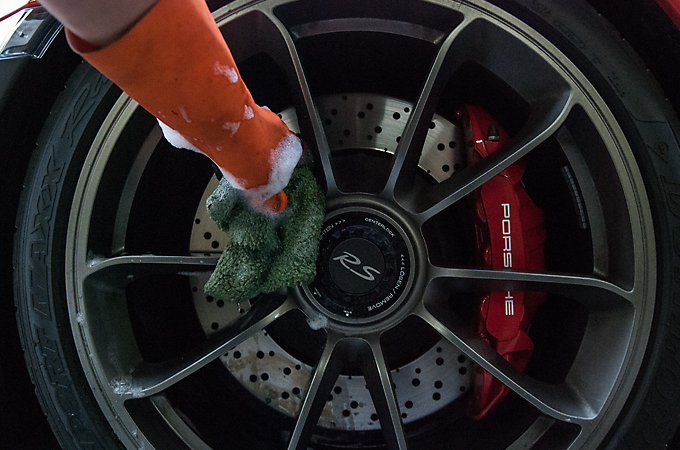
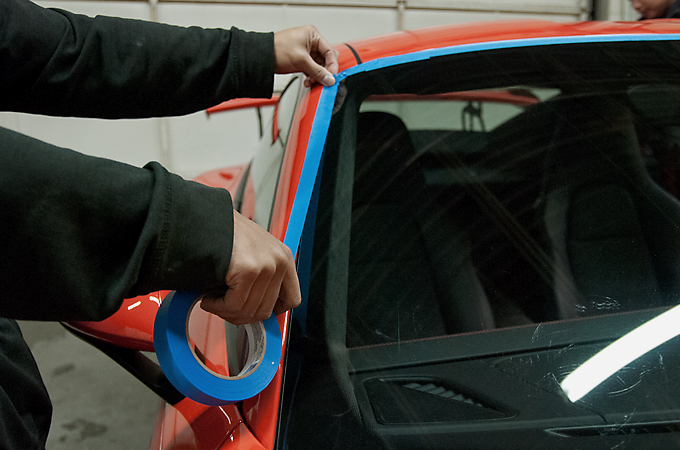
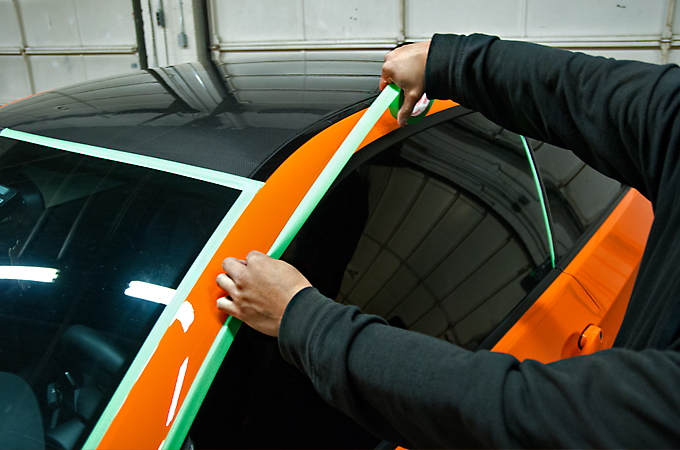
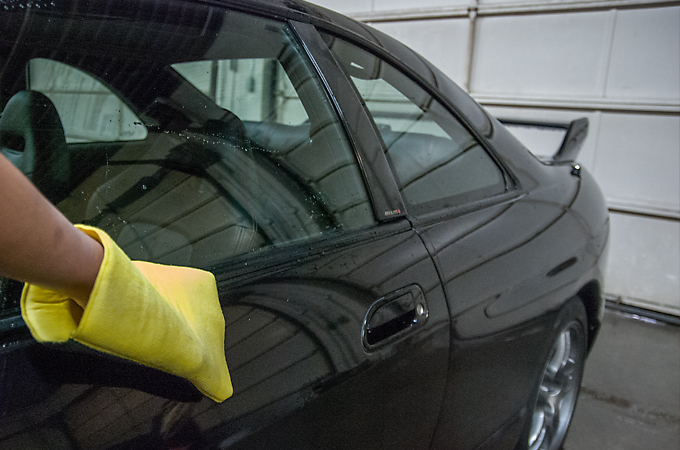
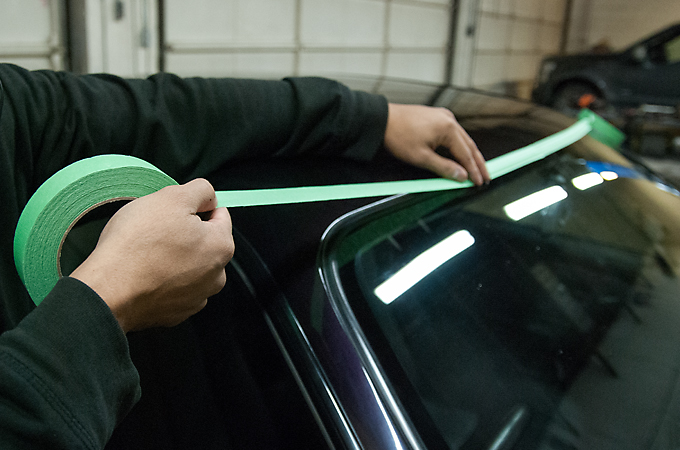
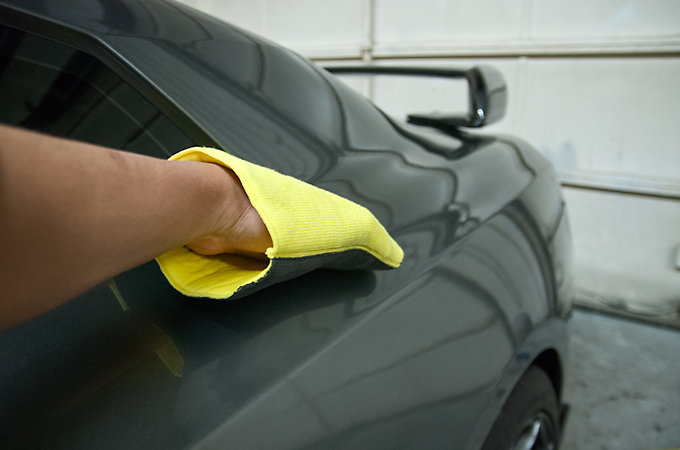
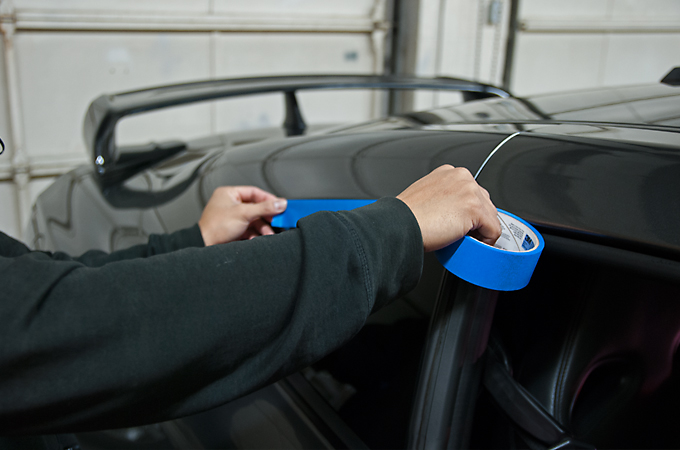
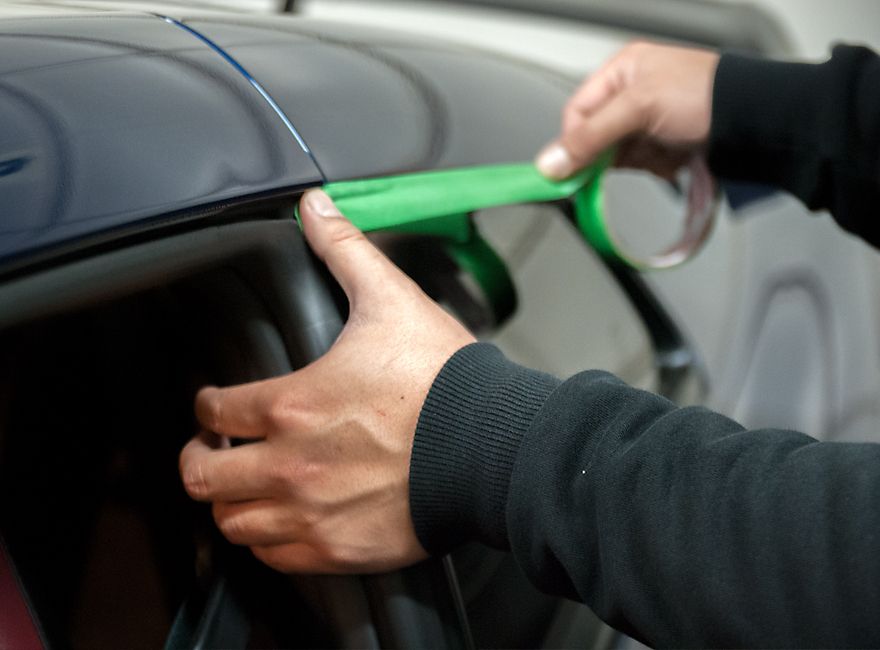
After cleaning the wheels, 2 Bucket Method wash, and clay bar, we masked the rubber trim
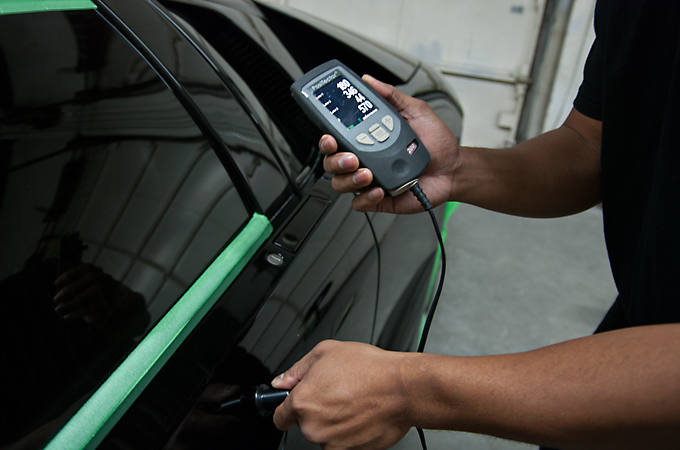
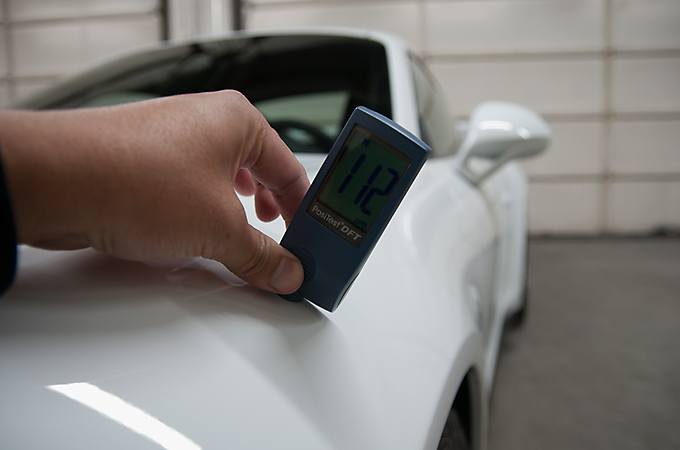
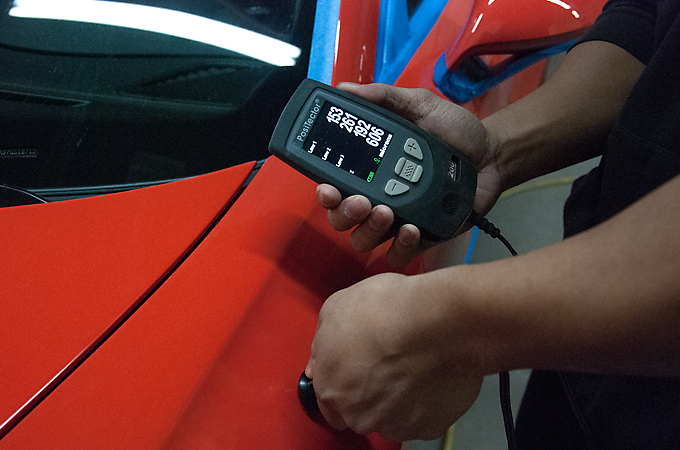
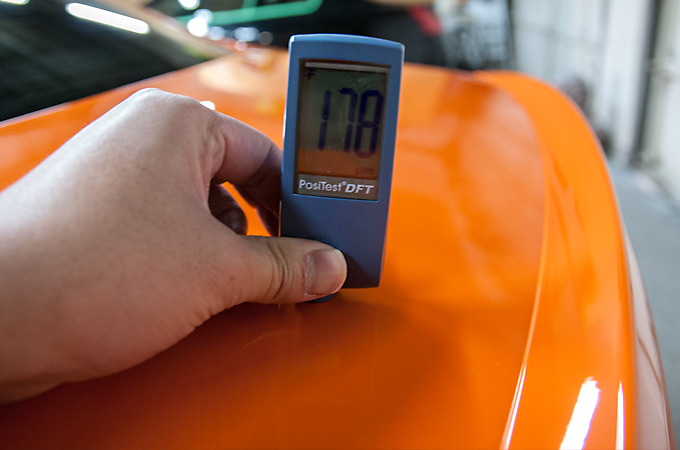
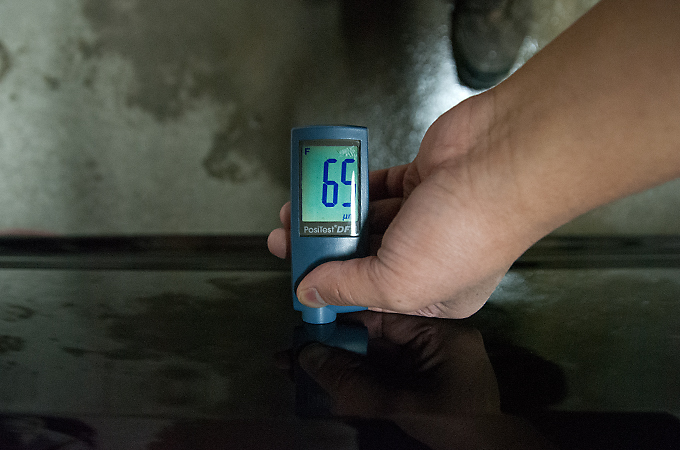
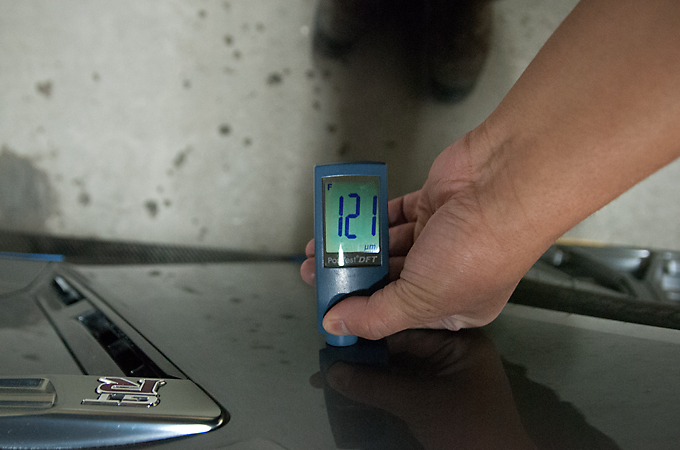
Next up was to take measurements of the paint with our special paint depth gauge which measures via ultrasound due to a few panels not being made of steel or aluminium. This gauge is not cheap at all and costed us $3000
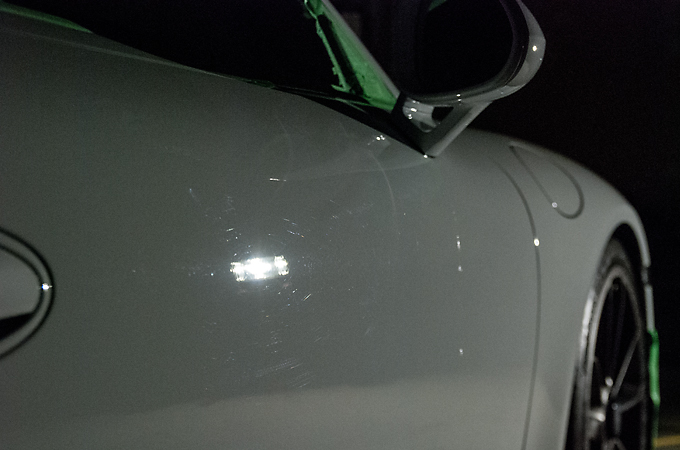
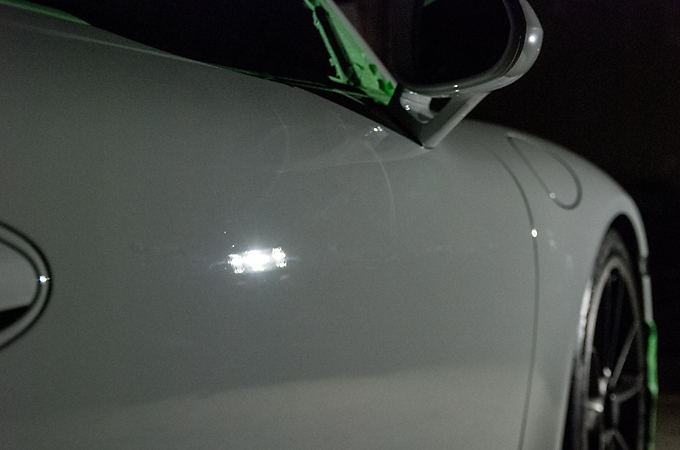
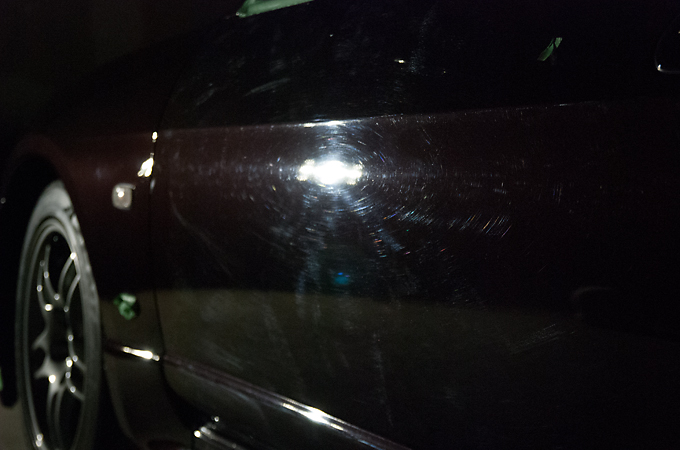
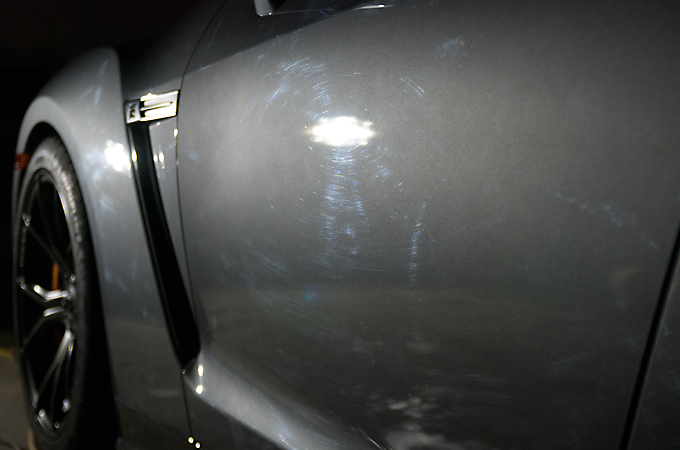
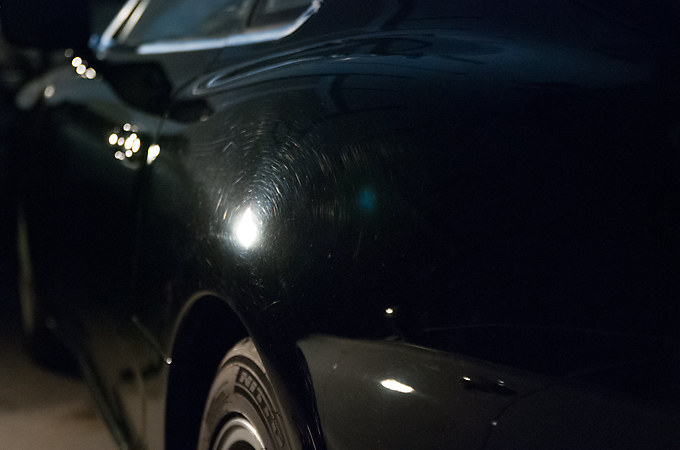
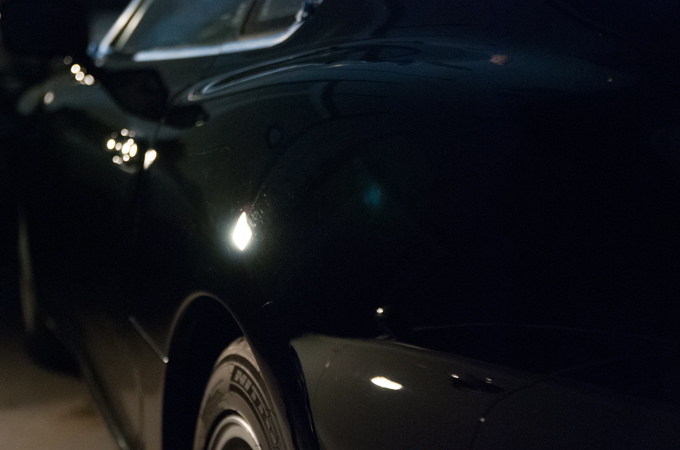
These are the results of the 1st stage of polishing
Before
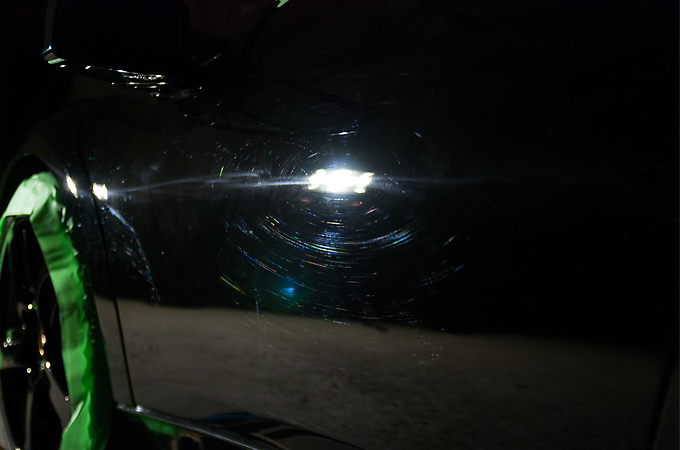
After(did I mention that solid black is a pain in the a**?!)
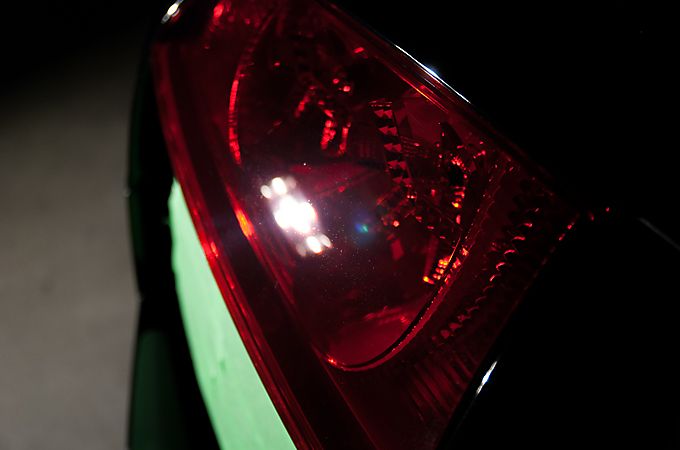
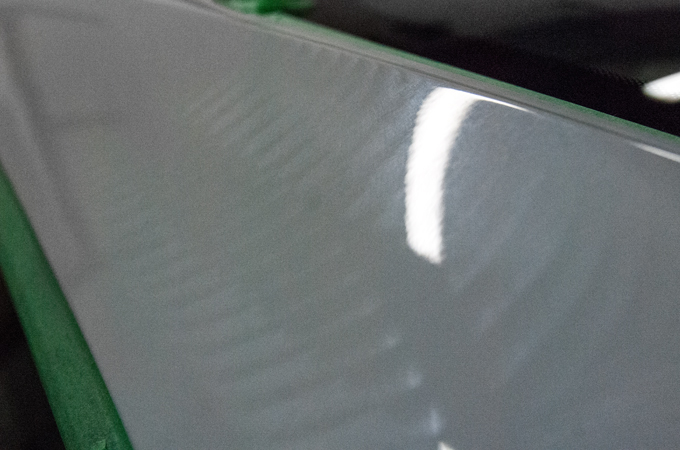
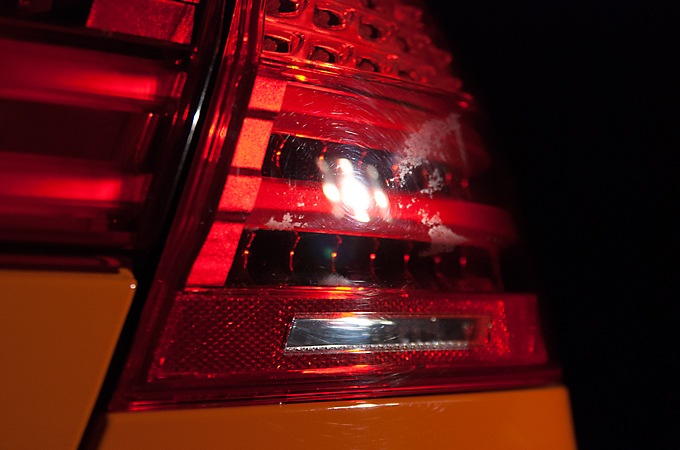
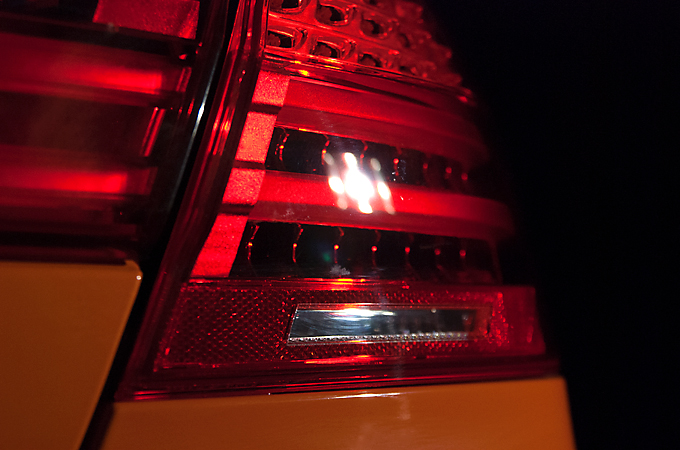
Headlights & Taillights were polished as well
Before
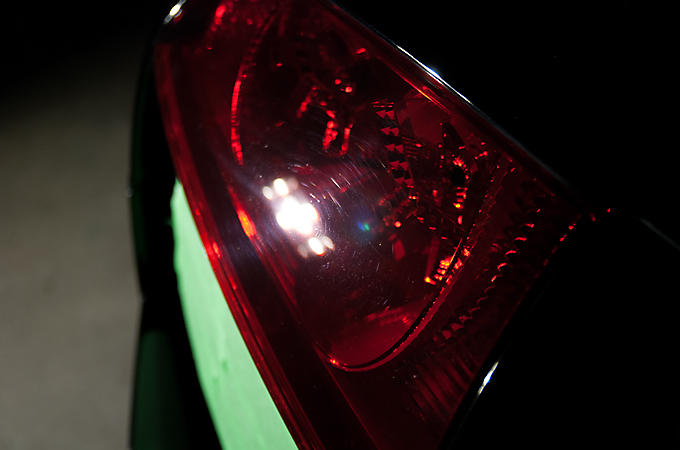
After
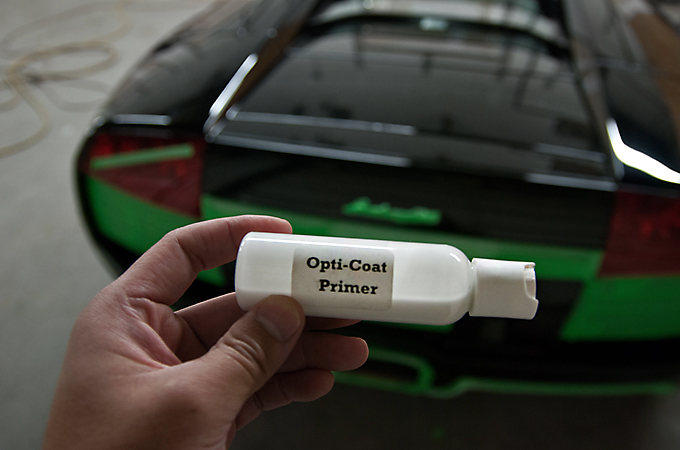
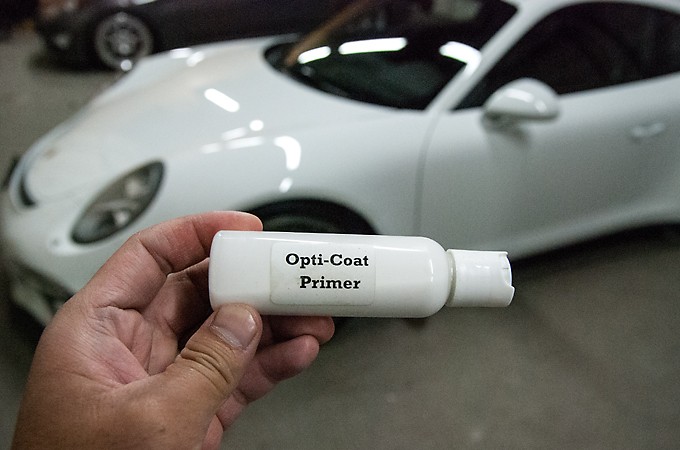
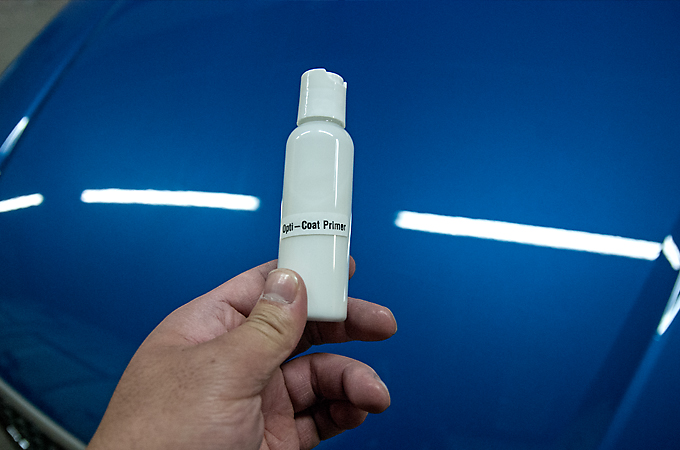
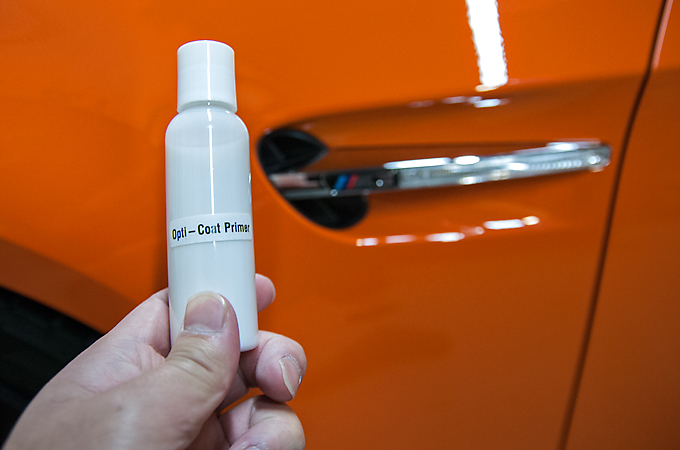
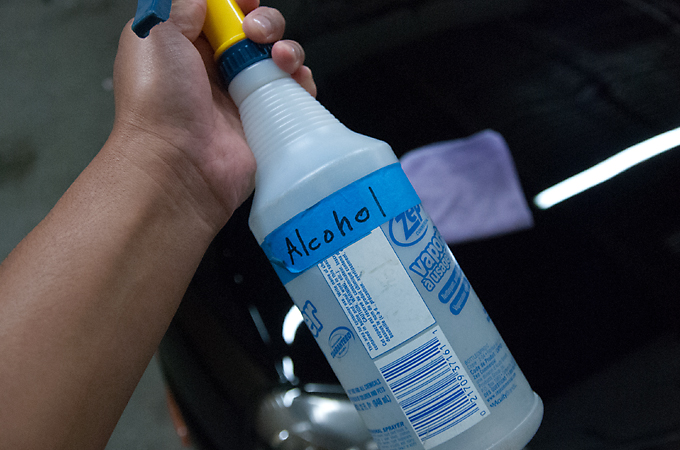
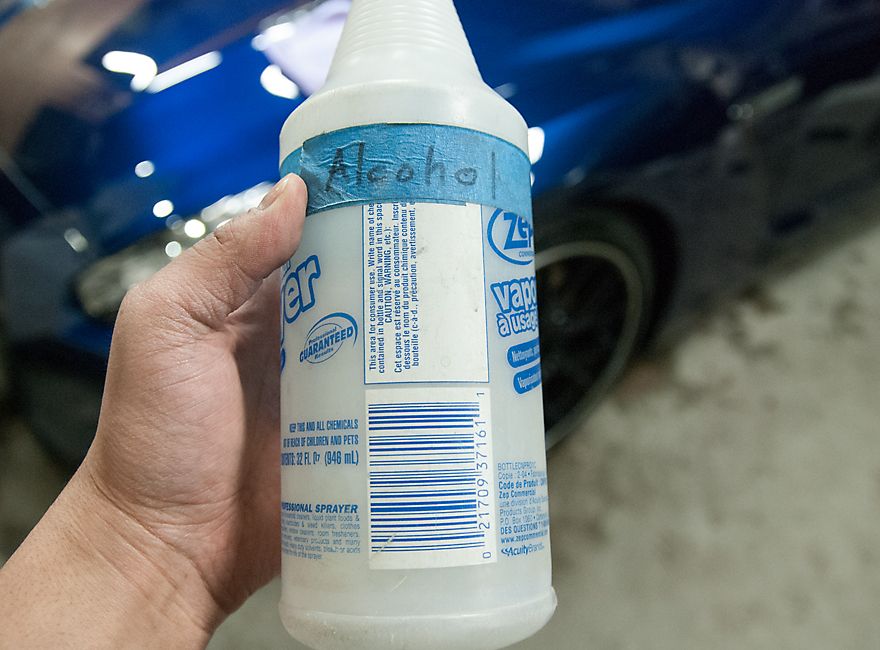
2nd stage of polishing was completed and then an alcohol wipe down to remove the polishing oils. Finally Opti Coat Primer applied to prepare for the Opti Coat Pro application
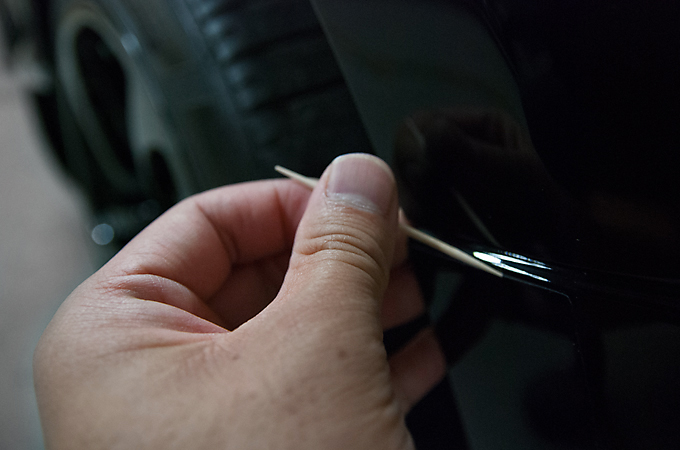
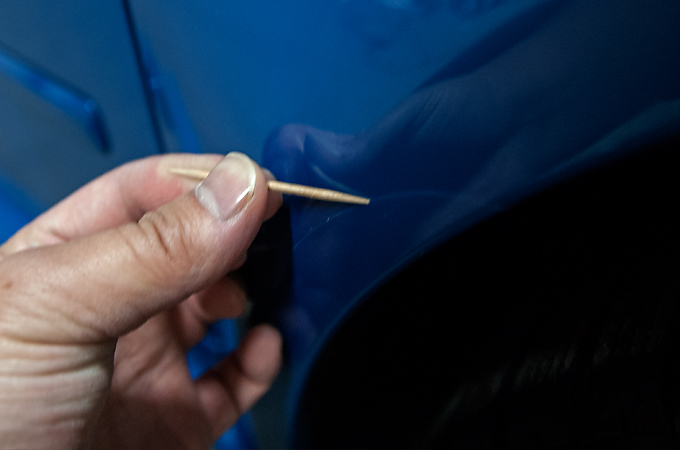
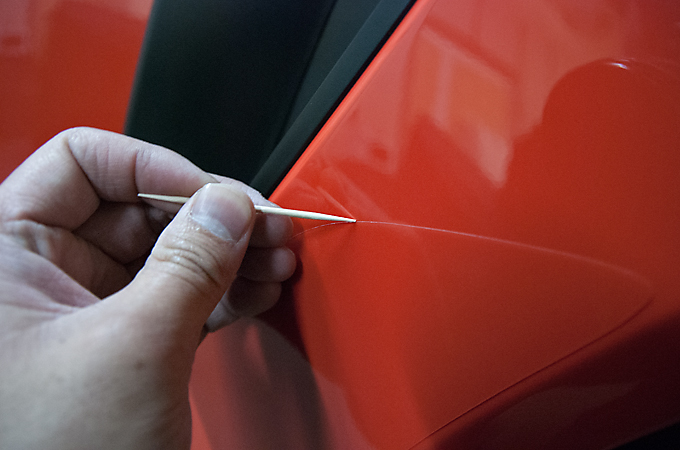
Tape removed and little details such as removing polish with a tooth pick from the edge of the stone guard was performed
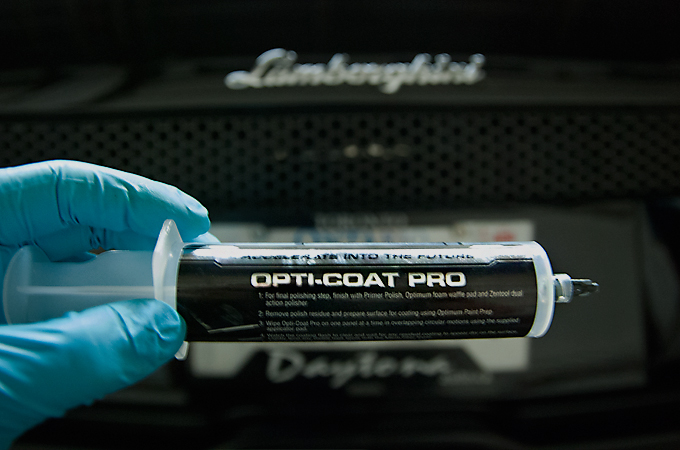
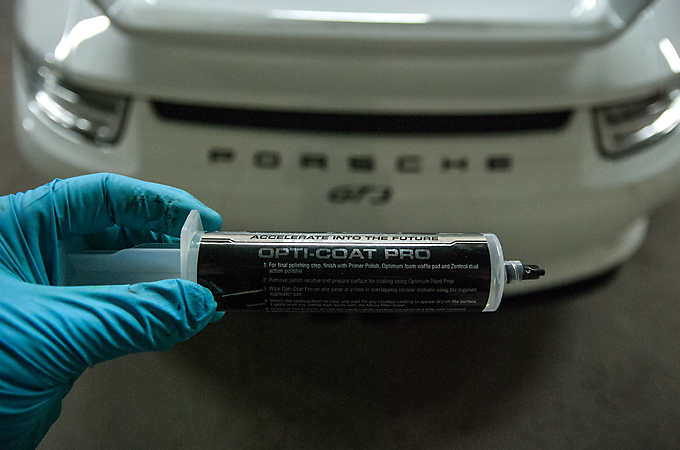
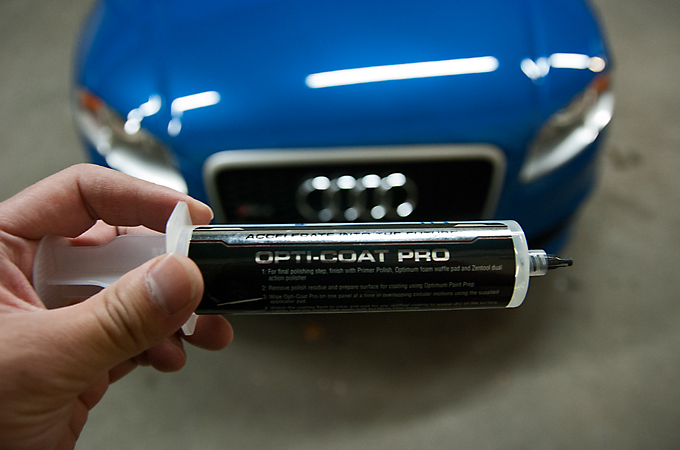
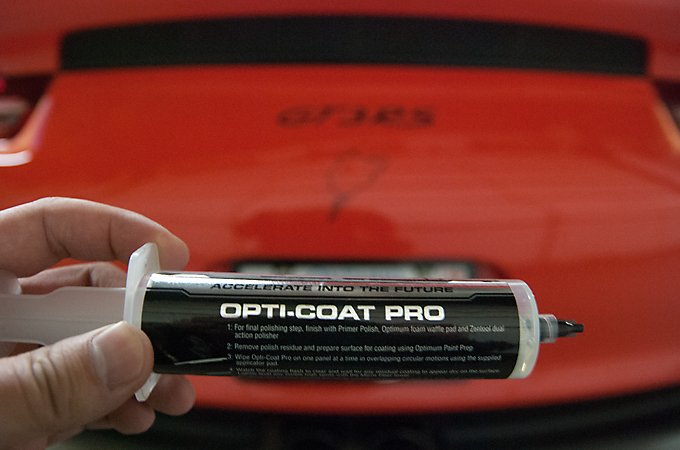
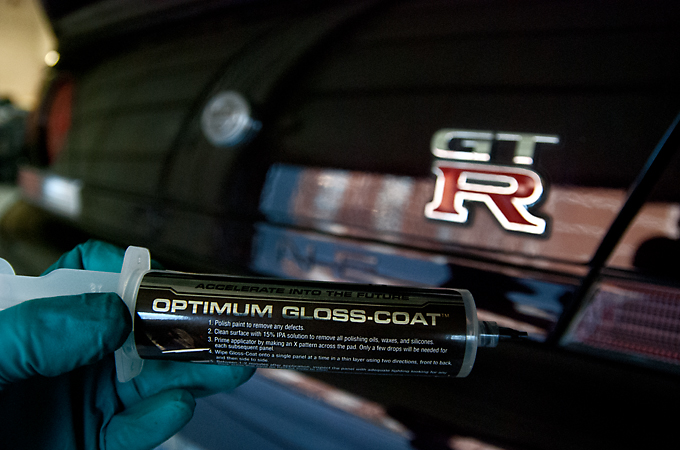
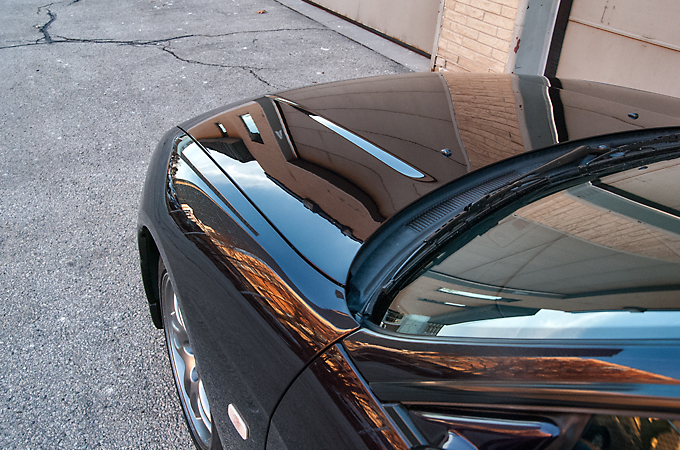
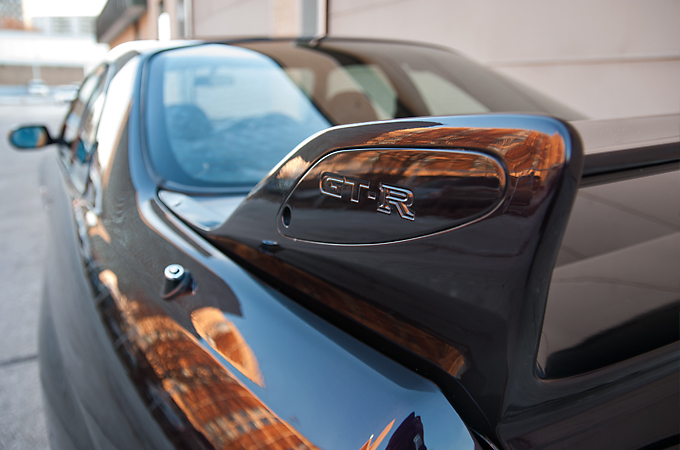
And finally the star of the show, Opti Coat Pro
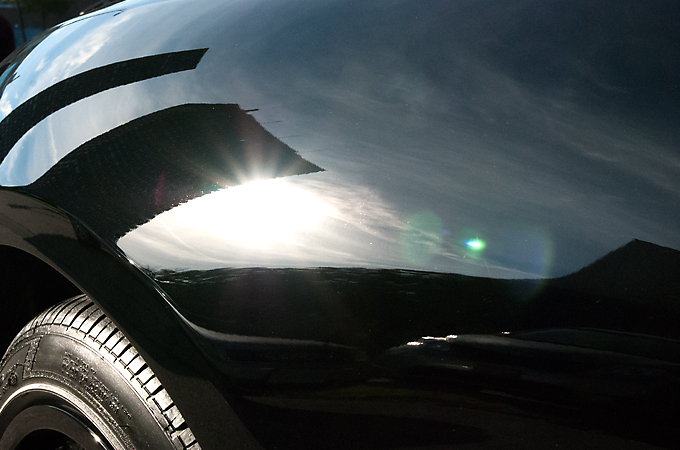
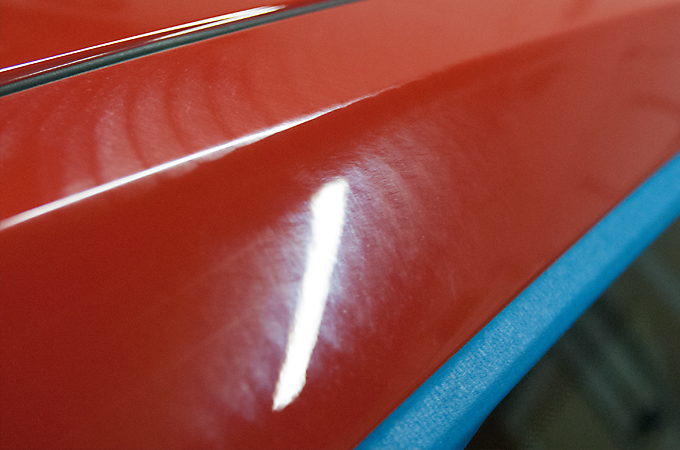
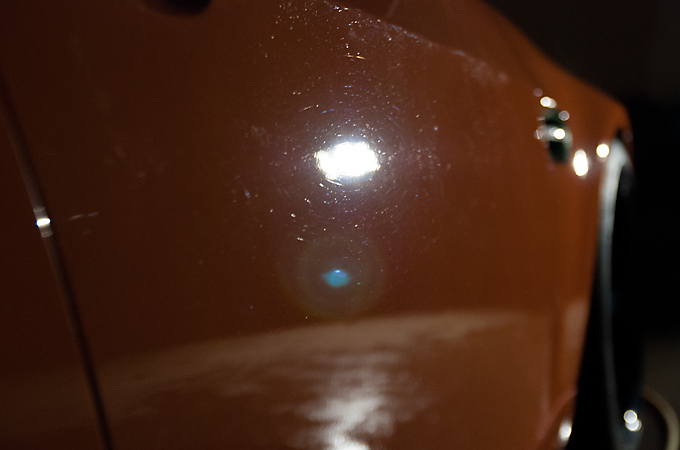
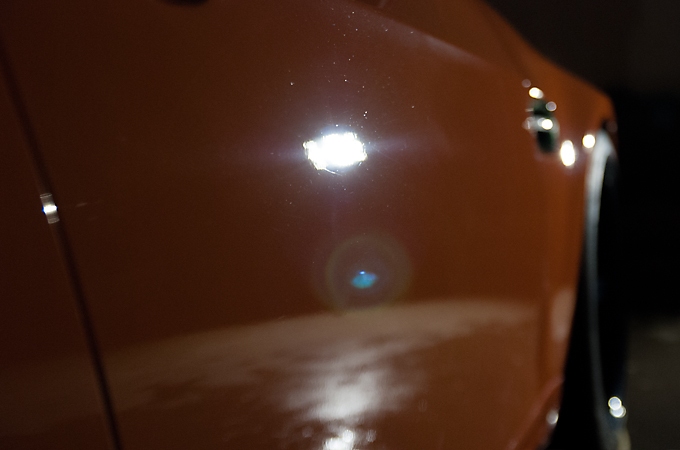
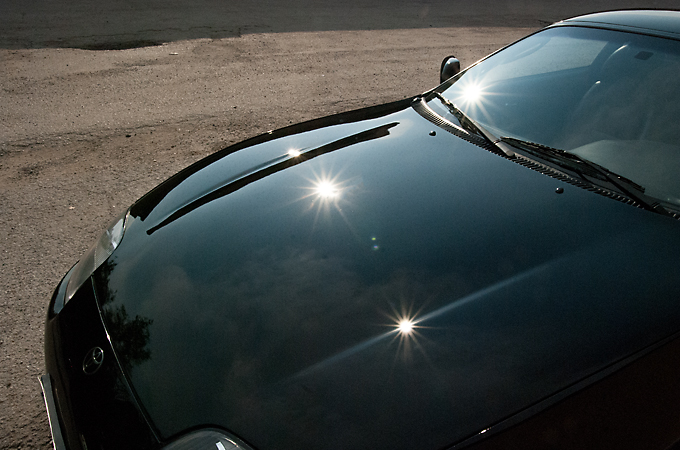
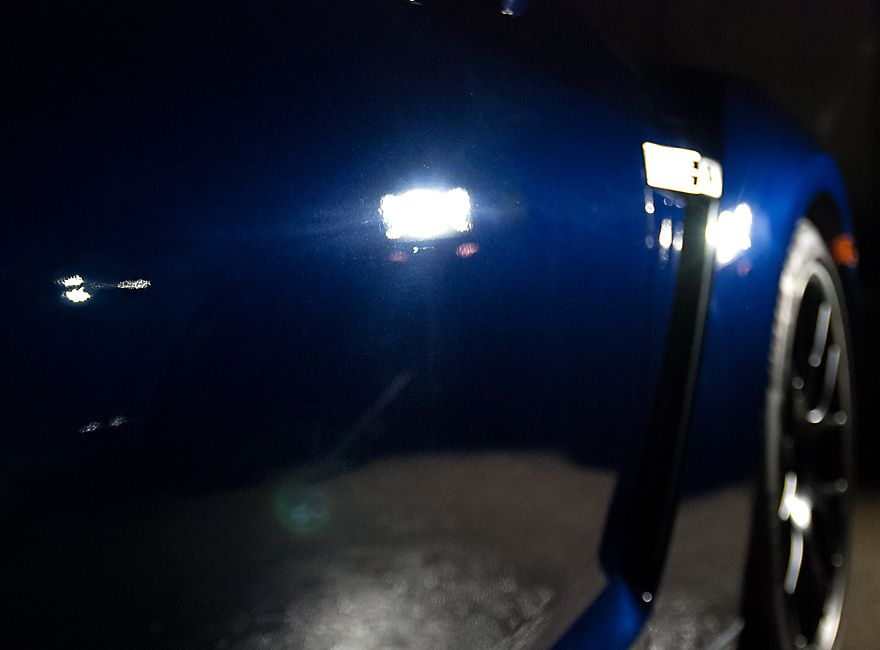
A shot in the sun to show no more swirls in the paint
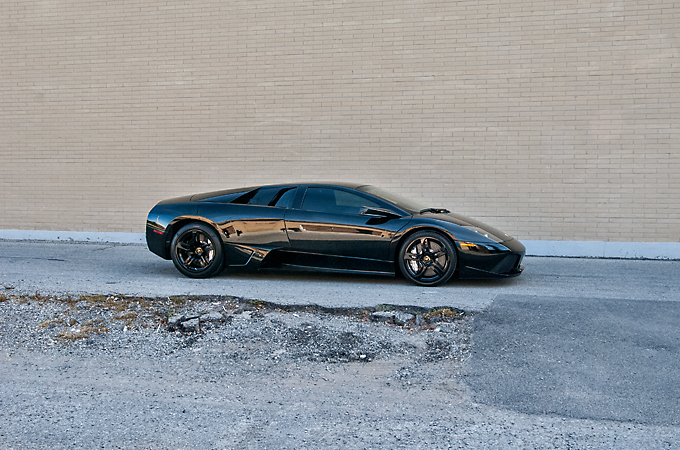
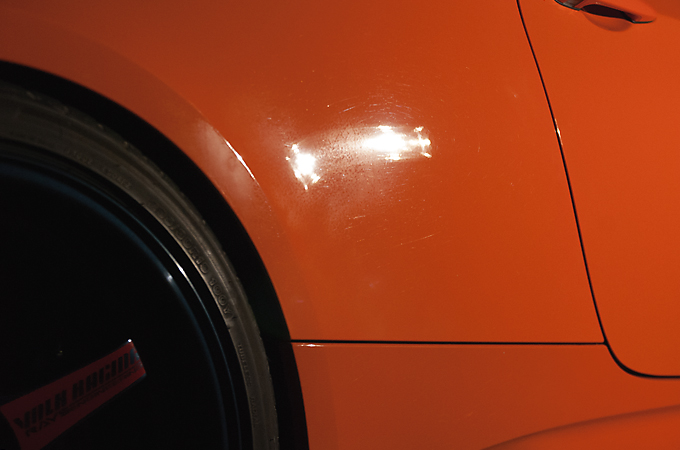
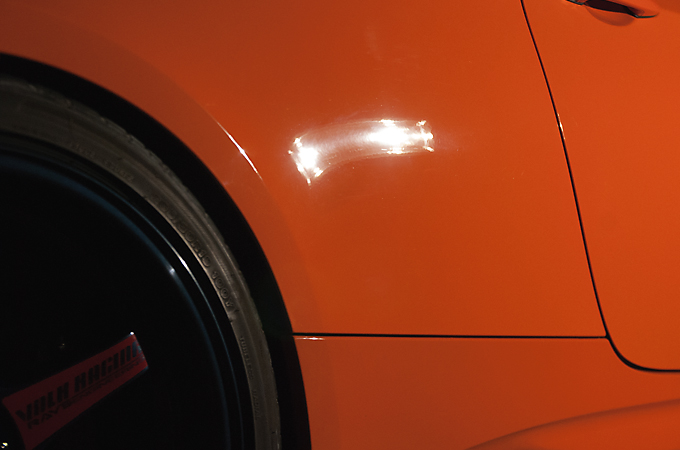
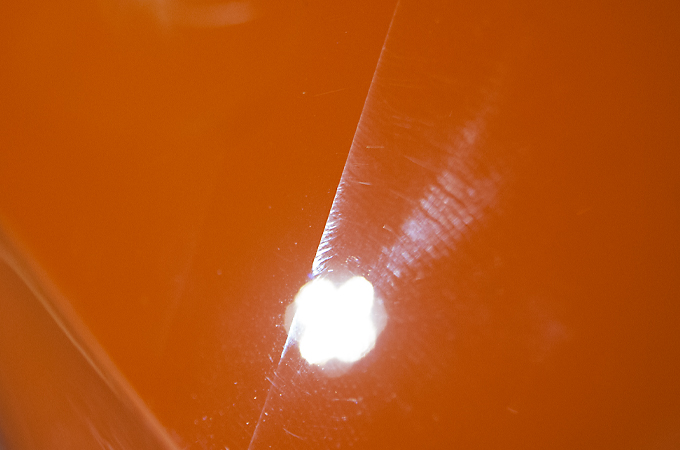
All in all minus some deeper scratches which I suspect may have been from people leaning on the car for pics and the fact that it is solid black, I would say we got the paint condition to about an 8.5/9 out of 10.
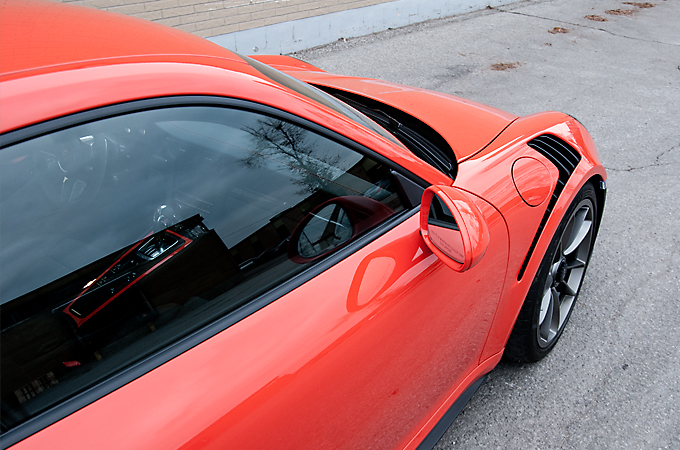
Here are the results
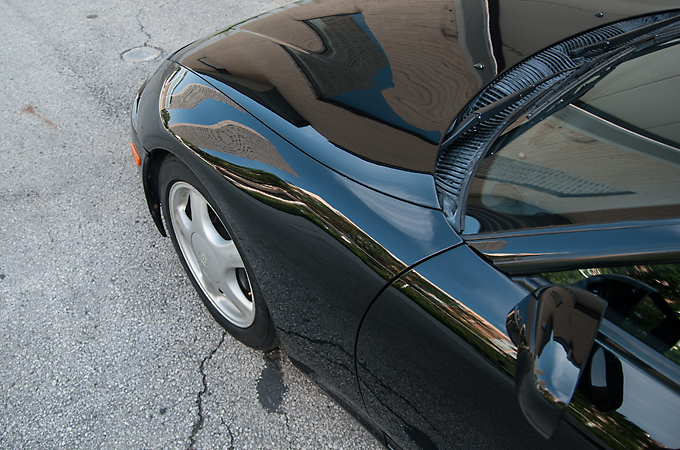
I love reflection pics
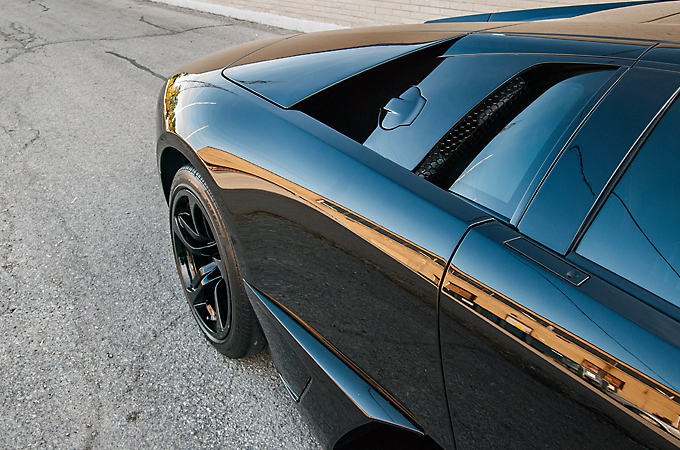
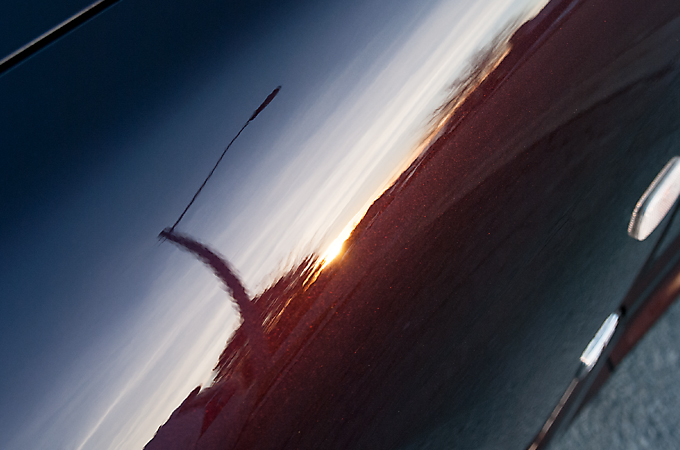
The lens flare pointing at the car is pretty cool
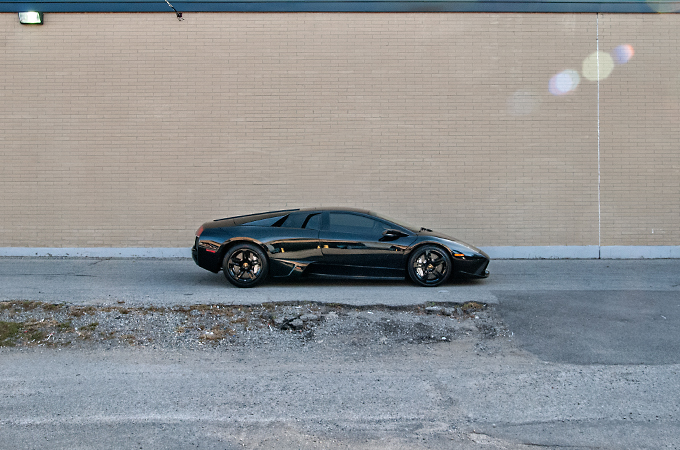
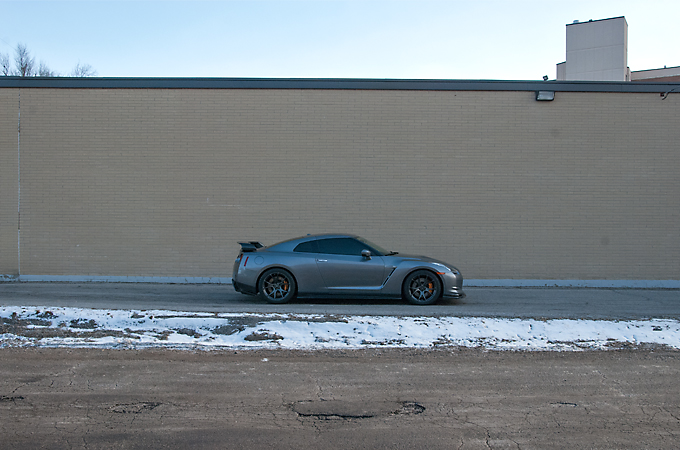
And the last pic to finish the walk around
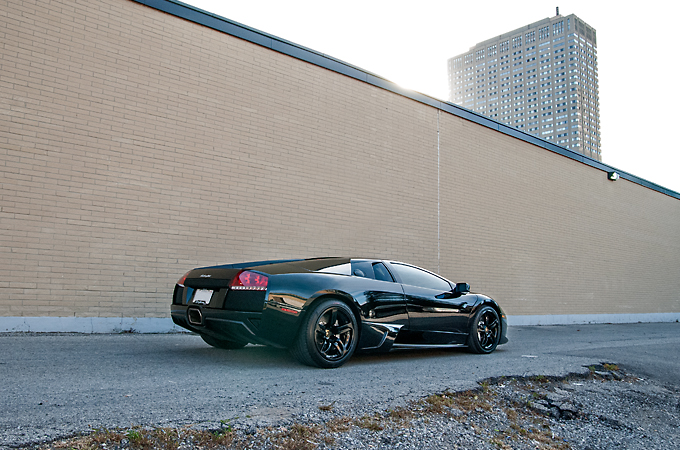
Hope you enjoyed the pics!!!
We had tried to schedule an appointment prior to this one but due to rainy weather we had to reschedule and he mentioned that maybe he was considering postponing the detail until the springtime, which is understandable. Luckily
... he had a change of heart and we were able to schedule a date where the weather worked in our favour!So in to the shop it came!
As usual, the arrival pic
After cleaning the wheels, 2 Bucket Method wash, and clay bar, we masked the rubber trim
Next up was to take measurements of the paint with our special paint depth gauge which measures via ultrasound due to a few panels not being made of steel or aluminium. This gauge is not cheap at all and costed us $3000
These are the results of the 1st stage of polishing
Before
After(did I mention that solid black is a pain in the a**?!)
Headlights & Taillights were polished as well
Before
After
2nd stage of polishing was completed and then an alcohol wipe down to remove the polishing oils. Finally Opti Coat Primer applied to prepare for the Opti Coat Pro application
Tape removed and little details such as removing polish with a tooth pick from the edge of the stone guard was performed
And finally the star of the show, Opti Coat Pro
A shot in the sun to show no more swirls in the paint
All in all minus some deeper scratches which I suspect may have been from people leaning on the car for pics and the fact that it is solid black, I would say we got the paint condition to about an 8.5/9 out of 10.
Here are the results
I love reflection pics
The lens flare pointing at the car is pretty cool
And the last pic to finish the walk around
Hope you enjoyed the pics!!!
 10-17-2015, 06:40 PM
#62
New Member

We need more Aventador
11-02-2015, 01:52 PM
#63
Registered User
Thread Starter
Lol^
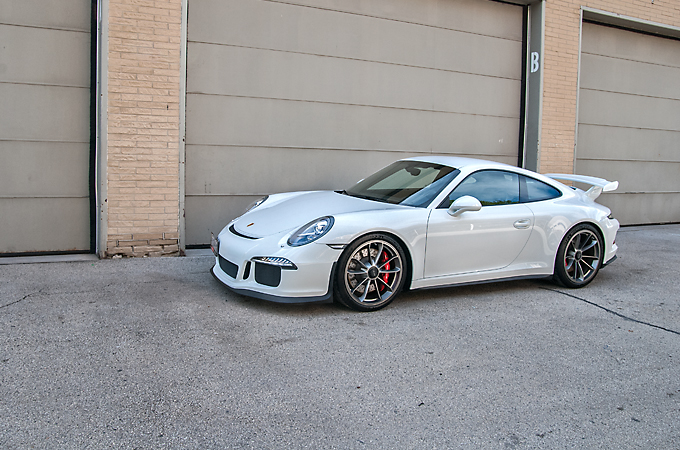
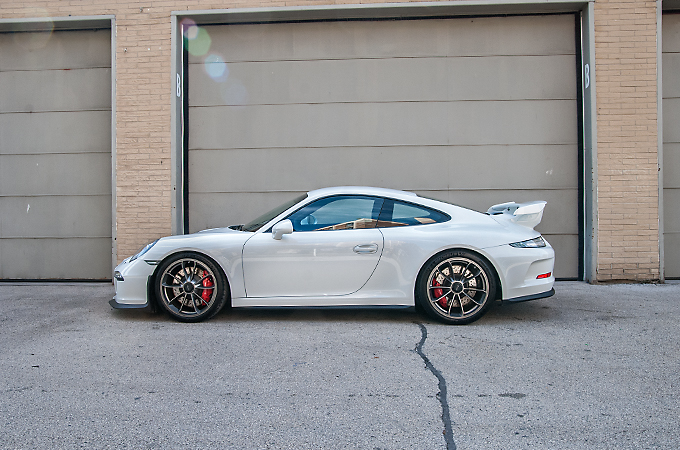
We had spoken to this client while we were polishing the 991 GT3 in Vancouver. He had a few vehicles he was taking delivery of and wanted to protect them all with Opti Coat Pro.
This was the Golf R that literally came directly from the dealership. It had very light swirling and a 1 stage polish was all that was needed to clean it up.
Arrival pic
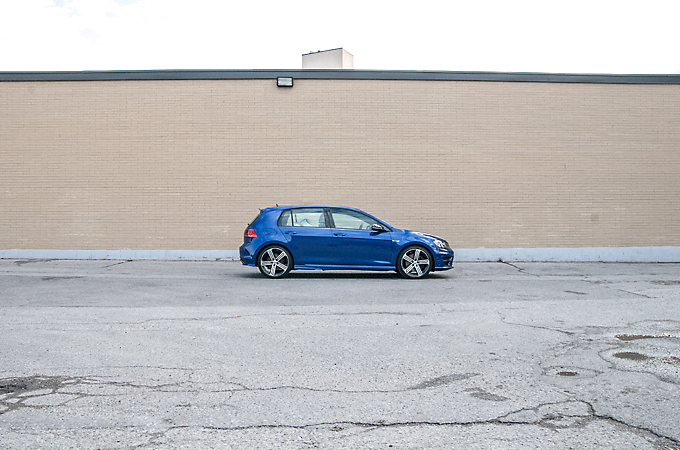
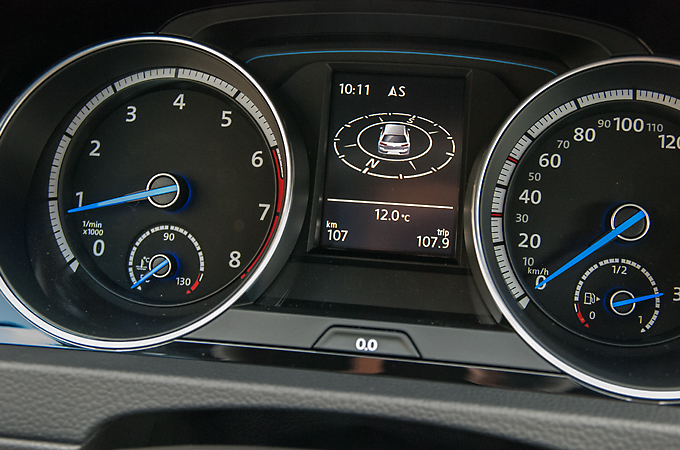
Only 107km on the odometer
Cleaning the wheels

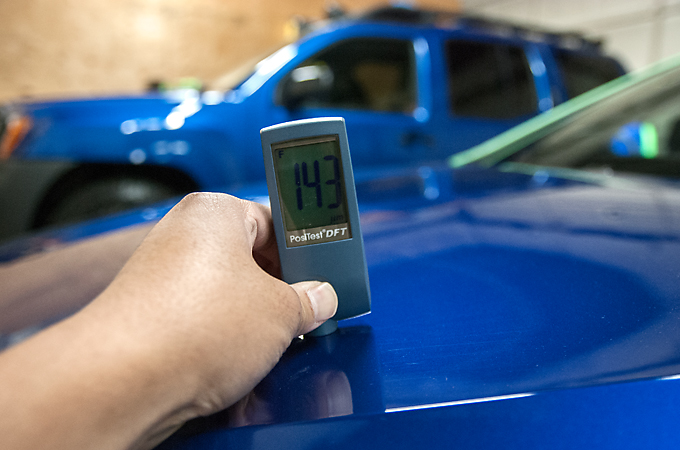
Measuring the paint to make sure there were no surprises
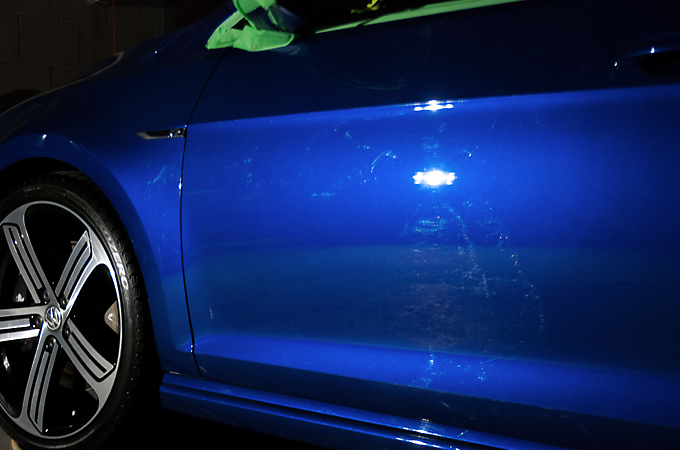
Before
After
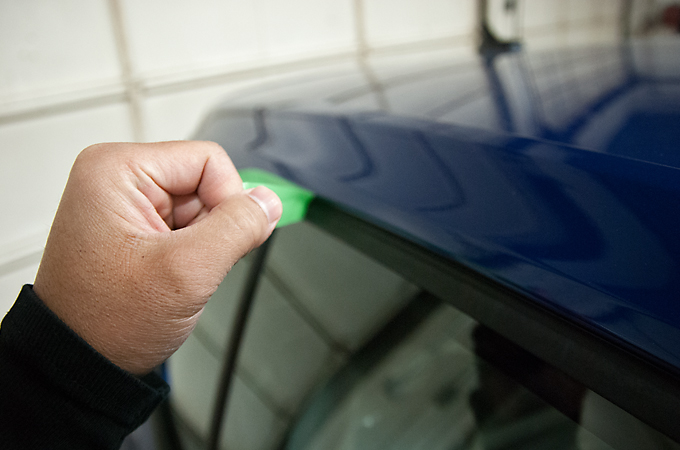
Removing the masking tape
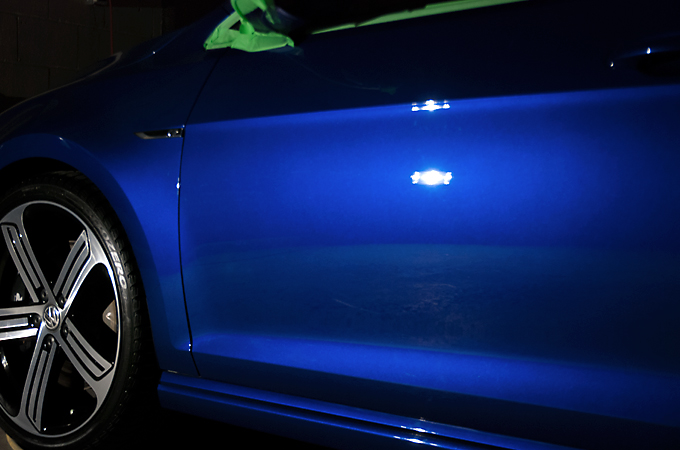
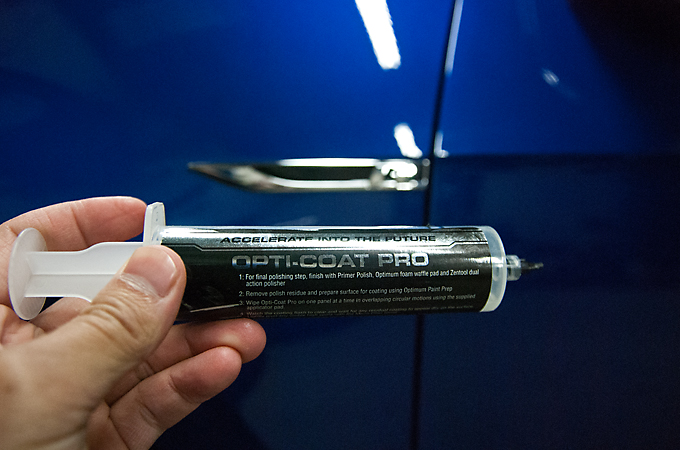
Opti Coat Pro
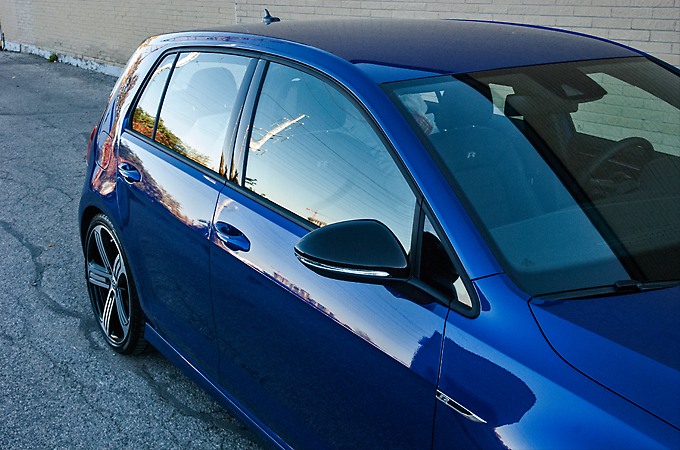
And the finished pics

We had spoken to this client while we were polishing the 991 GT3 in Vancouver. He had a few vehicles he was taking delivery of and wanted to protect them all with Opti Coat Pro.
This was the Golf R that literally came directly from the dealership. It had very light swirling and a 1 stage polish was all that was needed to clean it up.
Arrival pic
Only 107km on the odometer
Cleaning the wheels
Measuring the paint to make sure there were no surprises
Before
After
Removing the masking tape
Opti Coat Pro
And the finished pics
11-15-2015, 06:49 AM
#64
Registered User
Thread Starter
We had spoken to this client a few weeks prior to this detail and he had actually referred a Bentley to us earlier in the spring.
The car was fairly new and well taken care of so the paint was not in bad shape at all. A 1 stage polish was all that was needed to clean up the light swirls which then was protected with Opti Coat Pro afterwards.
Arrival
Claybarring the paint
Taking measurements
Masking up the plastic and rubber trim

Then on to polishing the paint
Before
After
After the polishing Opti Coat Primer was applied to the paint
Via machine
Then Opti Coat Pro applied
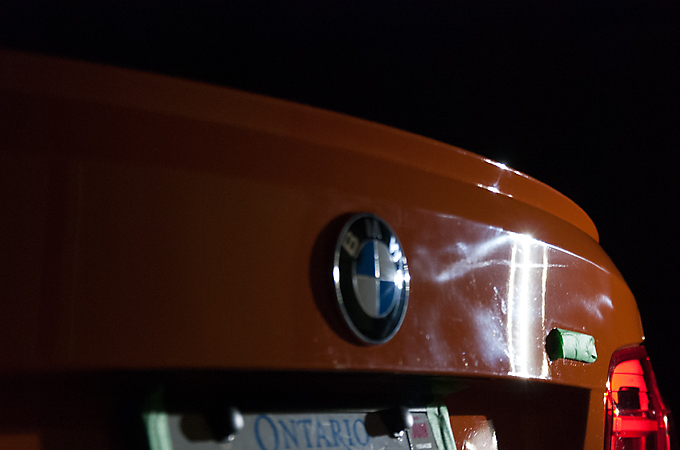
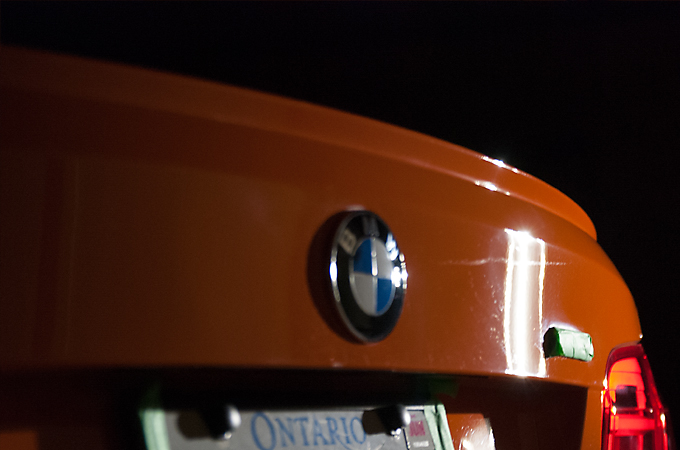
And finally the finished pics starting with a reflection on the hood

Hope you liked the pics on this track monster!
The car was fairly new and well taken care of so the paint was not in bad shape at all. A 1 stage polish was all that was needed to clean up the light swirls which then was protected with Opti Coat Pro afterwards.
Arrival
Claybarring the paint
Taking measurements
Masking up the plastic and rubber trim
Then on to polishing the paint
Before
After
After the polishing Opti Coat Primer was applied to the paint
Via machine
Then Opti Coat Pro applied
And finally the finished pics starting with a reflection on the hood
Hope you liked the pics on this track monster!
11-15-2015, 07:07 AM
#65
New Member
That thing is sick. Is that a center lock wheel!?
11-21-2015, 08:41 PM
#66
Registered User
Thread Starter
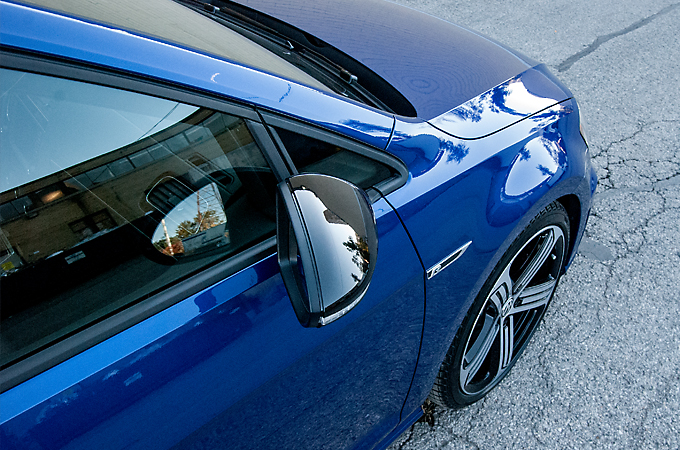
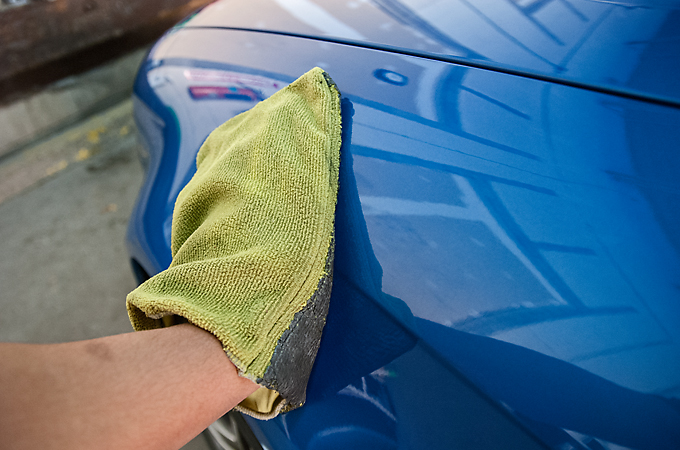
^Yes center lock wheels!
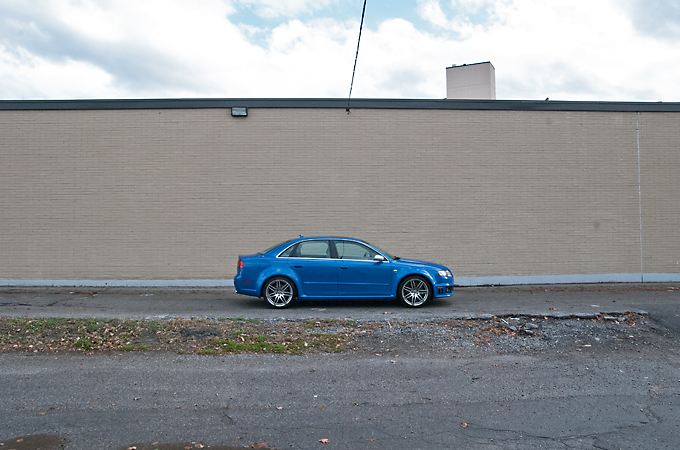
I had talked to this client for quite sometime now regarding his other vehicles like an e39 M5(which was sold) and an e30 M3. We had never gotten a chance to book a solid date but stayed in contact over the years. He had recently purchased this new Sprint Blue RS4 and was planning to drive it year round and wanted to protect it with Opti Coat Pro. The car was brought in for a consultation and we finally booked a date!
Arrival
After cleaning the wheels and a car wash we claybarred the paint
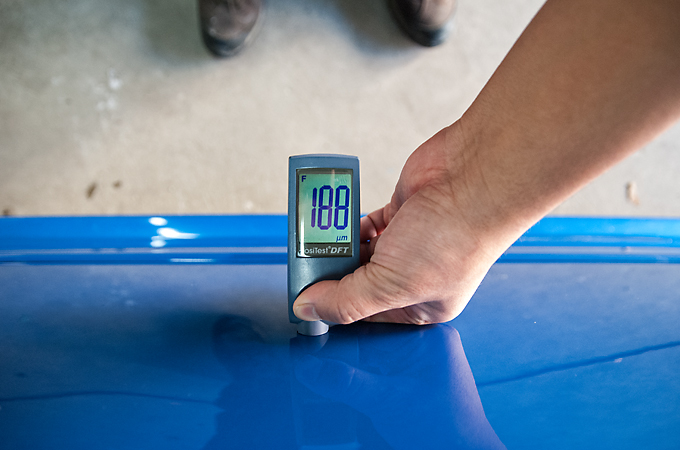
Took some paint measurements
And finally we started with the 1st stage of polishing
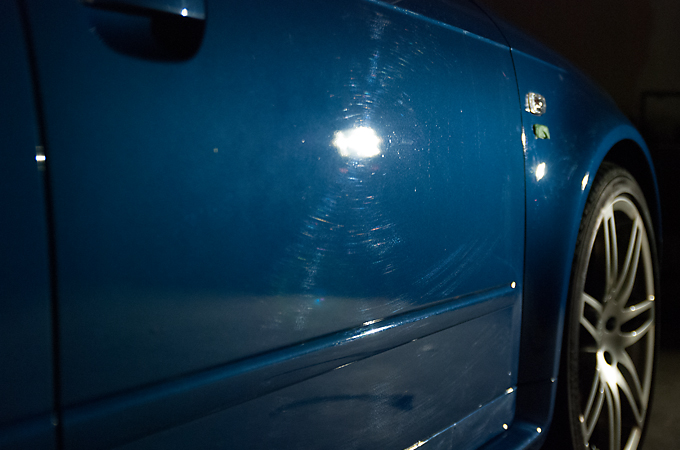
Before
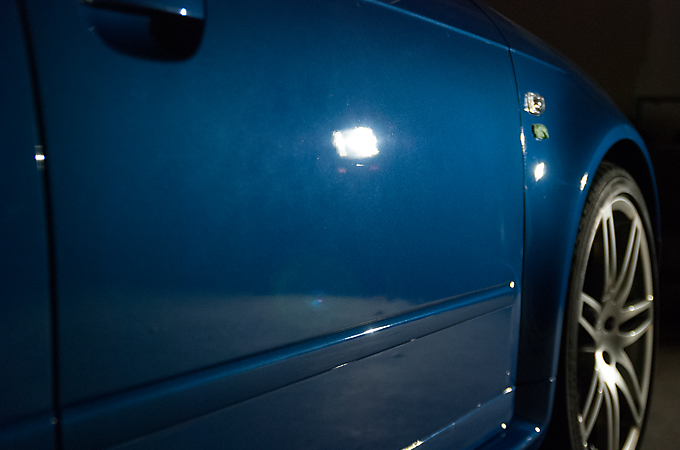
After
A 50/50 shot
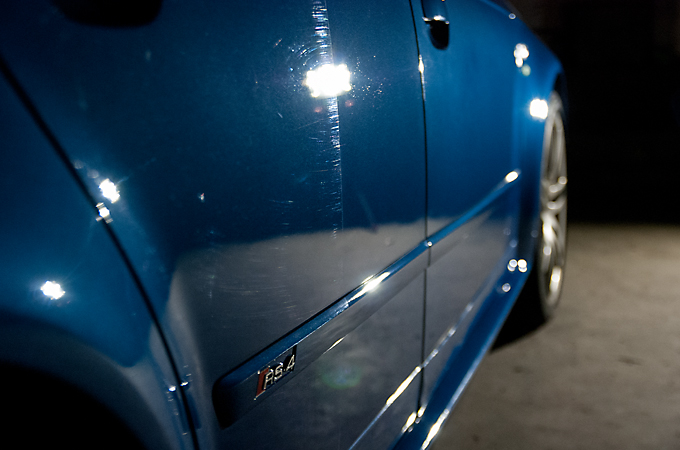
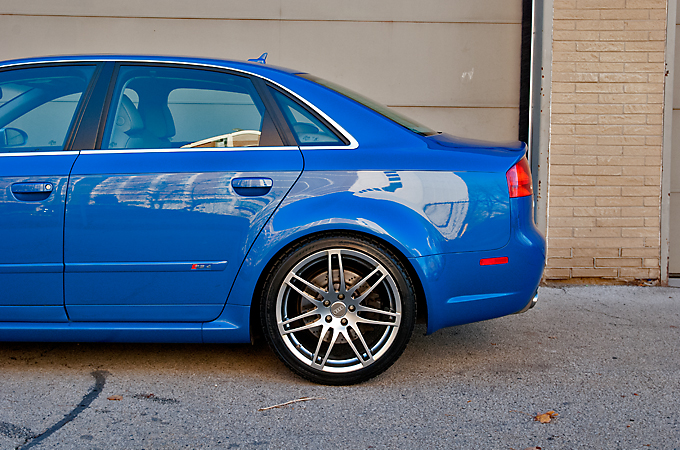
The metallic flake in the Sprint Blue started to really POP again!
We also polished the headlights and taillights
Before
After
After all the polishing Opti Coat Primer was applied
Unmasking
Then cleaning all the little details like removing polish from the edge of the stone guard
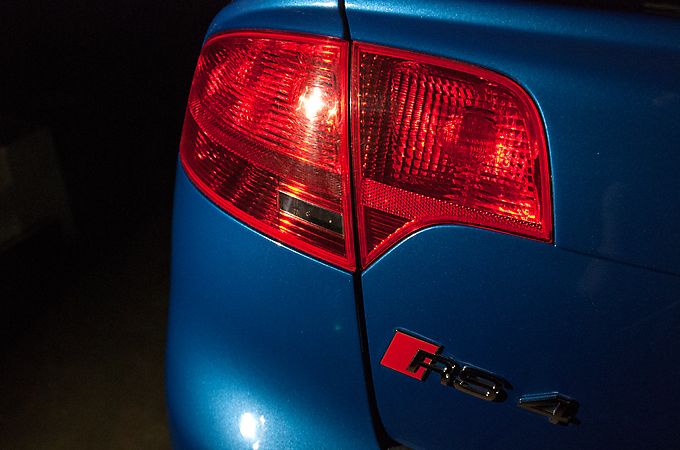
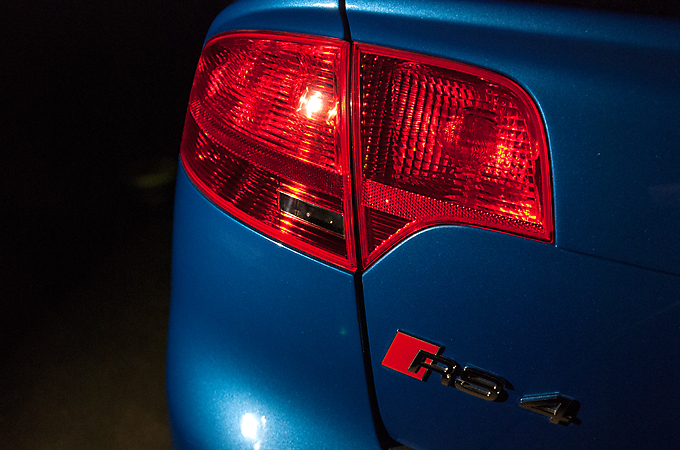
Then finally Opti Coat Pro is applied
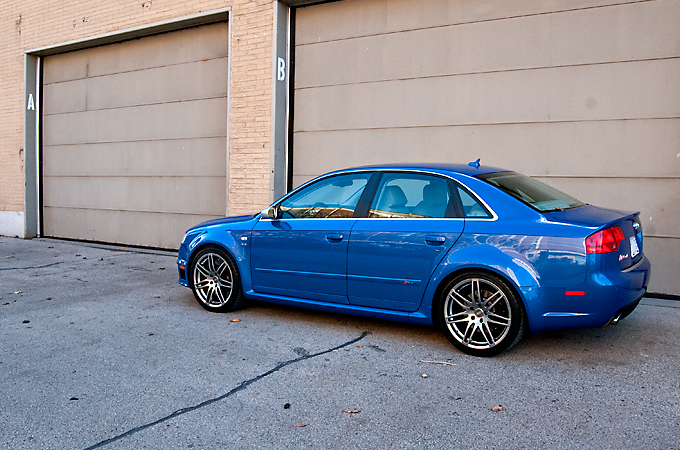
And here are the afters
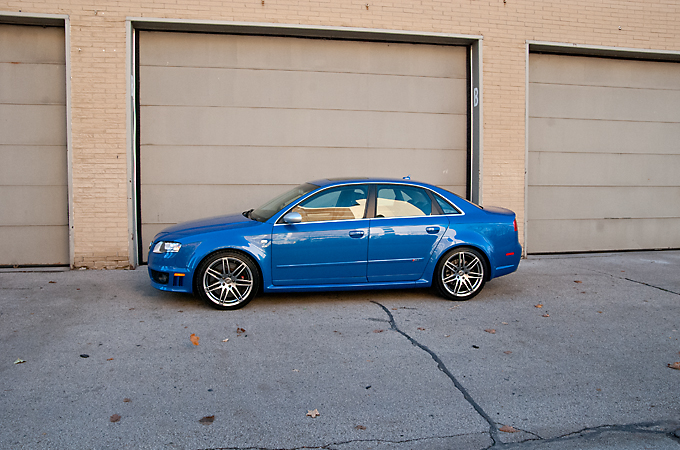
Always a pleasure to work on an RS and glad we could bring this Sprint Blue back to life!
I had talked to this client for quite sometime now regarding his other vehicles like an e39 M5(which was sold) and an e30 M3. We had never gotten a chance to book a solid date but stayed in contact over the years. He had recently purchased this new Sprint Blue RS4 and was planning to drive it year round and wanted to protect it with Opti Coat Pro. The car was brought in for a consultation and we finally booked a date!
Arrival
After cleaning the wheels and a car wash we claybarred the paint
Took some paint measurements
And finally we started with the 1st stage of polishing
Before
After
A 50/50 shot
The metallic flake in the Sprint Blue started to really POP again!
We also polished the headlights and taillights
Before
After
After all the polishing Opti Coat Primer was applied
Unmasking
Then cleaning all the little details like removing polish from the edge of the stone guard
Then finally Opti Coat Pro is applied
And here are the afters
Always a pleasure to work on an RS and glad we could bring this Sprint Blue back to life!
11-21-2015, 09:04 PM
#67
New Member
That paint color is insane
12-09-2015, 01:56 PM
#68
Registered User
Thread Starter
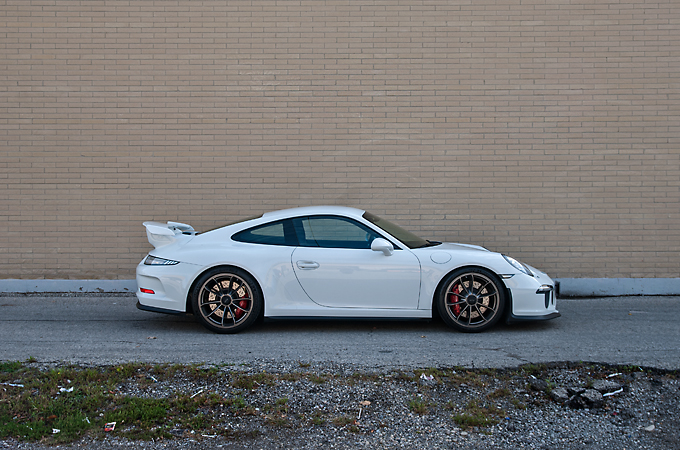
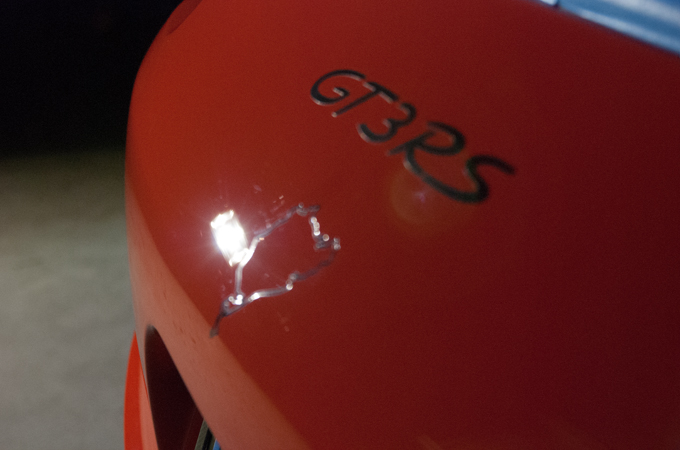
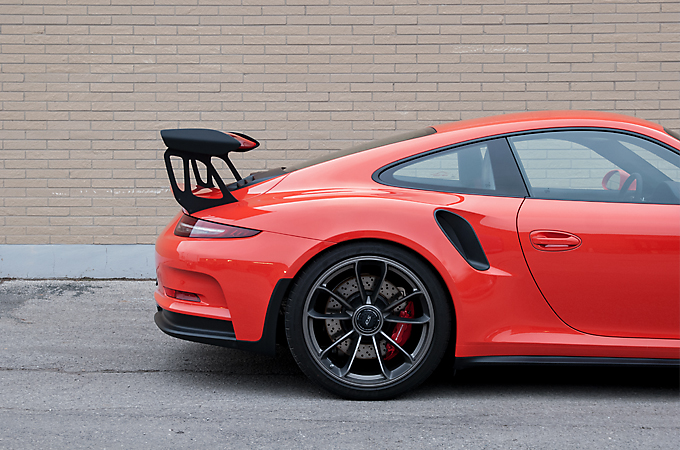
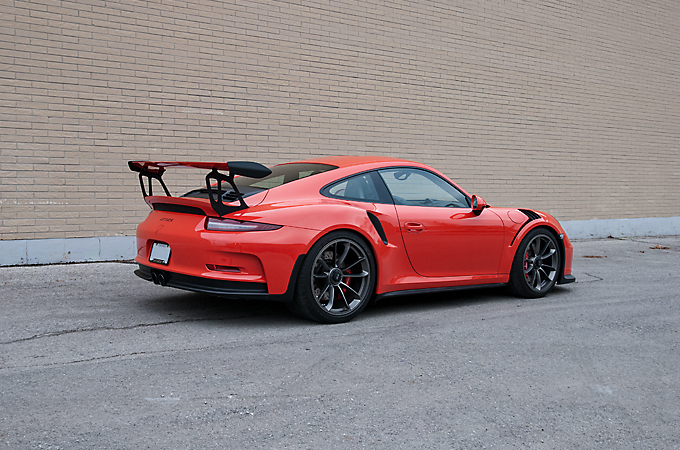
We had been looking forward to this Lava Orange 991 GT3RS for quite sometime. We maintain this clients other RS's as well so we knew about this one for almost a year now.
Not really much else to say, got the call Saturday evening and it was in the shop by Wednesday
Arrival
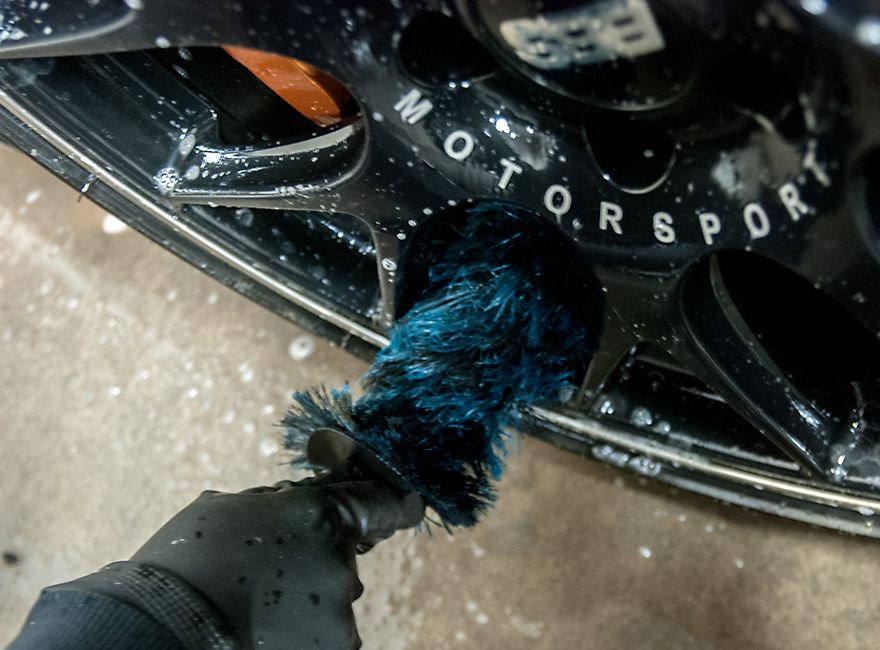
Cleaning the wheels
Masking off the rubber and plastic trim
The whole front end is carbon fibre so we had to bring out our ultrasound paint gauge to measure the paint
Underneath the hood
Ultrasound measurements
Magnetic measurements
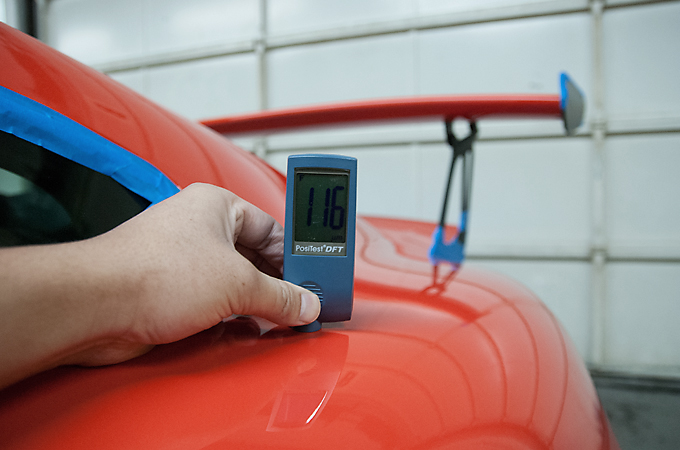
And on to polishing the paint.
There was already close to 5000km on the odometer so the paint had some light swirls to polish out before applying Opti Coat Pro.
Before
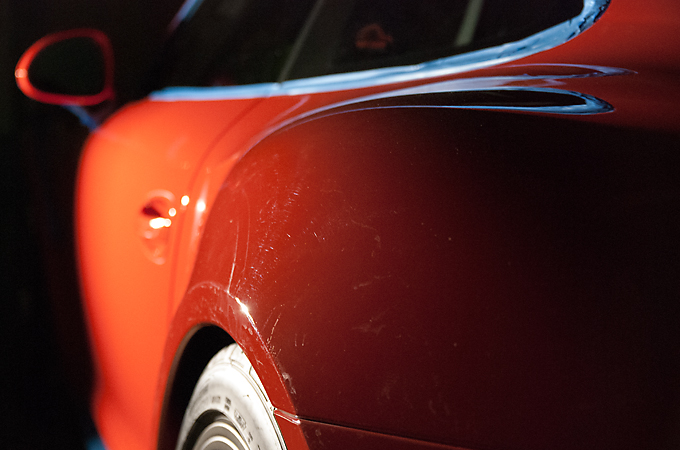
After
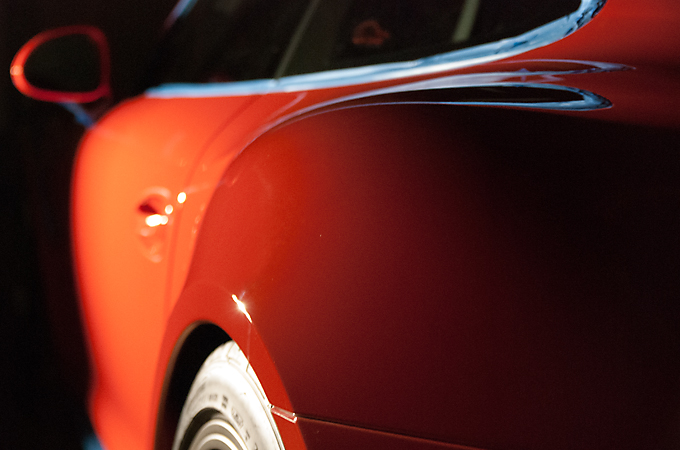
Before
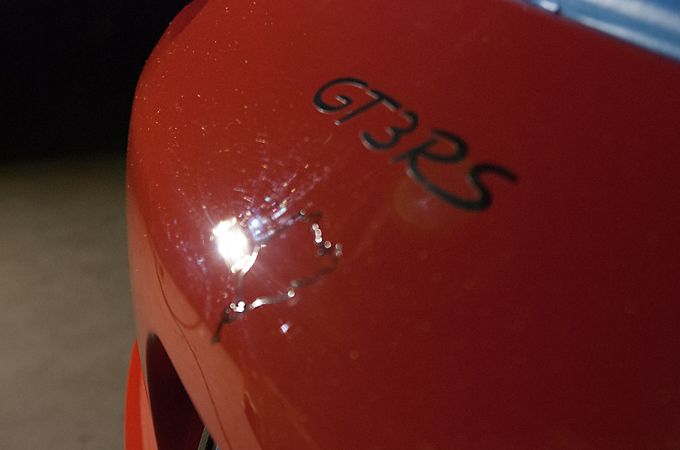
After
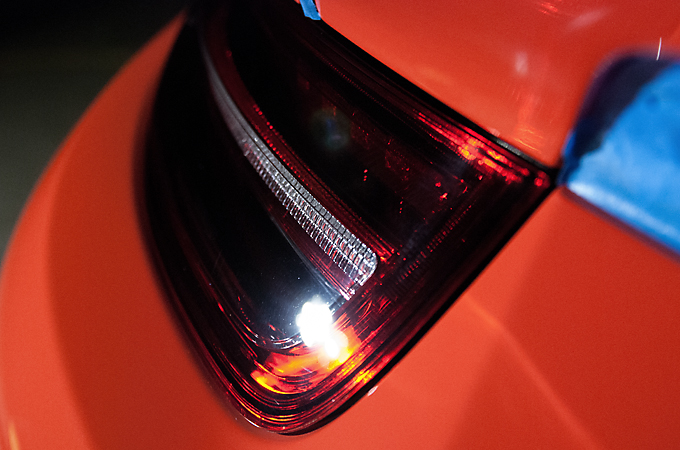
The taillights were polished as well
Before
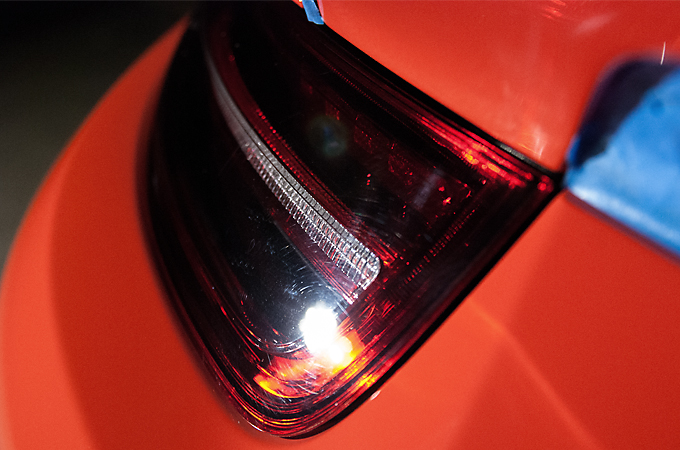
After
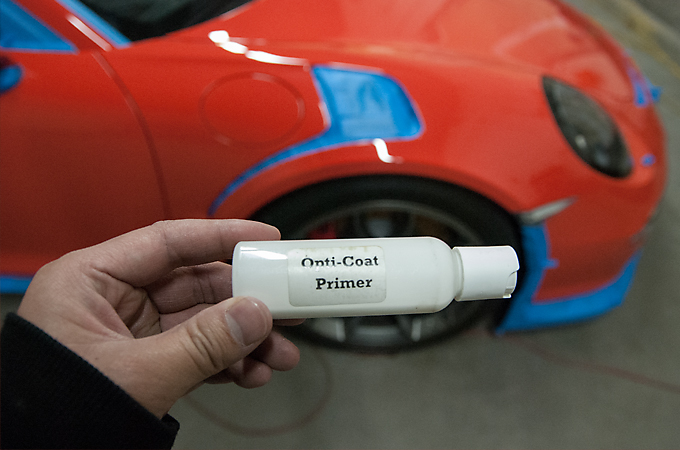
After the 2nd stage of polishing was completed we applied Opti Coat Primer via machine to the paint
We unmasked the trim and took care of some finishing touches like cleaning up the polishing dust and cleaning polish from the edge of the stone guard with a tooth pick
And finally applied Opti Coat Pro
Overcast day so the gloss was not photographing the best it could be, but still happy with the finished pics!

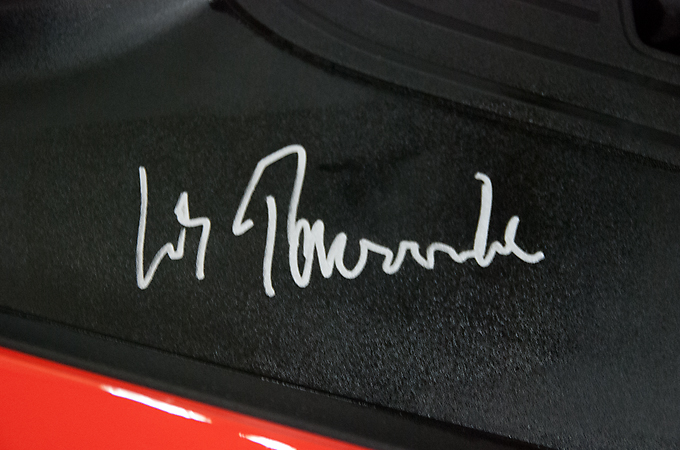
And the icing on the cake.... an autograph under the hood from Wolfgang Porsche!!!
Hope you enjoyed the pics as much as we enjoyed working on the car!
Thanks!
Not really much else to say, got the call Saturday evening and it was in the shop by Wednesday
Arrival
Cleaning the wheels
Masking off the rubber and plastic trim
The whole front end is carbon fibre so we had to bring out our ultrasound paint gauge to measure the paint
Underneath the hood
Ultrasound measurements
Magnetic measurements
And on to polishing the paint.
There was already close to 5000km on the odometer so the paint had some light swirls to polish out before applying Opti Coat Pro.
Before
After
Before
After
The taillights were polished as well
Before
After
After the 2nd stage of polishing was completed we applied Opti Coat Primer via machine to the paint
We unmasked the trim and took care of some finishing touches like cleaning up the polishing dust and cleaning polish from the edge of the stone guard with a tooth pick
And finally applied Opti Coat Pro
Overcast day so the gloss was not photographing the best it could be, but still happy with the finished pics!
And the icing on the cake.... an autograph under the hood from Wolfgang Porsche!!!
Hope you enjoyed the pics as much as we enjoyed working on the car!
Thanks!
01-06-2016, 02:44 PM
#69
Registered User
Thread Starter
Happy New Year!
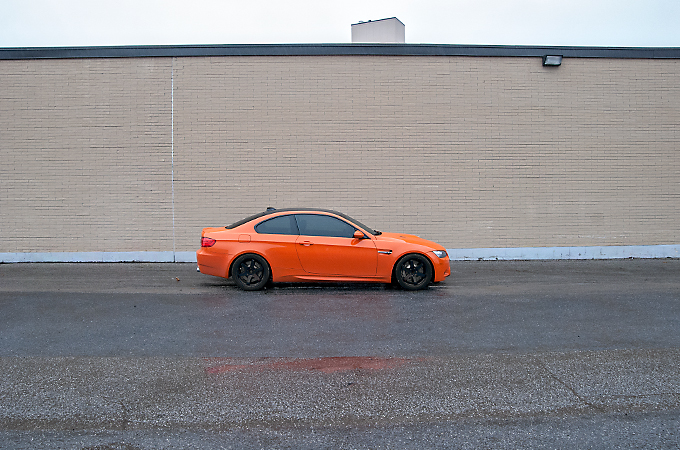
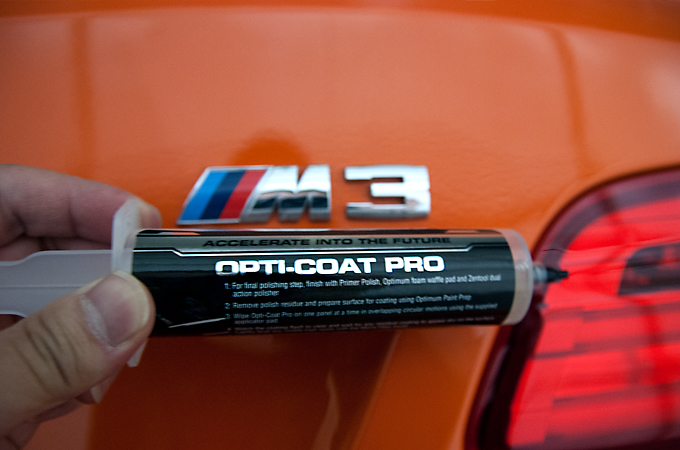
We were contacted by this client to detail this rare fire orange M3,1 of 2 I believe in Toronto, for storage. When it came in to the shop and upon inspection we came to the conclusion that it definitely needed a 2 stage polish as the paint was in rough condition. Anyways onto the polishing.
Arrival
Claybarring the paint

Measuring the paint
Masking off the rubber and plastic trim
Finally with all the prep done we started the compounding
Before
After
Before
After
Before (the trunk was in horrible shape with buffer trails everywhere)
After (there was a deeper scratch that was to deep to come out)
50/50 shot
Headlights and taillights were polished as well
Before
After
After all the compounding and polishing Opti Coat Primer was applied
Then Opti Coat Pro was applied
Here is the result of all our hard work starting with a sun shot

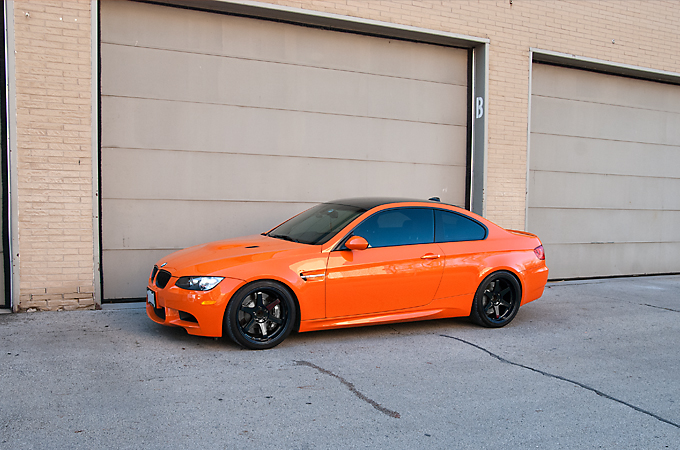
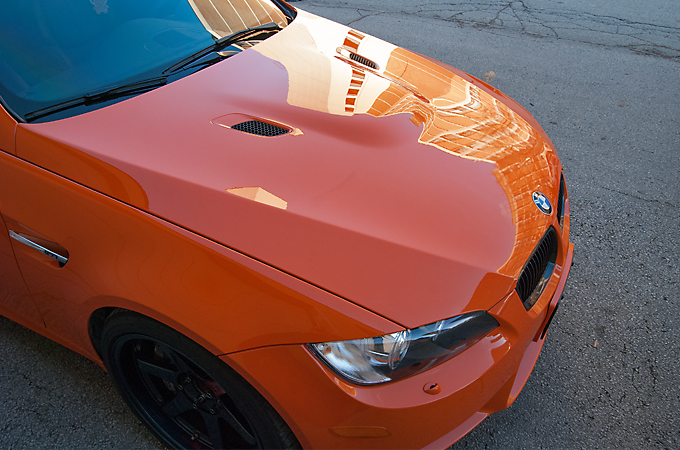
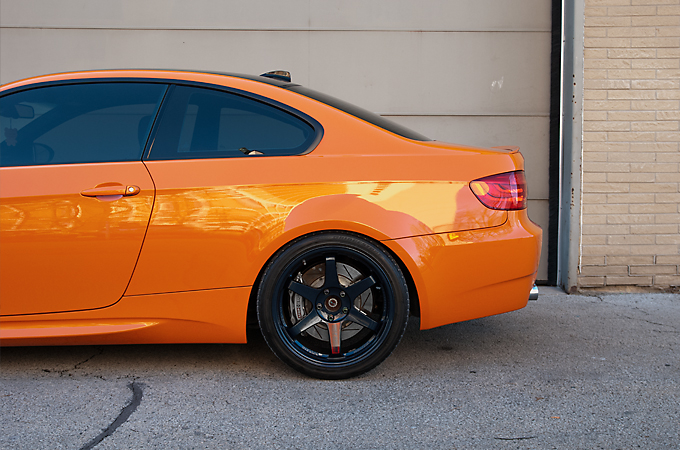
And finally my favourite shot
All the best in 2016!
We were contacted by this client to detail this rare fire orange M3,1 of 2 I believe in Toronto, for storage. When it came in to the shop and upon inspection we came to the conclusion that it definitely needed a 2 stage polish as the paint was in rough condition. Anyways onto the polishing.
Arrival
Claybarring the paint
Measuring the paint
Masking off the rubber and plastic trim
Finally with all the prep done we started the compounding
Before
After
Before
After
Before (the trunk was in horrible shape with buffer trails everywhere)
After (there was a deeper scratch that was to deep to come out)
50/50 shot
Headlights and taillights were polished as well
Before
After
After all the compounding and polishing Opti Coat Primer was applied
Then Opti Coat Pro was applied
Here is the result of all our hard work starting with a sun shot
And finally my favourite shot
All the best in 2016!
01-06-2016, 03:17 PM
#70
New Member
Those center locking wheels. Oh and that BMW.
UGH maybe I just like Orange cars
UGH maybe I just like Orange cars
Last edited by HRMoneyPit; 01-07-2016 at 10:26 PM.
02-15-2016, 08:42 AM
#71
Registered User
Thread Starter
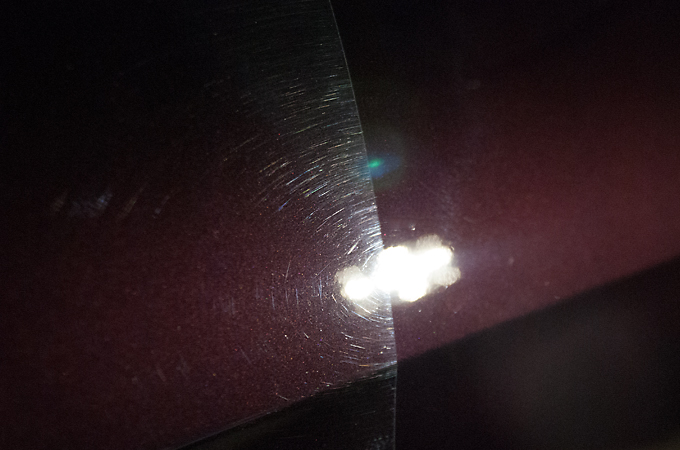
It was a huge pleasure to work on this classic R33 Skyline and in Midnight Purple too! We ended up performing a 2 stage polish on the paint and protecting it afterwards with Opti Gloss Coat. Ran into a small complication with the paint being fairly thin in some areas and couldn't get as aggressive as we would like to but everything turned out great regardless.
Hope you enjoy the pics!
Arrival
Cleaning the wheels
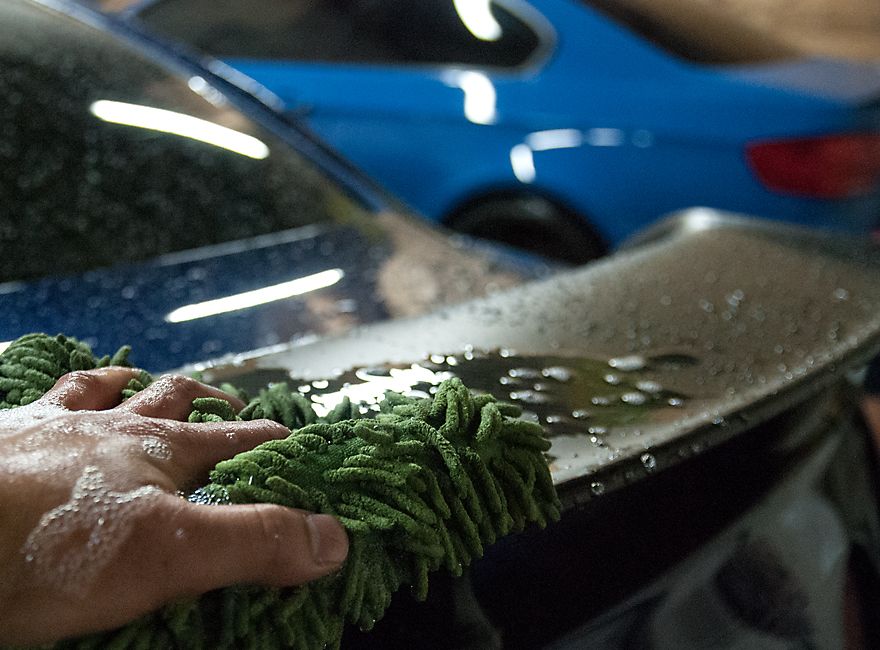
2 Bucket car wash
Claybarring the paint with the Nanoskin mitt
Masking off the rubber trim
And measuring the paint. This is one of the lower areas earlier mentioned
Before
After

50/50 shot
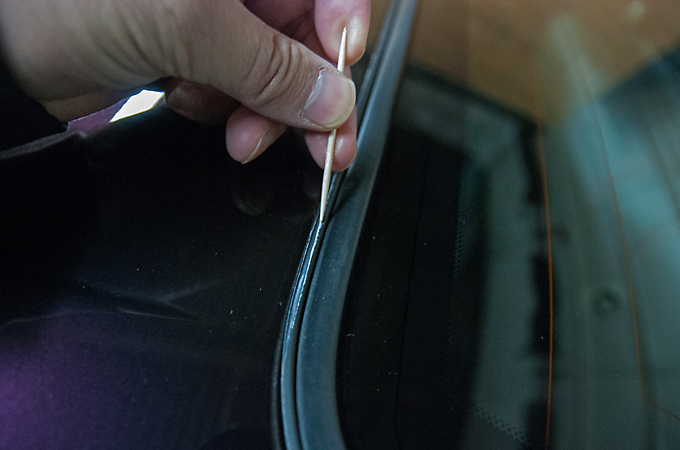
After the polishing was completed we cleaned out the left over polish out of the tighter areas with our trusty tooth pick
And finally Opti Gloss Coat is applied
Now for the finished pics

I tried to get a sun shot to show the flake but it had already set to far. This is the best I could do.
Hope you enjoyed the pics on this R33 Godzilla!
Hope you enjoy the pics!
Arrival
Cleaning the wheels
2 Bucket car wash
Claybarring the paint with the Nanoskin mitt
Masking off the rubber trim
And measuring the paint. This is one of the lower areas earlier mentioned
Before
After
50/50 shot
After the polishing was completed we cleaned out the left over polish out of the tighter areas with our trusty tooth pick
And finally Opti Gloss Coat is applied
Now for the finished pics
I tried to get a sun shot to show the flake but it had already set to far. This is the best I could do.
Hope you enjoyed the pics on this R33 Godzilla!
03-07-2016, 07:54 AM
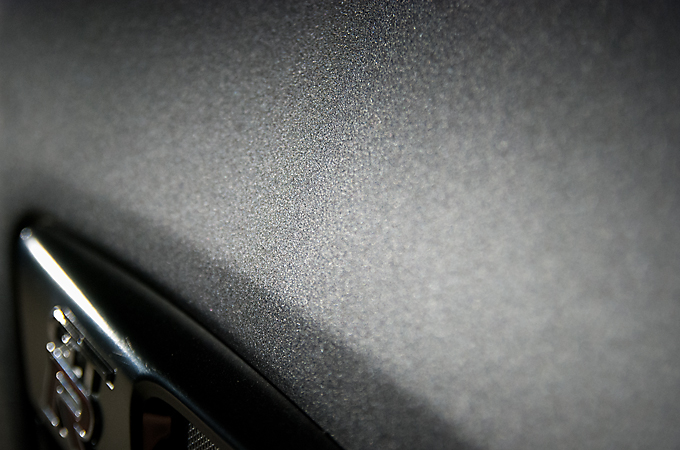
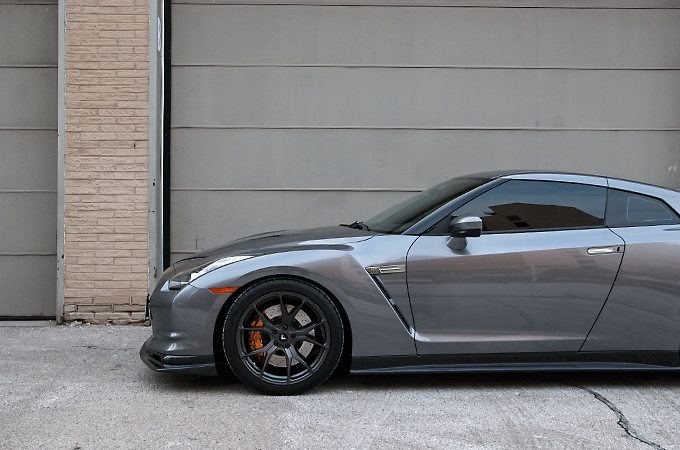
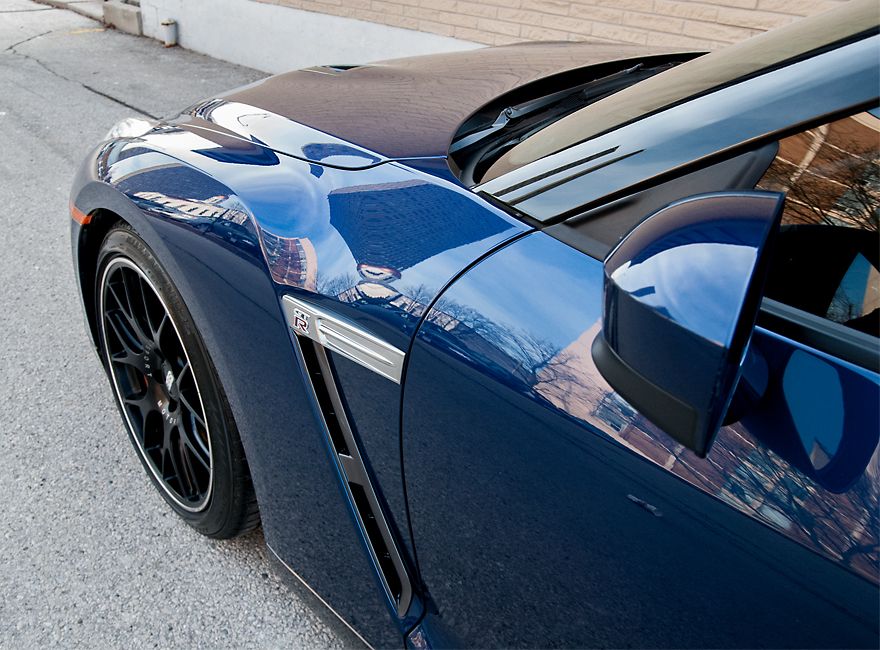
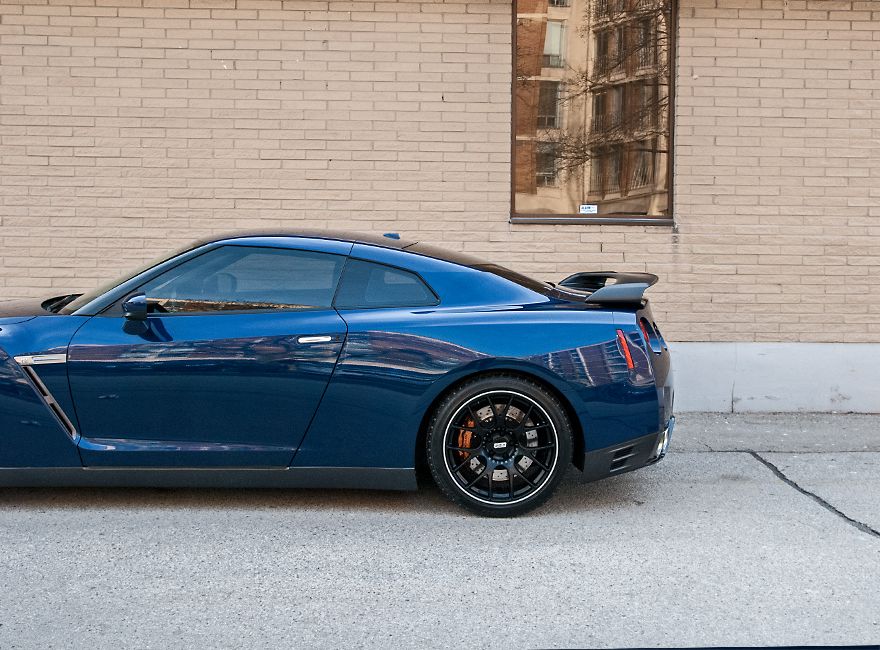
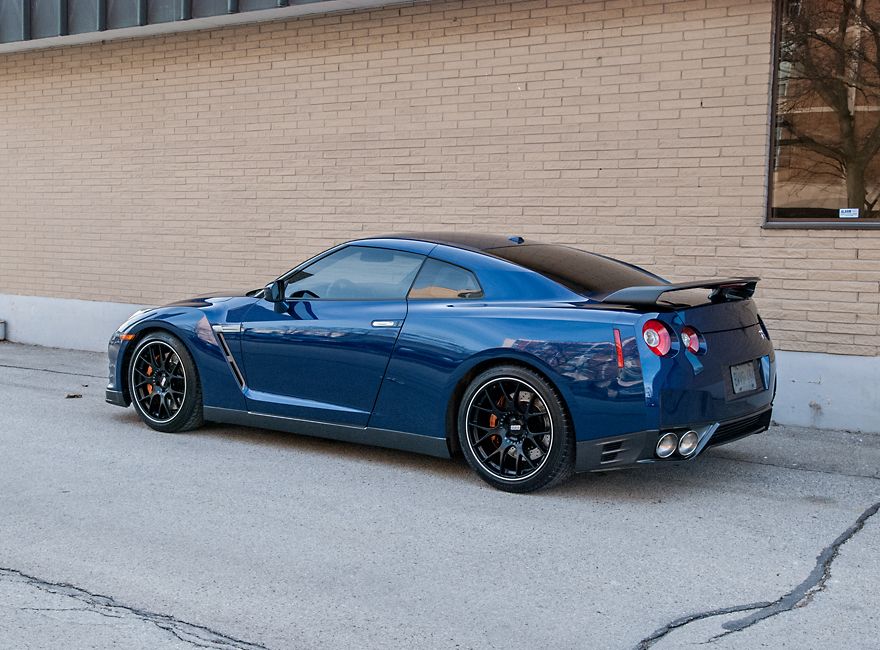
#72
Registered User
Thread Starter
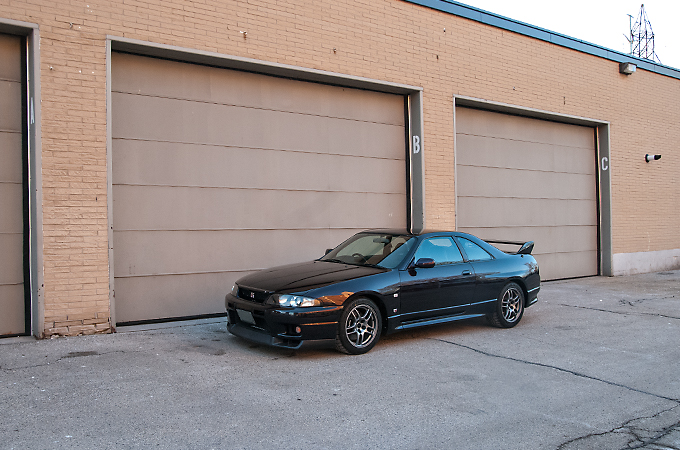
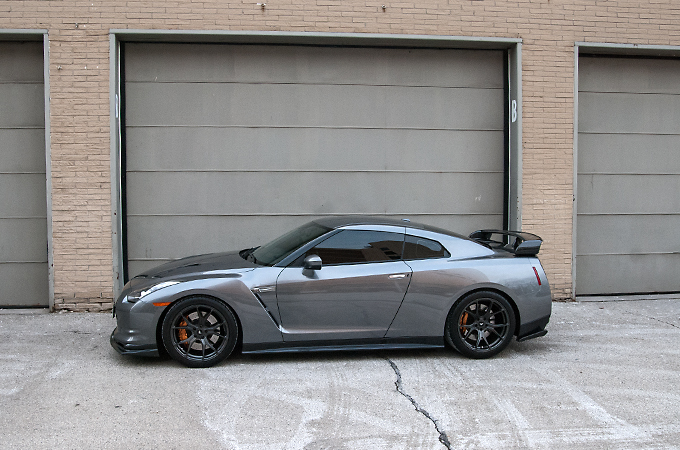
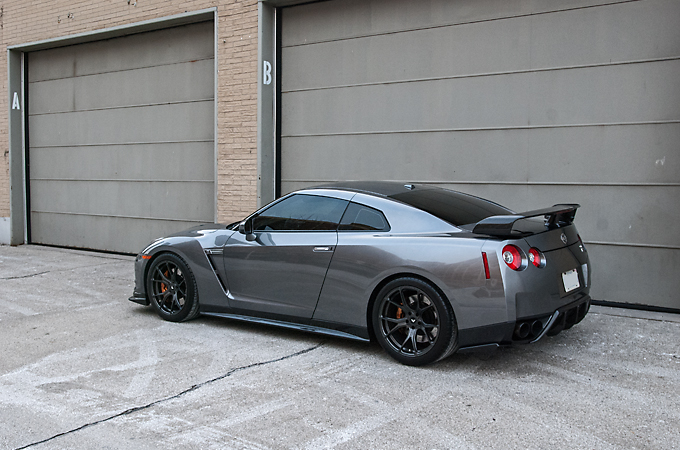
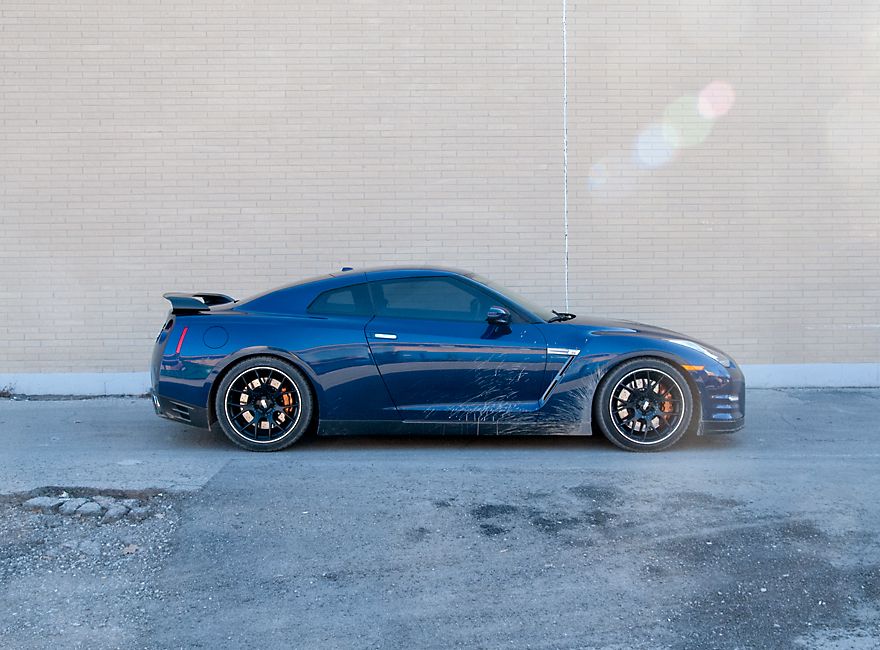
This GT-R came in for a promotion we were having in January. I spoke briefly to the client about a few areas of concern over the phone and then we both agreed that weather permitting it would come in for a 2 stage polish + Opti Gloss Coat. Luckily everything worked out and surprisingly the client didn't live to far away from the shop.
Arrival
Claybarring the paint
Masking off the rubber trim
Measuring the paint
Onto the 1st stage of polishing
Before
After
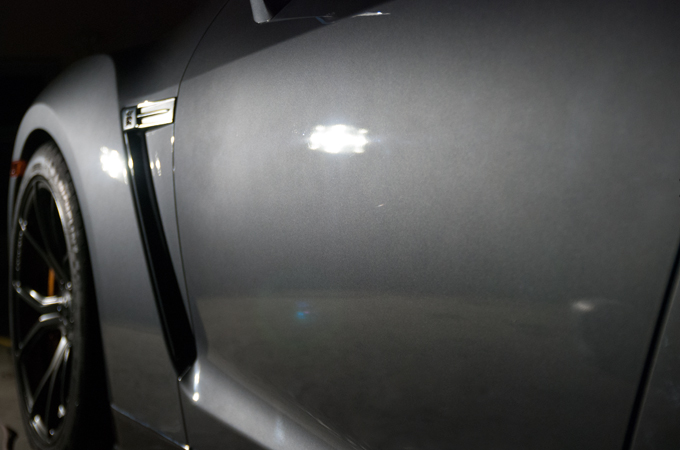
Metallic flake popping again
Opti Gloss Coat about to be applied
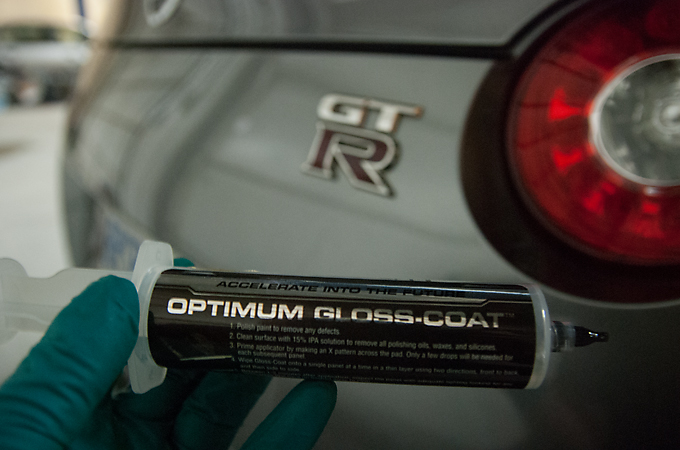
And the final results!
Arrival
Claybarring the paint
Masking off the rubber trim
Measuring the paint
Onto the 1st stage of polishing
Before
After
Metallic flake popping again
Opti Gloss Coat about to be applied
And the final results!
 08-03-2016, 06:36 PM
#74
Registered User
Thread Starter
This is the 2nd time I have ever seen an unmodified MKIV Supra. Client had told me he had bought a Porter Cable to polish it himself and had an old syringe of discontinued Opti Coat 2.0 to coat it afterwards but with his wife expecting their first child he had no time for the project anymore.
We were happy to help and enjoyed every bit of 2 stage polishing this JDM classic!
Arrival
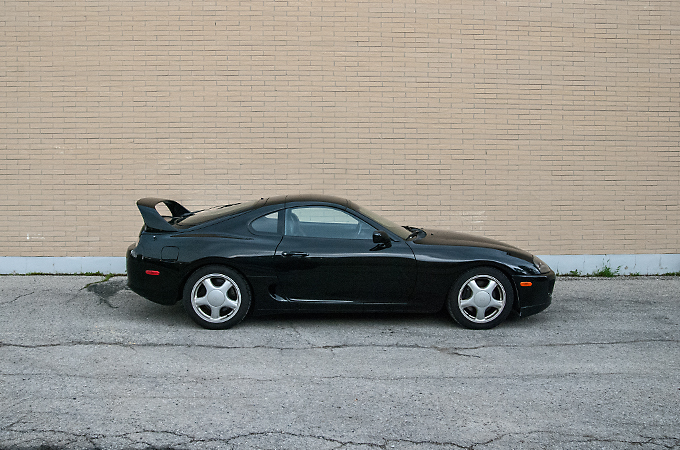
Cleaning the wheels
After all the prep work we began the polishing
Before
After
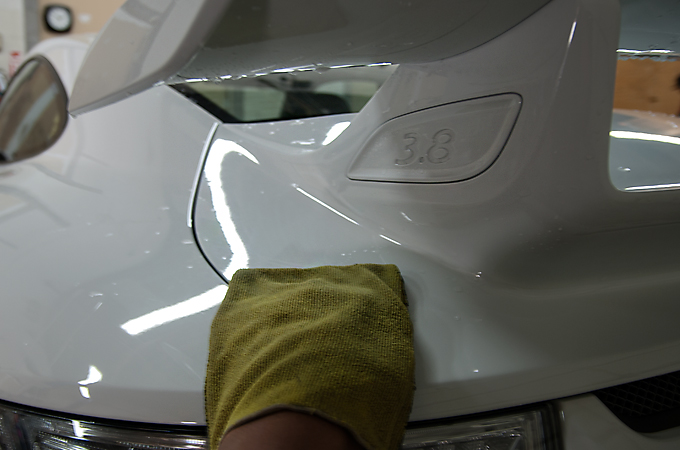
After all the polishing was completed we wiped down the paint with ipa to clean off the polishing oils
Lol a really old syringe of Opti Coat 2.0 that belonged to the customer
And finally the finished results of our work starting off with a sun shot
The paint didn't turn out perfect but all in all I would say an 8.5 out of 10 minus some deeper scratches.
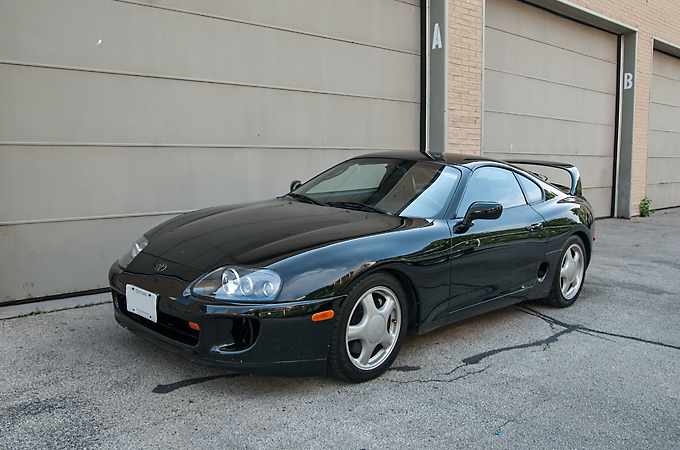
Hope you enjoyed the pics on this Japanese classic!
We were happy to help and enjoyed every bit of 2 stage polishing this JDM classic!
Arrival
Cleaning the wheels
After all the prep work we began the polishing
Before
After
After all the polishing was completed we wiped down the paint with ipa to clean off the polishing oils
Lol a really old syringe of Opti Coat 2.0 that belonged to the customer
And finally the finished results of our work starting off with a sun shot
The paint didn't turn out perfect but all in all I would say an 8.5 out of 10 minus some deeper scratches.
Hope you enjoyed the pics on this Japanese classic!
 12-18-2017, 10:22 AM
#76
Registered User
Thread Starter
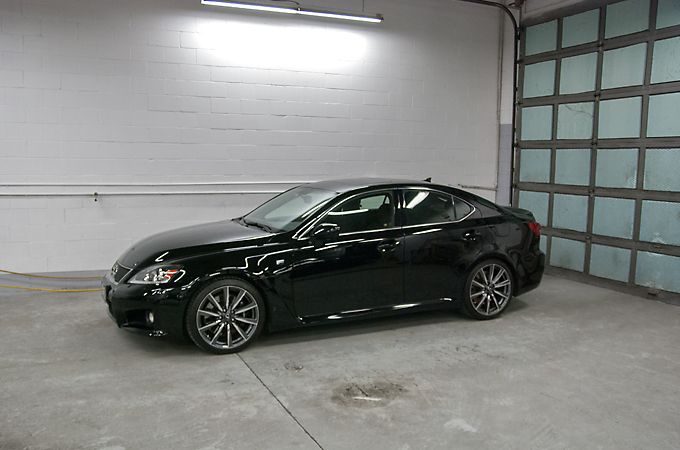
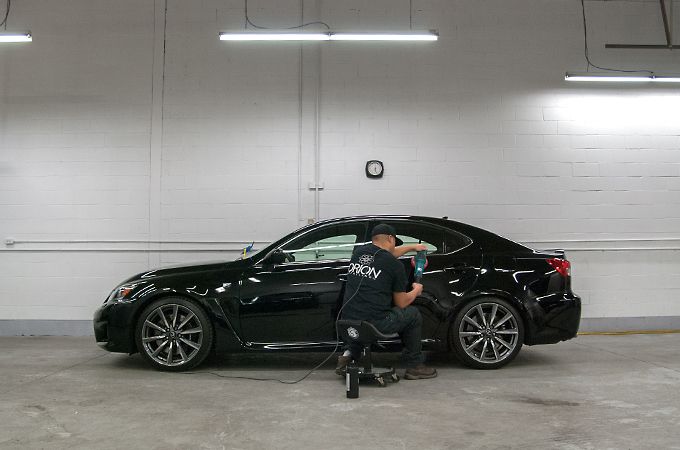
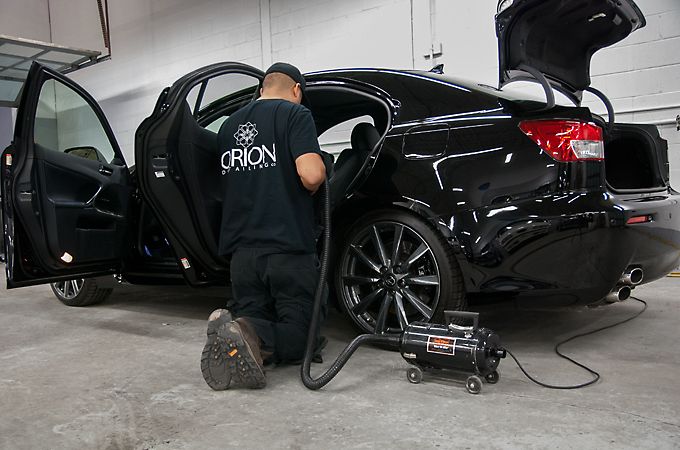
Spoke to this client on Facebook a few months back and he let me know he was expecting this ISF sometime later in the year and that he wanted to give it a "fresh" start. We weren't sure which service to go with and decided to wait until the ISF arrived. Fast forward to last week and in it came. Originally we agreed on a 2 stage polish + Opti Gloss Coat but as we started to polish the paint we encountered an issue and found out that a product called RestoreFX had been applied hindering us from achieving proper paint correction. I contacted the owner and let him know the revised quote to remove the RestoreFX and then to perform the 2 stage polish and in the end we decided to go with our Basic In & Out service as the client figured out what to do about the situation.
I haven't seen a Lexus ISF in awhile and besides the power and styling, I love the fact that they are not so commonly seen around town!
Hope you guys enjoy the pics of this Basic In & Out detail!
Arrival
Claybarring the paint
Lite polish and wax on the paint
Vacuuming the interior
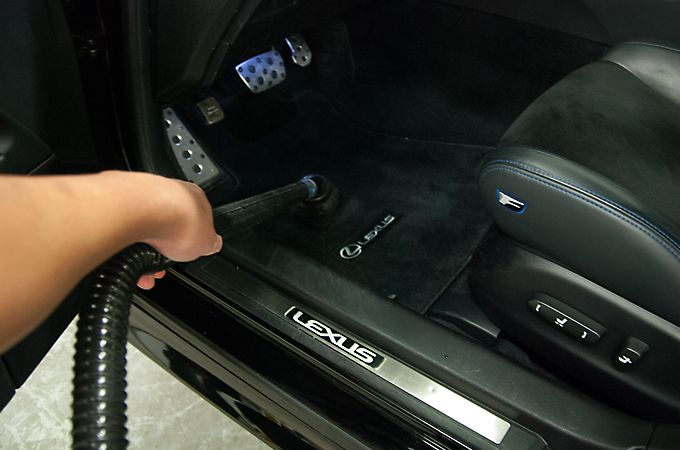
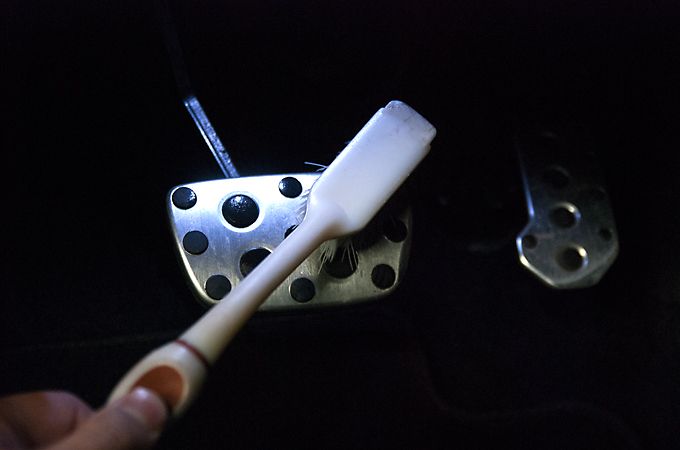
Even the pedals get cleaned
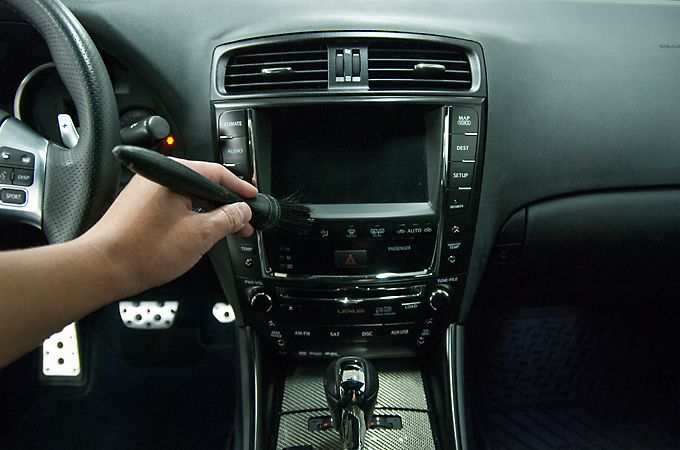
Using our brush to get in the cracks and crevices
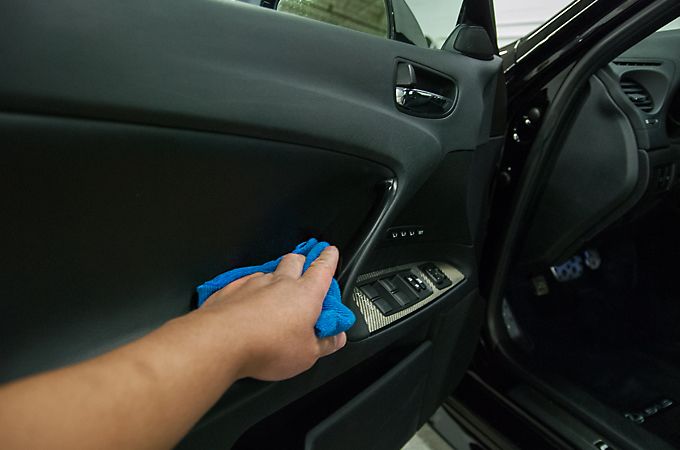
Wiping down the interior
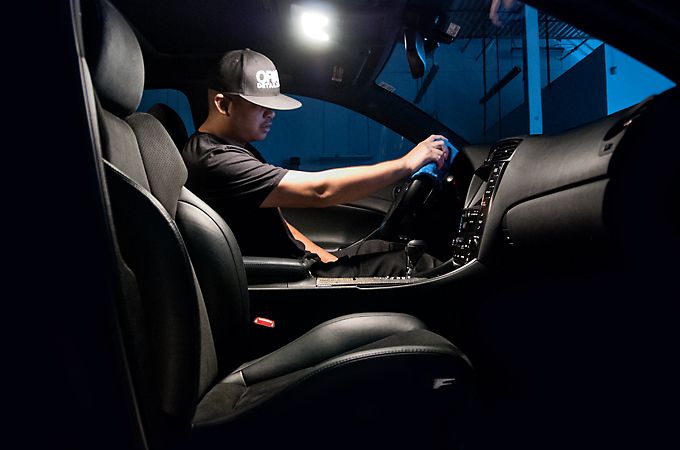
Artsy fartsy shot of wiping down the interior but the steering wheel does get attention as well when cleaning
And finally the finished shots which was sadly taken on a rainy day
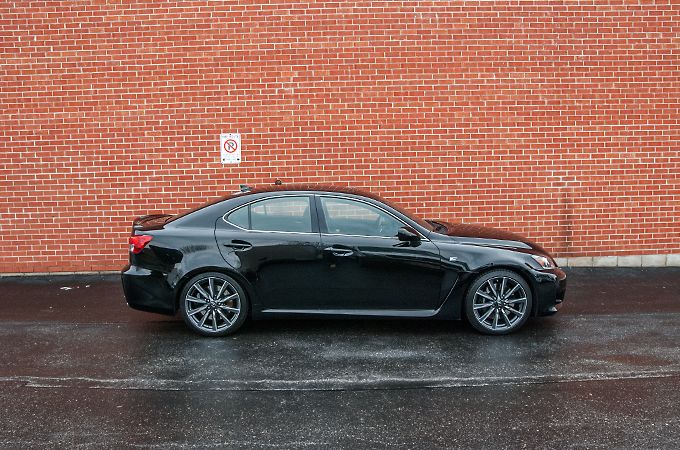
My favourite part on the exterior are the front fenders
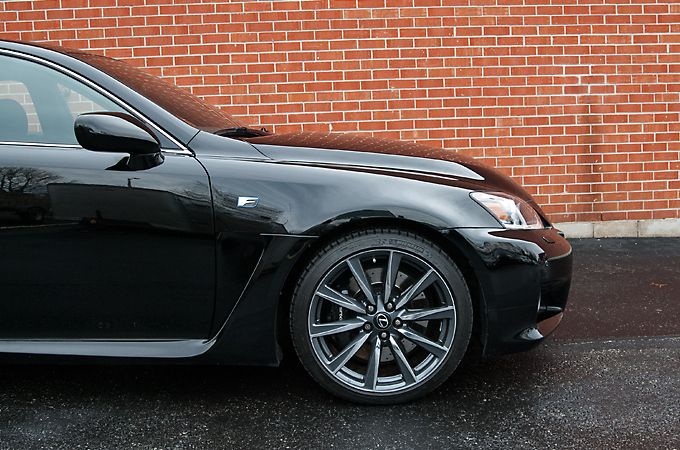
Hope you liked the pics! After spending some time with one I definitely want to see one of these in my future!
Thanks,
Wes
(647)999-8499
www.instagram.com/oriondetailing.co
I haven't seen a Lexus ISF in awhile and besides the power and styling, I love the fact that they are not so commonly seen around town!
Hope you guys enjoy the pics of this Basic In & Out detail!
Arrival
Claybarring the paint
Lite polish and wax on the paint
Vacuuming the interior
Even the pedals get cleaned
Using our brush to get in the cracks and crevices
Wiping down the interior
Artsy fartsy shot of wiping down the interior but the steering wheel does get attention as well when cleaning
And finally the finished shots which was sadly taken on a rainy day
My favourite part on the exterior are the front fenders
Hope you liked the pics! After spending some time with one I definitely want to see one of these in my future!
Thanks,
Wes
(647)999-8499
www.instagram.com/oriondetailing.co
01-24-2019, 10:01 AM
#77
Registered User
Thread Starter
Long time client brought us his Black Edition for a 2 stage polish + Opti Gloss Coat. I love the BBS's as winter wheels lol!
Paint wasn't to bad but definitely needed a 2 stage polish to get it up to standard.
Hope you guys/gals like the pics!
Arrival
Cleaning the wheels
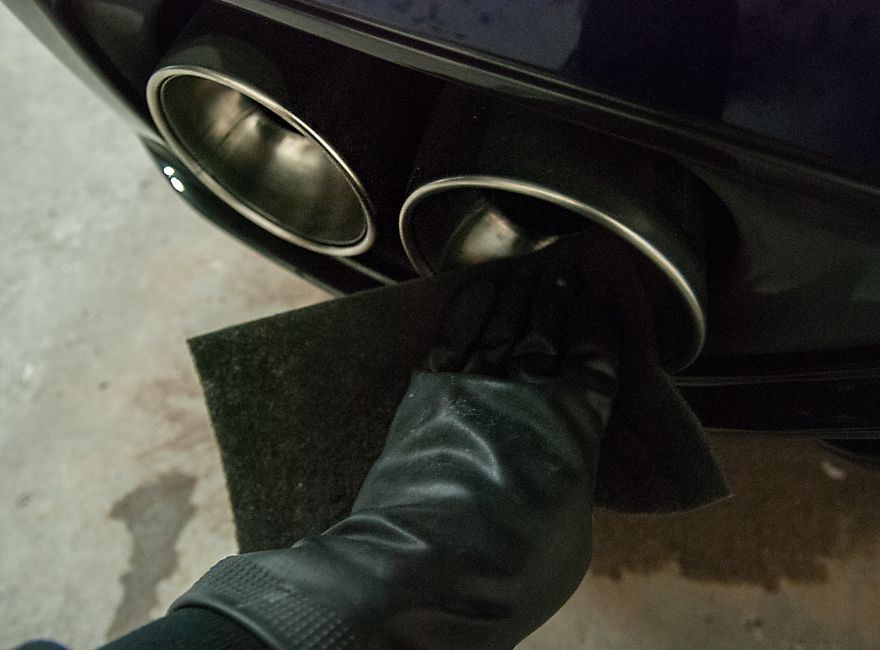
Cleaning the exhaust
Two Bucket handwash
Claybarring the paint
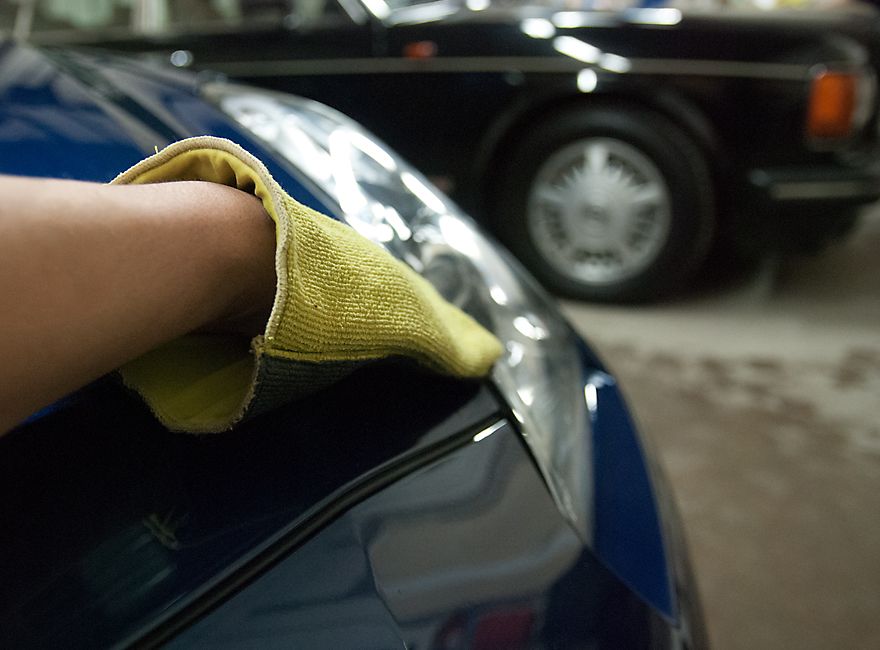
Drying the paint with a microfibre towel
Rubber and plastic trim was masked off
Measuring the paint

Before

After
Shot of the metallic flake after the 2nd stage of polishing
Alcohol wipe down to remove the polishing oils
Opti Gloss Coat ceramic coating about to be applied

And the finished pics

Always a pleasure to take care of clients we've developed a great relationship with over the years!
Thanks!
Wes
https://www.instagram.com/oriondetailing.co/
Paint wasn't to bad but definitely needed a 2 stage polish to get it up to standard.
Hope you guys/gals like the pics!
Arrival
Cleaning the wheels
Cleaning the exhaust
Two Bucket handwash
Claybarring the paint
Drying the paint with a microfibre towel
Rubber and plastic trim was masked off
Measuring the paint
Before
After
Shot of the metallic flake after the 2nd stage of polishing
Alcohol wipe down to remove the polishing oils
Opti Gloss Coat ceramic coating about to be applied
And the finished pics
Always a pleasure to take care of clients we've developed a great relationship with over the years!
Thanks!
Wes
https://www.instagram.com/oriondetailing.co/
Last edited by Wes_R; 01-24-2019 at 10:05 AM.

Thread
Thread Starter
Forum
Replies
Last Post
350Z_Al
Exterior & Interior
133
10-29-2020 07:44 PM
Tochigi_236
Feedback & Suggestions for Our Forum
8
09-27-2015 03:40 PM

