Assembly of my new Built Short Block
 08-17-2007, 05:14 PM
#21
Originally Posted by jonb7007
Good job on removing that pilot biotch.. That was a huge PITA I neva accomplished.. How exactly did you remove it?? I re-read twice and dont see it..
Moving right along, the new bearing is in and looks great. Next I will attempt to install the flywheel and clutch. I just need to wait for my next day off Sunday.
 08-17-2007, 05:32 PM
#22
Originally Posted by rrmedicx
I am very embarrassed to say...it was ugly. I spent enough money going back and forth to AutoZone buying tools which I will most likely only be using once...So I used a flathead screwdriver and found an angle that caught the inside of the bearing and worked it around with WD40 until it spun out just enough that I could barely catch an edge with a pair of pliers enough to yank it out. Very Crude but effective. Lets just say, the bearing that was in there is no longer recognizable.
Moving right along, the new bearing is in and looks great. Next I will attempt to install the flywheel and clutch. I just need to wait for my next day off Sunday.
Moving right along, the new bearing is in and looks great. Next I will attempt to install the flywheel and clutch. I just need to wait for my next day off Sunday.
 BTW if you have a strut bar on or any type of stillen engine mount.. It has to be taken off.. LOL.. I had to learn that from 4hrs of unneccasary tranny pushing, prodding and punching into place (just FYI)..
  08-17-2007, 06:40 PM
#23
Originally Posted by jonb7007
Ok, that makes me feel better....... The alignment is a *****.. So get it perfectly right.. BTW if you have a strut bar on or any type of stillen engine mount.. It has to be taken off.. LOL.. I had to learn that from 4hrs of unneccasary tranny pushing, prodding and punching into place (just FYI)..
BTW if you have a strut bar on or any type of stillen engine mount.. It has to be taken off.. LOL.. I had to learn that from 4hrs of unneccasary tranny pushing, prodding and punching into place (just FYI).. And yeah thanks Adrian, I'm moving as fast as I can. I had to get my new apartment in BK set up. So it took me a couple of extra days, but I'm good now. You got a new Z neighbor kid.
 08-18-2007, 11:37 AM
#25
Z + Rear Seat

iTrader: (3)
Join Date: Jun 2005
Location: St.Pete,FL
Posts: 1,642
Likes: 0
Received 0 Likes
on
0 Posts
Great job on the info and pictures... as always...
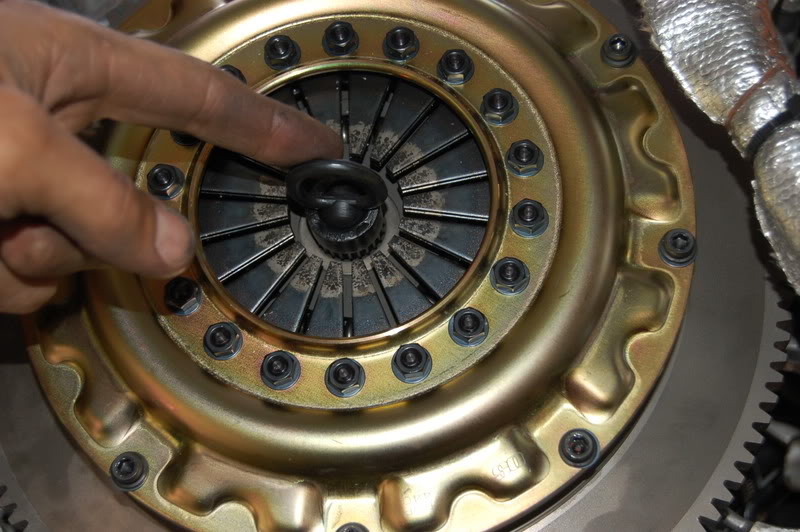
I have a question about the flywheel/clutch... Here's the picture:
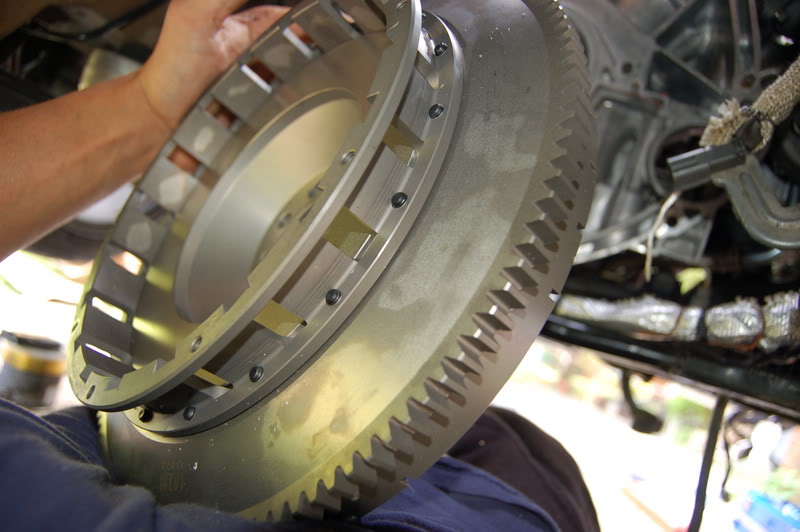
Is the built up side part of the clutch actually part of the flywheel?
It looks like the clutch is multi-disk. I guess I'm asking if you could explain what type of clutch/flywheel combination this is...
Nice picture of you and the new wife... Congratulations on getting married!
I have a question about the flywheel/clutch... Here's the picture:
Is the built up side part of the clutch actually part of the flywheel?
It looks like the clutch is multi-disk. I guess I'm asking if you could explain what type of clutch/flywheel combination this is...
Nice picture of you and the new wife... Congratulations on getting married!
08-18-2007, 02:09 PM
#26
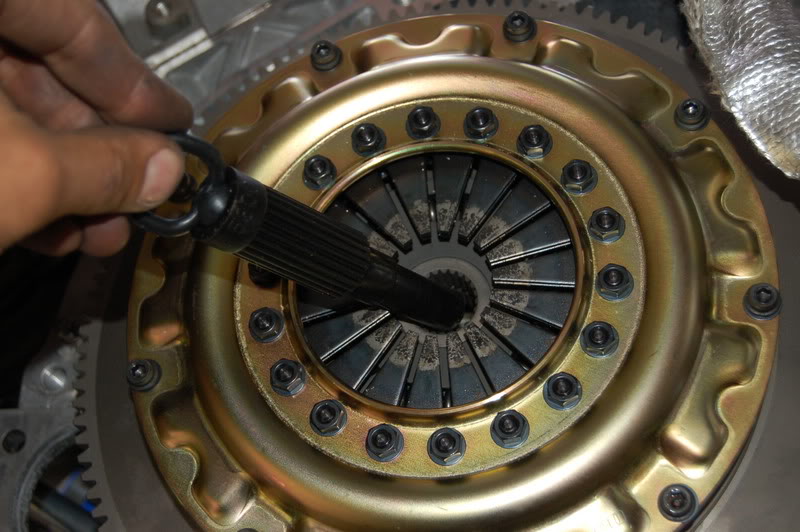
Yes, it is a multi disc OS Giken see below.
Here we go..Here is the Clutch OS Giken Twin:
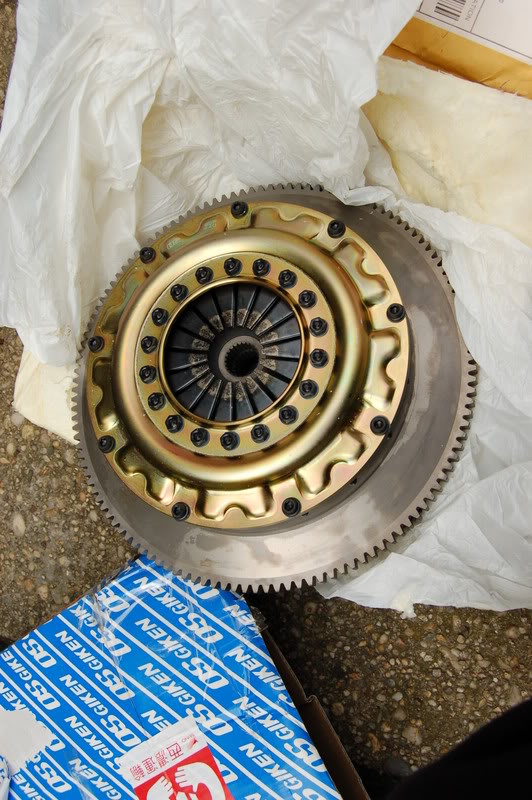
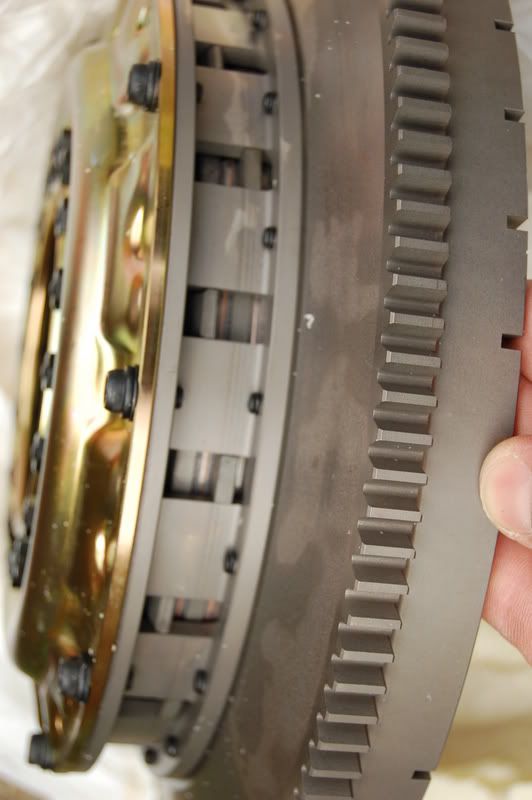
In order to install you have to disassemble the multi discs to access the back wall which acts as the flywheel. Then after mounting to the back of the crank, you add the clutch plates and close it up for the clutch components.
Here we go..Here is the Clutch OS Giken Twin:
In order to install you have to disassemble the multi discs to access the back wall which acts as the flywheel. Then after mounting to the back of the crank, you add the clutch plates and close it up for the clutch components.
08-19-2007, 04:47 PM
#29
I believe I left off in my assembly of attempted install of the flywheel component of the twin clutch.
Ended up I broke one of the bolts by over torquing. So I resorted to my back up bolt spare and this time I used loctite, which I feel made the bolts torque easier. It provided a little lubrication in torquing and I was able to accomplish 93 ft/lbs of torque much easier the second time around.
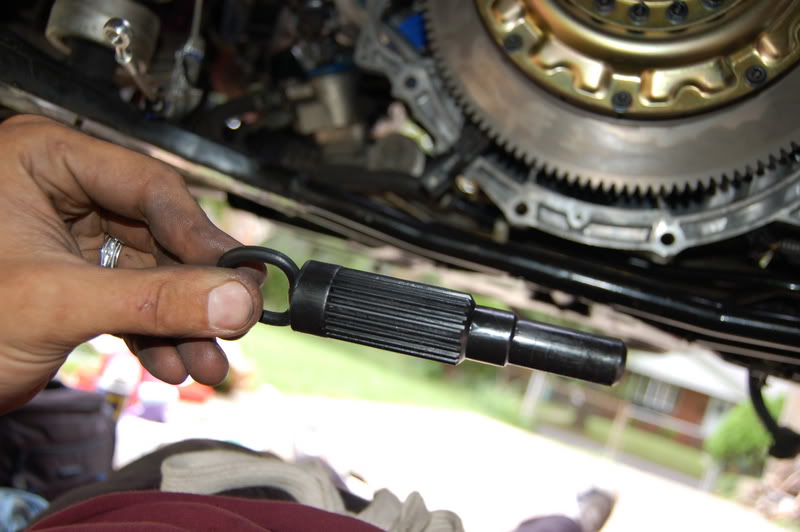
I managed to call on a friend who lent me the appropriate Nissan Spec Clutch Install tool. The universal tool was useless with multiple clutch plates as it only goes in as far as the first clutch plate. Note to self, if you are installing a multi clutch, get the appropriate Nissan Clutch alignment tool.
Then install the clutch plates and secure the alignment with a Nissan Clutch alignment tool.

Beautiful clutch.
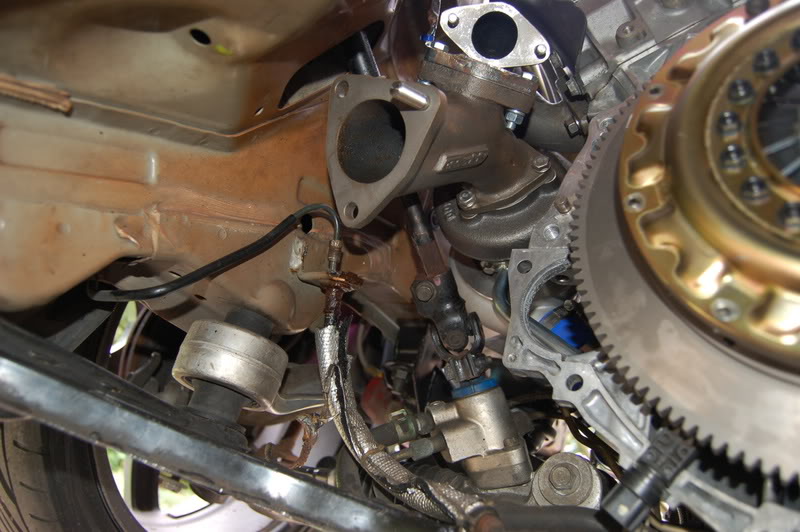
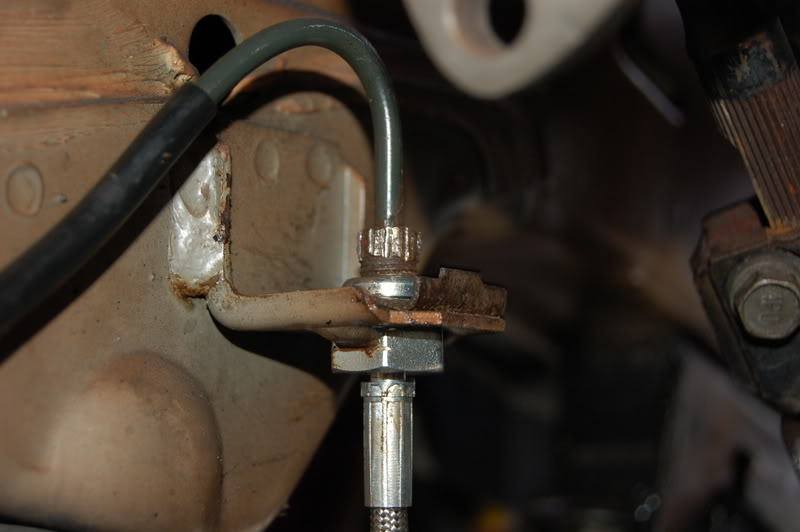
Here you can see in the lower left corner the original rubber clutch line.
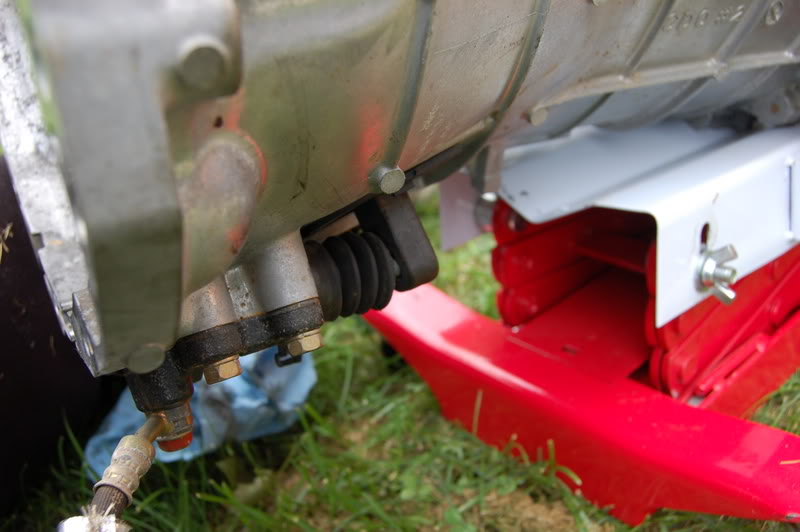
Lets get that out of the way and replace it with the SS line I've been sitting on for 1 year already.

Actually it would be better to install it on the other end, not on the tranny.
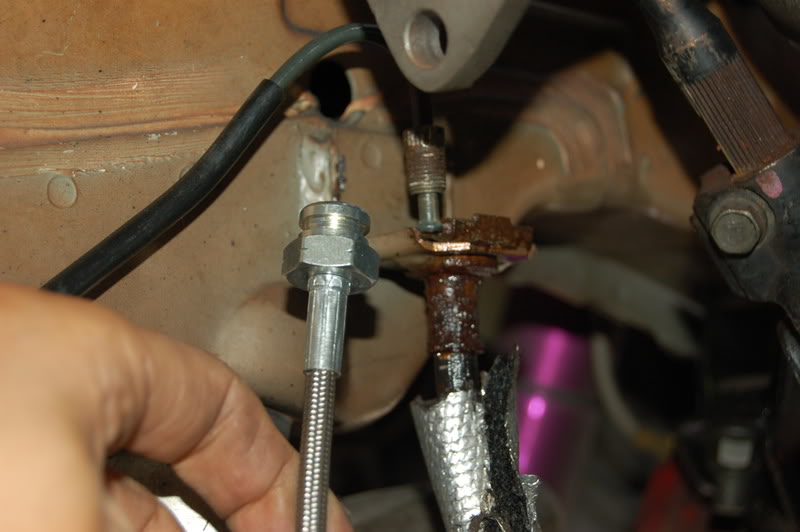
This is where the original lines meets to the hard line.
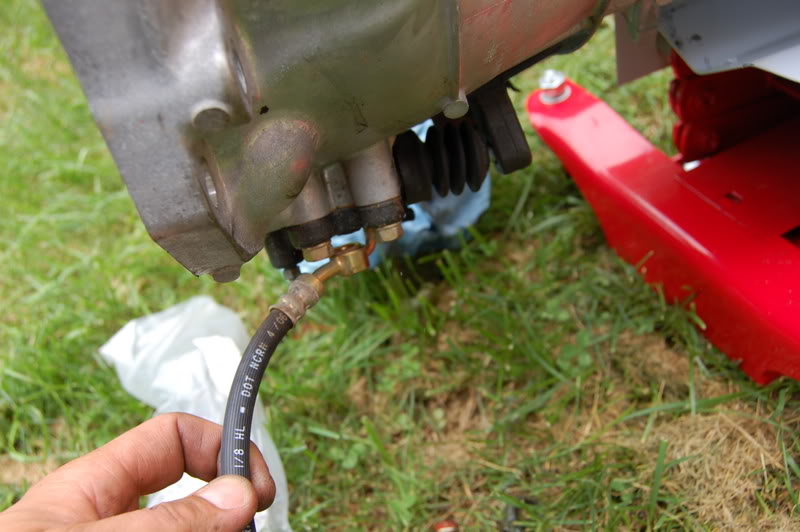
Close up.

Side by side comparison
You have to pull the slide lock out to disengage the OEM line
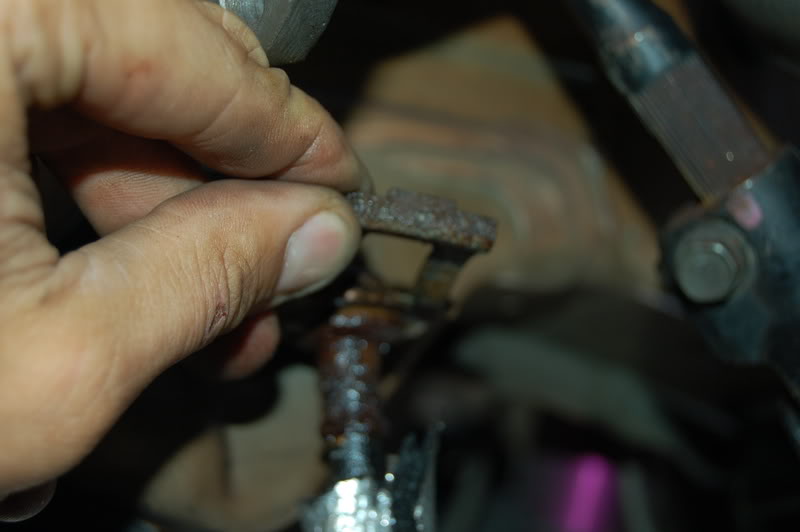
Here is a look at the slide lock
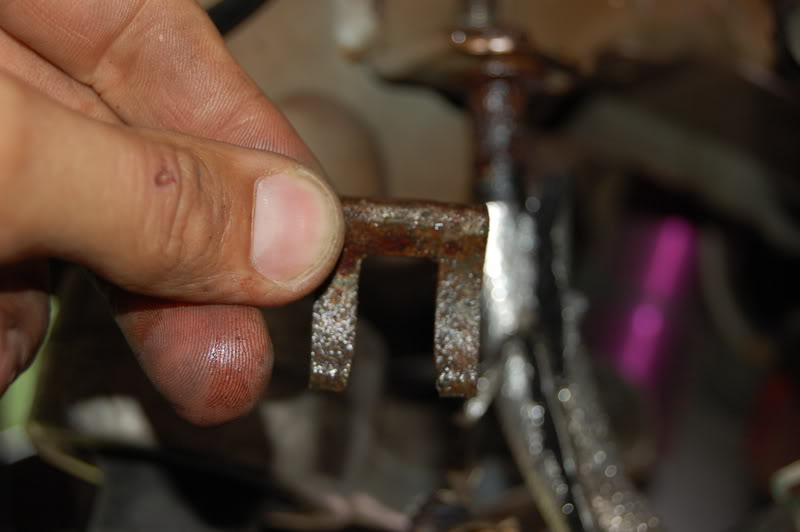
Install the other end of the SS line and slide the lock back in place.
I had to raise the car extra high to allow room for the tranny now that it is mounted on top of the tranny lift.
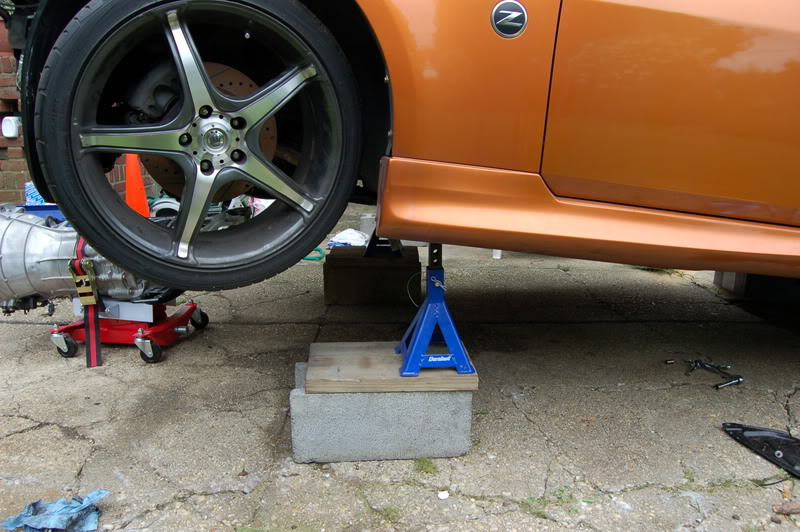
The weight of the tranny is towards the rear.
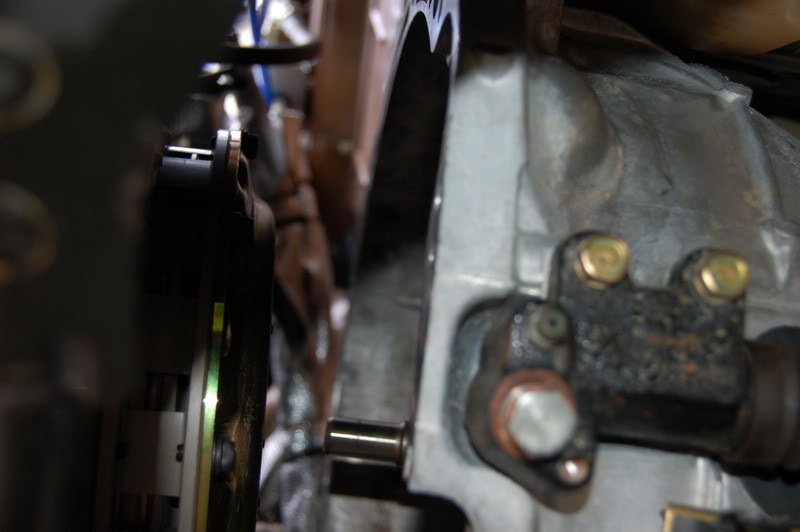
Lets take a quick look at the internal of the transmission so you know what to do.
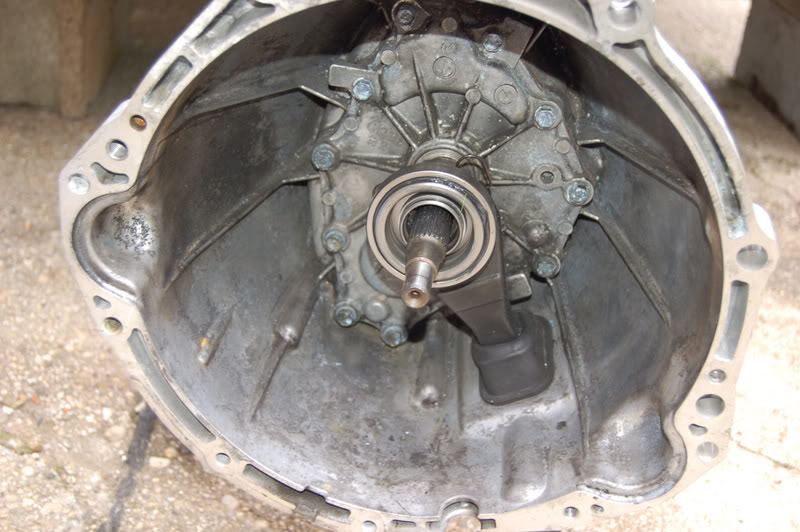
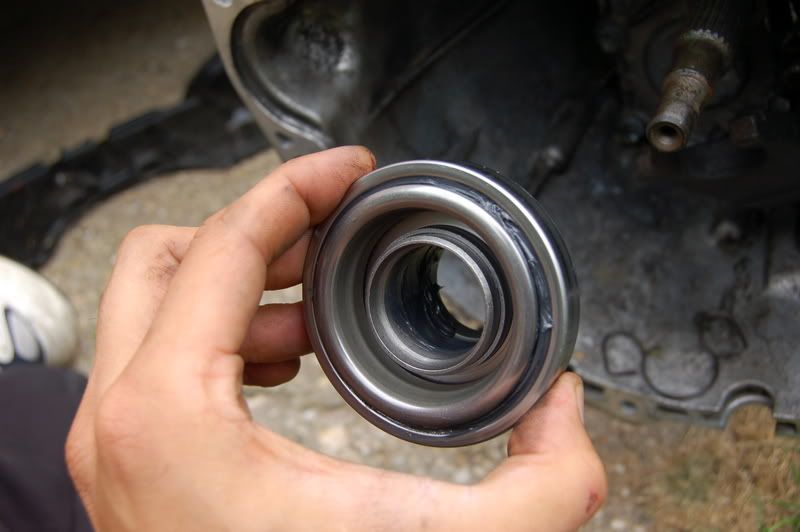
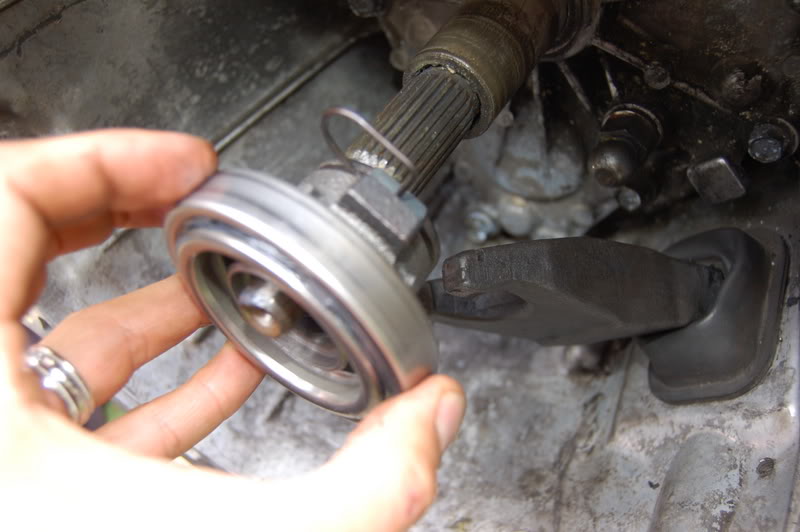
This is the throw out bearing.
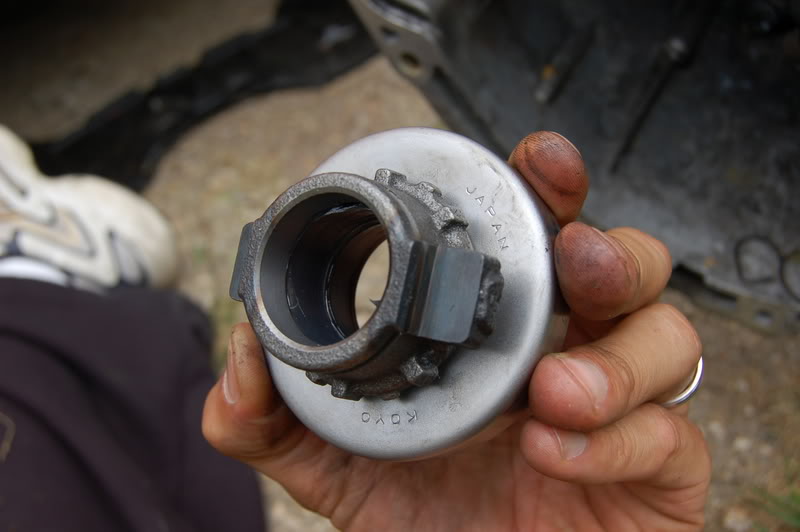
Flip it over and this is the side that pushes up against the pressure plate of the clutch
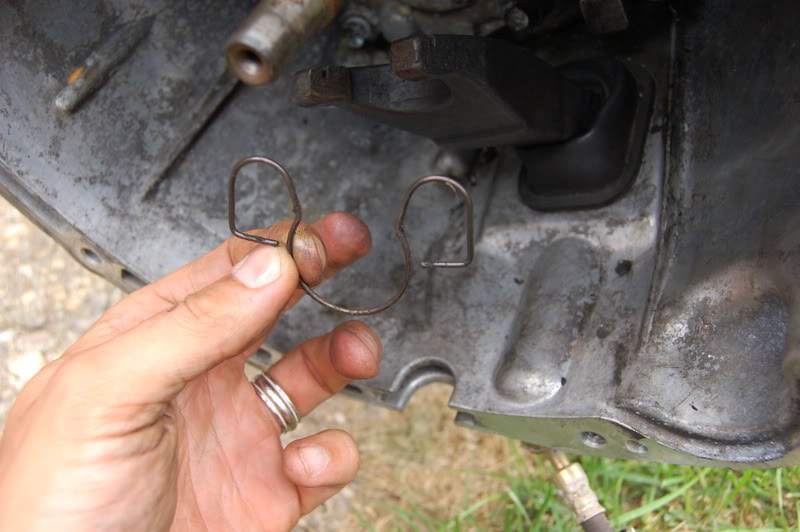
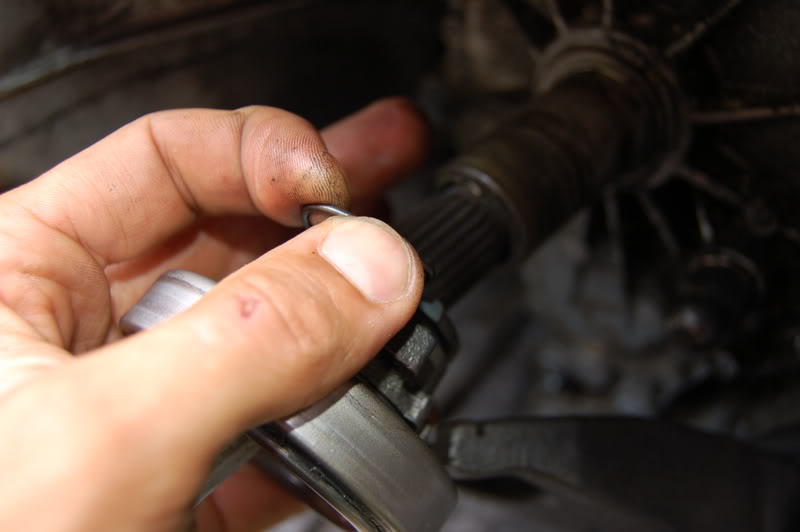
Look closely and you can see a slide locking ring on the back of the assembly
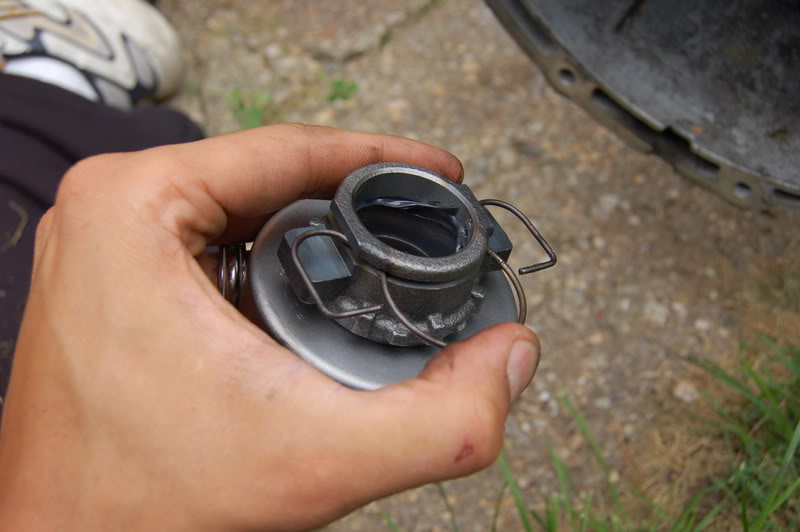
Here it is snapped in place.
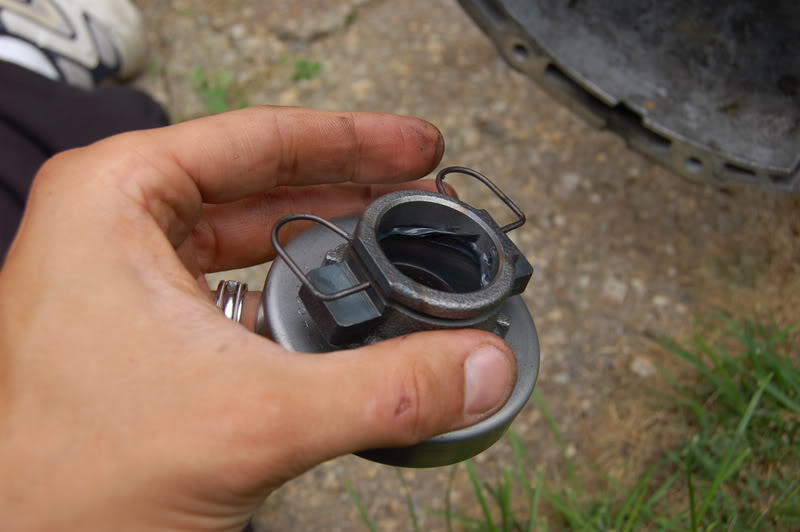
This is the snap ring.
You can slip the throw out bearing over the input shaft of the tranny, remember to prep it with a light coating of grease on the inside and on the bearing surface.
You can see the fork below the bearing. The snap ring is also secured to the fork to keep it from coming off.

For lack of a better term the ears of the snap ring and flexible and loop over the 2 tips of the fork and that is what keeps the fork attached to the throw out bearing.
I know its dark but its the best I could do.
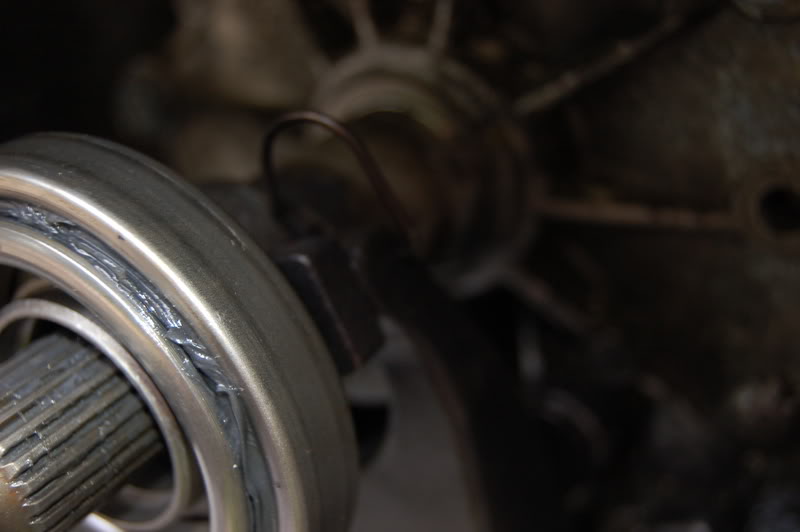
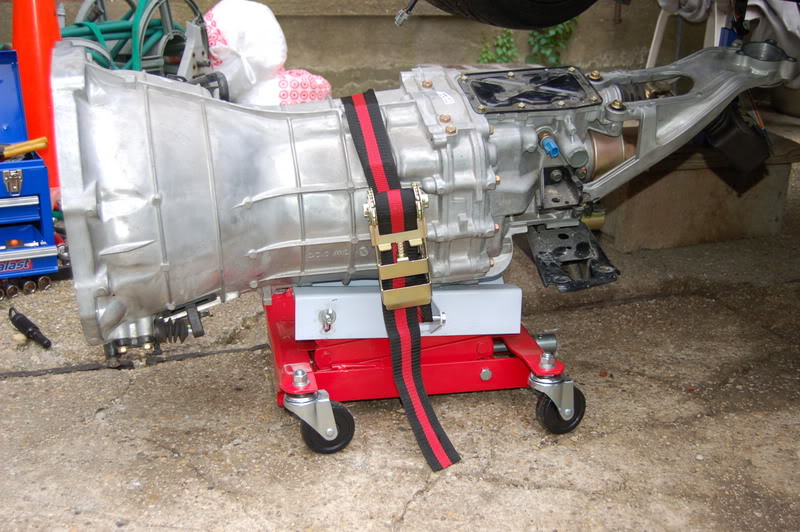
The new bearing is in place and I am ready to attempt to install the tranny by myself.
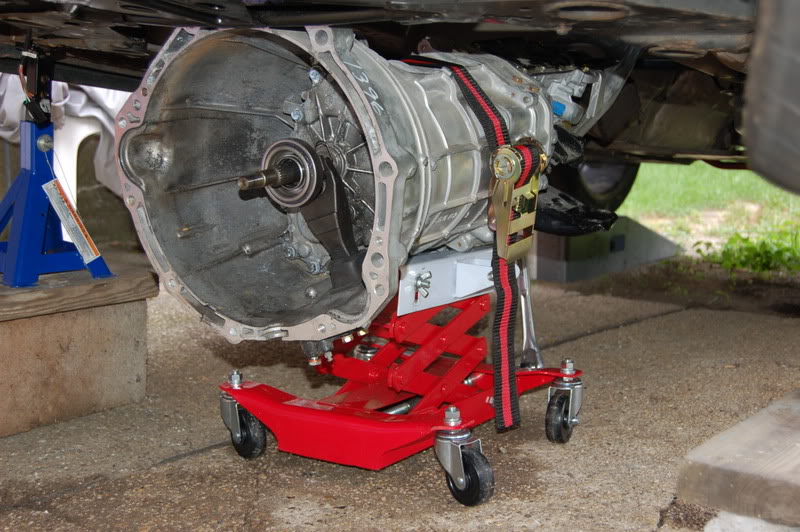
Here is the tranny jack doing its thing. I used a 1/2 inch ratchet to raise or lower it.
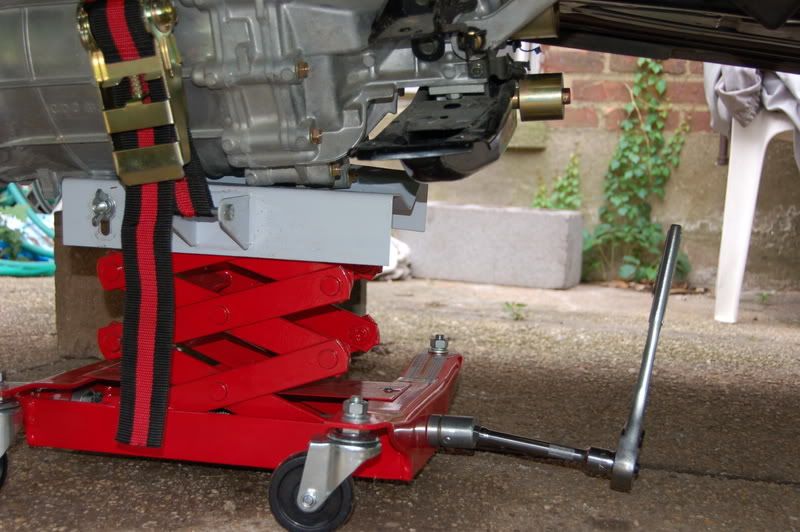
I got the tranny to about 3/4 of an inch to full attachment.
Here comes the rain again.
Damn. TO be continued
Ended up I broke one of the bolts by over torquing. So I resorted to my back up bolt spare and this time I used loctite, which I feel made the bolts torque easier. It provided a little lubrication in torquing and I was able to accomplish 93 ft/lbs of torque much easier the second time around.
I managed to call on a friend who lent me the appropriate Nissan Spec Clutch Install tool. The universal tool was useless with multiple clutch plates as it only goes in as far as the first clutch plate. Note to self, if you are installing a multi clutch, get the appropriate Nissan Clutch alignment tool.
Then install the clutch plates and secure the alignment with a Nissan Clutch alignment tool.
Beautiful clutch.
Here you can see in the lower left corner the original rubber clutch line.
Lets get that out of the way and replace it with the SS line I've been sitting on for 1 year already.
Actually it would be better to install it on the other end, not on the tranny.
This is where the original lines meets to the hard line.
Close up.
Side by side comparison
You have to pull the slide lock out to disengage the OEM line
Here is a look at the slide lock
Install the other end of the SS line and slide the lock back in place.
I had to raise the car extra high to allow room for the tranny now that it is mounted on top of the tranny lift.
The weight of the tranny is towards the rear.
Lets take a quick look at the internal of the transmission so you know what to do.
This is the throw out bearing.
Flip it over and this is the side that pushes up against the pressure plate of the clutch
Look closely and you can see a slide locking ring on the back of the assembly
Here it is snapped in place.
This is the snap ring.
You can slip the throw out bearing over the input shaft of the tranny, remember to prep it with a light coating of grease on the inside and on the bearing surface.
You can see the fork below the bearing. The snap ring is also secured to the fork to keep it from coming off.
For lack of a better term the ears of the snap ring and flexible and loop over the 2 tips of the fork and that is what keeps the fork attached to the throw out bearing.
I know its dark but its the best I could do.
The new bearing is in place and I am ready to attempt to install the tranny by myself.
Here is the tranny jack doing its thing. I used a 1/2 inch ratchet to raise or lower it.
I got the tranny to about 3/4 of an inch to full attachment.
Here comes the rain again.
Damn. TO be continued
Last edited by rrmedicx; 08-19-2007 at 04:53 PM.
 08-19-2007, 08:01 PM
#31
No idea. guessing $20K after purchasing car, trying a supercharger and single turbo and finally killing my engine & tranny, and finally deciding on Built block, and TT. The only saving grace is that I did all of the labor in every project which saved me from spending $40K.
Last edited by rrmedicx; 08-19-2007 at 08:12 PM.
08-19-2007, 10:27 PM
#32
Z + Rear Seat
iTrader: (3)
Join Date: Jun 2005
Location: St.Pete,FL
Posts: 1,642
Likes: 0
Received 0 Likes
on
0 Posts
Great job!
Everything is looking super so far!
I hope you have someone that can help you when you go to push the transmission in through the clutch. That will be tricky... nice to have a buddy to twist the output shaft and make sure the car is steady.
Good luck... I think you're home free after you get the transmission in!
08-20-2007, 06:45 AM
#33
Originally Posted by __jb
Great job!
Everything is looking super so far!
I hope you have someone that can help you when you go to push the transmission in through the clutch. That will be tricky... nice to have a buddy to twist the output shaft and make sure the car is steady.
Good luck... I think you're home free after you get the transmission in!
Everything is looking super so far!
I hope you have someone that can help you when you go to push the transmission in through the clutch. That will be tricky... nice to have a buddy to twist the output shaft and make sure the car is steady.
Good luck... I think you're home free after you get the transmission in!
08-20-2007, 06:54 AM
#34
Professional
iTrader: (7)

Join Date: Jan 2004
Location: Home
Posts: 1,211
Likes: 0
Received 0 Likes
on
0 Posts
The last 3/4" is such a PITA man.. There were 2 of us and it took us a 1/2 hour from that point just bangin away.. It will slide in there when its ready, just need a bigger hammer.. Your almost there after the tranny is in..
GL!!
GL!!
08-20-2007, 08:16 AM
#35
Originally Posted by Kenk2
The last 3/4" is such a PITA man.. There were 2 of us and it took us a 1/2 hour from that point just bangin away.. It will slide in there when its ready, just need a bigger hammer.. Your almost there after the tranny is in..
GL!!
GL!!
08-20-2007, 08:49 AM
#37
I just realized that the starter motor won't fit with the turbos installed.
Damn. Now I'll have to remove the right side turbo and re-assemble.
I think I'm gonna yank it out and attach the tranny to the engine outside the car. This is killing me.
Any ideas?
Damn. Now I'll have to remove the right side turbo and re-assemble.
I think I'm gonna yank it out and attach the tranny to the engine outside the car. This is killing me.
Any ideas?
08-20-2007, 08:58 AM
#38
Professional
iTrader: (7)
Join Date: Jan 2004
Location: Home
Posts: 1,211
Likes: 0
Received 0 Likes
on
0 Posts
Originally Posted by rrmedicx
I just realized that the starter motor won't fit with the turbos installed.
Damn. Now I'll have to remove the right side turbo and re-assemble.
I think I'm gonna yank it out and attach the tranny to the engine outside the car. This is killing me.
Any ideas?
Damn. Now I'll have to remove the right side turbo and re-assemble.
I think I'm gonna yank it out and attach the tranny to the engine outside the car. This is killing me.
Any ideas?
If I were you, I would yank the motor out and bolt the tranny up that way.. So much easier man..
08-20-2007, 01:57 PM
#39
Z + Rear Seat
iTrader: (3)
Join Date: Jun 2005
Location: St.Pete,FL
Posts: 1,642
Likes: 0
Received 0 Likes
on
0 Posts
One of the problems pushing the transmission back in, is that everything can be perfect, but the splines in the input shaft don't line up correctly with the openings between the splines in the clutch disk(s). You need to be able to turn the input shaft once things are close to lining up.
I used to put the front yoke from a driveshaft into the back of the transmission so that I could turn the front input shaft and get it to slip into the clutch easier. The transmission needs to be in gear of course. With just a front yoke stuck in the back of the transmission, I could lift the transmission into place with both hands and then grab the yoke and turn it (and push) with my right hand.
If you don't have a spare yoke, you could just stick the front of the driveshaft into the rear of the transmission and use that to turn the front input shaft. That will make the transmission heavier, but might be OK since you have a trans jack.
08-20-2007, 02:02 PM
#40
Registered User
iTrader: (18)
Join Date: Oct 2004
Location: .
Posts: 9,482
Likes: 0
Received 0 Likes
on
0 Posts
One thing (not sure if this was addressed).
Why go with the UR crank pulley with all the issues that have been reported with them on high hp setups? Not worth it in my opinion...
Why go with the UR crank pulley with all the issues that have been reported with them on high hp setups? Not worth it in my opinion...