DIY: Cusco LSD Type RS+SPL Solid Bushings (Home Install)
 03-21-2009, 12:08 PM
#1

Here is a copy and paste from a local board I run www.midnightruns.com, I had a project thread running of all this. I hope it can help others out since there is a lack of English documentation for the Cusco LSD. I did most of it myself, with hand tools. If anything is un-clear or anyone has more questions let me know and I'll try to answer from my experience.
In continuation from this thread https://my350z.com/forum/engine-driv...iguration.html, this is the removal and installation of the OEM VLSD, replacing it with a CUSCO Type RS LSD and SPL Solid bushings.
There is a lot of hindsight on my behalf which I will try to document clearly to save anyone else my own issues.
I took the LSD and new bearings to a buddy, and he pressed them on with ease. This is something I wouldn�t attempt myself.
Someone at Surgenor thinks he's a funny man

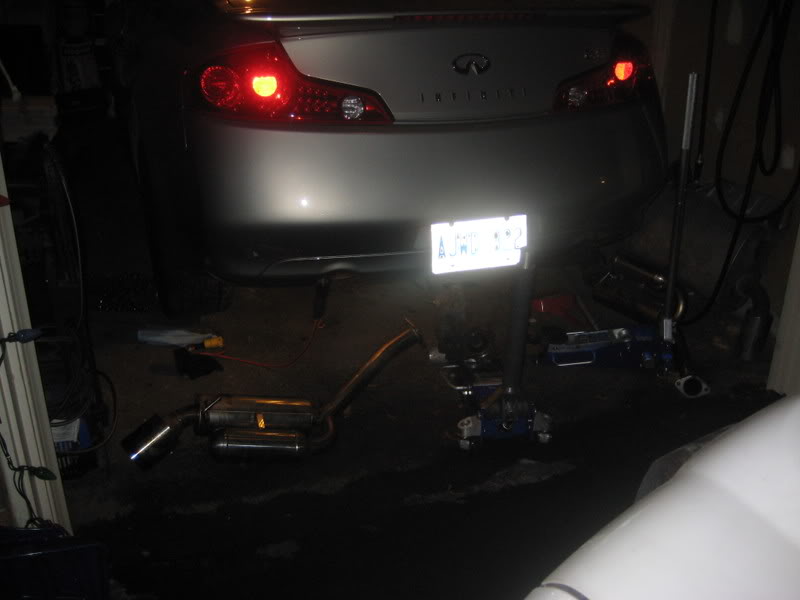
Just to give an idea of what I'm working with...single car garage.
Plate ****ed up the picture...
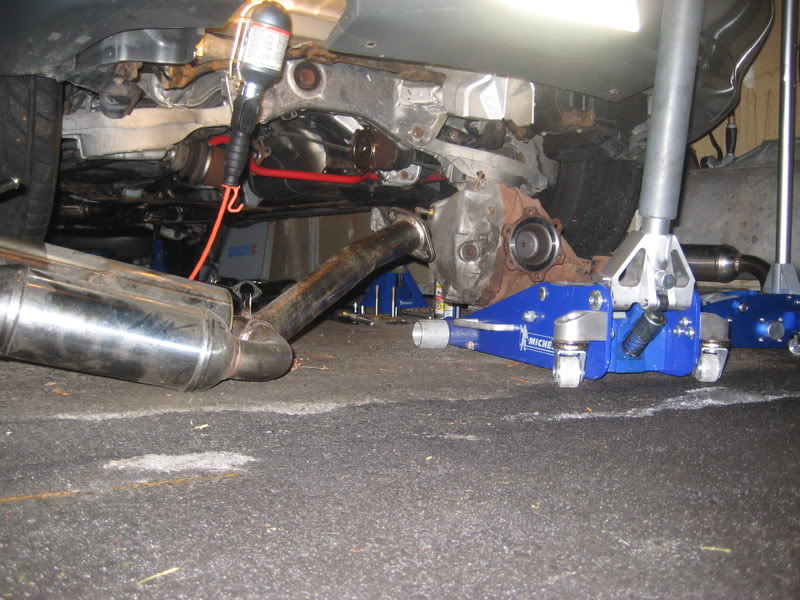
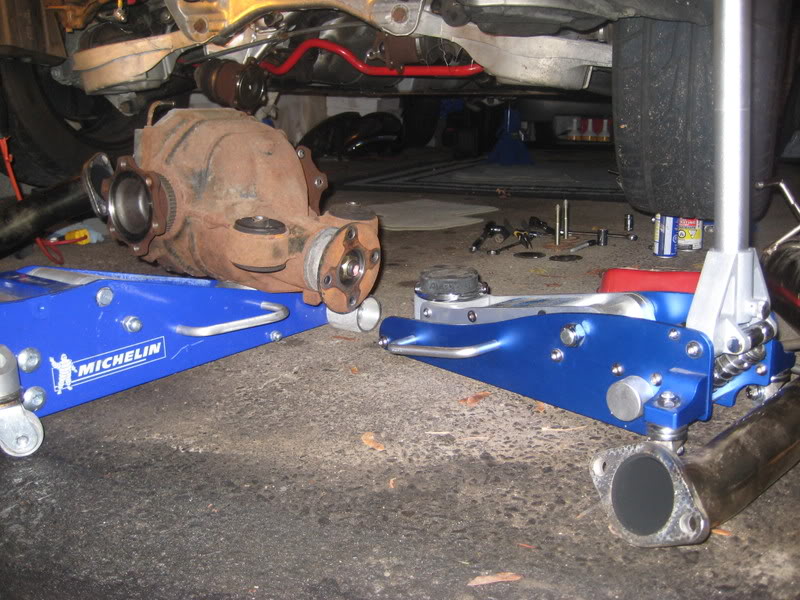
Over the past few days for about an hour a night, I was taking the diff itself out, unbolted exhaust, drive shaft, axle stubs, bushing mounts and dropped it out.
*Hint, to make your life easier, take the time to take the sway bar out as well, if you don�t it�s a pain sliding it out over top. Not worth the headaches for what takes 5 minutes extra.
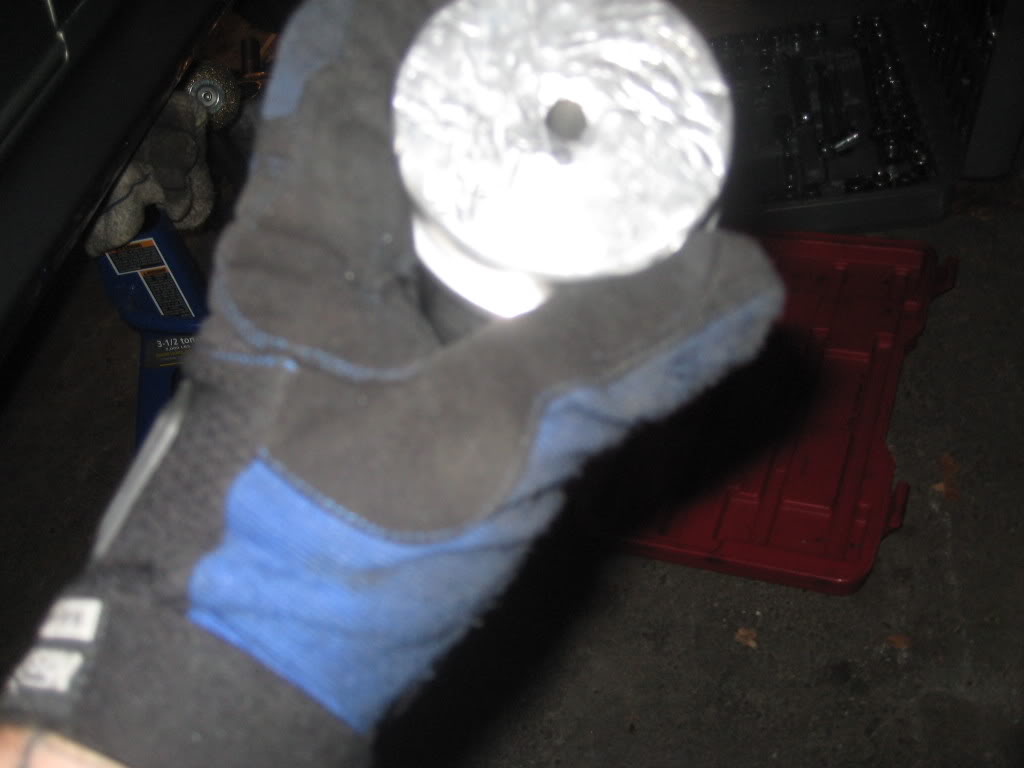
I wanted to lower it on the jack, but didn't really have the space I wanted, so I dropped it on my chest and worked it out. This thing must weigh 80 ****ing pounds.

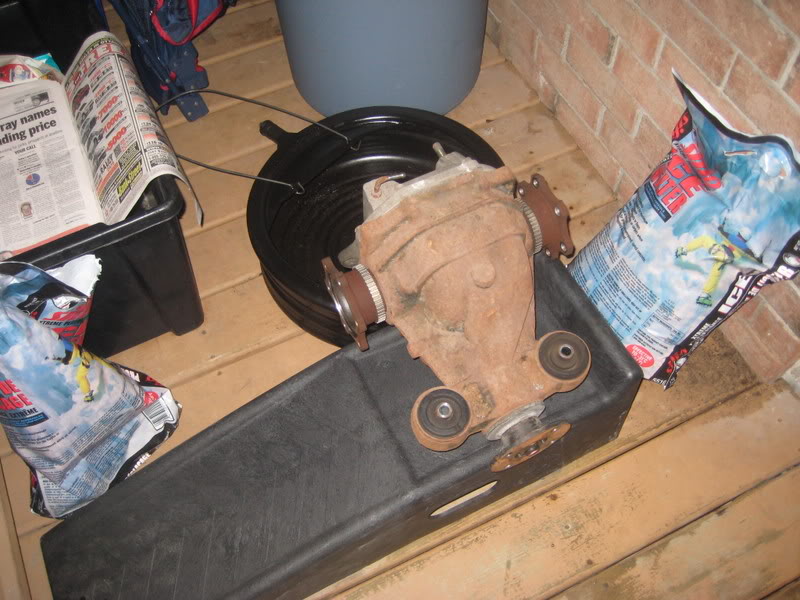
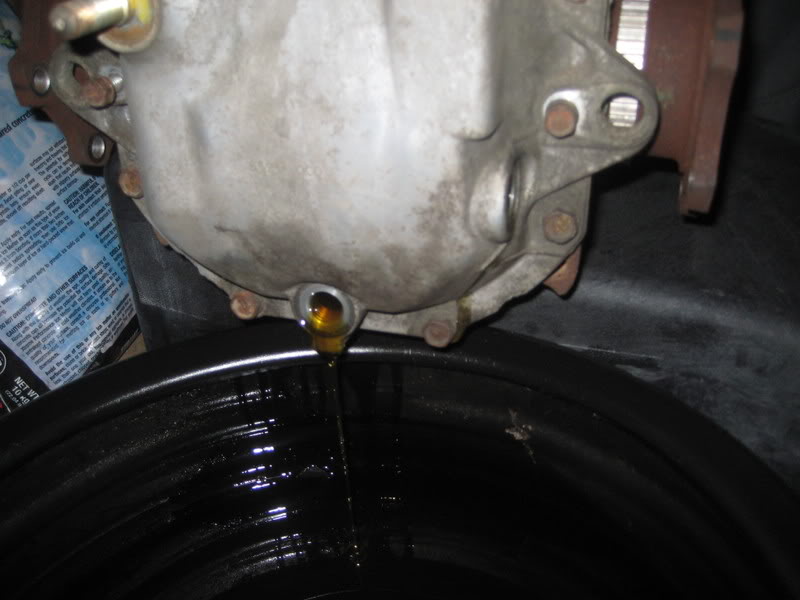
Draining the fluids...
That�s pretty much it for now, I'll open it next week.
So in continuation of my LSD Saga I picked up the tools again tonight, I've been sick for a few days so I didn�t really have the energy till now.
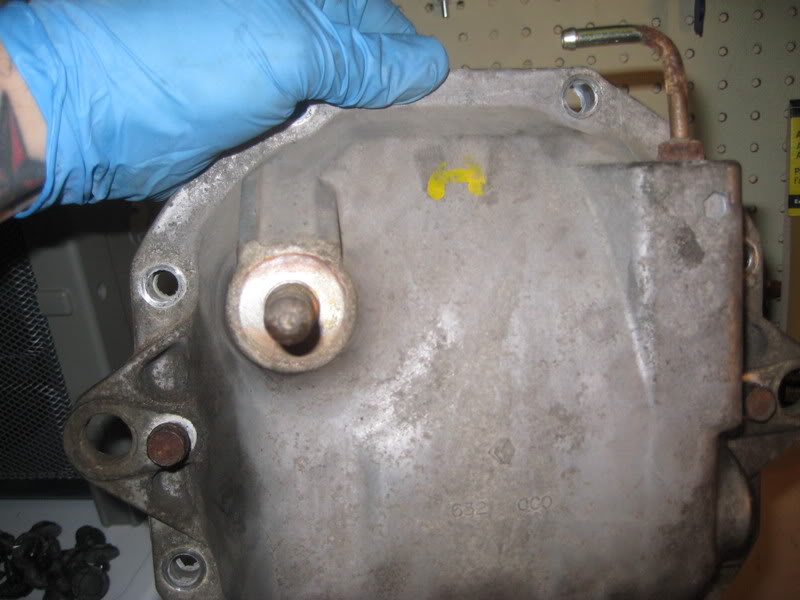
LSD out on bench; broke all the bolts loose on the cover.
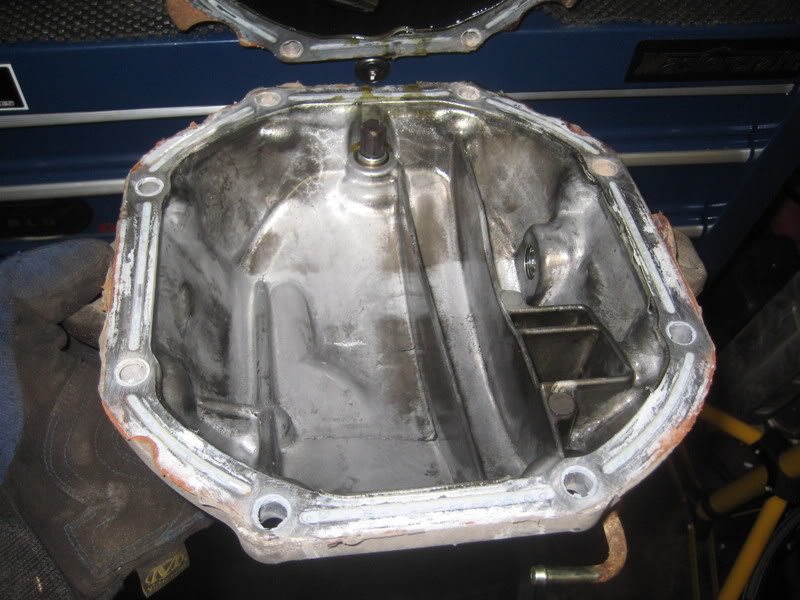
Cover off, pretty clean.
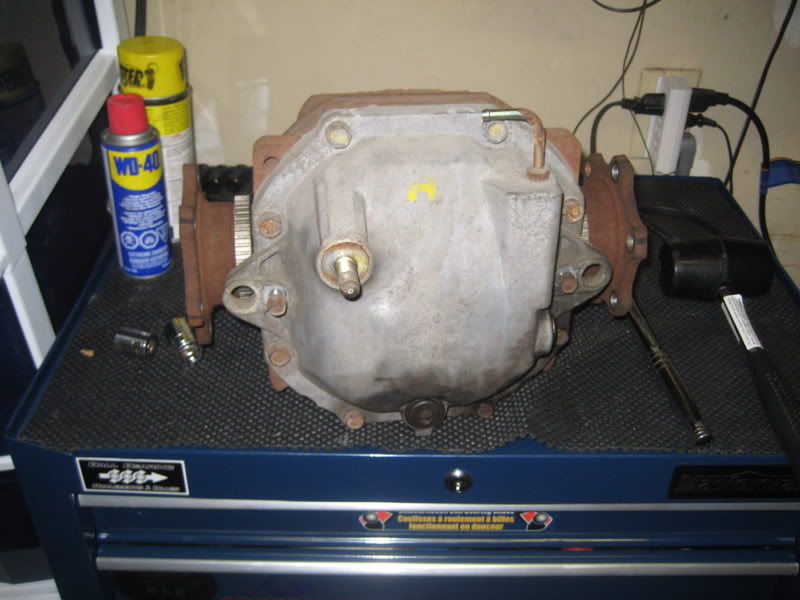
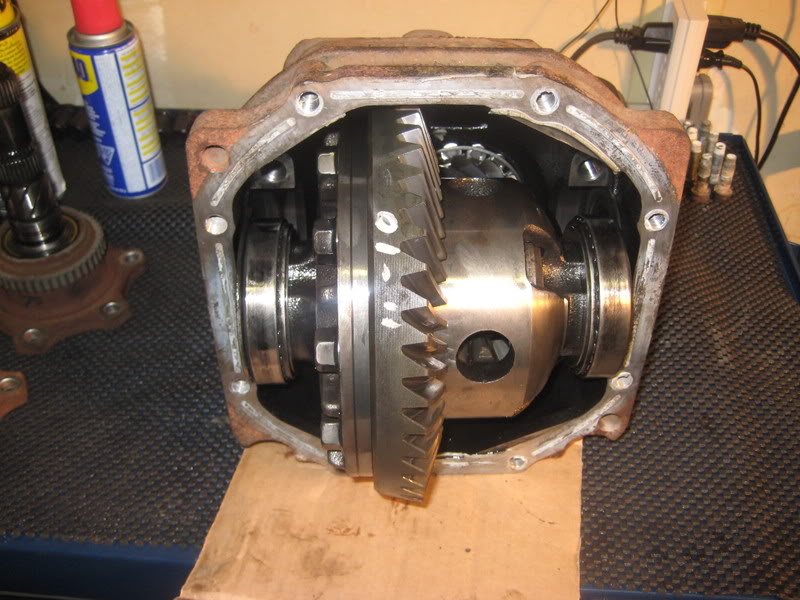
Stock VLSD

I like to label things with a sharpie so I don�t get mixed up.
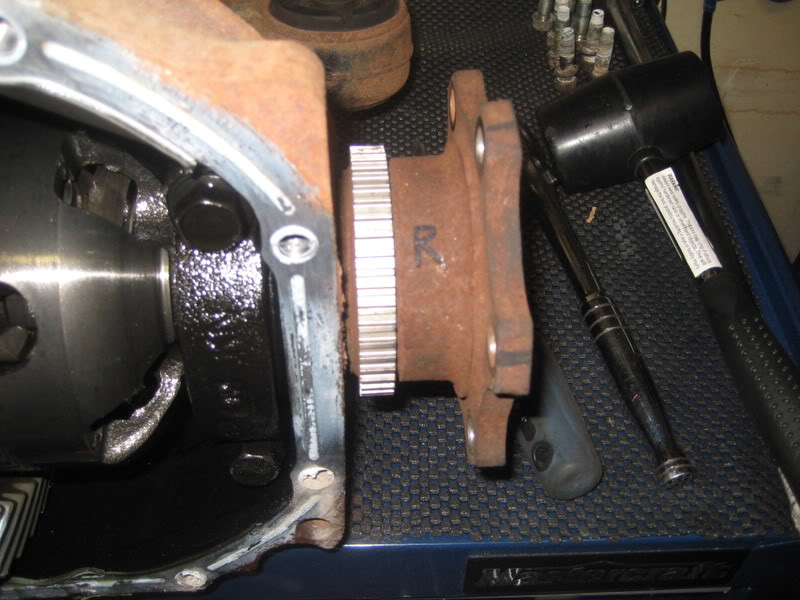
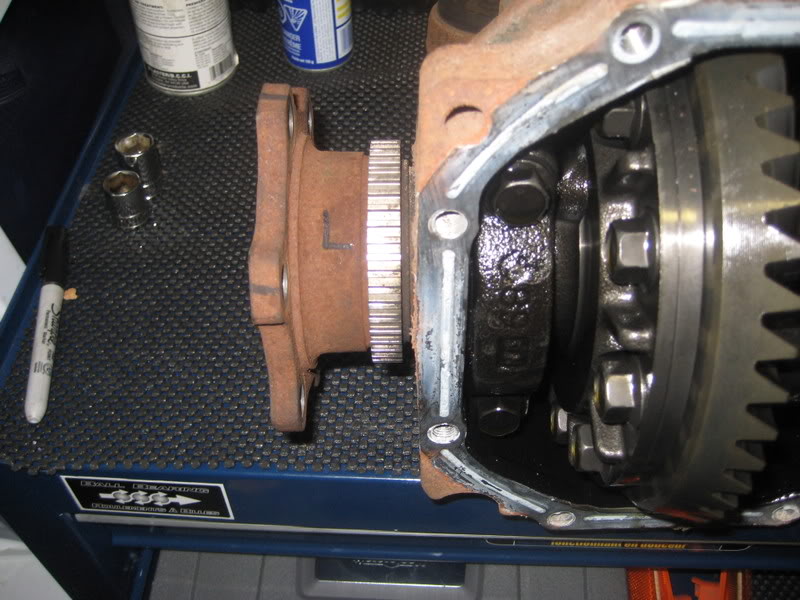
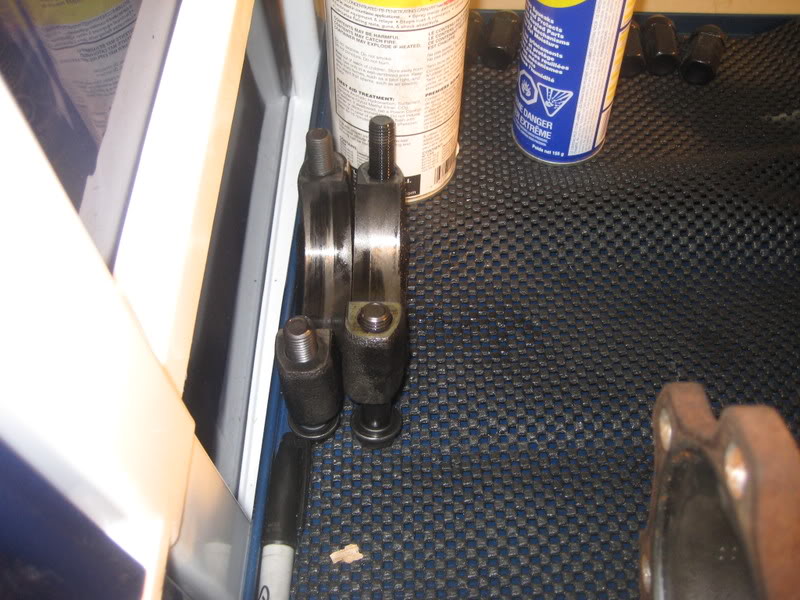
Stub Axles Labeled (Even thought they are different lengths)
*Note: It has been recommended to get new stub axles as well, I may do this since the right one pulled out without the C-clip, and new stub axles come with everything already installed. Plus they're new and not rusty.
Few taps of a rubber mallet and they pop out.

*HINT: At this point If you care (I did later on) measure your ring gear and pinion backlash of the stock VLSD installed, you�ll see why I recommend this later on.
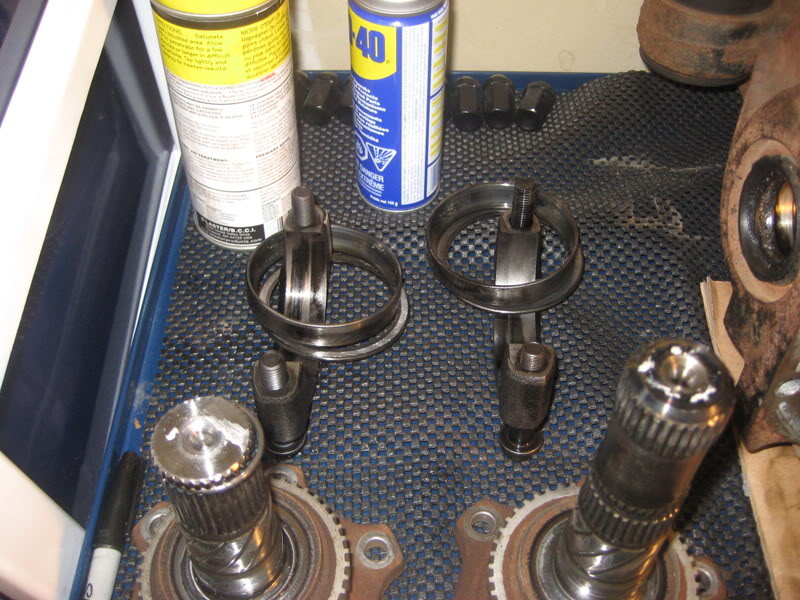
Bearing Cap bolts loosened
Caps off
Left and Right put aside
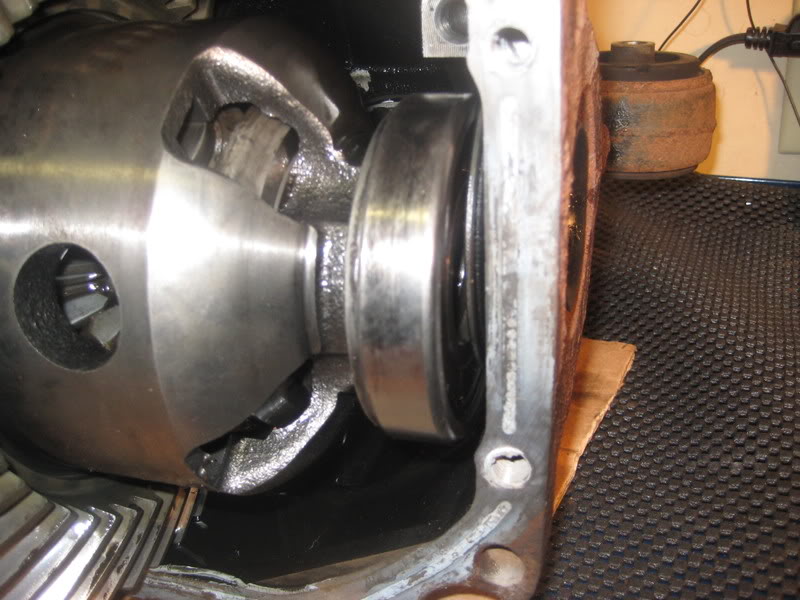
This was really tight (obviously) so I had to tap it out from the axle holes with a mallet and punch. Eventually I worked it out. If you care about your OEM VLSD then I would advise using brass drifts, or using a slide hammer to pull it out. I didn�t care and you�ll see later there is some damage on the inside from my use of cold steel punches.
Right
Left

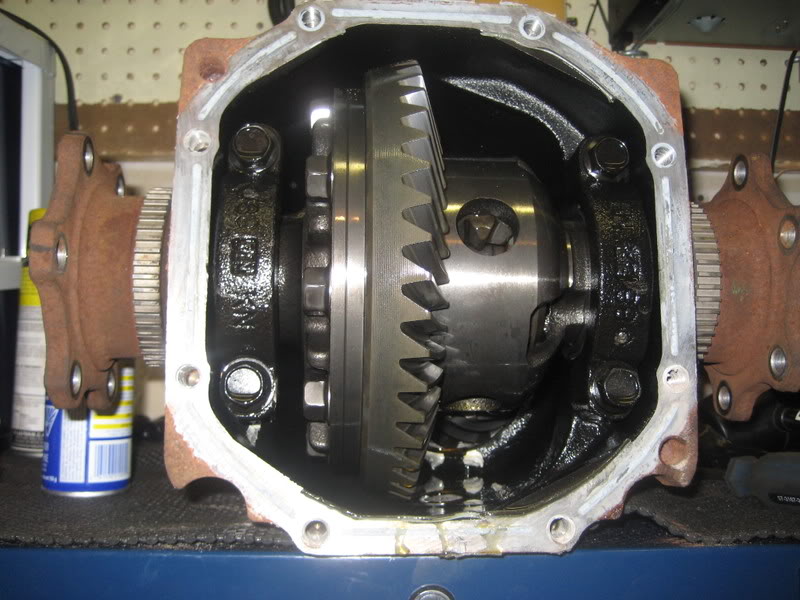
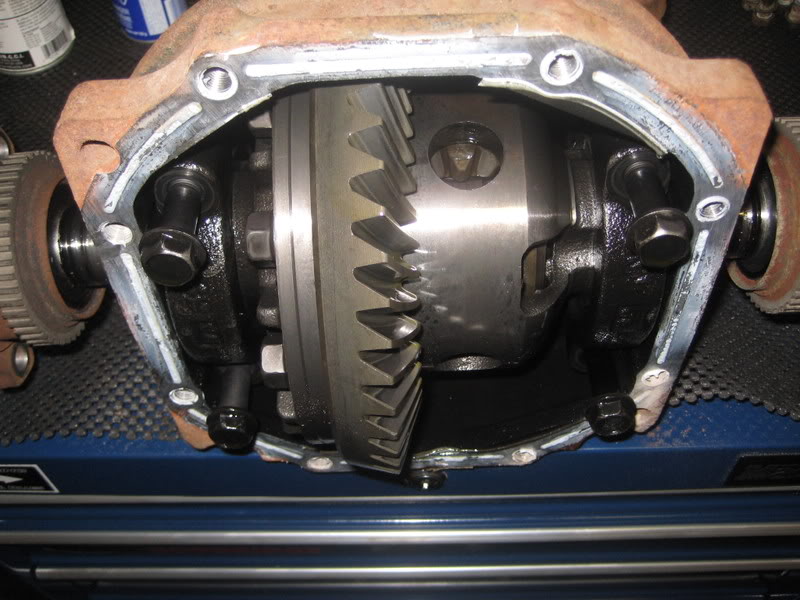
Stock VLSD plops out
Set the shims and side bearings aside but with their respective bearing caps to keep track of everything.
Cleaned it up so I can take it inside (I have a vice inside) and take the ring gear off...
Stay tuned �
So from what I was reading the ring gear bolts are on tight. Really tight, no problem for a 1/2" breaker bar right?
Wrong.
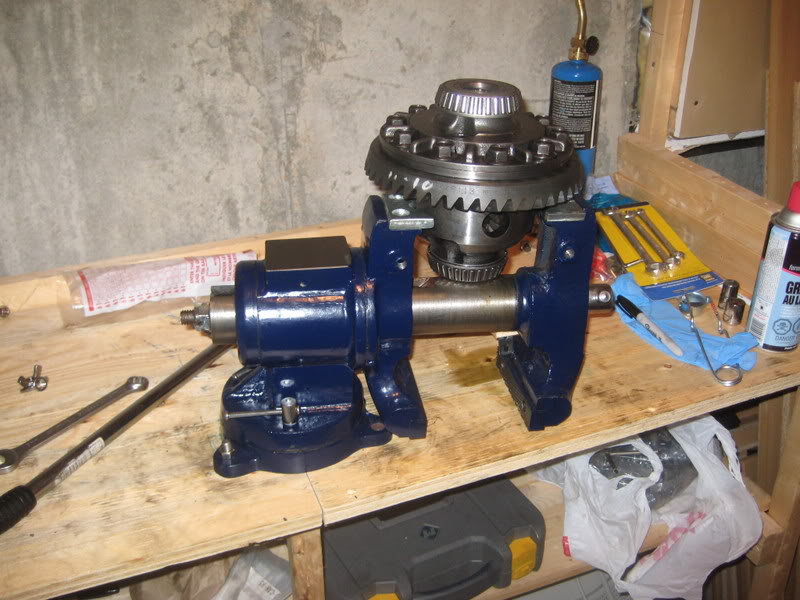
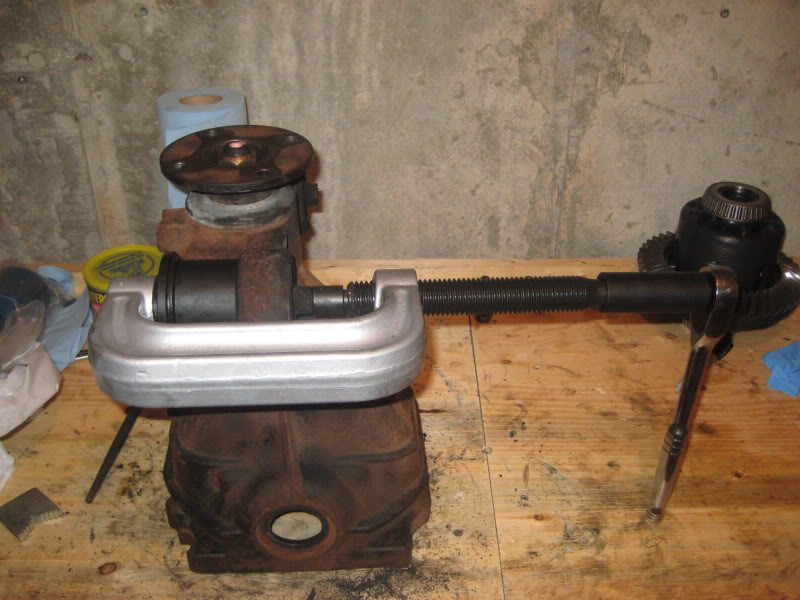
OEM LSD in vice.
After wrestling with it for a while, the weakest link broke. My vice LOL

Thanks princess auto!
Time for a bigger badder one .
If you want to save yourself some more trouble take it to someone with air tools, did I?
**** NO.
I took the vice back, and picked up the bigger 5" version with my store credit. It is definitely more sturdy, just from the weight and looks.
I looked up the torque specs for the ring gear bolts and its 55-61ft lbs, but you have to use locktite. I assume that�s why I was having a hard time.
Ok here we go again...
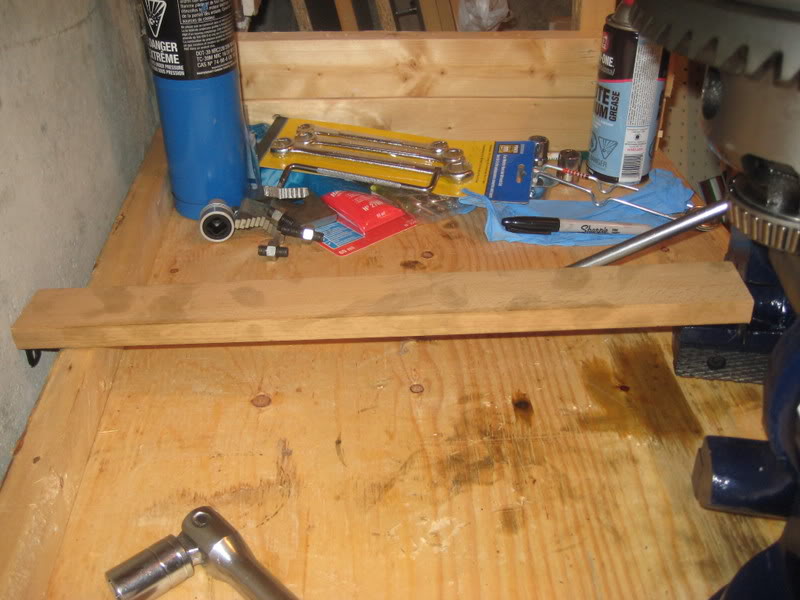
****, this is a swivel vice and it just keeps spinning in place when I put my weight into it...improvise!
Piece of wood against the wall and vice lol
At this point I had all my weight on it, and something had to give either I was going flying or the LSD was...eventually the bolts broke loose.
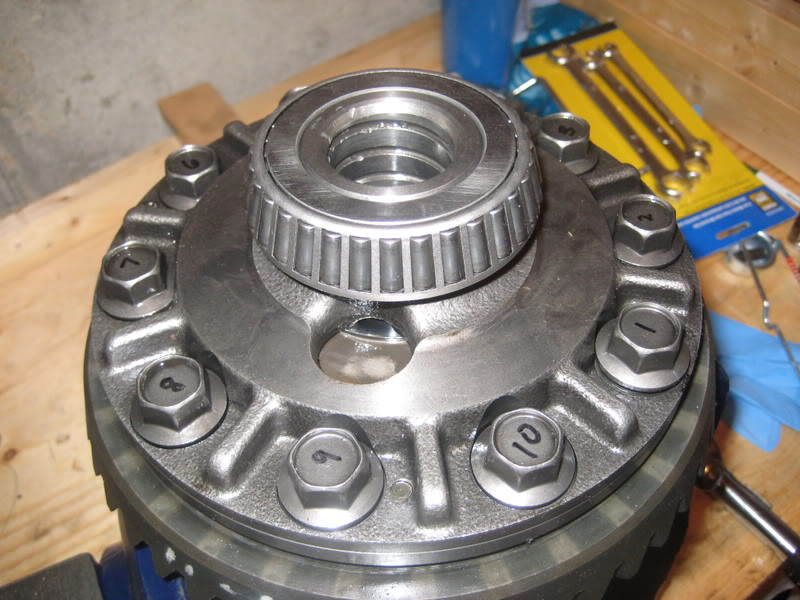
Me and my markings, for no real good reason since I won�t be using the OEM LSD anymore...
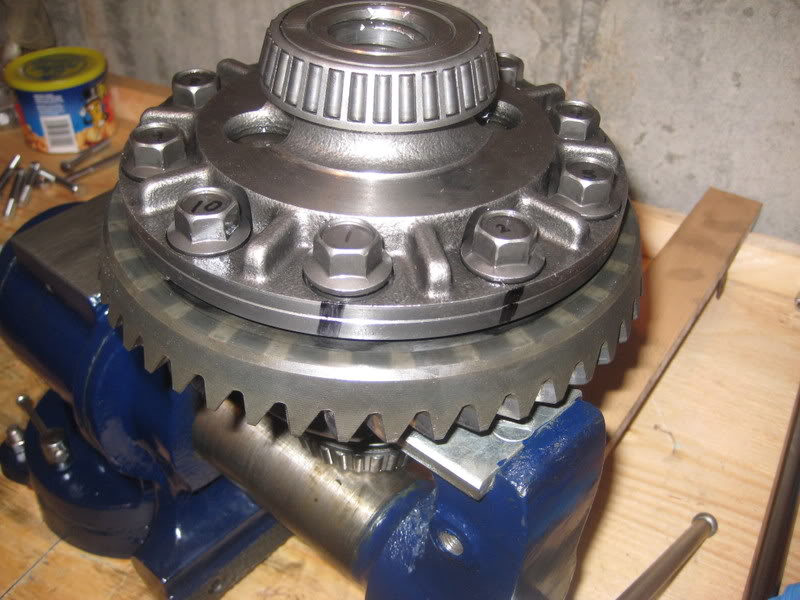
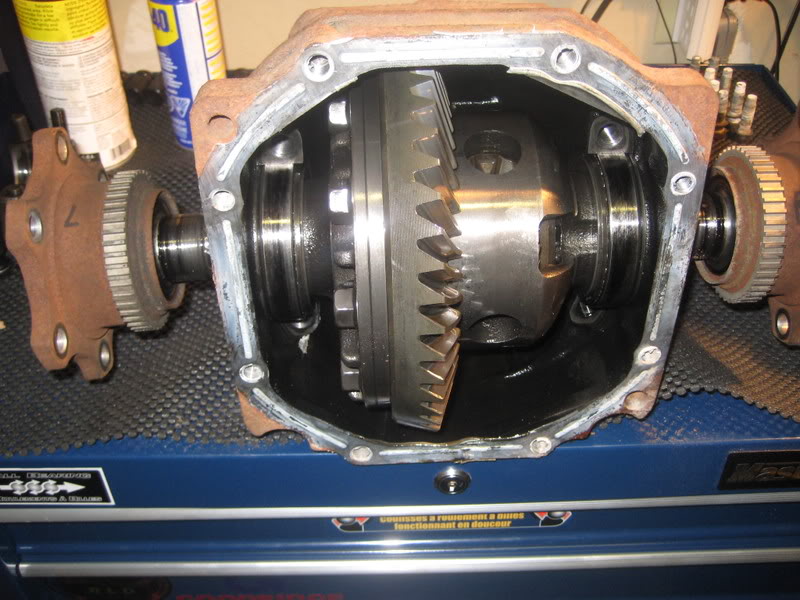
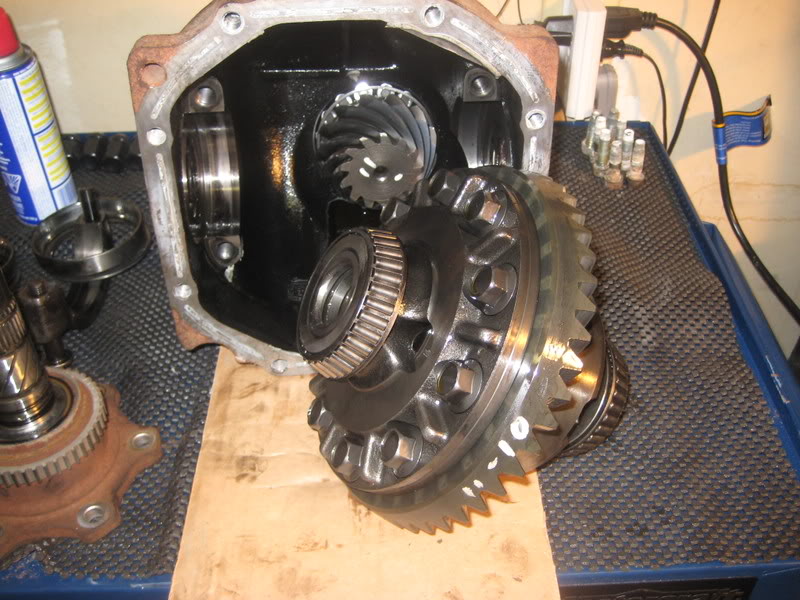
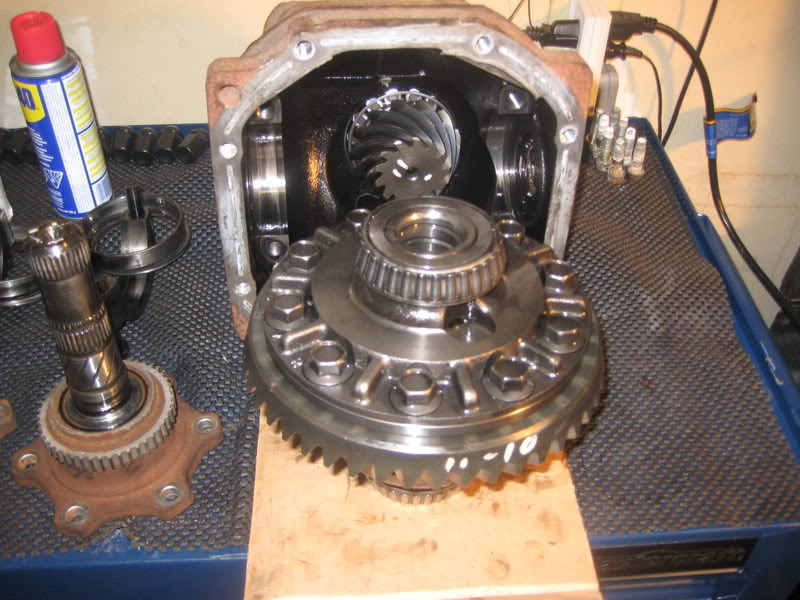
Ring gear popped right off after all that.
Cleaned it up with brake cleaner outside.
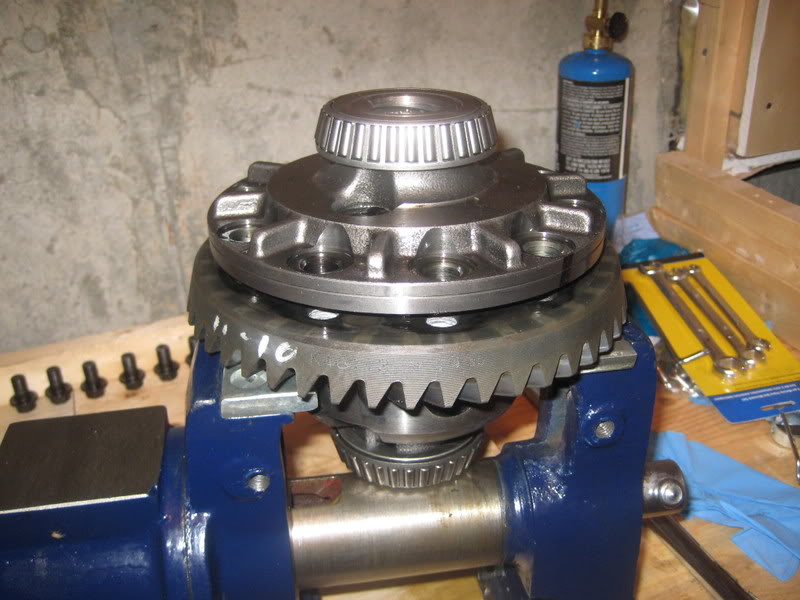
On the new Cusco LSD which drops right on, snugly.
So at this point, Nissan recommends replacing all the ring bolt hardware and not re-using, I assume due to the stress on the bolts. I don't have them yet...so again it sits for now.
So I called the dealership, he can't find the part number for the ring gear bolts, I have to call back on Monday, but the pricing difference from US to Canada is insane.
For instance, Axle Stubs (flange) from Performance Nissan in US $128each, here $239each.
So for now I just ordered the C-Clips for the flanges.
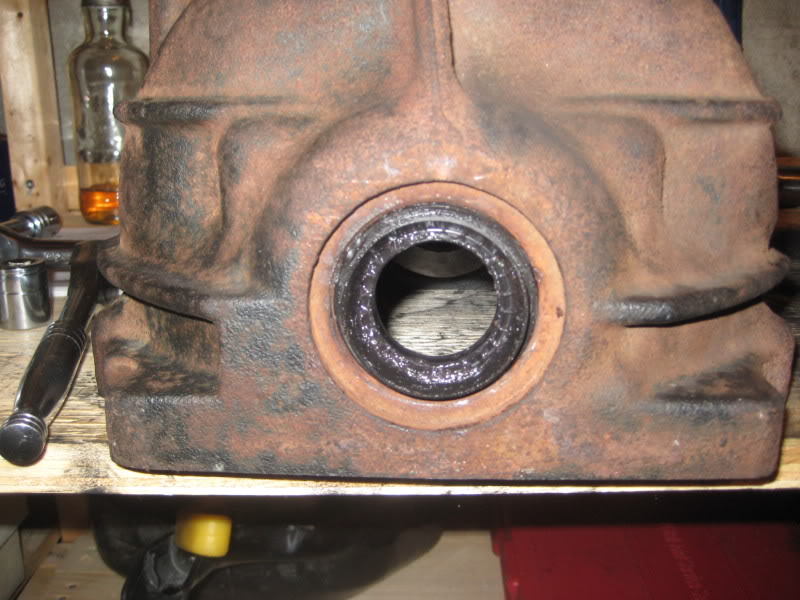
I decided to clean the casing, take out the rubber side seals and clean the diff cover, but noticed something.
Looks like a stress crack...
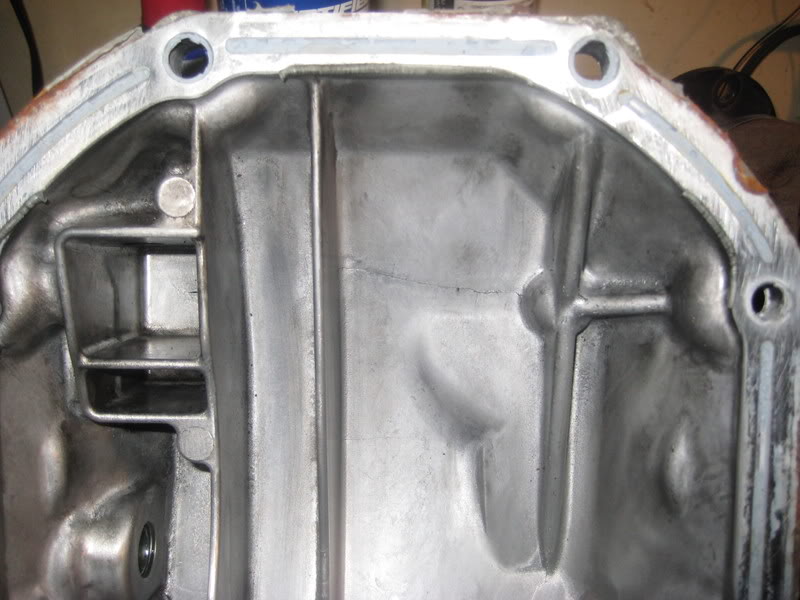
If I flip the cover around, that crack is stemming from where the rear sub frame mount is. But it�s only on the inside...
So I ordered the NISMO finned cover from CZP.
After about 2 days of this...
and

lol
I had to call the man with the bigger gun. My buddy who owns a shop�
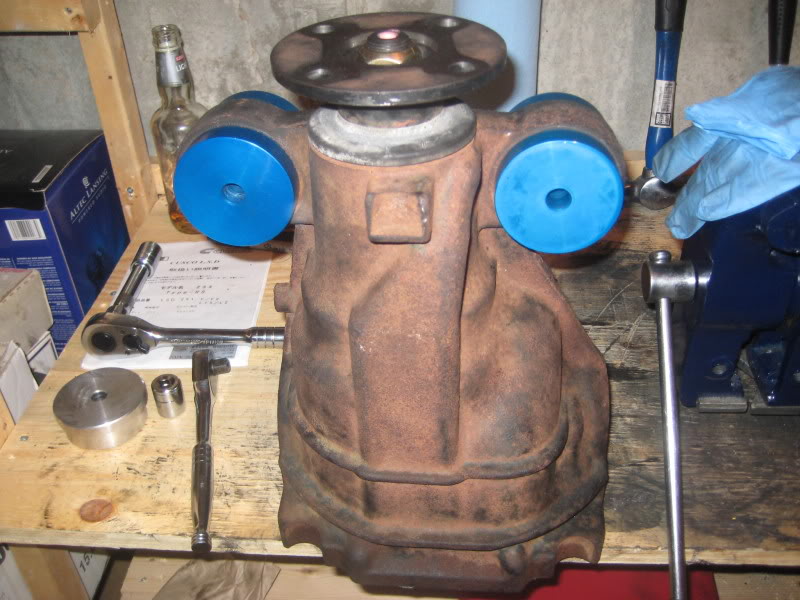
Brought him the carrier assembly tonight, he hit the bushings with the rattle gun and they popped out.
(It really helps having proper tools or air tools)
We popped in the new solid bushings, and while I was there he installed the side oil seals.
*Hint we used the old seal race to tap in the new ones...
Now I am left with this...
Solid Bushings
New Side Oil Seals
In continuation from this thread https://my350z.com/forum/engine-driv...iguration.html, this is the removal and installation of the OEM VLSD, replacing it with a CUSCO Type RS LSD and SPL Solid bushings.
There is a lot of hindsight on my behalf which I will try to document clearly to save anyone else my own issues.
I took the LSD and new bearings to a buddy, and he pressed them on with ease. This is something I wouldn�t attempt myself.
Someone at Surgenor thinks he's a funny man
Just to give an idea of what I'm working with...single car garage.
Plate ****ed up the picture...
Over the past few days for about an hour a night, I was taking the diff itself out, unbolted exhaust, drive shaft, axle stubs, bushing mounts and dropped it out.
*Hint, to make your life easier, take the time to take the sway bar out as well, if you don�t it�s a pain sliding it out over top. Not worth the headaches for what takes 5 minutes extra.
I wanted to lower it on the jack, but didn't really have the space I wanted, so I dropped it on my chest and worked it out. This thing must weigh 80 ****ing pounds.
Draining the fluids...
That�s pretty much it for now, I'll open it next week.
So in continuation of my LSD Saga I picked up the tools again tonight, I've been sick for a few days so I didn�t really have the energy till now.
LSD out on bench; broke all the bolts loose on the cover.
Cover off, pretty clean.
Stock VLSD
I like to label things with a sharpie so I don�t get mixed up.
Stub Axles Labeled (Even thought they are different lengths)
*Note: It has been recommended to get new stub axles as well, I may do this since the right one pulled out without the C-clip, and new stub axles come with everything already installed. Plus they're new and not rusty.
Few taps of a rubber mallet and they pop out.
*HINT: At this point If you care (I did later on) measure your ring gear and pinion backlash of the stock VLSD installed, you�ll see why I recommend this later on.
Bearing Cap bolts loosened
Caps off
Left and Right put aside
This was really tight (obviously) so I had to tap it out from the axle holes with a mallet and punch. Eventually I worked it out. If you care about your OEM VLSD then I would advise using brass drifts, or using a slide hammer to pull it out. I didn�t care and you�ll see later there is some damage on the inside from my use of cold steel punches.
Right
Left
Stock VLSD plops out
Set the shims and side bearings aside but with their respective bearing caps to keep track of everything.
Cleaned it up so I can take it inside (I have a vice inside) and take the ring gear off...
Stay tuned �
So from what I was reading the ring gear bolts are on tight. Really tight, no problem for a 1/2" breaker bar right?
Wrong.
OEM LSD in vice.
After wrestling with it for a while, the weakest link broke. My vice LOL
Thanks princess auto!
Time for a bigger badder one .
If you want to save yourself some more trouble take it to someone with air tools, did I?
**** NO.
I took the vice back, and picked up the bigger 5" version with my store credit. It is definitely more sturdy, just from the weight and looks.
I looked up the torque specs for the ring gear bolts and its 55-61ft lbs, but you have to use locktite. I assume that�s why I was having a hard time.
Ok here we go again...
****, this is a swivel vice and it just keeps spinning in place when I put my weight into it...improvise!
Piece of wood against the wall and vice lol
At this point I had all my weight on it, and something had to give either I was going flying or the LSD was...eventually the bolts broke loose.
Me and my markings, for no real good reason since I won�t be using the OEM LSD anymore...
Ring gear popped right off after all that.
Cleaned it up with brake cleaner outside.
On the new Cusco LSD which drops right on, snugly.
So at this point, Nissan recommends replacing all the ring bolt hardware and not re-using, I assume due to the stress on the bolts. I don't have them yet...so again it sits for now.
So I called the dealership, he can't find the part number for the ring gear bolts, I have to call back on Monday, but the pricing difference from US to Canada is insane.
For instance, Axle Stubs (flange) from Performance Nissan in US $128each, here $239each.
So for now I just ordered the C-Clips for the flanges.
I decided to clean the casing, take out the rubber side seals and clean the diff cover, but noticed something.
Looks like a stress crack...
If I flip the cover around, that crack is stemming from where the rear sub frame mount is. But it�s only on the inside...
So I ordered the NISMO finned cover from CZP.
After about 2 days of this...
and
lol
I had to call the man with the bigger gun. My buddy who owns a shop�
Brought him the carrier assembly tonight, he hit the bushings with the rattle gun and they popped out.
(It really helps having proper tools or air tools)
We popped in the new solid bushings, and while I was there he installed the side oil seals.
*Hint we used the old seal race to tap in the new ones...
Now I am left with this...
Solid Bushings
New Side Oil Seals
 03-21-2009, 12:09 PM
#2
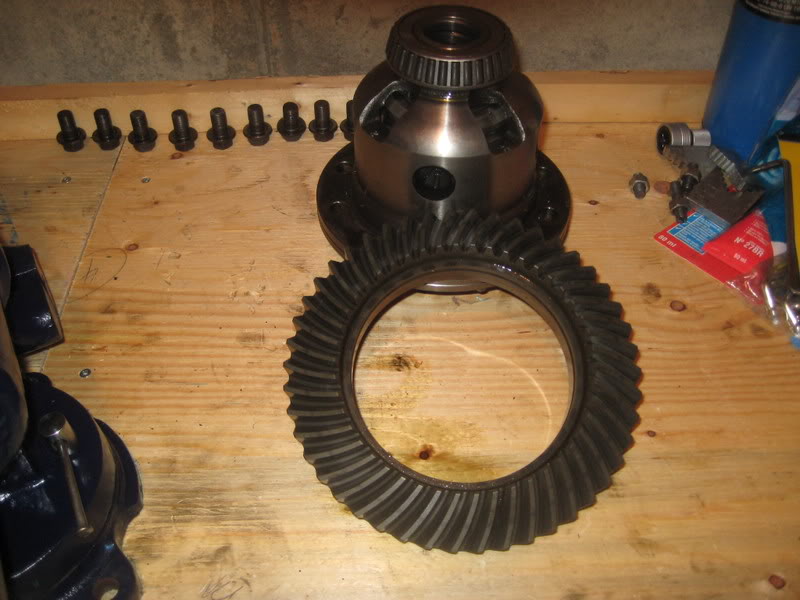
So I set that aside and got to work on the new LSD and ring gear bolts.
A dab of locktite on each bolt...this is not permanent locktite, but the high strength high heat red. The manual called for medium, but I’d rather be safe than sorry.
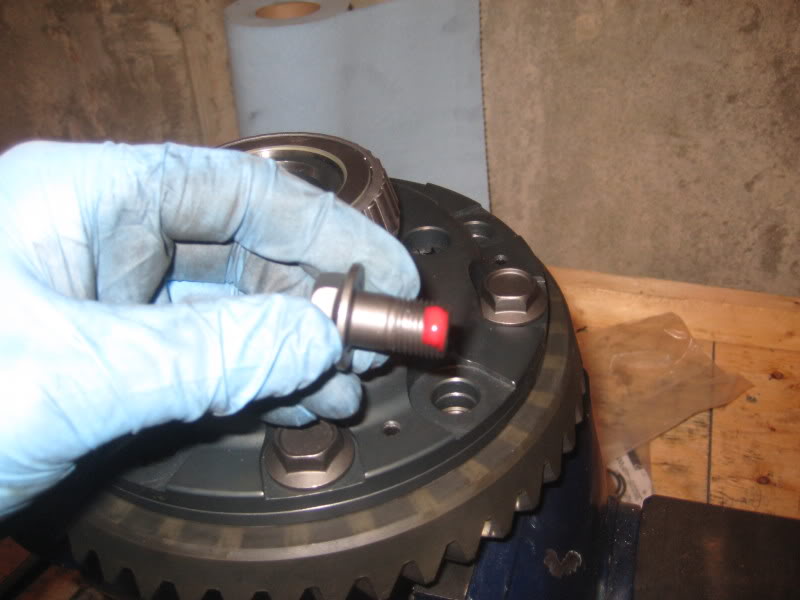
Torque in a criss cross pattern from 55ft lbs to 61ft lbs then turn them 30 degrees more according to the manual.

That’s it for tonight...
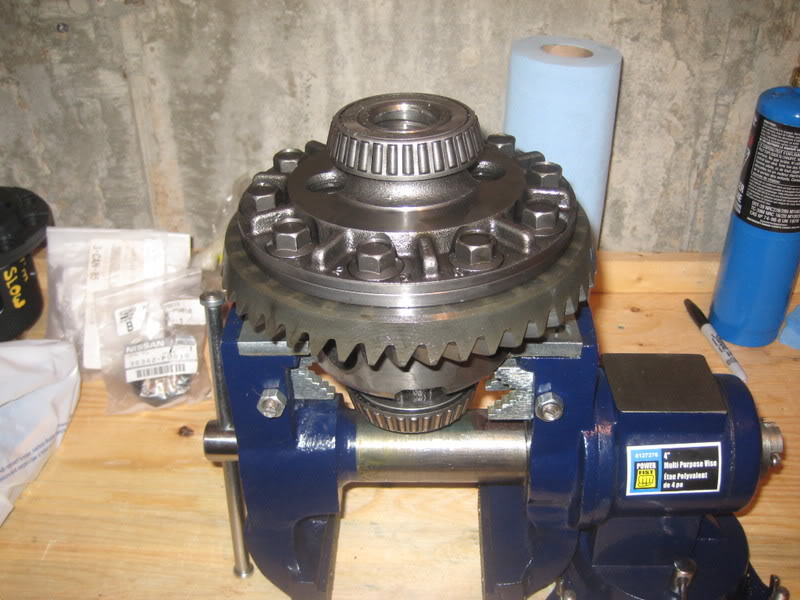
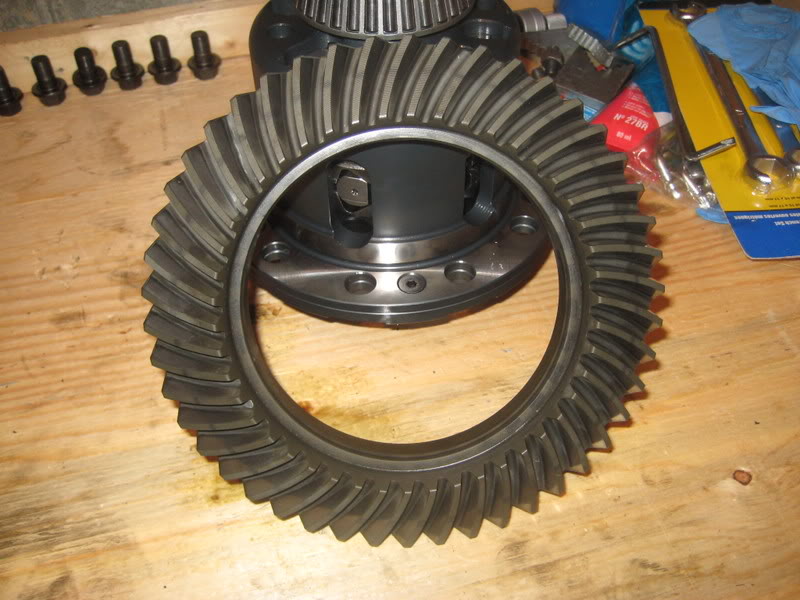
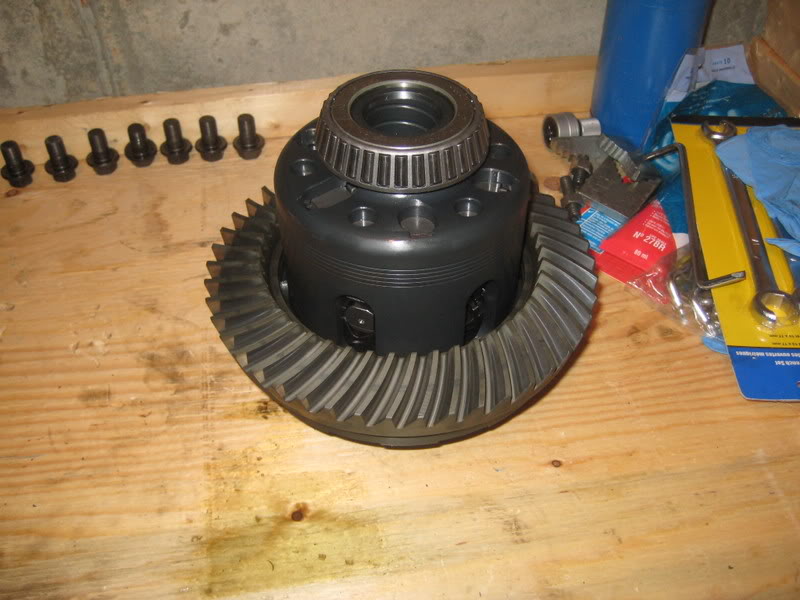
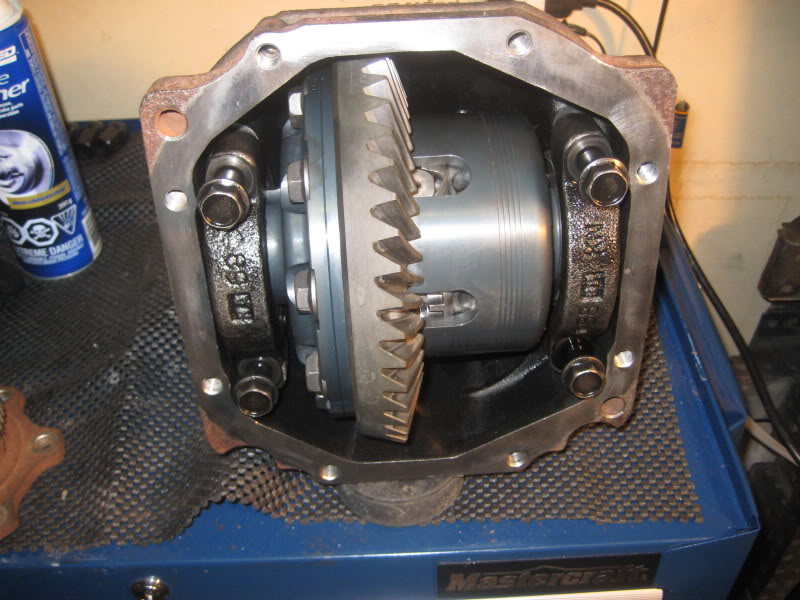
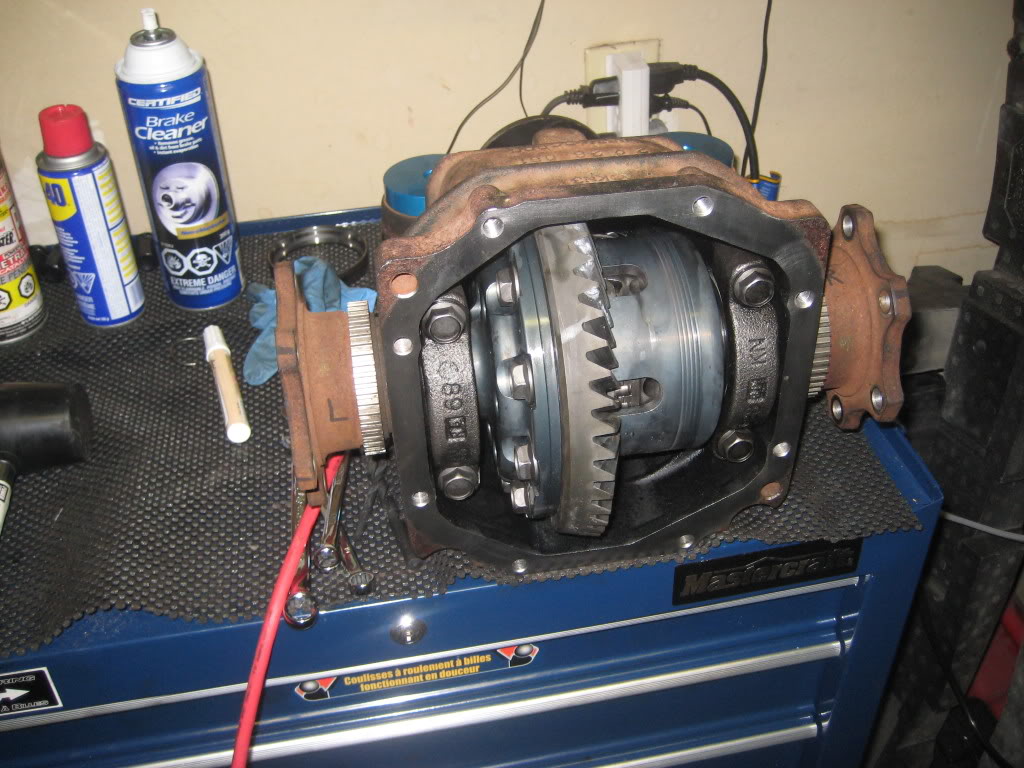
Installing the new LSD+Ring Gear back into carrier.
I cleaned up the old RTV gasket from the carrier using a brass brush and a drill. Worked great.
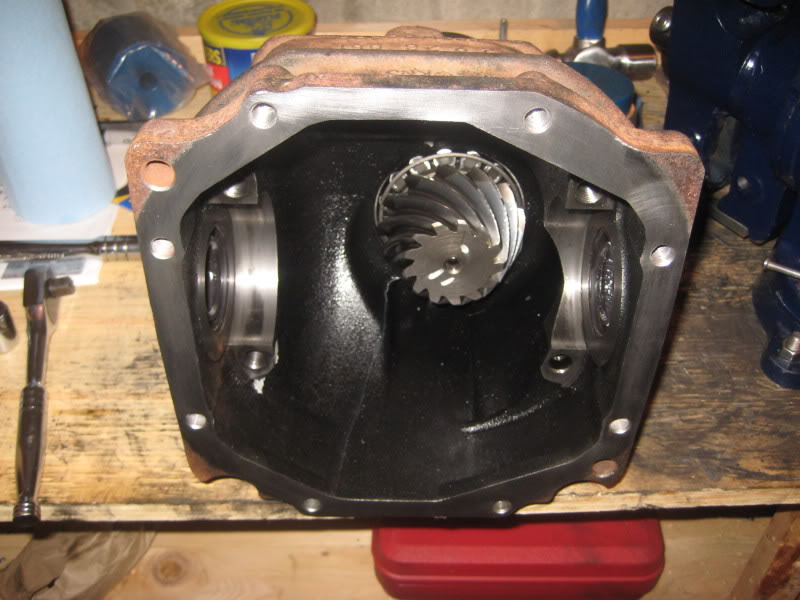
Place shims in appropriate locations with new bearing races.
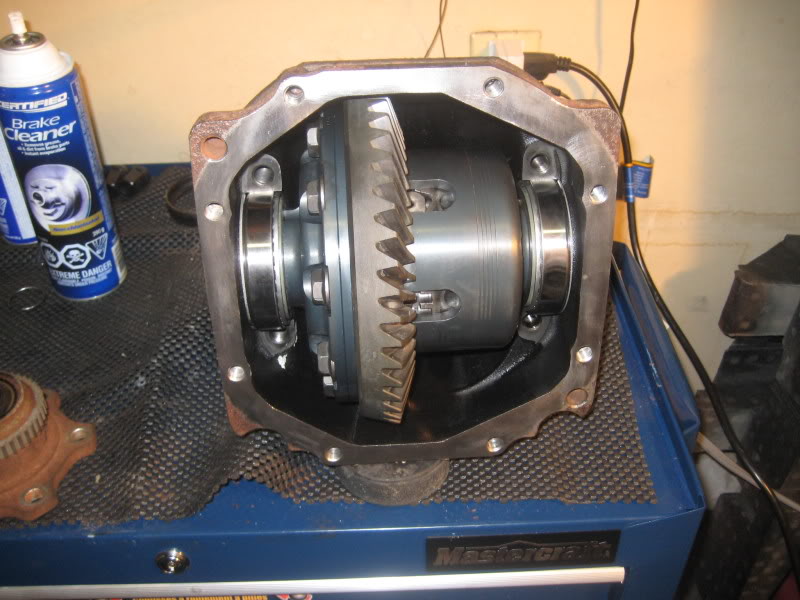
I placed the bearing caps on, and hand tightened the bolts. Then I torqued them in a criss cross pattern again to 65-72ft lbs.
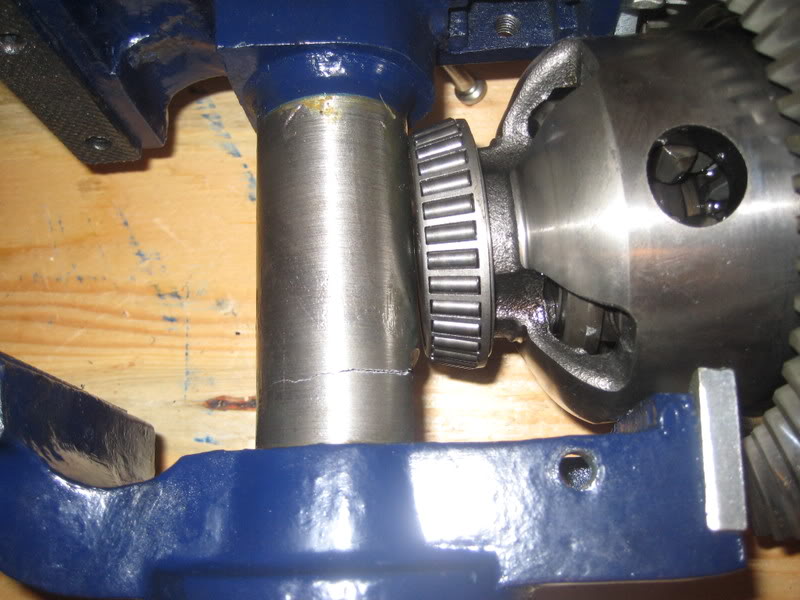
I checked tooth contact with some white washable marker in 4 locations.
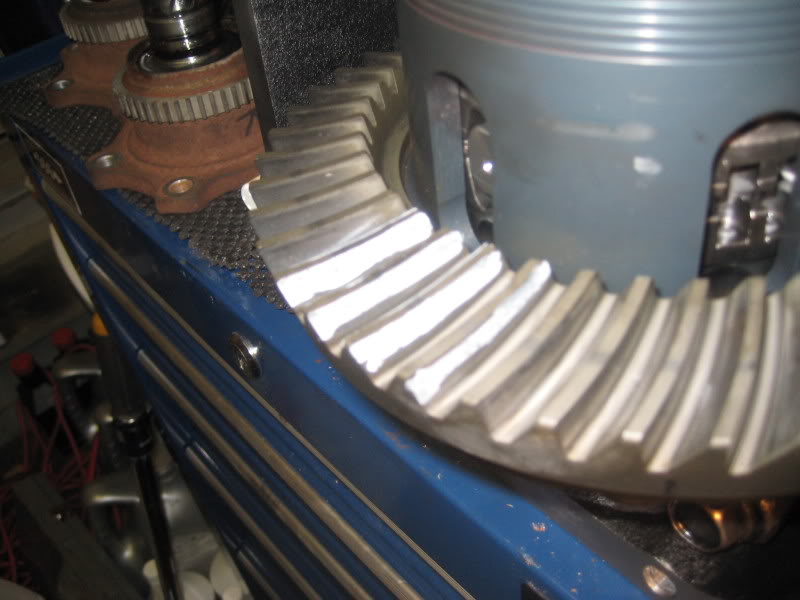

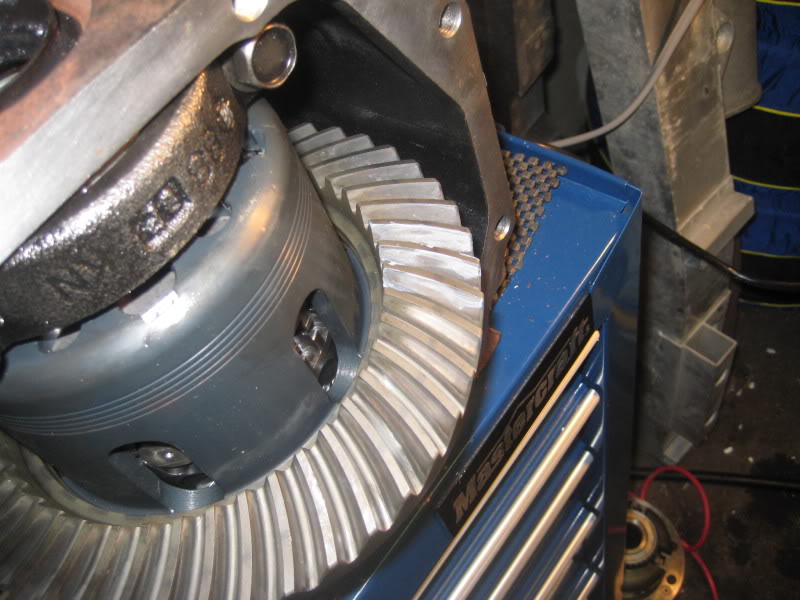
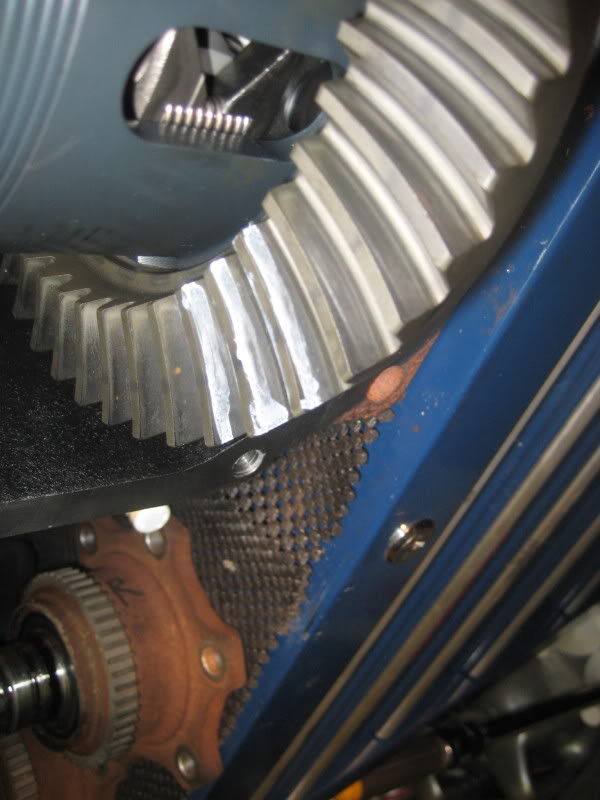
Each contacted correctly according to the manual...
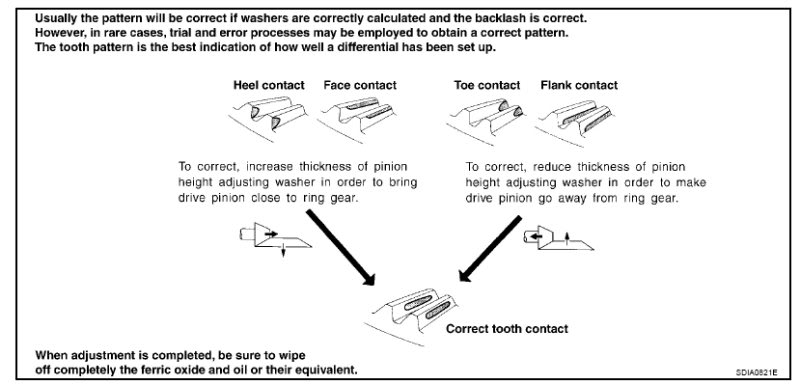
At this point, I noticed a lot of guys just check tooth contact and close it up, well small but disappointing update...after doing everything myself, except for bushings/bearings I bought a 0-1 inch Dial Indicator and Magnetic Base from Princess Auto today for 20 bucks to check my ring gear to drive pinion backlash.
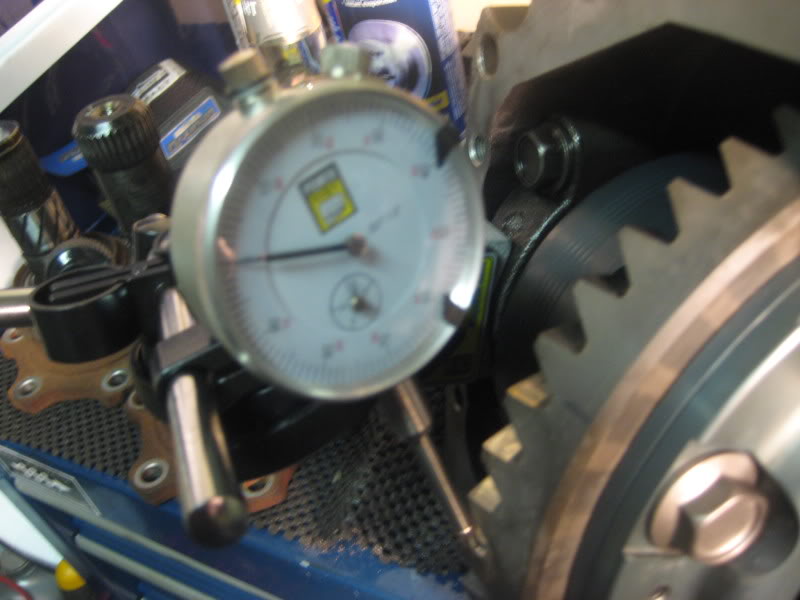
Turns out I'm more than what the manual states.
Manual; 0.10 - 0.15 mm (0.0039 - 0.0059 in) less
Me; About .0070
According the manual, If backlash is too small, adjustment of washer thickness is required. Decrease thickness of left shim and increase thickness of right by the same amount.
If backlash is too great, reverse the above procedure.
After researching on the net to make sure I’m doing this correctly, I found a really great write up at http://www.miata.net/garage/diff_rr.html and followed that for my setup.
My only concern as the article states, I should have checked backlash prior to taking out the stock LSD, maybe it was within the .007 range, I can't say.
So I guess the smart thing to do is to take it to an experienced installer. My buddy Paul checked it out for me…
.007 on the outside of the ring gear... .0055 in the inside. .006 In the middle (Contact patch).
I'm comfortable closing it up.
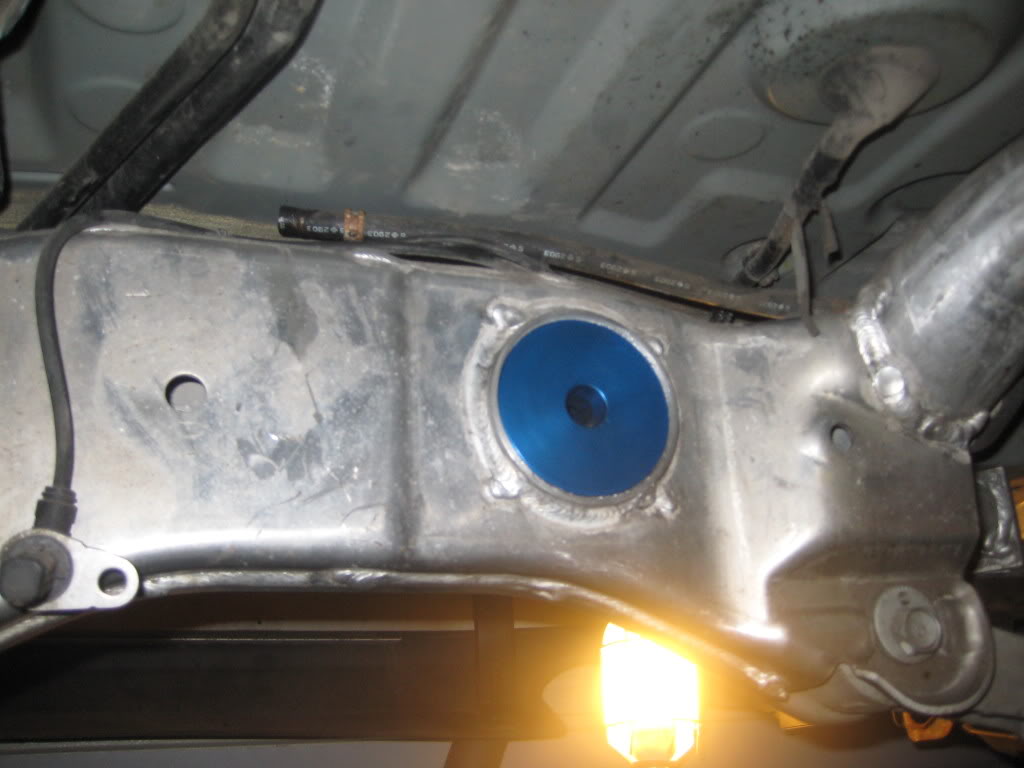
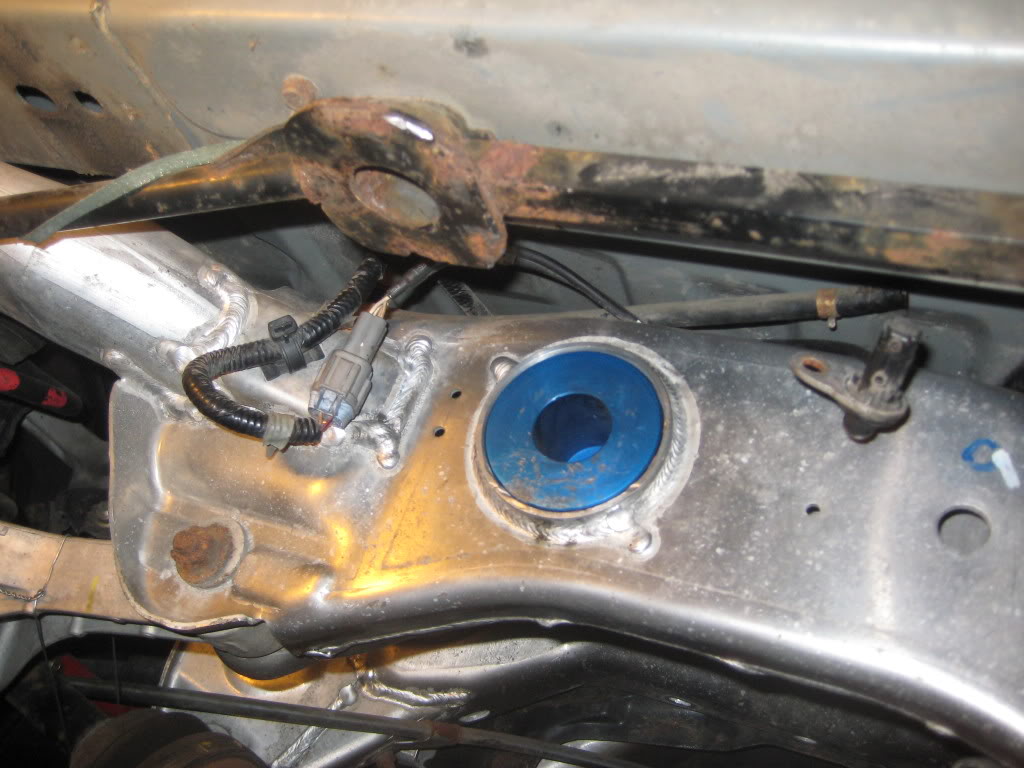
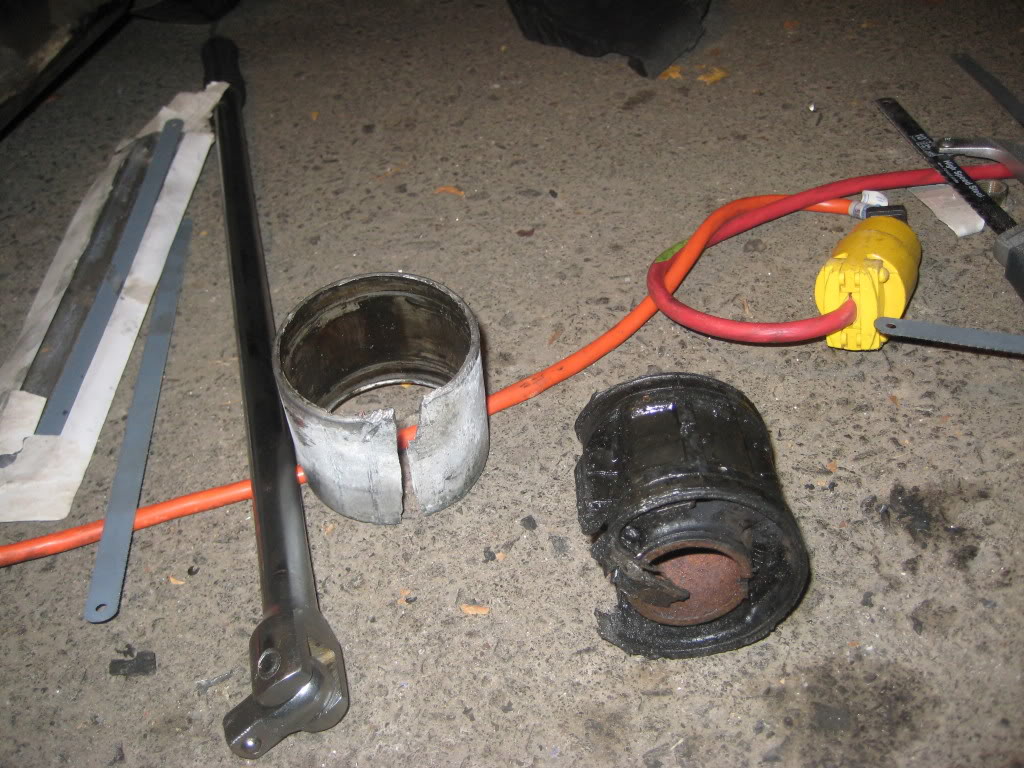
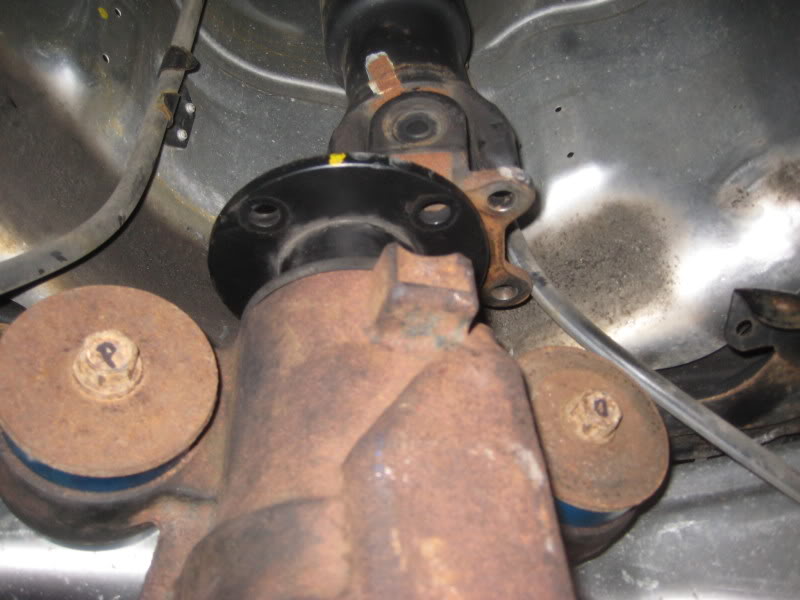
Befre re-installing the diff, I need to install the rear sub-frame bushing.
I Hacked out the rear sub-frame bushing tonight, took about 3 hours, drilled through the rubber, and patiently (sometimes not so patiently) cut through the outer race with a hack saw blade. A tip if you have issues, is feed the blade through the whole, and re-connect the hacksaw handle upside down and use it like that. I was eventually able to pound it out with the driver shipped with it.
So maybe tomorrow I'll try popping in the new one, it’s in the freezer right now.
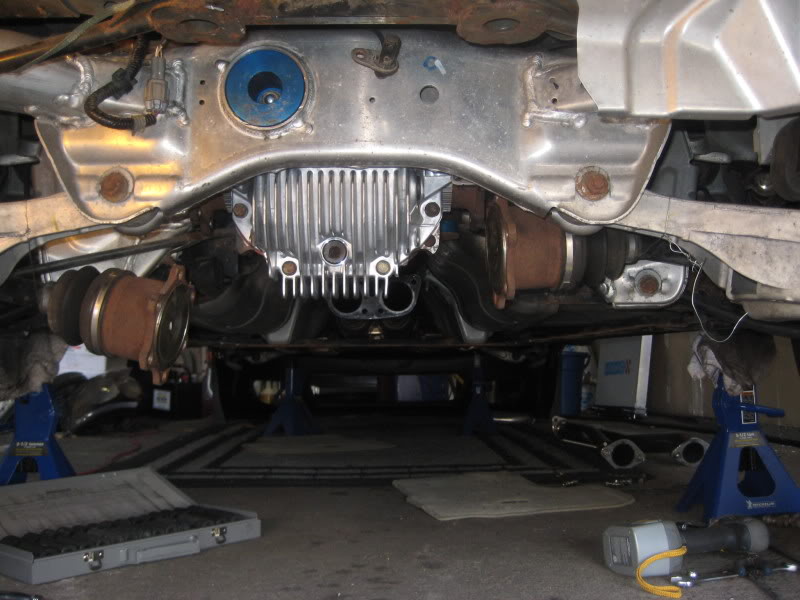
Still waiting on new diff cover to finish it all up...tracking shows it’s in Canada now at least.
OK back at it...
I ran the frozen sub frame bushing from my freezer out to the garage rolled under the car and hammered it almost ALL the way in before it warmed up (I'm guessing) and became stubborn.
After hitting it with the driver that came with the kit, then dropping the driver and hitting it directly with the hammer (lol?) I switched to my useless bushing install kit from Princess Auto, ****ing SUCCESS. Solid bushing in place, not as pretty as the other pics but hey, it’s in.
Driver.
Massacred OEM bushing
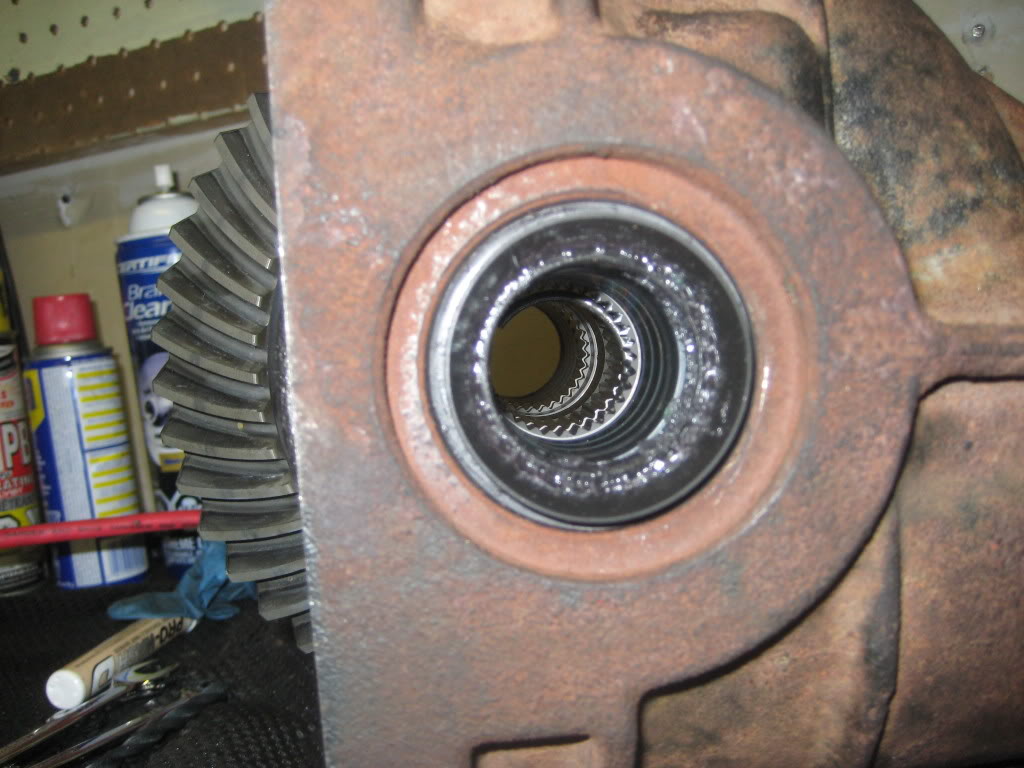
After that I turned my attention to the diff again, I realized the new LSD comes with "C-Clips" pre installed.
Hi in there...
Popped the stub axles back in, made sure everything was tight.
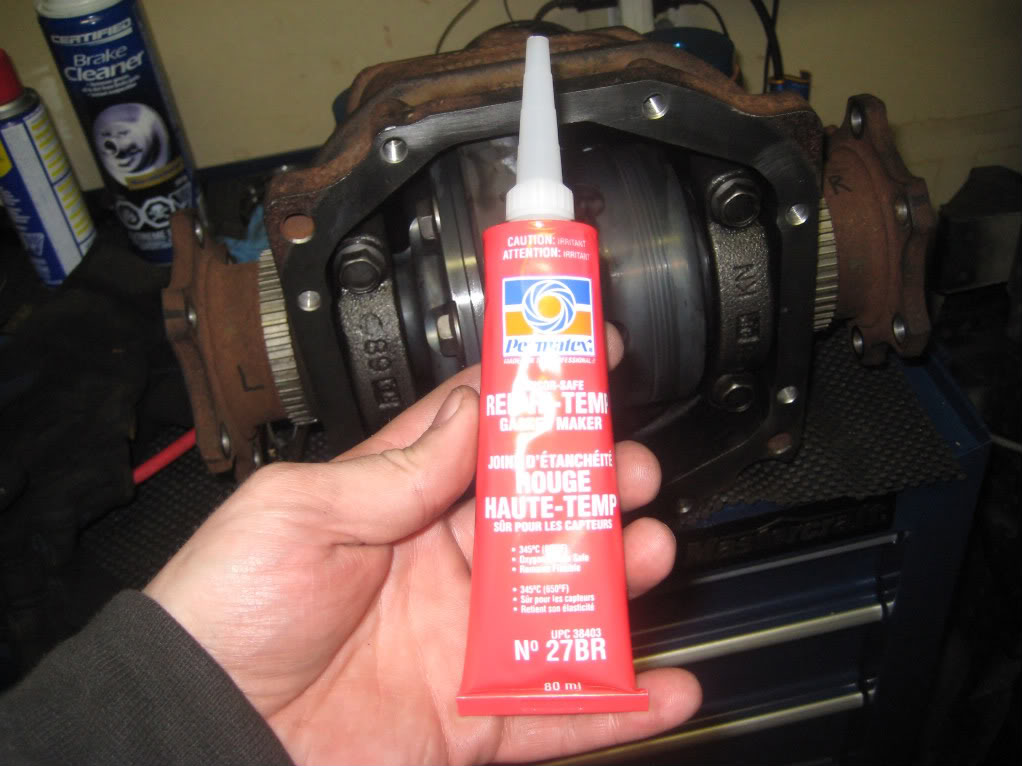
Using RTV high heat red, I made a gasket on the diff housing.

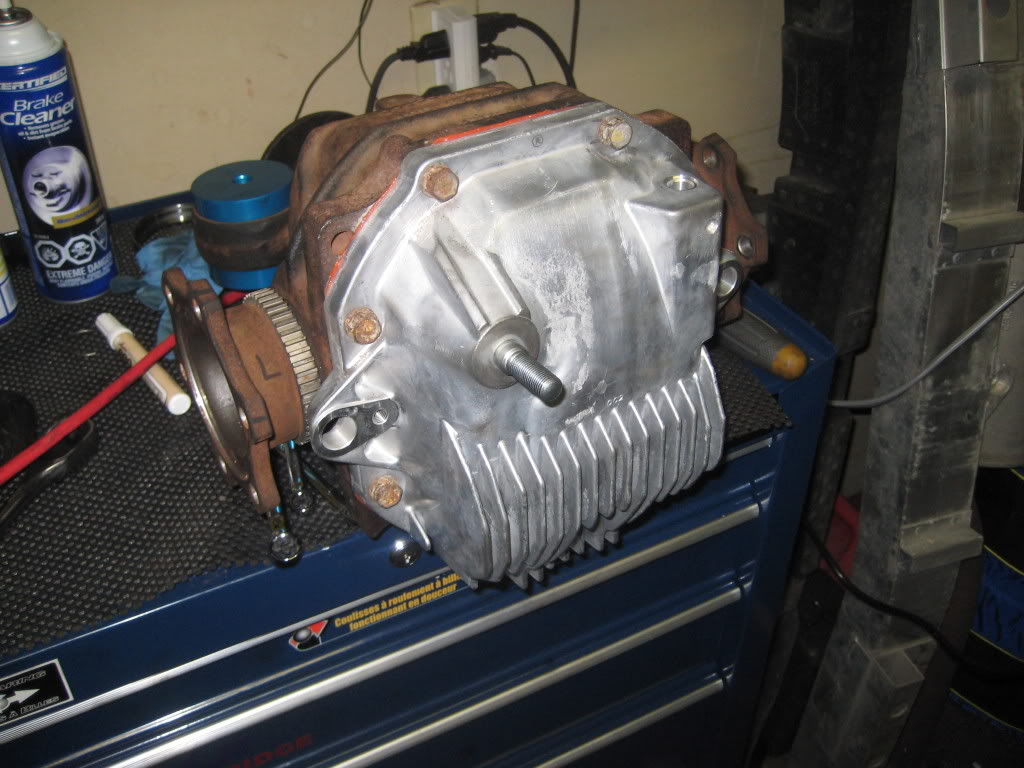
Torque the new cover on to 29ft-lbs using shitty old bolts, I should have bought new ones. Oh well.
Installed Stud and wheels speed/ABS Sensor bolts and left it at that. I'll let the RTV cure, then dump some new fluid in it tomorrow...
Good news is everything turned forward and backwards. Won't know if LSD works until I drive it LOL
I was able to drive in the (frozen) breather tube into the new cover using brass drifts I had bought, it went in pretty easy, then filled it with Redline 75w 90 for the break-in. I may attempt the install tomorrow...
Alright, so today I committed to re-install everything and I did. My arms are so sore I can barely type lol
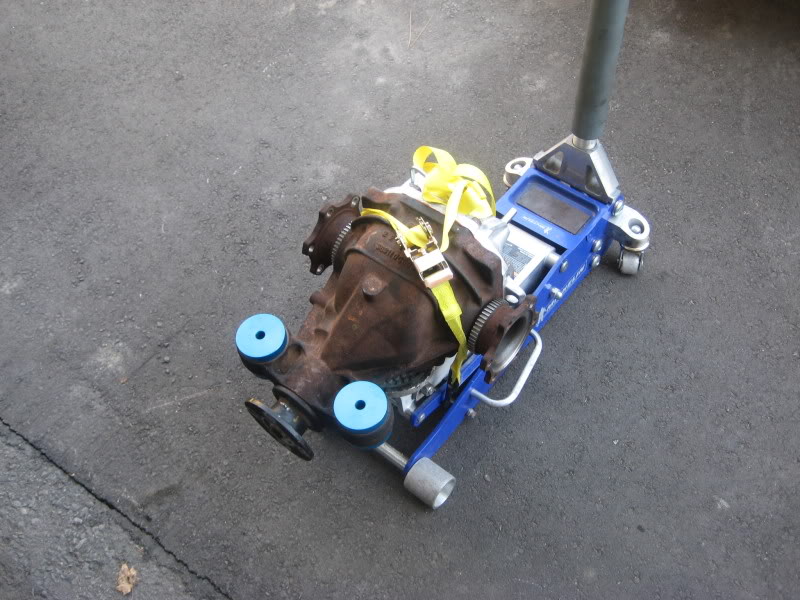
Started off with the whole diff strapped to the jack to roll it under and jack it up.
Oh to make my life a million times easier, something I should have taken the time to do in the beginning was remove the rear sway bar. This allows me to get directly under the car with the jack and lift it straight into place. With the sway in, I had to work it out over top...hindsight is 20/20, like a lot of things I learned during all of this.

With the Sway bar out, it gave me a change to re-grease it anyways.
With the diff jacked into place, I maneuvered the rear stud into the new solid bushing.
*Hint: Connect the breather hose as you jack the diff into place, otherwise it’s difficult to connect with the diff installed..
Then I hand tightened the 2 front bolts (this was a pain), I had to give each side a few turns to make sure everything went in evenly.
Torque the rear mount bolt to 74-88ft lbs and the 2 fronts to 67-81ft lbs, connect the wheel sensors.
BACK IN BLACK! I should have weighed this thing (I don’t own a scale cause I’m fat) but it must weigh 80lbs all together.
Connect the drive shaft (line up your marks) and torque bolts to 51-57ft lbs, connect stub axles (line up your marks) and torque bolts to 47-58ft lbs.
I noticed that 1 fin was broken on the bottom far right of my new cover; I guess it shipped like that and I didn’t notice. Too ****ing late now, it’s in.
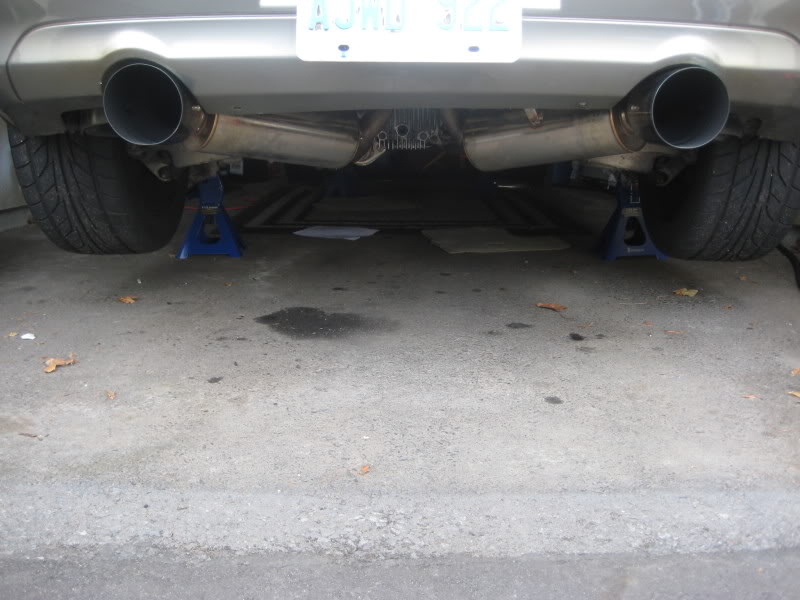
The easiest way to install everything at this point, is sway bar first, then your middle exhaust section (in my case anyways)
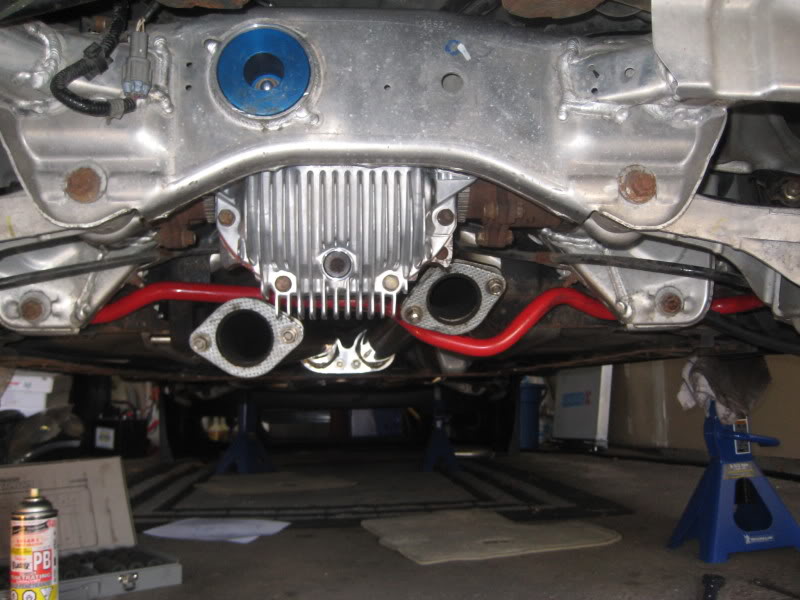
The most annoying thing was probably the rear HKS exhaust canisters, they are heavy and ****ing awkward, especially with the rubber bushings they connect to. PB Blaster on the bushing made them slide in really easy.
All cleaned up.
As frustrating and long as this has been, it was satisfying; I just hope it really works out the way I want. I won’t know till I put the front of the car back together, change fluids and fire it up...
Thanks to my family for realizing I have an addiction to this stuff and allowing me to take the time to do it.
Thanks Sleeman for the tasty work beverages.
A dab of locktite on each bolt...this is not permanent locktite, but the high strength high heat red. The manual called for medium, but I’d rather be safe than sorry.
Torque in a criss cross pattern from 55ft lbs to 61ft lbs then turn them 30 degrees more according to the manual.
That’s it for tonight...
Installing the new LSD+Ring Gear back into carrier.
I cleaned up the old RTV gasket from the carrier using a brass brush and a drill. Worked great.
Place shims in appropriate locations with new bearing races.
I placed the bearing caps on, and hand tightened the bolts. Then I torqued them in a criss cross pattern again to 65-72ft lbs.
I checked tooth contact with some white washable marker in 4 locations.
Each contacted correctly according to the manual...
At this point, I noticed a lot of guys just check tooth contact and close it up, well small but disappointing update...after doing everything myself, except for bushings/bearings I bought a 0-1 inch Dial Indicator and Magnetic Base from Princess Auto today for 20 bucks to check my ring gear to drive pinion backlash.
Turns out I'm more than what the manual states.
Manual; 0.10 - 0.15 mm (0.0039 - 0.0059 in) less
Me; About .0070
According the manual, If backlash is too small, adjustment of washer thickness is required. Decrease thickness of left shim and increase thickness of right by the same amount.
If backlash is too great, reverse the above procedure.
After researching on the net to make sure I’m doing this correctly, I found a really great write up at http://www.miata.net/garage/diff_rr.html and followed that for my setup.
My only concern as the article states, I should have checked backlash prior to taking out the stock LSD, maybe it was within the .007 range, I can't say.
So I guess the smart thing to do is to take it to an experienced installer. My buddy Paul checked it out for me…
.007 on the outside of the ring gear... .0055 in the inside. .006 In the middle (Contact patch).
I'm comfortable closing it up.
Befre re-installing the diff, I need to install the rear sub-frame bushing.
I Hacked out the rear sub-frame bushing tonight, took about 3 hours, drilled through the rubber, and patiently (sometimes not so patiently) cut through the outer race with a hack saw blade. A tip if you have issues, is feed the blade through the whole, and re-connect the hacksaw handle upside down and use it like that. I was eventually able to pound it out with the driver shipped with it.
So maybe tomorrow I'll try popping in the new one, it’s in the freezer right now.
Still waiting on new diff cover to finish it all up...tracking shows it’s in Canada now at least.
OK back at it...
I ran the frozen sub frame bushing from my freezer out to the garage rolled under the car and hammered it almost ALL the way in before it warmed up (I'm guessing) and became stubborn.
After hitting it with the driver that came with the kit, then dropping the driver and hitting it directly with the hammer (lol?) I switched to my useless bushing install kit from Princess Auto, ****ing SUCCESS. Solid bushing in place, not as pretty as the other pics but hey, it’s in.
Driver.
Massacred OEM bushing
After that I turned my attention to the diff again, I realized the new LSD comes with "C-Clips" pre installed.
Hi in there...
Popped the stub axles back in, made sure everything was tight.
Using RTV high heat red, I made a gasket on the diff housing.
Torque the new cover on to 29ft-lbs using shitty old bolts, I should have bought new ones. Oh well.
Installed Stud and wheels speed/ABS Sensor bolts and left it at that. I'll let the RTV cure, then dump some new fluid in it tomorrow...
Good news is everything turned forward and backwards. Won't know if LSD works until I drive it LOL
I was able to drive in the (frozen) breather tube into the new cover using brass drifts I had bought, it went in pretty easy, then filled it with Redline 75w 90 for the break-in. I may attempt the install tomorrow...
Alright, so today I committed to re-install everything and I did. My arms are so sore I can barely type lol
Started off with the whole diff strapped to the jack to roll it under and jack it up.
Oh to make my life a million times easier, something I should have taken the time to do in the beginning was remove the rear sway bar. This allows me to get directly under the car with the jack and lift it straight into place. With the sway in, I had to work it out over top...hindsight is 20/20, like a lot of things I learned during all of this.
With the Sway bar out, it gave me a change to re-grease it anyways.
With the diff jacked into place, I maneuvered the rear stud into the new solid bushing.
*Hint: Connect the breather hose as you jack the diff into place, otherwise it’s difficult to connect with the diff installed..
Then I hand tightened the 2 front bolts (this was a pain), I had to give each side a few turns to make sure everything went in evenly.
Torque the rear mount bolt to 74-88ft lbs and the 2 fronts to 67-81ft lbs, connect the wheel sensors.
BACK IN BLACK! I should have weighed this thing (I don’t own a scale cause I’m fat) but it must weigh 80lbs all together.
Connect the drive shaft (line up your marks) and torque bolts to 51-57ft lbs, connect stub axles (line up your marks) and torque bolts to 47-58ft lbs.
I noticed that 1 fin was broken on the bottom far right of my new cover; I guess it shipped like that and I didn’t notice. Too ****ing late now, it’s in.
The easiest way to install everything at this point, is sway bar first, then your middle exhaust section (in my case anyways)
The most annoying thing was probably the rear HKS exhaust canisters, they are heavy and ****ing awkward, especially with the rubber bushings they connect to. PB Blaster on the bushing made them slide in really easy.
All cleaned up.
As frustrating and long as this has been, it was satisfying; I just hope it really works out the way I want. I won’t know till I put the front of the car back together, change fluids and fire it up...
Thanks to my family for realizing I have an addiction to this stuff and allowing me to take the time to do it.
Thanks Sleeman for the tasty work beverages.
Last edited by RandomHer0; 03-21-2009 at 12:41 PM.


Trending Topics
04-03-2009, 11:54 PM
#9
Did same project with "assistance" of a shop who ended up driving the axle stub with a c-clip through the side of the lsd that already had a c-clip on the interior. Bad Move! Ended up having to send my lsd to a cusco dealer to rebuild entirely in order to replace that 1 measely interior c-clip. What a pain in the ****!
Labeling is my thing, but the shop thought they were a little too good and made a small mistake that cost me time, money and a major inconvenience. And after watching them do the install, I was then able to do it in reverse when I had to put the stock VLSD back in. Fortunately the cusco fits in 99% of the time without any other adjustments from what I've read.
Nice write up. Great pics!


 04-10-2009, 08:35 AM
#16
Took the car out, no bumper, FMIC in full view. Lots of looks from people LOL
I went down to the park and ride on Trim to do figure 8's with the new LSD to break it in a bit. I can hear it working, during slow speed turning I can hear the tires scrubbing, which is normal. It doesn't sound broken as some people make it seem, although Im inside not outside the car.
I can't give a great review because I didn't really want to attract attention, but the car just wants to go, no more stepping out, out of a turn it just pushes and pushes, you expect to lose traction...but you don't.
I can obviously get the car sideways powering over, but if I let the LSD do its job, it seems to doit well.
As for the solid bushings, I don't really hear any whining, probably because my tranny whines like a dog box and I can't hear anything outside of that LOL
No wheel hop, the car just wants to hook.
I'm happy.
P.S. I was leaving a 4 way stop pretty hard, and looked in my rear view and thought I dropped my diff fluid on the road, my heart sank. So I pulled over, got under the car, nothing. No drips, no nothing.
I went back and it just looked like a squigly long crack in the road which looked like fluids I guess as I pulled away lol
Just gotta get my E-Test.
