DIY, How to build an electronic stethoscope (electronic det-can)
 04-12-2009, 08:13 PM
#1
New Member
Thread Starter
iTrader: (7)

Join Date: Apr 2007
Location: York County, Pennsylvania.
Posts: 211
Likes: 0
Received 0 Likes
on
0 Posts
This is copied and pasted from my thread on my local forum.
First you might ask, what would you need a stethoscope for in a performance automotive application. They are great for finding a noise in an engine, but a performance useage?
Sure! By physically connecting a microphone to your engine block, you can hear what's going on combustion wise inside the engine. That means you can hear detonation, or the lack thereof. Using a clip like in this application lets you easily monitor from different positions on the engine. This is by no means a catch-all as you have to train yourself to pick out the bad noises, but used with other indicators, such as reading the plugs, EGT, and AFR, can offer tuning solutions for those who choose to do it without a dyno, remember, they weren't always as common as they seem to be today.
Now for the why. I am removing the UTEC from my G, it has a very sensitive circuit that monitors the knock sensor and pulls timing as soon as it is tickled. I am switching over to using the factory ECU for tuning instead of the UTEC, and the factory ECU doesn't monitor detonation as well. This device will give me a window into the combustion chamber during dynamic conditions so that I can eliminate any issues that the factory knock detection might ignore.
This device is commonly called a, "det can," and is made of copper or brass tube, flattened on one end to close it off, it is then bolted to the engine, and a piece of heavy rubber tube is run into the passenger compartment for the tuner to monitor. Clumsy and a pain to run a big tube through a car, I came across another solution, an electronic device. I will go into detail of it's construction below.
First a list of materials, all but the epoxy is available at your local Radio Shack.
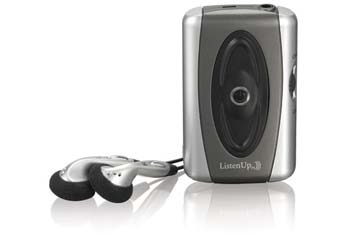
Listen Up personal sound amplifier Catalog #: 63-154
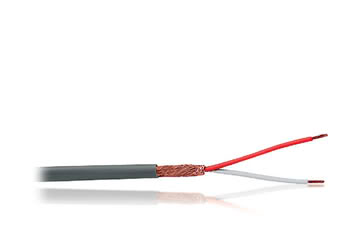
Audio cable 50' Catalog #: 278-513
Heavy-Duty 30-Amp Car Battery Clips Catalog #: 270-343
Some sort of 2 part epoxy, I used Permatex 4 minute perma poxy. Make sure it's suitable for higher heat, this stuff is good to 300*F.
Electrical tape
Soldering equipment
Tools
Common sense

Now you don't need 50' of cable, so you can cut and use the length you determine you need, or do like I did and wrap it on the spool in a way that you can unwrap as much as you need, then wrap it back on the spool for storage.
My pics were all taken after I was complete.
First, read all instructions before starting.
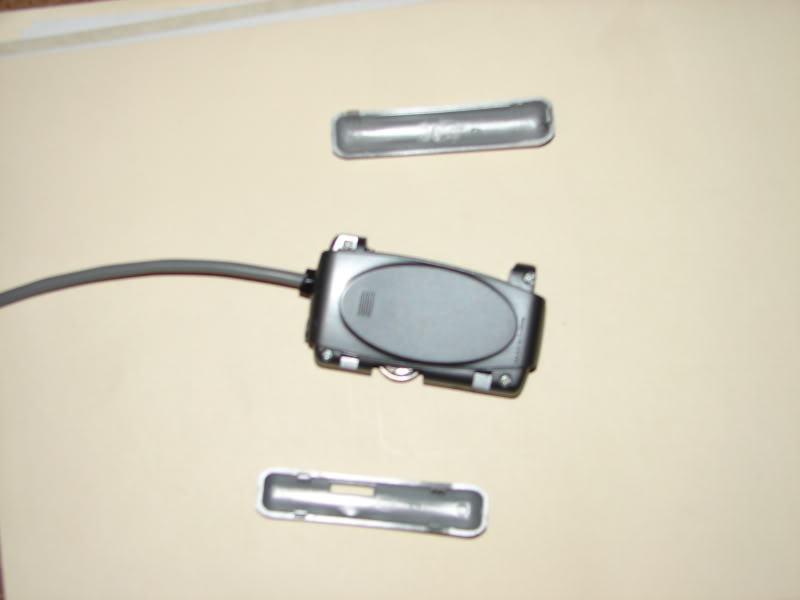
Remove the battery cover and the opposite side cover from the Listen up device. The side opposite of the battery cover pulls off in the same manner.
Now remove the 4 screwes holding the case halfs together, then the two screws holding the board to the case, remove the board.
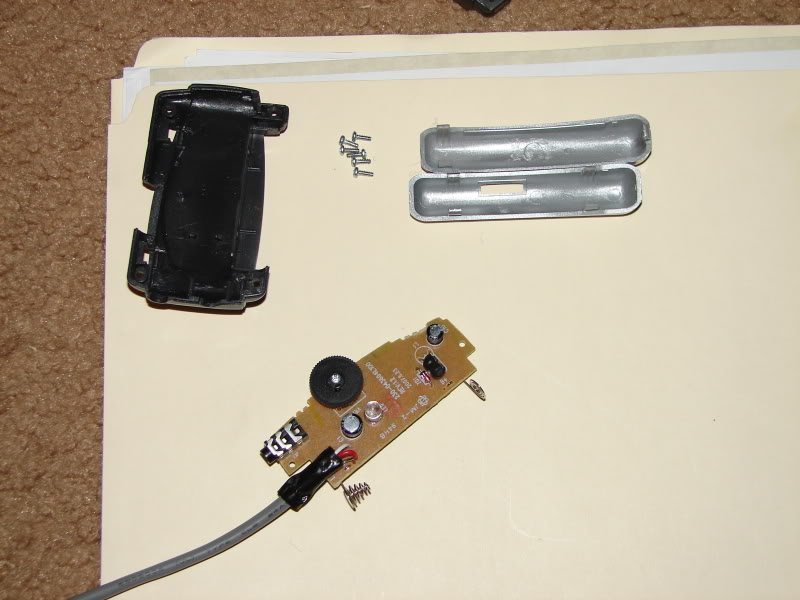
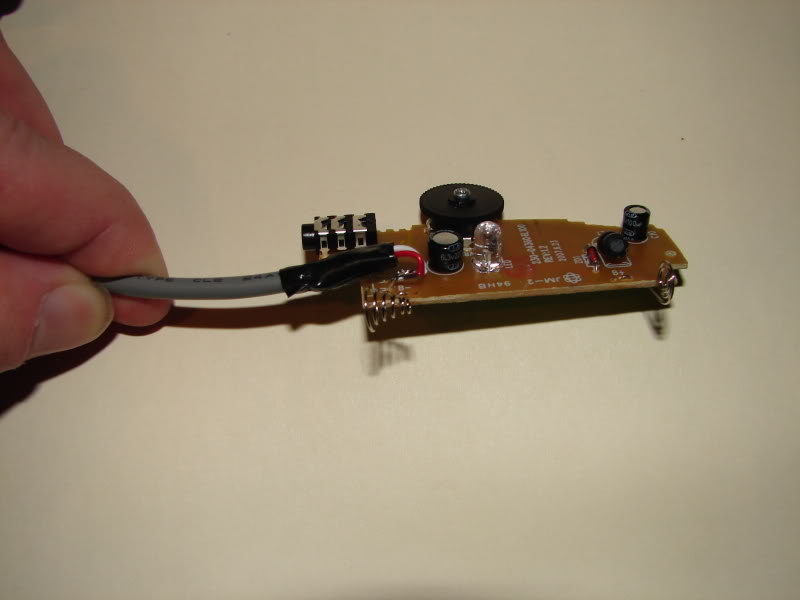
Since my unit is complete, you see the audio cable soldered in place of the microphone. You will need to desolder the mic paying attention to polarity, and attach the audio cable in it's place. Put a few wraps of electrical tape on the cable for stress relief.
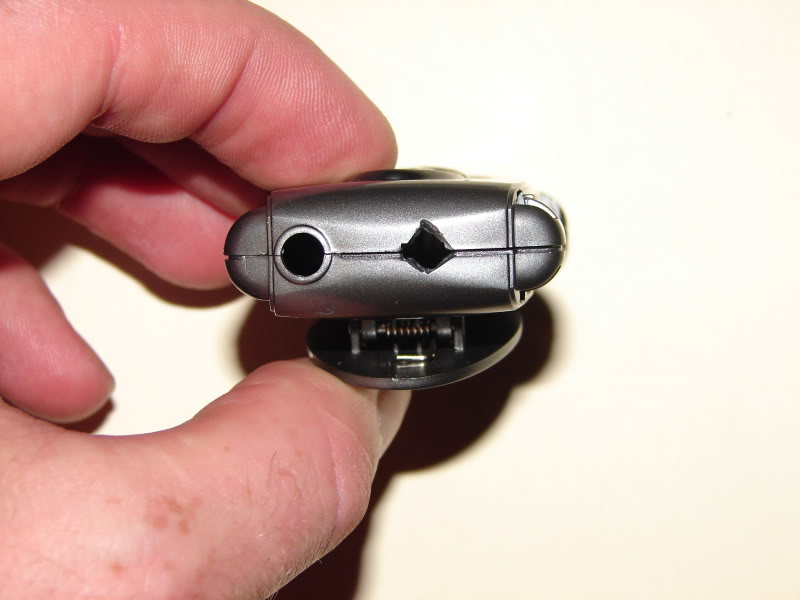
Modify the case in the slot cut for the microphone with a set of side cutters so the cable can pass through without being pinched.
Reinstall the board on the case half, and reassemble the unit, if you need more instruction than this to figure it out, go to your toolbox and get a hammer, then proceed to hit yourself in the face with it.
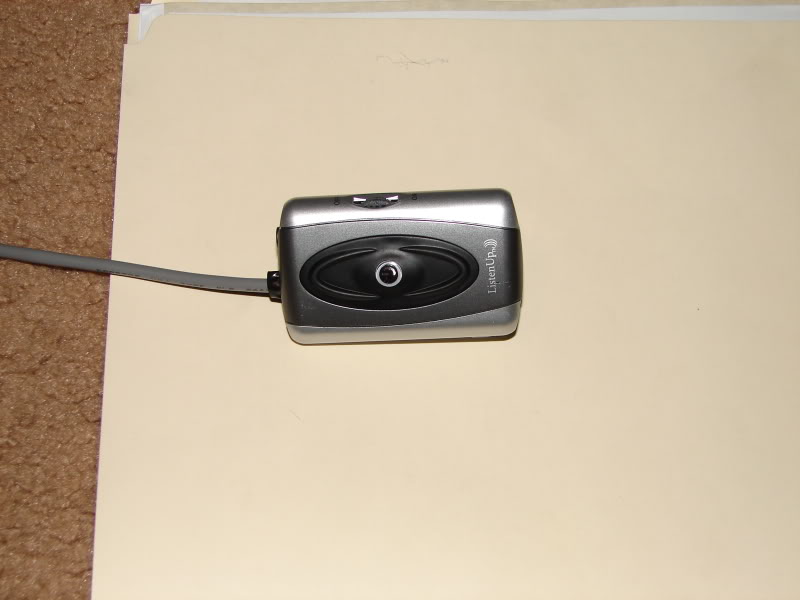
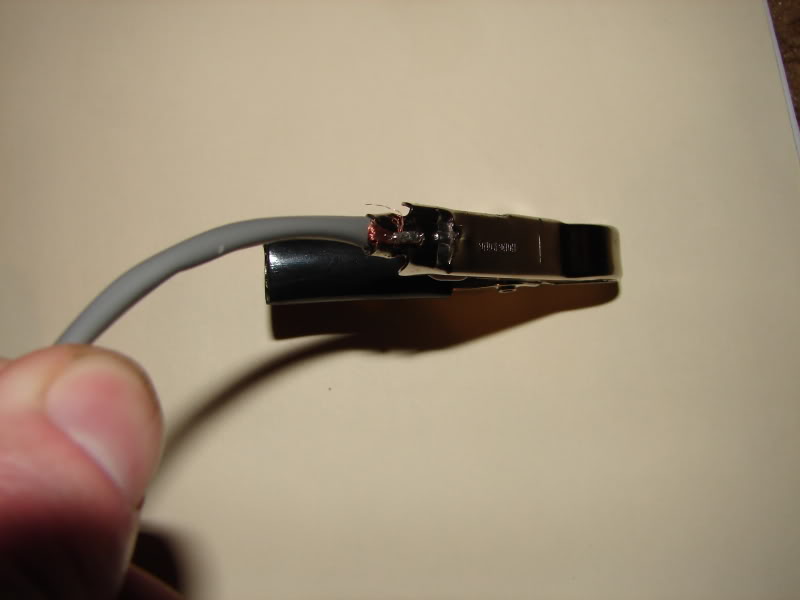
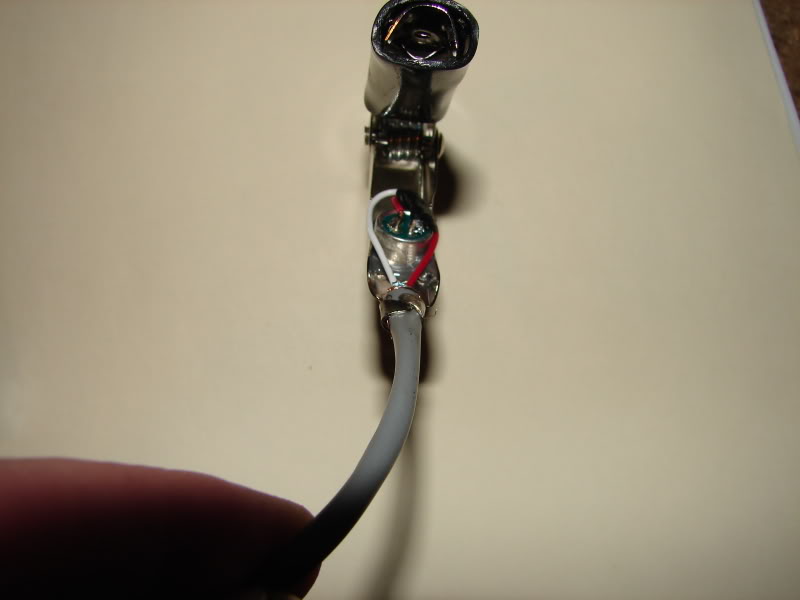
Figure out how much length you need, be generous, because like any guy, you know you'll want more than you have once length is fixed. Take one of the clips, remove the plastic insulator, put it on the cable, you'll be mad when you have to take it back apart if you forget this. Flatten the cable crimp attachment point.(see the circle in the first pic below) Solder the mic to the end of the cable, run the cable shielding through the hole in the clip and back under the cable so it will be held in place when you crimp the cable into the clip. The mic will be a tight fit into the clip, but put some epoxy on it, and push it into the channel over the flat area of the clip. Crimp the cable in the tabs of the clip, and carefully slide the insulator over the whole mess. As you can see, I suck with Photobucket's image editor.
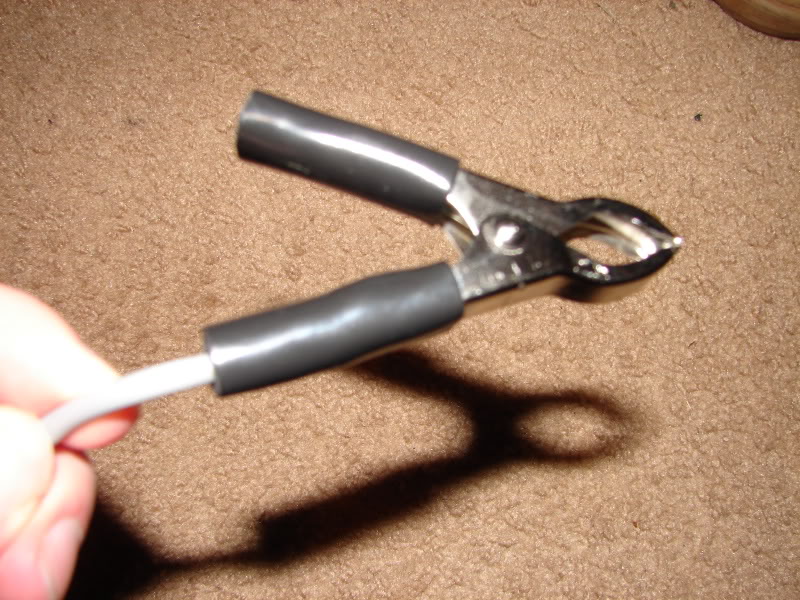
Completed unit with the wire wound on the spool for storage.

Install the battery, plug in the headphones, and clip it to what you want to listen to. THIS THING CAN PROBABLY GET LOUD ENOUGH TO DAMAGE YOUR HEARING! Don't get angry with me if you lose your sense of hearing, your own silly **** should have turned it down.
Detonation will sound like popcorn over the sound of the engine. Tomorrow when I have more time, I'll go into recording the sound to the computer and displaying it in the analysis program. I will also add some sound clips of detonation.
I can't take credit for the idea, as there are others like this posted on the net, I just came up with this specific execution.
First you might ask, what would you need a stethoscope for in a performance automotive application. They are great for finding a noise in an engine, but a performance useage?
Sure! By physically connecting a microphone to your engine block, you can hear what's going on combustion wise inside the engine. That means you can hear detonation, or the lack thereof. Using a clip like in this application lets you easily monitor from different positions on the engine. This is by no means a catch-all as you have to train yourself to pick out the bad noises, but used with other indicators, such as reading the plugs, EGT, and AFR, can offer tuning solutions for those who choose to do it without a dyno, remember, they weren't always as common as they seem to be today.
Now for the why. I am removing the UTEC from my G, it has a very sensitive circuit that monitors the knock sensor and pulls timing as soon as it is tickled. I am switching over to using the factory ECU for tuning instead of the UTEC, and the factory ECU doesn't monitor detonation as well. This device will give me a window into the combustion chamber during dynamic conditions so that I can eliminate any issues that the factory knock detection might ignore.
This device is commonly called a, "det can," and is made of copper or brass tube, flattened on one end to close it off, it is then bolted to the engine, and a piece of heavy rubber tube is run into the passenger compartment for the tuner to monitor. Clumsy and a pain to run a big tube through a car, I came across another solution, an electronic device. I will go into detail of it's construction below.
First a list of materials, all but the epoxy is available at your local Radio Shack.
Listen Up personal sound amplifier Catalog #: 63-154
Audio cable 50' Catalog #: 278-513
Heavy-Duty 30-Amp Car Battery Clips Catalog #: 270-343
Some sort of 2 part epoxy, I used Permatex 4 minute perma poxy. Make sure it's suitable for higher heat, this stuff is good to 300*F.
Electrical tape
Soldering equipment
Tools
Common sense
Now you don't need 50' of cable, so you can cut and use the length you determine you need, or do like I did and wrap it on the spool in a way that you can unwrap as much as you need, then wrap it back on the spool for storage.
My pics were all taken after I was complete.
First, read all instructions before starting.
Remove the battery cover and the opposite side cover from the Listen up device. The side opposite of the battery cover pulls off in the same manner.
Now remove the 4 screwes holding the case halfs together, then the two screws holding the board to the case, remove the board.
Since my unit is complete, you see the audio cable soldered in place of the microphone. You will need to desolder the mic paying attention to polarity, and attach the audio cable in it's place. Put a few wraps of electrical tape on the cable for stress relief.
Modify the case in the slot cut for the microphone with a set of side cutters so the cable can pass through without being pinched.
Reinstall the board on the case half, and reassemble the unit, if you need more instruction than this to figure it out, go to your toolbox and get a hammer, then proceed to hit yourself in the face with it.
Figure out how much length you need, be generous, because like any guy, you know you'll want more than you have once length is fixed. Take one of the clips, remove the plastic insulator, put it on the cable, you'll be mad when you have to take it back apart if you forget this. Flatten the cable crimp attachment point.(see the circle in the first pic below) Solder the mic to the end of the cable, run the cable shielding through the hole in the clip and back under the cable so it will be held in place when you crimp the cable into the clip. The mic will be a tight fit into the clip, but put some epoxy on it, and push it into the channel over the flat area of the clip. Crimp the cable in the tabs of the clip, and carefully slide the insulator over the whole mess. As you can see, I suck with Photobucket's image editor.
Completed unit with the wire wound on the spool for storage.
Install the battery, plug in the headphones, and clip it to what you want to listen to. THIS THING CAN PROBABLY GET LOUD ENOUGH TO DAMAGE YOUR HEARING! Don't get angry with me if you lose your sense of hearing, your own silly **** should have turned it down.
Detonation will sound like popcorn over the sound of the engine. Tomorrow when I have more time, I'll go into recording the sound to the computer and displaying it in the analysis program. I will also add some sound clips of detonation.
I can't take credit for the idea, as there are others like this posted on the net, I just came up with this specific execution.


Trending Topics
07-18-2009, 09:03 PM
#8
Banned

Join Date: Jul 2009
Location: 1
Posts: 3
Likes: 0
Received 0 Likes
on
0 Posts
As a fundraising opportunity the Rotorua Ngongotaha Rail Trust has been given a 1941 mother of the bride dresses. The Trust is wishing to offer this garment up for wedding dress online: http://www.royalmedresses.com. The wedding dress is in excellent condition, and has only been worn once. It is a cream velvet, hand stitched, size 8, princess line dress wholesale dresses

Thread
Thread Starter
Forum
Replies
Last Post
350Z_Al
Exterior & Interior
133
10-29-2020 07:44 PM
Tochigi_236
Feedback & Suggestions for Our Forum
8
09-27-2015 03:40 PM
attached, build, building, cans, det, diy, electrical, electronic, electronics, good, knock, make, mic, microphone, stethoscope