DIY - Transgo Valve Body Upgrade
 10-31-2009, 03:53 PM
#1
Registered User
Thread Starter

I'm going to start off with saying this "kit" is not for someone who has never worked on cars ..
I AM NOT responsible if you mess up your car, tranny, fingers, etc
this is just a tool to help someone decide if they want to do this mod themselves or pay someone
and if you do decide to do it yourself, this should help make the install go smoothly
............................................................ ......................................
Tools -
10mm, 14mm, 19mm sockets / 14mm wrench
drain pan
torque wrenches (ft lb for drain plug .. inch lb for everything else) - I had to buy inch lb torque wrench .. $40 @ napa
funnel
5mm allen head socket
stiff wire (use to help get shims out valve body)
dikes / pliers
flat screwdriver
punch or 1/4" drive extension (drive in tapered orfice)
light hammer
Supplies -
8 quarts NISSAN S-MATIC ATF (do not use anything else) $8.12 / quart with discount (work at dodge dealer) .. they wanted $18
two rolls of paper towel or shop towels
Transgo Valve Body Upgrade Kit $295 (really fast free shipping from forged performance .. also avail. @ GTM)
Vaseline or suitable assembly lube / grease (hold ***** in place)
Instructions -
Download both VB Removal and Transgo Install pdf files off GTM website
Start One Day Trial with transgo website and download three more files
(Study all and become familiar with the parts, bolts, etc before starting)
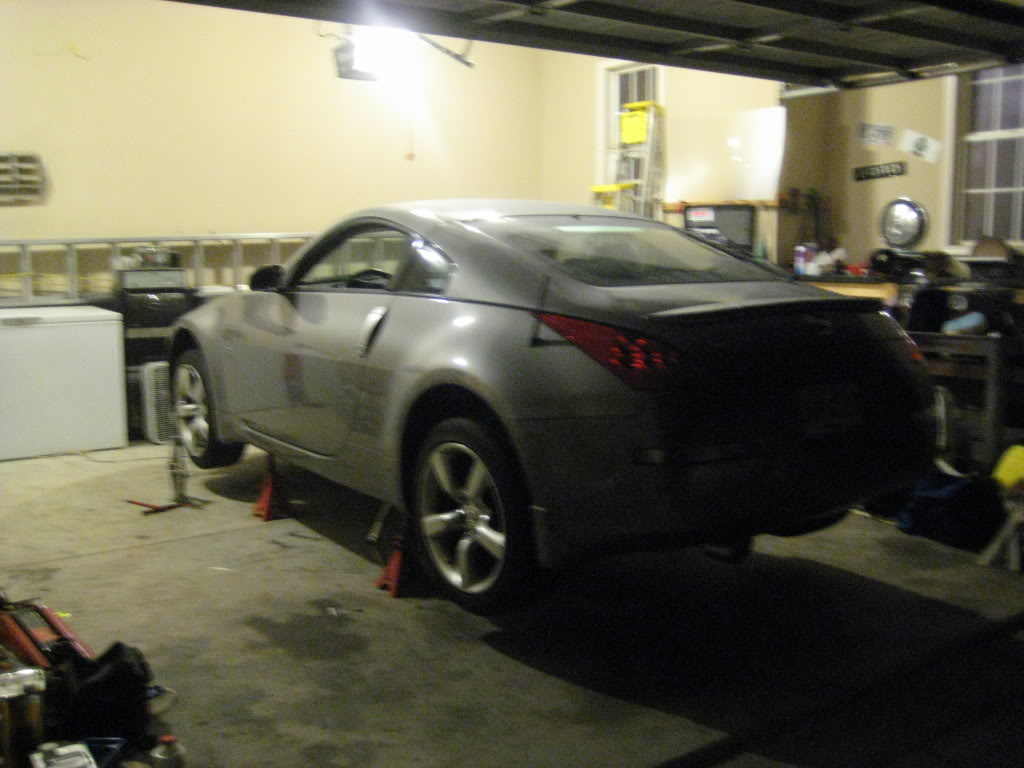
1) Jack car up and set on jack stands, then drain tranny fluid (4 quarts), re-install drain plug at 35 ft lb
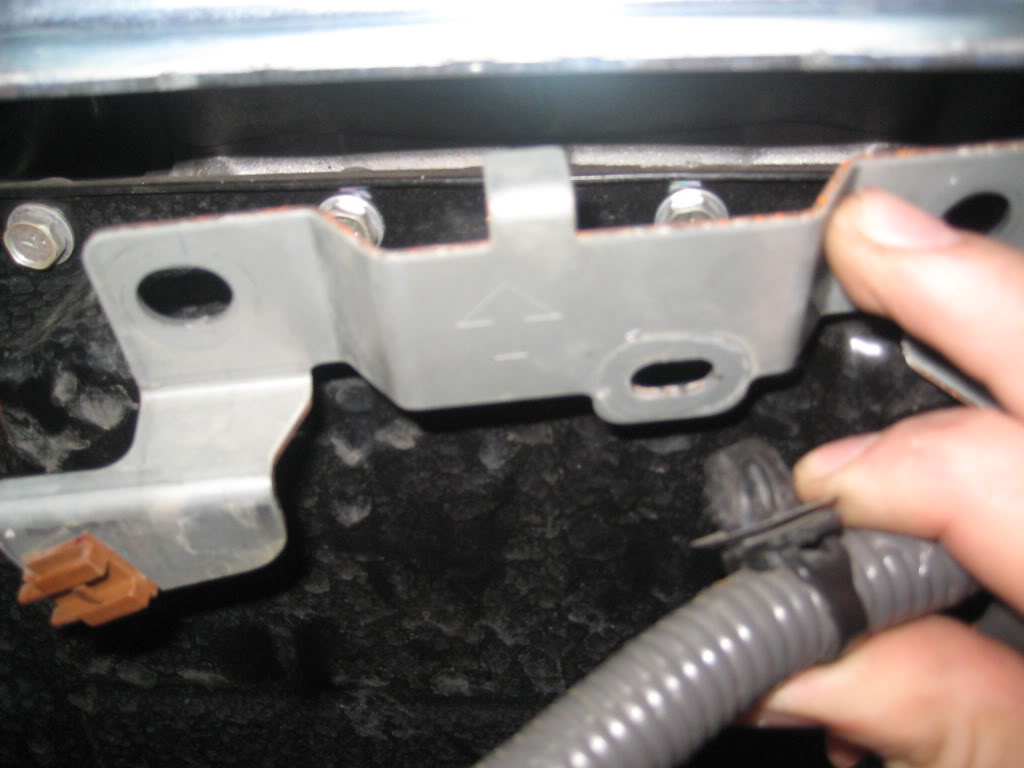
2) Remove two bolts holding the bracket that 02 sensor wires mount to .. one on passenger side with 14mm wrench .. drivers side with socket .. then remove wire clip from bracket for easy install
unclip o2 sensor wires and push everything out of the way
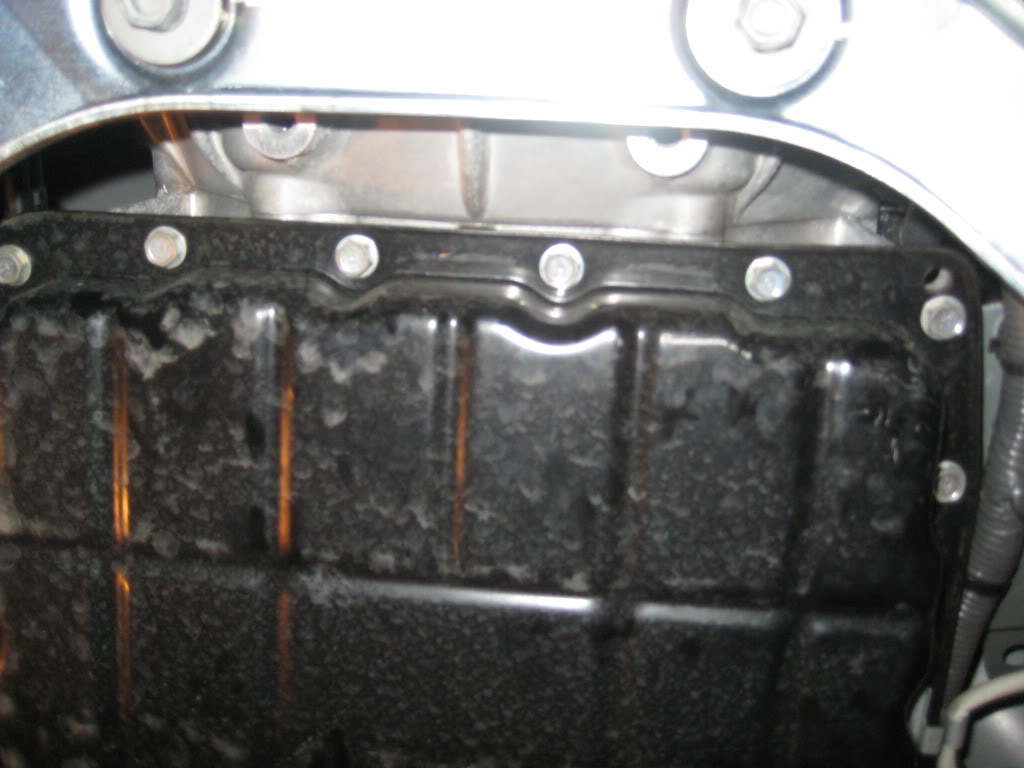
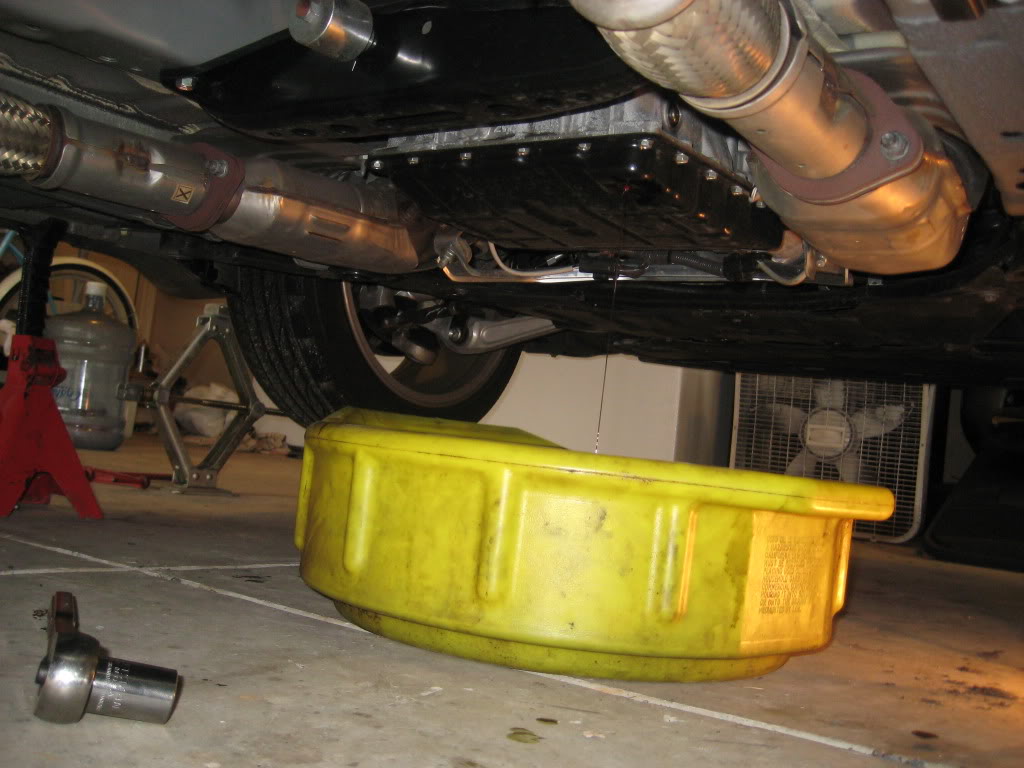
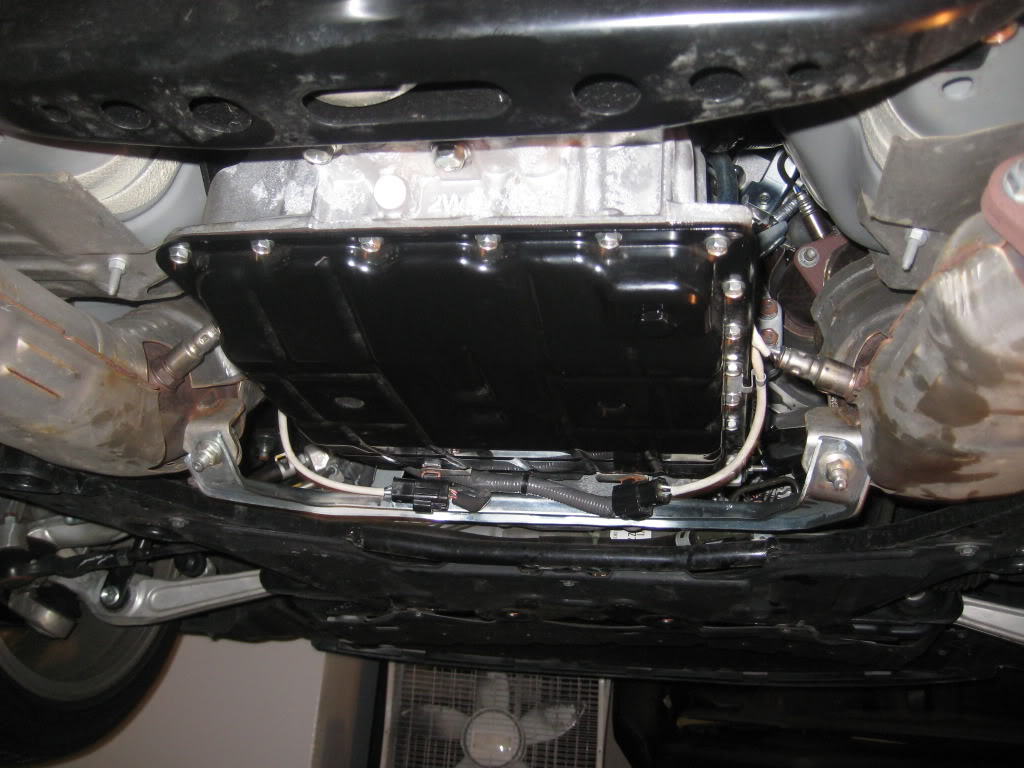
3) Take 10mm bolts out of tranny pan and drop, drain, and put to the side (wont need it for a while)
there will be another quart or so in the pan
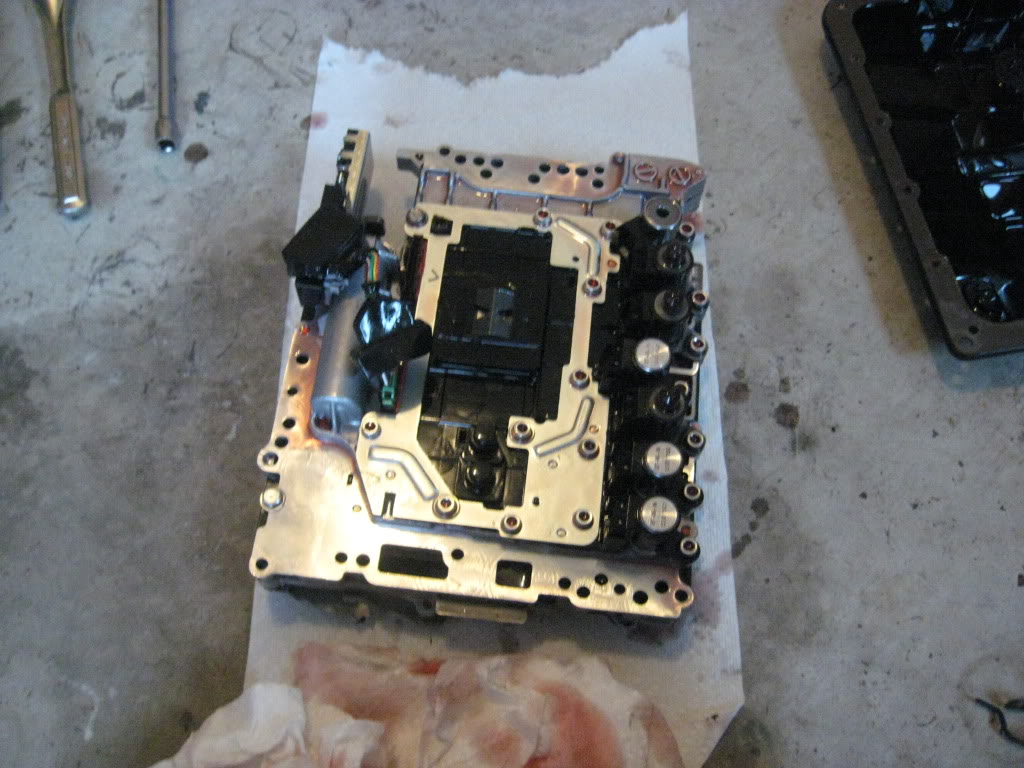
then you see this
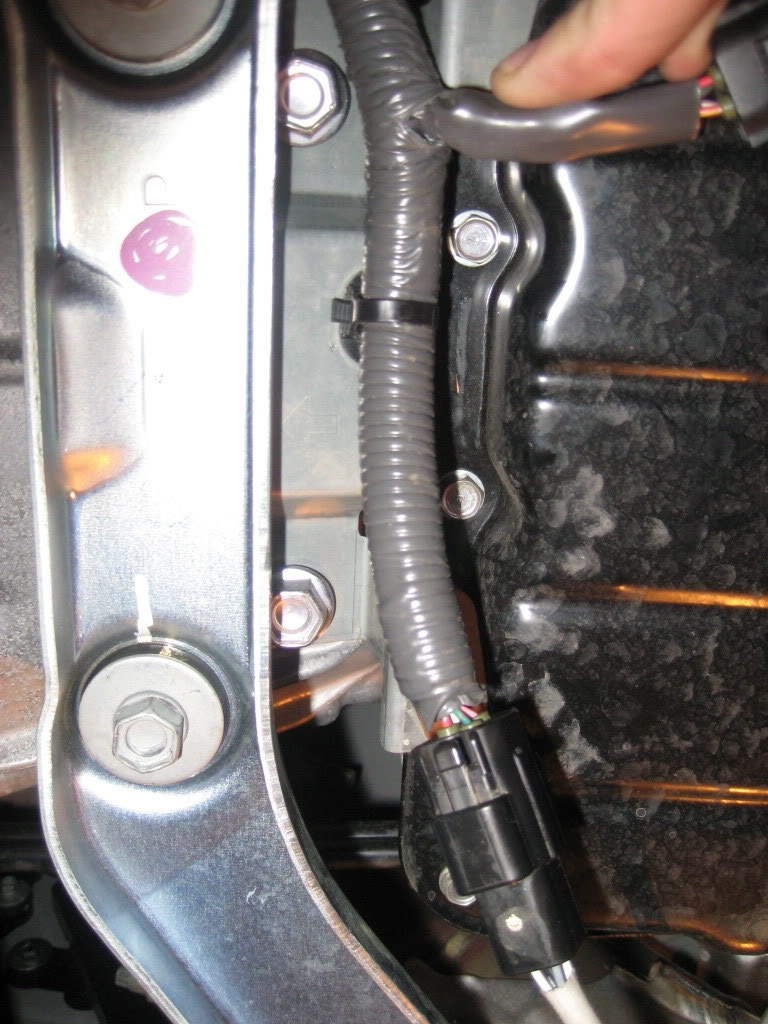
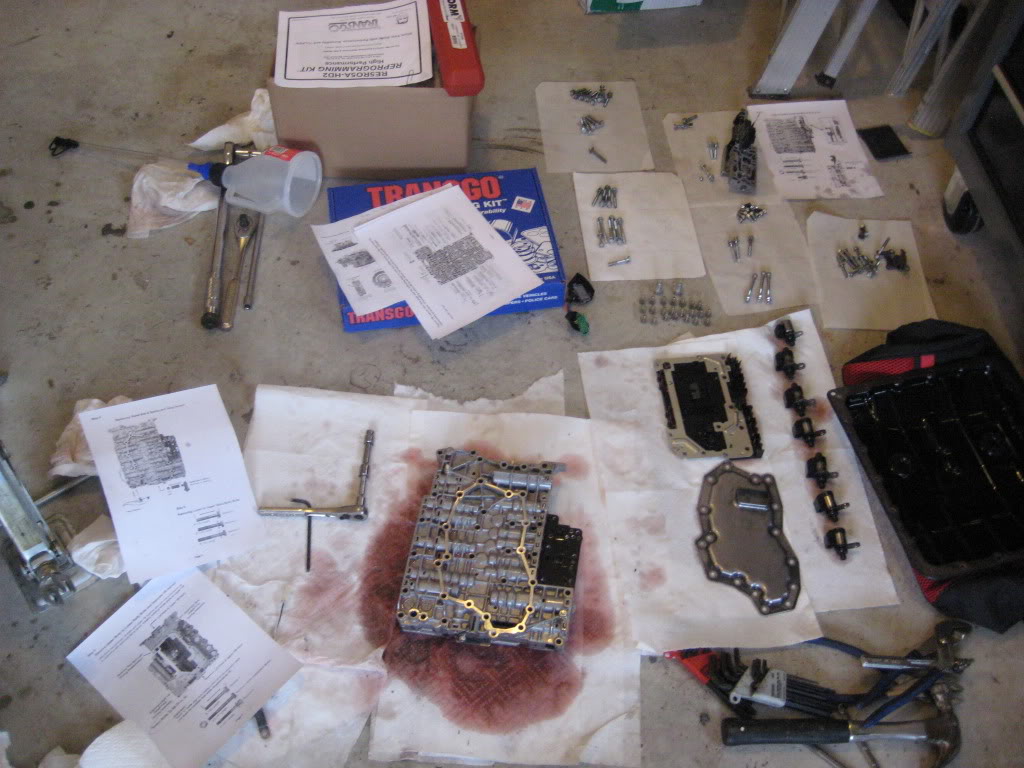
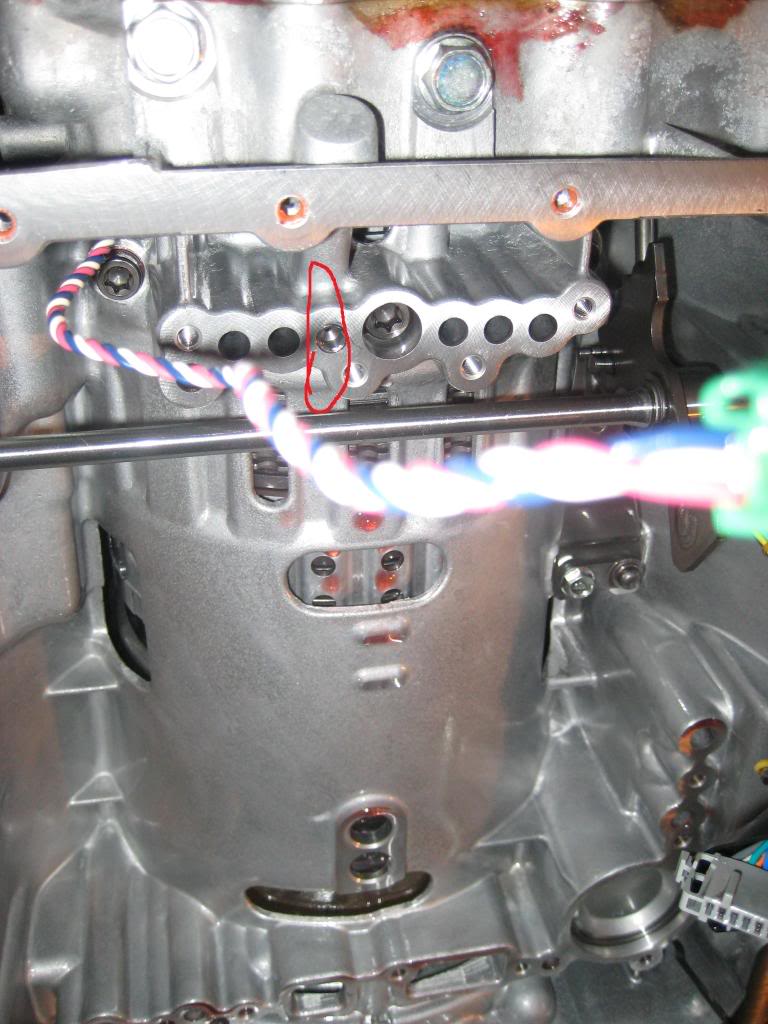
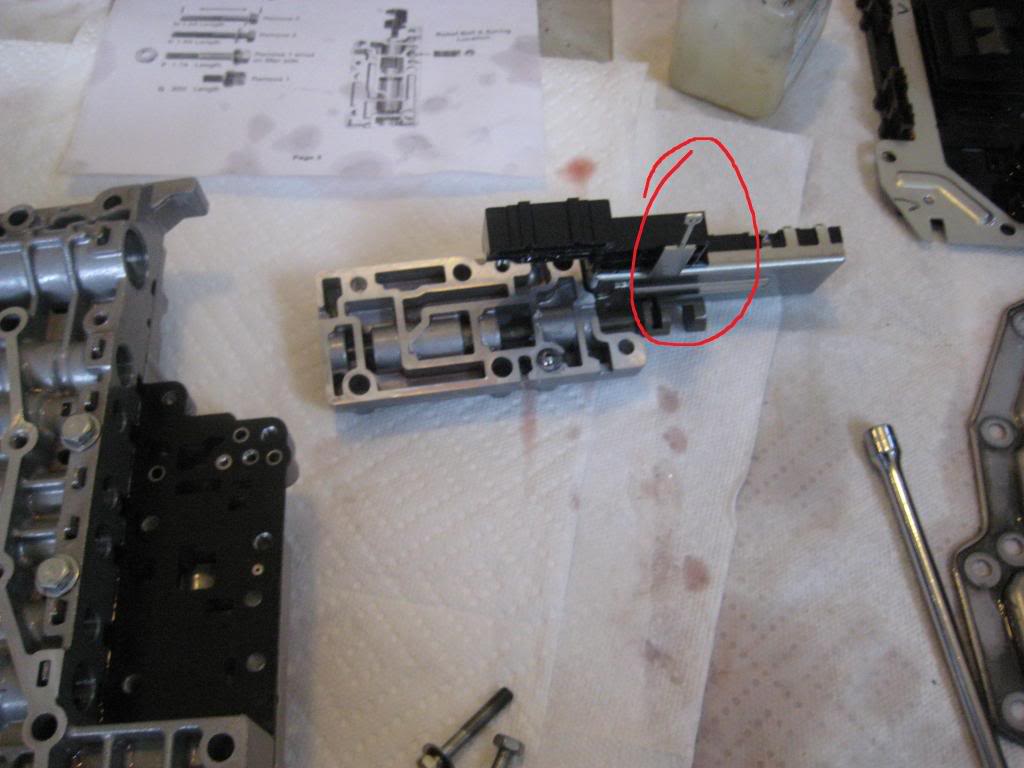
4) Get out the instructions .. unhook the wires on the bottom .. then take out and label bolts according to the diagram (A, B, C, ETC) ... I used paper with letters on them to organize the bolts (or you could use bags)
get organized b/c there are ALOT of pieces to keep up with
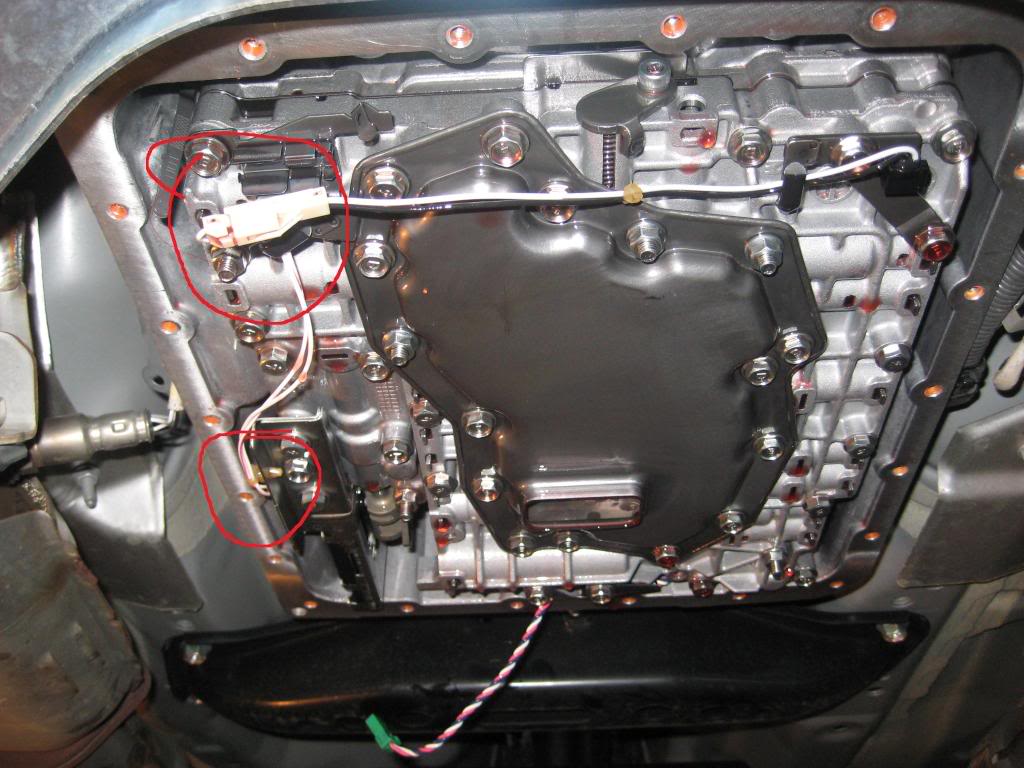
NOTE - Unclip the two things circled in red before unbolting .. clip on side of the VB sucks when your holding the vb up .. haha
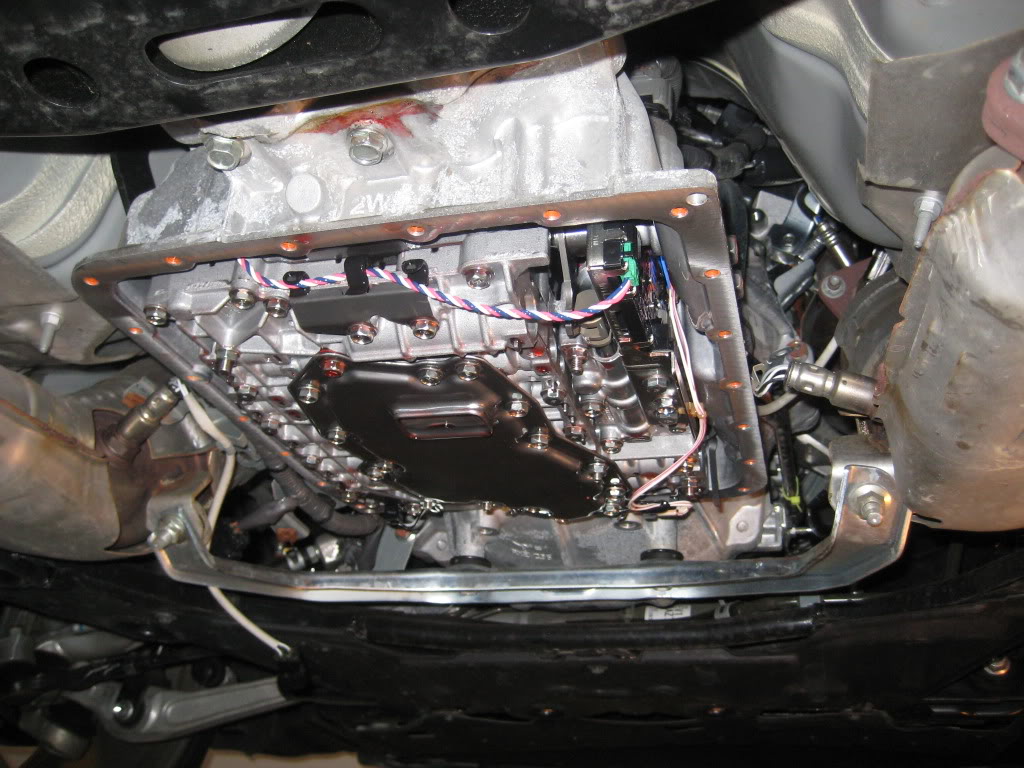
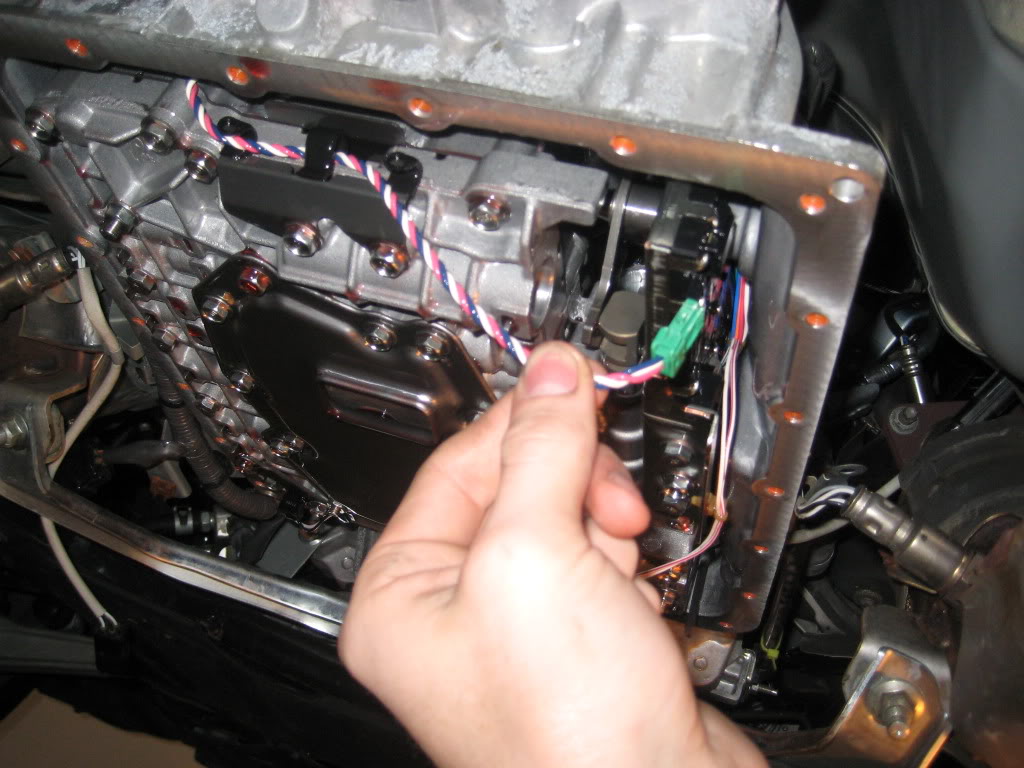
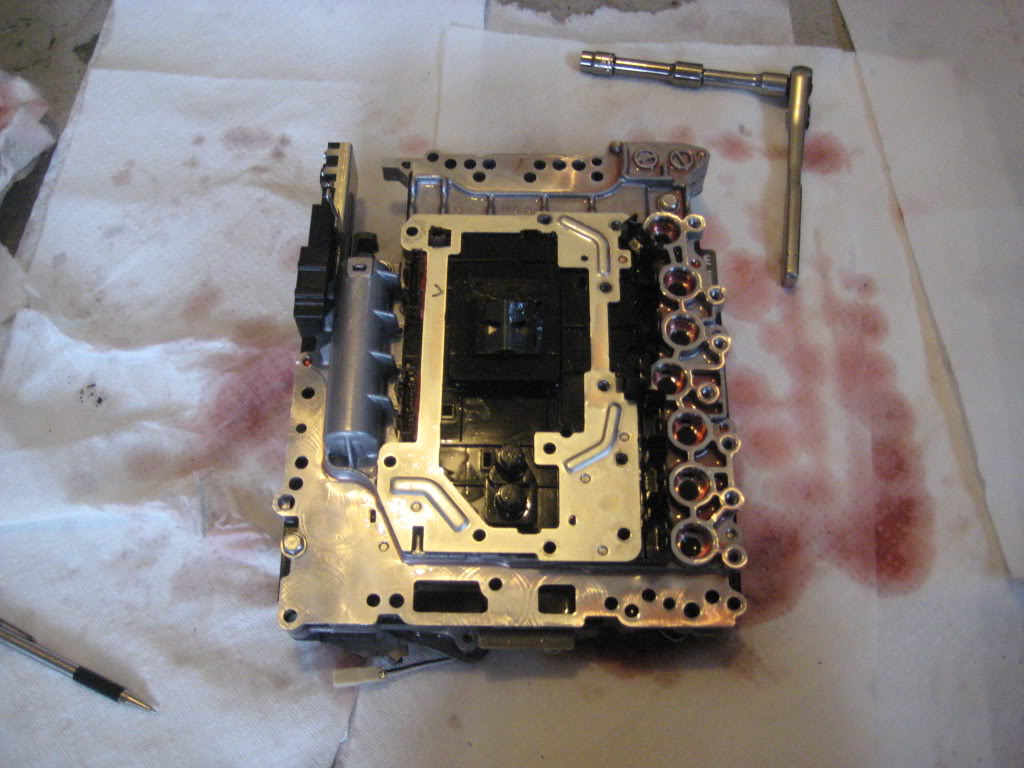
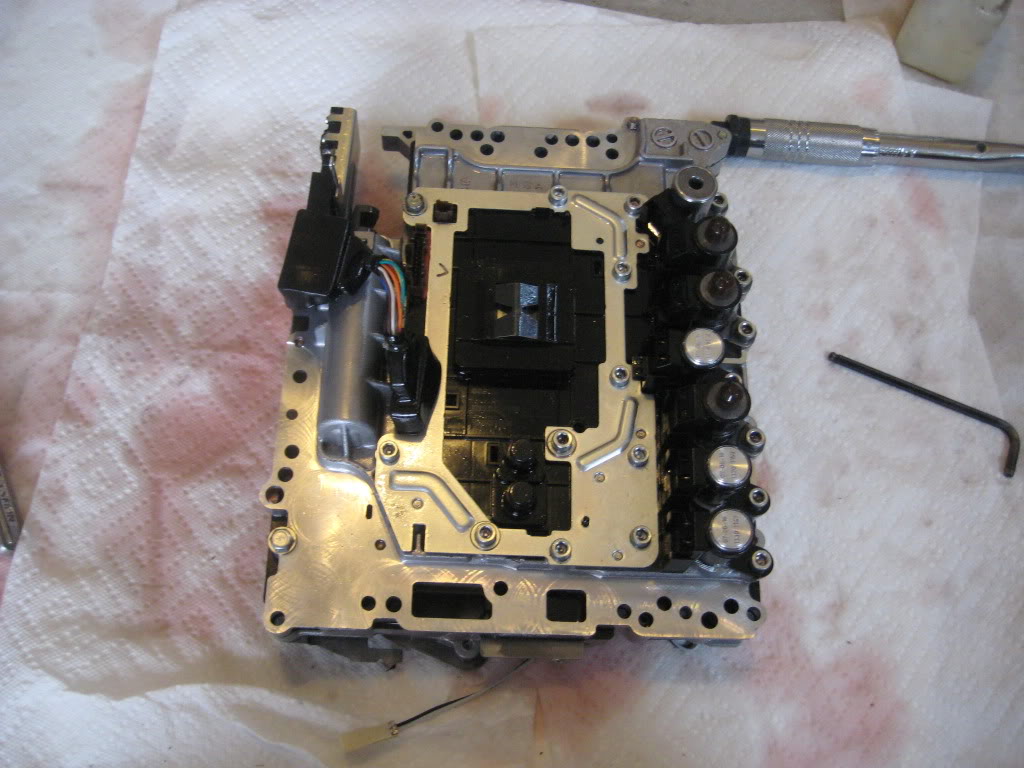
5) BE CAREFUL dropping the valve body .. there are wires you have to disconnect on top (around 6" of slack in them)
put a glove on or paper towel between your hand and the valve body .. this is where I cut my finger .. the pickup is razor sharp
after that little struggle .. you get this
go ahead and take a break b/c that was the "easy part" ..the harder part is next
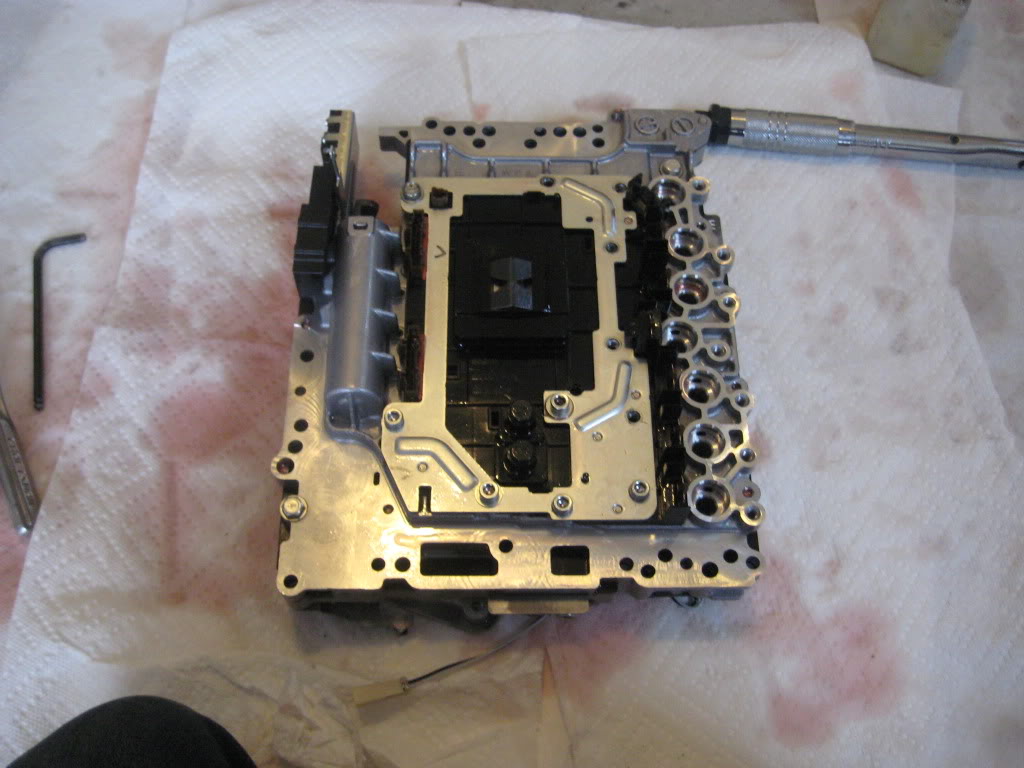
6) Following the instructions for removing electronics / solenoids .. remove / label bolts and keep solenoids in order
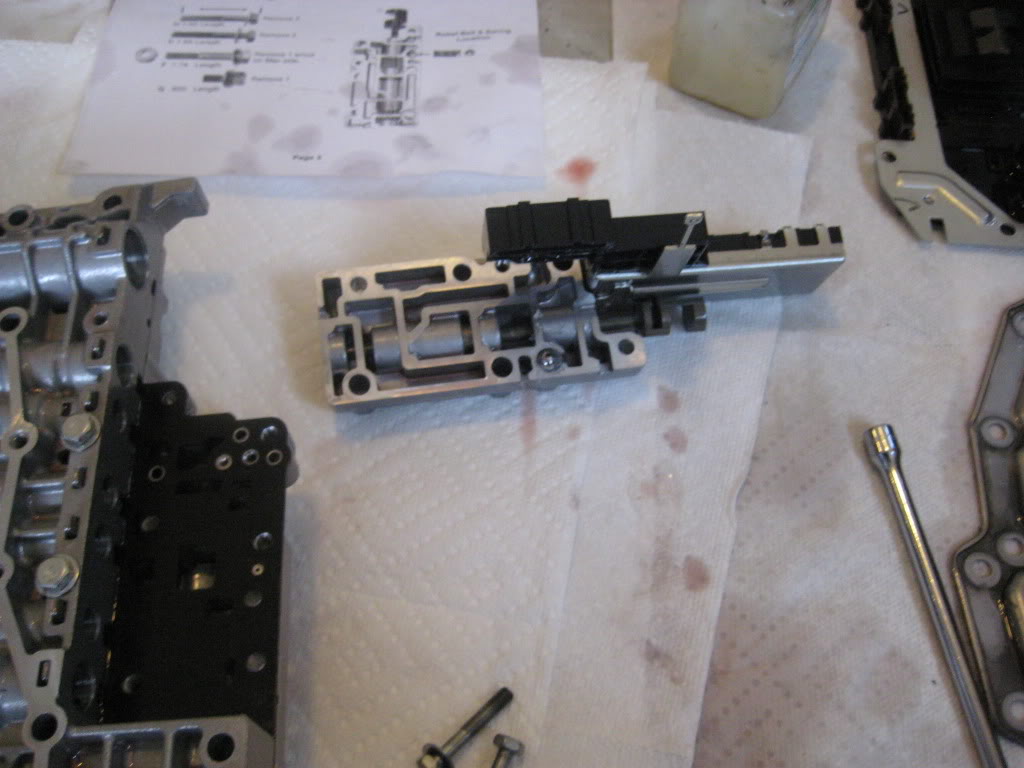
7) Remove / Label filter bolts .. then remove the manual valve body and watch for the spring and ball inside
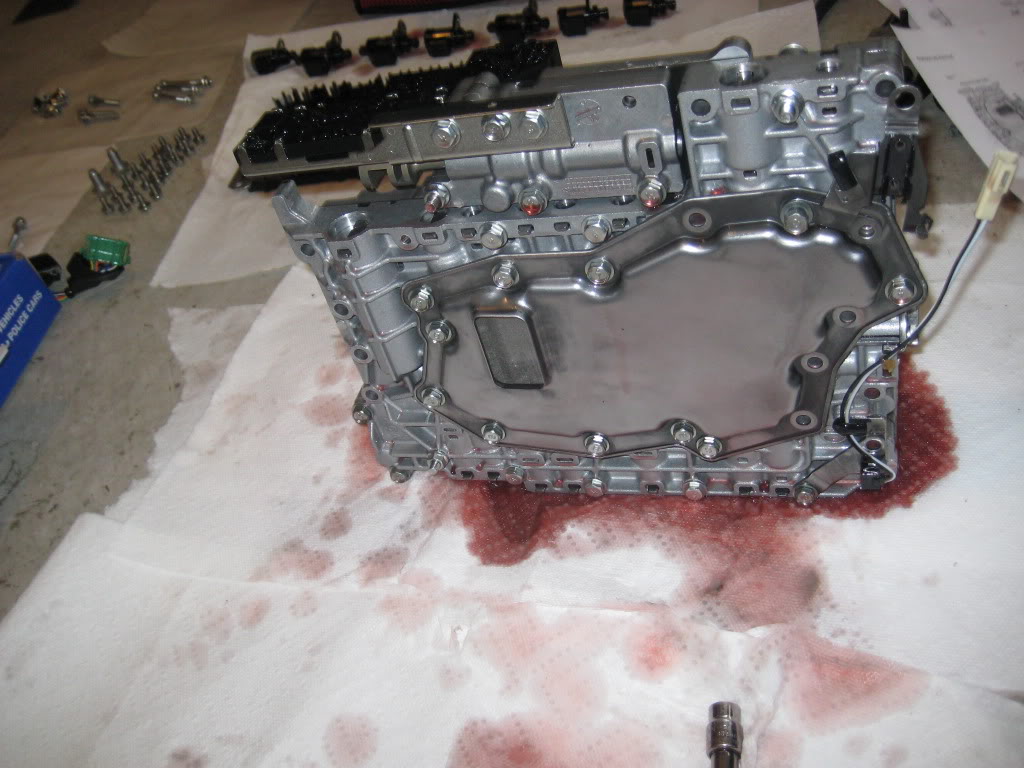
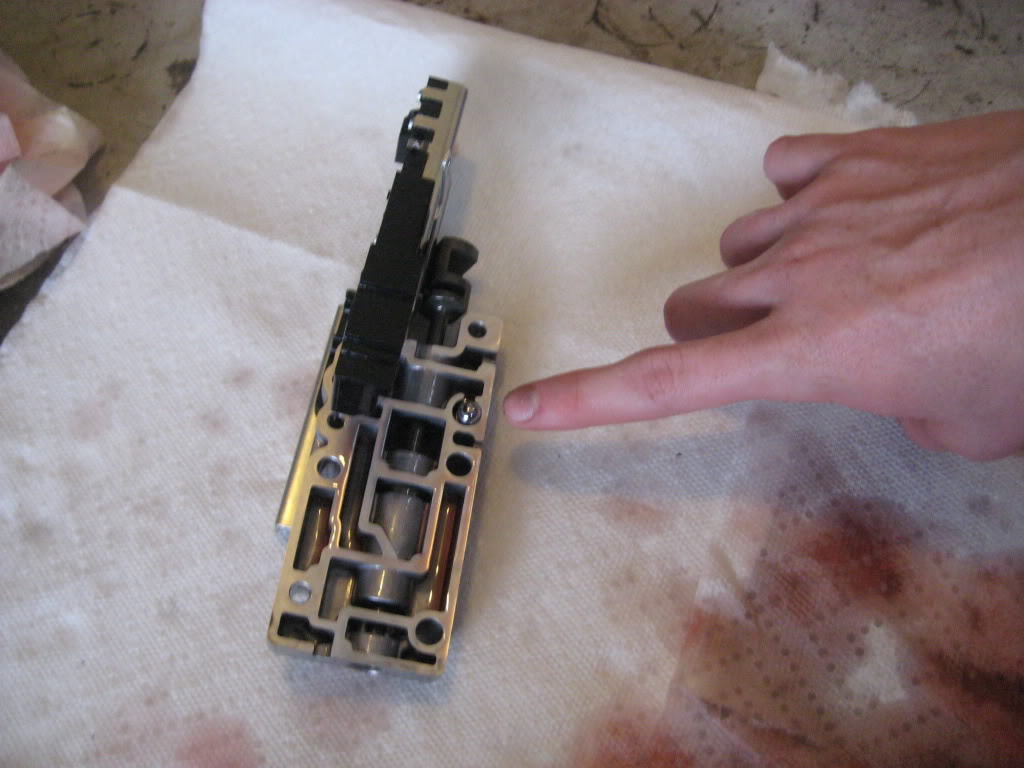
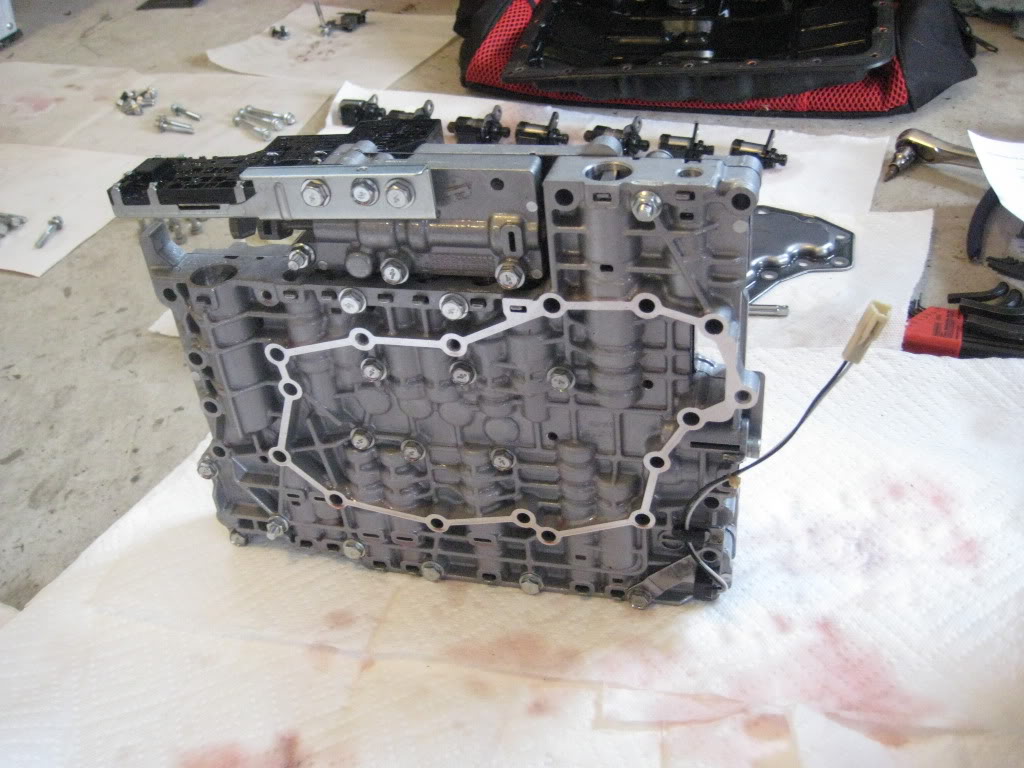
8) Remove Temp Sensor and Relief Ball & Spring

Around now you should have something that looks like this
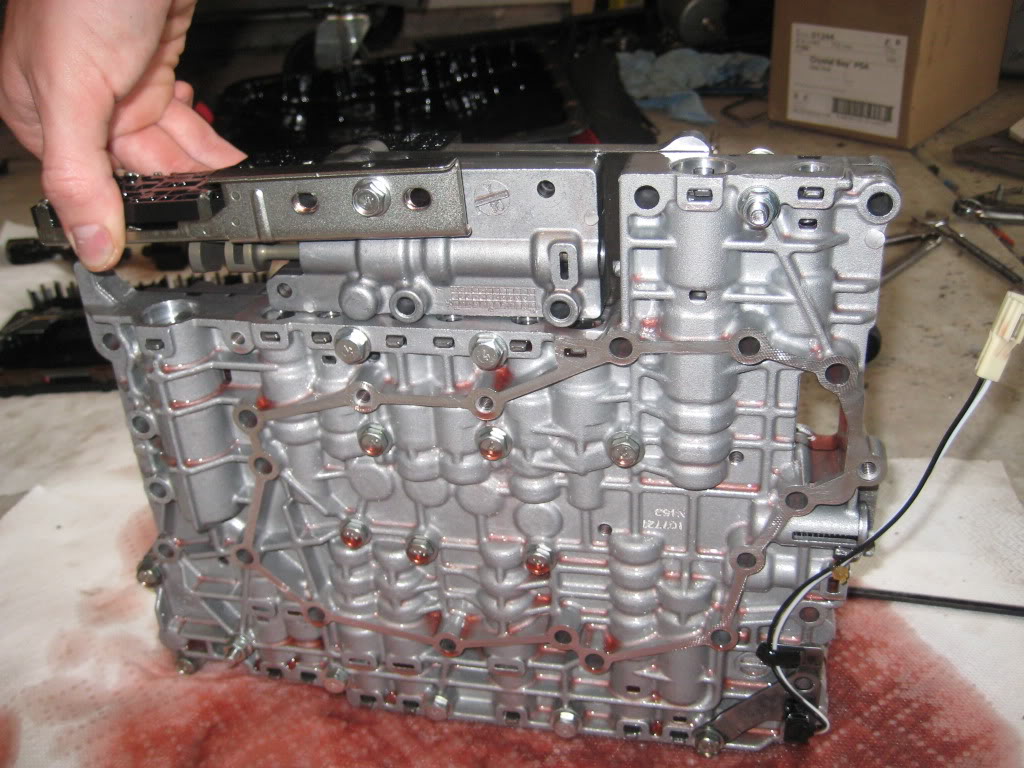
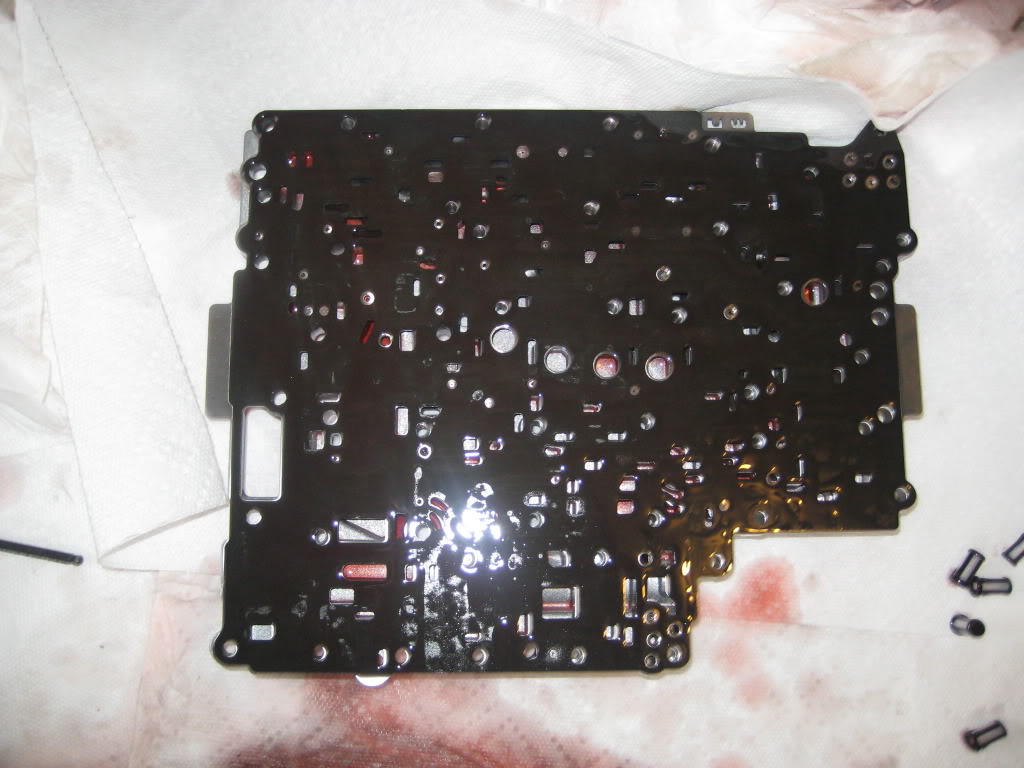
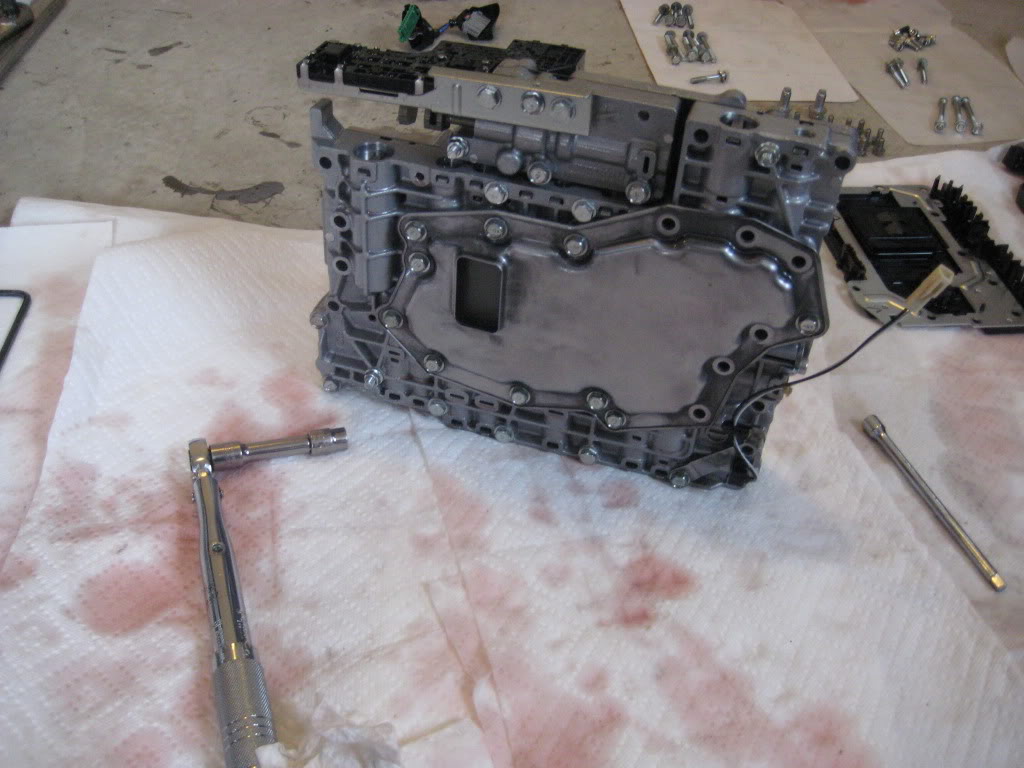
9) Again follow the instructions to remove the upper to lower vb bolts .. and lower to upper
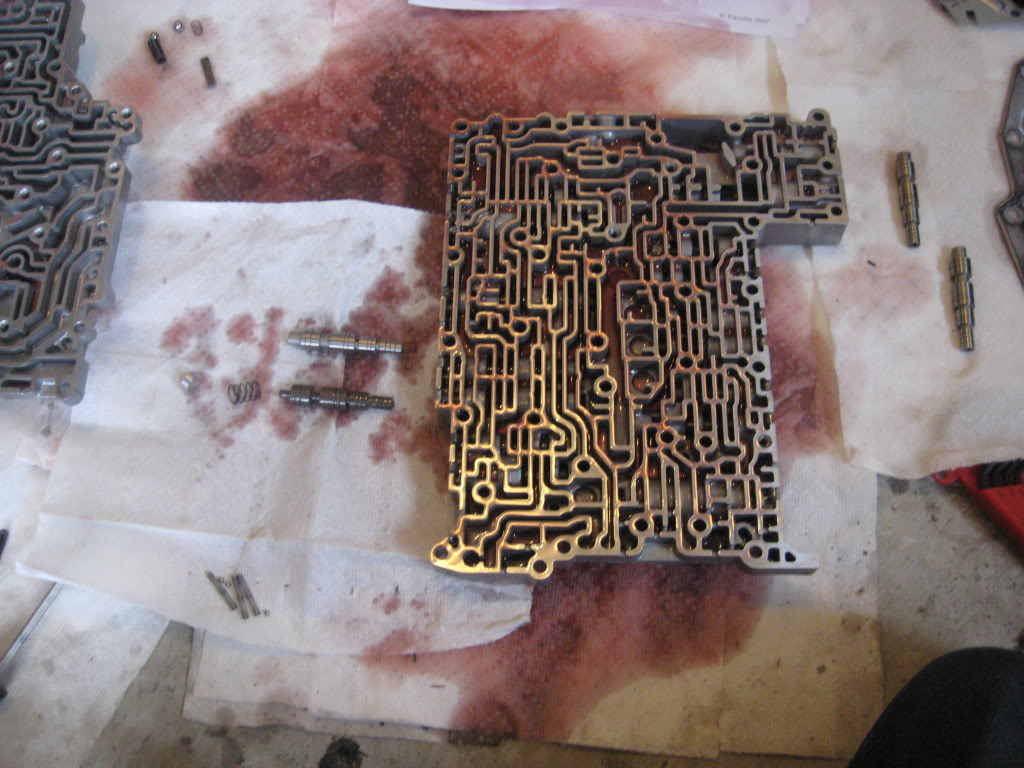
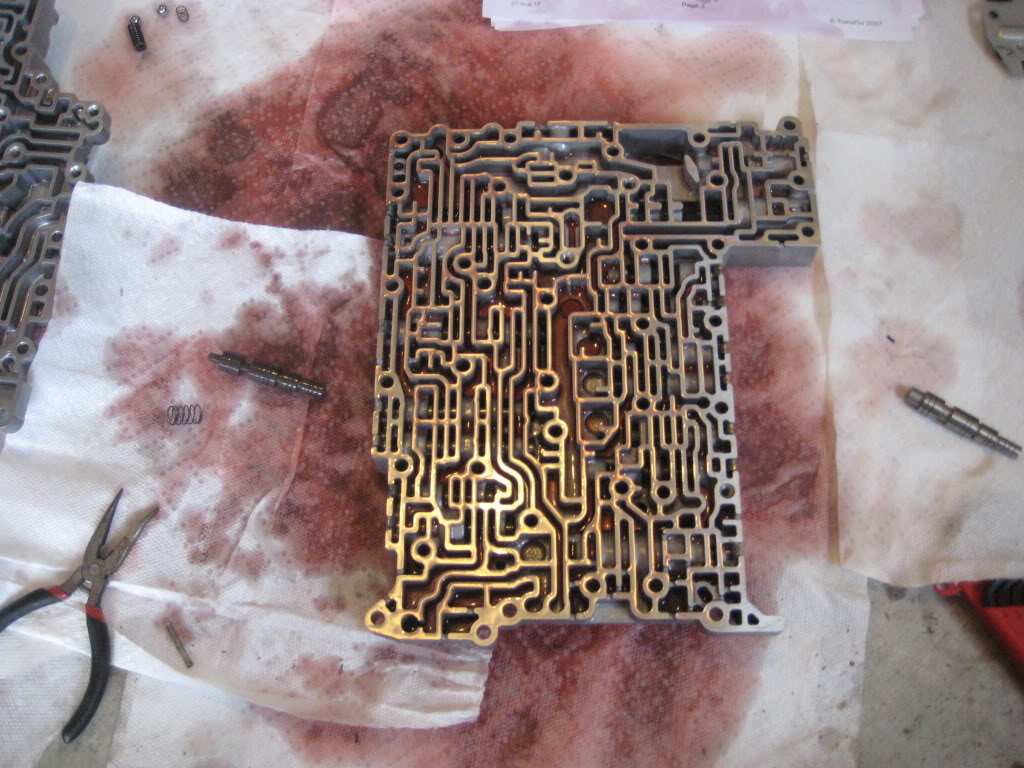
then lift the upper vb off WITH the separator plate so the ***** don't fall out of the upper .. flip over as an assembly and set down (no mods to upper)
only lower vb and separator plate get worked on
also .. take note where the ***** are in the lower vb section (yours may differ by VB)
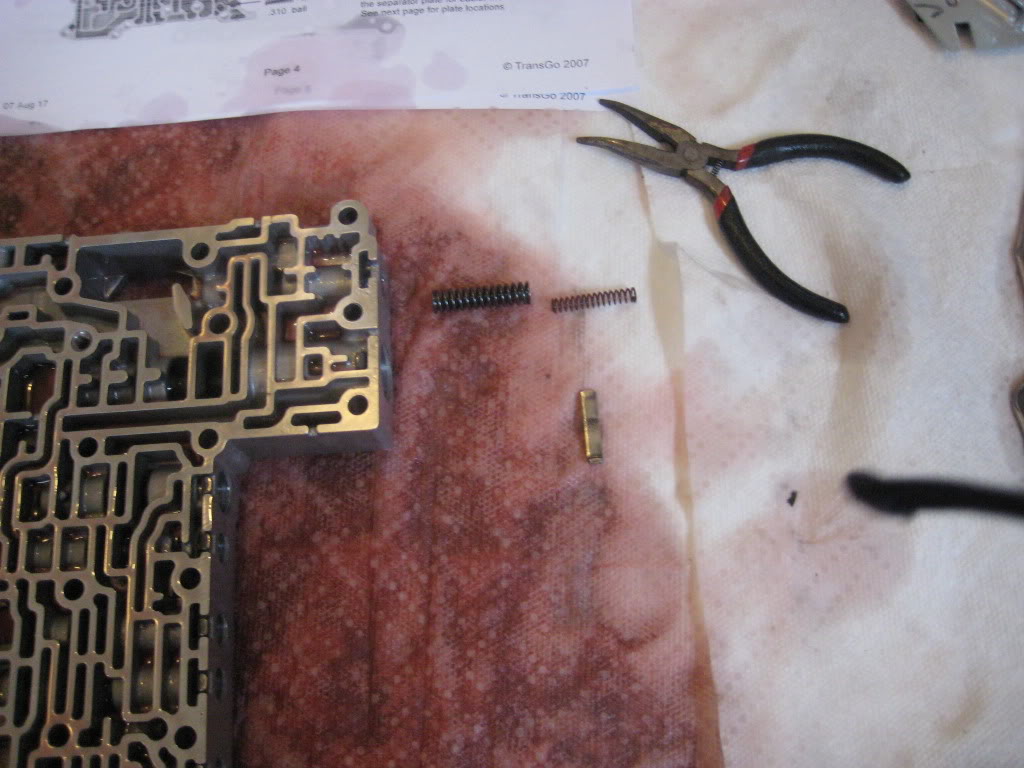
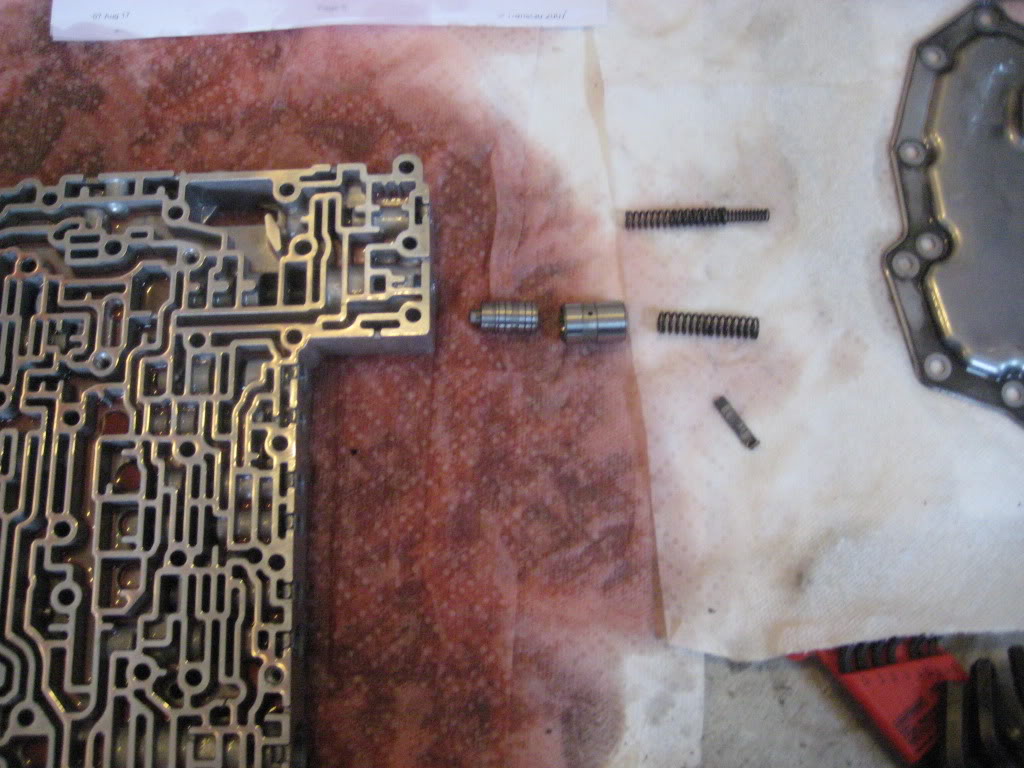
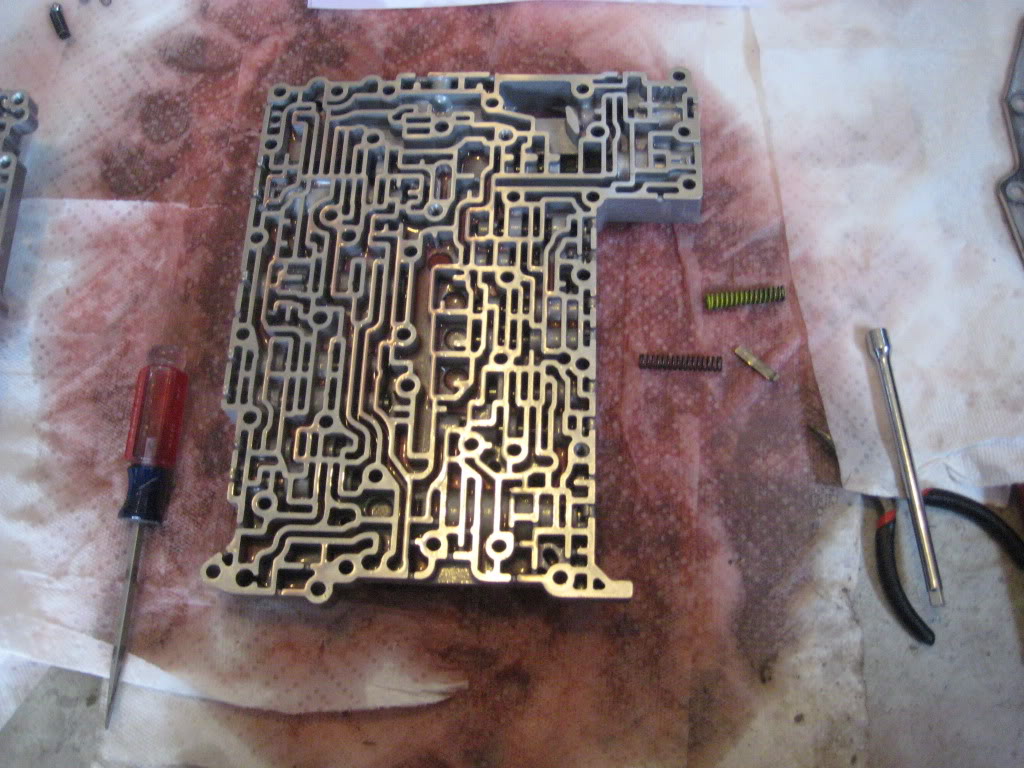
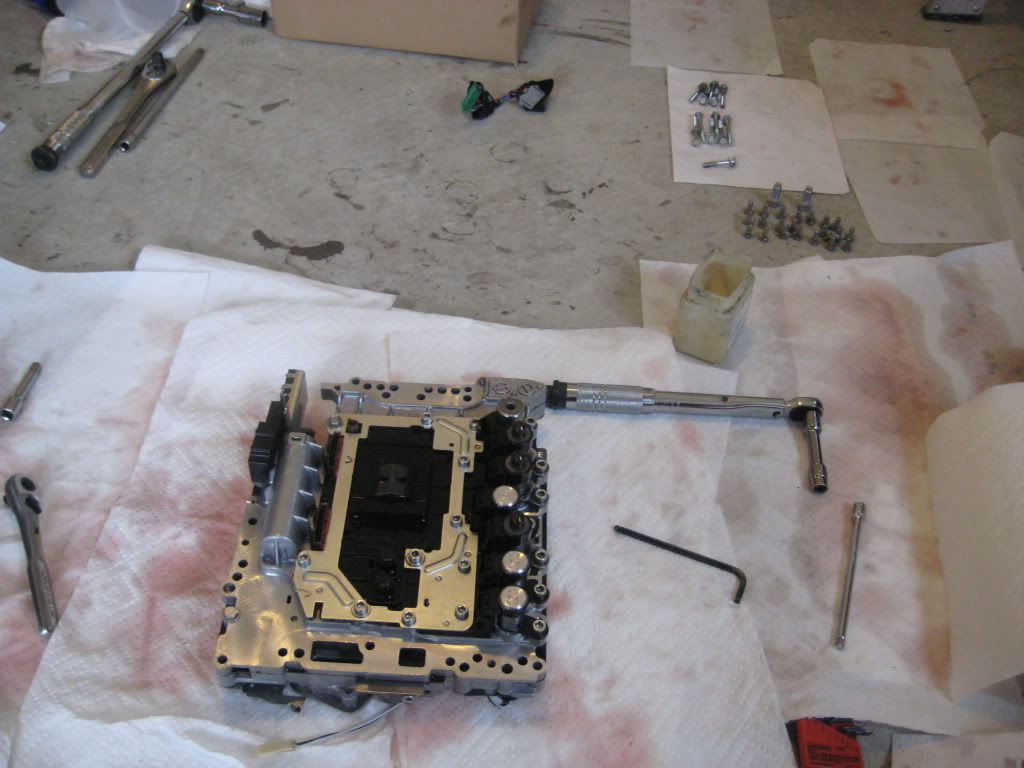
10) The fun part begins .. installing the kit .. take out the transgo vb install instructions and follow them for location and color of springs
DO ONE AT A TIME and double check everything
I used a piece of thick wire with a hook on the end to help push out the shims .. installing springs on left side is easy, right side are stiffer / harder
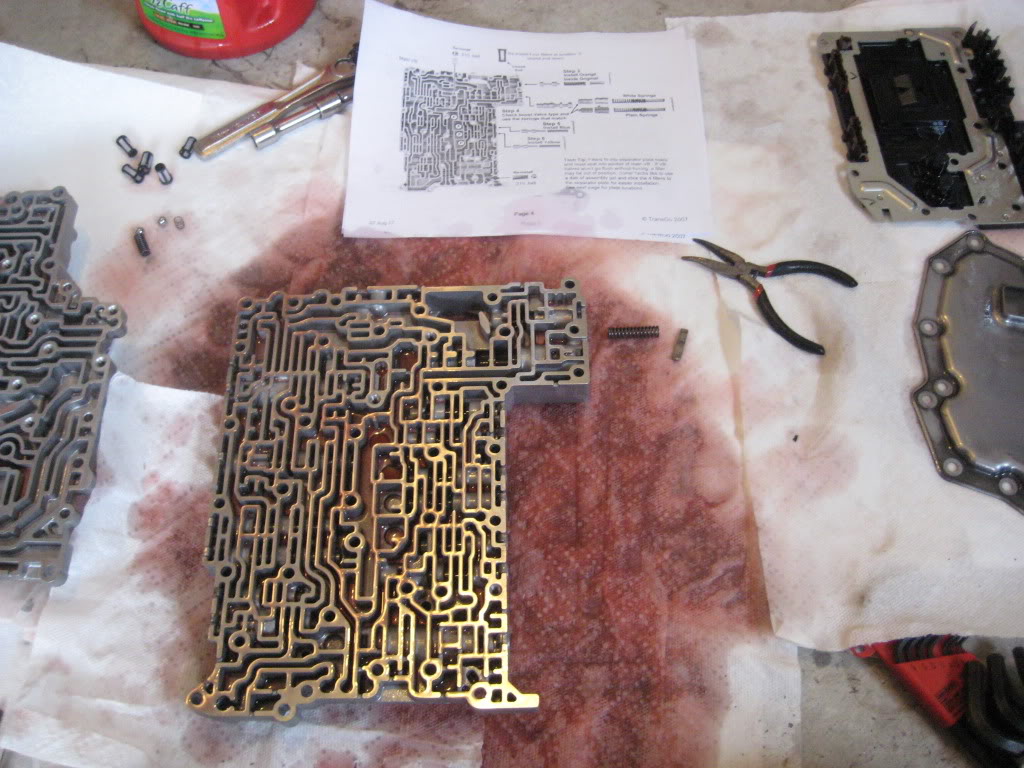

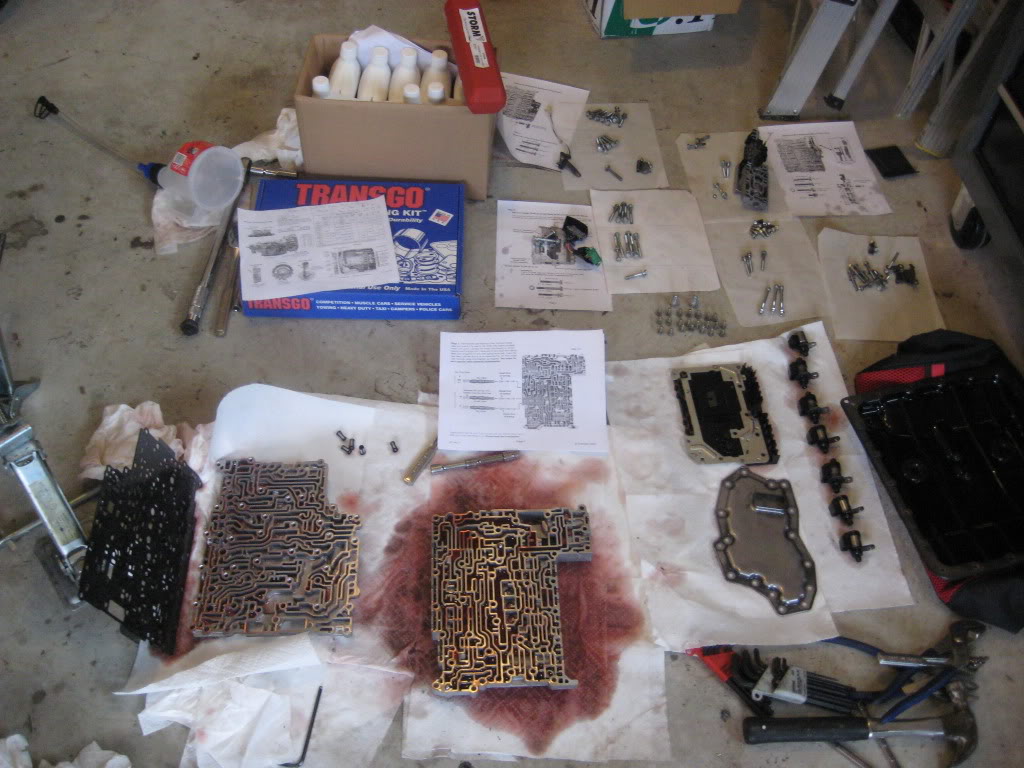
and your organized mess of parts should look like this now
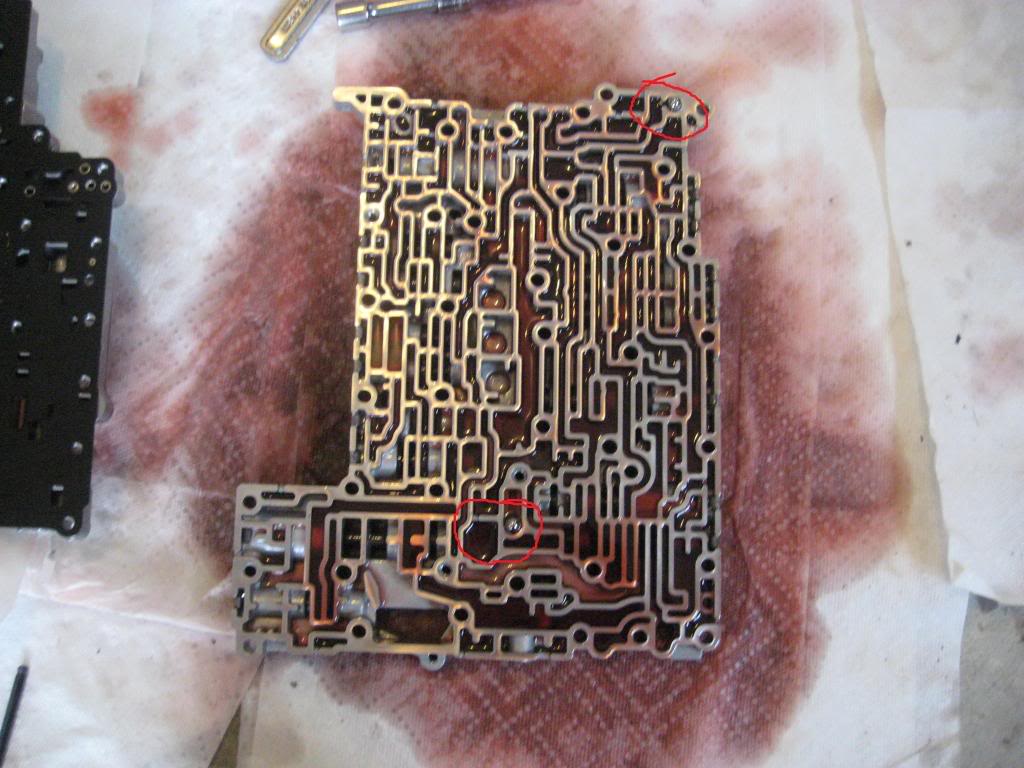
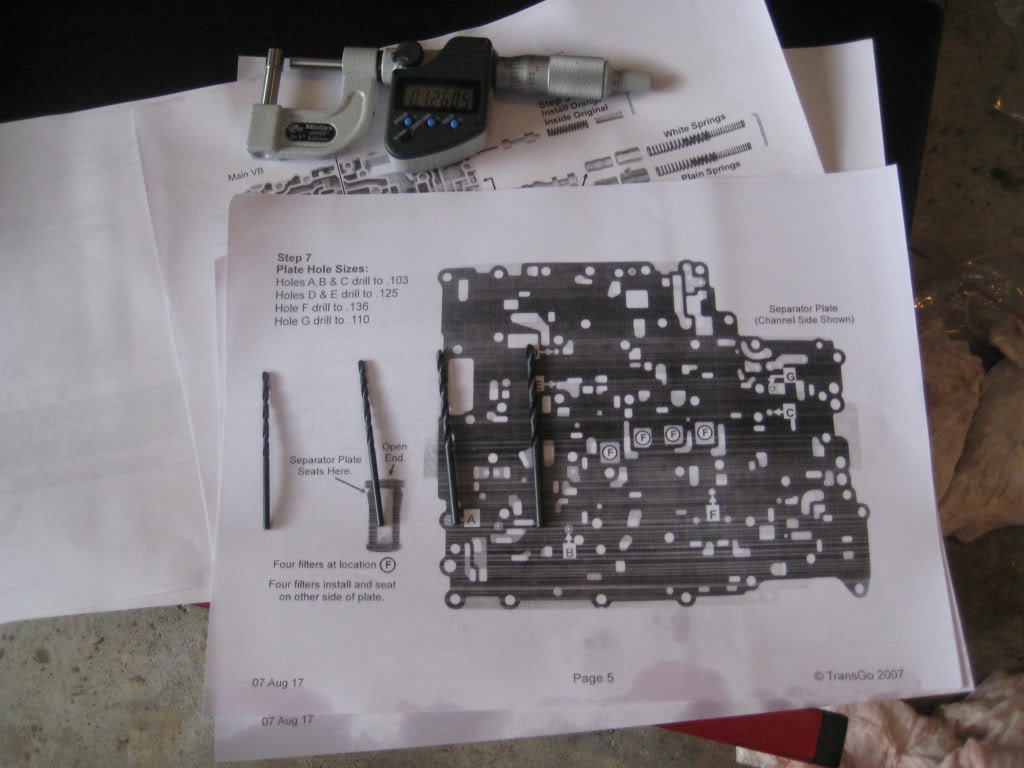
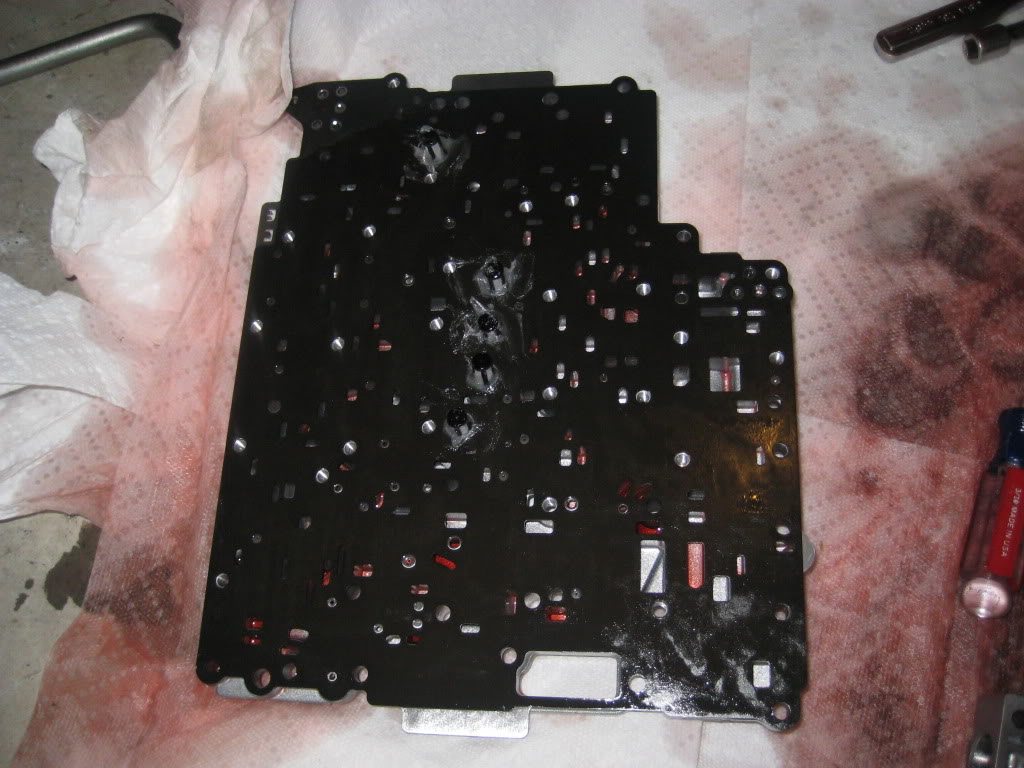
11) Measure each drill bit in the kit and / or order them from small to large .. then carefully drill out the seperator plate holes according to the instructions
BE VERY CAREFUL AND DOUBLE CHECK THE LOCATIONS BEFORE DRILLING
I noticed the holes are shiny that need to be drilled out .. if you locate a hole and it isnt shiny .. dont drill it out and check it again
12) Make sure the separator plate is clean of metal shavings, check all of the ***** in upper and lower VB (I put Vaseline on them to be safe and hold them) .. then Vaseline the filters onto the separator plate
carefully flip upper vb / separator plate over onto lower and make sure the filters stay in place and aligned
Torque to - 65 to 70 inch pounds
then start assembling reversal of the instructions .. make sure to put the bolts in the correct holes

13) Re-Install manual valve body, vb filter, temp sensor and relief ball / spring
NOTE - Everything torques to 65 to 70 INCH lb
Vaseline the ball to help keep it in place
14) Re-Install Electronics board, Soleniods (in order), and wiring
15) Tap the "tapered orfice" into the hole in the transmission before putting the valve body back in .. make sure it is below the surface
I used a 1/4" drive extension .. book says punch .. but either works
16) INSTALL VB
I got my brother to help since it is awkward to hold, hook up wires, align and bolt up
follow instructions for bolts, but make sure you get this metal stud in the little clip up in the tranny
17) bolt up the pan .. torque to 95 inch lb (service manual says 7.9 ft lb) .. then bolt the bracket for the o2 sensor wires back up
18) lower the car down and fill up the transmission (mine took just over 7 quarts) .. start engine, run through each gear P, R, N, D ... after 5 minutes check cold side of dipstick ..
once you get it right .. bolt the dipstick down and
DONE !!!
just hope it works .. take it for a drive .. be easy for a few miles and shifting through all gears a few times (get air out of vb)
then let it rip .. just watch out for telephone poles and ditches .. haha
it was raining when I finished .. every shift over 4K threw the car sideways and tires spinning
If anyone has any questions just shoot me a PM ..
EDIT - I reset the computer after the install .. just disconnect the battery cables for a minute or so .. after 100 miles the kit has seemed and I like it alot
I AM NOT responsible if you mess up your car, tranny, fingers, etc
this is just a tool to help someone decide if they want to do this mod themselves or pay someone
and if you do decide to do it yourself, this should help make the install go smoothly
............................................................ ......................................
Tools -
10mm, 14mm, 19mm sockets / 14mm wrench
drain pan
torque wrenches (ft lb for drain plug .. inch lb for everything else) - I had to buy inch lb torque wrench .. $40 @ napa
funnel
5mm allen head socket
stiff wire (use to help get shims out valve body)
dikes / pliers
flat screwdriver
punch or 1/4" drive extension (drive in tapered orfice)
light hammer
Supplies -
8 quarts NISSAN S-MATIC ATF (do not use anything else) $8.12 / quart with discount (work at dodge dealer) .. they wanted $18
two rolls of paper towel or shop towels
Transgo Valve Body Upgrade Kit $295 (really fast free shipping from forged performance .. also avail. @ GTM)
Vaseline or suitable assembly lube / grease (hold ***** in place)
Instructions -
Download both VB Removal and Transgo Install pdf files off GTM website
Start One Day Trial with transgo website and download three more files
(Study all and become familiar with the parts, bolts, etc before starting)
1) Jack car up and set on jack stands, then drain tranny fluid (4 quarts), re-install drain plug at 35 ft lb
2) Remove two bolts holding the bracket that 02 sensor wires mount to .. one on passenger side with 14mm wrench .. drivers side with socket .. then remove wire clip from bracket for easy install
unclip o2 sensor wires and push everything out of the way
3) Take 10mm bolts out of tranny pan and drop, drain, and put to the side (wont need it for a while)
there will be another quart or so in the pan
then you see this
4) Get out the instructions .. unhook the wires on the bottom .. then take out and label bolts according to the diagram (A, B, C, ETC) ... I used paper with letters on them to organize the bolts (or you could use bags)
get organized b/c there are ALOT of pieces to keep up with
NOTE - Unclip the two things circled in red before unbolting .. clip on side of the VB sucks when your holding the vb up .. haha
5) BE CAREFUL dropping the valve body .. there are wires you have to disconnect on top (around 6" of slack in them)
put a glove on or paper towel between your hand and the valve body .. this is where I cut my finger .. the pickup is razor sharp
after that little struggle .. you get this
go ahead and take a break b/c that was the "easy part" ..the harder part is next
6) Following the instructions for removing electronics / solenoids .. remove / label bolts and keep solenoids in order
7) Remove / Label filter bolts .. then remove the manual valve body and watch for the spring and ball inside
8) Remove Temp Sensor and Relief Ball & Spring
Around now you should have something that looks like this
9) Again follow the instructions to remove the upper to lower vb bolts .. and lower to upper
then lift the upper vb off WITH the separator plate so the ***** don't fall out of the upper .. flip over as an assembly and set down (no mods to upper)
only lower vb and separator plate get worked on
also .. take note where the ***** are in the lower vb section (yours may differ by VB)
10) The fun part begins .. installing the kit .. take out the transgo vb install instructions and follow them for location and color of springs
DO ONE AT A TIME and double check everything
I used a piece of thick wire with a hook on the end to help push out the shims .. installing springs on left side is easy, right side are stiffer / harder
and your organized mess of parts should look like this now
11) Measure each drill bit in the kit and / or order them from small to large .. then carefully drill out the seperator plate holes according to the instructions
BE VERY CAREFUL AND DOUBLE CHECK THE LOCATIONS BEFORE DRILLING
I noticed the holes are shiny that need to be drilled out .. if you locate a hole and it isnt shiny .. dont drill it out and check it again
12) Make sure the separator plate is clean of metal shavings, check all of the ***** in upper and lower VB (I put Vaseline on them to be safe and hold them) .. then Vaseline the filters onto the separator plate
carefully flip upper vb / separator plate over onto lower and make sure the filters stay in place and aligned
Torque to - 65 to 70 inch pounds
then start assembling reversal of the instructions .. make sure to put the bolts in the correct holes
13) Re-Install manual valve body, vb filter, temp sensor and relief ball / spring
NOTE - Everything torques to 65 to 70 INCH lb
Vaseline the ball to help keep it in place
14) Re-Install Electronics board, Soleniods (in order), and wiring
15) Tap the "tapered orfice" into the hole in the transmission before putting the valve body back in .. make sure it is below the surface
I used a 1/4" drive extension .. book says punch .. but either works
16) INSTALL VB
I got my brother to help since it is awkward to hold, hook up wires, align and bolt up
follow instructions for bolts, but make sure you get this metal stud in the little clip up in the tranny
17) bolt up the pan .. torque to 95 inch lb (service manual says 7.9 ft lb) .. then bolt the bracket for the o2 sensor wires back up
18) lower the car down and fill up the transmission (mine took just over 7 quarts) .. start engine, run through each gear P, R, N, D ... after 5 minutes check cold side of dipstick ..
once you get it right .. bolt the dipstick down and
DONE !!!
just hope it works .. take it for a drive .. be easy for a few miles and shifting through all gears a few times (get air out of vb)
then let it rip .. just watch out for telephone poles and ditches .. haha
it was raining when I finished .. every shift over 4K threw the car sideways and tires spinning
If anyone has any questions just shoot me a PM ..
EDIT - I reset the computer after the install .. just disconnect the battery cables for a minute or so .. after 100 miles the kit has seemed and I like it alot
Last edited by Adrians07Z; 11-02-2009 at 12:00 PM.

The following users liked this post:
260DET (07-03-2020)
 10-31-2009, 05:42 PM
#3
Registered User
Thread Starter
the transgo kit was $295 w/ free shipping from forged performance
guess I need to add the prices .. real quick
gotta go through and check stuff too b/c I just finished the diy
the tein s-techs are around .5 to .75 inch drop .. looks good, but not too low to hit stuff
guess I need to add the prices .. real quick
gotta go through and check stuff too b/c I just finished the diy
the tein s-techs are around .5 to .75 inch drop .. looks good, but not too low to hit stuff
Last edited by Adrians07Z; 10-31-2009 at 05:53 PM.
 10-31-2009, 06:30 PM
#5
Registered User
Thread Starter


Trending Topics
11-01-2009, 06:52 PM
#8
Registered User
Thread Starter
yes .. the transgo kit will work on every 5AT 350z (03-08)
the only difference will be slight differences in locations of check ***** and some other things .. they are covered in the instructions ..
my 07 vb was slightly different with the two check ***** in the lower vb sections, and the relief ball location
I believe there are 3 different vb's .. 03-04, 05-06, 07-08
all use same kit and instructions (major differences are covered in the instructions)
Last edited by Adrians07Z; 11-01-2009 at 06:55 PM.

 11-02-2009, 11:57 AM
#10
Registered User
Thread Starter
I got off work early today .. so made a short video on the way home .. traffic sucked or I would of got a longer one 
but for now this should help a little .. this is after 100 miles with the kit .. computer was reset with the kit .. that reminds me I need to add that to the DIY
this is turning right onto a highway .. rolled out then got in it .. if you turn the volume up you can hear the tires chirp
stock 07 HR w/ good stock rear tires .. only mod would be k&n filters .. but doubt they did anything
Last edited by Adrians07Z; 11-02-2009 at 12:05 PM.
11-02-2009, 06:27 PM
#11
Registered User
Thread Starter
 11-02-2009, 07:13 PM
#14
 11-03-2009, 11:56 AM
#15
Registered User
Thread Starter
stillens upgrade .. they only do it
the transgo .. you can either buy the kit and do it yourself ($295)
or pay Forged Performance or GTM around $800 to install it
the transgo .. you can either buy the kit and do it yourself ($295)
or pay Forged Performance or GTM around $800 to install it
11-04-2009, 01:00 AM
#16

though it looks pretty involving, Im pretty sure I could ahve done it myself now that i have seen this. Too late now since I already had a shop do it... Ohhhh well
But this is definitely an excellent upgrade! Man...I really want to take it apart and check my VB though. My 4-5 shift is very sluggish... All the others are lightning quick.
But this is definitely an excellent upgrade! Man...I really want to take it apart and check my VB though. My 4-5 shift is very sluggish... All the others are lightning quick.
11-04-2009, 02:30 PM
#17
Registered User
Thread Starter
 .. dont know if the 4-5 shift is changed .. really never get the chance to be on it hard enough to go that fast .. haha
 I'm lucky to be in it long enough to bark 3rd
11-04-2009, 04:39 PM
#18
Registered User

Join Date: Aug 2007
Location: Houston, Tx
Posts: 12
Likes: 0
Received 0 Likes
on
0 Posts
u didnt need to remove any electronics, just leave that side of the vb on an old pillow and careful not to ding the solenoids. saves u at least 30 mins of work. heres the installationon my truck, we have the same transmission  http://www.youtube.com/watch?v=KzHFSh1zfQQ from 1st to 2nd it barks the tire (turn upthe volume also on 3rd it hits hard as well but since im too heavy it wont chirp lol
http://www.youtube.com/watch?v=KzHFSh1zfQQ from 1st to 2nd it barks the tire (turn upthe volume also on 3rd it hits hard as well but since im too heavy it wont chirp lol
Last edited by kha4079; 11-04-2009 at 04:42 PM.
11-04-2009, 04:46 PM
#19
Registered User
Thread Starter
yea .. figured I didn't "have" to
but really all it was is a few allen head bolts .. the electronics "board" then the solenoids pull out
didn't take long to take the electronics off .. most of the time was spent jacking the car up, installing the kit (springs and drilling holes), then filling it all back up
but really all it was is a few allen head bolts .. the electronics "board" then the solenoids pull out
didn't take long to take the electronics off .. most of the time was spent jacking the car up, installing the kit (springs and drilling holes), then filling it all back up
