LS1 Drift Build 'Nuff Said'


 07-28-2011, 07:30 AM
#23

Thanks everyone for the kind words. This is why I do it, to help spread good info for our community. So thanks guys
Thanks. I like where ur mind is at. I will have some black krinkle eliminates along with some other goodies.
Thanks bro. Glad I can help and thanks for ur LS write up. And yup love me some DogFish head.
I was but. I have plans of stroking and twin turboing this motor. Later and if it blows I can replace it a little easier. And got a deal on this motor.
Thanks bro. Glad u like the beer idea. Wanted to do something different. And I will hit u up for sure bro. Thanks
That was the whole idea of this build thread to help out any one that plans to do this build. The price can change between person on how much they want to spend. I think I went the high route. Lol
Sorry not me. I think u are thinking of Kar. He had a white Z that copied my stlye and then painted it that dark blue color and rocking those Rotiforms. He had a Supra and his dad has a GTR.
Thanks bro. I have something up my sleeve for my throttle cable and gas pedal. But I will hit u up about injectors. What size are they?
Thanks guys again. Just to let u guys know I am way head of these pics. Wanted this way so you guys would not have to wait for pics.
Sorry not me. I think u are thinking of Kar. He had a white Z that copied my stlye and then painted it that dark blue color and rocking those Rotiforms. He had a Supra and his dad has a GTR.
Thanks guys again. Just to let u guys know I am way head of these pics. Wanted this way so you guys would not have to wait for pics.
07-28-2011, 09:18 AM
#24
Registered User
iTrader: (3)

Join Date: Oct 2007
Location: san antonio,tx
Posts: 1,520
Likes: 0
Received 0 Likes
on
0 Posts

 07-31-2011, 07:27 PM
#29
Okay folks here I am with week 2 update.. I plan on updating every Sunday...
STAGE 1: Phase 2 'Cam/Pulley Install'
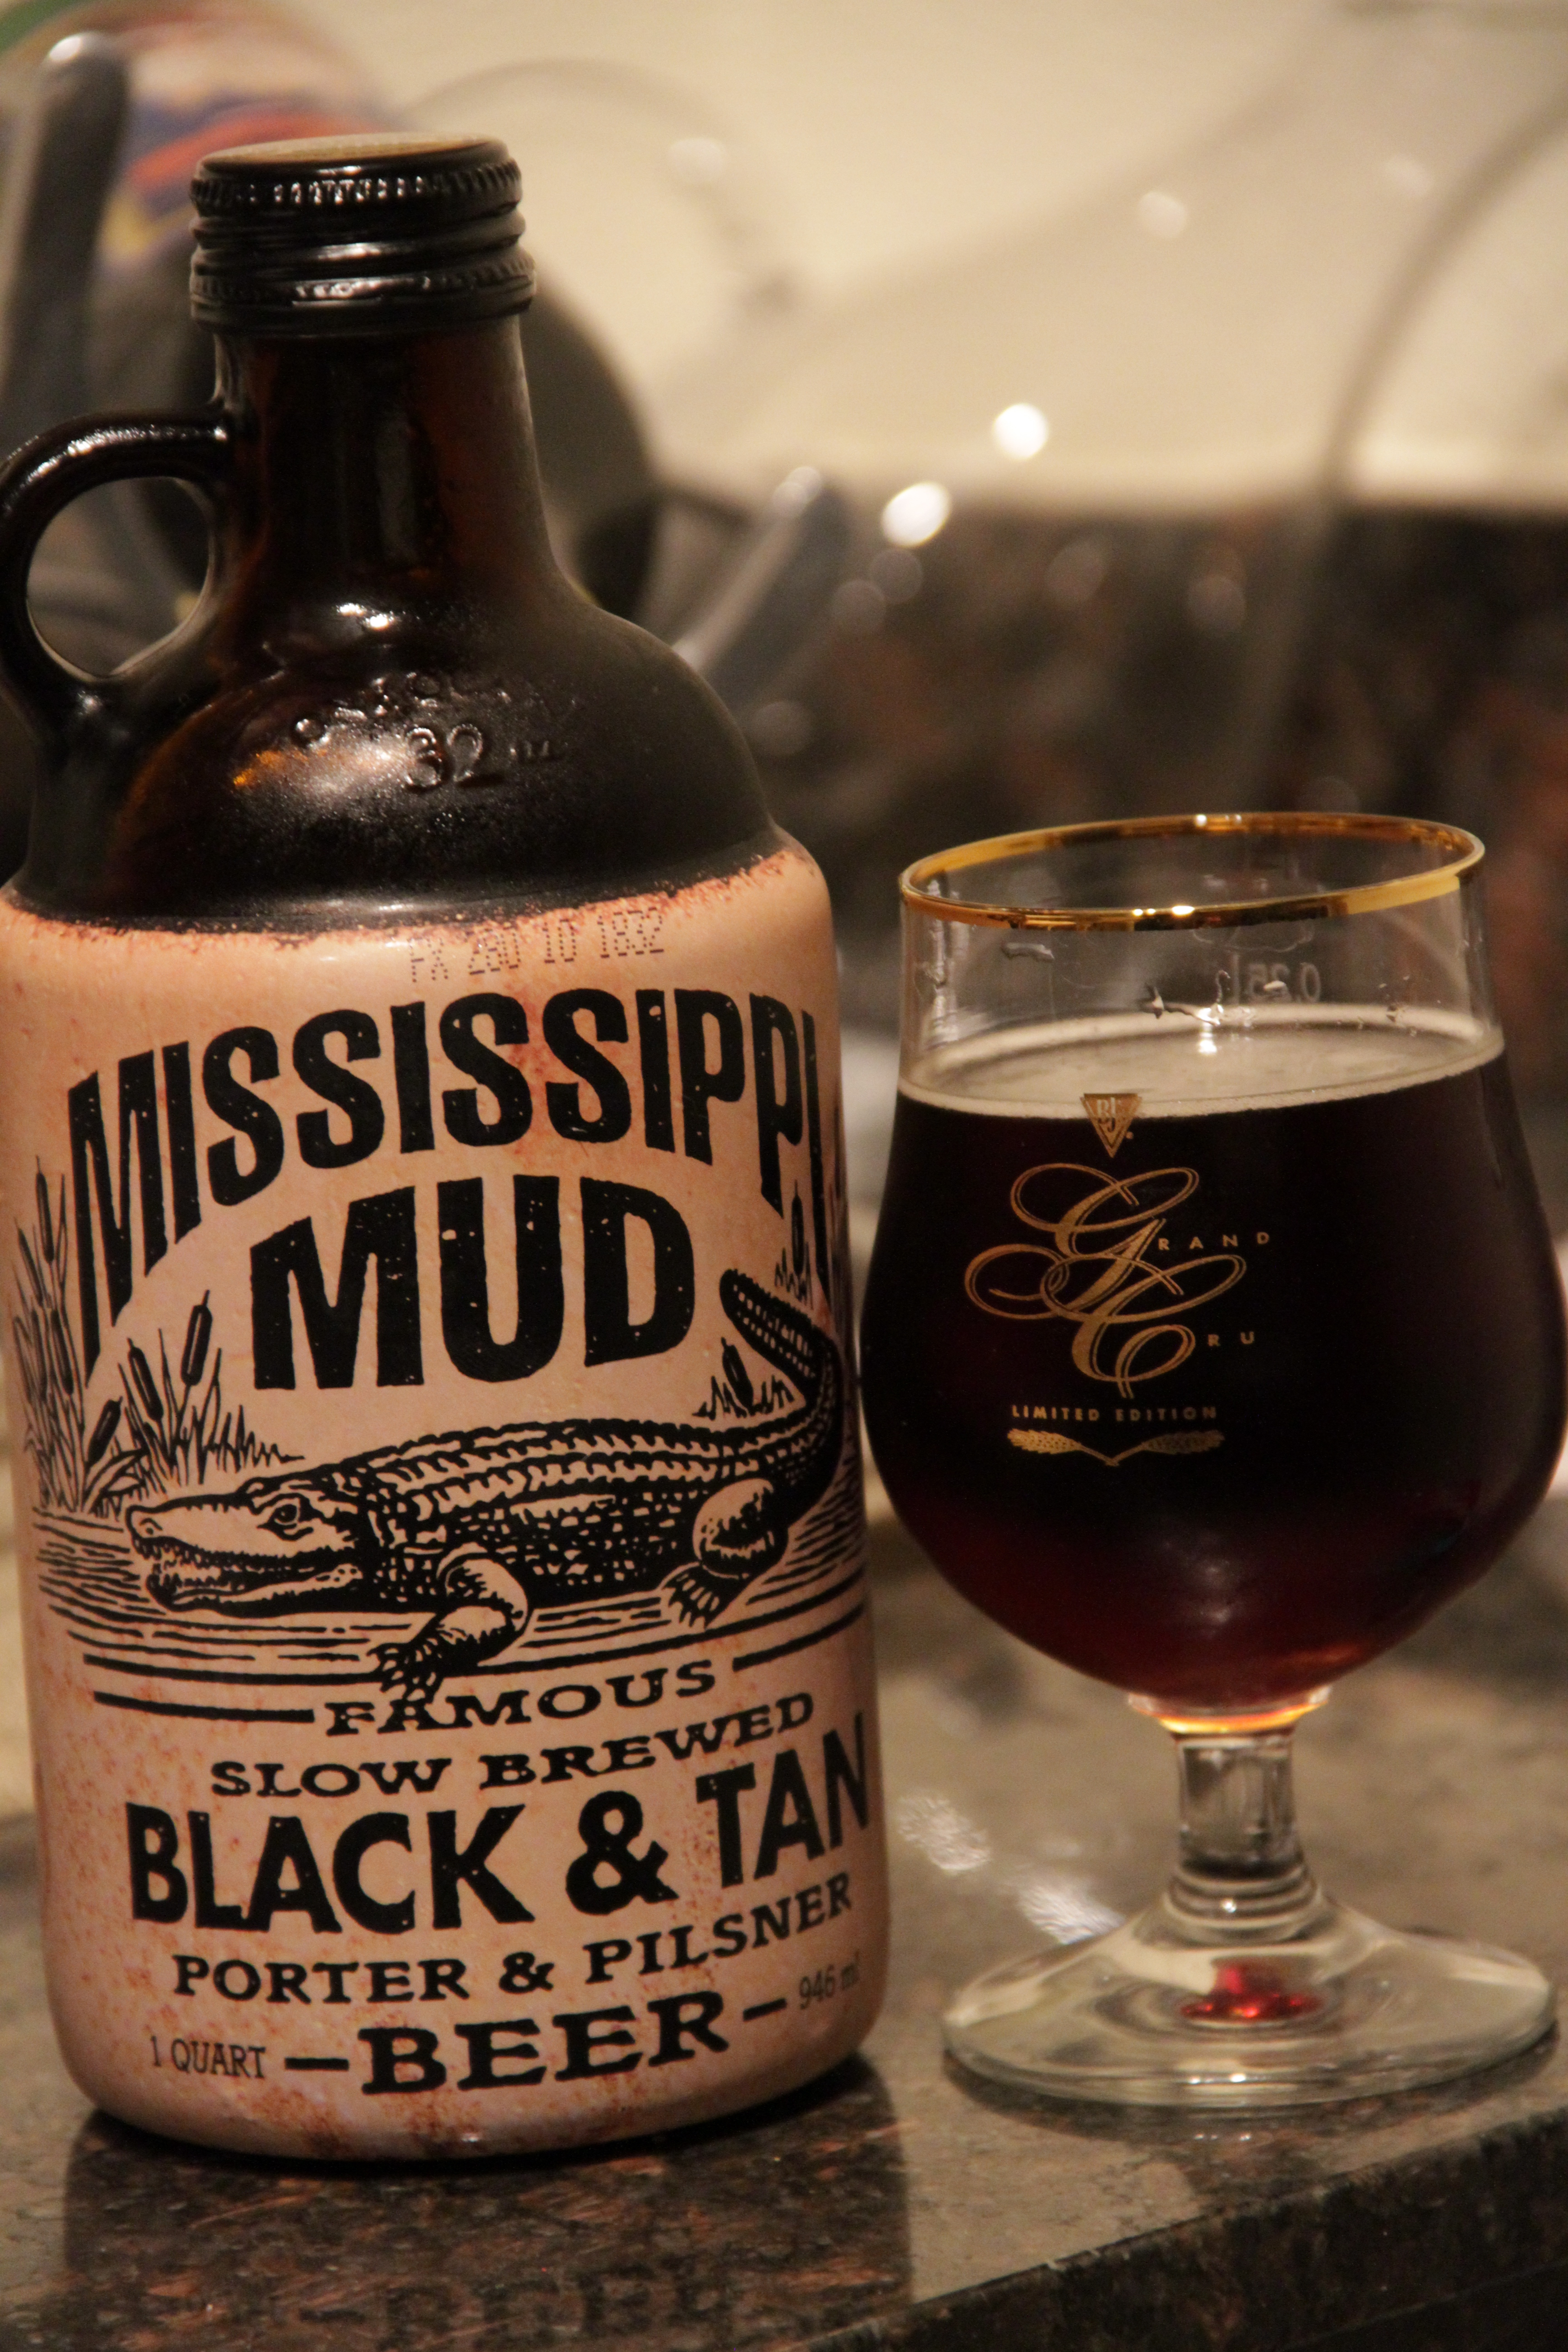
Lets start this off with the Beer of the week.. We have here folks 'Mississippi Mud' Its a Black & Tan beer which has a little kick to it.. I also love the bottle it comes in, makes me feel like I should be sitting on a porch throwing meat to alligators..lol
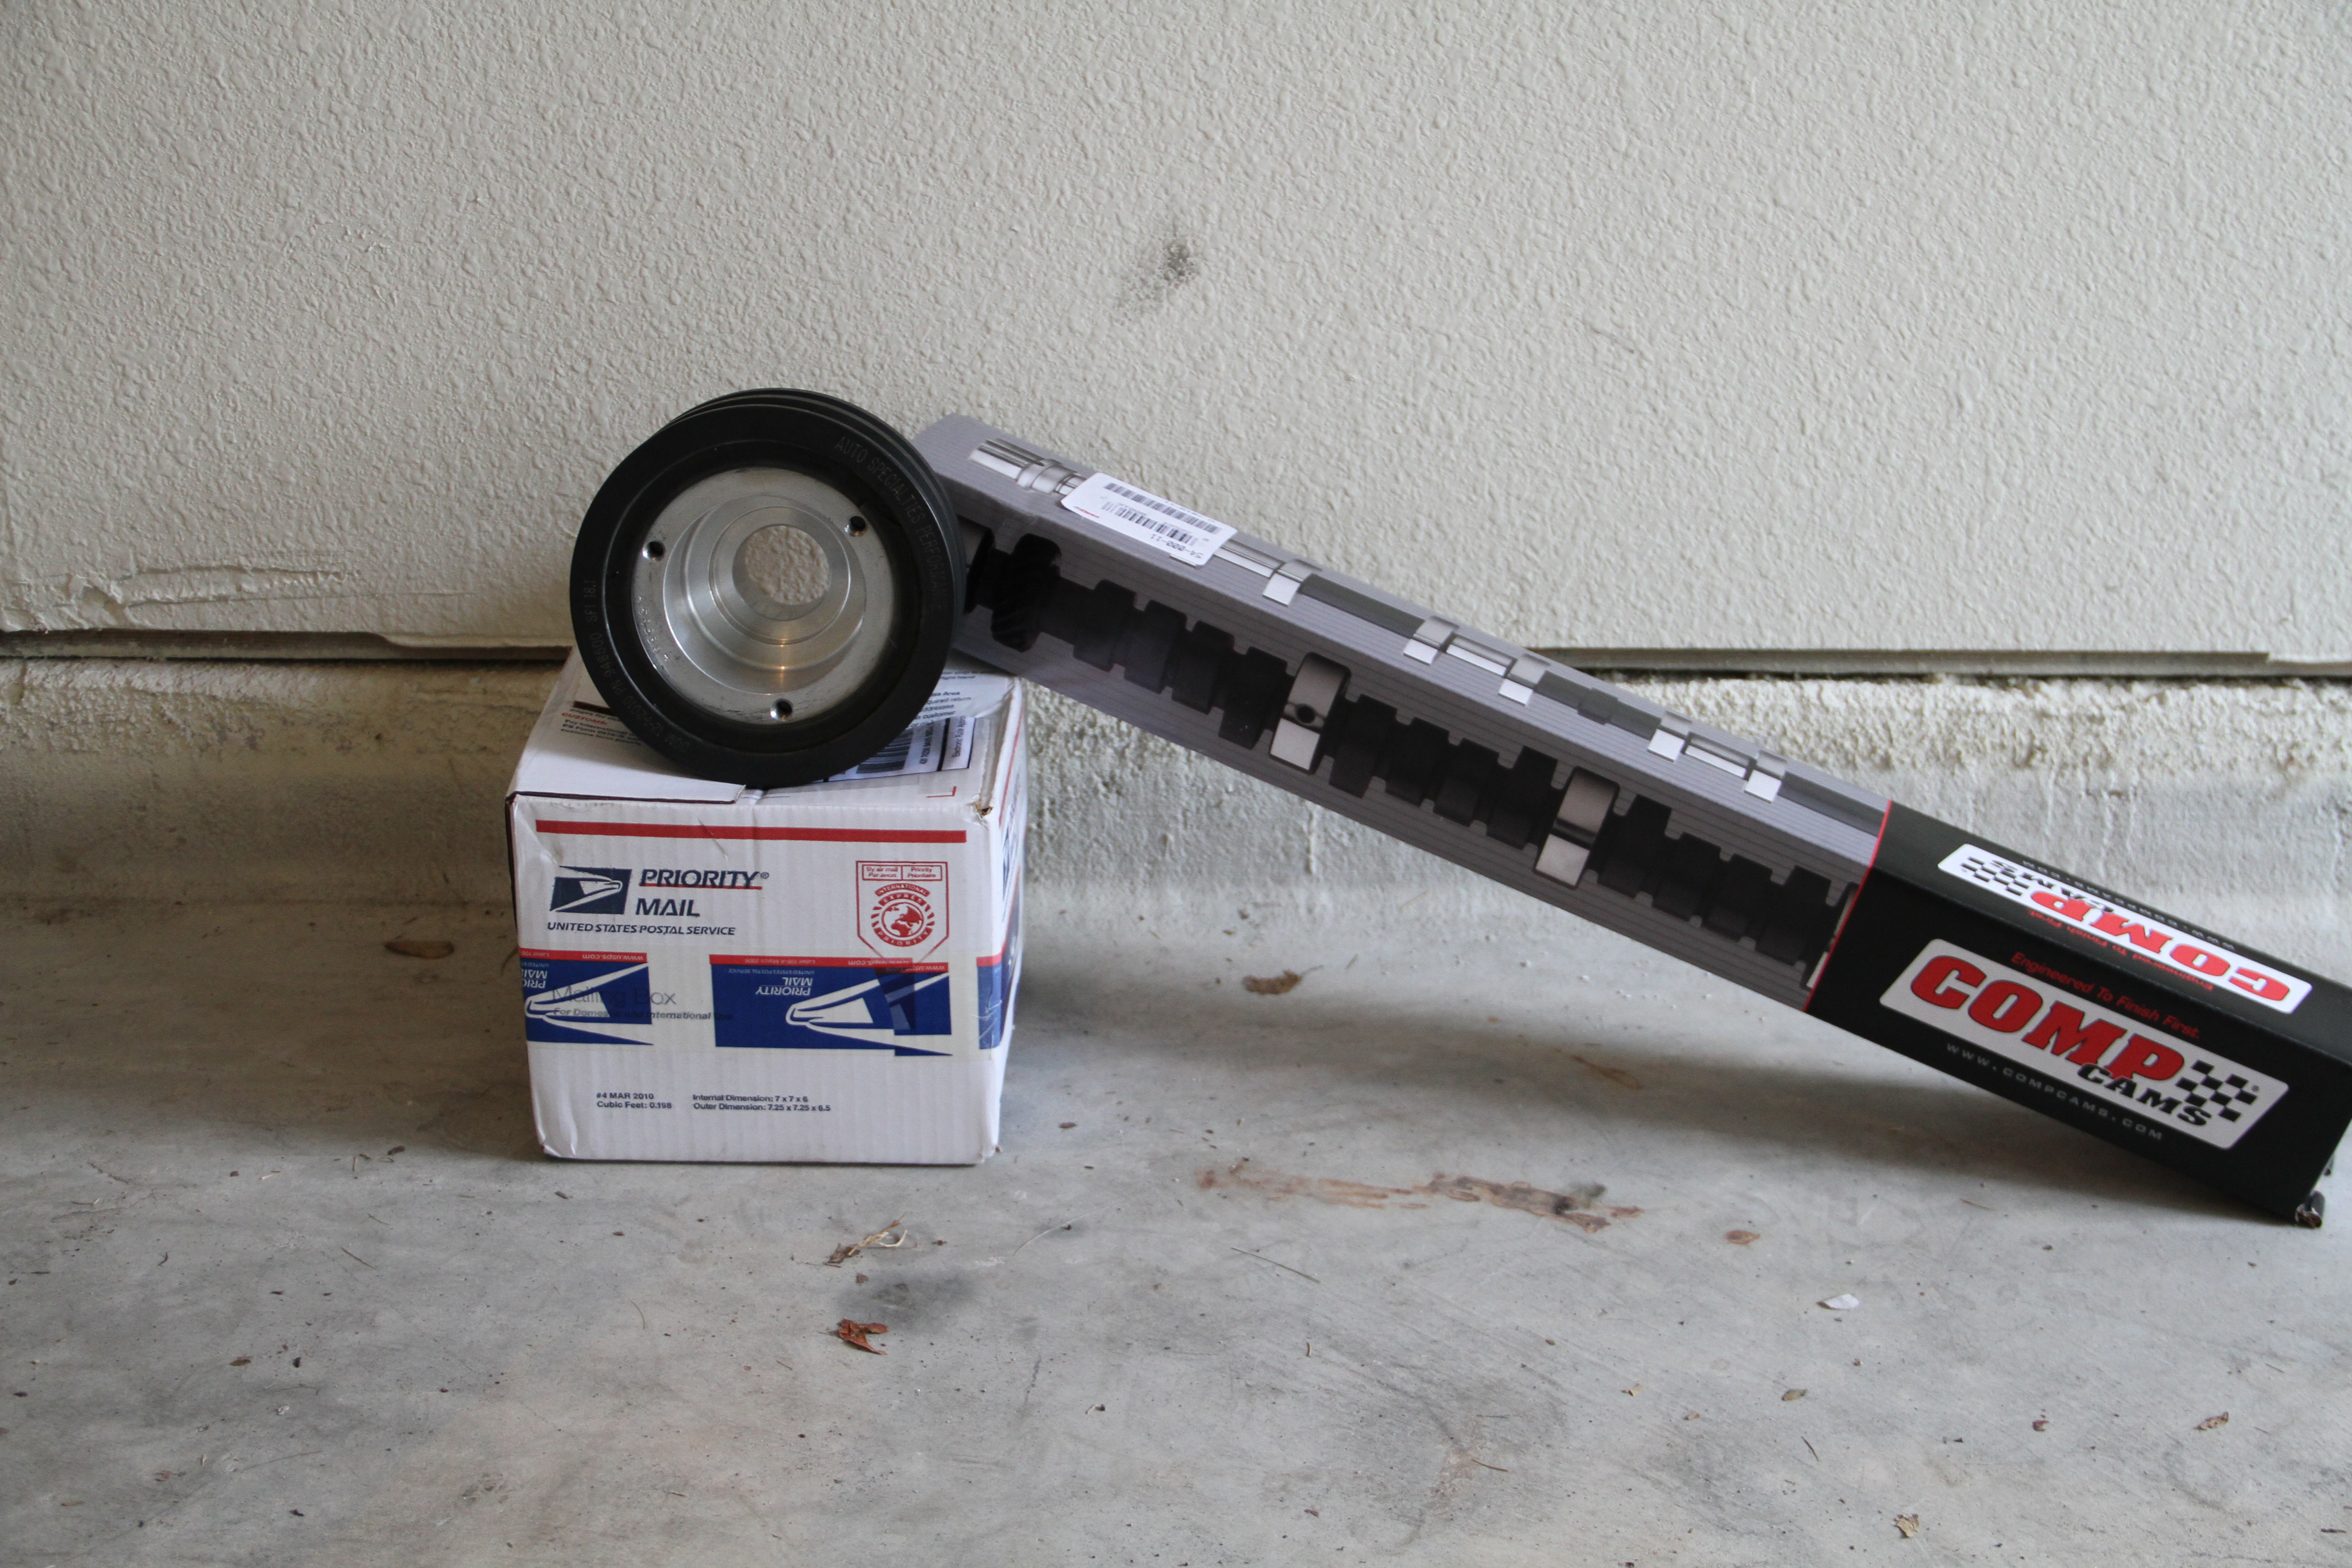
Okay what I am installing today is a MS4 Cam from Texas Speed Shop and a ASP Harmonic Balancer. Now I bought the the Texas Speed Shop Camshaft package that comes with a Texas Speed Hardened Chromoly Pushrods and Dual Valve Sprigs.. I will install those later..
MS4 CamShaft Package = $699.99
ASP Harmonic Balancer = $214.99
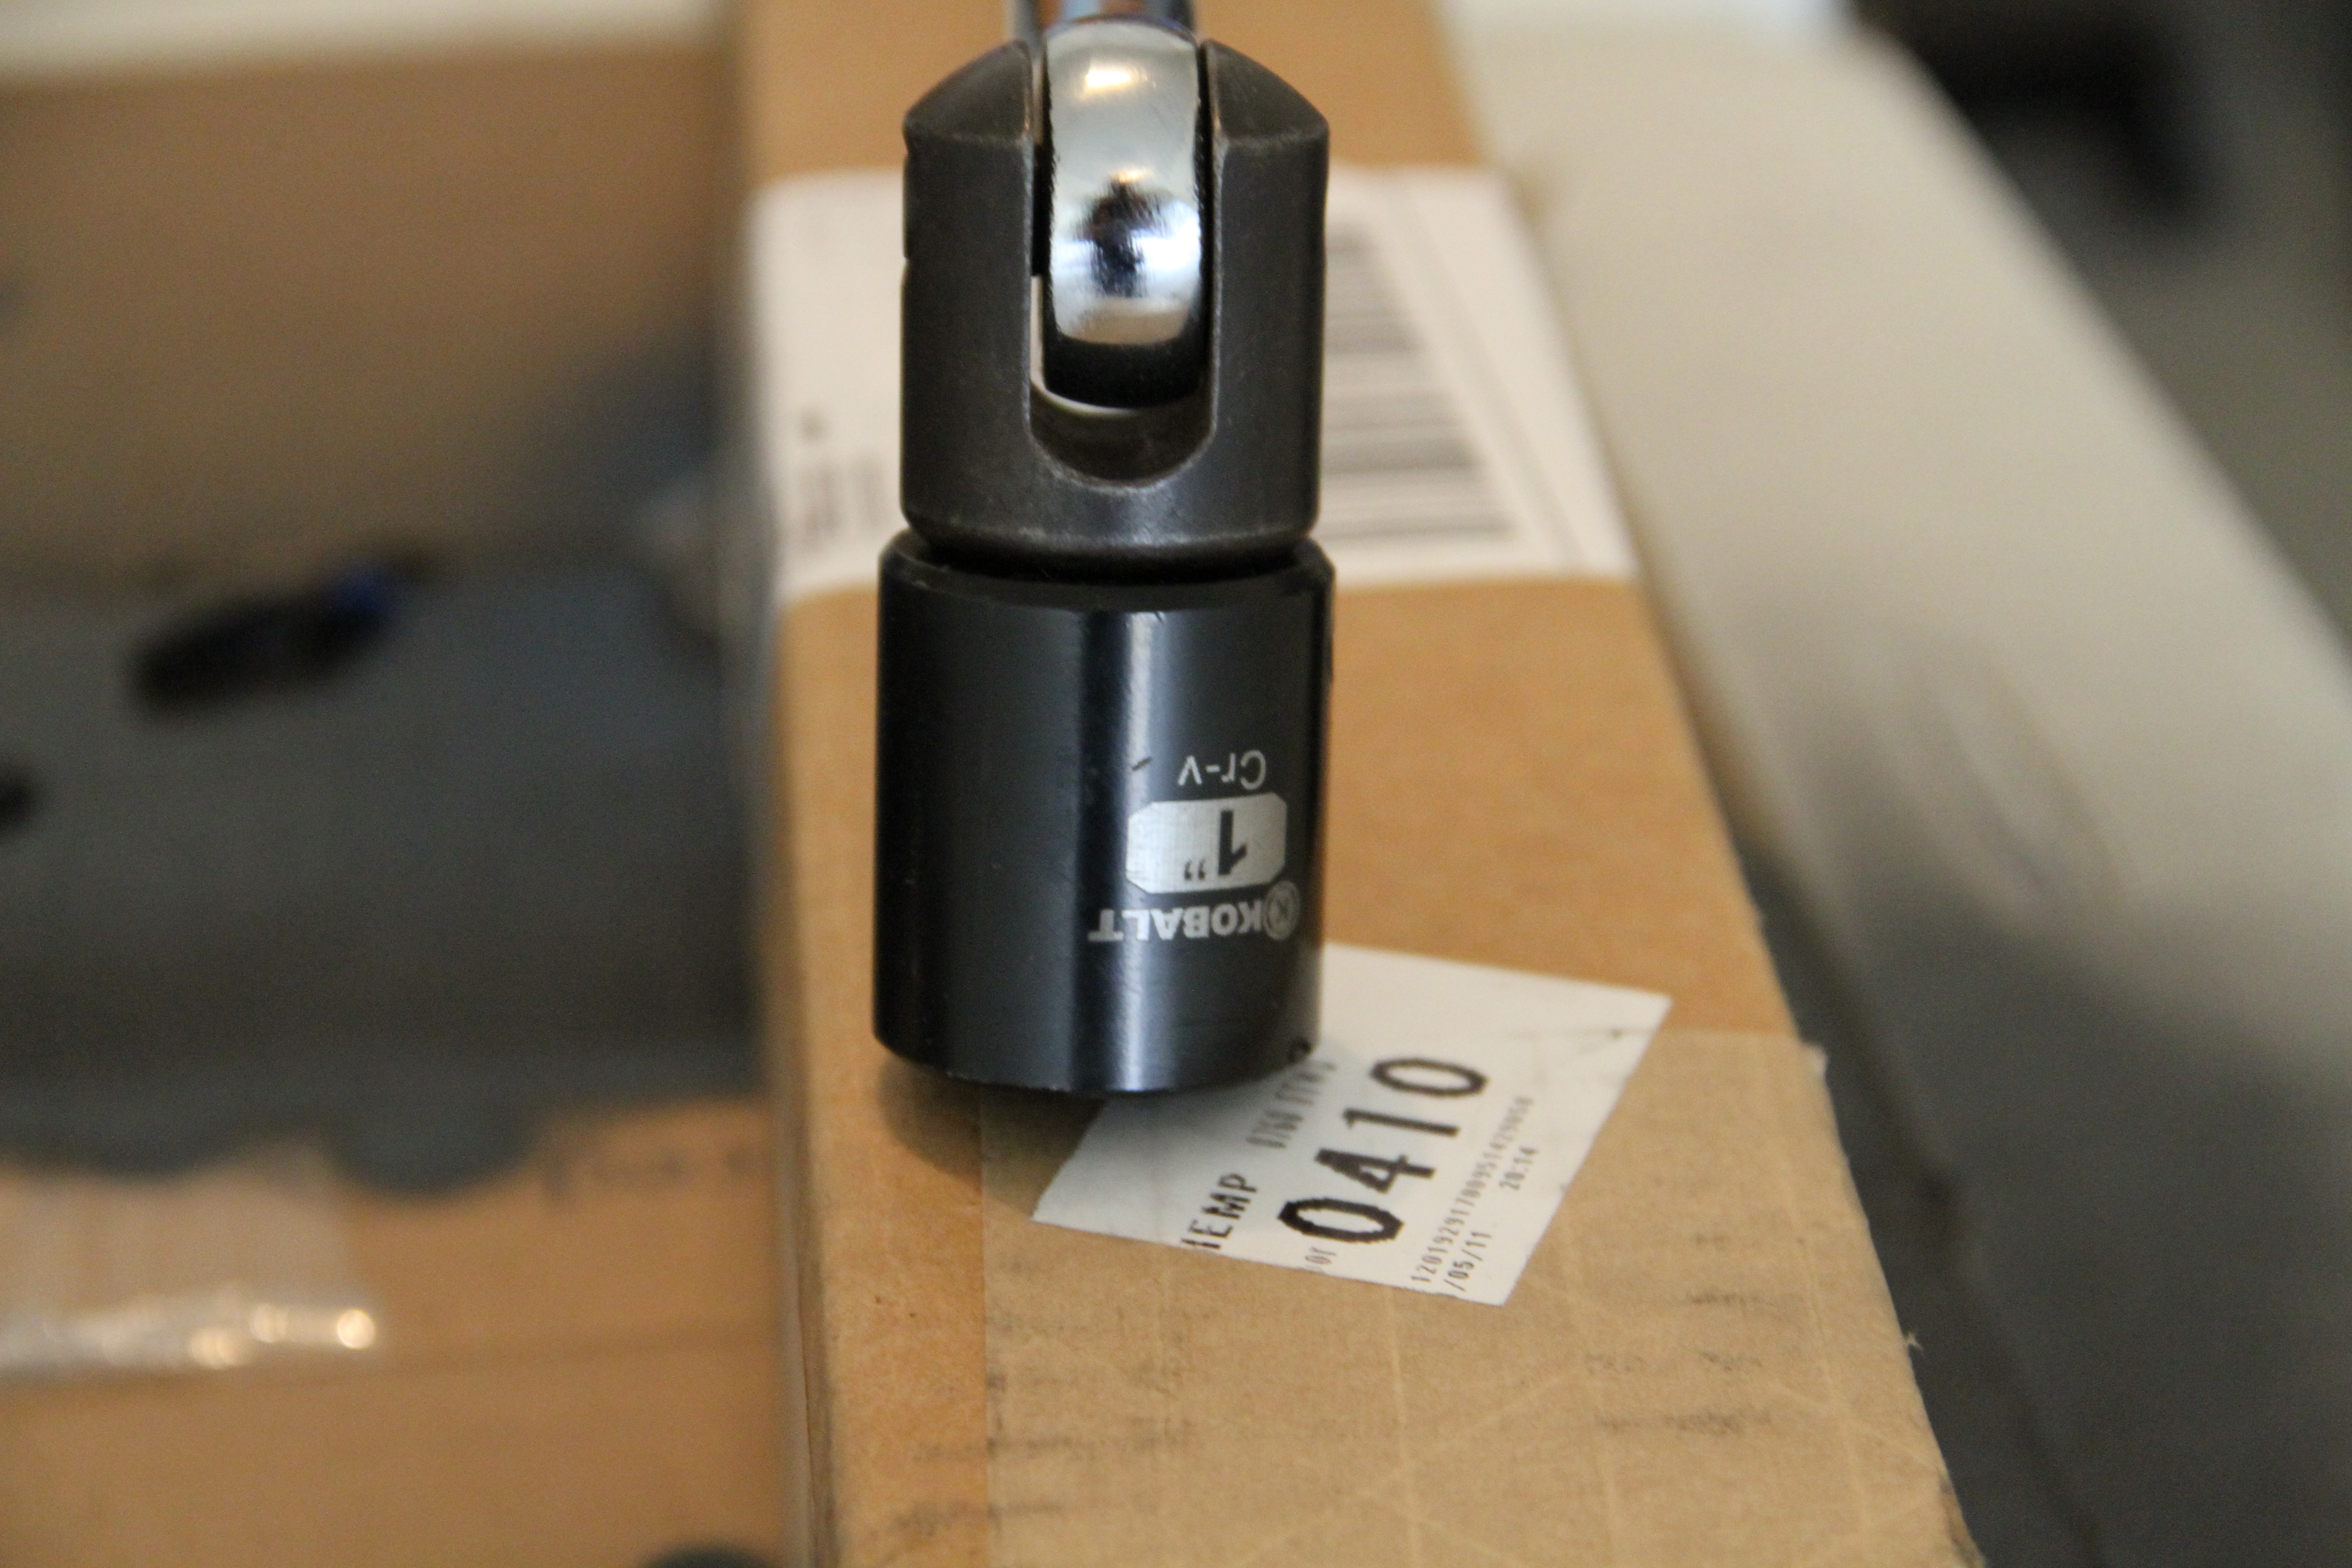
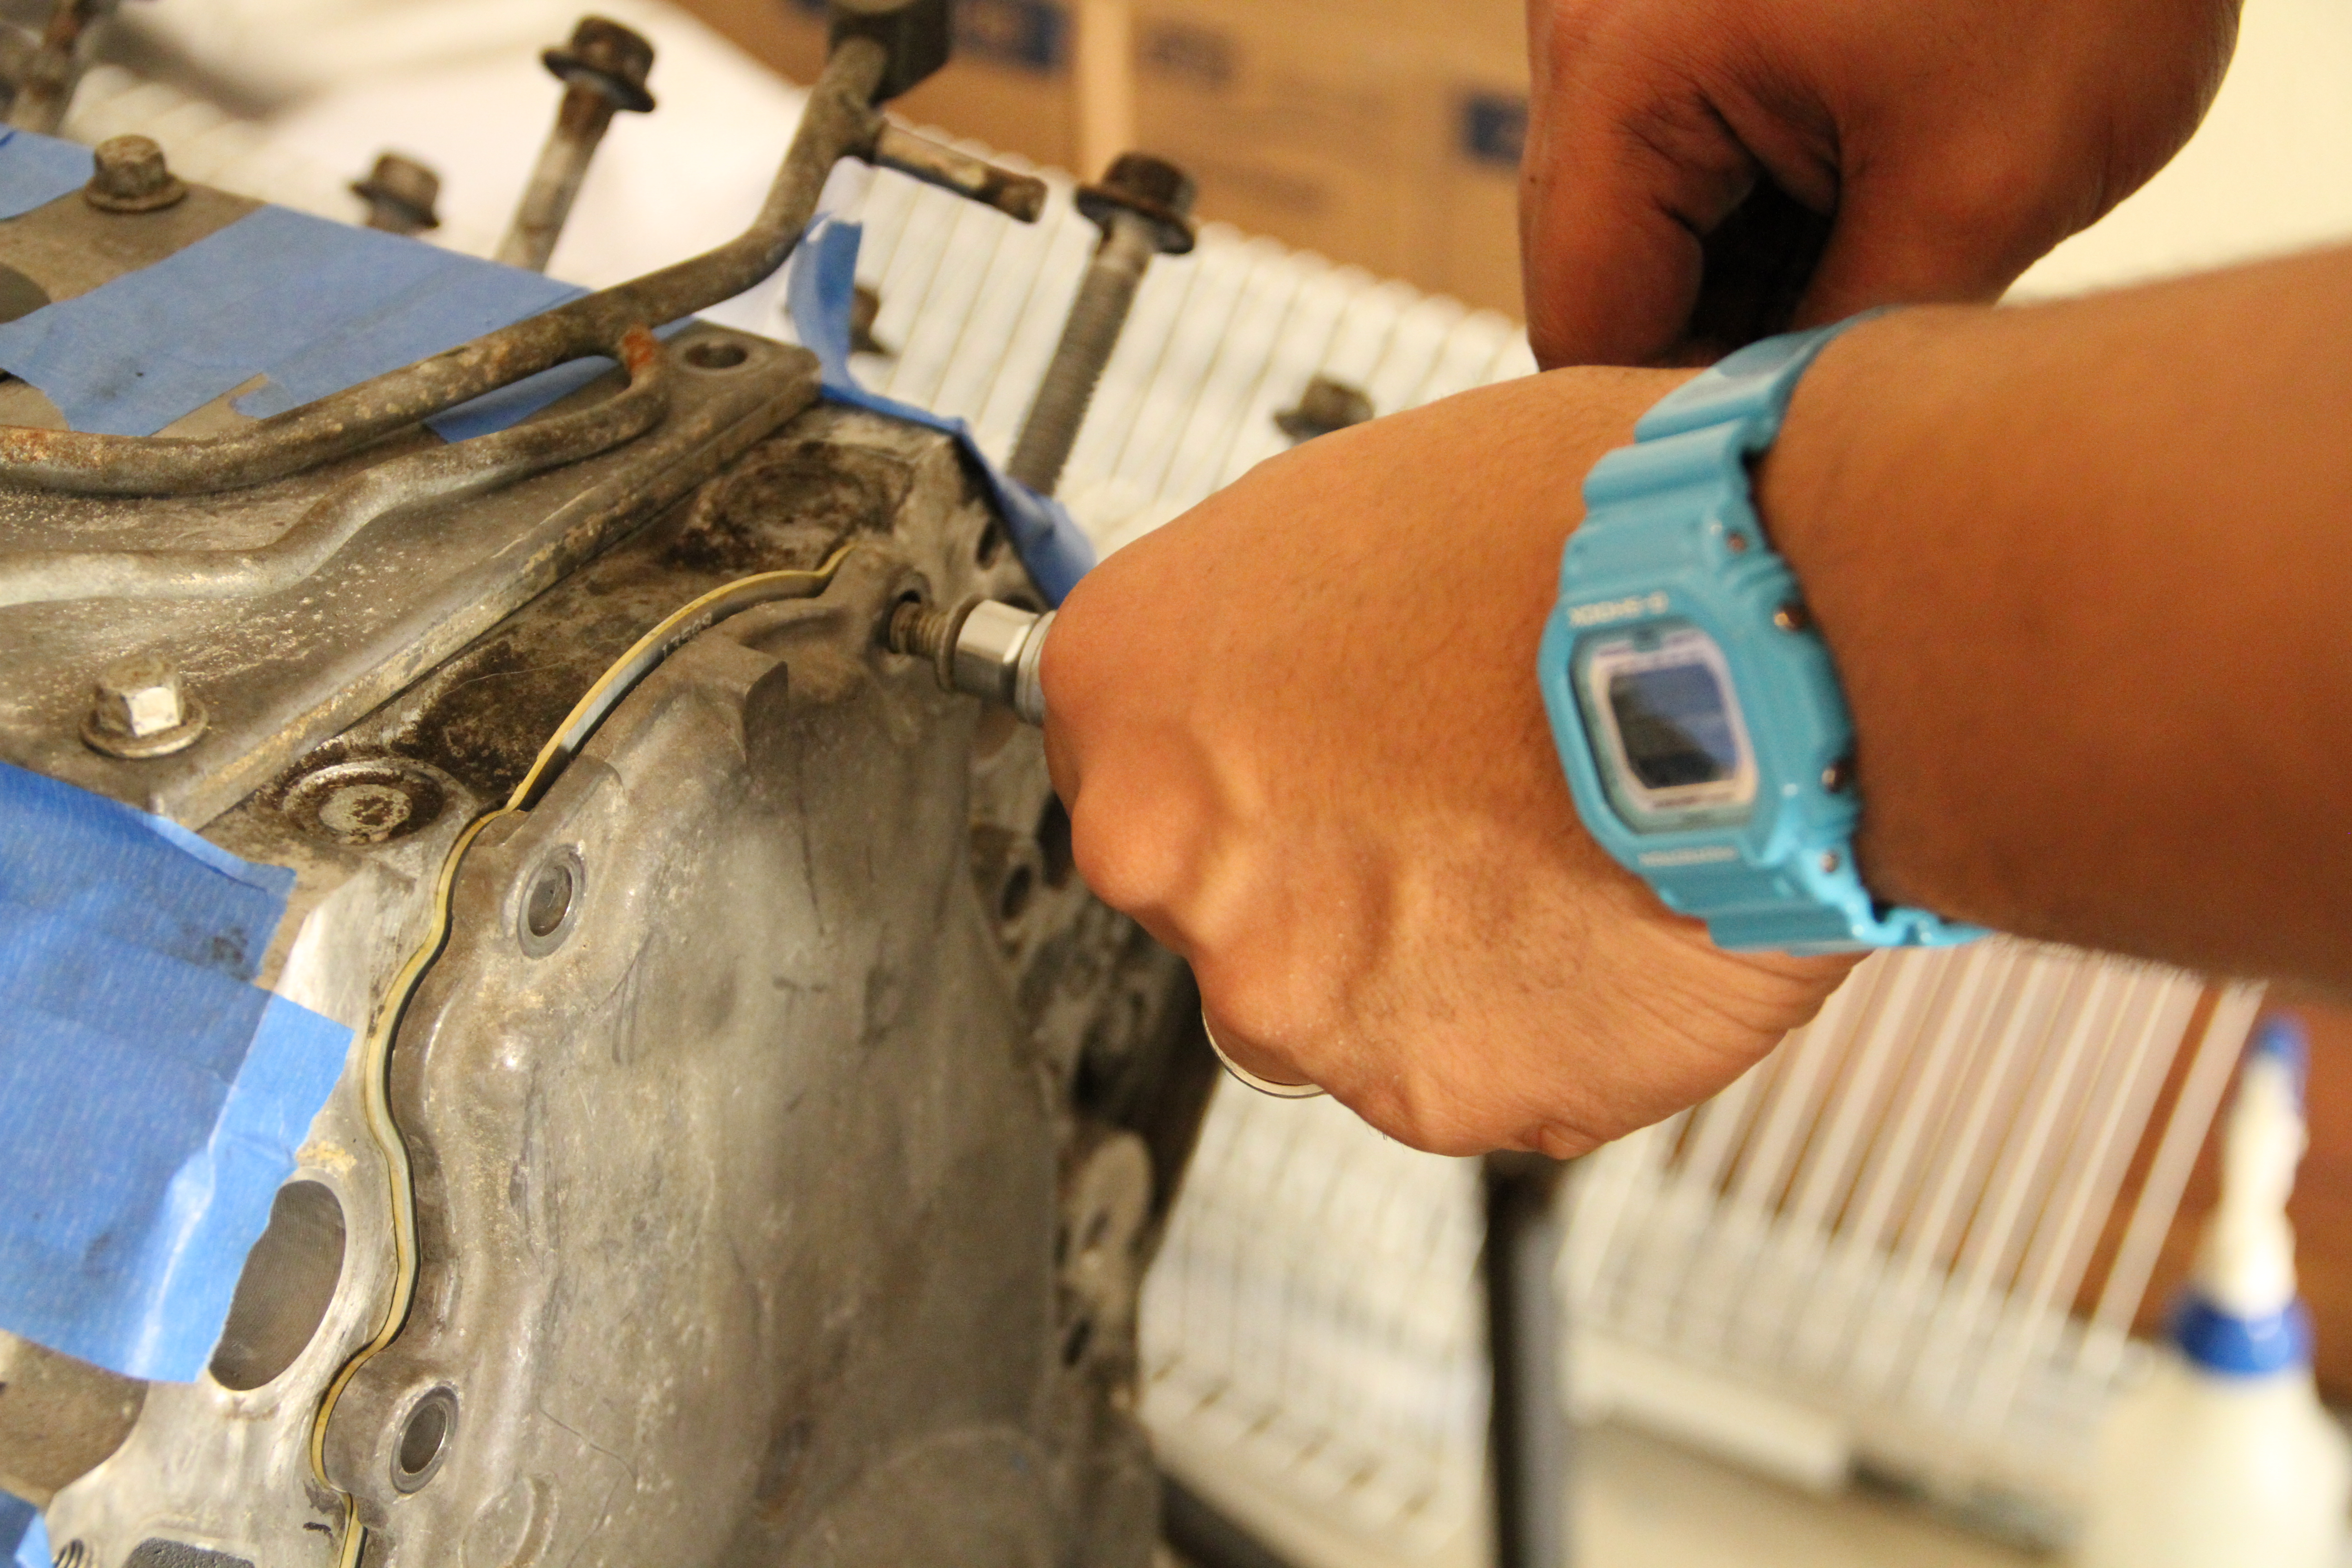
Okay lets get started on removing the old stuff. First on the list is the balancer. You will need a 1" socket to remove the bolt that holds it in place..

A braker bar is a must when it comes to taking off this damn bolt..
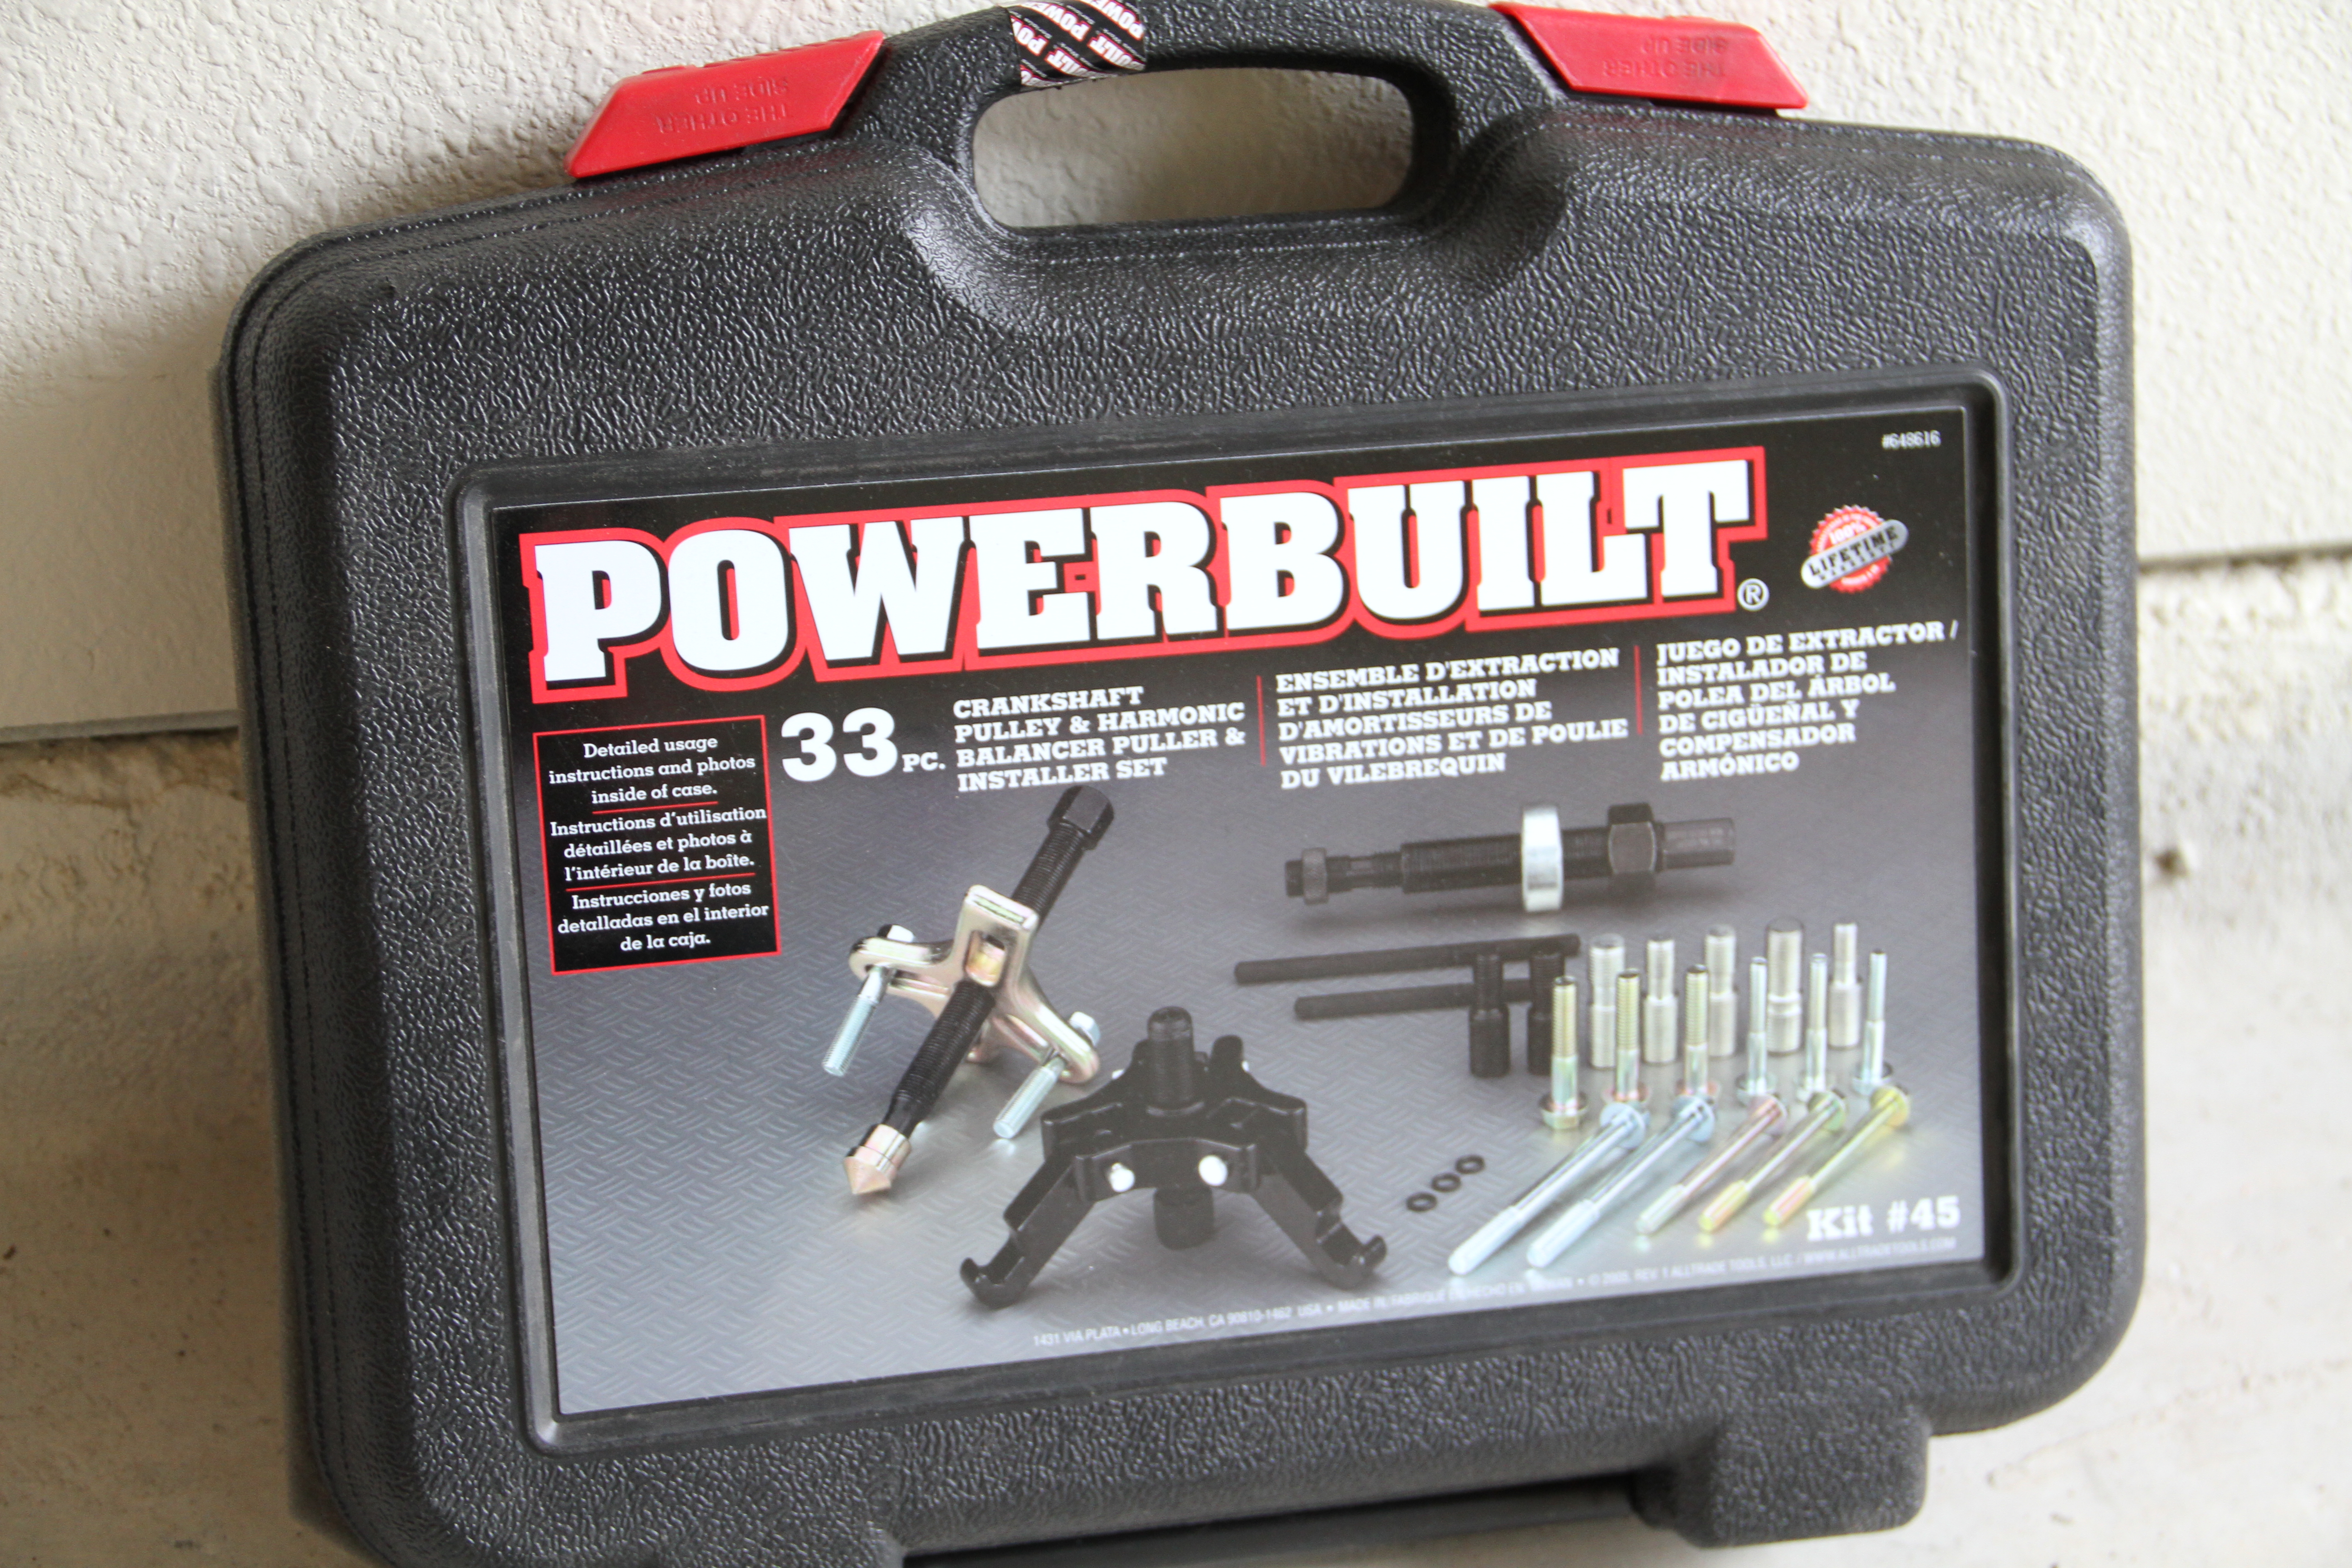
Again Advance Auto Parts come in handing when I needed to rent a tool.. I went there to pick up a Pulley puller. This tool is a must and really the only way you can actually get this dang pulley off the engine.
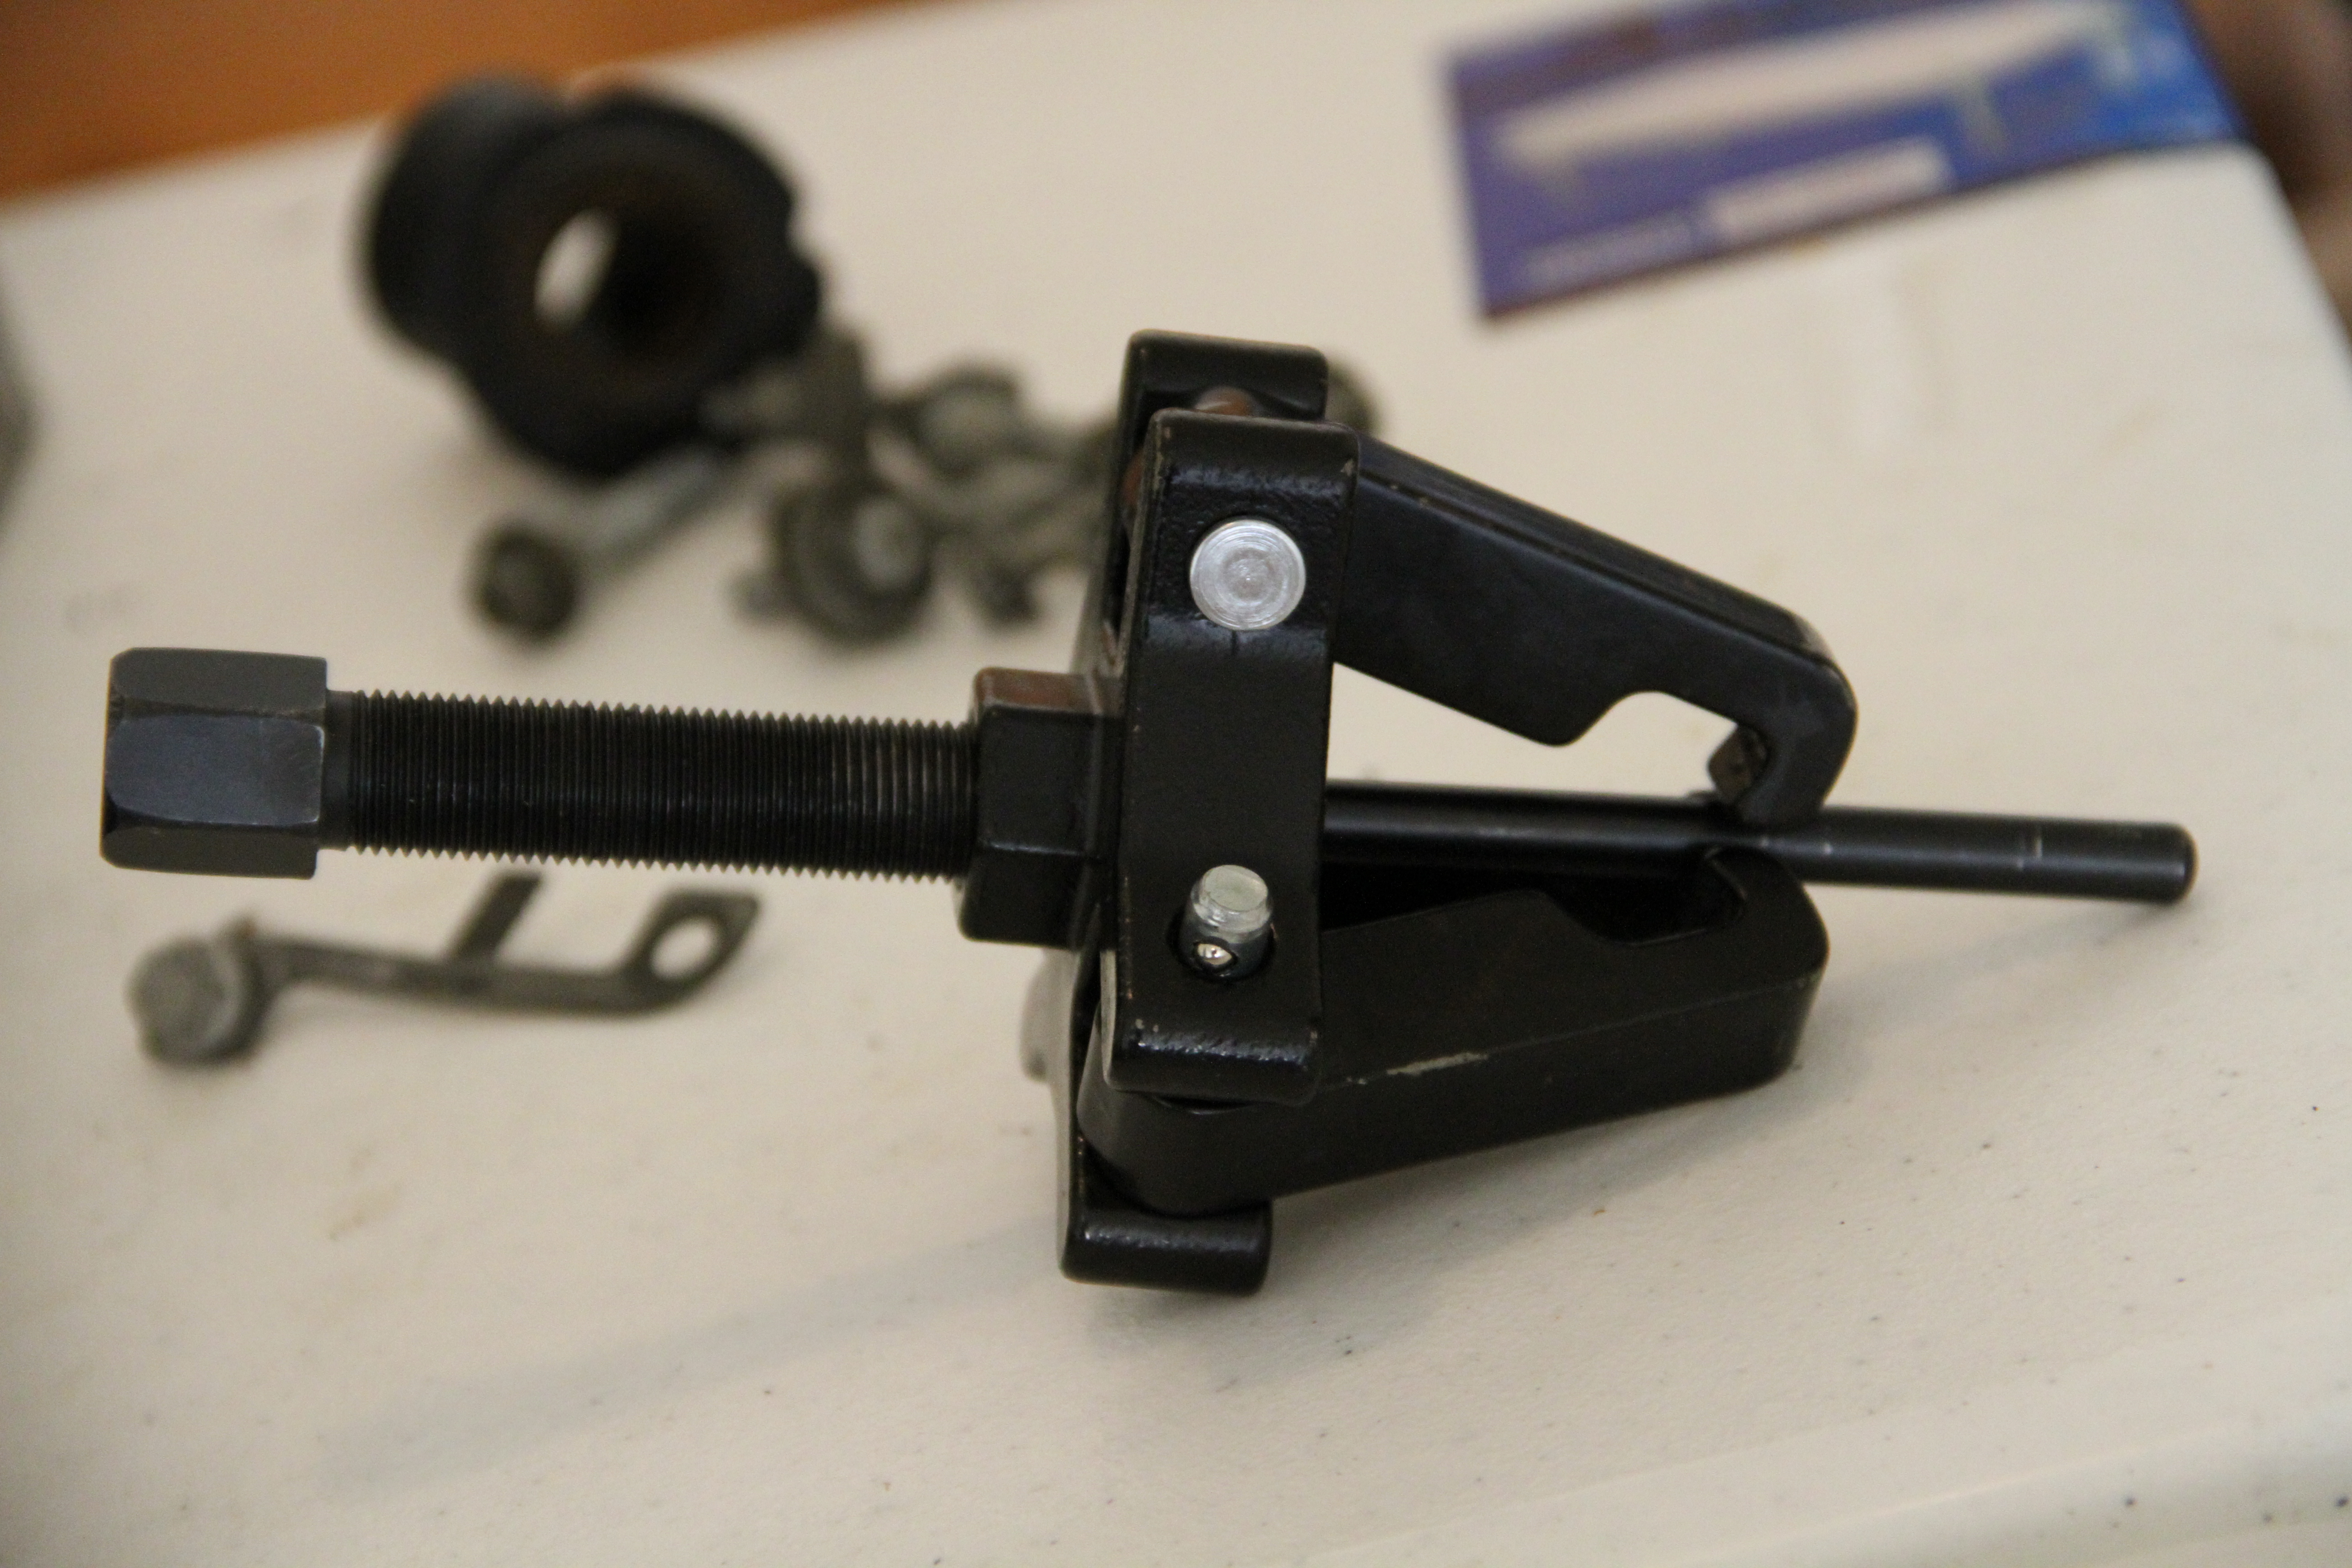
Tool set up...
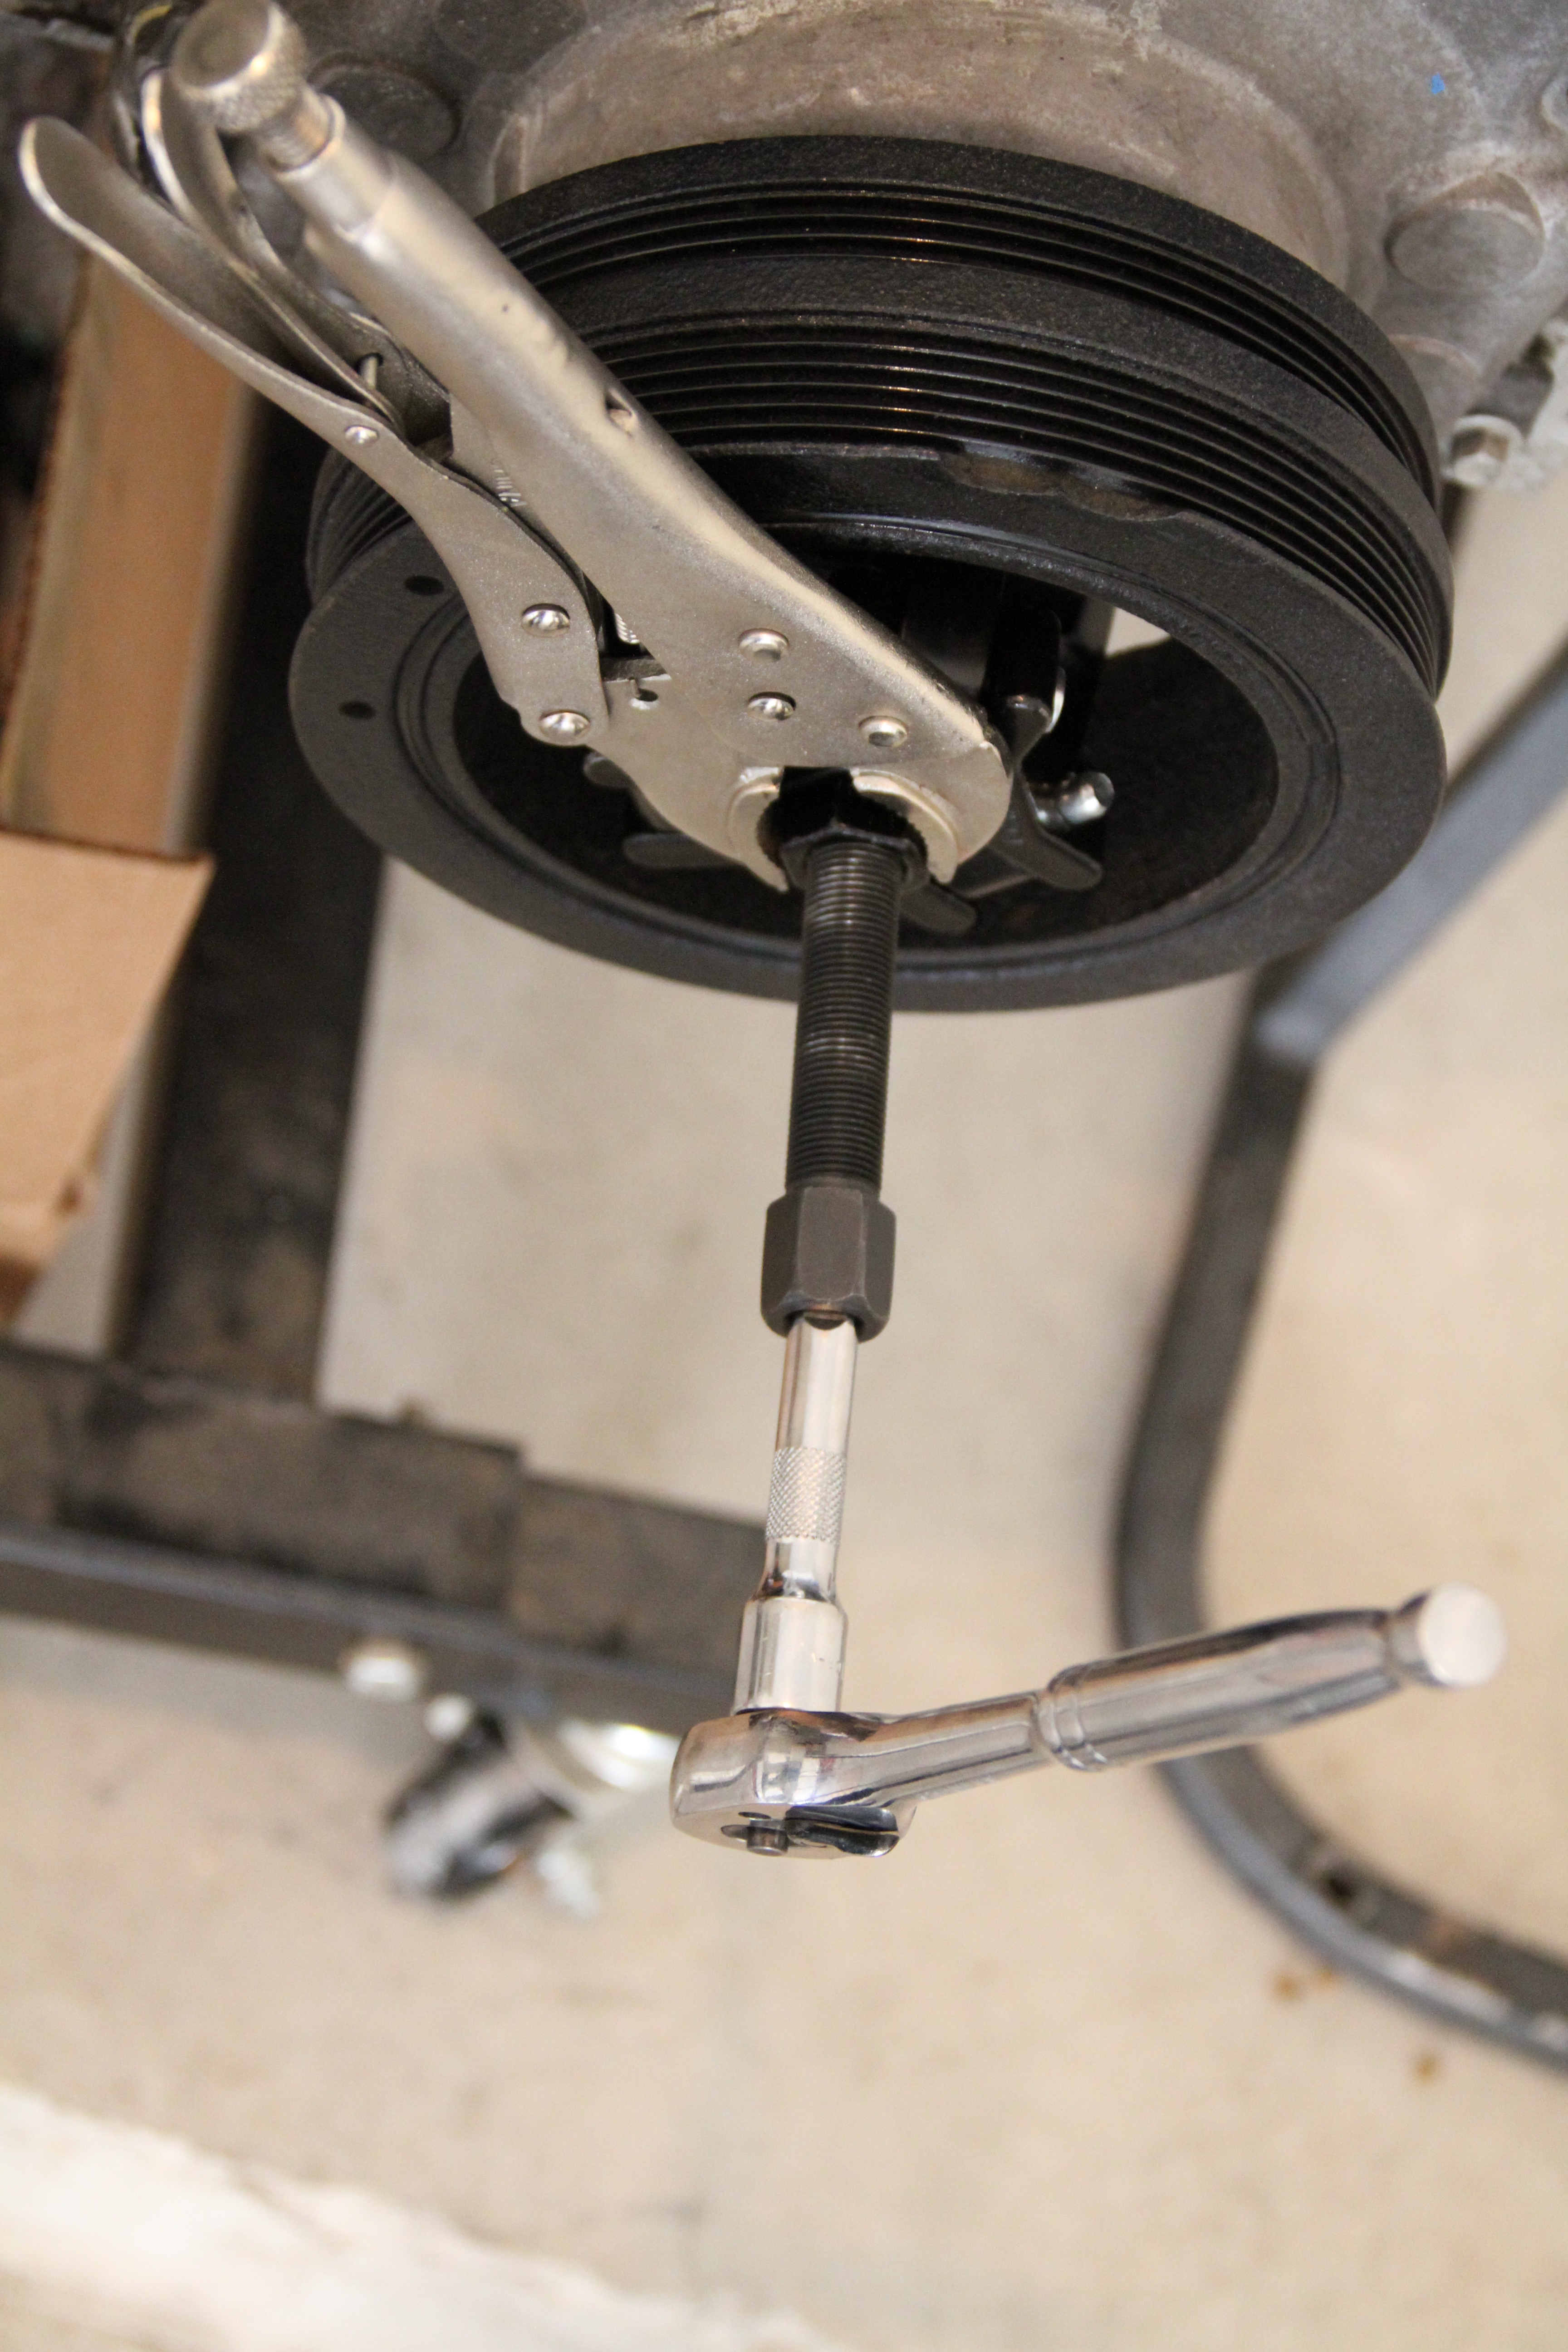
The claw hooks grab the pulley and pulls it away from the engine.. As you begin to tightening the bolt it starts to get harder and harder to do.
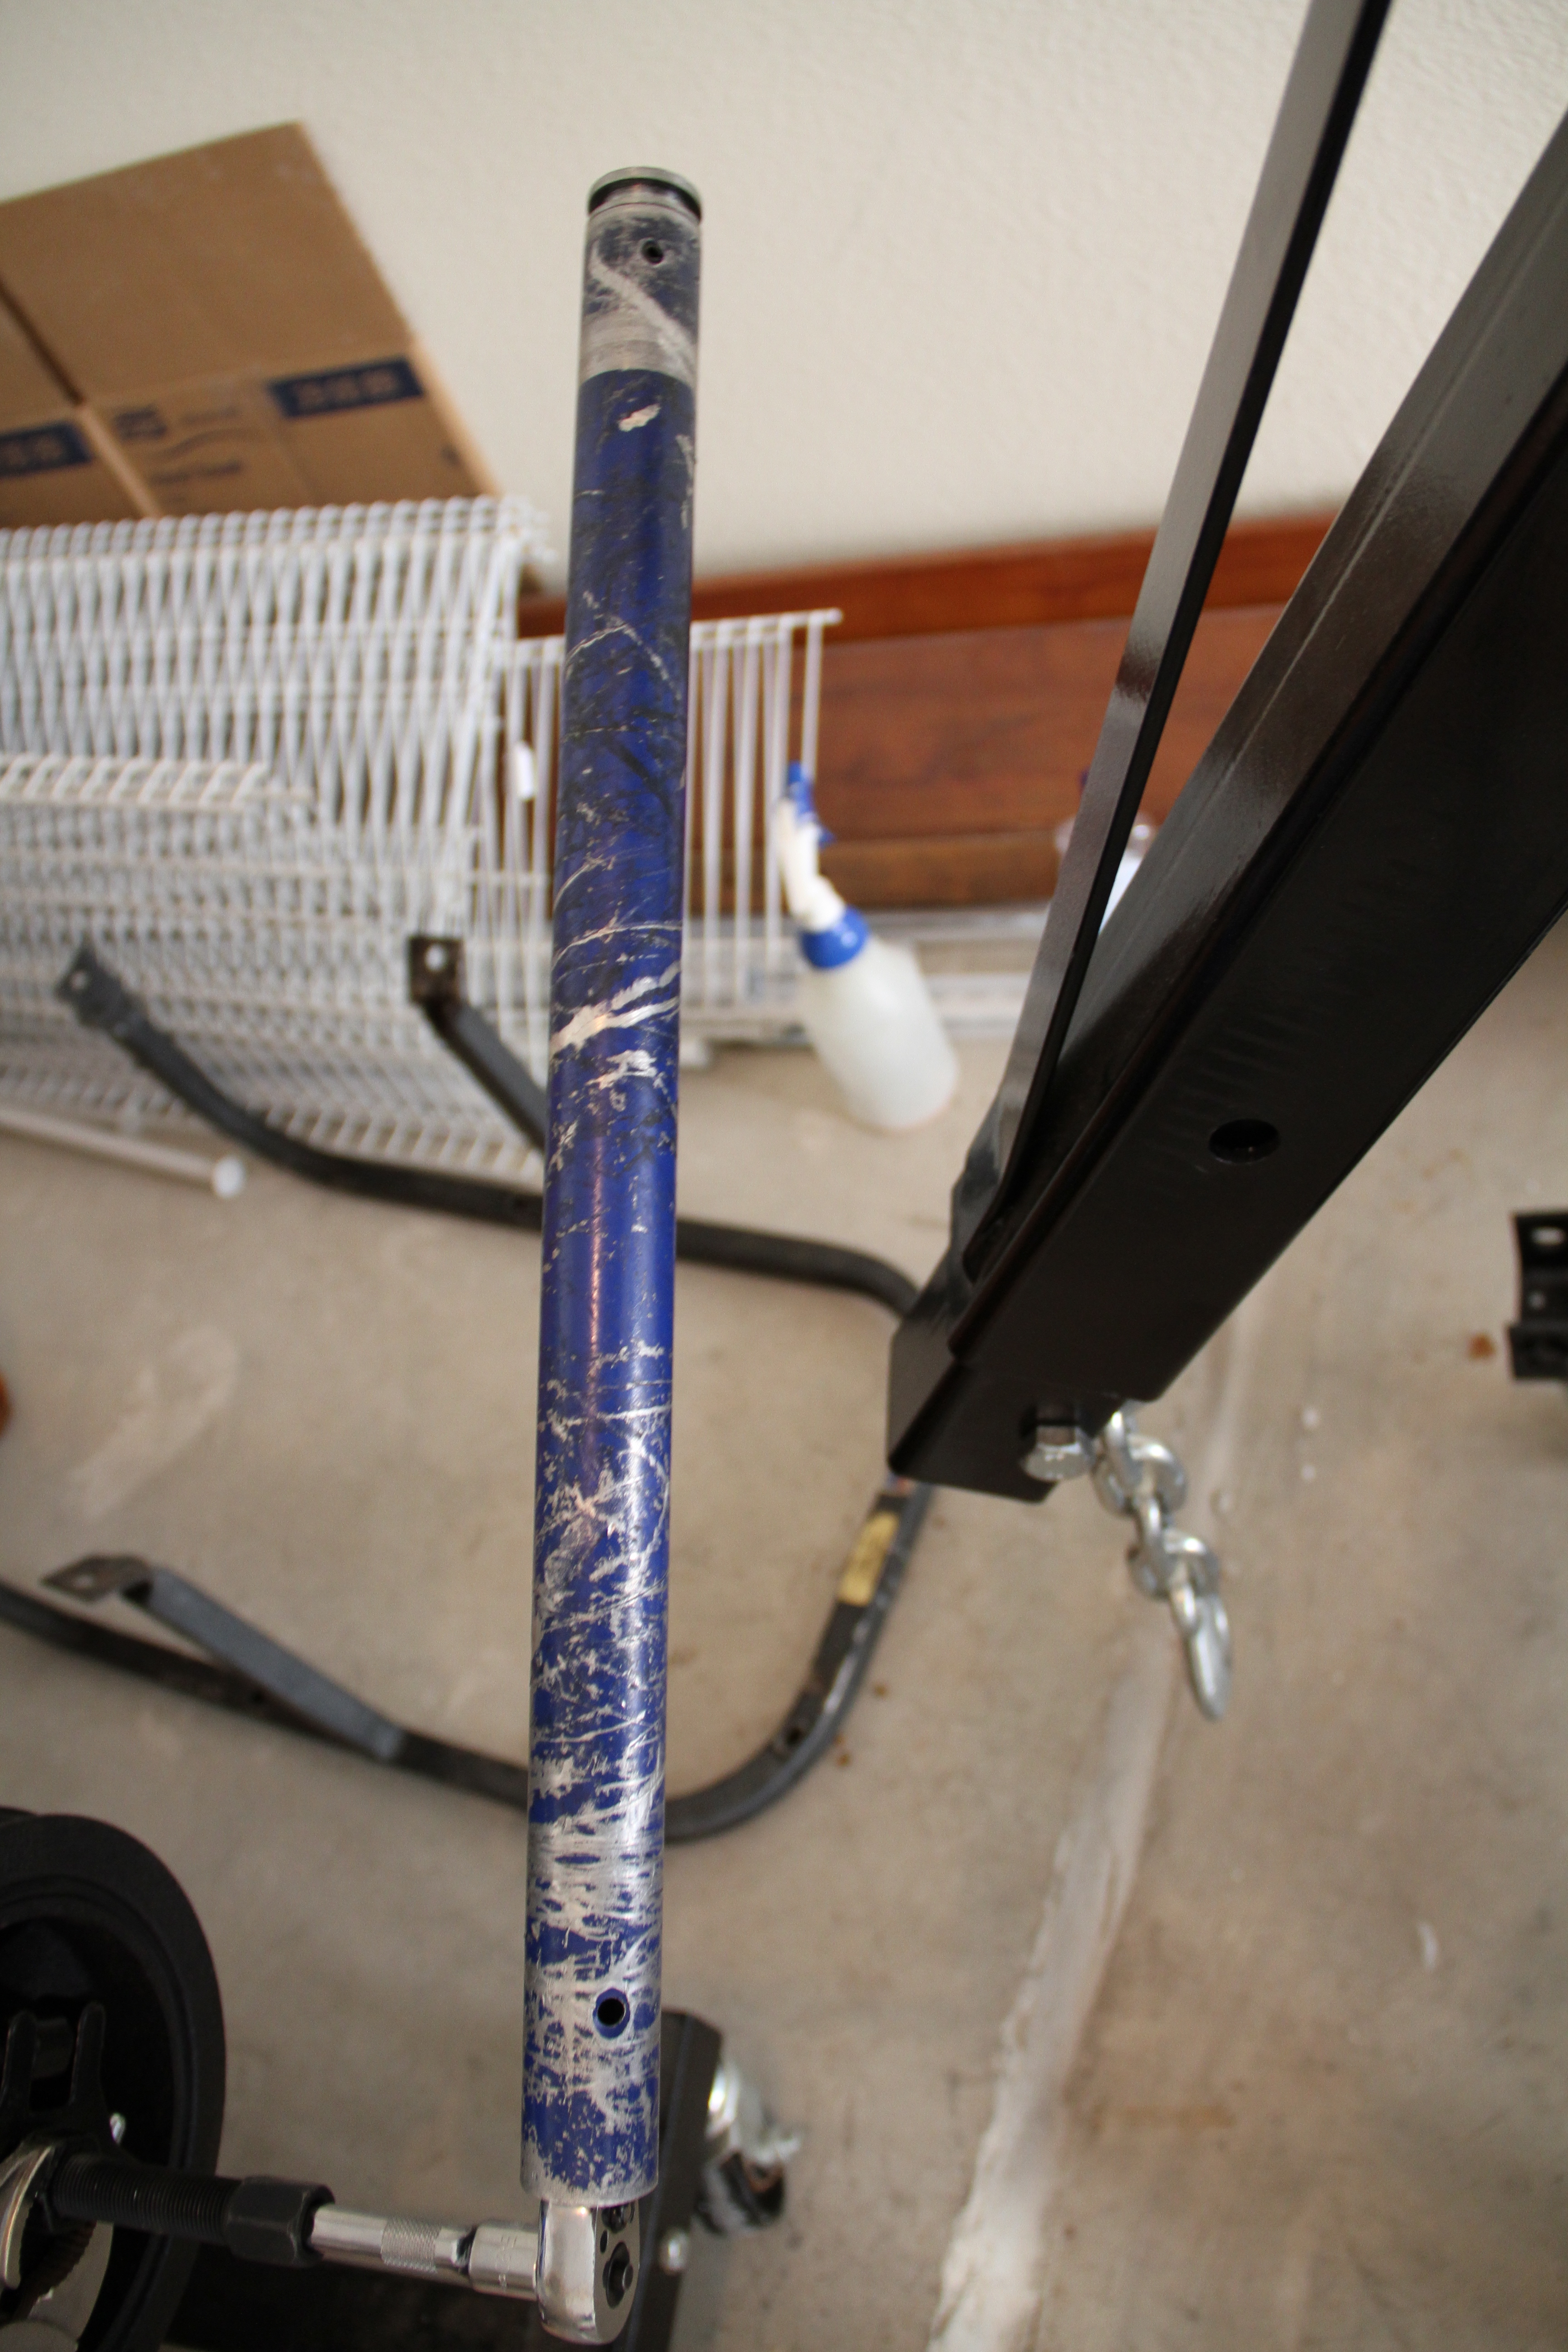
That is when a pole comes in handy...lol
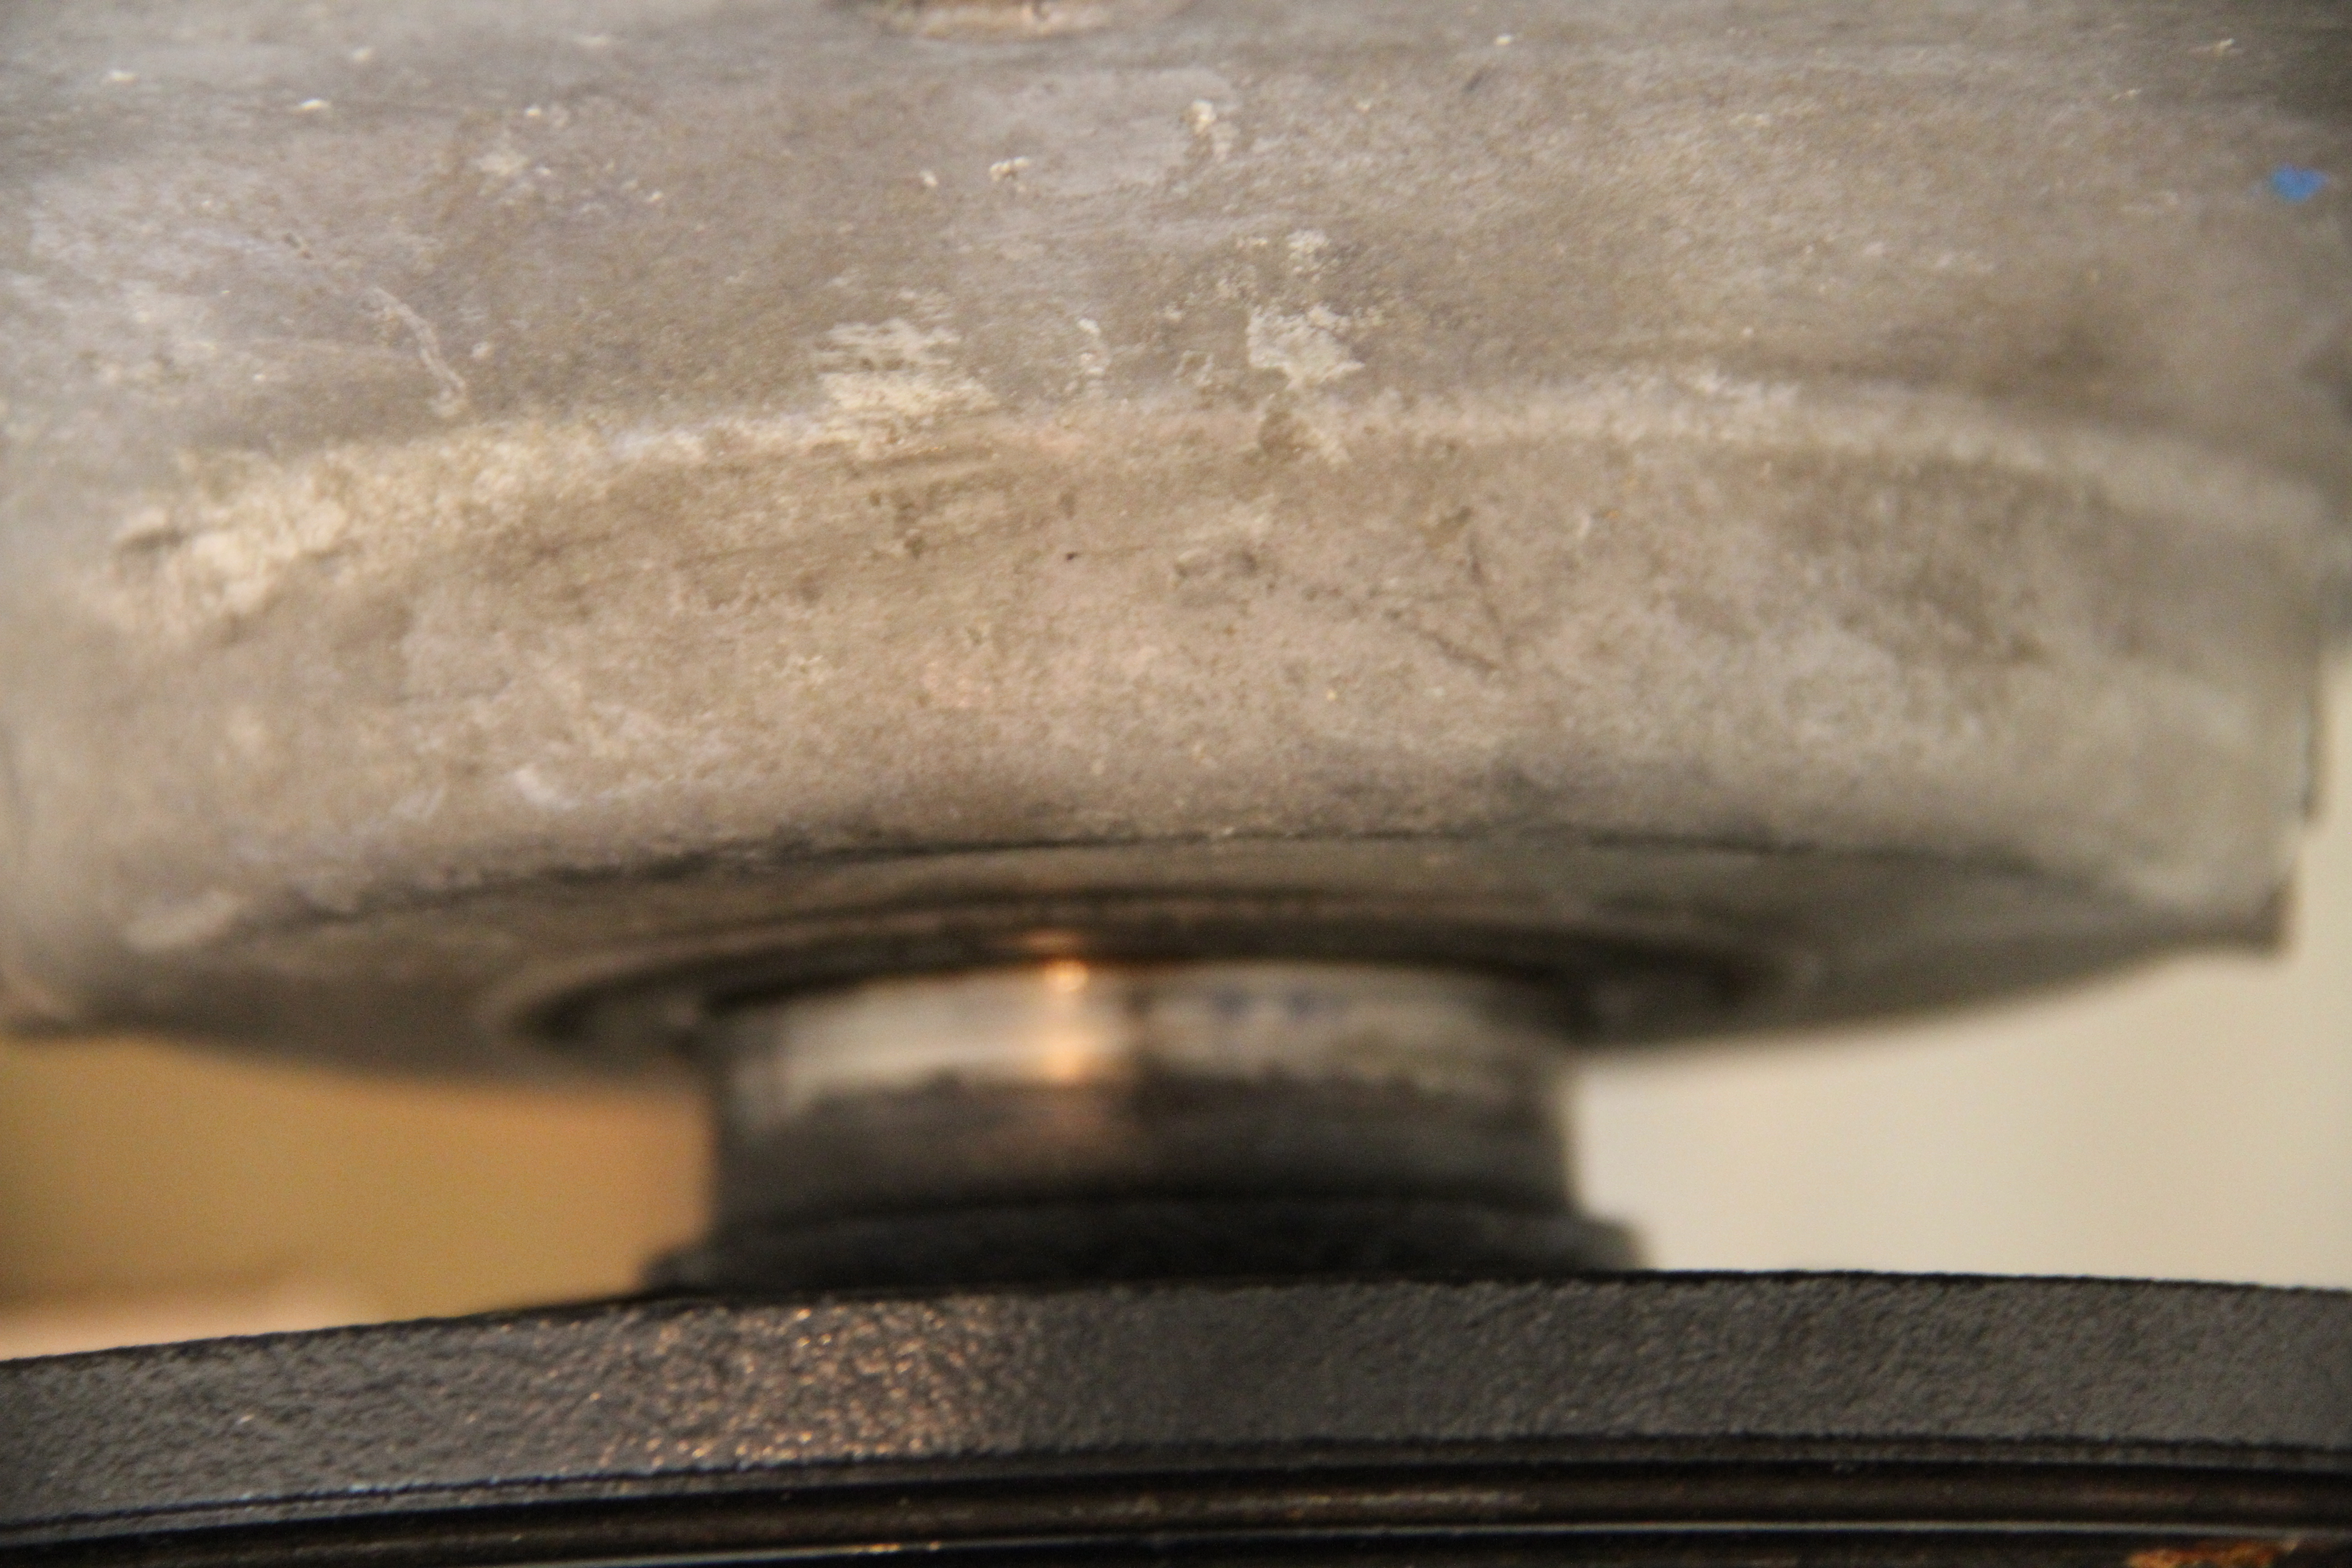
You know you are doing it right when you start to see silver from behind the pulley.
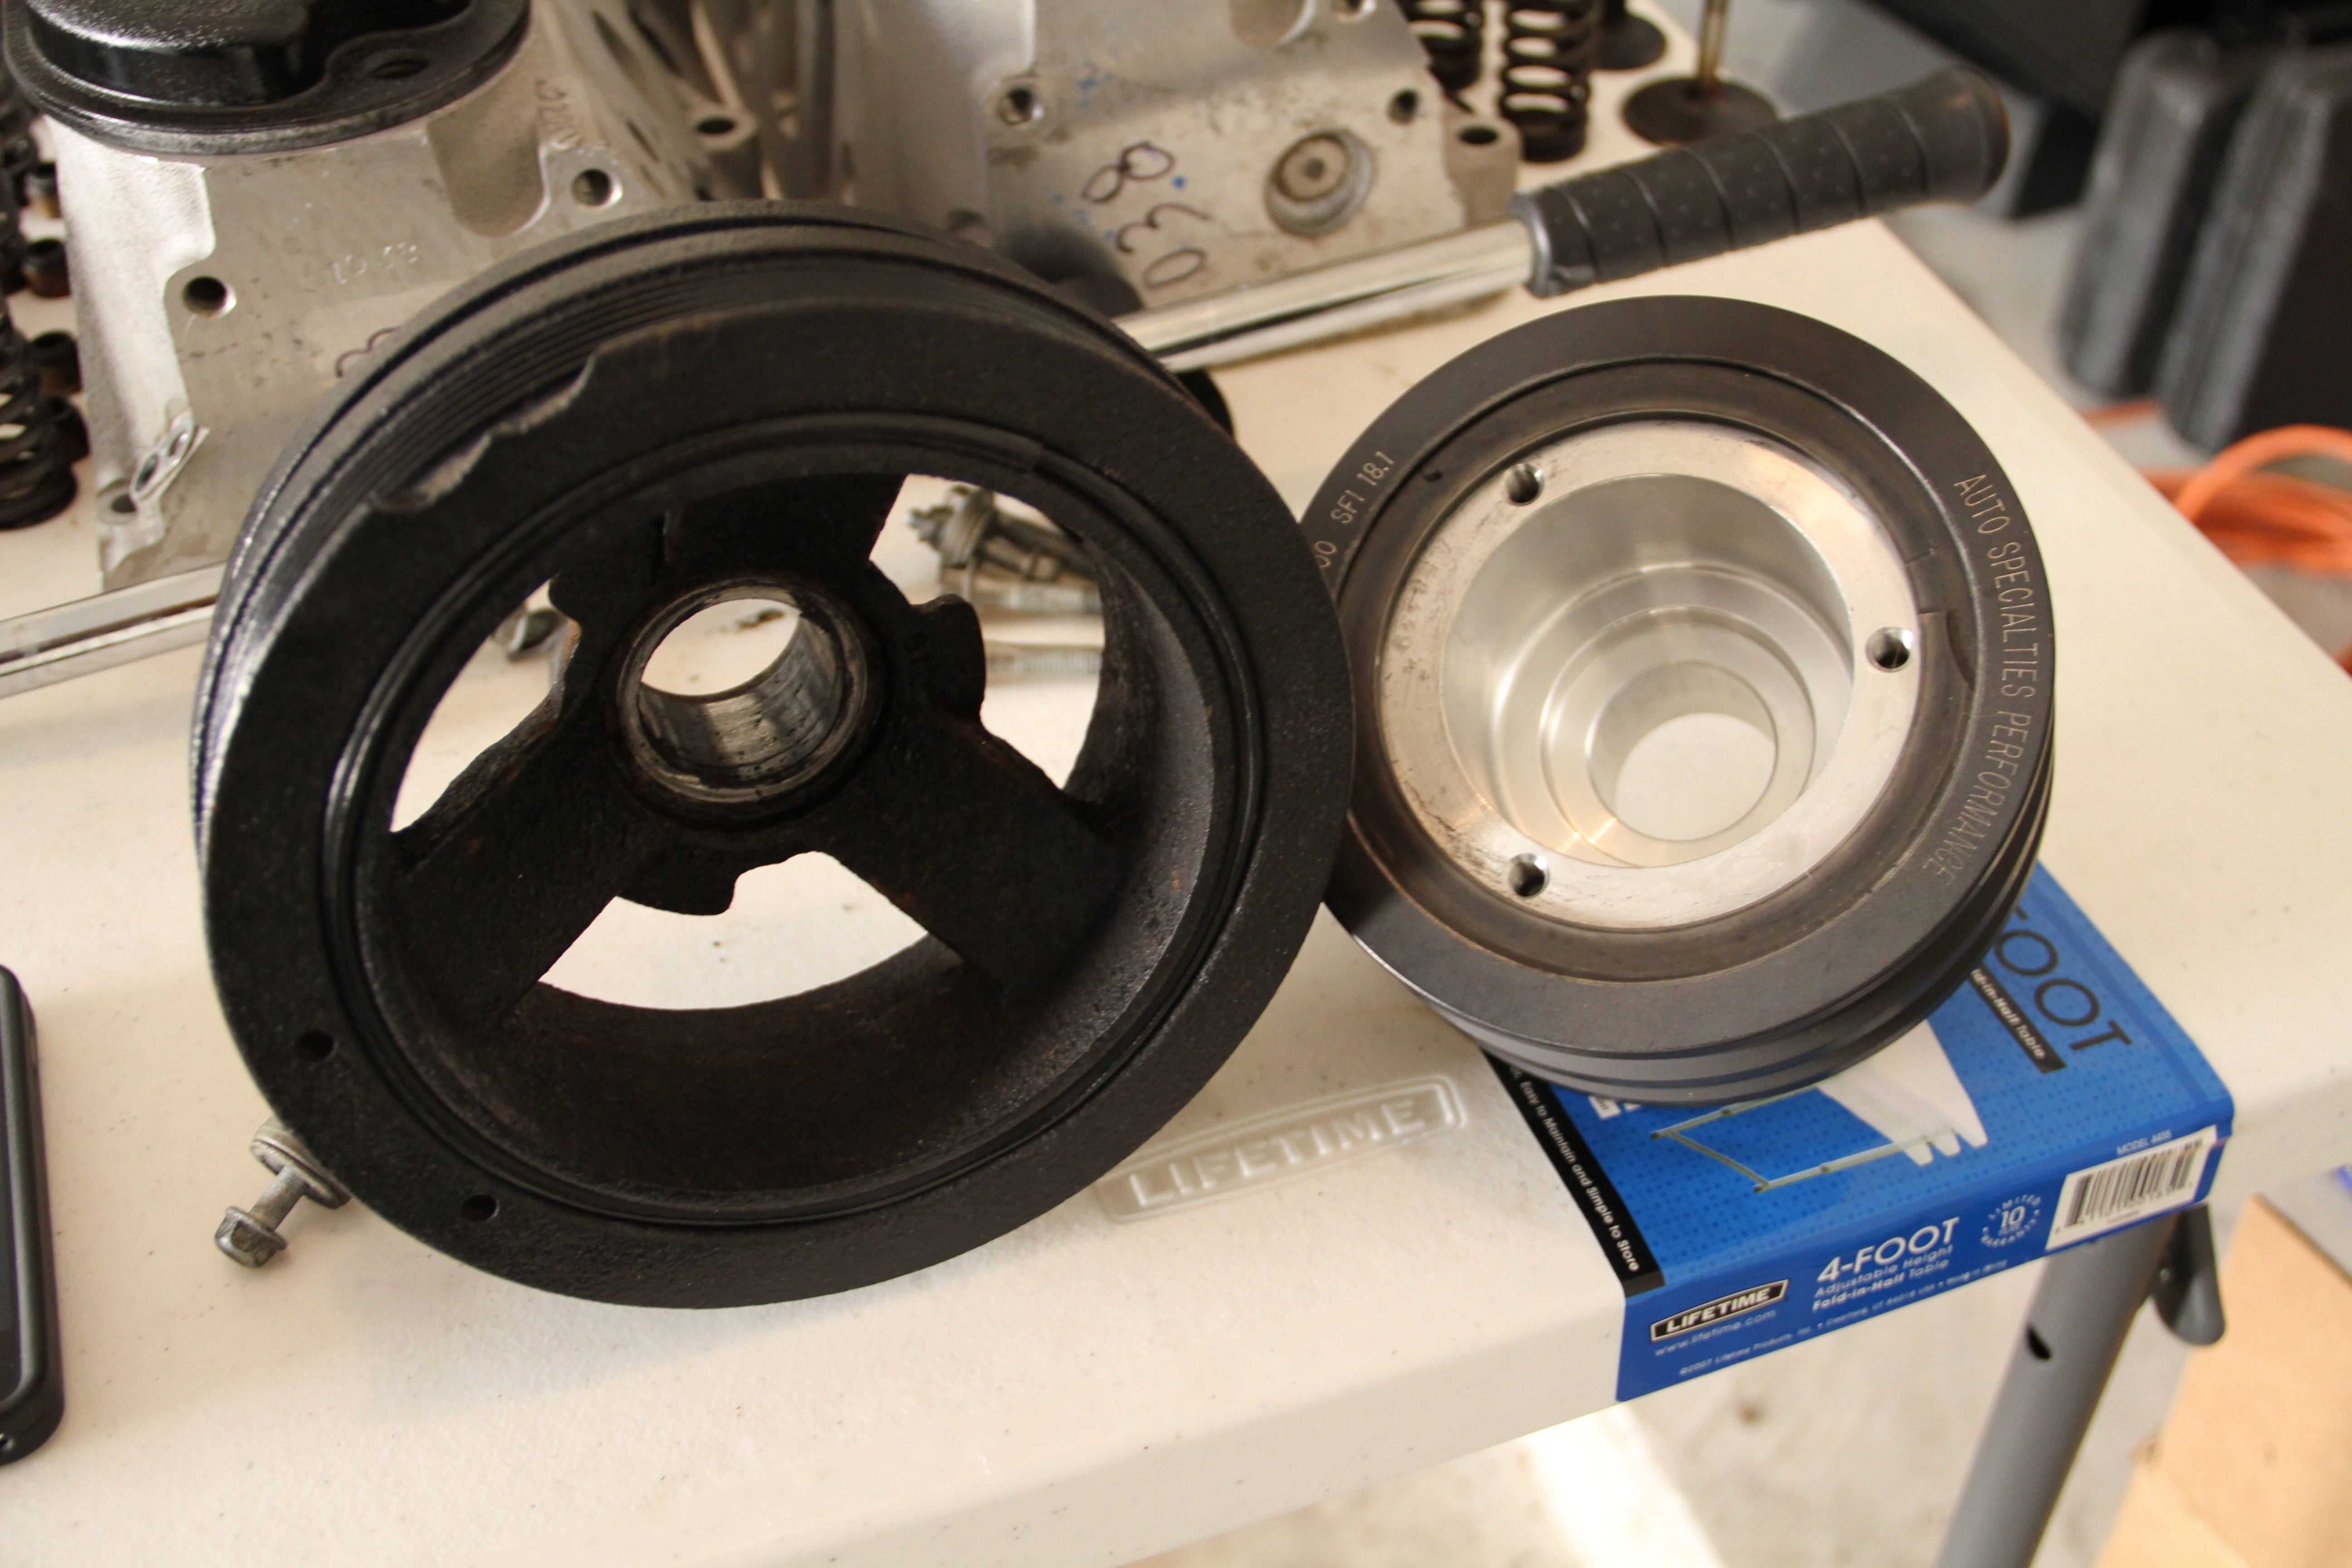
Just to give you an idea of the size difference between the ASP pulley and OEM pulley.. ASP gives you around a 15% more power, every bet counts..
Next we can remove the timing chain cover.. This requires you to use a 10mm,, really easy..
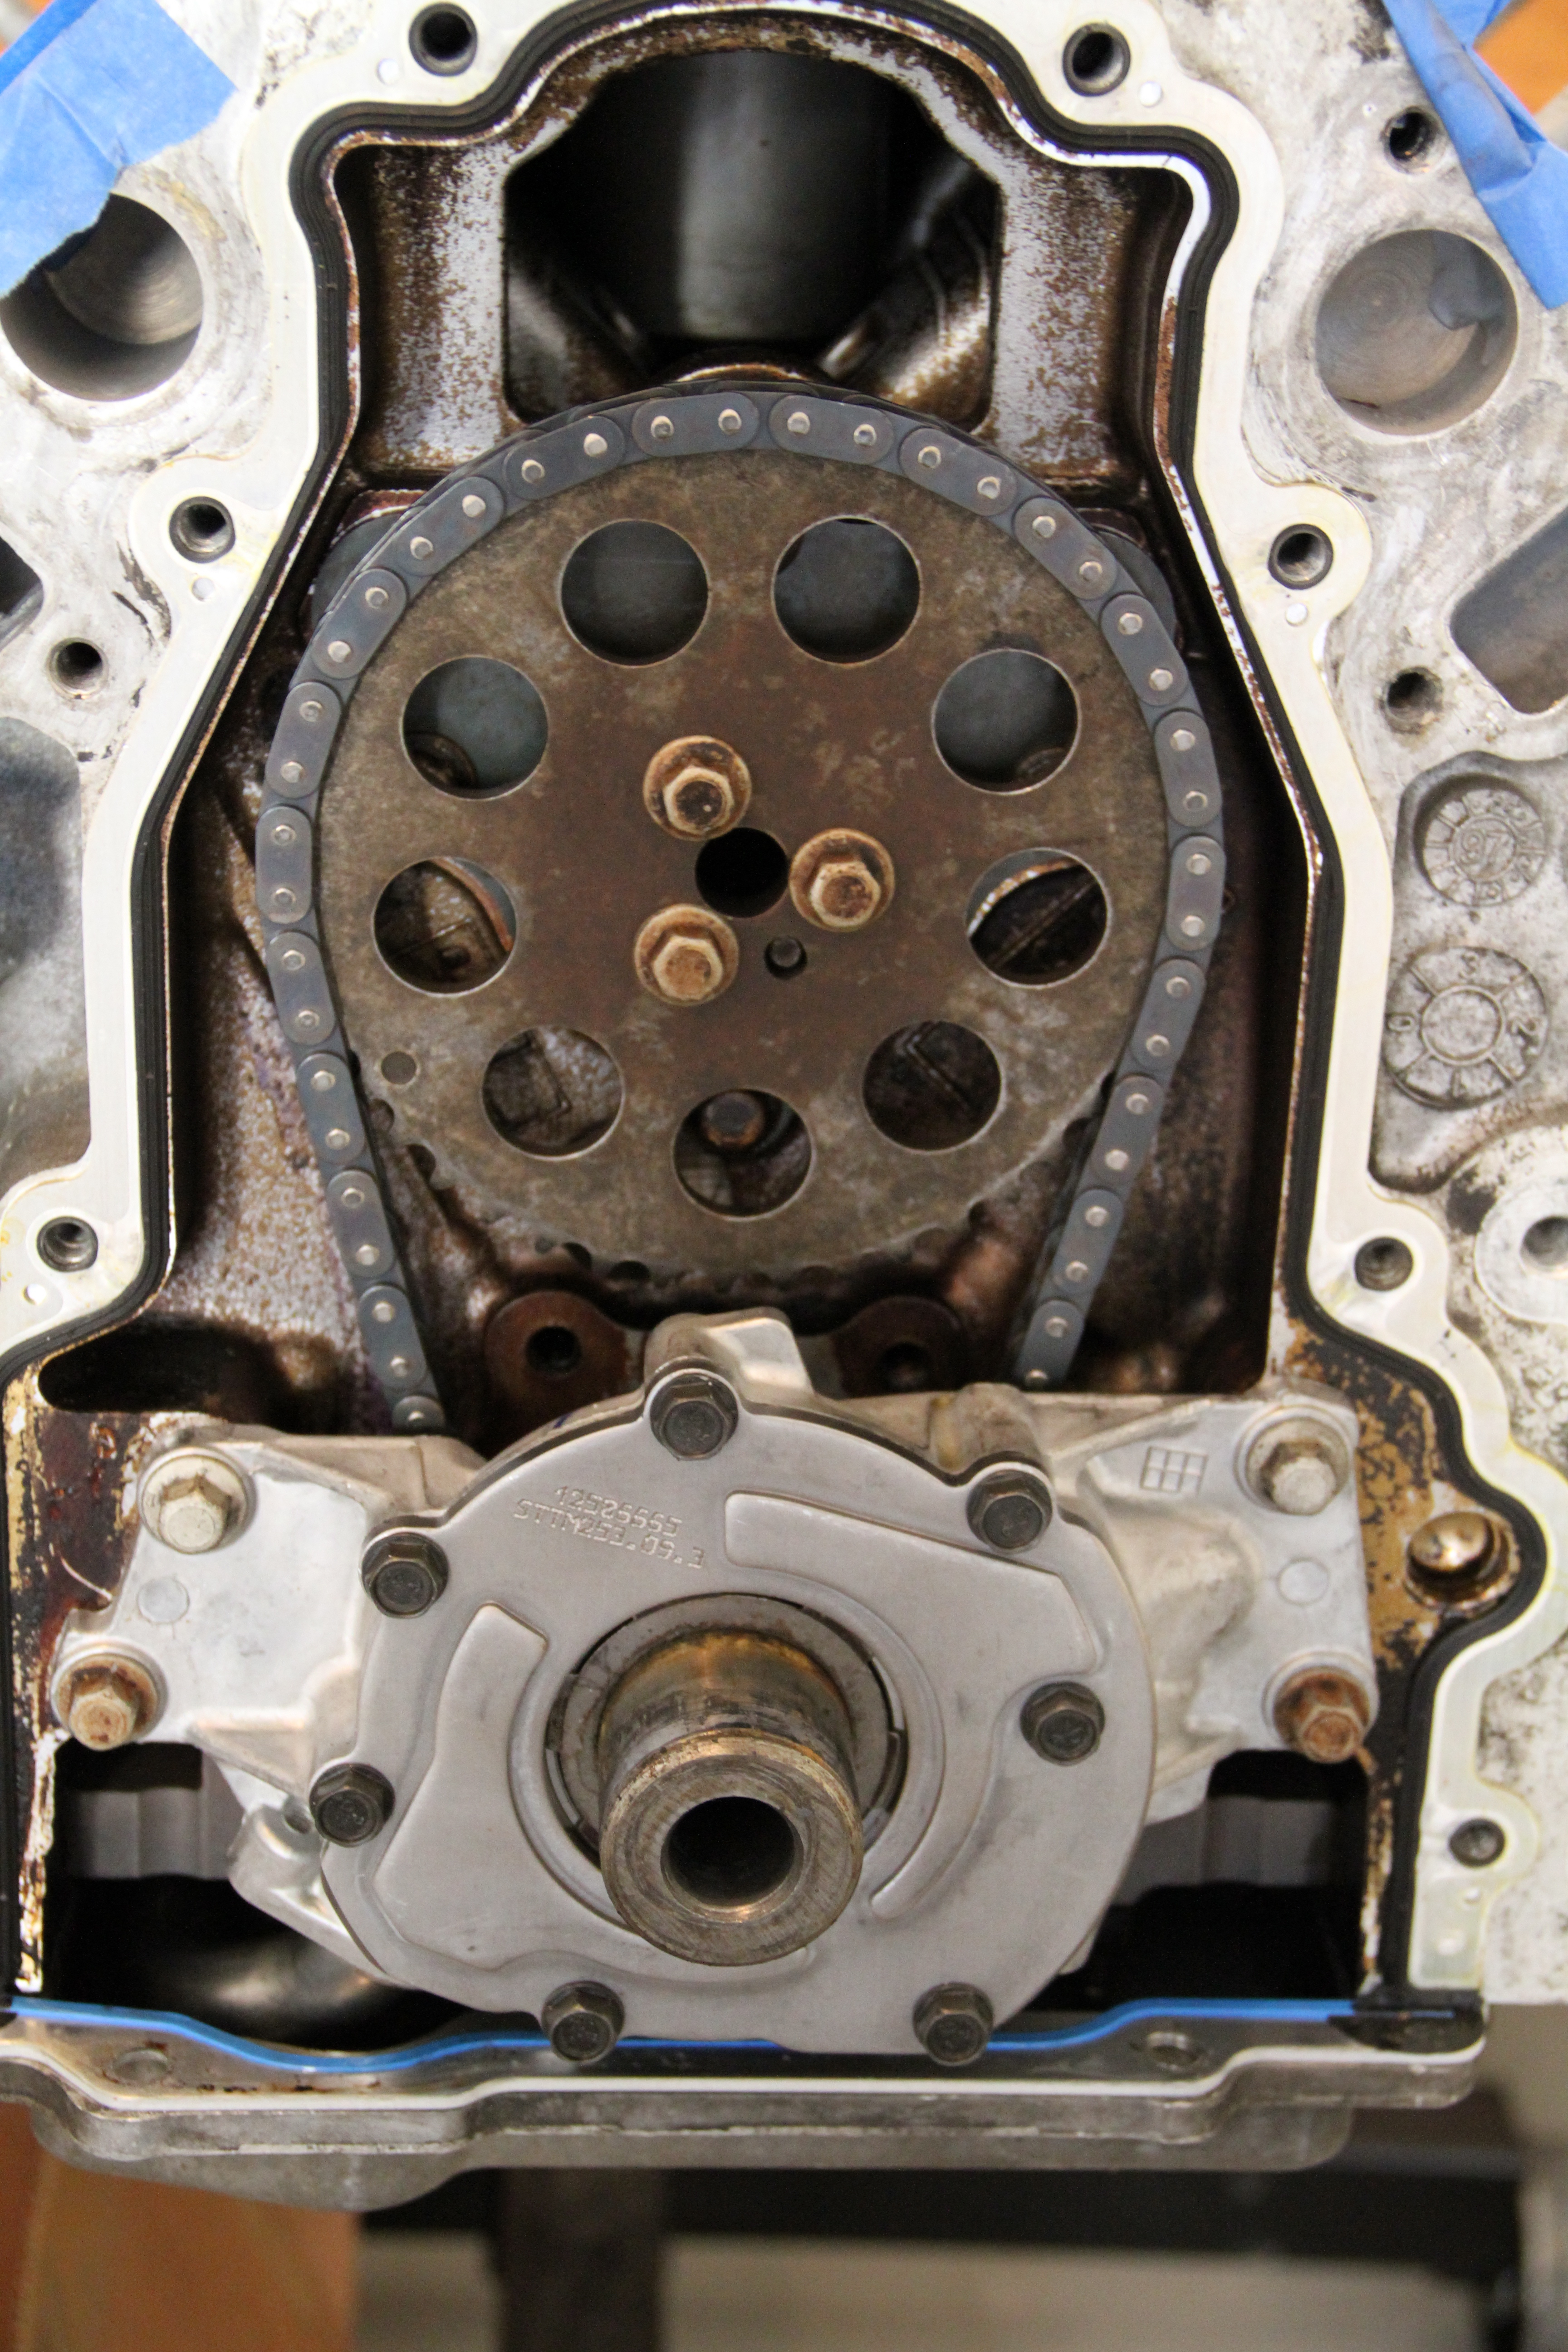
Bam!!, look at the LS6 oil pump and LS2 timing chain... Good stuff..
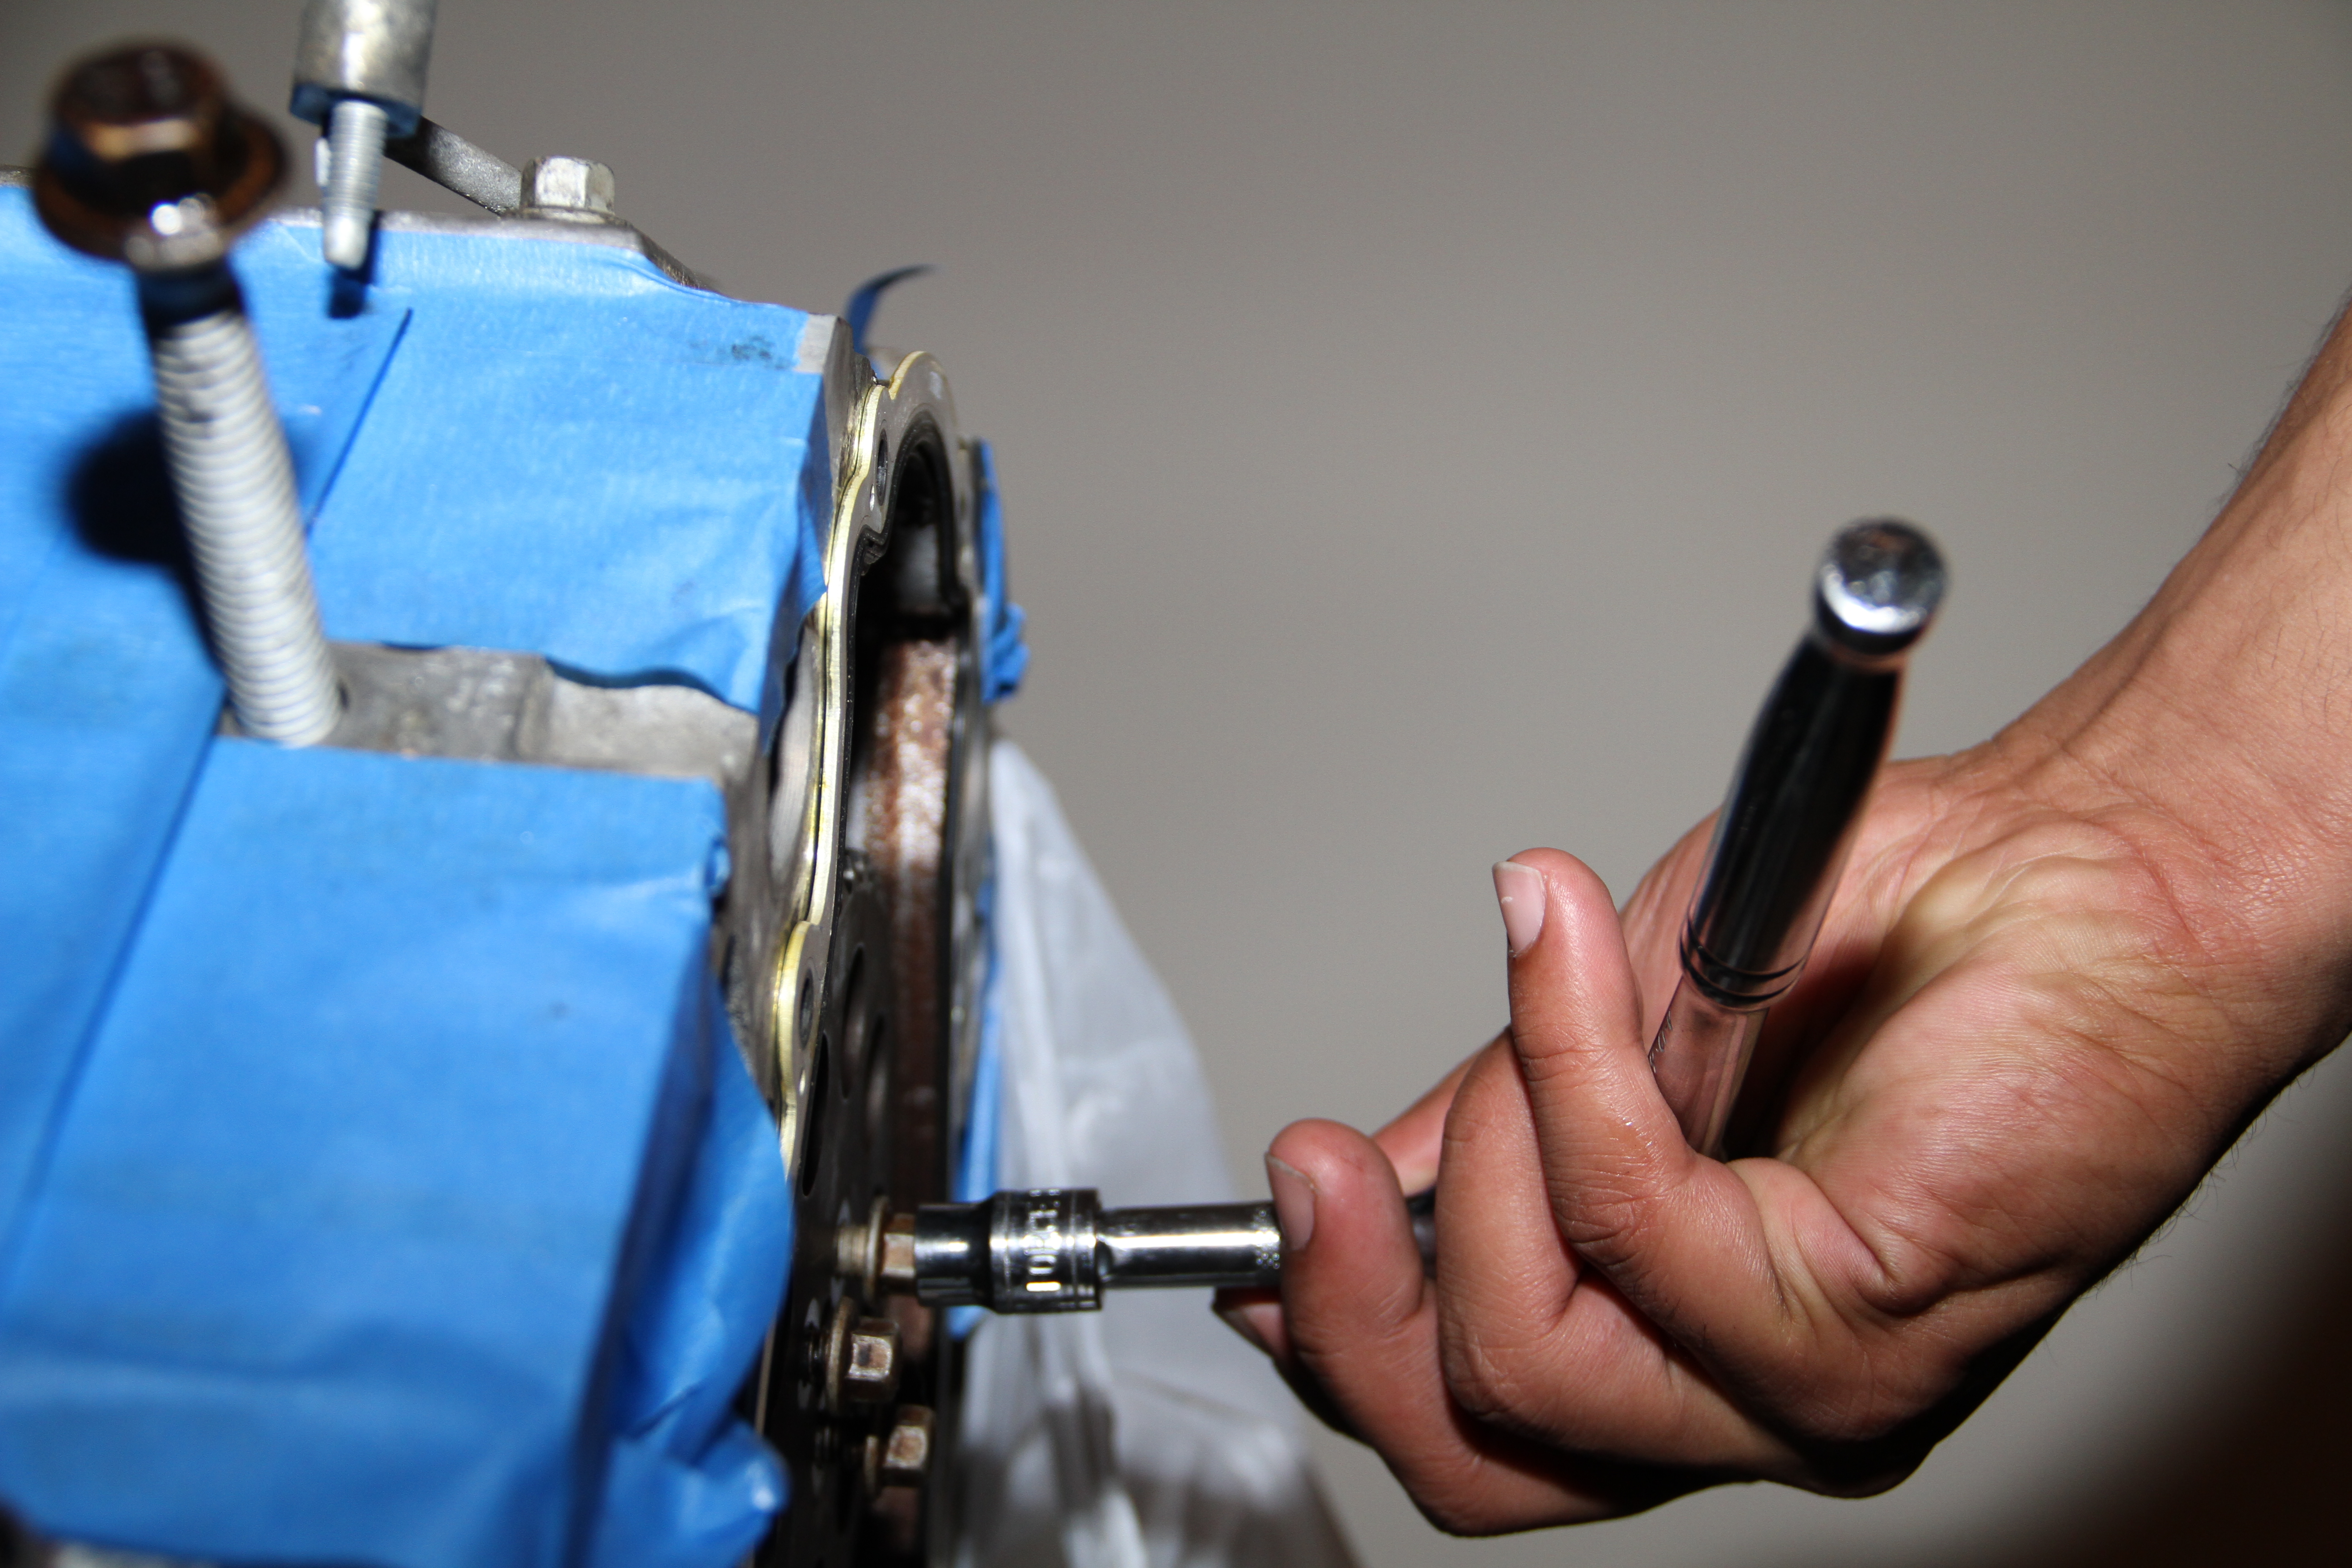
Now we can remove the timing chain sprocket, Unbolt the 3 cam gear bolts and remove the gear, letting the chain droop down into the oil pan for now
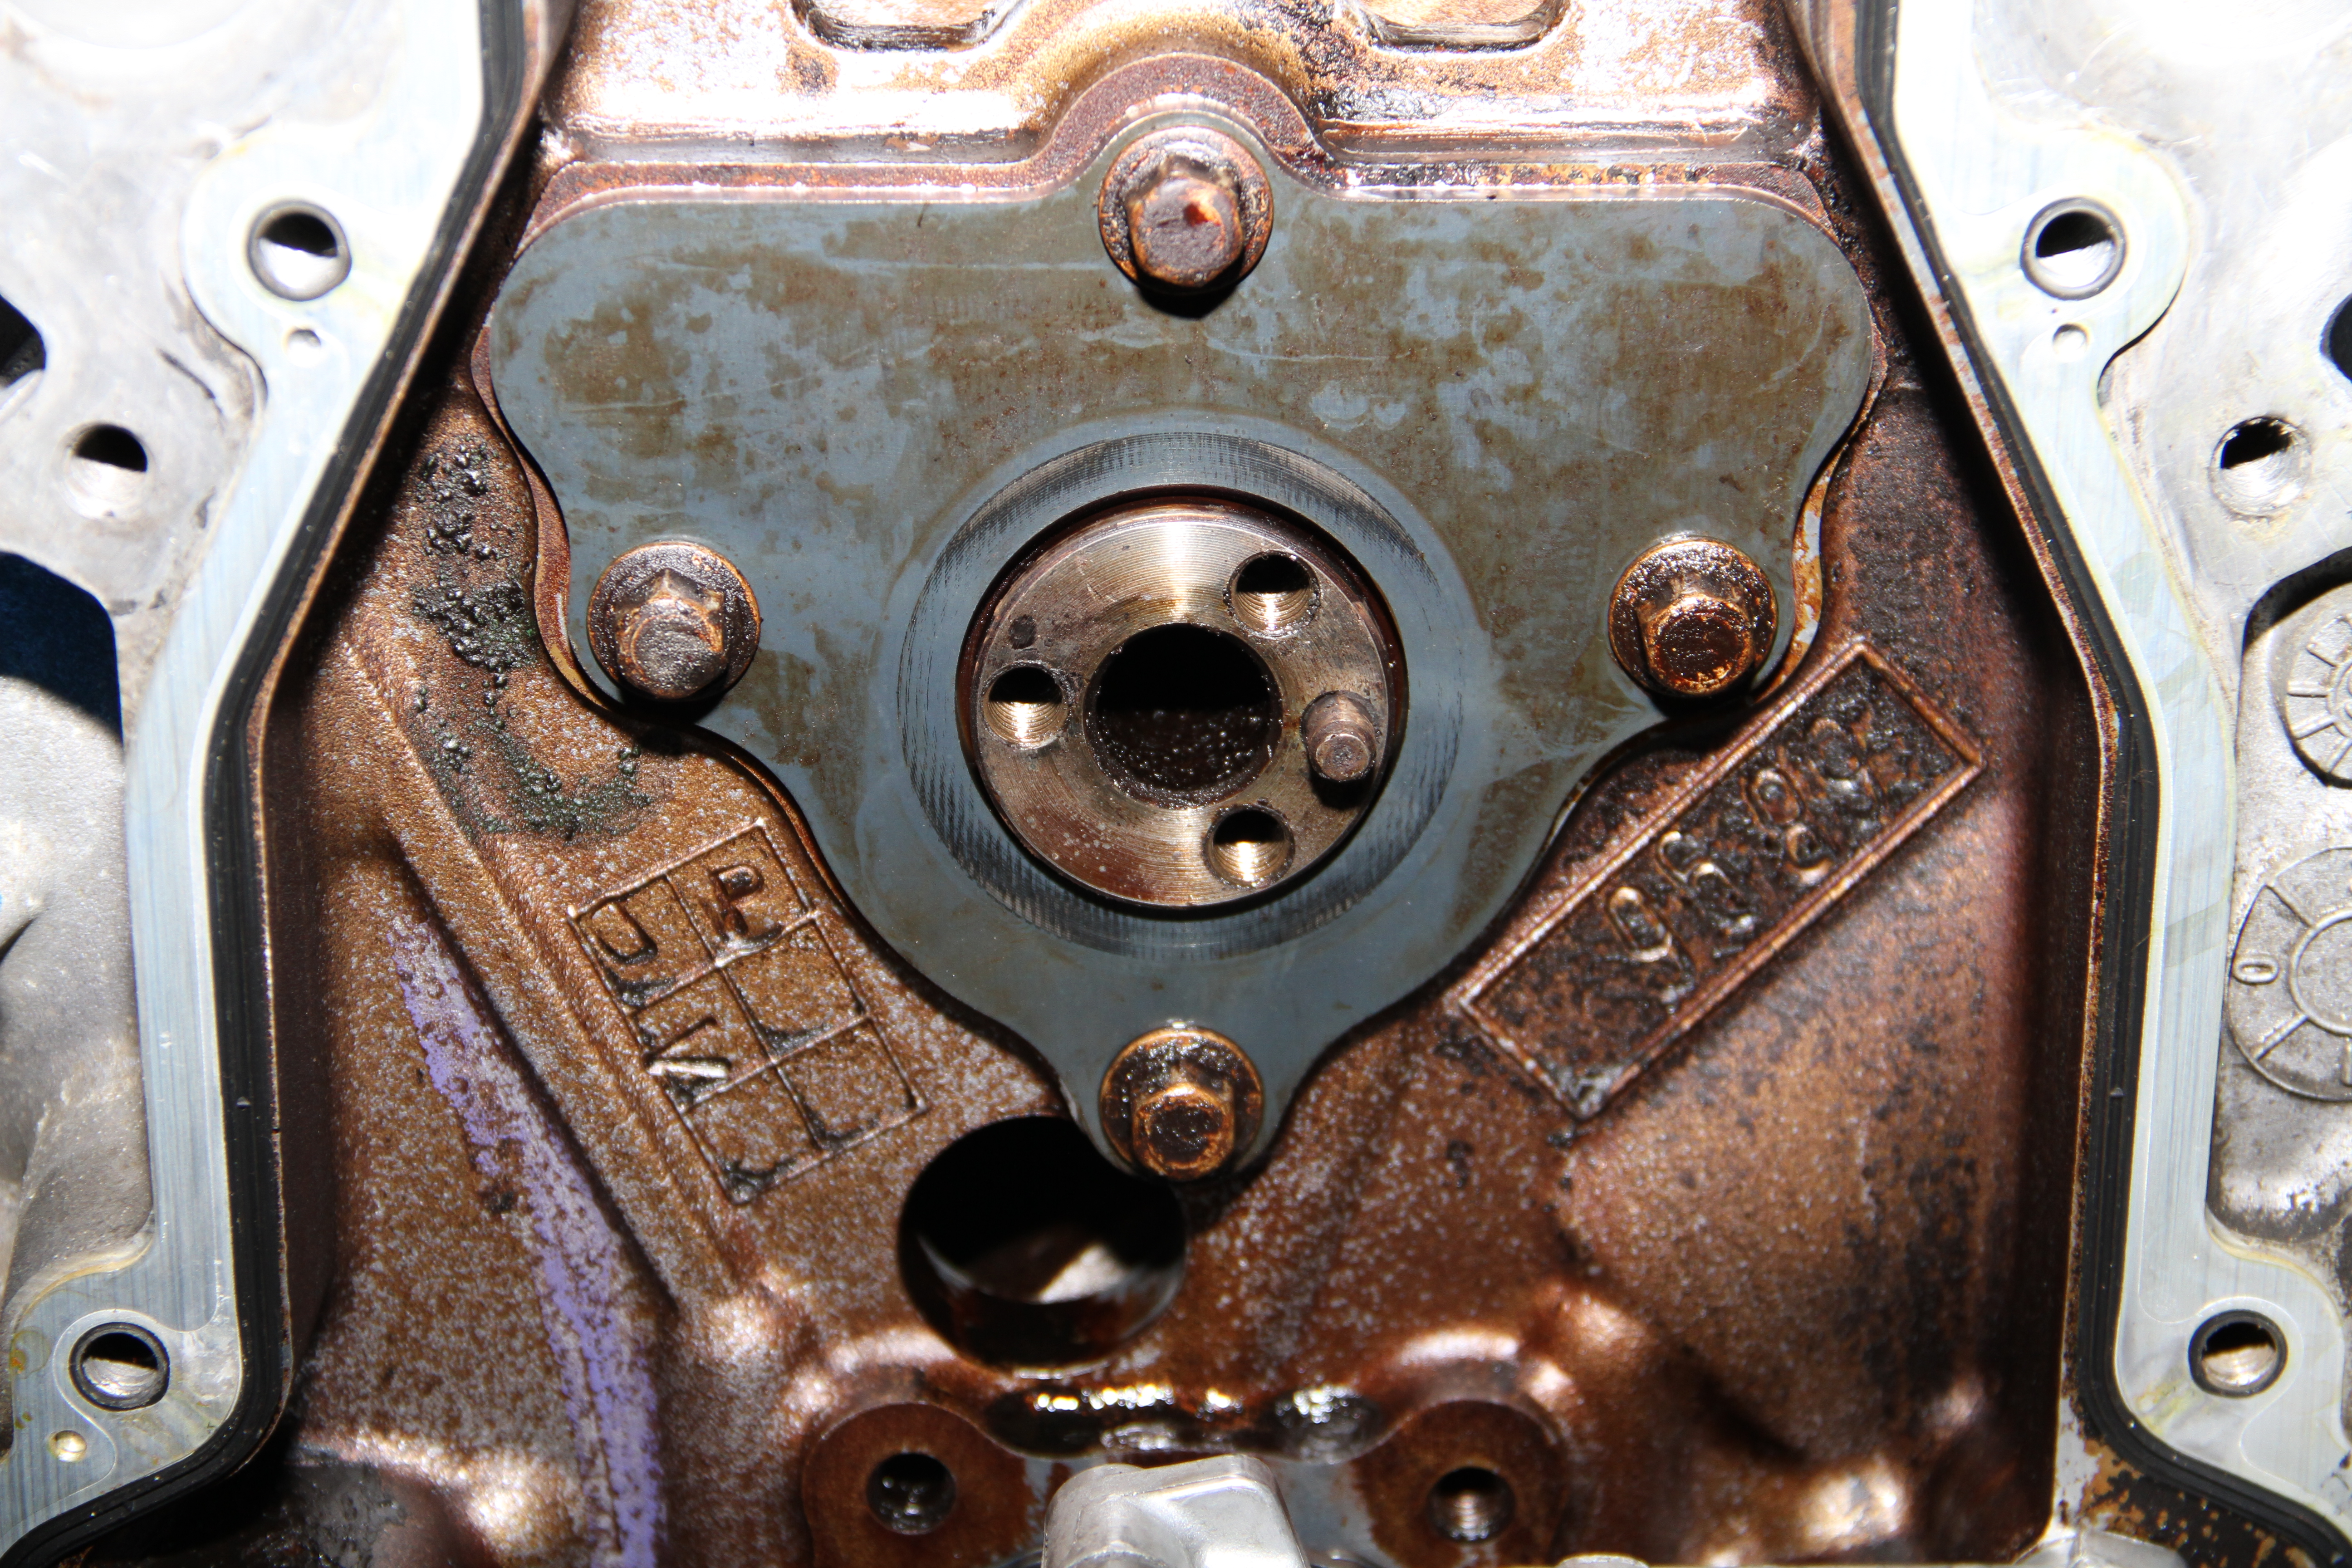
Next is the retainer plate

Next you'll see a black/brown cam retainer plate behind the gear, held on by 4 10mm bolts. Unbolt and remove this too.

remove, the bolts..
Out with the old cam....
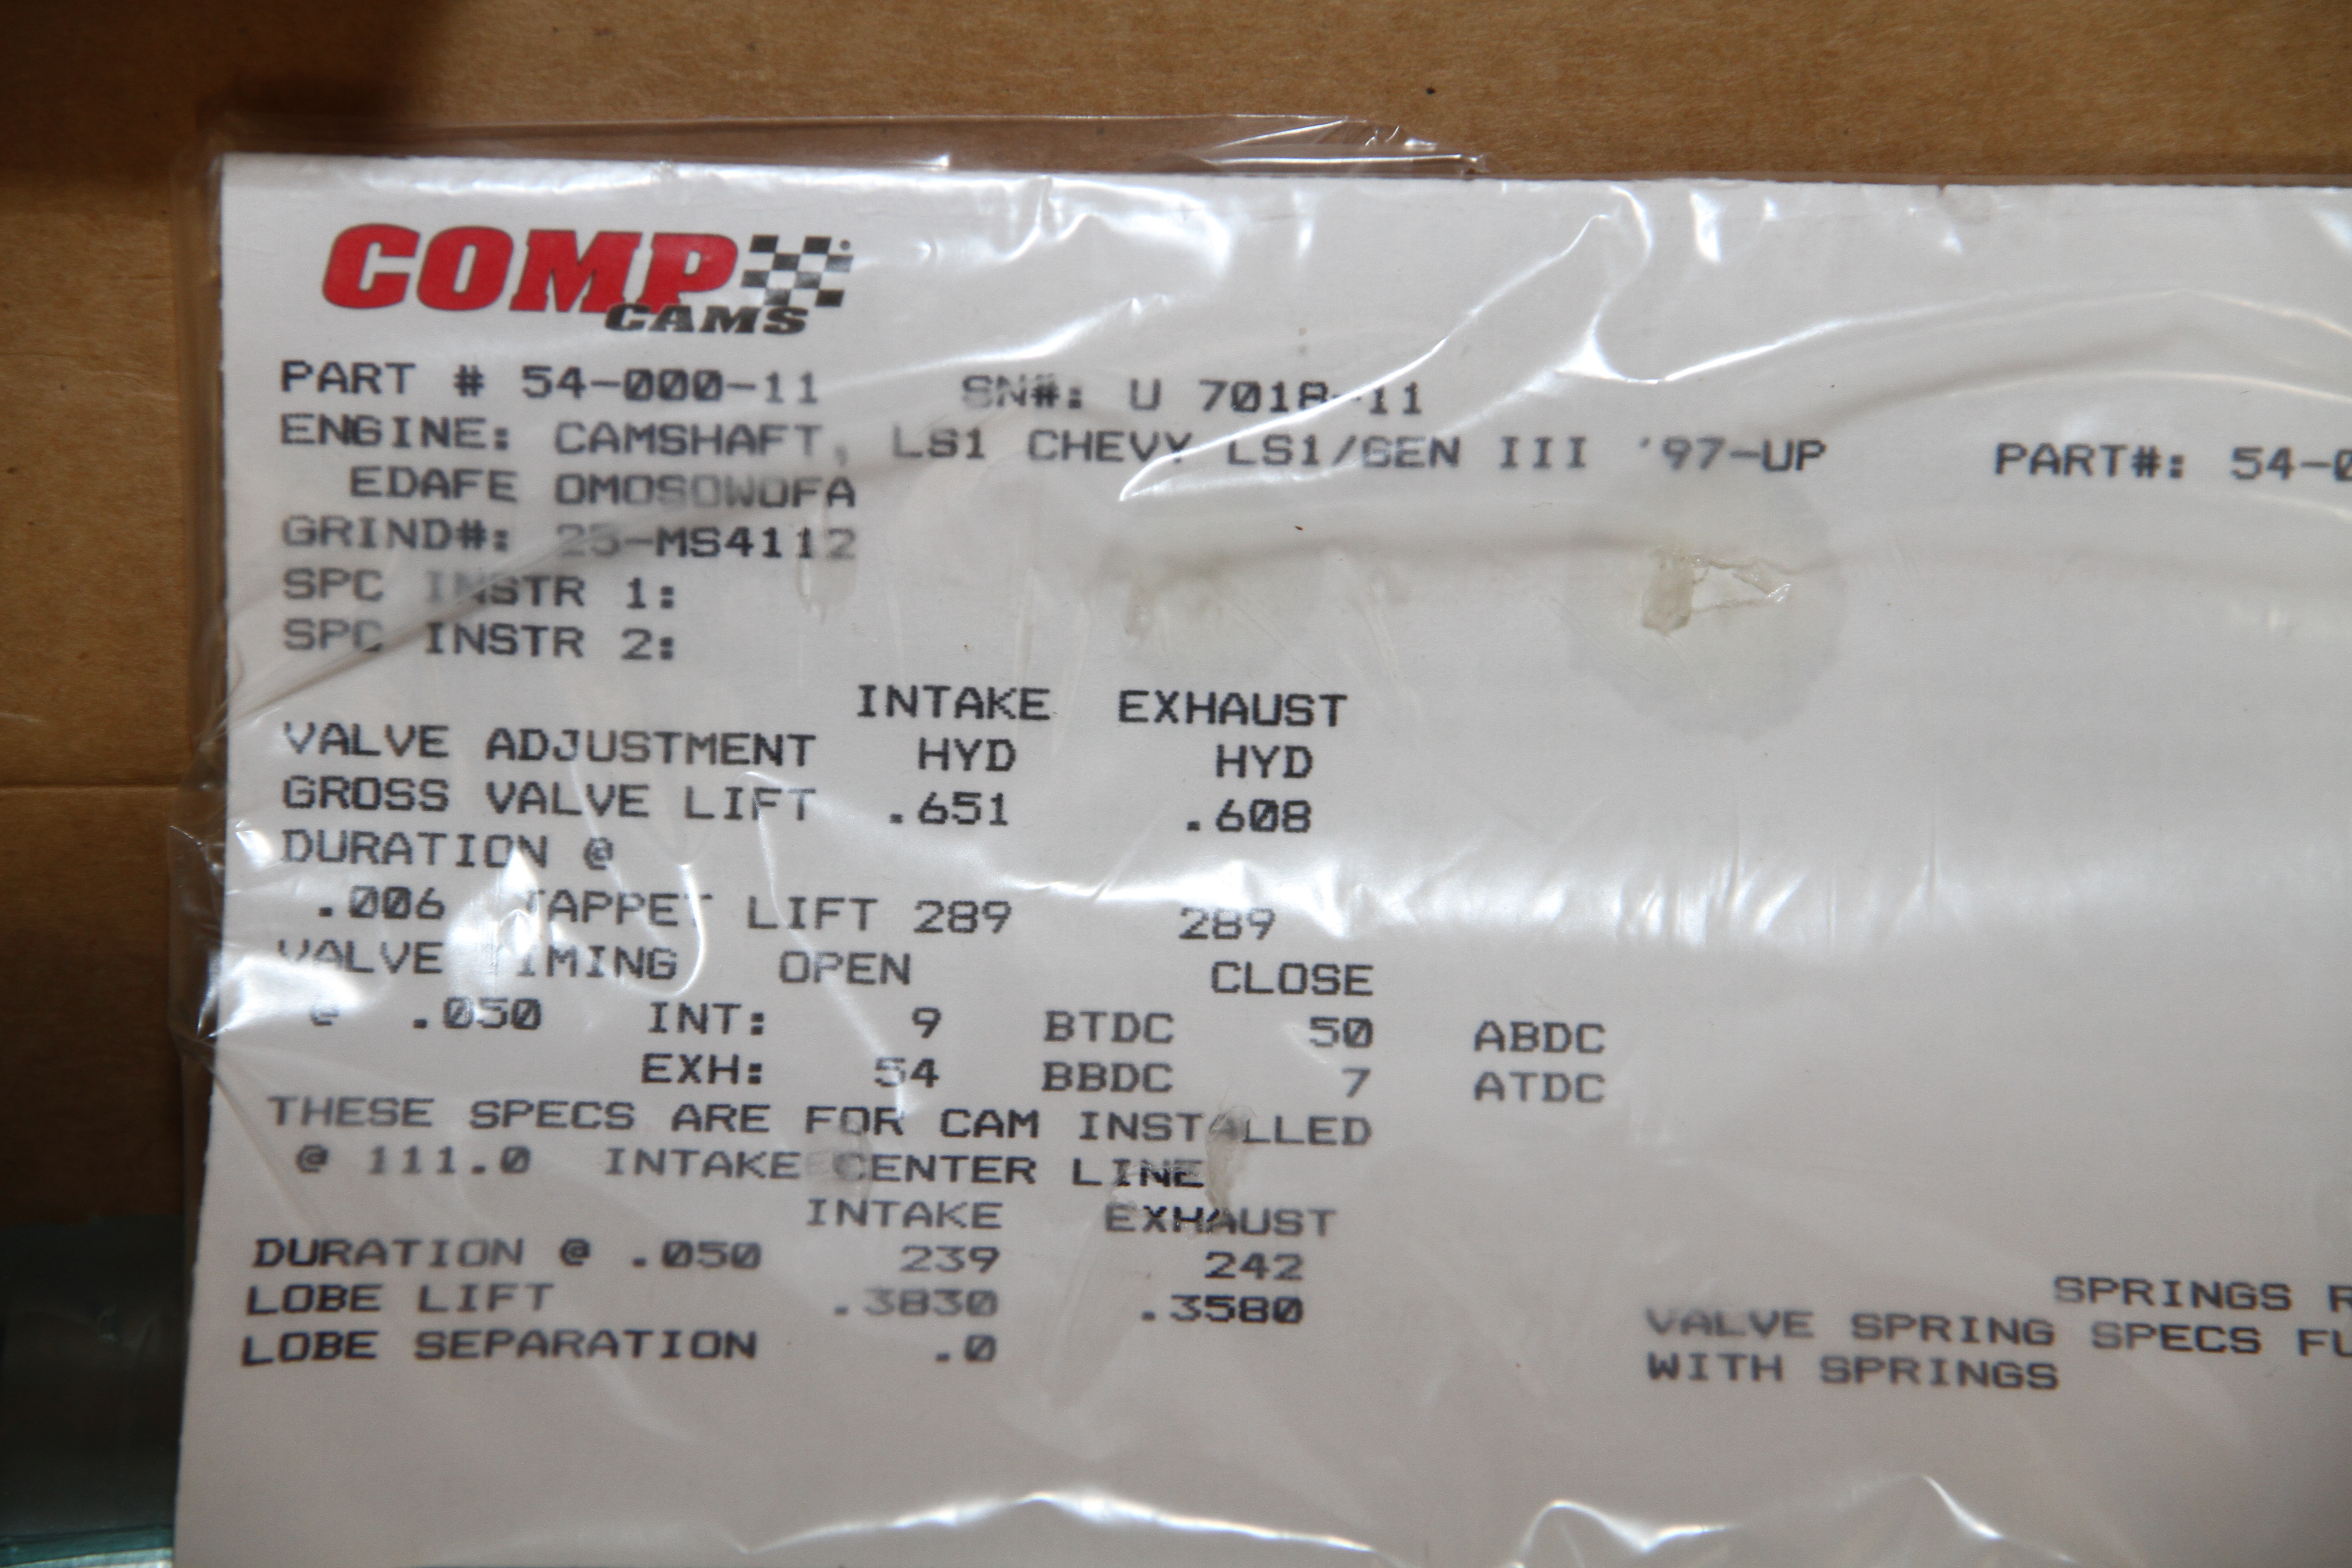
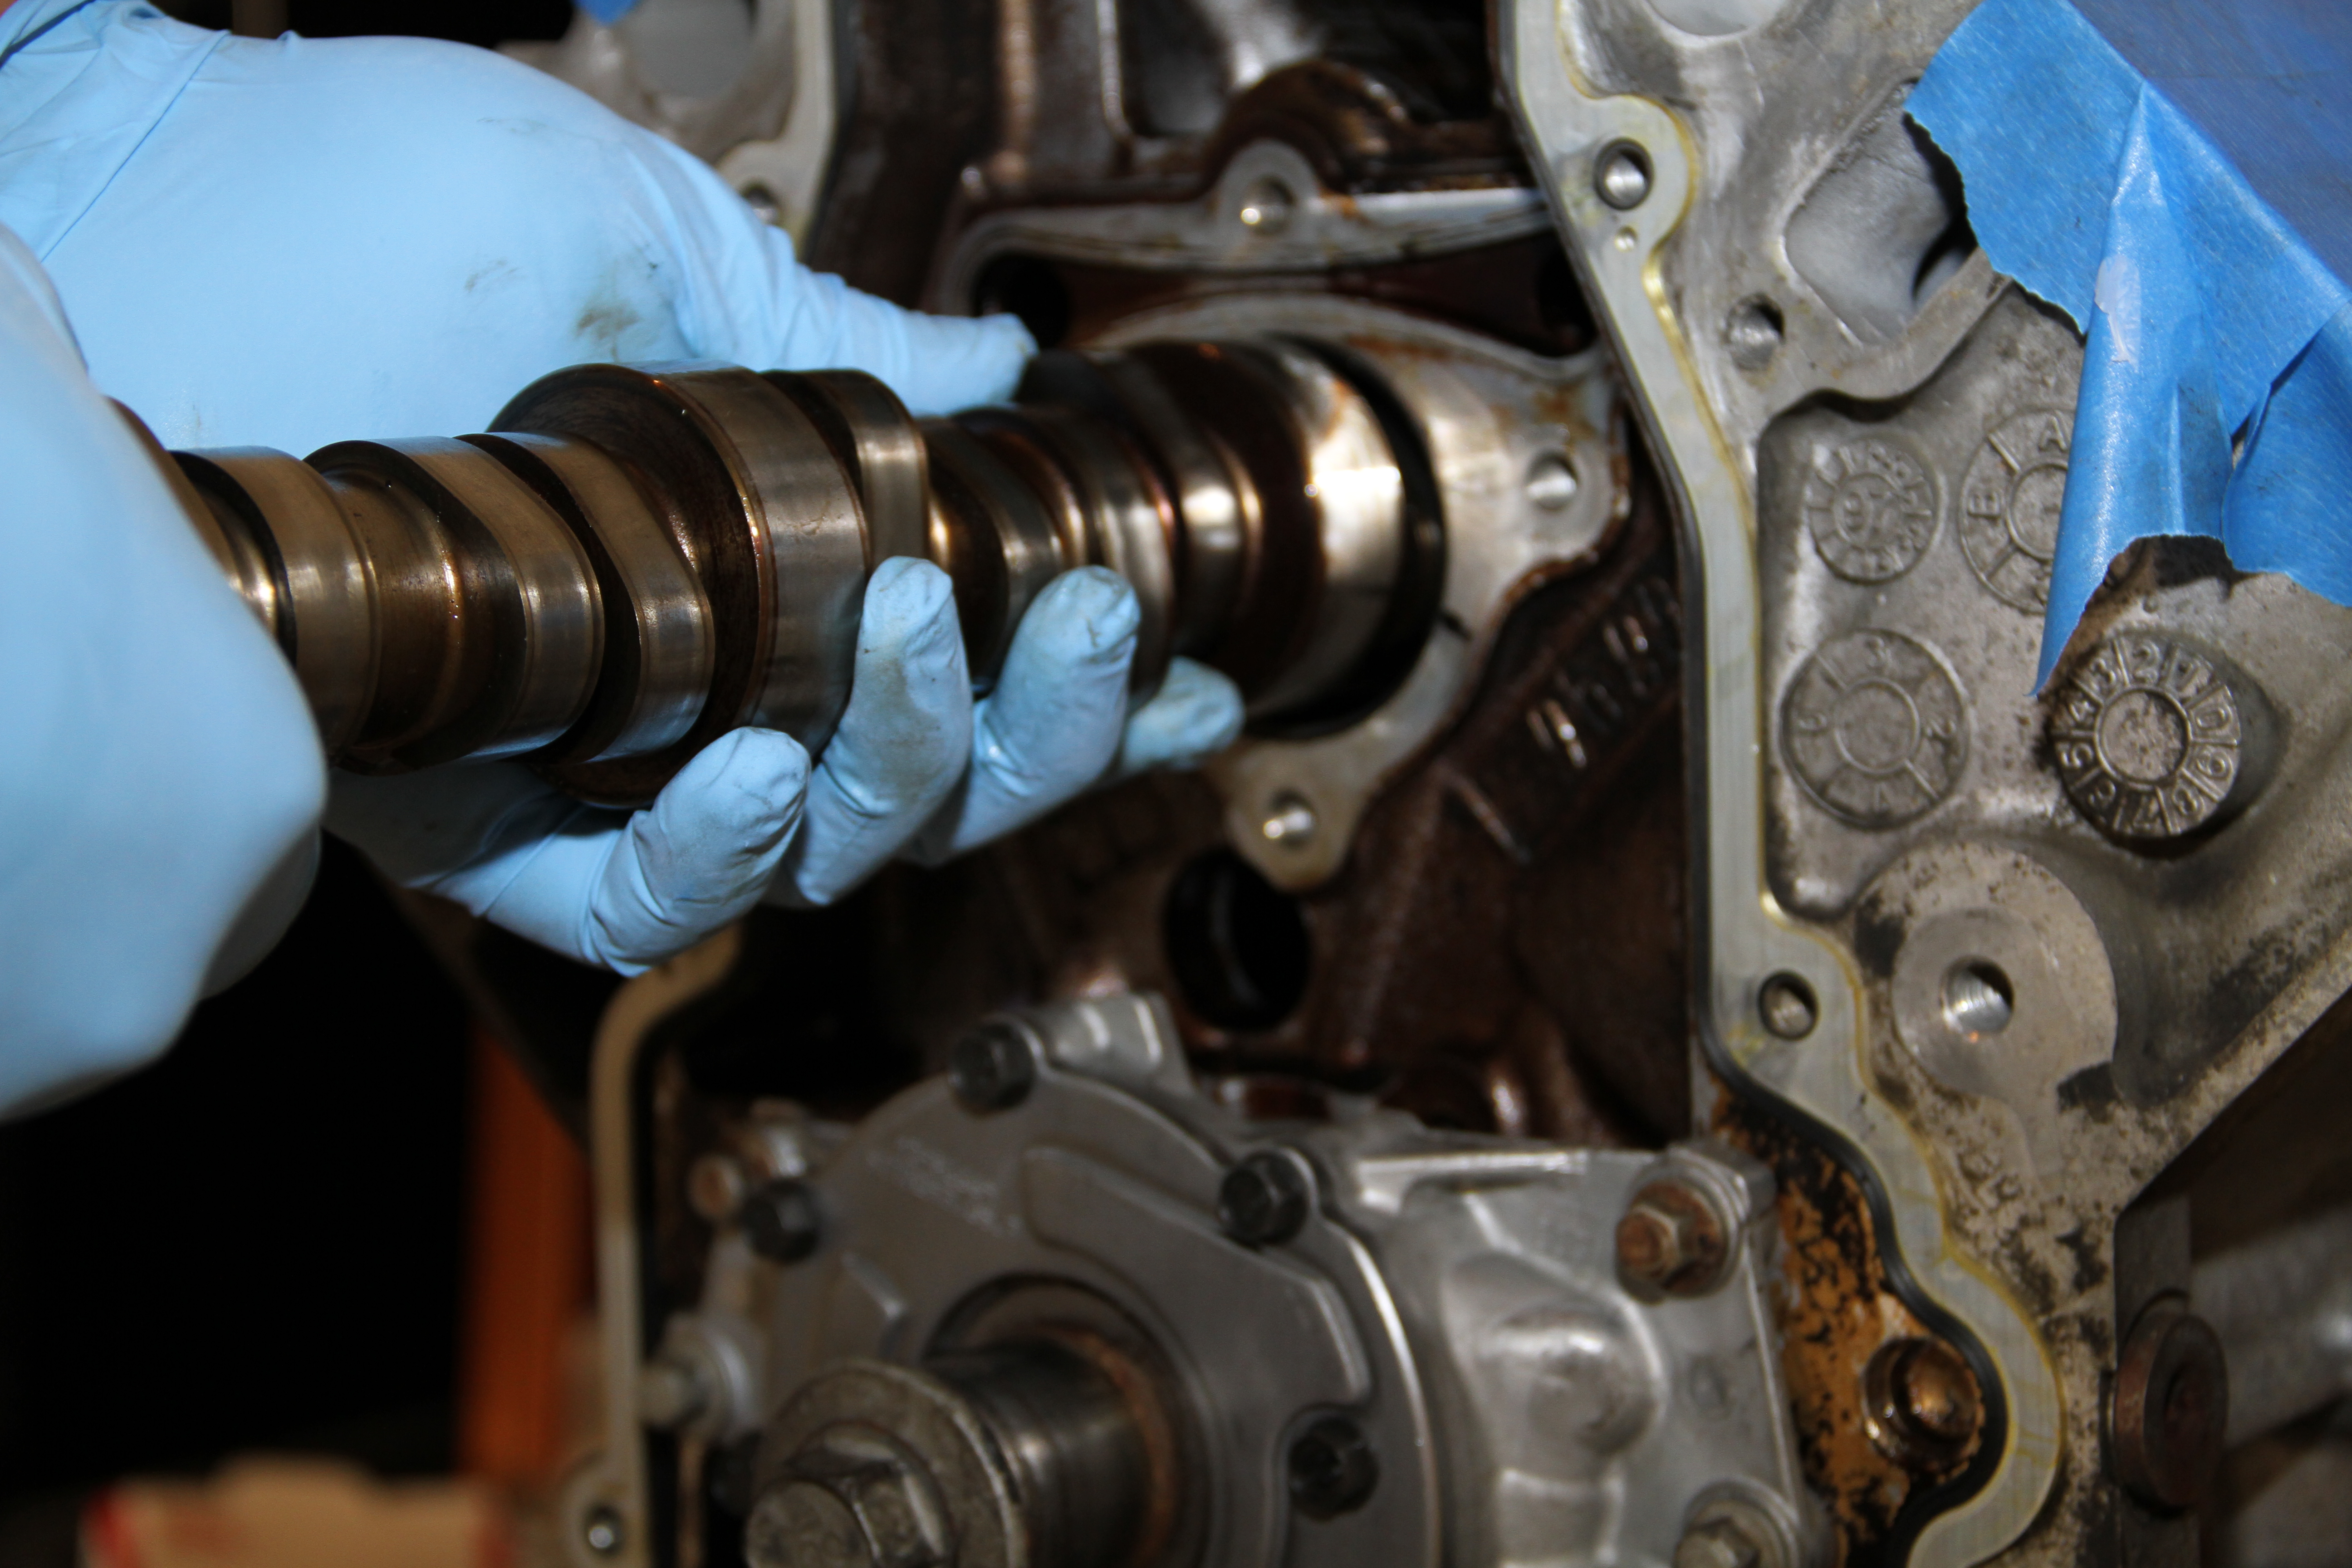
And in with the new.. The MS4 cam is a 239/242 .649"/.609" Camshaft.... Oh yeah...
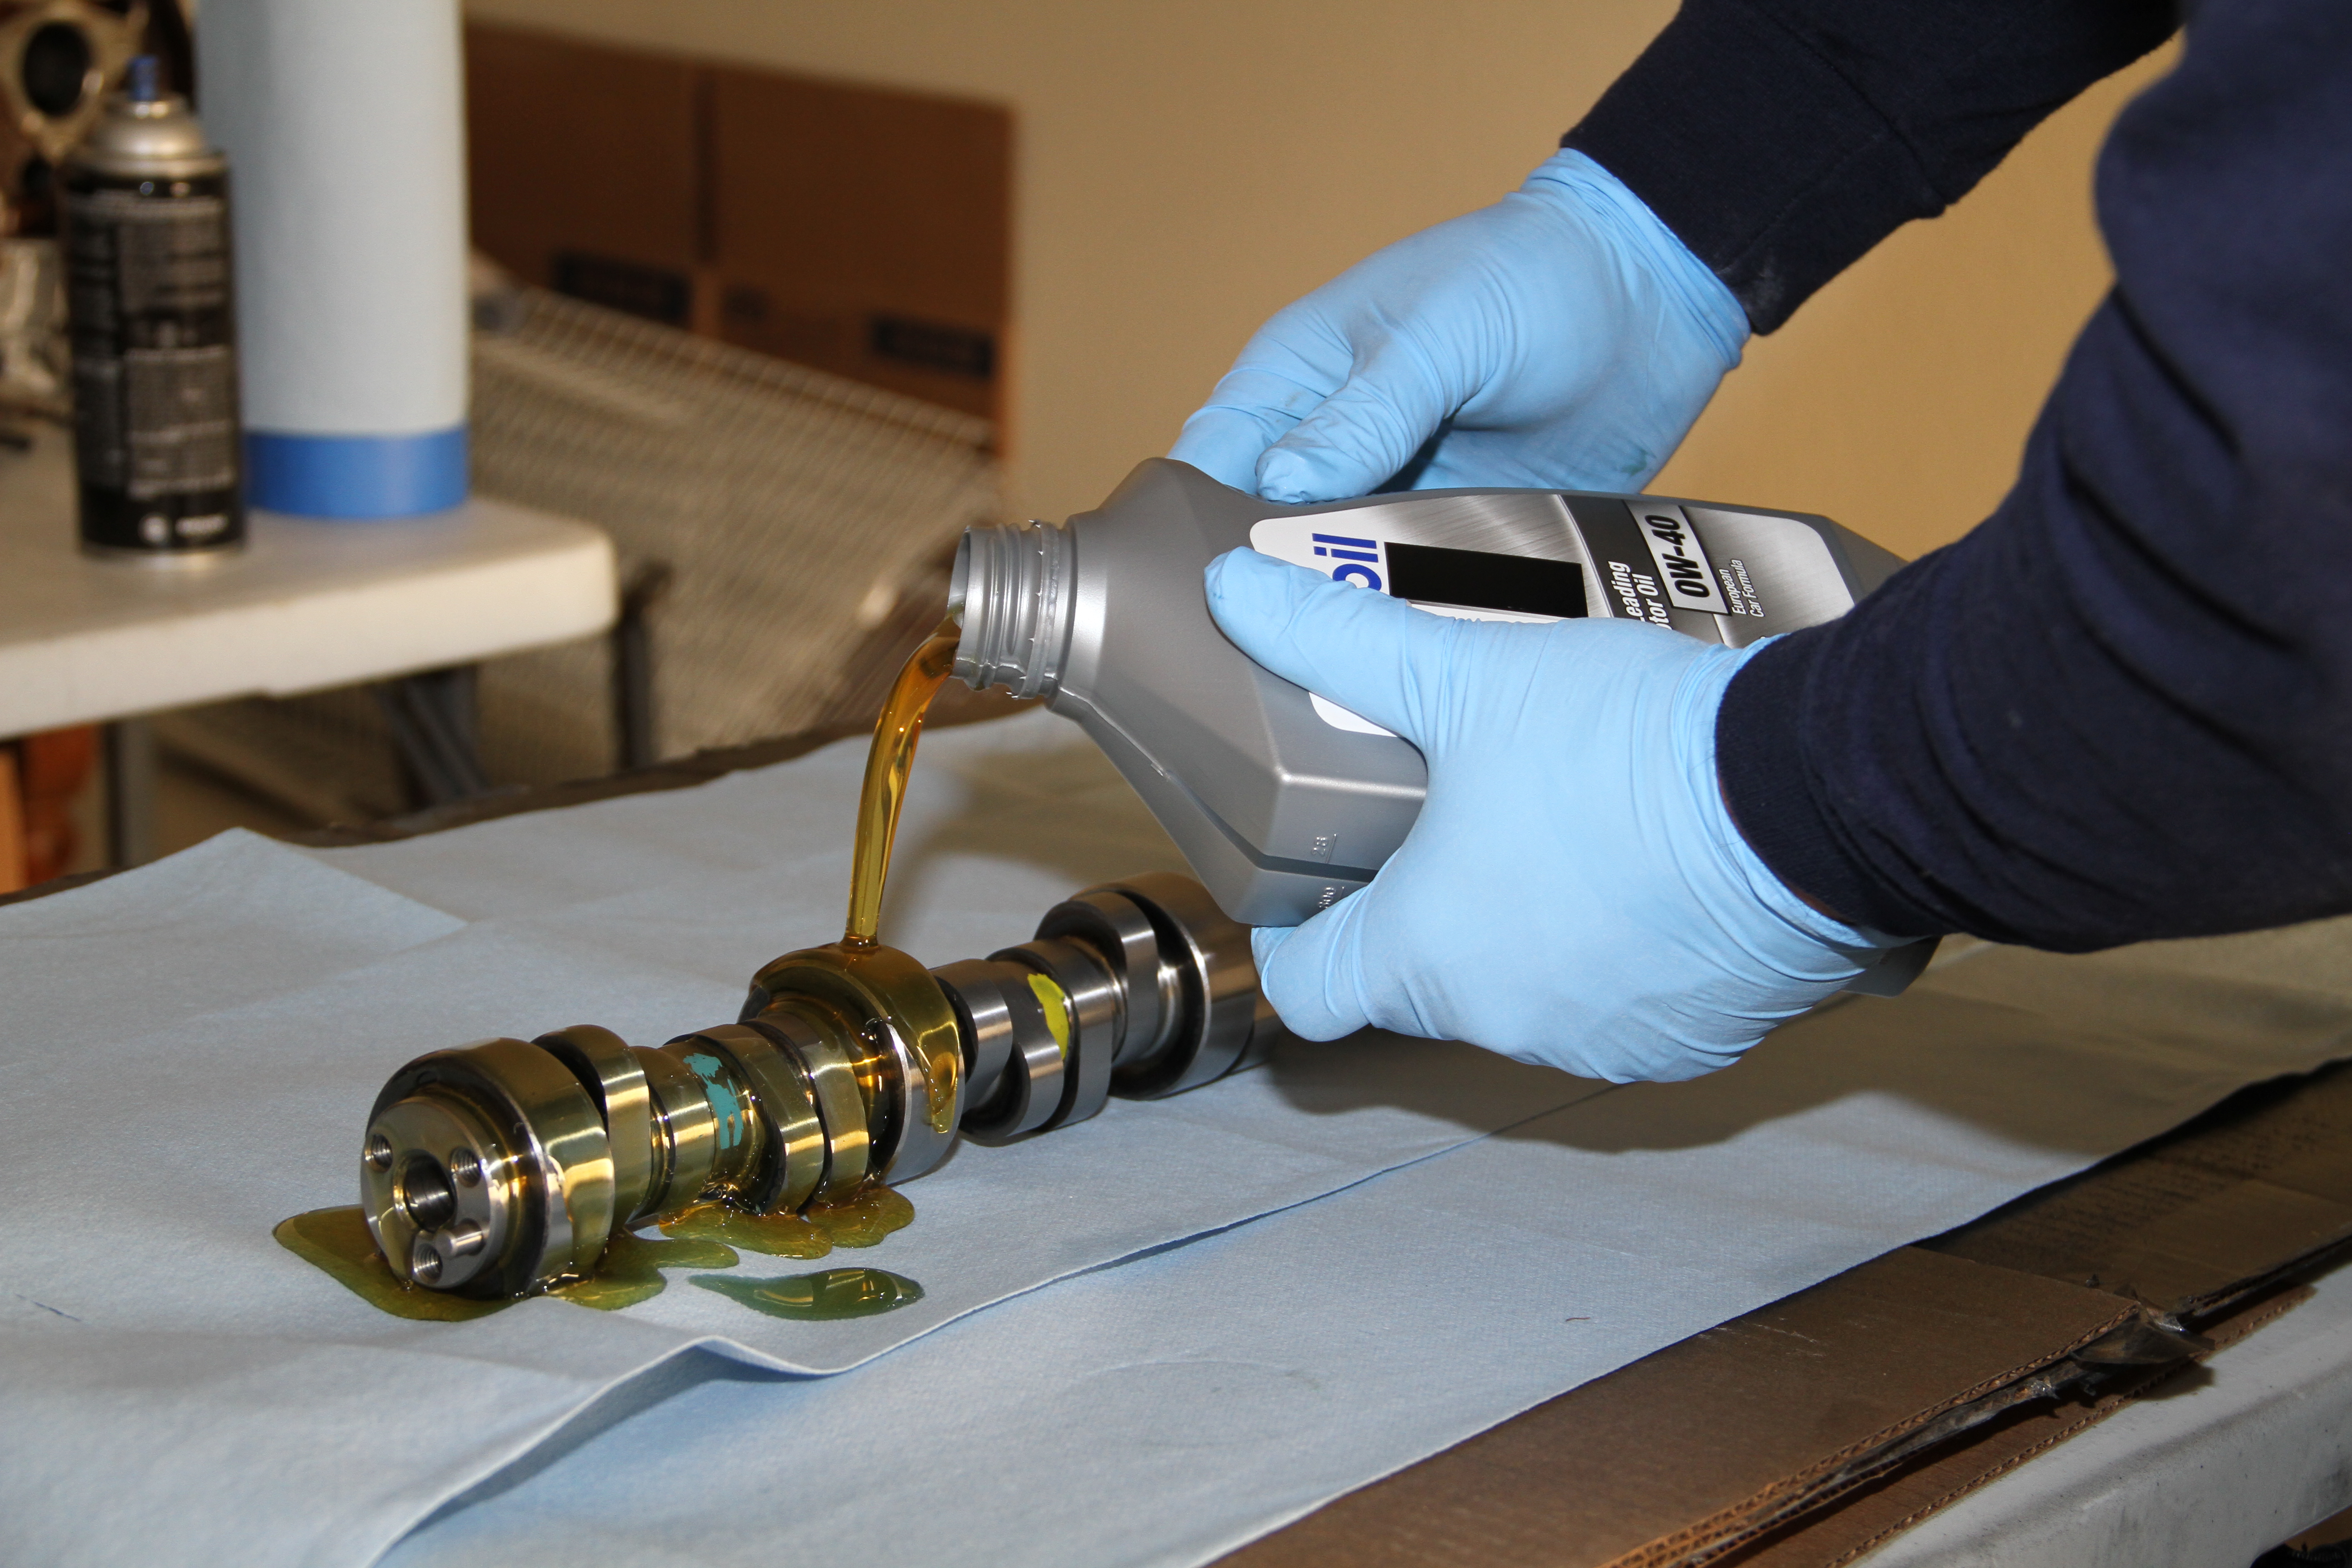
Now it is time to prep the new cam for install. Coat the whole thing with fresh motor oil, and transfer your 3 camgear bolts (or waterpump bolts if you were using those) to the end of the new cam so again you have a handle to grip onto.
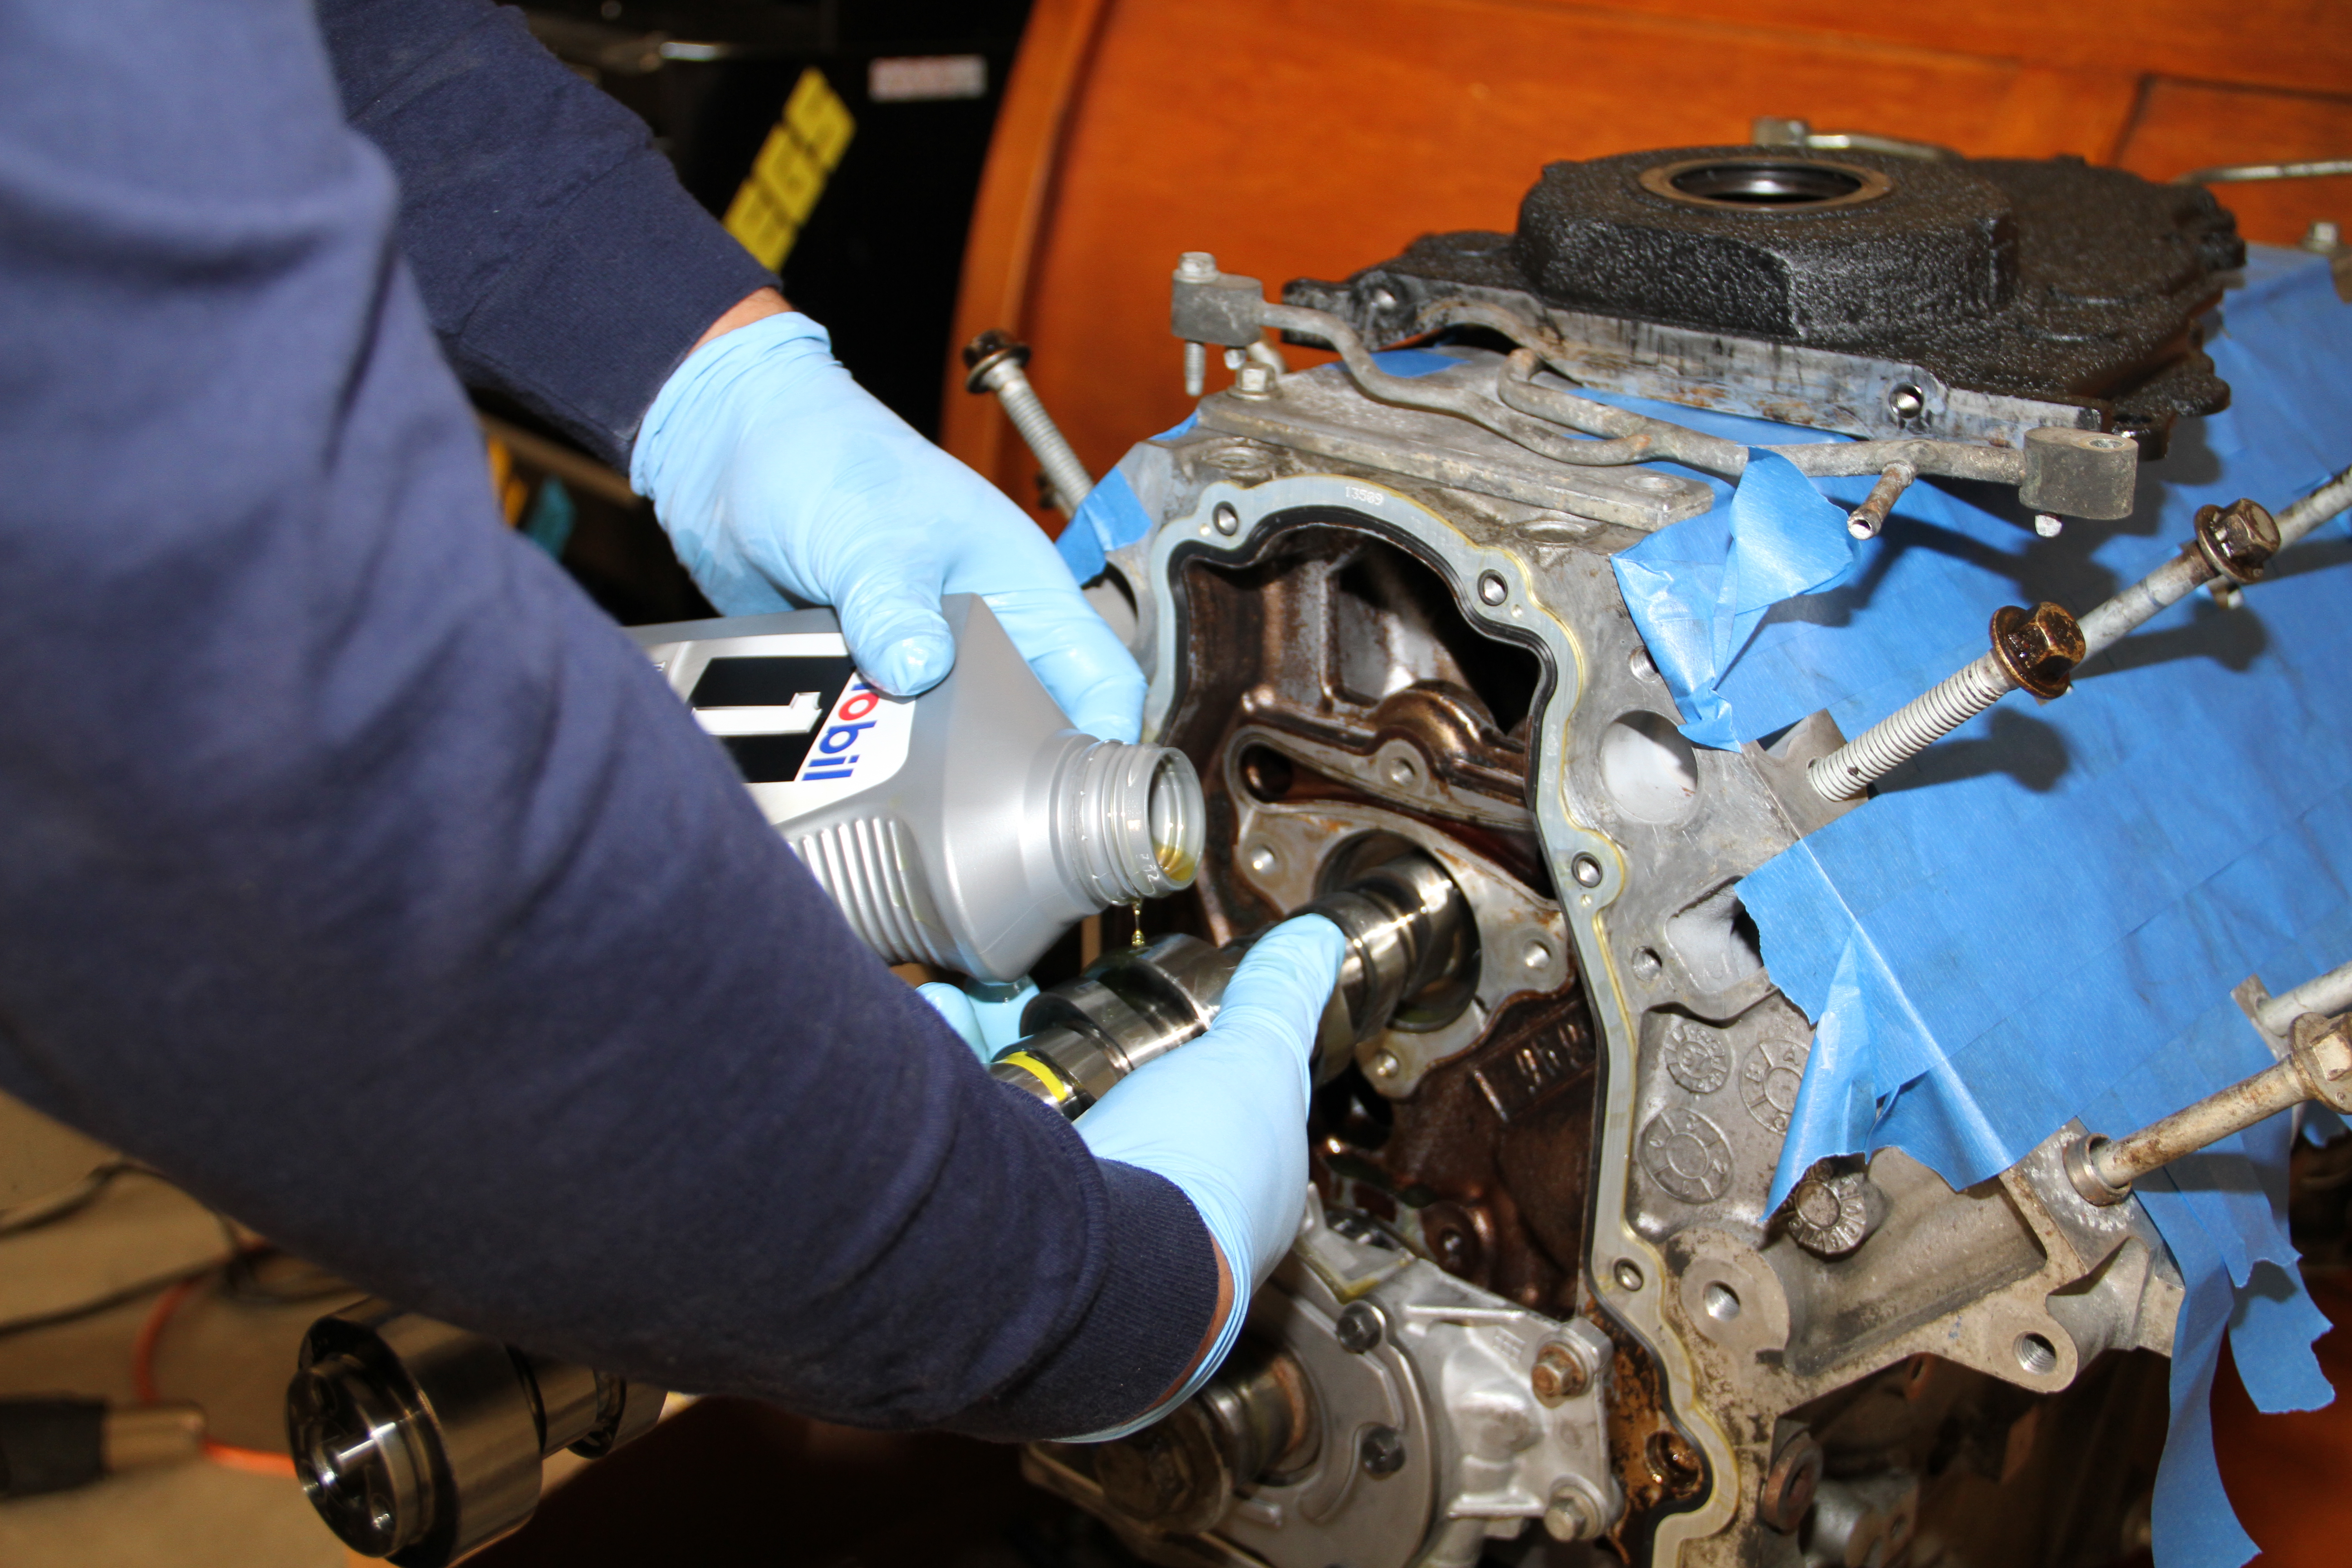
Now take your time installing the new cam, and keep on coating the cam with fresh oil as you go..
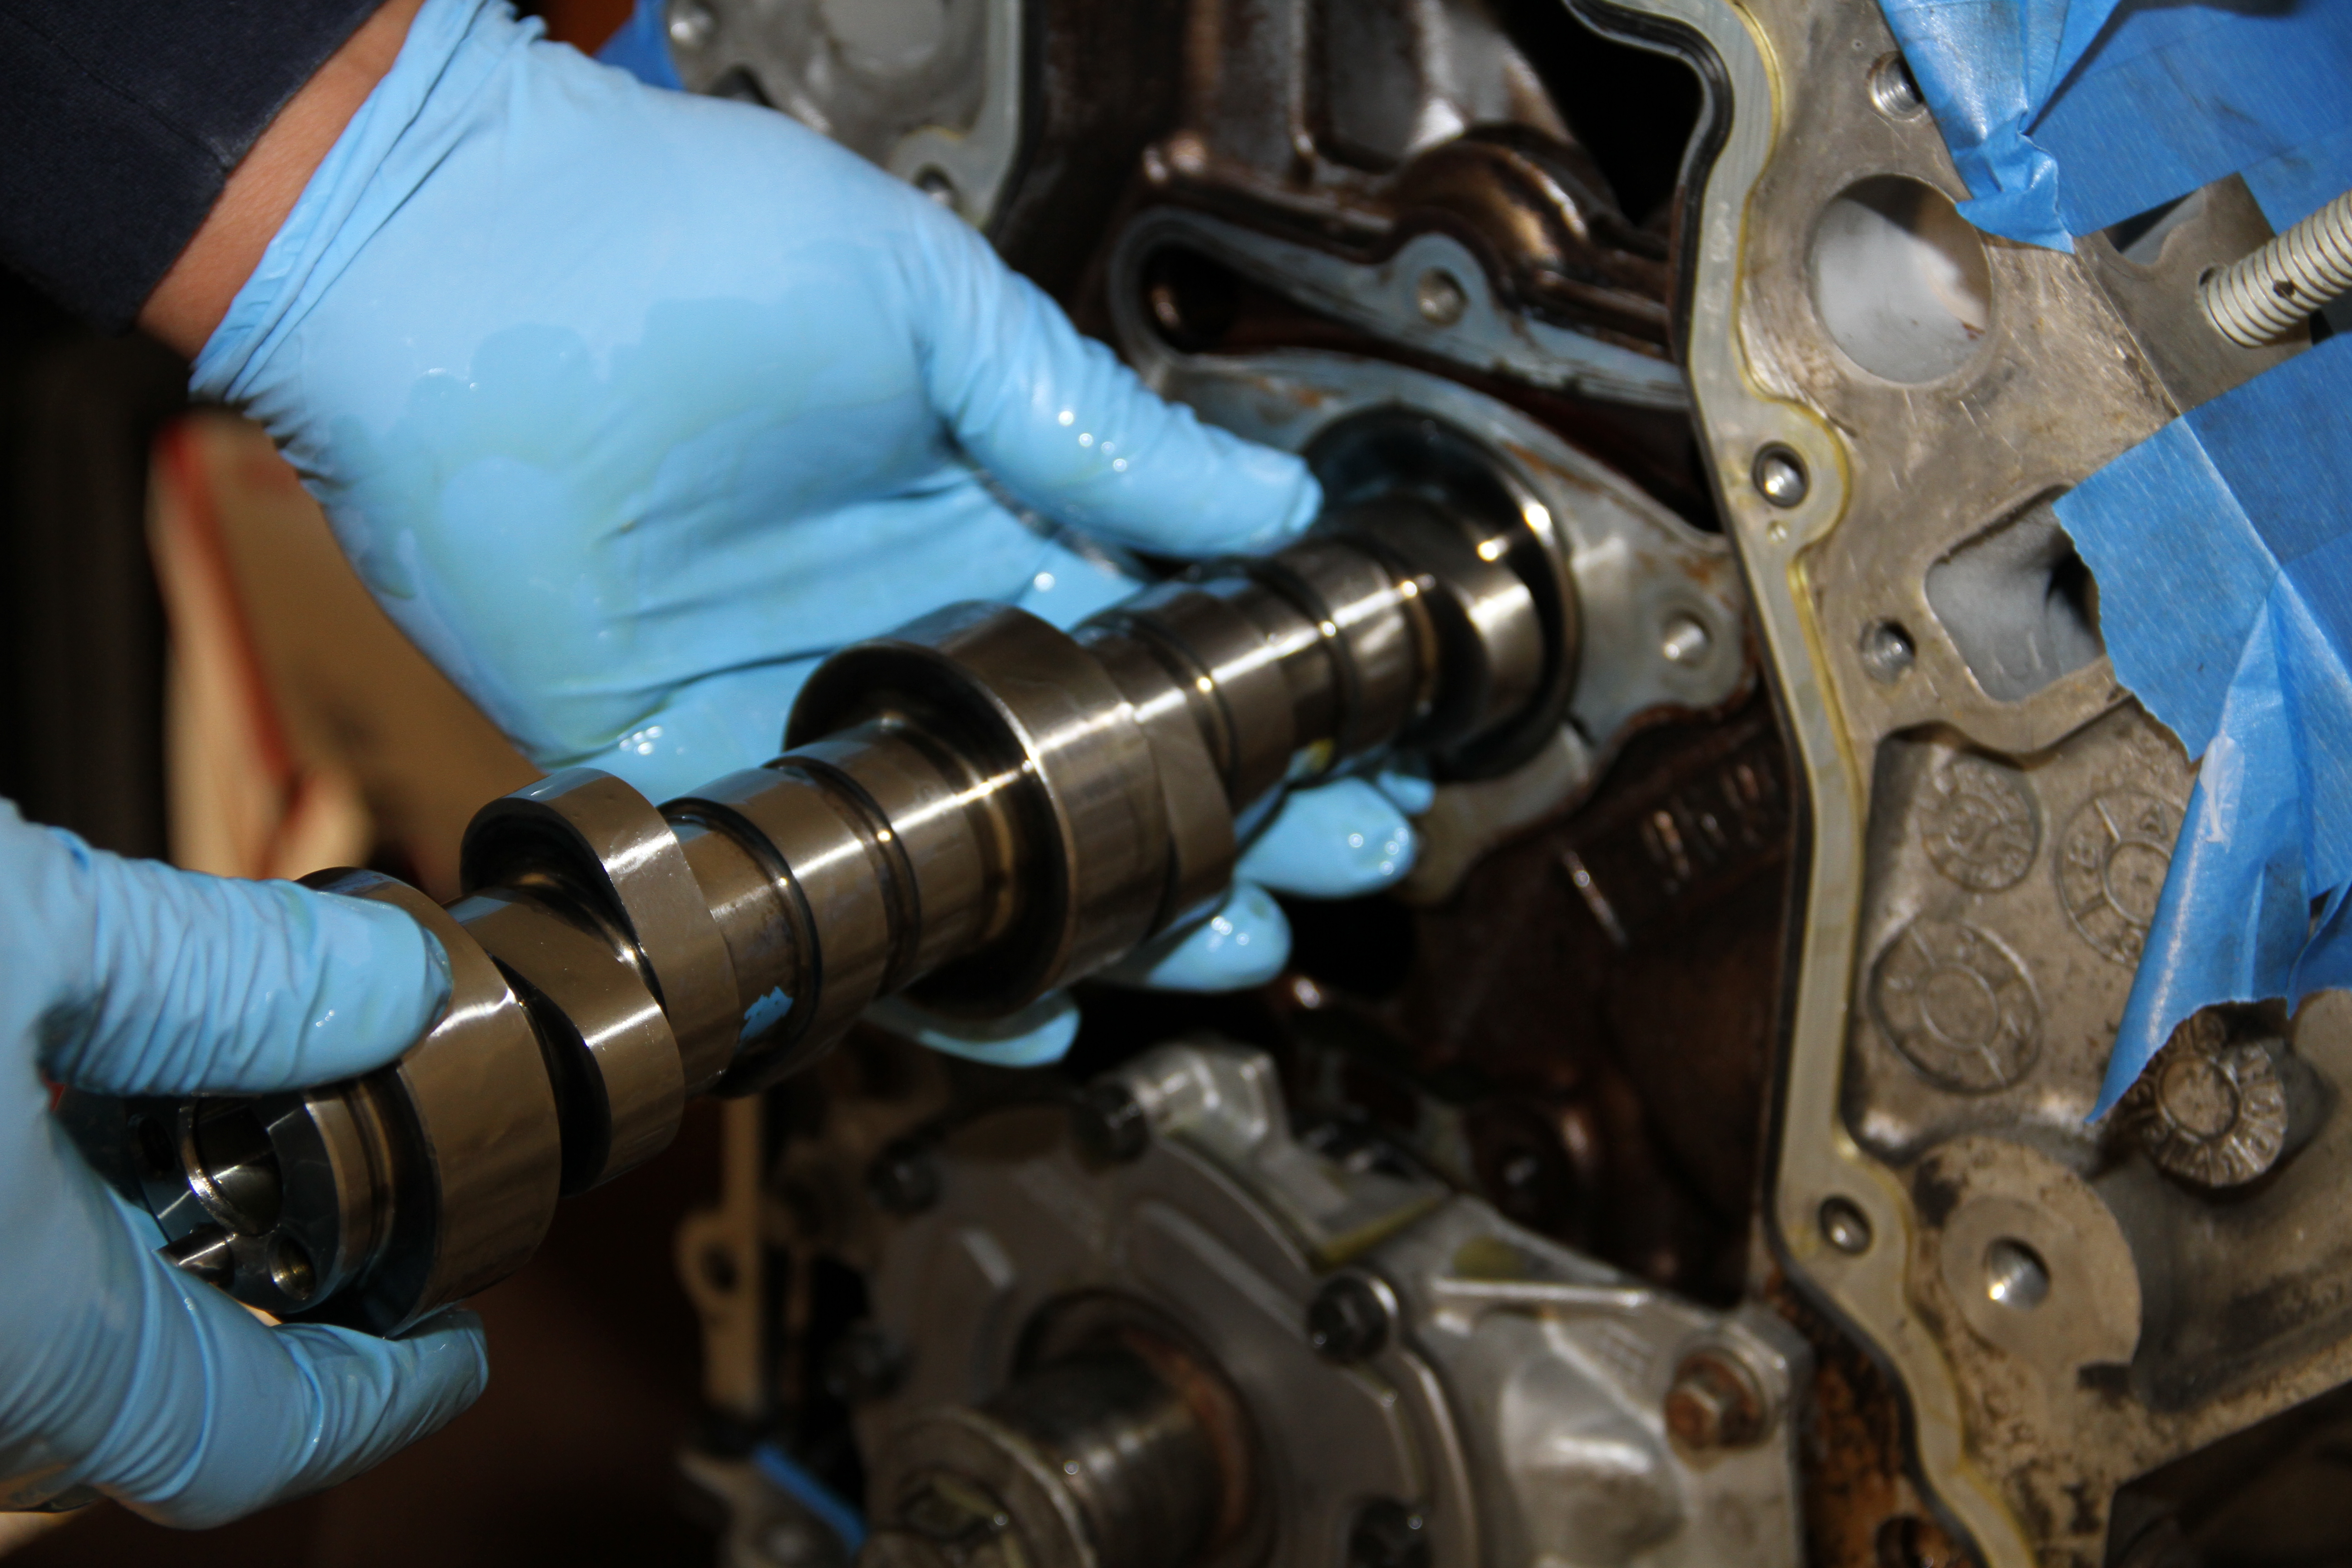
Almost done,, the 3 camgear bolts come in handy towards the end when you don't have nothing to grab onto,, so def do this..
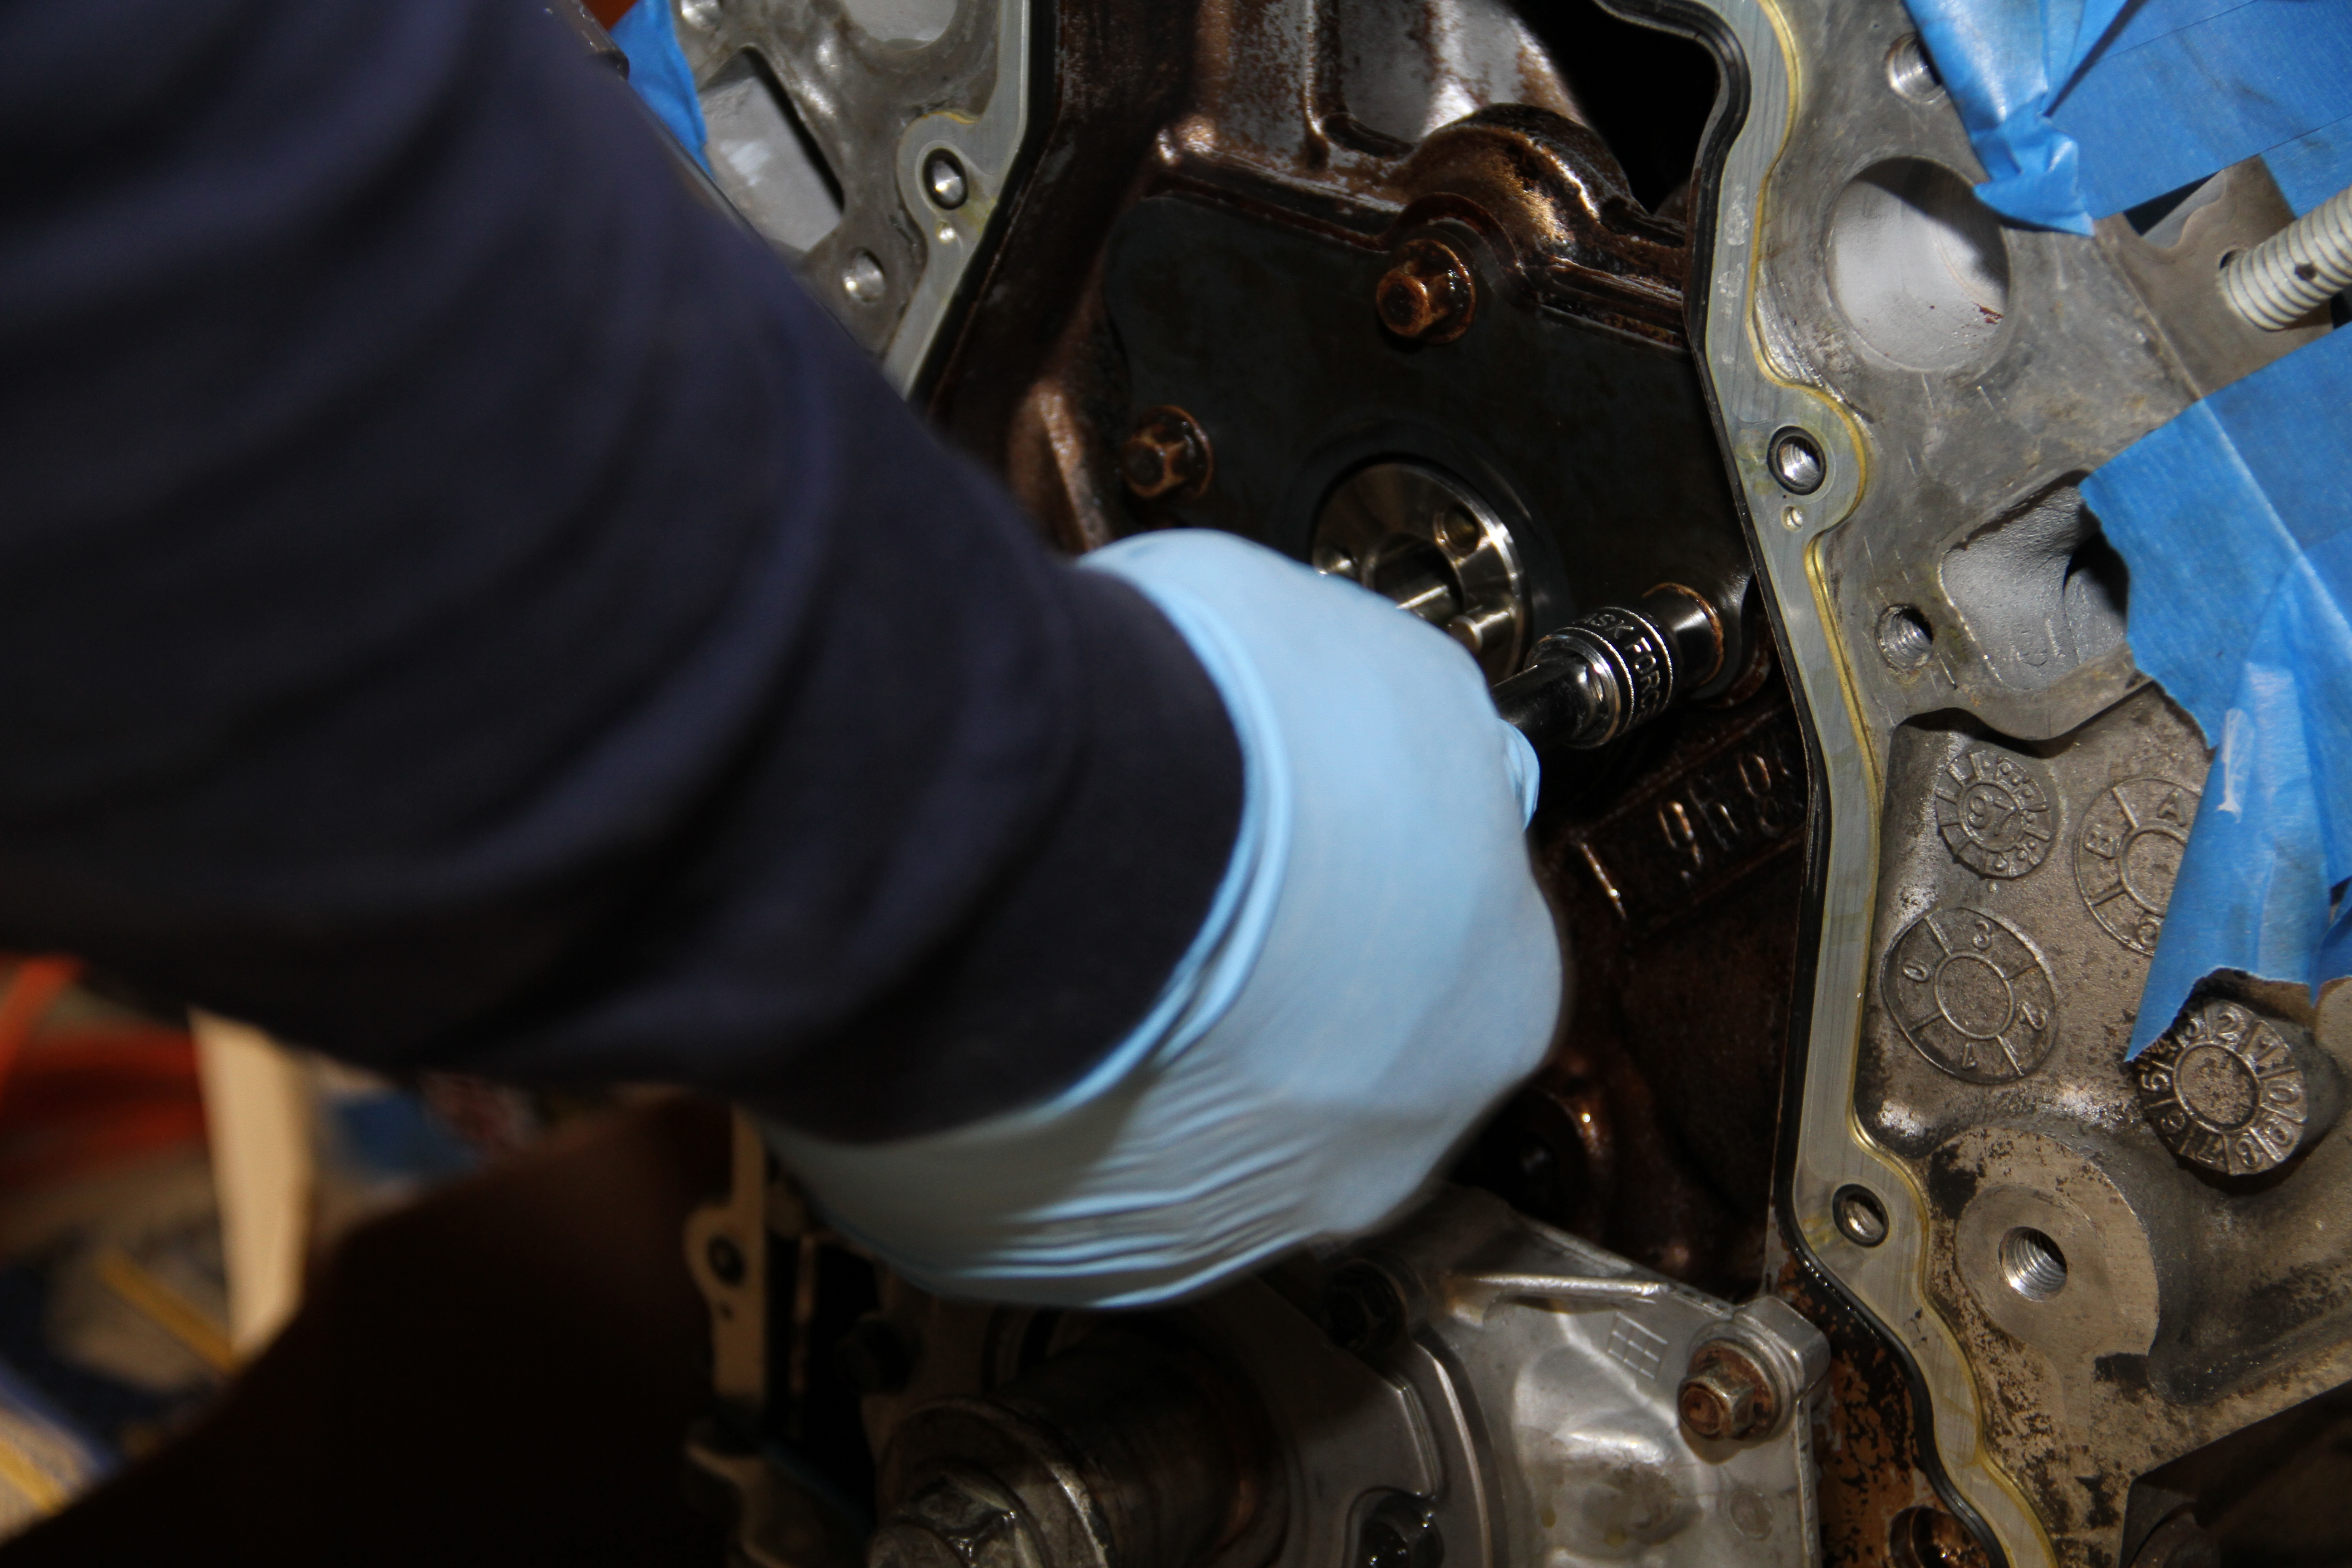
Once in, re-install the cam retainer plate and its 4 10mm bolts. I usually put some locktite on the 4 bolts and the GM torque spec on them is 18lbft.
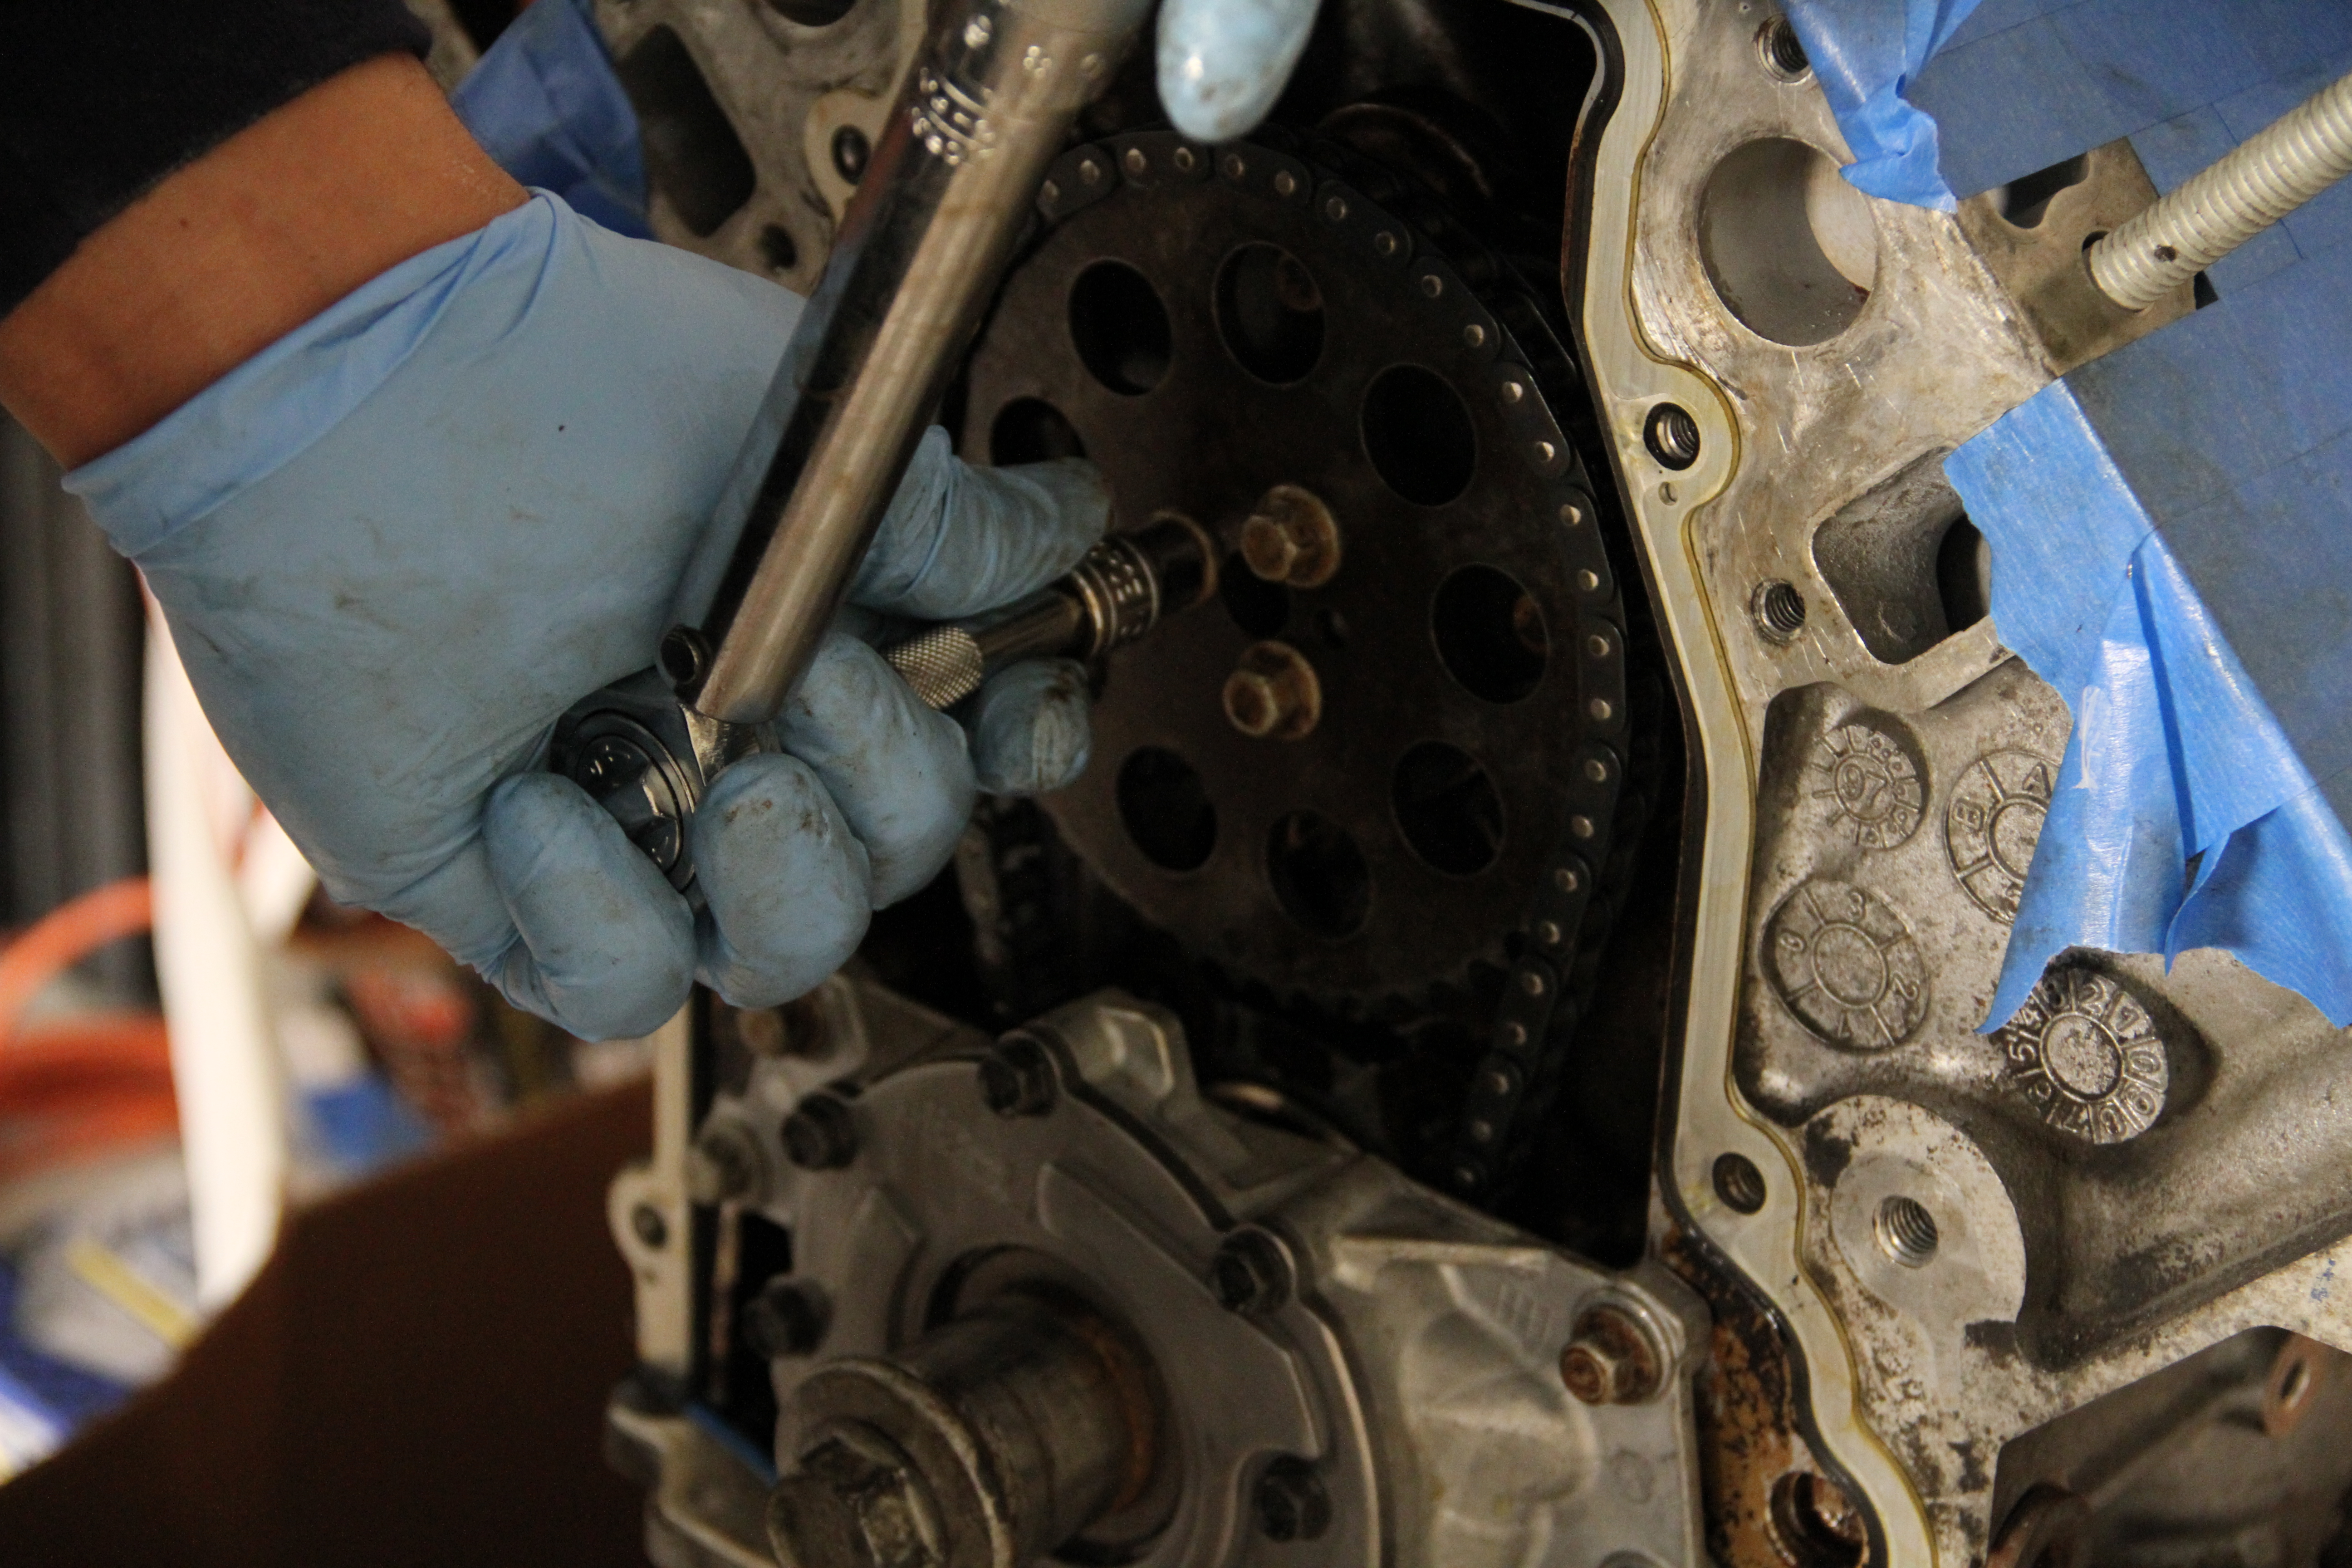
Then install the timing gear, and torque spec on these is 18lbft as well.
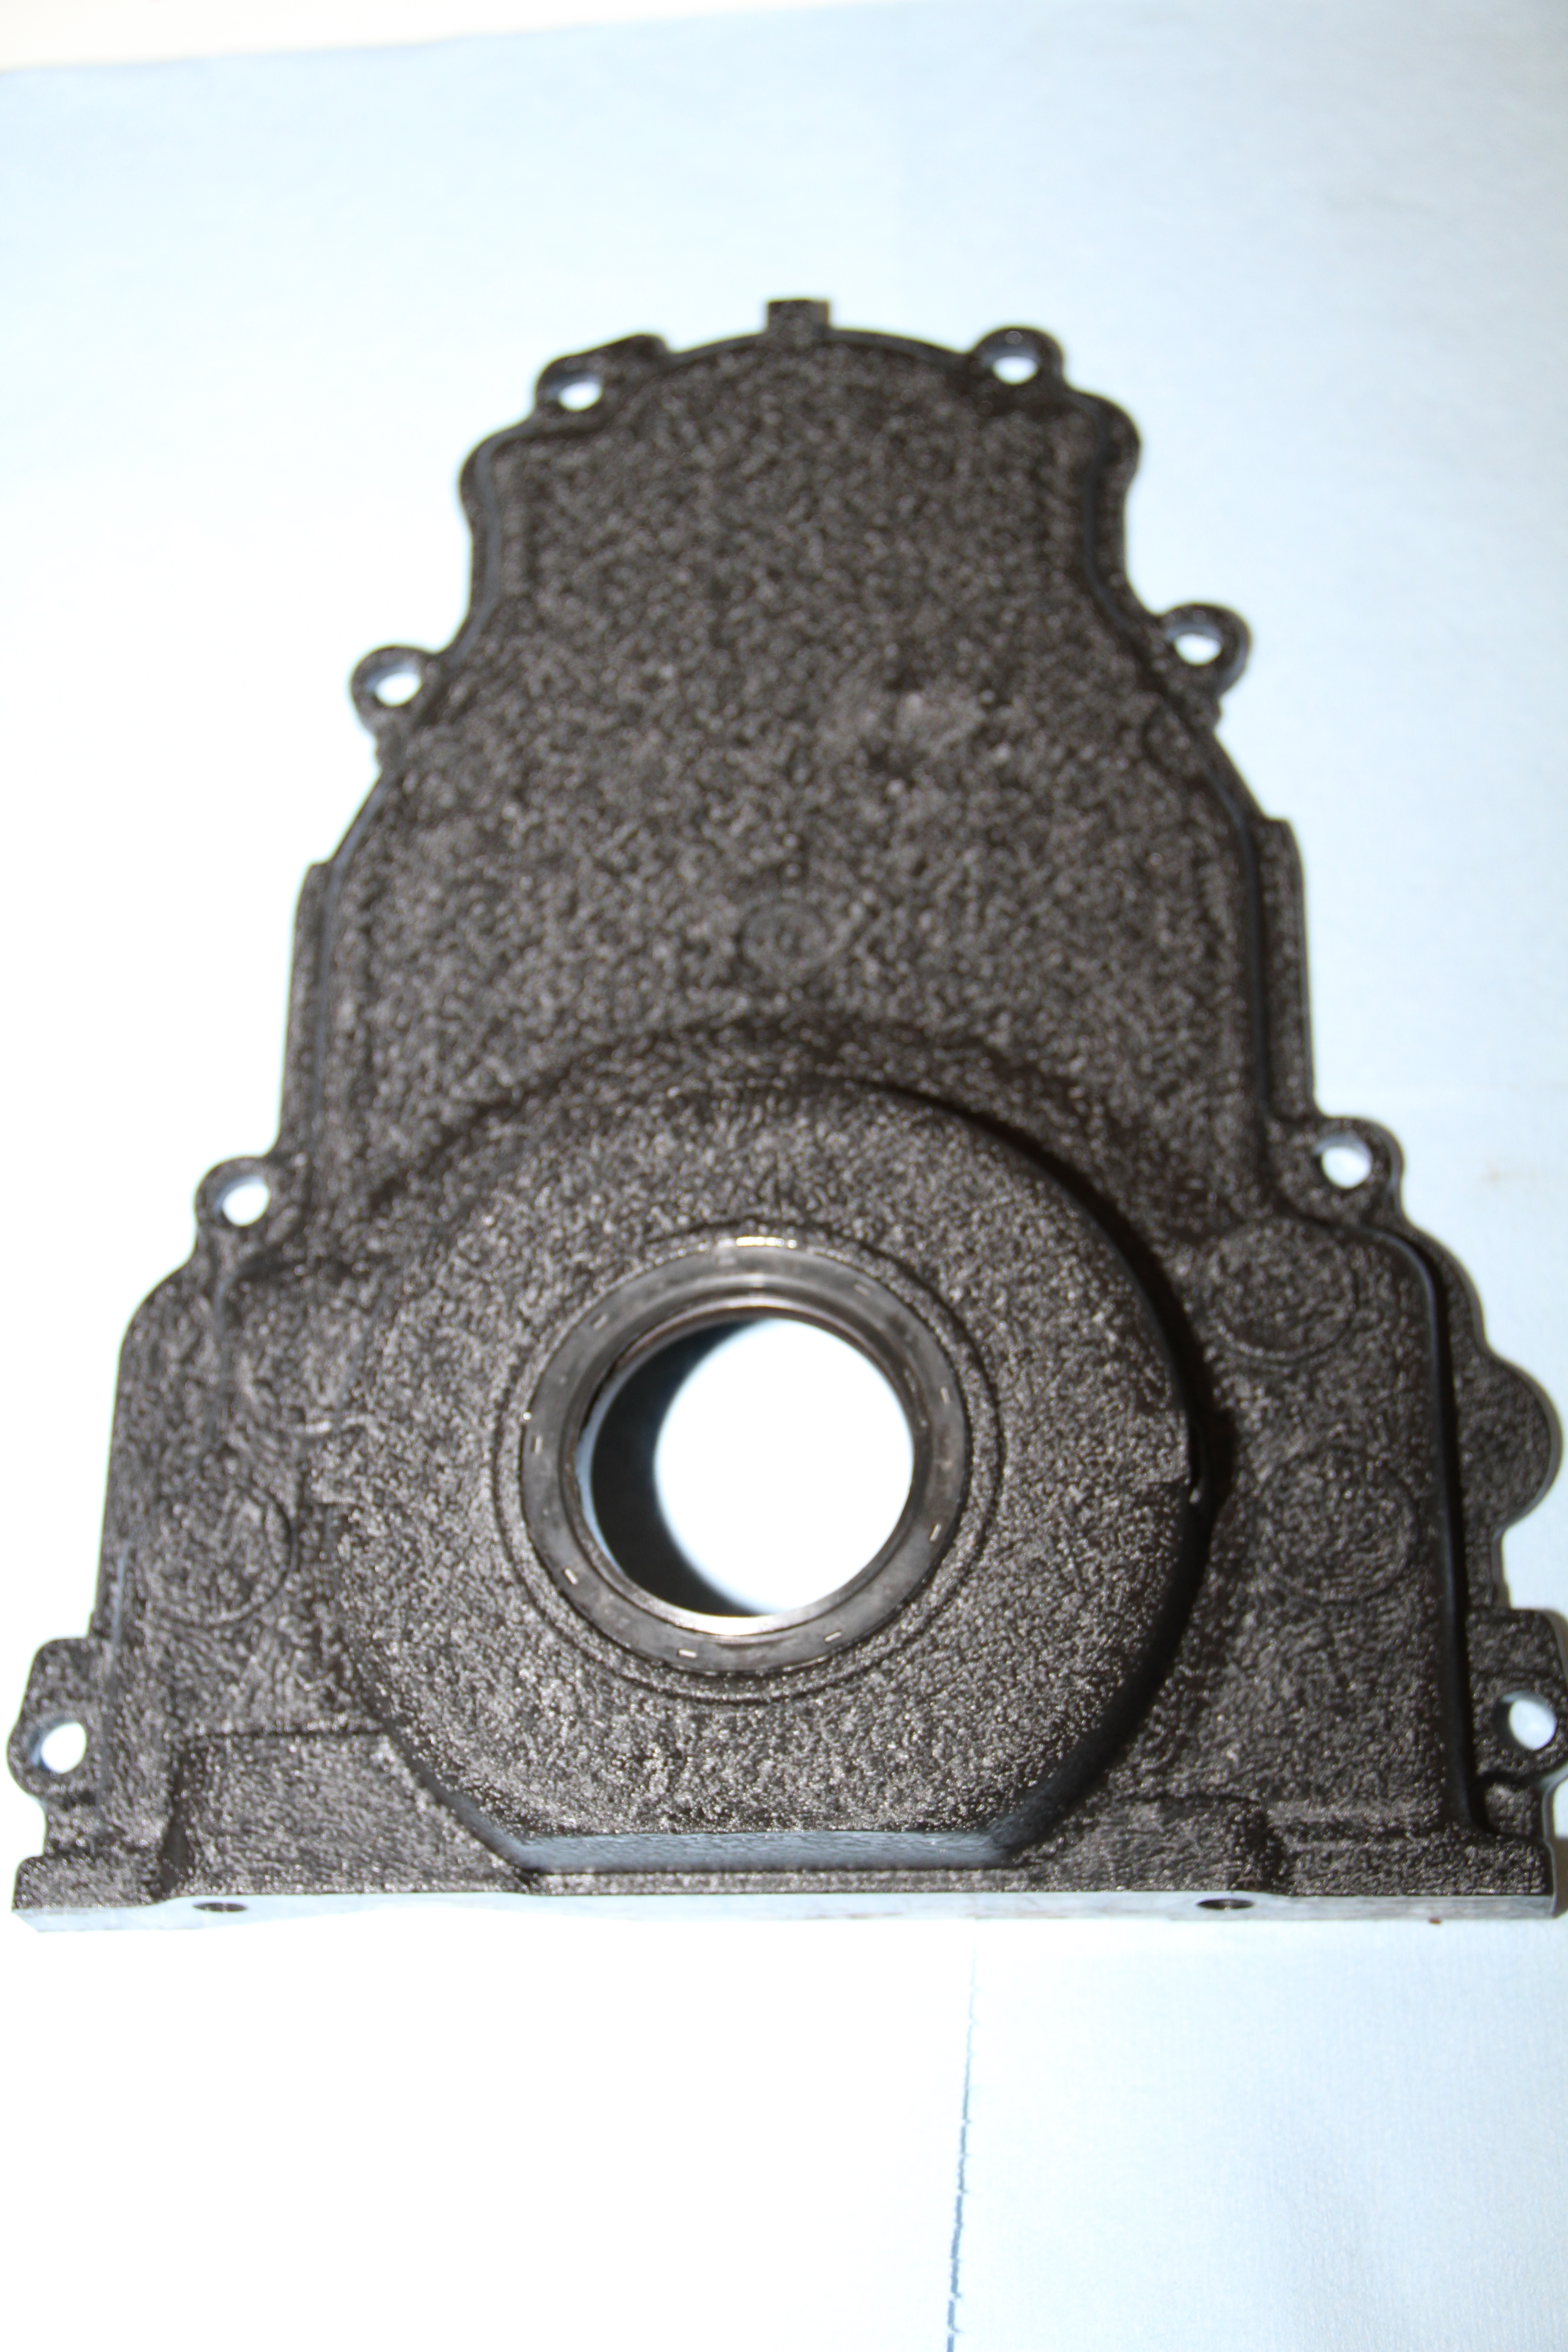
Now since the timing chain cover was off, I decided to spice it up some.. So I painted it a black crinkle. I think it turned out great.
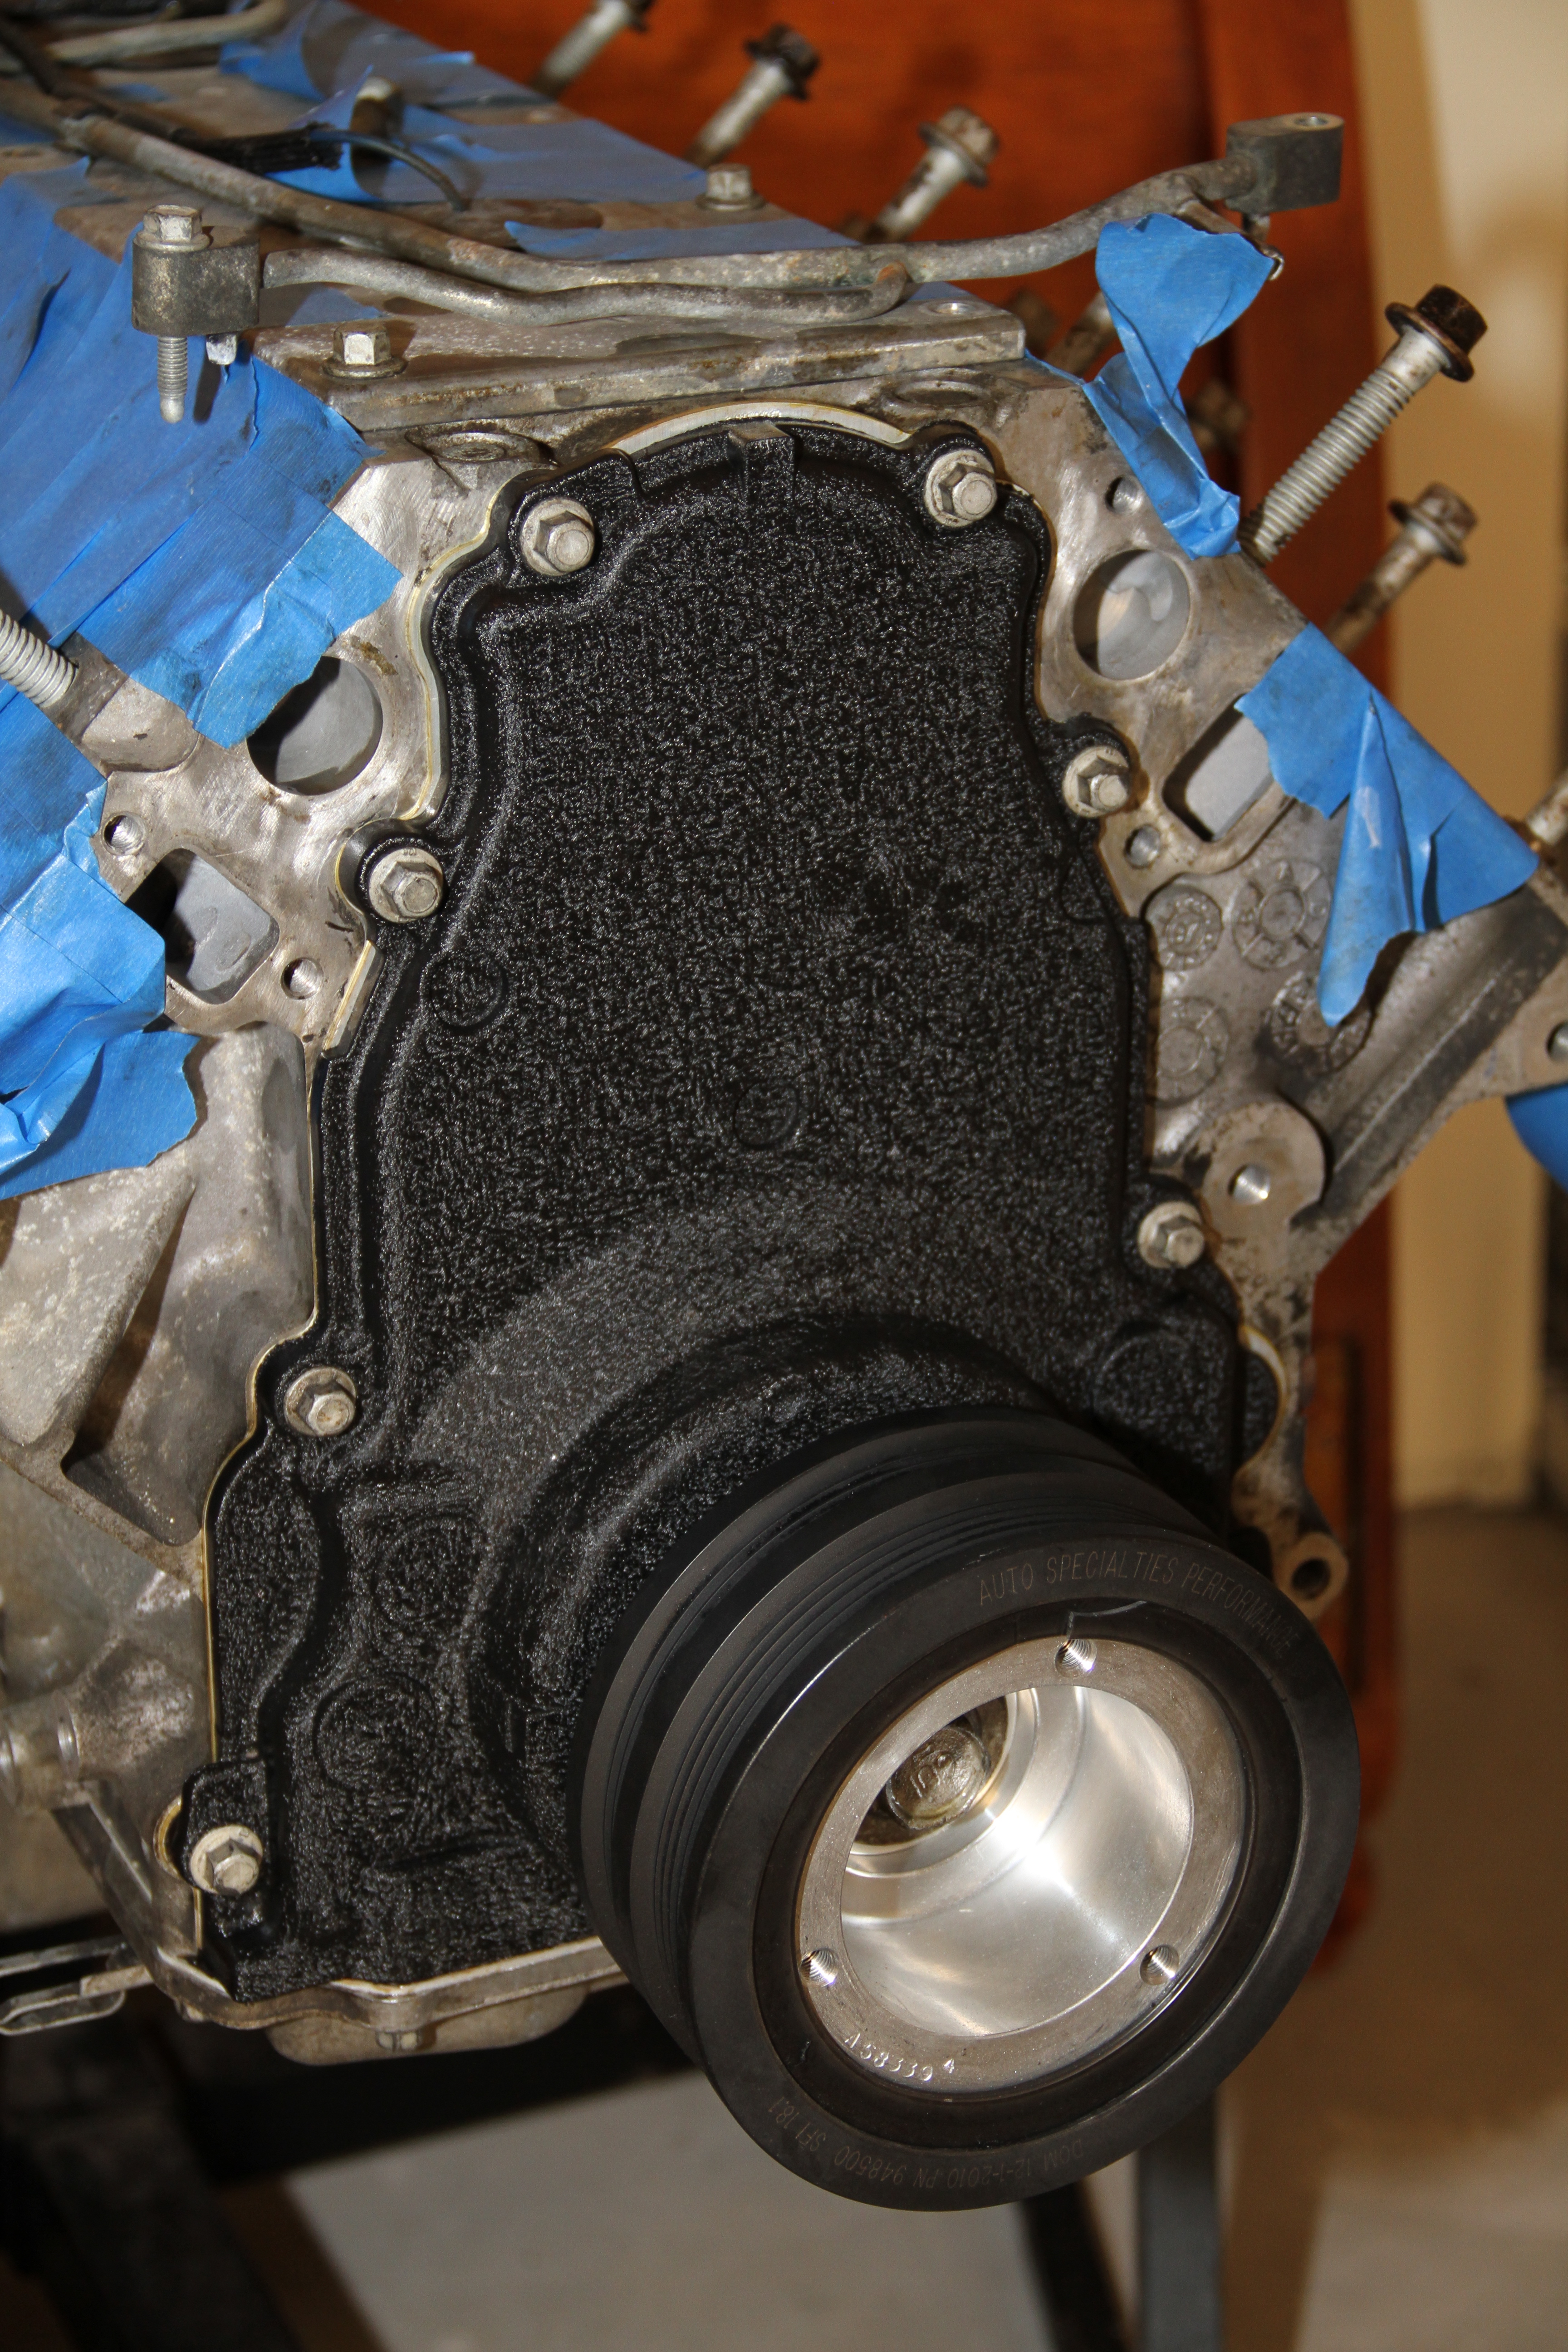
Now for the time being I used the OEM balancer bolt to install the new ASP balancer. Now the Crankshaft Balancer Bolt (Installation Pass-to Ensure the Balancer is Completely Installed) needs to be torqued to 240lbft. And then remove bolt and replace with an ARP balancer bolt and torque to 37lbft. I will do this later once tranny is installed.
Well hope you enjoyed this weeks post...
Total spent: $2,464.98
STAGE 1: Phase 3 'rocker arms/valve springs/ head Install'
STAGE 1: Phase 2 'Cam/Pulley Install'
Lets start this off with the Beer of the week.. We have here folks 'Mississippi Mud' Its a Black & Tan beer which has a little kick to it.. I also love the bottle it comes in, makes me feel like I should be sitting on a porch throwing meat to alligators..lol
Okay what I am installing today is a MS4 Cam from Texas Speed Shop and a ASP Harmonic Balancer. Now I bought the the Texas Speed Shop Camshaft package that comes with a Texas Speed Hardened Chromoly Pushrods and Dual Valve Sprigs.. I will install those later..
MS4 CamShaft Package = $699.99
ASP Harmonic Balancer = $214.99
Okay lets get started on removing the old stuff. First on the list is the balancer. You will need a 1" socket to remove the bolt that holds it in place..
A braker bar is a must when it comes to taking off this damn bolt..
Again Advance Auto Parts come in handing when I needed to rent a tool.. I went there to pick up a Pulley puller. This tool is a must and really the only way you can actually get this dang pulley off the engine.
Tool set up...
The claw hooks grab the pulley and pulls it away from the engine.. As you begin to tightening the bolt it starts to get harder and harder to do.
That is when a pole comes in handy...lol
You know you are doing it right when you start to see silver from behind the pulley.
Just to give you an idea of the size difference between the ASP pulley and OEM pulley.. ASP gives you around a 15% more power, every bet counts..
Next we can remove the timing chain cover.. This requires you to use a 10mm,, really easy..
Bam!!, look at the LS6 oil pump and LS2 timing chain... Good stuff..
Now we can remove the timing chain sprocket, Unbolt the 3 cam gear bolts and remove the gear, letting the chain droop down into the oil pan for now
Next is the retainer plate
Next you'll see a black/brown cam retainer plate behind the gear, held on by 4 10mm bolts. Unbolt and remove this too.
remove, the bolts..
Out with the old cam....
And in with the new.. The MS4 cam is a 239/242 .649"/.609" Camshaft.... Oh yeah...
Now it is time to prep the new cam for install. Coat the whole thing with fresh motor oil, and transfer your 3 camgear bolts (or waterpump bolts if you were using those) to the end of the new cam so again you have a handle to grip onto.
Now take your time installing the new cam, and keep on coating the cam with fresh oil as you go..
Almost done,, the 3 camgear bolts come in handy towards the end when you don't have nothing to grab onto,, so def do this..
Once in, re-install the cam retainer plate and its 4 10mm bolts. I usually put some locktite on the 4 bolts and the GM torque spec on them is 18lbft.
Then install the timing gear, and torque spec on these is 18lbft as well.
Now since the timing chain cover was off, I decided to spice it up some.. So I painted it a black crinkle. I think it turned out great.
Now for the time being I used the OEM balancer bolt to install the new ASP balancer. Now the Crankshaft Balancer Bolt (Installation Pass-to Ensure the Balancer is Completely Installed) needs to be torqued to 240lbft. And then remove bolt and replace with an ARP balancer bolt and torque to 37lbft. I will do this later once tranny is installed.
Well hope you enjoyed this weeks post...
Total spent: $2,464.98
STAGE 1: Phase 3 'rocker arms/valve springs/ head Install'
 07-31-2011, 10:40 PM
#31
Super Moderator
MY350Z.COM
MY350Z.COM


iTrader: (8)
I have a feeling this is going to be a sick build.

 08-01-2011, 01:22 PM
#35
I really don't know.. I will must likely have someone do this part for me as I am a little confused with the whole thing. Some people on LS1tech said don't worry about it but I just want to be safe.. So once my tube chassis is done and I will do this for sure.. How about you.. I know Comp Cam makes a kit..
Me too


