Another LS Build
 05-05-2015, 03:01 PM
#101

Nah, its a roll center issue. Its only on the back end and if you reference the picture you can see how low it is. I just need to raise the back end about half an inch to get the roll center back up. I say "twitchy" but i'm being overly critical i think.
 05-05-2015, 03:18 PM
#102
Ahhh. When I had a 350z and wanted to drift I always went one tighter on the rear sway bar to make it twitchy but controllable. I really want to see this come together for you, I think your car will do amazing things once it gets dialed in with the right track upgrades
 05-17-2015, 01:29 PM
#105
I don't have any better pictures and unfortunately I won't take the engine back out until next winter. I sourced a lot of pieces from the original(older) sikky adapter and everything else s just spare tool steel I had laying around with the exception of the actual lever arm which I had CNC milled.
A/C is my next big project for it, well after I get the fuel issue sorted since my corvette FPR decided to crap out on me this last weekend at the track. I have most of the raw materials minus the trinary pressure switch and a few odds and ends.
A/C is my next big project for it, well after I get the fuel issue sorted since my corvette FPR decided to crap out on me this last weekend at the track. I have most of the raw materials minus the trinary pressure switch and a few odds and ends.
 05-21-2015, 03:04 AM
#107
Unfortunately I'm not sure. The local dyno here is using an 8 inch roller that maxes out at 400whp. We stuck the car on to see if it would do it but it hit the limit at around 5000 rpm and we had to lift off. The car was tuned off of AFR and accelerometer data since I have the ability to legaly do a 4th gear pull on the autobahn. I really have not made a huge effort to find another dyno.
08-24-2015, 11:54 AM
#110
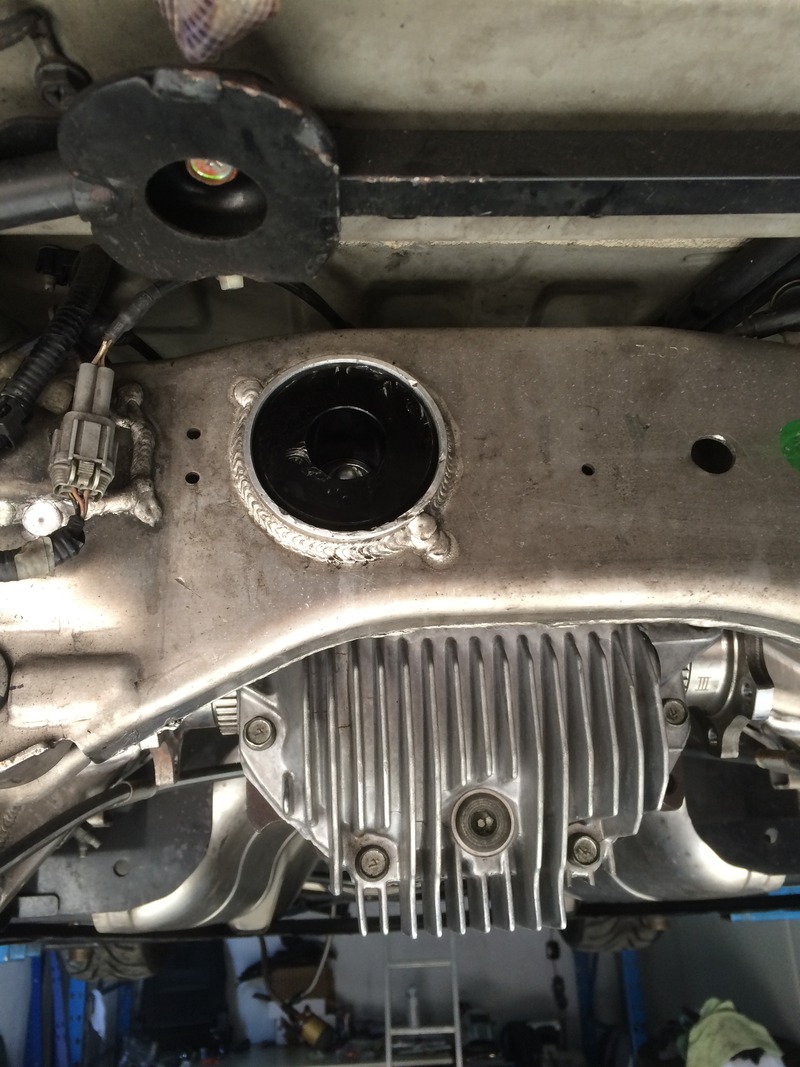
So the track time has finally started wearing on the car a bit which is expected and normal so it was time to do some mid season servicing on the car. First off was getting the differential in order. If you read the track progression thread here: https://my350z.com/forum/autocross-r...evolution.html
then you would have seen the hockey puck mod I had to do when the whiteline bushing failed. I had bought a set of SPL solid bushings by they did not arrive in time. Well in any case, here is what a hockey puck looks like after 500 miles and 3 hours on a track.
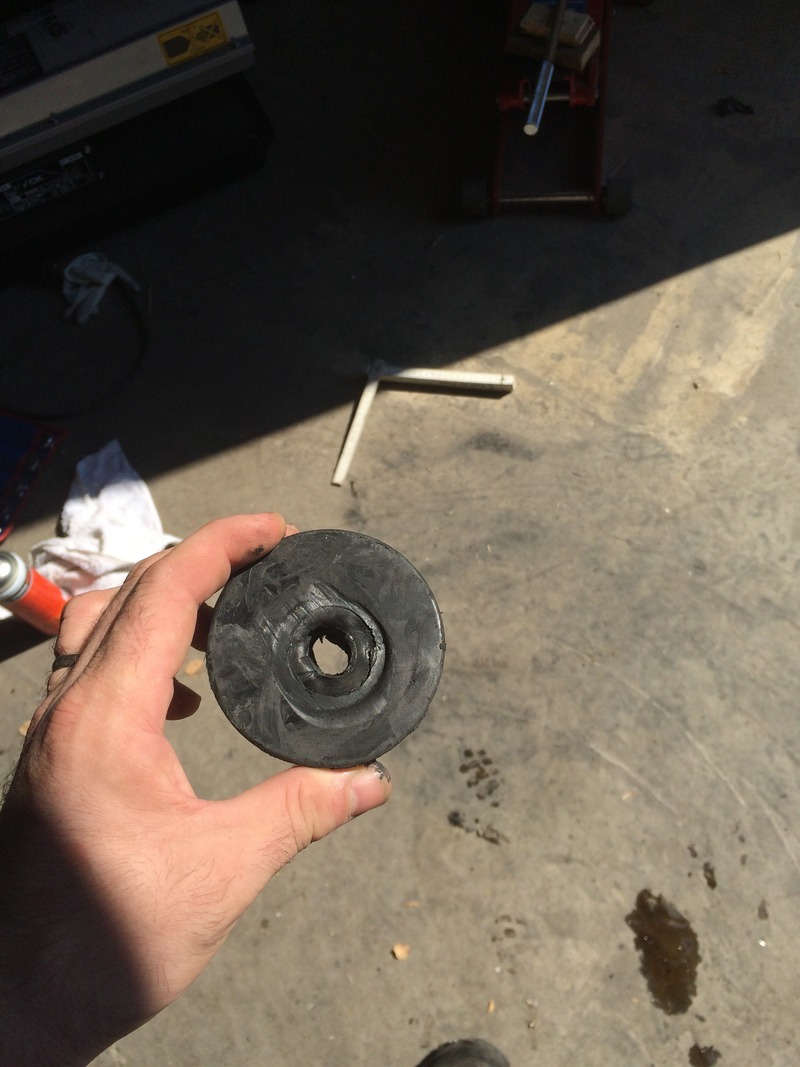
It held up just as good as the whiteline bushing if I'm honest. So lesson learned, fellow swappers, just go solid differential bushings. So SPL it is...
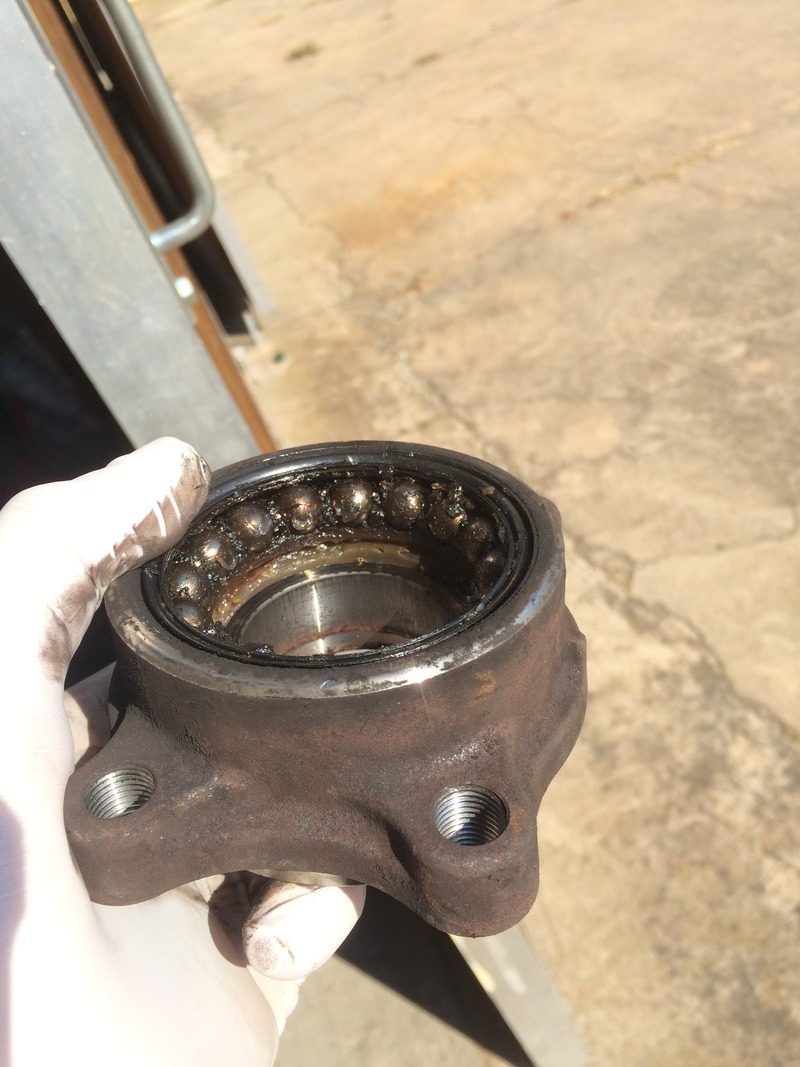
next was wheel bearing replacement. I was not getting any play but I was getting a hum that increased intensity with speed. Here it was when I got it off, its kind of hard to see, but the first of the 2 ball bearings was on its way out. Grease at the top was breaking down and the ***** had flat spots. If you look at the lower bearing in the set you can see the clean white grease.
Up next is dropping the motor out for the rear main seal inspection and oil pan gasket replacement. Oh yeah, and also the cam install.
then you would have seen the hockey puck mod I had to do when the whiteline bushing failed. I had bought a set of SPL solid bushings by they did not arrive in time. Well in any case, here is what a hockey puck looks like after 500 miles and 3 hours on a track.

It held up just as good as the whiteline bushing if I'm honest. So lesson learned, fellow swappers, just go solid differential bushings. So SPL it is...

next was wheel bearing replacement. I was not getting any play but I was getting a hum that increased intensity with speed. Here it was when I got it off, its kind of hard to see, but the first of the 2 ball bearings was on its way out. Grease at the top was breaking down and the ***** had flat spots. If you look at the lower bearing in the set you can see the clean white grease.

Up next is dropping the motor out for the rear main seal inspection and oil pan gasket replacement. Oh yeah, and also the cam install.
09-06-2015, 01:23 AM
#111
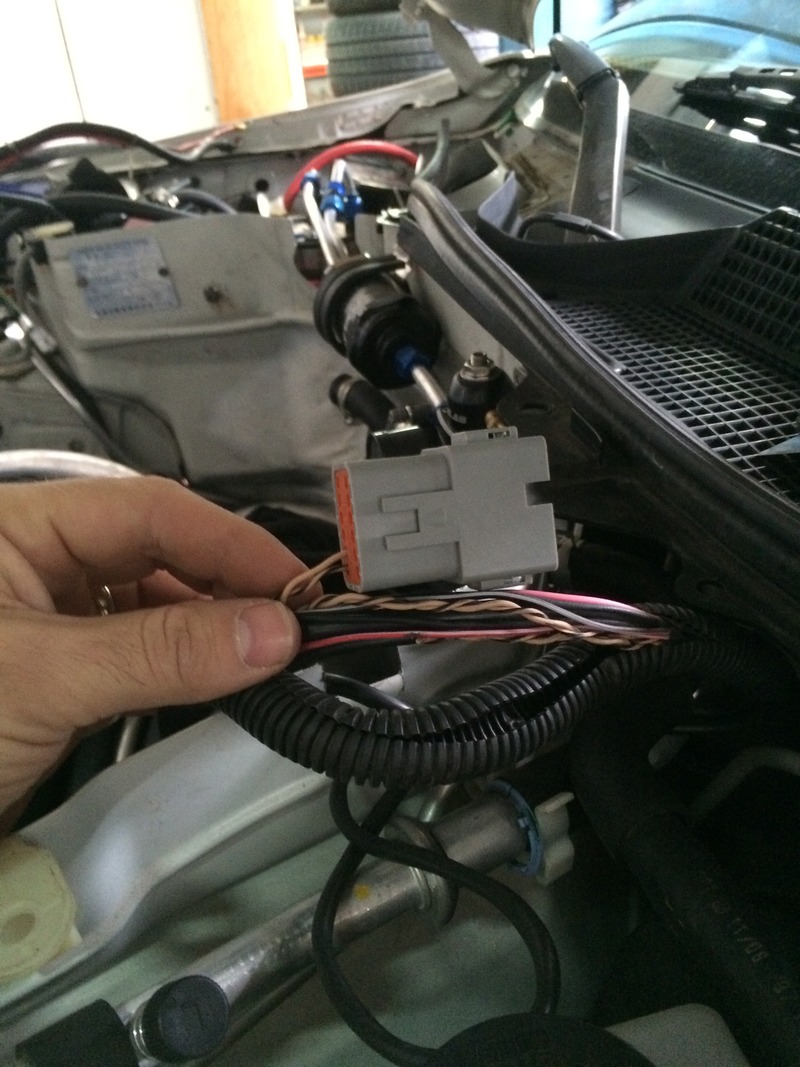
I finally found the time to do a bit more work on the car yesterday. I got around to doing something that I had wanted to do which is changing the throttle and OBD2 port wiring to having quick disconnect plugs. If I don't it takes a lot of time to get under the dash and disconnect and run everything bach through the fire wall. Here is what I used:
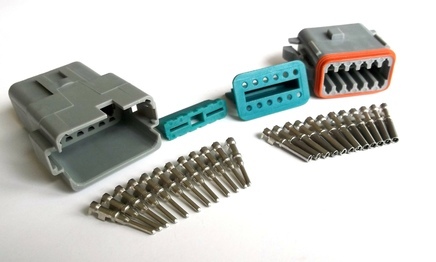
Originally I was going to use mil spec bulkhead conectors but at over $100 for a matched pair, it just was not cost effective. Luckily amphenol makes these sealed units that run about $12 per. One note on these, you need to either crimp the pins with a special crimping tool, or you can solder them in. I have had better luck with crimping since chasing a cold solder sucks. It was very easy, just snip, crimp and plug.
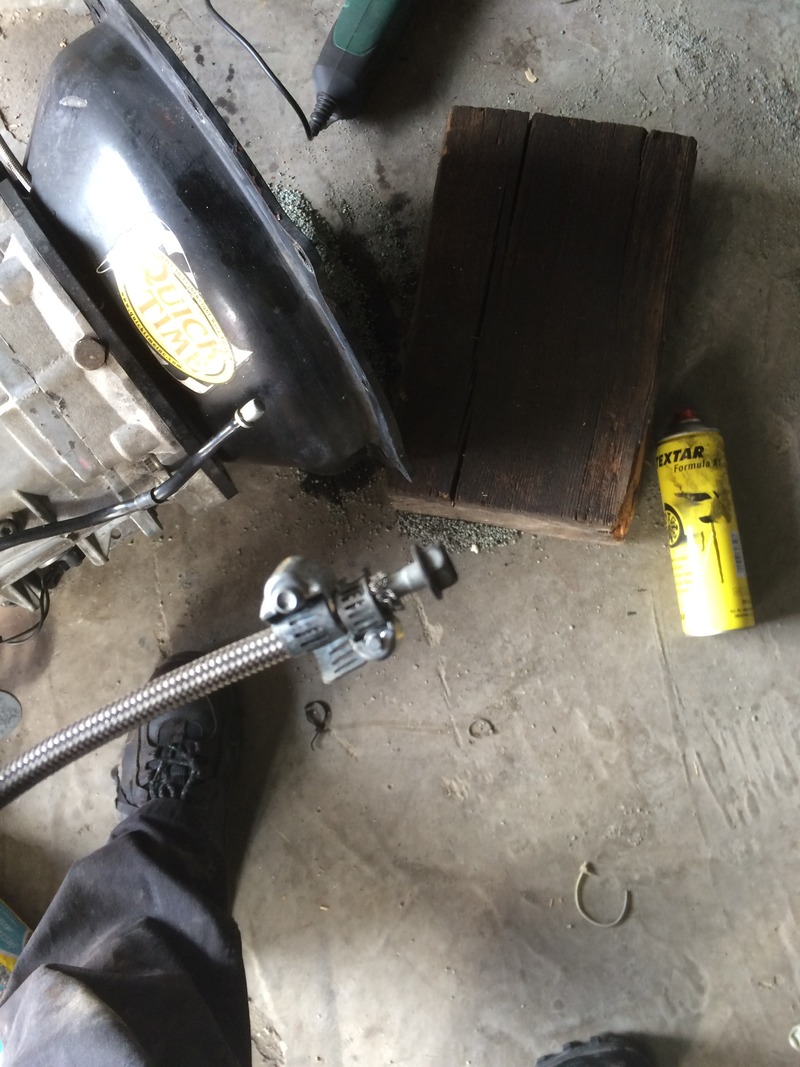
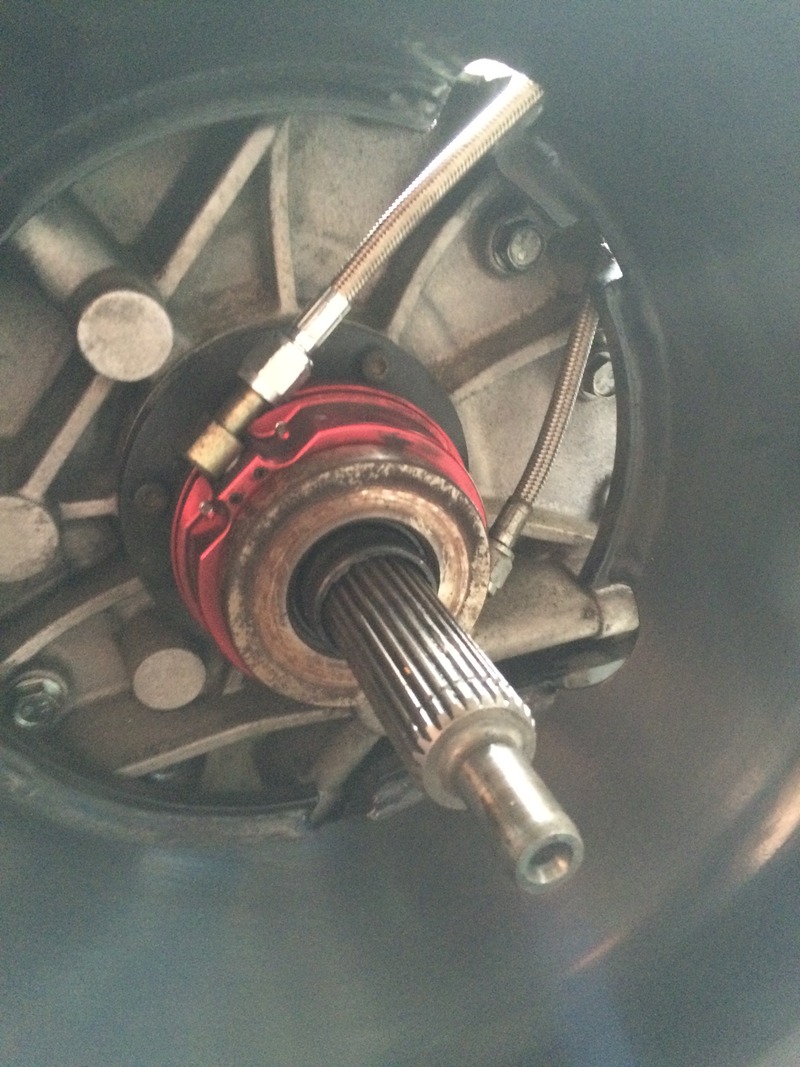
I then dropped the motor out and started fixing all the small issues I had acrrued throughout the season. First up was replacing the melted up clutch bleed line.
This was my trackside fix when it happened, it held but obviously was not permanant.
And now the new line is in.
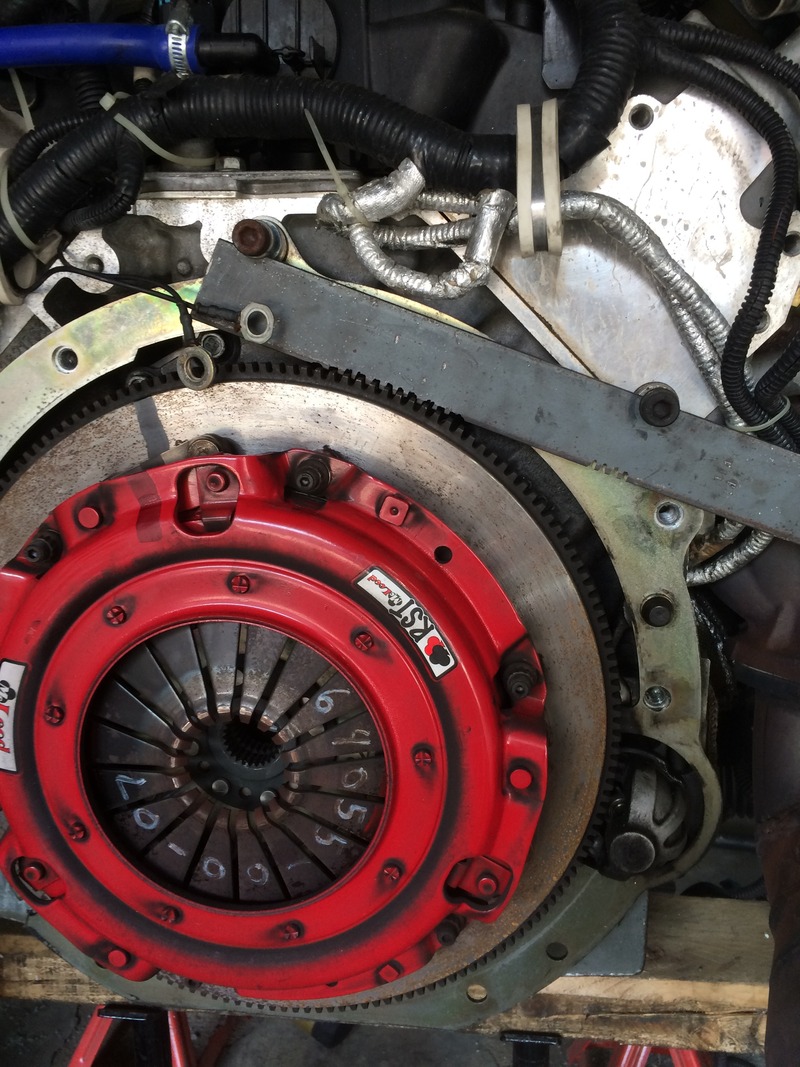
Then in prep for the cam install I had to remove the crank pulley. A pain in the *** on any car. I used some spare tooling iron I had laying around and made a flywheel lock so I could get enough torque on the bolt.
Hopefully today I can get the front accessories off and get the cam swapped out then replace the oil pan gasket and start the rebuild.

Originally I was going to use mil spec bulkhead conectors but at over $100 for a matched pair, it just was not cost effective. Luckily amphenol makes these sealed units that run about $12 per. One note on these, you need to either crimp the pins with a special crimping tool, or you can solder them in. I have had better luck with crimping since chasing a cold solder sucks. It was very easy, just snip, crimp and plug.

I then dropped the motor out and started fixing all the small issues I had acrrued throughout the season. First up was replacing the melted up clutch bleed line.
This was my trackside fix when it happened, it held but obviously was not permanant.

And now the new line is in.

Then in prep for the cam install I had to remove the crank pulley. A pain in the *** on any car. I used some spare tooling iron I had laying around and made a flywheel lock so I could get enough torque on the bolt.

Hopefully today I can get the front accessories off and get the cam swapped out then replace the oil pan gasket and start the rebuild.
09-14-2015, 07:11 AM
#112
So I finally got around to swapping cams. The cam going is is a BTR ground cam focusing on mid range power. with it came hardened pushrods, dual valve springs, titanium retainers etc. I'm also switching from an LS3 style chain and tensioner to a C5R chain and tensioner.
dont mind the wooden dowels.
Also i'm going from a 1 bolt cam to a 3 bolt cam.
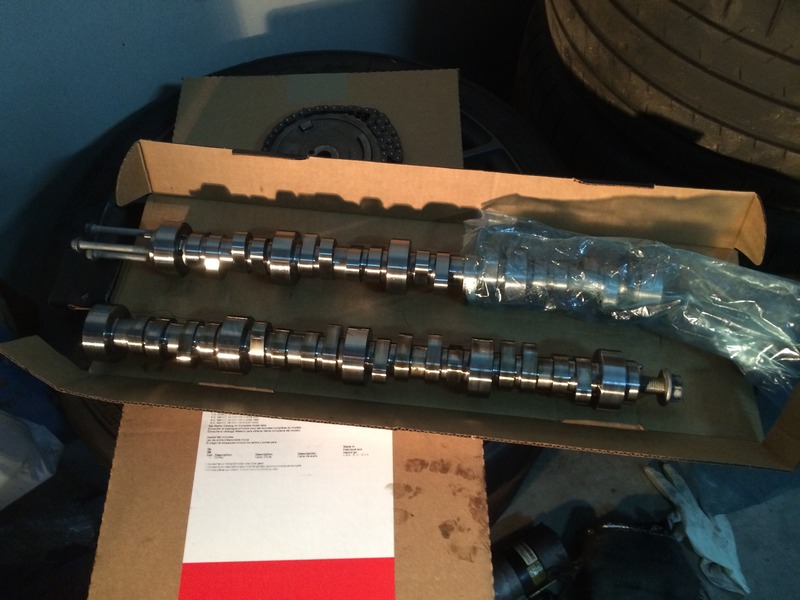
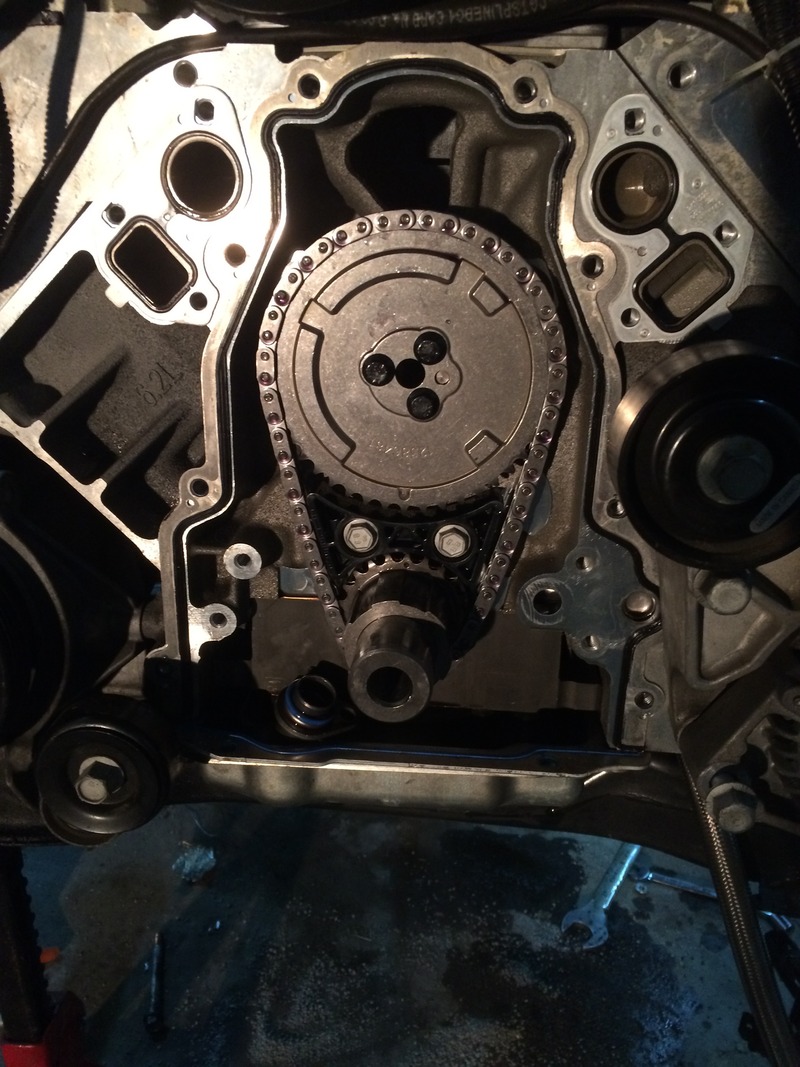
Here is the cam d and the new tensioner, chain and gear installed .
It was all going so well up until THIS.
What your looking at is my spring compressor tool. While putting in the springs onto the last cylinder the composite substance bent. This in turn bent the valve and broke off the valve seal seat/valve guide in the head...
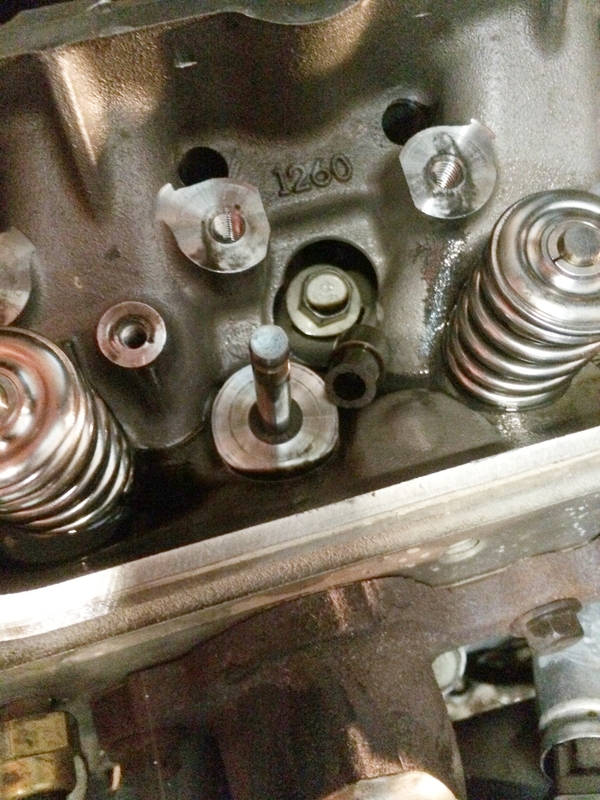
This pretty much ends the season for me. The head is garbage now and I won't be able to get a replacement for at least 2 weeks if not longer depending how long it takes to come up with funds. The only silver lining here that brand new ported LS3 heads run only about $150 more than OEM heads so I'll get a slight power bump from that if I go that route.
I'm still pretty pissed of about the tool breaking like that and taking the head with it. I'm at a loss for words honestly. I may later look at seeing if I can get the seat TIG'ed back on but I'm not sure about it yet.

dont mind the wooden dowels.
Also i'm going from a 1 bolt cam to a 3 bolt cam.

Here is the cam d and the new tensioner, chain and gear installed .

It was all going so well up until THIS.

What your looking at is my spring compressor tool. While putting in the springs onto the last cylinder the composite substance bent. This in turn bent the valve and broke off the valve seal seat/valve guide in the head...

This pretty much ends the season for me. The head is garbage now and I won't be able to get a replacement for at least 2 weeks if not longer depending how long it takes to come up with funds. The only silver lining here that brand new ported LS3 heads run only about $150 more than OEM heads so I'll get a slight power bump from that if I go that route.
I'm still pretty pissed of about the tool breaking like that and taking the head with it. I'm at a loss for words honestly. I may later look at seeing if I can get the seat TIG'ed back on but I'm not sure about it yet.
09-17-2015, 01:23 AM
#114
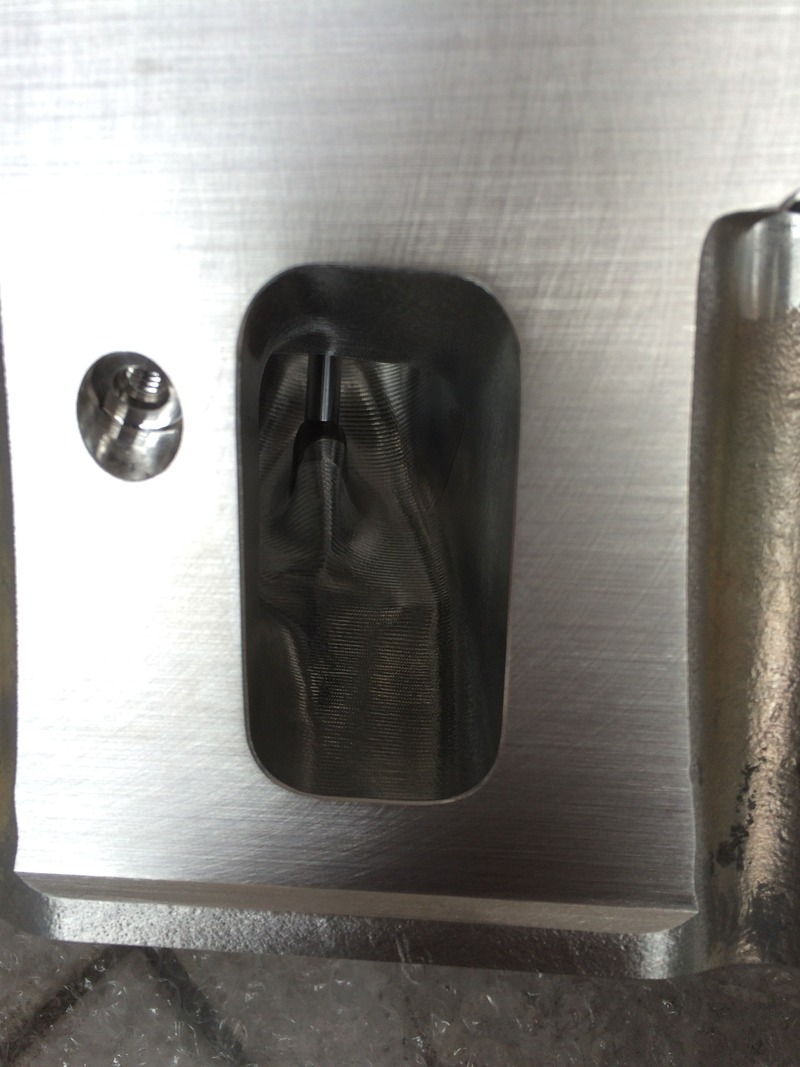
When I took the heads off and got them cleaned up I found out I was initially wrong. The valve guides are sintered metal inserts. I was so used to only seeing brass/steel/manganese valve guides I was sure they were cast into the head. I ended up selling a set of rims and tires and have the ported heads on the way. I'll send these heads out to a shop in texas for rebuild. I just haven't decided to get a stock rebuild and port job on them and sell them, or if I want to have them ported and built up for a later High RPM(7500-8000) build.
09-23-2015, 11:05 AM
#115
The week started out great. I got back from a weekend trip to a pile of goodies in my mailbox. In probably what has been the fastest I have seen, I got all of my parts in a record 5 days from the states. A quick inventory :
New MLS headgaskets, head bolts, exhaust manifold gaskets, valve seals, and a new valve spring compressor tool from comp cams. That tool is much better, I can cut the time it takes to swap out valve springs in half and with more confidence.

Looking at the CNC work on the heads, one thing to note is the intake tract still has the minute tooling lines from the CNC machine, its not a polished face.
There are 2 schools of thought on the intake tract, one group says the lines should stay since they help with atomization of the fuel, the other says they should be completely smooth to allow better airflow.
My thought process is that the tooling marks will help create a boundary layer and is more beneficial.
The heads came with springs installed but were not enough for the lift my Cam is going to bring so I had to change out the beehives for double springs and Ti retainers.
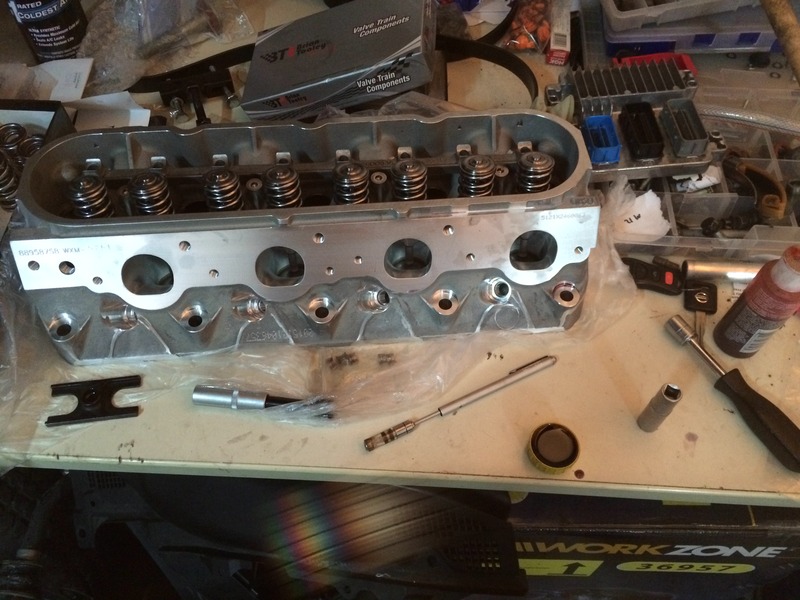
the springs are all changed out and I spent the rest of the time cleaning the old head gasket material off the block in prep for the installation.
New MLS headgaskets, head bolts, exhaust manifold gaskets, valve seals, and a new valve spring compressor tool from comp cams. That tool is much better, I can cut the time it takes to swap out valve springs in half and with more confidence.

Looking at the CNC work on the heads, one thing to note is the intake tract still has the minute tooling lines from the CNC machine, its not a polished face.

There are 2 schools of thought on the intake tract, one group says the lines should stay since they help with atomization of the fuel, the other says they should be completely smooth to allow better airflow.
My thought process is that the tooling marks will help create a boundary layer and is more beneficial.
The heads came with springs installed but were not enough for the lift my Cam is going to bring so I had to change out the beehives for double springs and Ti retainers.

the springs are all changed out and I spent the rest of the time cleaning the old head gasket material off the block in prep for the installation.
The following users liked this post:
Classy (09-23-2015)
09-24-2015, 11:54 AM
#118
With prep work finished, it was time to throw on the heads.
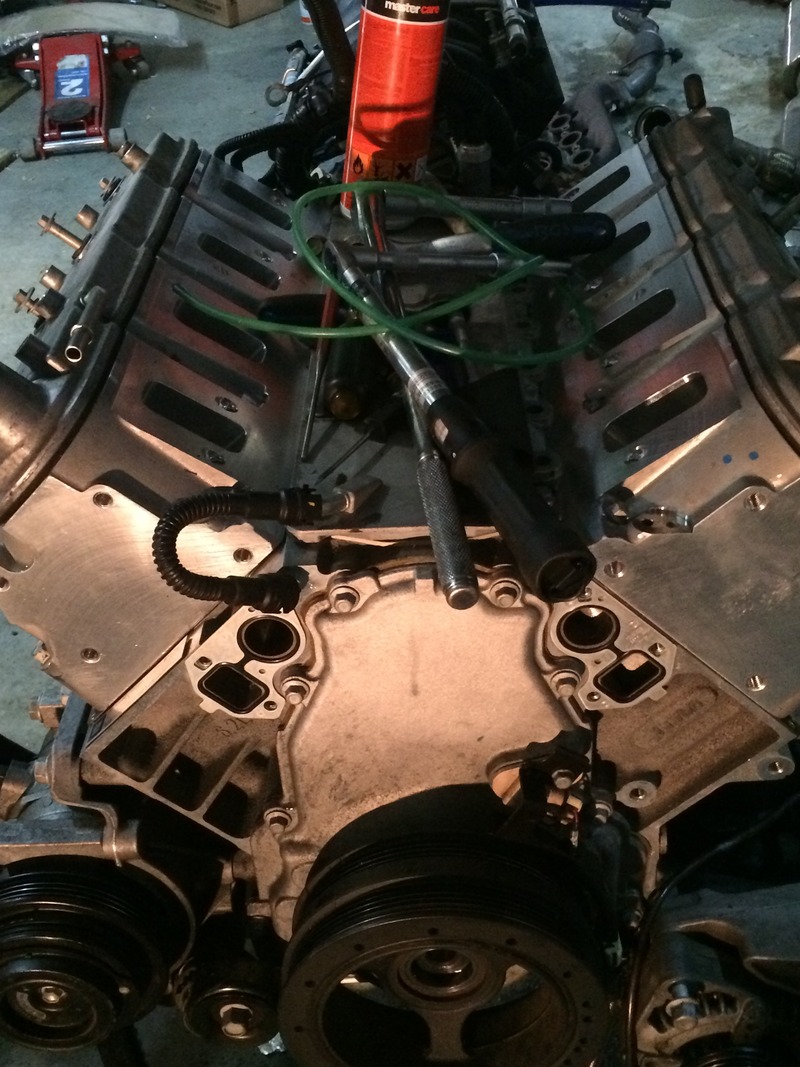
Its extremely important to clean the head bolt holes out before you install them, if there is any liquid or built up dirt/threadlock inside you run the risk of cracking the block when you torque the head down. I used a wet dry vac some duct tape and the green air line tube to blow out then vacuum the holes clean. After that I took an old head bolt, cut a slot in the threaded portion and used it as a thread chaser. It scraped the threads clean and collected the crud in the slot.
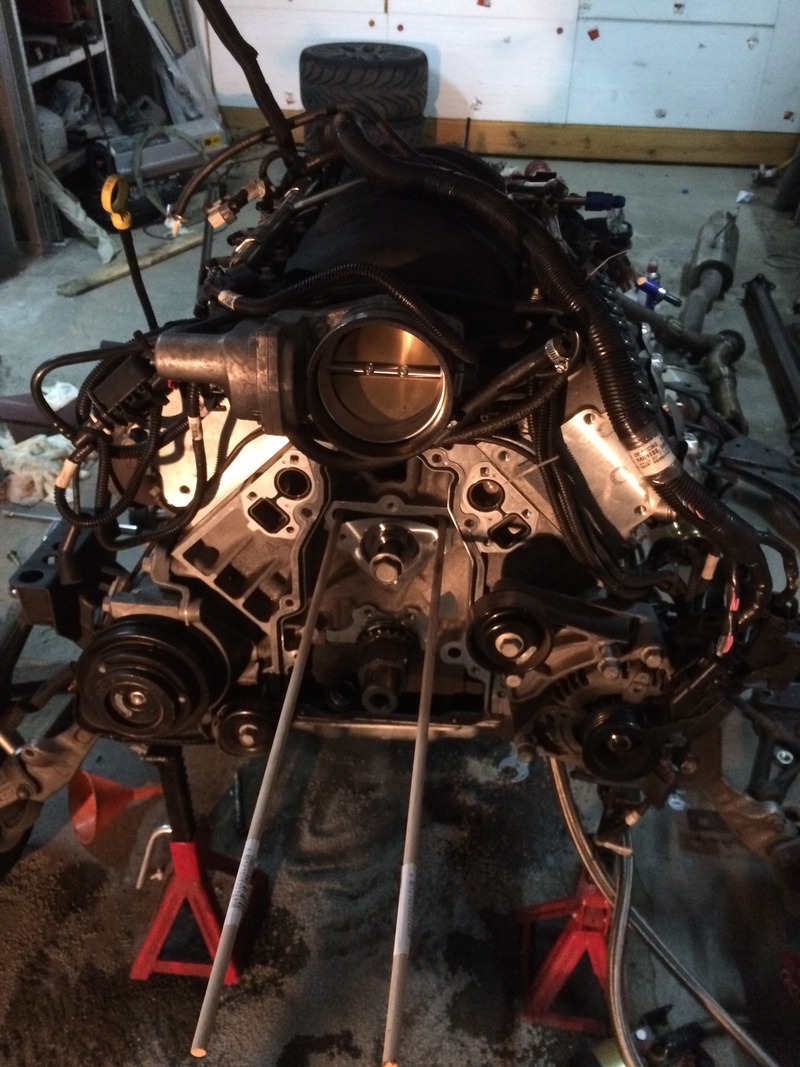
After that it was time to dress the motor.
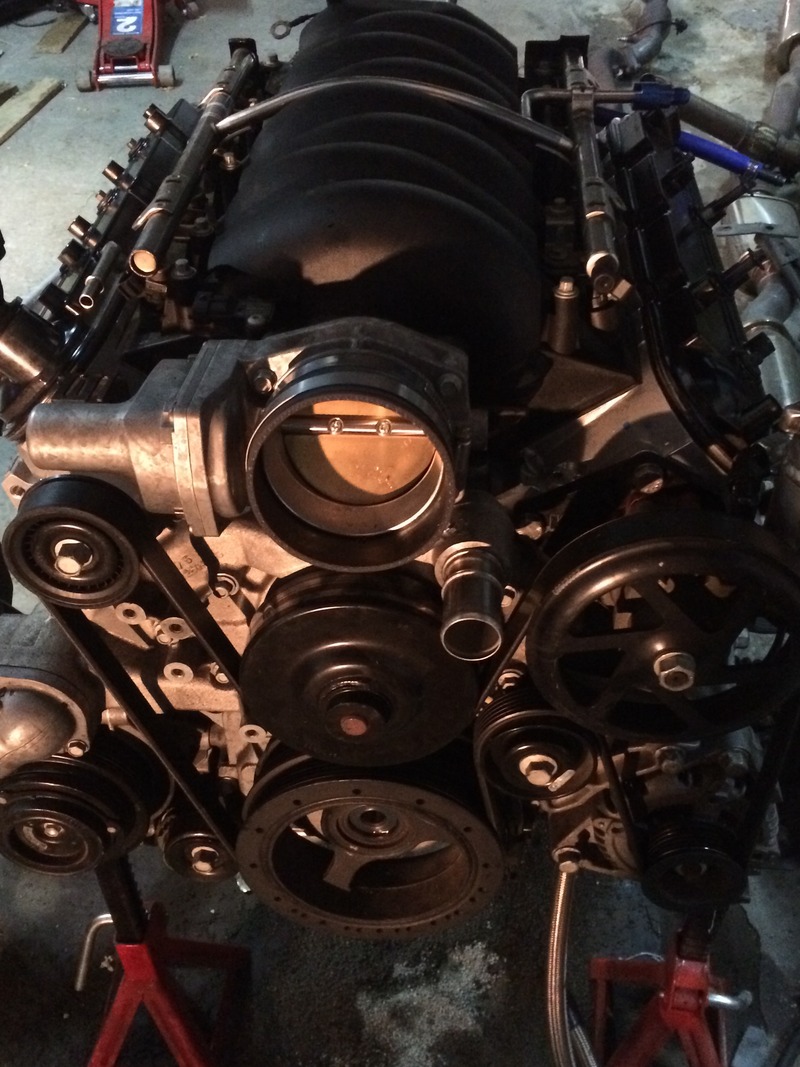
Its all built up minus running the wire harness, After that she will be ready for install. Since I made better time on the rebuild than I thought I'm finally going to tackle my long standing side project before I put the motor back in. Its time for Air conditioning!

Its extremely important to clean the head bolt holes out before you install them, if there is any liquid or built up dirt/threadlock inside you run the risk of cracking the block when you torque the head down. I used a wet dry vac some duct tape and the green air line tube to blow out then vacuum the holes clean. After that I took an old head bolt, cut a slot in the threaded portion and used it as a thread chaser. It scraped the threads clean and collected the crud in the slot.
After that it was time to dress the motor.

Its all built up minus running the wire harness, After that she will be ready for install. Since I made better time on the rebuild than I thought I'm finally going to tackle my long standing side project before I put the motor back in. Its time for Air conditioning!
03-19-2016, 12:07 PM
#119
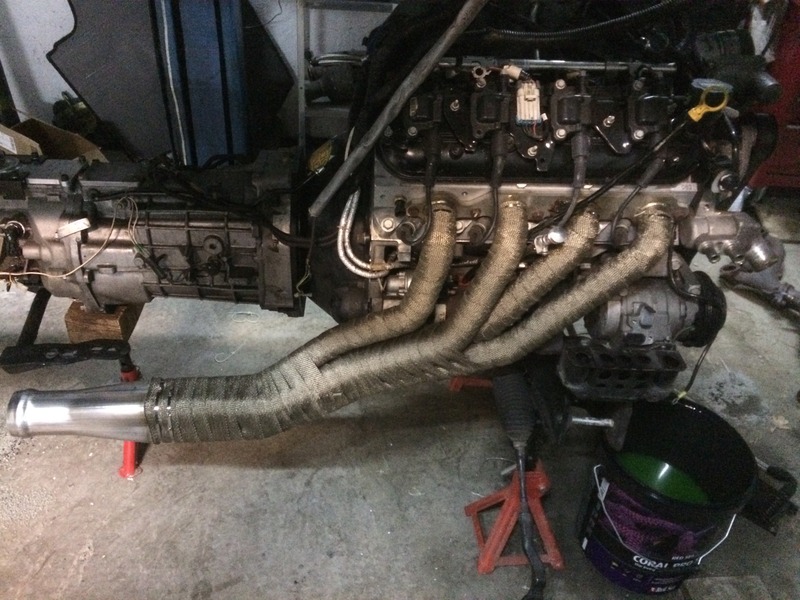
Time for more parts! I'm finally moving to longtubes for the car. Hopefully I will realize a nice little pickup at the top end. Here is the new vs the old.
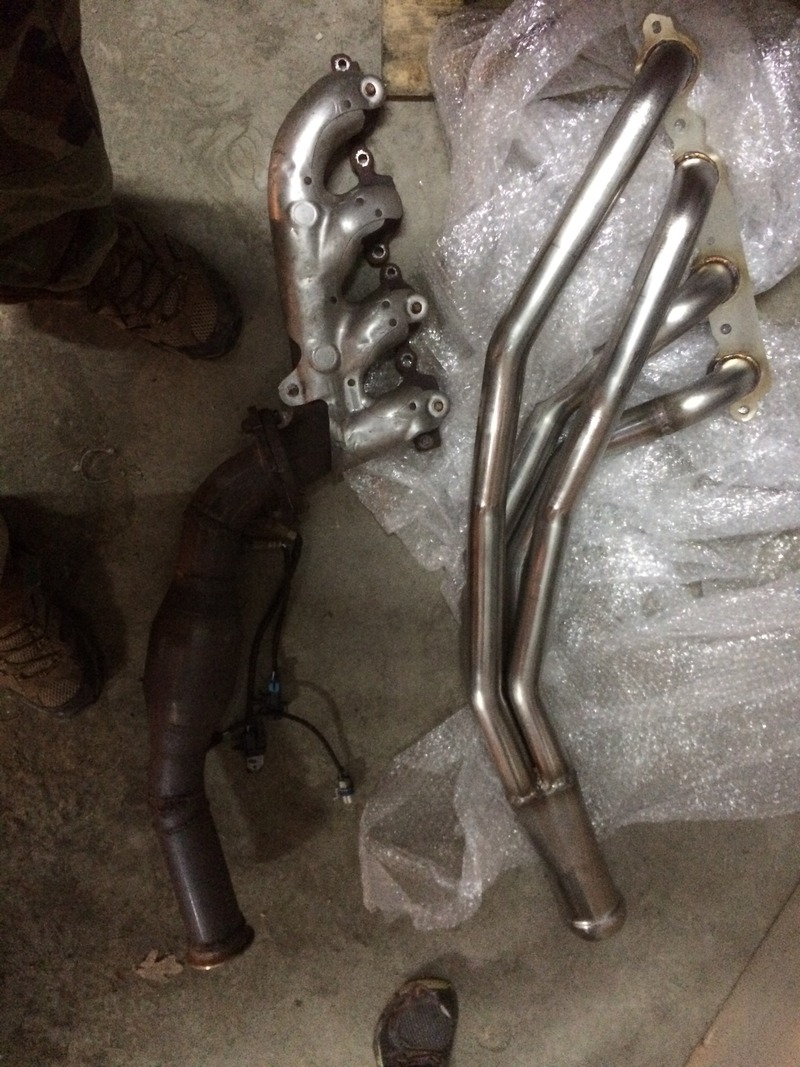
Admittedly most of the day was spent wrapping the headers with header wrap. God that stuff is just a pain...

Admittedly most of the day was spent wrapping the headers with header wrap. God that stuff is just a pain...
04-08-2016, 12:12 PM
#120
I got the long tubes on a few weeks ago and got around to finally fabbing up the Y pipe to make it all work.
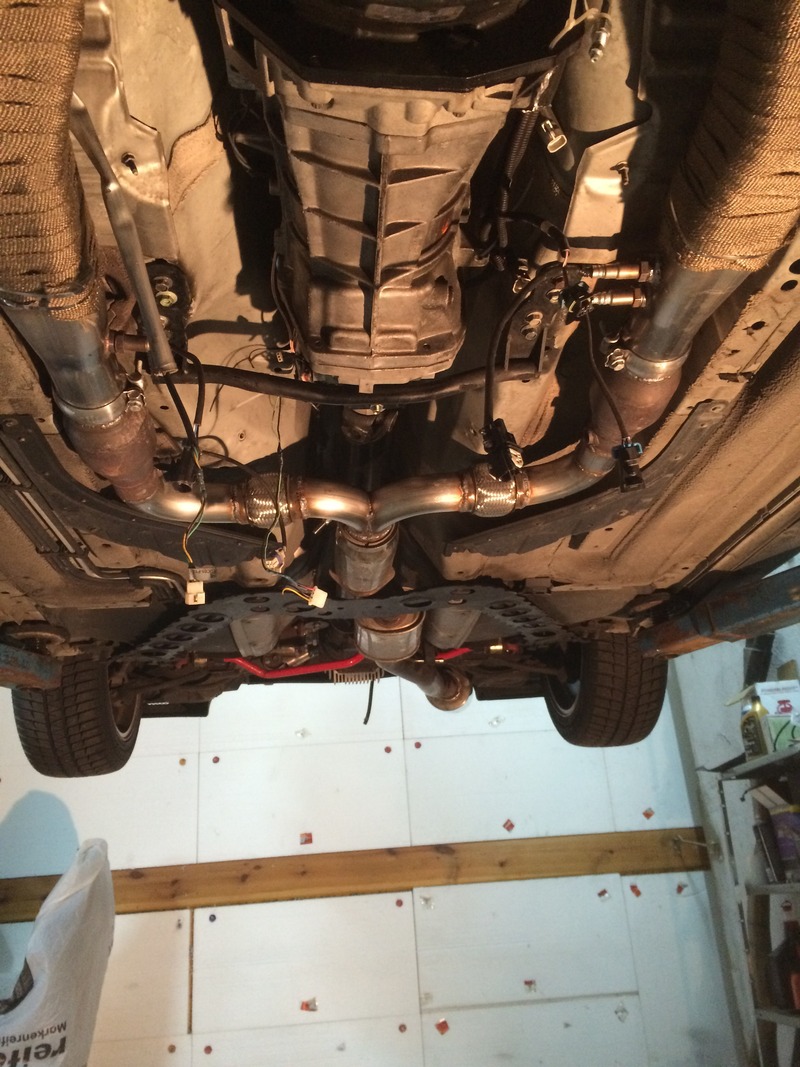
After that I mocked up the new corvette radiator position and a new radiator intake. I started cutting the tubing to make the radiator and bumper support as well.


After that I mocked up the new corvette radiator position and a new radiator intake. I started cutting the tubing to make the radiator and bumper support as well.