
"bumper tuck" pic request!!!
 07-30-2008, 10:31 PM
#41
Registered User
iTrader: (1)

Join Date: May 2006
Location: West Coast/Pacific Rim
Posts: 7,166
Likes: 0
Received 0 Likes
on
0 Posts
Its a pretty easy mod, as long as your not on a uphill slope. All I did was unscrew the white plastic pieces on each side, and screwed the bottom hole to the top. I didn't even touch the middle of the bumper. That tiny sag makes it look more natural.


 07-31-2008, 09:26 AM
#48
Originally Posted by joe645733
u didnt need to heat it or anything?
just folded it and it holds?
just folded it and it holds?
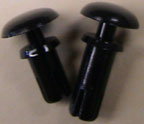
I had to dremel the holes a bit bigger, but these work PERFECTLY! They're flush, rust proof, they won't slip over time like a screw may, and are easy to install/remove. I have four of them holding the bumper up now.
Last edited by Phantom Menace; 07-31-2008 at 09:30 AM.
07-31-2008, 09:34 AM
#49
New Member
iTrader: (6)

Join Date: Apr 2008
Location: Towson, MD
Posts: 445
Likes: 0
Received 0 Likes
on
0 Posts
Do you guys like the way the hks shows with this mod? I think it looks better to show off under her skirt a little more, but not sure if my hks will look better or worse. Any advice?
07-31-2008, 11:38 AM
#55
Registered User
iTrader: (2)
Join Date: Feb 2007
Location: Phoenix
Posts: 82
Likes: 0
Received 0 Likes
on
0 Posts
Originally Posted by osinrider04
someone should make diy for this so I can get some visuals :-D
07-31-2008, 12:40 PM
#56
Registered User
iTrader: (3)
Join Date: Oct 2006
Location: IL
Posts: 1,348
Likes: 0
Received 0 Likes
on
0 Posts
Originally Posted by osinrider04
someone should make diy for this so I can get some visuals :-D
anyone got any pics under the car where u used those screws?
kinda lost to what the bumpers holding on to
07-31-2008, 11:21 PM
#57
Easy mod took 15 minutes, you just tuck the bumper cover to the aluminum crush panel or whatever you call it. Heres another pic of mine, i did it earlier today.
Tools req:
offset or really long phillips screwdriver
drill w/small bit(s) to make pilot holes with
4 self tapping screws
ratchet 3/8 w/extension 11mm socket
safety glasses
Here are the instructions I used.
1) Use a floor jack with a towel/rag on top and lift the middle "flap" until it's pressed against the bottom of the aluminum bar
2) Get a drill w/ small bit and drill holes (anywhere you want) upwards from the flap through the bar
3) Put self-tapping screw through holes
4) It's free, minus the cost of screws and electricity for drill/Dremel
*It's ugly with OEM. The OEM exhaust is big and flat black.
__________________
Last edited by 350ZTheStandard; 07-31-2008 at 11:24 PM.
08-01-2008, 06:00 AM
#58
New Member
iTrader: (6)
Join Date: Apr 2008
Location: Towson, MD
Posts: 445
Likes: 0
Received 0 Likes
on
0 Posts
the aluminum bar you're talking about, is that the same bar that is behind the front bumper of the car, just in the rear that you are screwing into?
350, did you roll the car up on that wood, then use a floor jack to prop the rear bumper up into position? Then you just drilled thru the bumper into the aluminum bar and said wallah?
350, did you roll the car up on that wood, then use a floor jack to prop the rear bumper up into position? Then you just drilled thru the bumper into the aluminum bar and said wallah?


