
Ram Air/Cold intake hood scoop
 02-06-2011, 01:37 PM
#21
Registered User
Thread Starter

Join Date: Feb 2011
Location: Charleston, SC
Posts: 94
Likes: 0
Received 0 Likes
on
0 Posts
I haven't done anything to the car yet. The only work I have done has been to the scoop. I wanted to wait until I got all the parts before I cut the hood and install the intake. I'm glad this happened before I installed the mods. I'm sure they would have blamed the entire thing on it.
I saw your other thread about your Z blowing up today. I hope the stealership doesn't tell you this was the reason behind it.")
But seriously, hope things work out ok for you and your Z. Everytime that I've talked to a stealership about anything it felt like it was turning into a proctologist visit.
Good luck!
But seriously, hope things work out ok for you and your Z. Everytime that I've talked to a stealership about anything it felt like it was turning into a proctologist visit.
Good luck!
 02-10-2011, 02:51 AM
#22
Registered User
Thread Starter
Join Date: Feb 2011
Location: Charleston, SC
Posts: 94
Likes: 0
Received 0 Likes
on
0 Posts
Update, well kind of.
JWT is ordered and waiting to get my car back from the shop. Once I get a nice day out I'm going to work on my custom air box and plenum. I need do some fiber glass work to get everything the way I want it.
I'm going to go with cable to open and close the flap. This is until I can come up with an electronic way to engage and disengage the flap. If some of you got some ideas or links let me know. I'm open to the suggestions. I just don�t have the back ground in that type of stuff.
What I�m looking for is a simple motor switch that can open and close, with a solid state. This means once the current is shut off it will not move. The motor needs some type of arm to slide the lever from open to close. I need to be able to run a motor to a switch that can be mounted in the cabin. Preferably in one of the button delete spots.
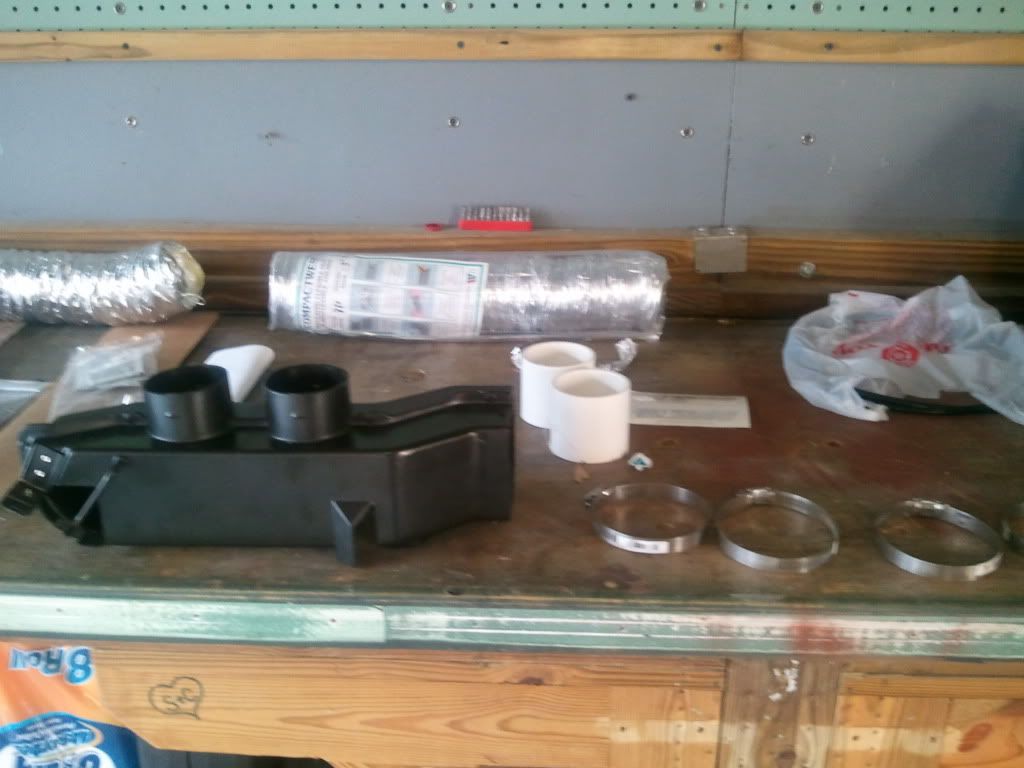
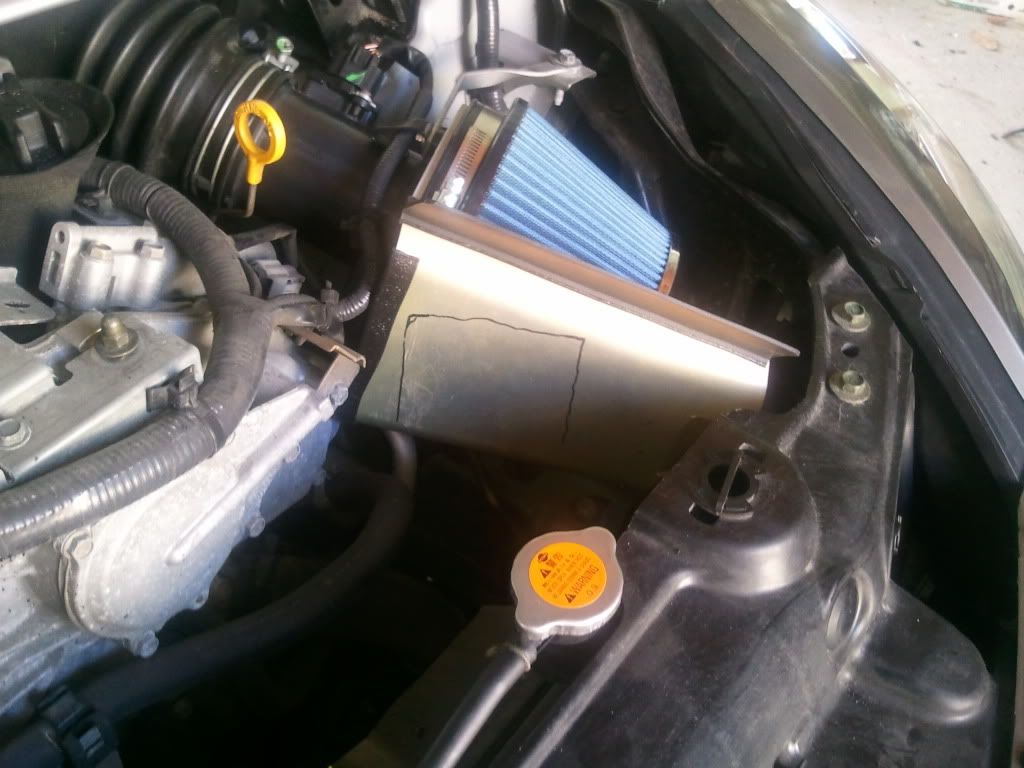
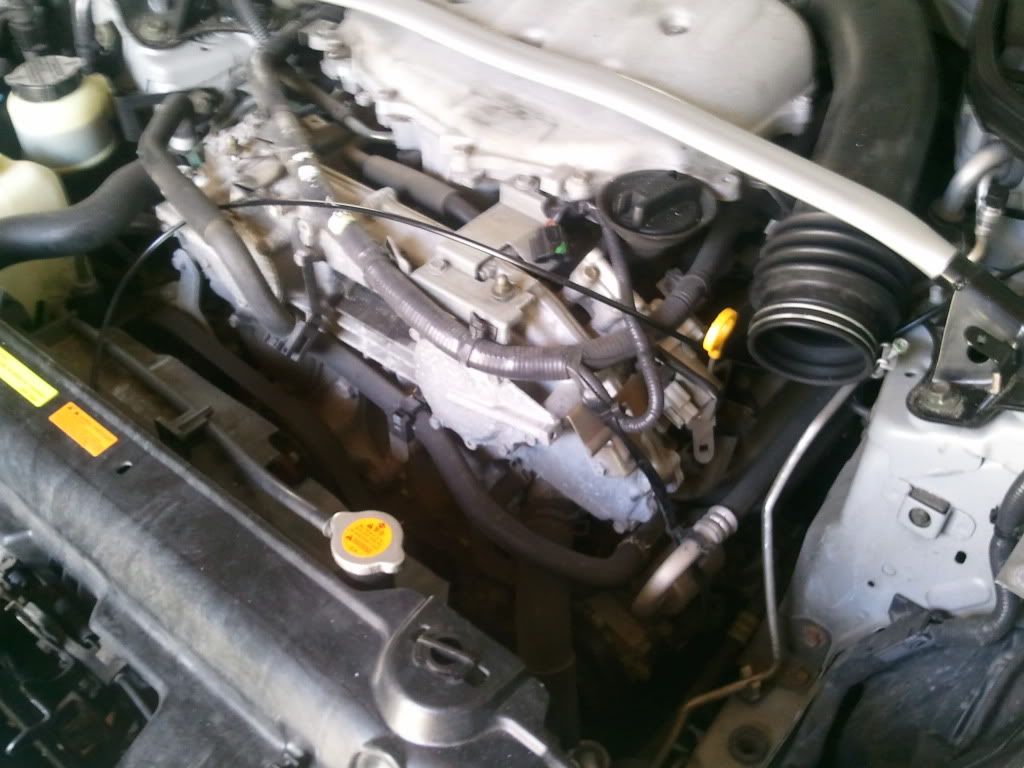
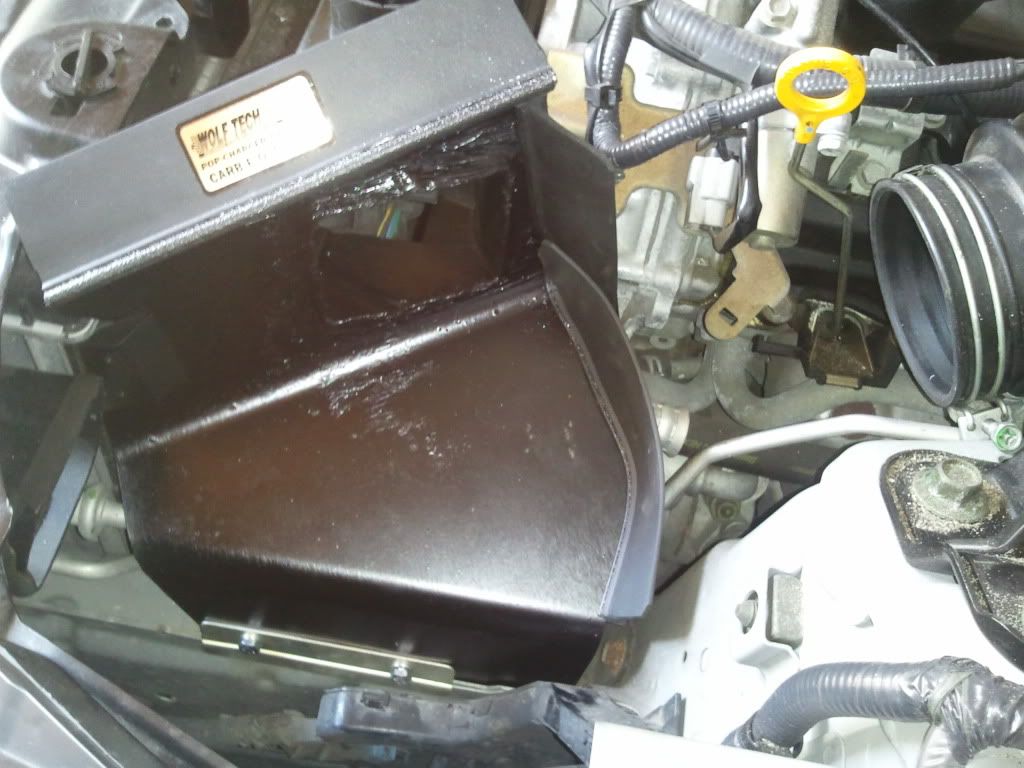
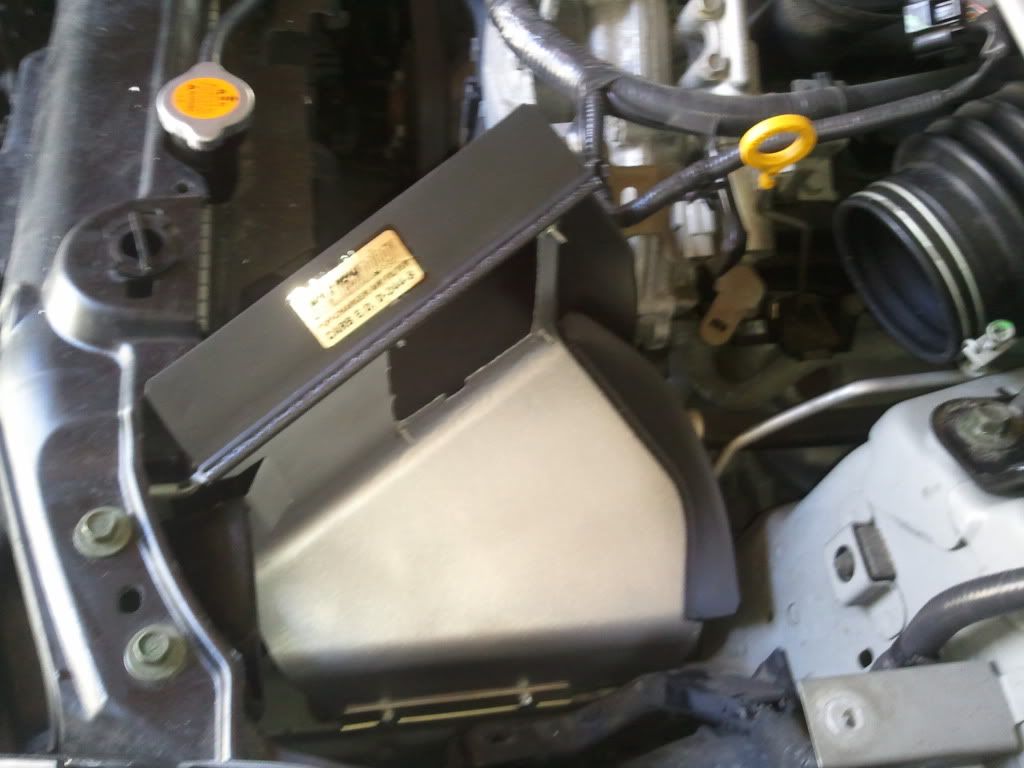
Here is the plenum (before mod) that I�m working with.

JWT is ordered and waiting to get my car back from the shop. Once I get a nice day out I'm going to work on my custom air box and plenum. I need do some fiber glass work to get everything the way I want it.
I'm going to go with cable to open and close the flap. This is until I can come up with an electronic way to engage and disengage the flap. If some of you got some ideas or links let me know. I'm open to the suggestions. I just don�t have the back ground in that type of stuff.
What I�m looking for is a simple motor switch that can open and close, with a solid state. This means once the current is shut off it will not move. The motor needs some type of arm to slide the lever from open to close. I need to be able to run a motor to a switch that can be mounted in the cabin. Preferably in one of the button delete spots.
Here is the plenum (before mod) that I�m working with.
 02-19-2011, 12:42 PM
#24
Registered User
Thread Starter
Join Date: Feb 2011
Location: Charleston, SC
Posts: 94
Likes: 0
Received 0 Likes
on
0 Posts
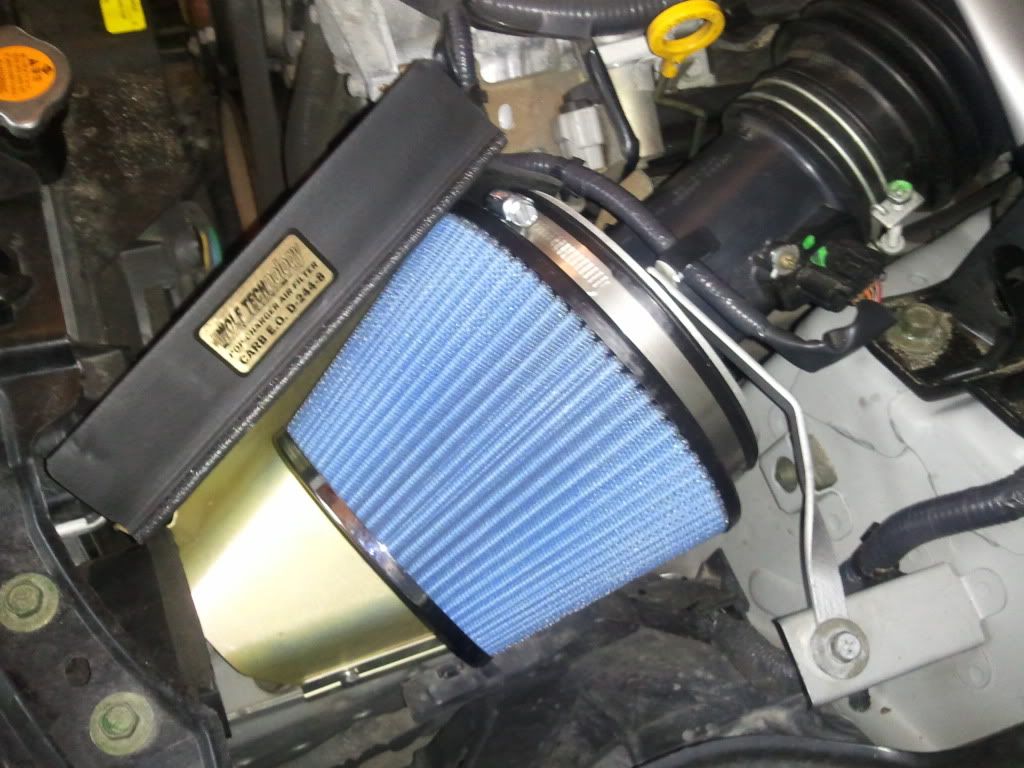
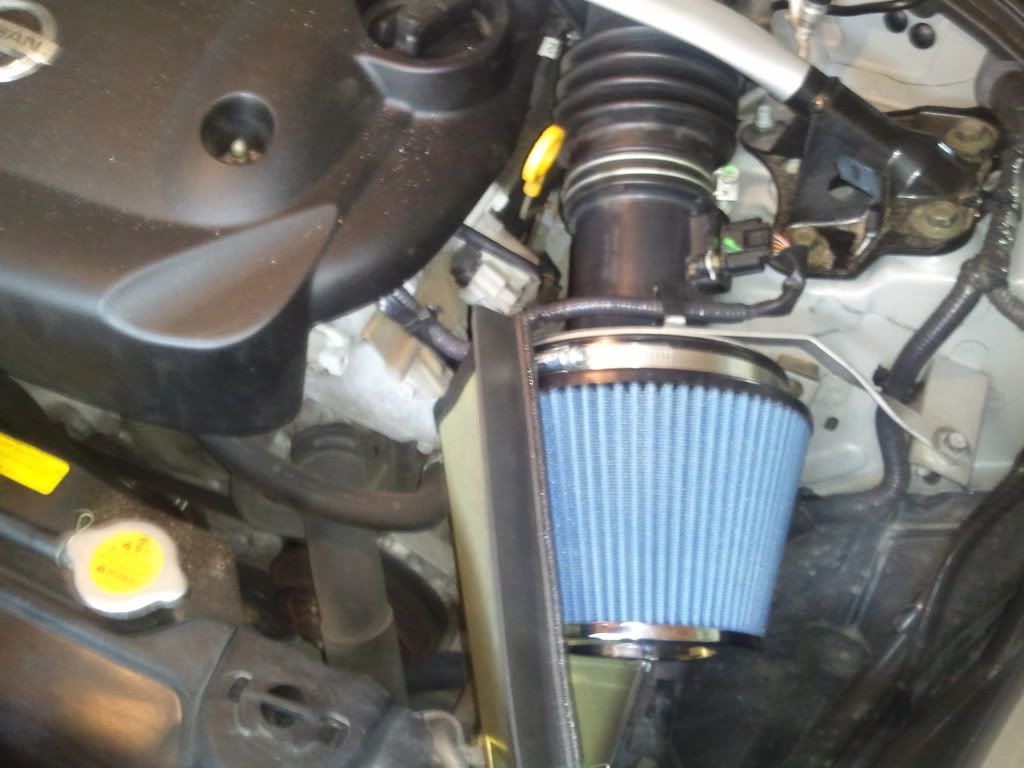
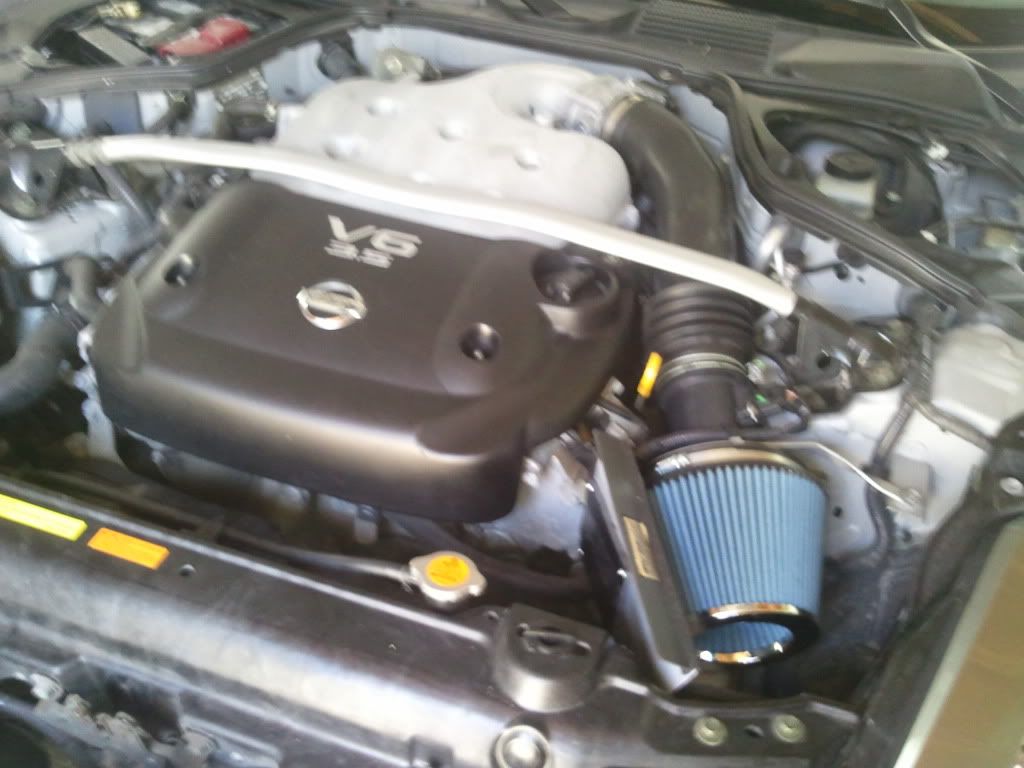
I installed the pop charger yesterday to see how it sits in the engine bay. I started work on the plenum and bought all the duct work need for Monday when I'm off. I'll install everything and cut the hood then.
02-22-2011, 05:27 AM
#25
Registered User
Thread Starter
Join Date: Feb 2011
Location: Charleston, SC
Posts: 94
Likes: 0
Received 0 Likes
on
0 Posts
Phase 2 and 3
Yesterday I came close to finishing the project. It did not come out completely like I wanted it to so I’m going to have to come back and redo a few things. However this is what I did.
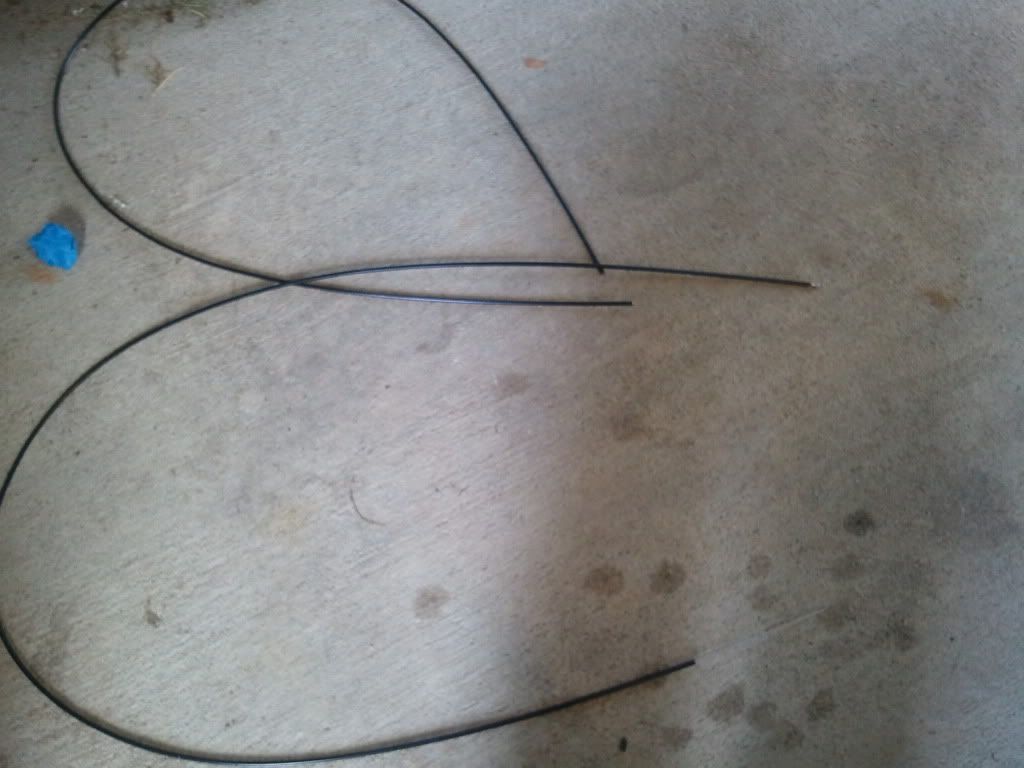
The things I need to start this project was the painted scoop (mortified), 2 inch dryer ducts, a defrost plenum from a 1966 mustang, hose clamps, 2 inch 2 PCV pipes , and 2 bicycle cables. Tools required a Dremel tool with metal cutting discs, drill with 2 � circular drill bit, silicone and assorted normal hand tools.
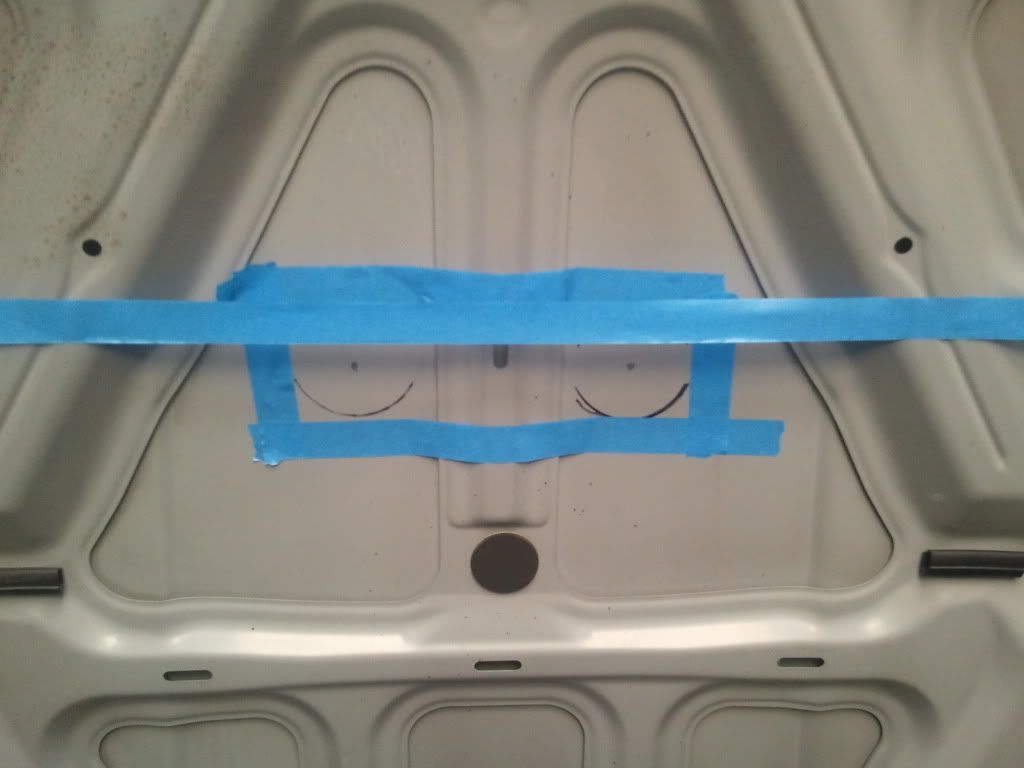
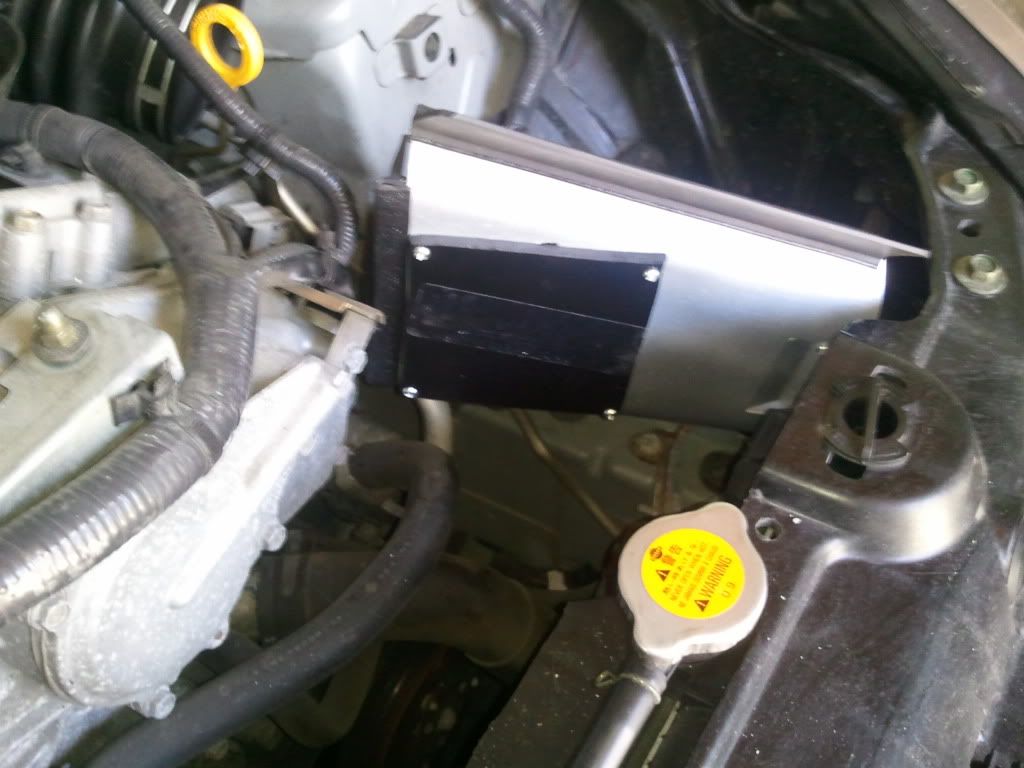
The first thing that needed to be done was to modify the plenum and remove the Pop Charger, along with the engine cover. I tested fitted the plenum and measured how much needed to be removed from the end to mate to the Pop Charger shield. I taped off the line on plenum and cut it with the Dremel tool.
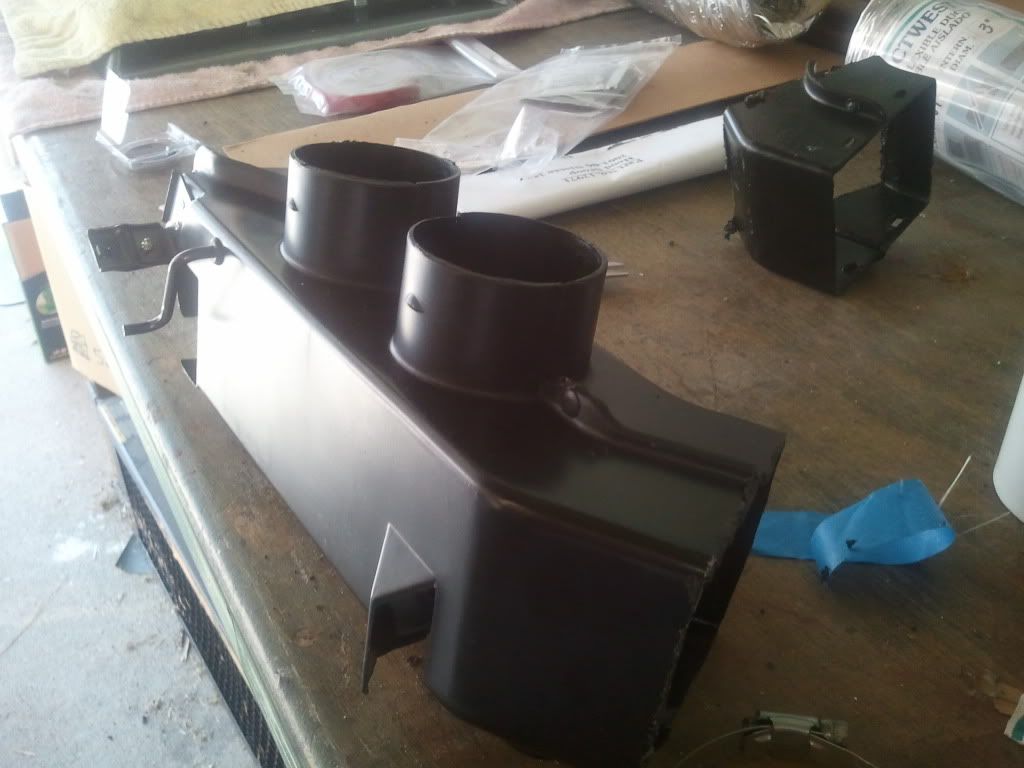
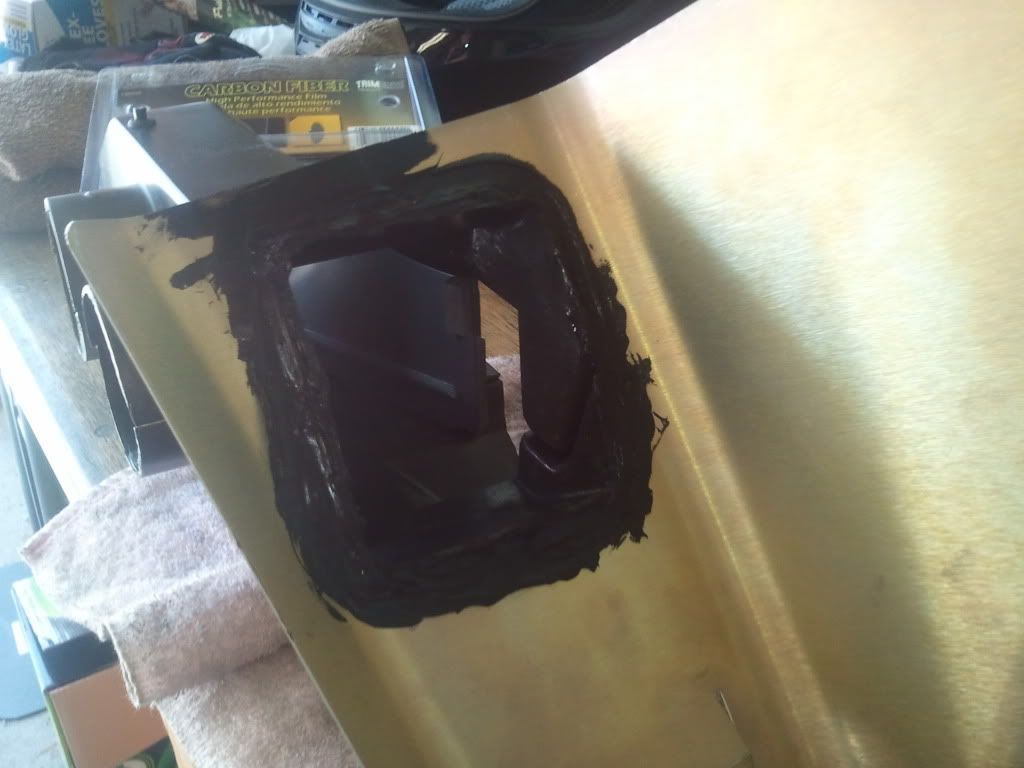
After the plenum had been cut, I then used the plenum to trace where the hole should be cut on the Pop Charger shield.
Using the Dremel, I proceeded to cut the hole in the shield. I then mated the two together and applied some black silicone to fill in the breaks between the plenum and the Pop Charger shield.

While that was drying I installed the cable that will operate the flap in the plenum.
Yesterday I came close to finishing the project. It did not come out completely like I wanted it to so I’m going to have to come back and redo a few things. However this is what I did.
The things I need to start this project was the painted scoop (mortified), 2 inch dryer ducts, a defrost plenum from a 1966 mustang, hose clamps, 2 inch 2 PCV pipes , and 2 bicycle cables. Tools required a Dremel tool with metal cutting discs, drill with 2 � circular drill bit, silicone and assorted normal hand tools.
The first thing that needed to be done was to modify the plenum and remove the Pop Charger, along with the engine cover. I tested fitted the plenum and measured how much needed to be removed from the end to mate to the Pop Charger shield. I taped off the line on plenum and cut it with the Dremel tool.
After the plenum had been cut, I then used the plenum to trace where the hole should be cut on the Pop Charger shield.
Using the Dremel, I proceeded to cut the hole in the shield. I then mated the two together and applied some black silicone to fill in the breaks between the plenum and the Pop Charger shield.
While that was drying I installed the cable that will operate the flap in the plenum.
02-22-2011, 05:28 AM
#26
Registered User
Thread Starter
Join Date: Feb 2011
Location: Charleston, SC
Posts: 94
Likes: 0
Received 0 Likes
on
0 Posts
Since I own an AT I do not have a third pedal so I was able to use the space. I drilled a hole in the firewall the size of the cable. I then pushed it through.
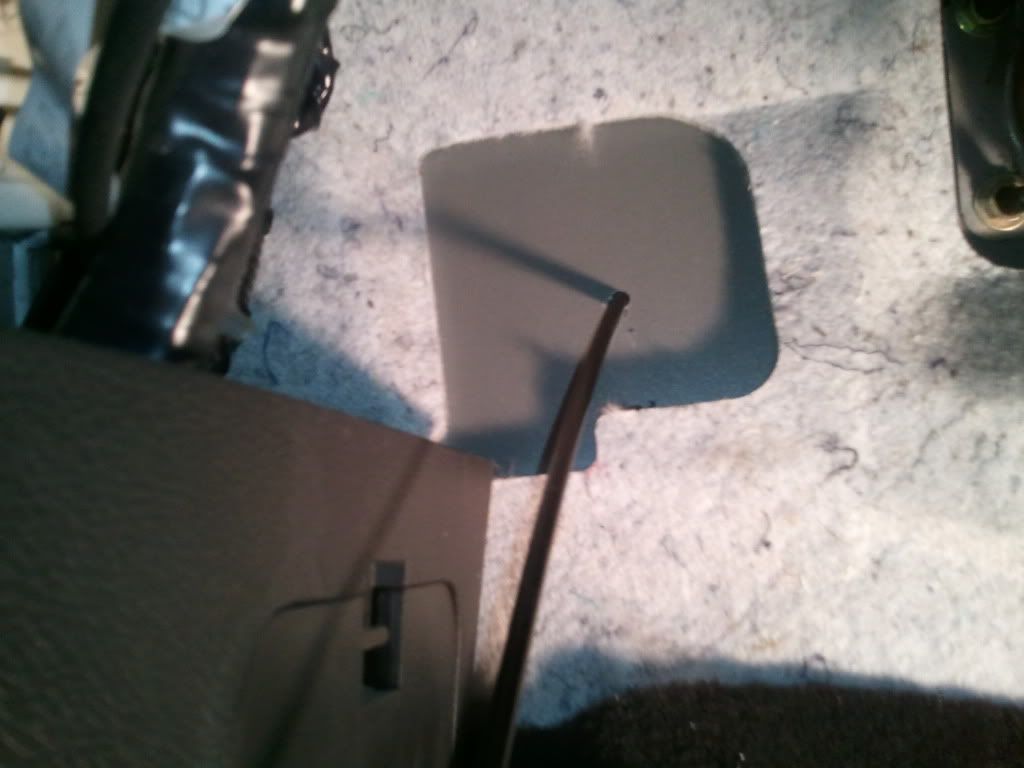
I removed the cubby lid on the driver’s side and feed the cable through a blank spot to get into the engine bay. I assume this was where the manual hardware mounts. For me it just saves me drilling another hole. It’s just blocked off by a black plastic spacer screw. I then ran the cable to the fornt of the car and left it there until I was able to install the plenum/shield.
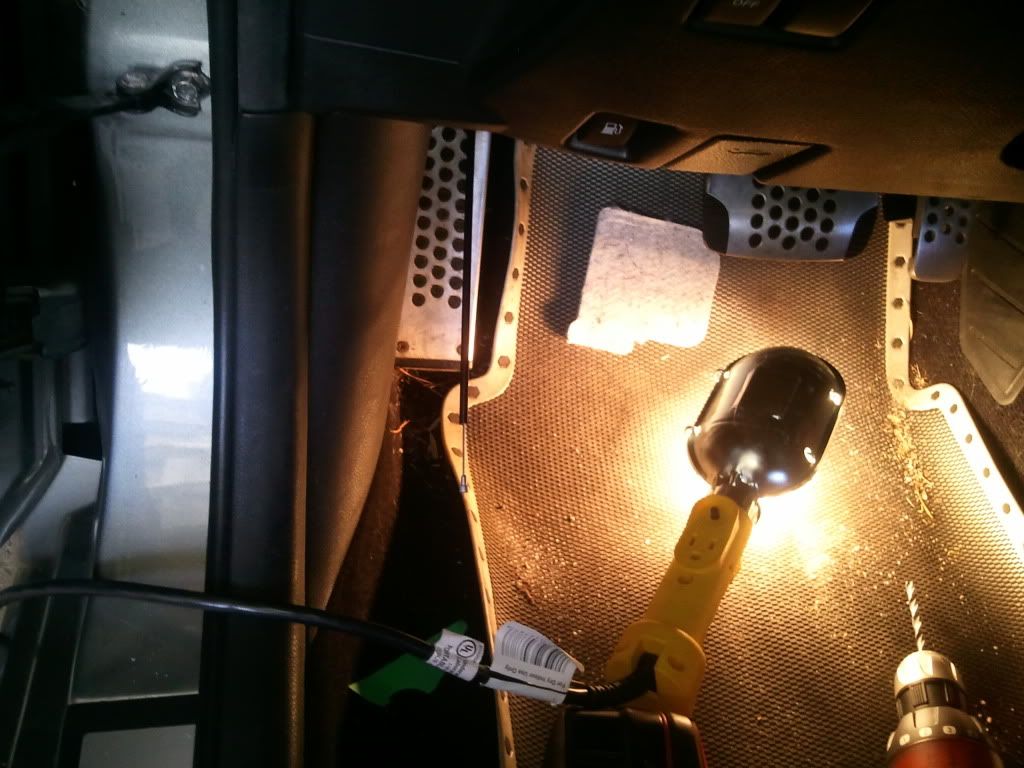
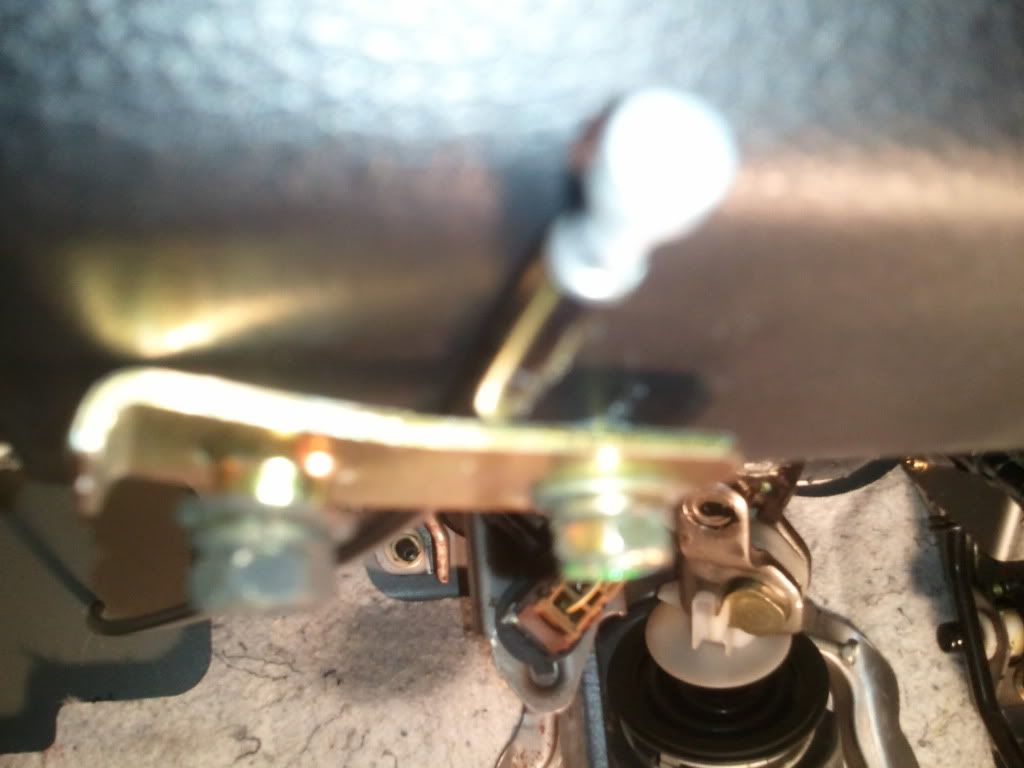
I fasinhed a make shift bracket then mounted it under the dash. When you pull the cable the flap opens and if you push it in the flap closes.
 02-22-2011, 05:28 AM
#27
Registered User
Thread Starter
Join Date: Feb 2011
Location: Charleston, SC
Posts: 94
Likes: 0
Received 0 Likes
on
0 Posts
Now comes the most nerve racking part, drilling the hood.
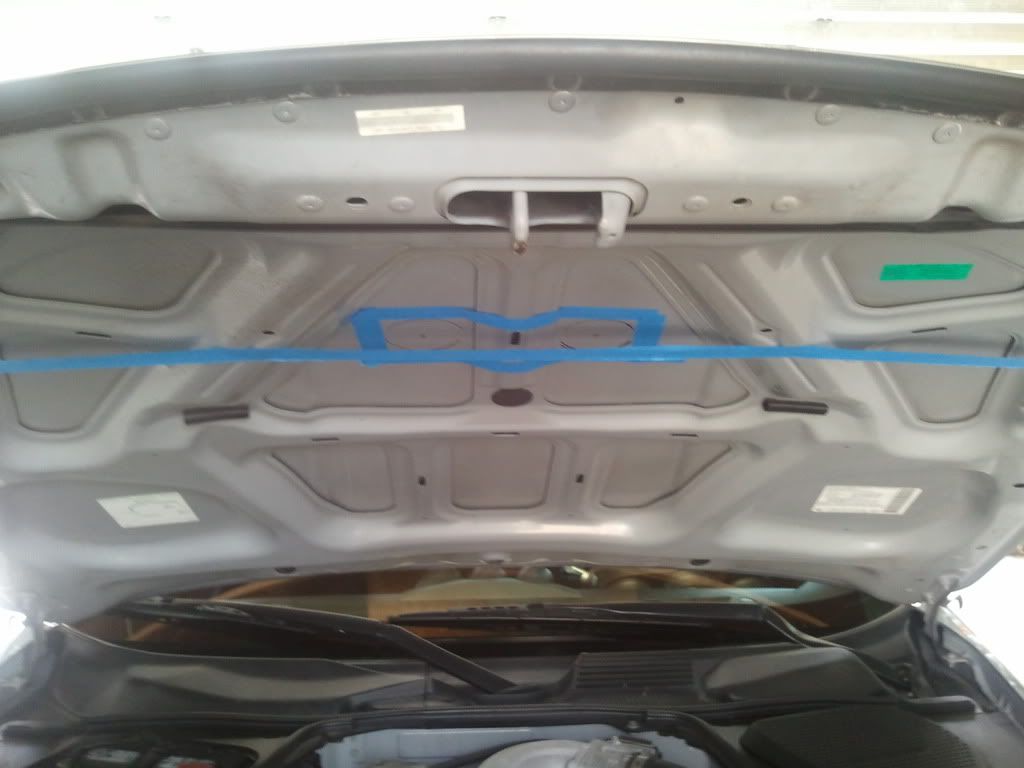
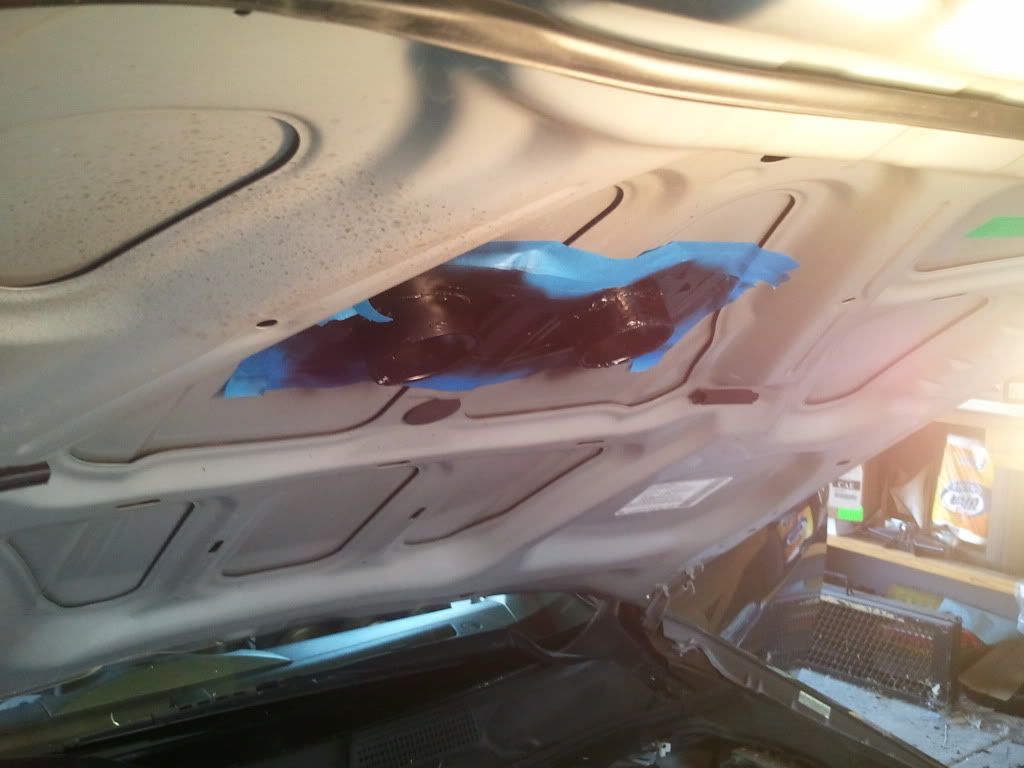
My first plan was to drill the holes toward the rear of the hood. Due to pluming issues I need to move these whole forward. So I measured, measured so more and measured again. I taped off the area and used the PCV pipes to trace a template on the bottom of the hood.
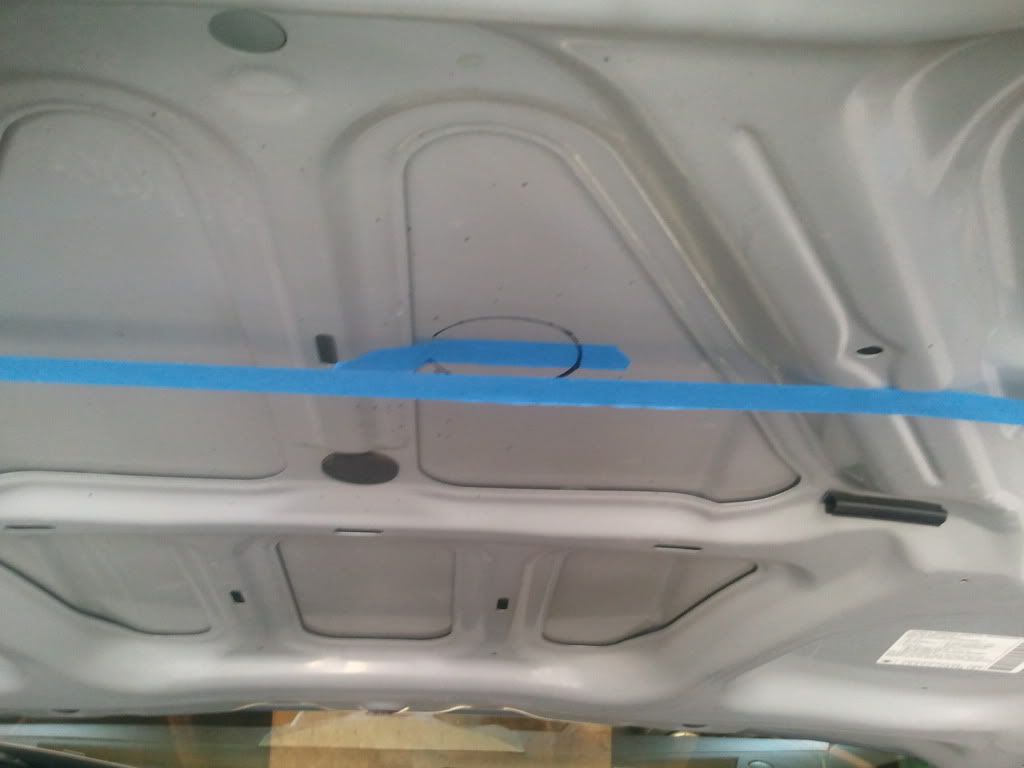
I attached the drill bit to the drill and made the holes. Phew, that was scary!
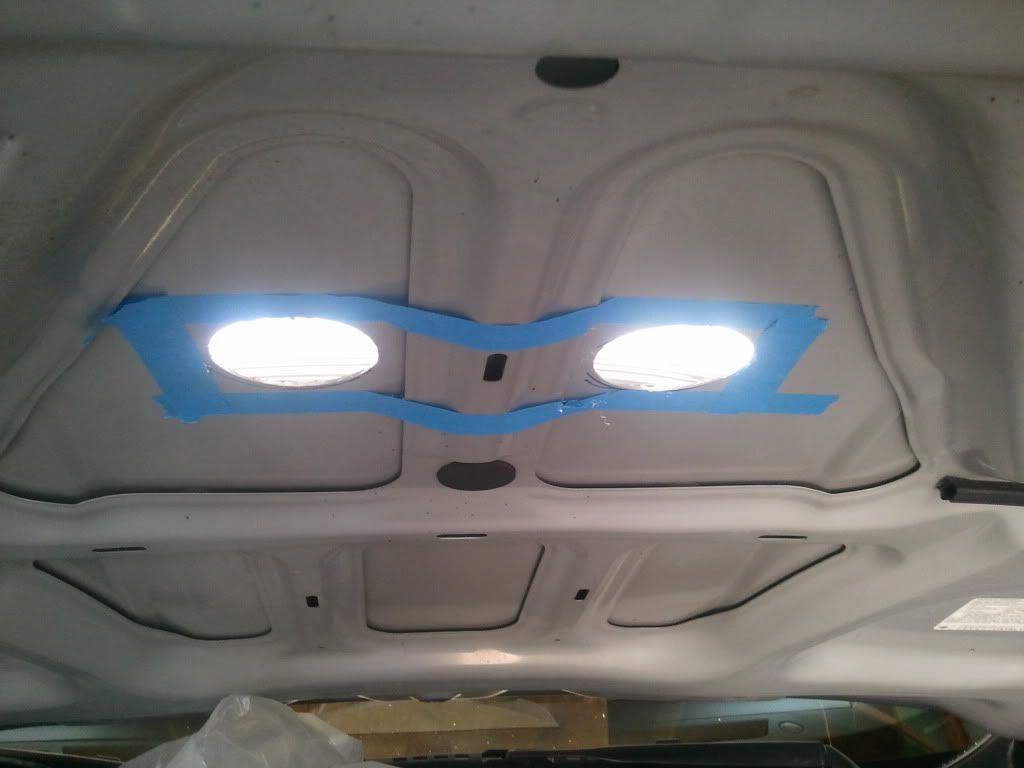
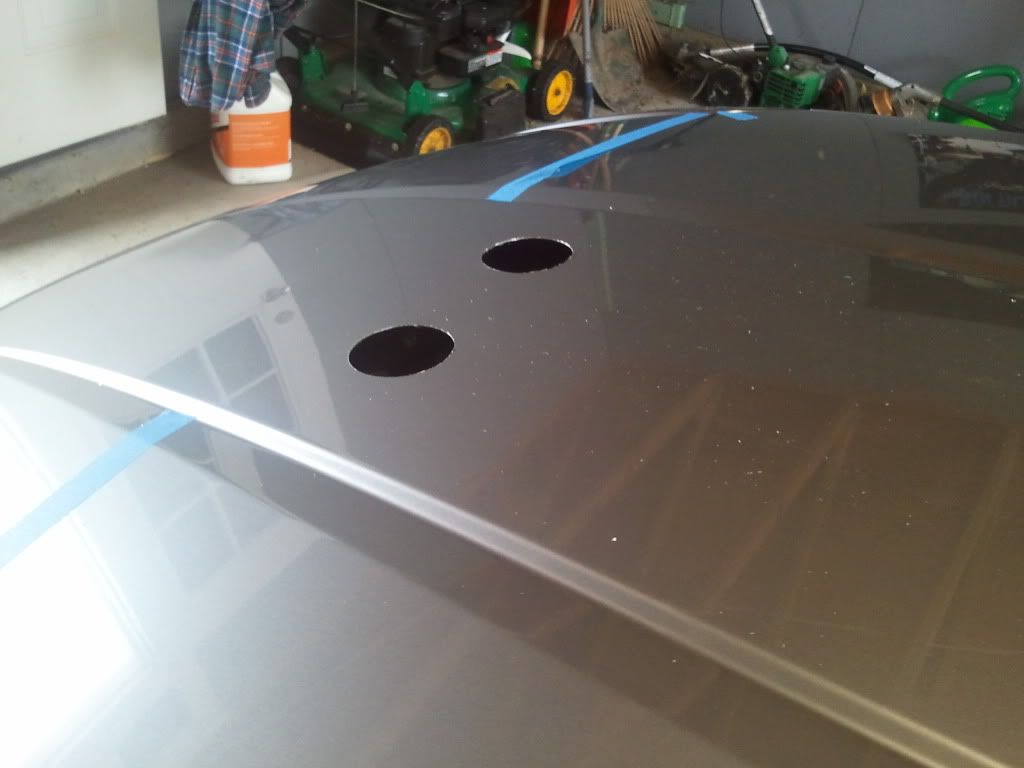
Next step is to install the vents.
My first plan was to drill the holes toward the rear of the hood. Due to pluming issues I need to move these whole forward. So I measured, measured so more and measured again. I taped off the area and used the PCV pipes to trace a template on the bottom of the hood.
I attached the drill bit to the drill and made the holes. Phew, that was scary!
Next step is to install the vents.
02-22-2011, 05:30 AM
#28
Registered User
Thread Starter
Join Date: Feb 2011
Location: Charleston, SC
Posts: 94
Likes: 0
Received 0 Likes
on
0 Posts
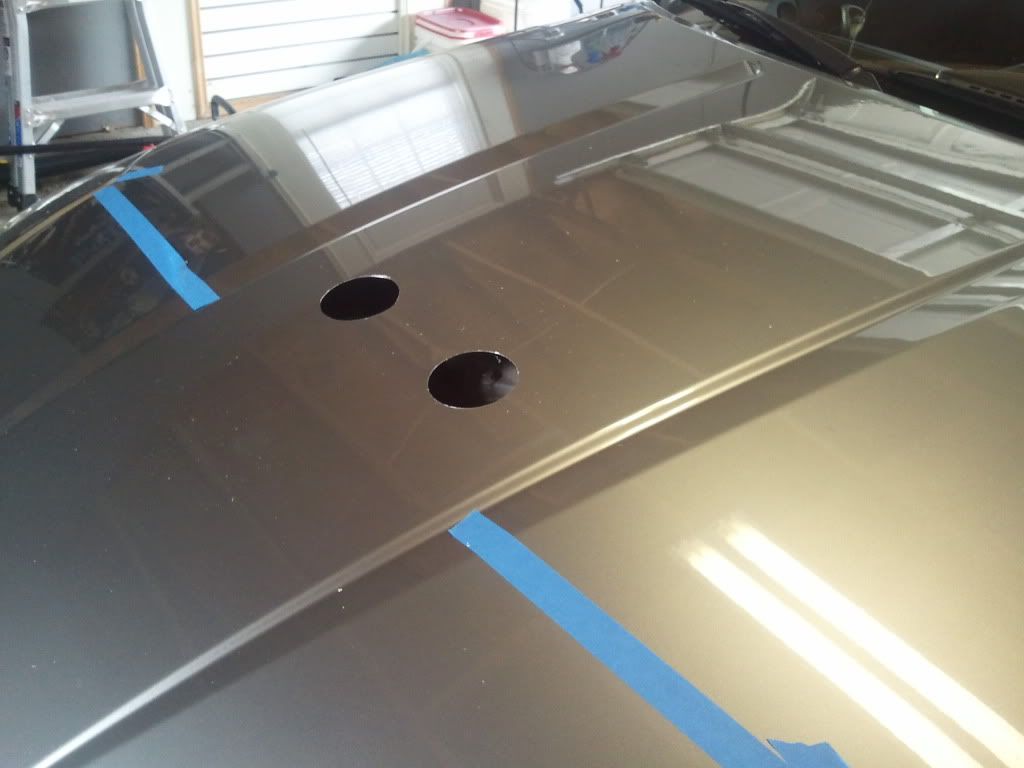
I ended up not having to use both PCV pipes only one cut in half. I fitted them though the holes I just cut and used some black silicone to seal them to the hood. After they dried I painted them black.
Next, it was time to install the plenum/shield. To get this to fit right I had to trim the fan shroud just a bit. I just used the Dremel tool to but a small notch so that the plenum would fit between the engine and radiator. After the space was cut I slid the plenum/shield assembly into place and mounted it.
Here is where I ran to some issues. No matter where I placed the bracket the plenum would move. The only way I could get it to stop was to place a few zip ties around the plenum and mount them to various brackets in the engine bay. This is not a permanent solution. However, it does not move right now.
Another issue was the cable. I mounted it the plenum flap but I could not come up with a good way to do this. I had to zip tie it as well to get it to function, again this not a permanent solution.

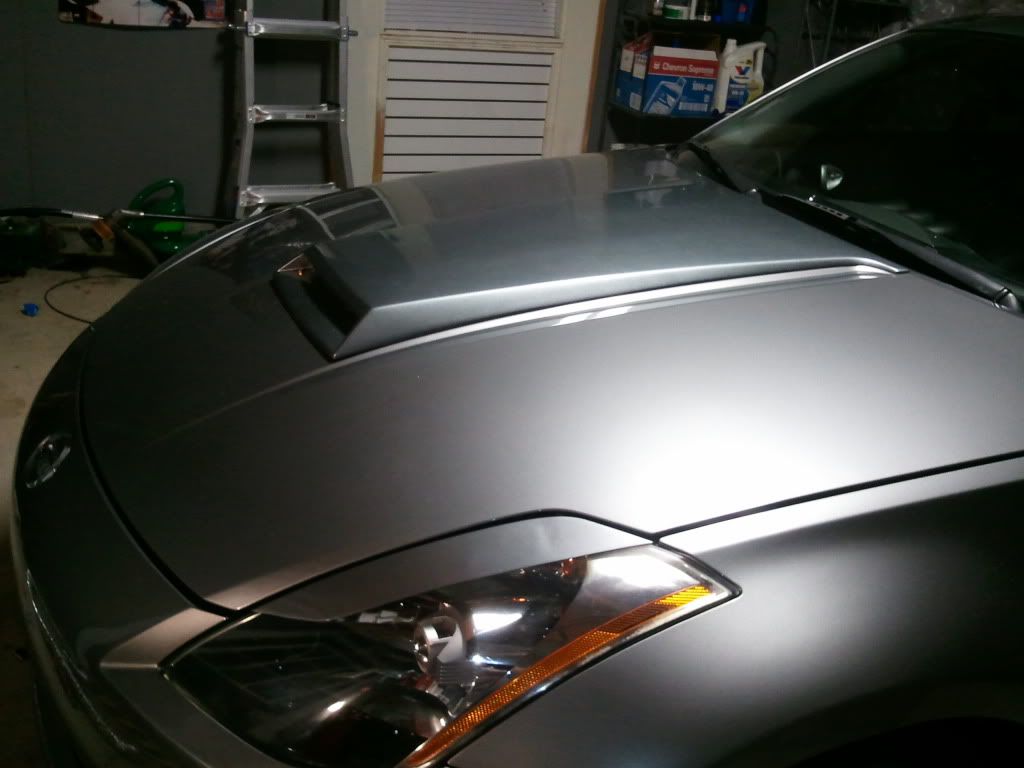
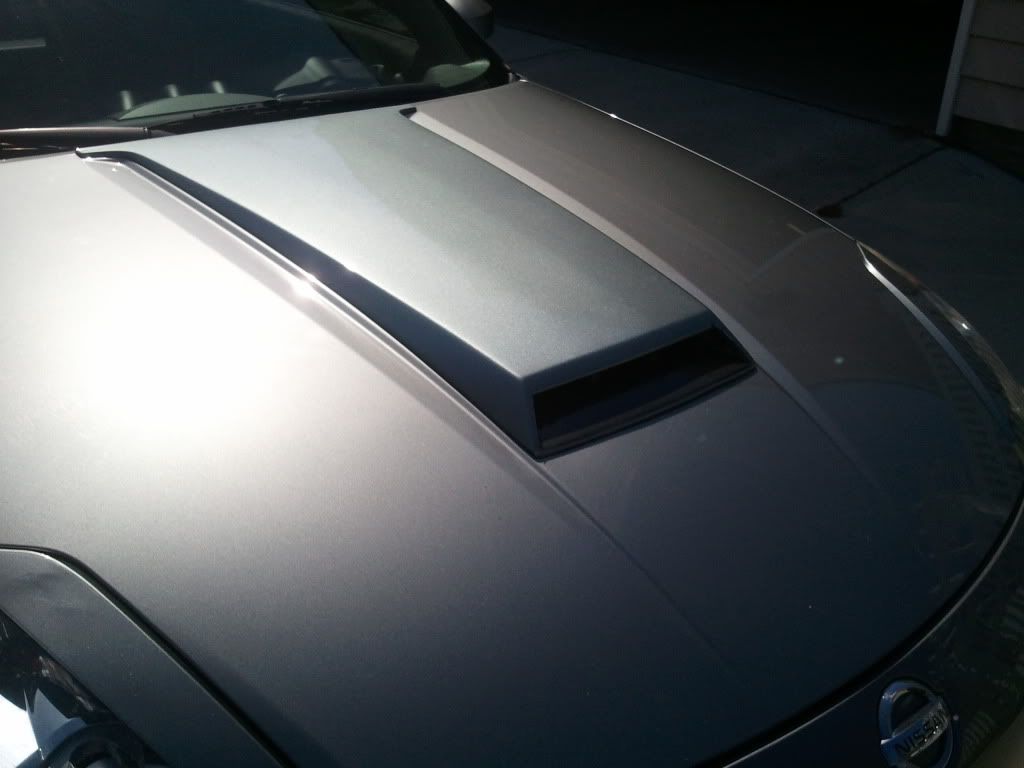
Now it’s time to install the hood scoop. Forgive me because I have no pictures of this step. The reason for this is due to things not working out. I was too busy trying to fix the issue than take pictures. For some reason things started to go south for me. Everything was going along great until this point.
I took the painted hood scoop inside laid it down upside down on some carpet and applied the 3M two sided tape. I planned to mount bolts to the hood along with the tape. I had to get my wife to help with this step. We both lifted the scoop over the hood and proceeded to bind it to the surface. This is where I messed up. When I directed my wife to lay her side down, at the same time I did. They scoop was not aligned correctly. Therefore the scoop was crooked. I then had to remove the scoop from the hood destroying the tape I had laid down. I went then went to an Auto parts store and bought new tape. Not too big a big deal. However when we tried to apply the scoop again it was not fitting.
The front of the scoop was not meshing with the hood. The tape is not strong enough to bring the front of the scoop down, leaving a huge gap. No problem, I was going to bolt the scoop down anyway. I drill two holes through the scoop and through the hood. This is where I ran into another issue. I did not have a drill bit or screws long enough to go all the way through the hood. So I had to use some screws I had on hand just to keep the scoop bolted to the hood for now. I’m going to have to come back and redo this.
Next, it was time to install the plenum/shield. To get this to fit right I had to trim the fan shroud just a bit. I just used the Dremel tool to but a small notch so that the plenum would fit between the engine and radiator. After the space was cut I slid the plenum/shield assembly into place and mounted it.
Here is where I ran to some issues. No matter where I placed the bracket the plenum would move. The only way I could get it to stop was to place a few zip ties around the plenum and mount them to various brackets in the engine bay. This is not a permanent solution. However, it does not move right now.
Another issue was the cable. I mounted it the plenum flap but I could not come up with a good way to do this. I had to zip tie it as well to get it to function, again this not a permanent solution.
Now it’s time to install the hood scoop. Forgive me because I have no pictures of this step. The reason for this is due to things not working out. I was too busy trying to fix the issue than take pictures. For some reason things started to go south for me. Everything was going along great until this point.
I took the painted hood scoop inside laid it down upside down on some carpet and applied the 3M two sided tape. I planned to mount bolts to the hood along with the tape. I had to get my wife to help with this step. We both lifted the scoop over the hood and proceeded to bind it to the surface. This is where I messed up. When I directed my wife to lay her side down, at the same time I did. They scoop was not aligned correctly. Therefore the scoop was crooked. I then had to remove the scoop from the hood destroying the tape I had laid down. I went then went to an Auto parts store and bought new tape. Not too big a big deal. However when we tried to apply the scoop again it was not fitting.
The front of the scoop was not meshing with the hood. The tape is not strong enough to bring the front of the scoop down, leaving a huge gap. No problem, I was going to bolt the scoop down anyway. I drill two holes through the scoop and through the hood. This is where I ran into another issue. I did not have a drill bit or screws long enough to go all the way through the hood. So I had to use some screws I had on hand just to keep the scoop bolted to the hood for now. I’m going to have to come back and redo this.
02-22-2011, 05:30 AM
#29
Registered User
Thread Starter
Join Date: Feb 2011
Location: Charleston, SC
Posts: 94
Likes: 0
Received 0 Likes
on
0 Posts
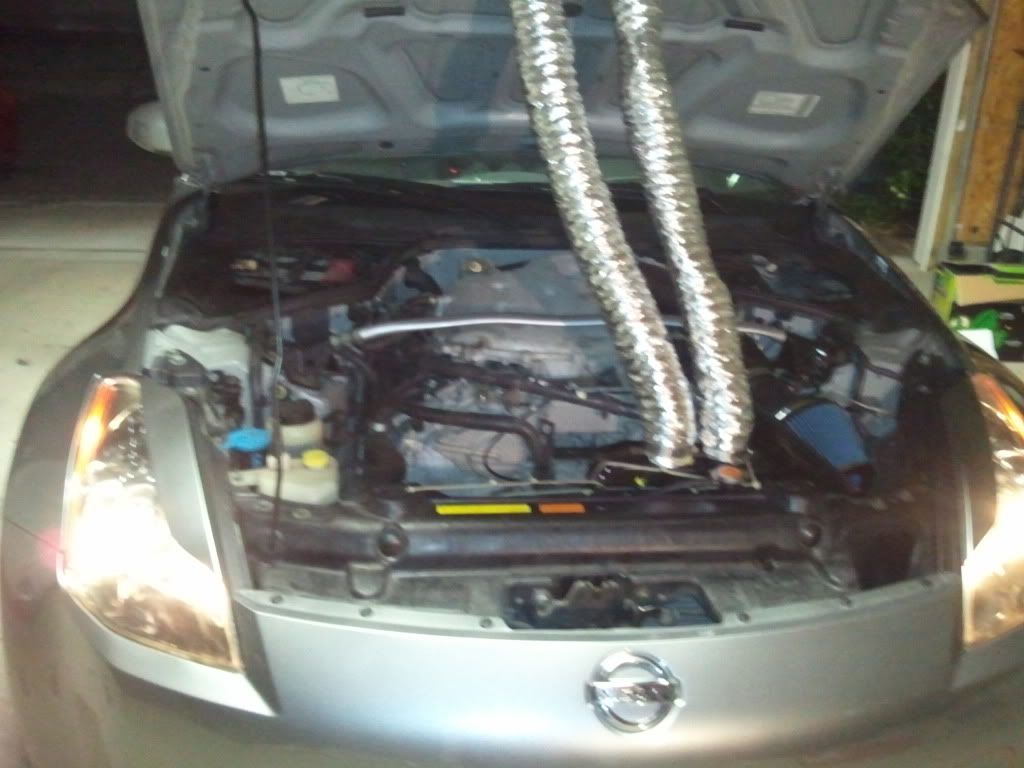
I then installed the Pop Charger filter. Since all the hard stuff was done all I had to do was install the duct work. This was an easy step I test fitted the ducts and them cut them to length. Slipped on some hose clamps and I was done. The cool thing about the 2 inch dryer ducts is that they act like an accordion when they collapse. This is how they fit when the hood closes.
I have some finishing touches to do before it is done but it will hold until I get some more time. I was not able to get any good pictures since it was dark out. When I’m all done I’ll post them.
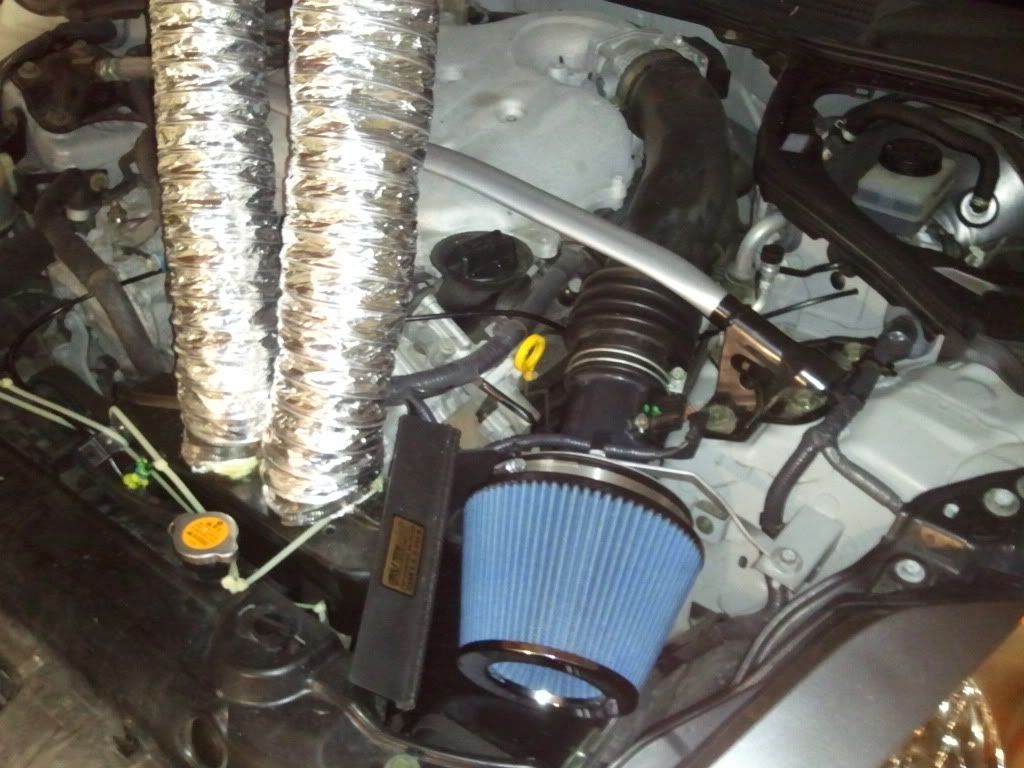

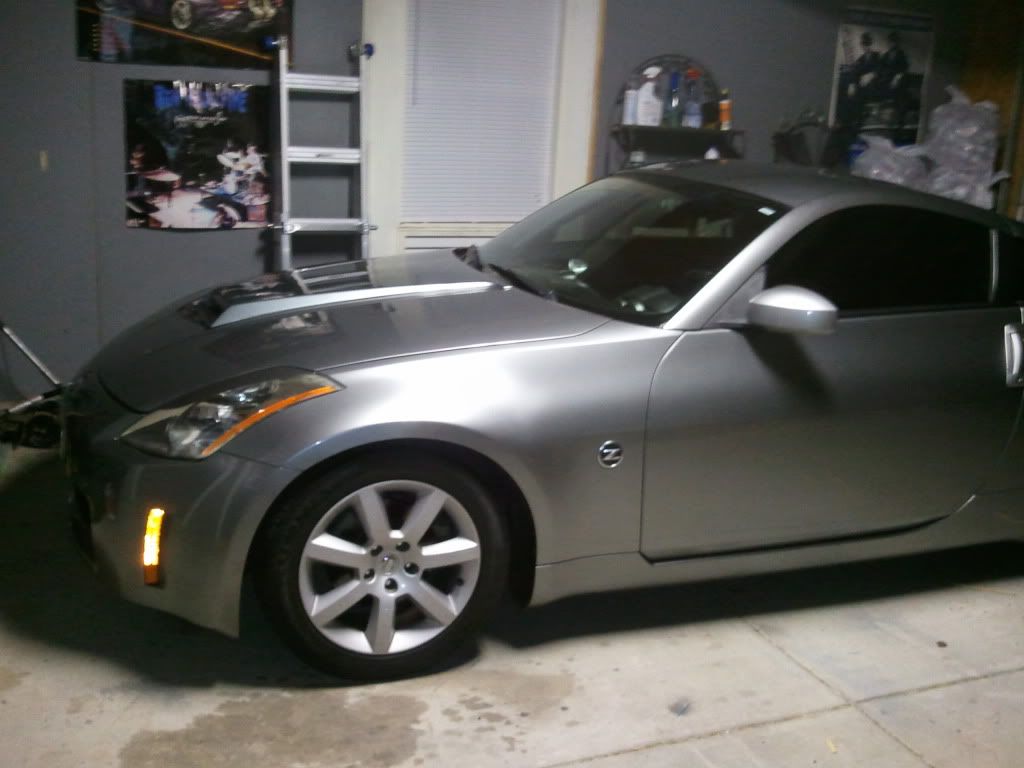
I have some finishing touches to do before it is done but it will hold until I get some more time. I was not able to get any good pictures since it was dark out. When I’m all done I’ll post them.
02-22-2011, 09:04 AM
#30

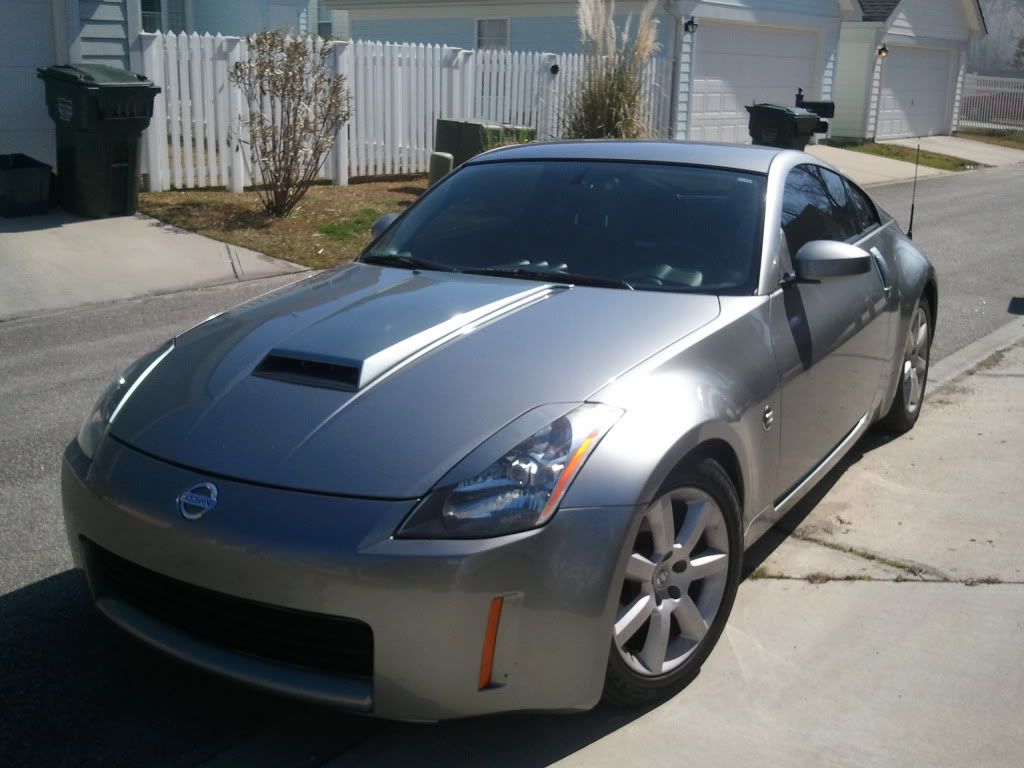
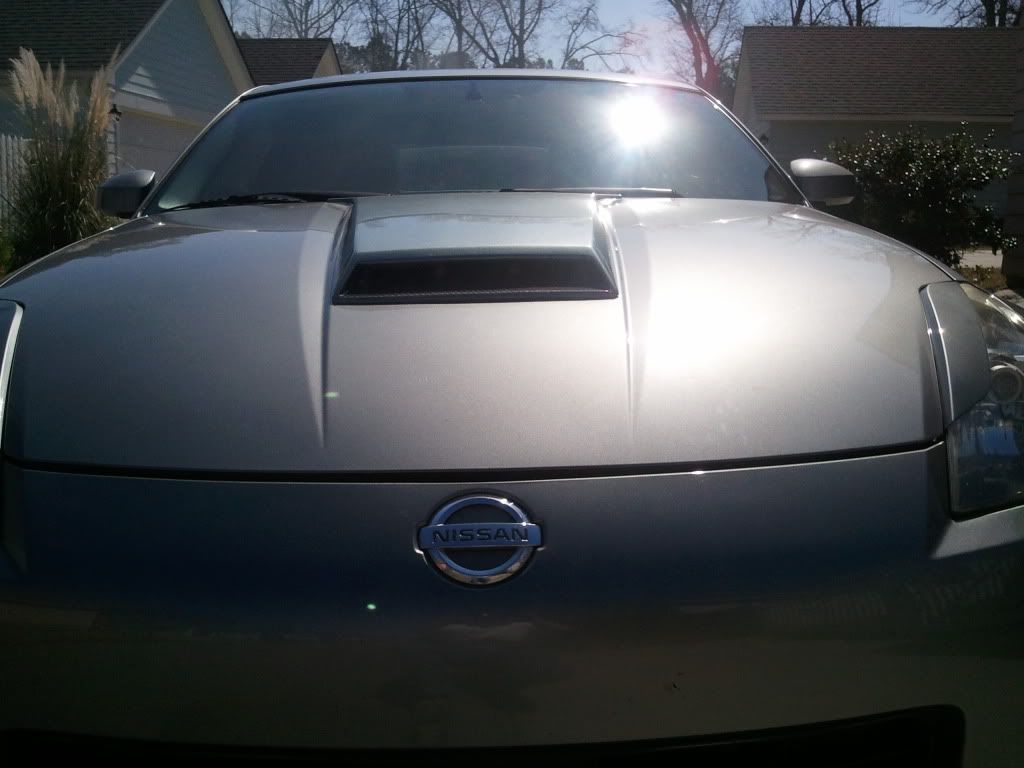
im not gunna flame you but there were alot easier and more fashionable ways to get ram air. the scoops looks nice but the flashy dryer duct stretching from hood to core support? no so much IMHO. As long as you keep your hood shut itll look nice 
https://my350z.com/forum/engine-driv...ml#post8979615
Heres my ram air..
https://my350z.com/forum/engine-driv...ml#post8979615
Heres my ram air..
02-22-2011, 09:08 AM
#31

i commend you for your DIY attitude.
just have a couple of comments....
1) have you considered your vent opening on the hood might be too small to adequately flow enough air fast enough through the 3 feet of compressed/unsmoothed dryer hose to your intake

2) the image above is a generalized image, but the color pressure distribution is fairly universal for all cars. Red / Orange on the CAR is high pressure from air flow toward the front of the car. the reason why the air duct cut in the nose or a funnel flowing the air from the front bumper up through the radiator frame hole cut out to the intake flows the best is because the amount of air flowing into the front bumper is the highest pressure zone.. aka. it will have the speed to flow to anywhere you direct it.
problem with a hood scoop in general is that you will need to have the leading edge of the scoop higher enough up over the boundary layer (that is attached at the hood surface) to direct the air flow into where you want to go.
if you had placed a scoop at the end of the hood, near the windsheild and turned your intake pipe backward, (if there was any room to do this..) perhaps you would have gotten near the same airflow speeds compariable to the nose of the car...
well. i'd be interested to see some intake air temps if you have the ability to do so..
just have a couple of comments....
1) have you considered your vent opening on the hood might be too small to adequately flow enough air fast enough through the 3 feet of compressed/unsmoothed dryer hose to your intake
2) the image above is a generalized image, but the color pressure distribution is fairly universal for all cars. Red / Orange on the CAR is high pressure from air flow toward the front of the car. the reason why the air duct cut in the nose or a funnel flowing the air from the front bumper up through the radiator frame hole cut out to the intake flows the best is because the amount of air flowing into the front bumper is the highest pressure zone.. aka. it will have the speed to flow to anywhere you direct it.
problem with a hood scoop in general is that you will need to have the leading edge of the scoop higher enough up over the boundary layer (that is attached at the hood surface) to direct the air flow into where you want to go.
if you had placed a scoop at the end of the hood, near the windsheild and turned your intake pipe backward, (if there was any room to do this..) perhaps you would have gotten near the same airflow speeds compariable to the nose of the car...
well. i'd be interested to see some intake air temps if you have the ability to do so..
Last edited by Chebosto; 02-22-2011 at 09:12 AM.
02-22-2011, 09:13 AM
#32
Registered User
Thread Starter
Join Date: Feb 2011
Location: Charleston, SC
Posts: 94
Likes: 0
Received 0 Likes
on
0 Posts
I don't disagree at all, there are better ways. I really wanted to make a hood scoop work. It might not have come off as well as I might of liked. I'm going to revisit it and make it a little cleaner.
I'm going to take a apart this weekend and clean it up the best I can.
I'm going to take a apart this weekend and clean it up the best I can.
im not gunna flame you but there were alot easier and more fashionable ways to get ram air. the scoops looks nice but the flashy dryer duct stretching from hood to core support? no so much IMHO. As long as you keep your hood shut itll look nice
https://my350z.com/forum/engine-driv...ml#post8979615
Heres my ram air..
https://my350z.com/forum/engine-driv...ml#post8979615
Heres my ram air..
02-22-2011, 09:17 AM
#33
Registered User
Thread Starter
Join Date: Feb 2011
Location: Charleston, SC
Posts: 94
Likes: 0
Received 0 Likes
on
0 Posts
Thanks for the post and I will take another look at the design then. Then adjust accordantly. I might be able to reverse the vents.
i commend you for your DIY attitude.
just have a couple of comments....
1) have you considered your vent opening on the hood might be too small to adequately flow enough air fast enough through the 3 feet of compressed/unsmoothed dryer hose to your intake
2) the image above is a generalized image, but the color pressure distribution is fairly universal for all cars. Red / Orange on the CAR is high pressure from air flow toward the front of the car. the reason why the air duct cut in the nose or a funnel flowing the air from the front bumper up through the radiator frame hole cut out to the intake flows the best is because the amount of air flowing into the front bumper is the highest pressure zone.. aka. it will have the speed to flow to anywhere you direct it.
problem with a hood scoop in general is that you will need to have the leading edge of the scoop higher enough up over the boundary layer (that is attached at the hood surface) to direct the air flow into where you want to go.
if you had placed a scoop at the end of the hood, near the windsheild and turned your intake pipe backward, (if there was any room to do this..) perhaps you would have gotten near the same airflow speeds compariable to the nose of the car...
well. i'd be interested to see some intake air temps if you have the ability to do so..


 02-23-2011, 09:13 AM
#36
Registered User
Thread Starter
Join Date: Feb 2011
Location: Charleston, SC
Posts: 94
Likes: 0
Received 0 Likes
on
0 Posts
I looked over my set up and going to get rid of the plenum and use CAI tubing to run it different with a fixed position on the engine bay. This will be something that can mesh up to the hood when it open and closes. That will get rid of the ugly ducts and look way cleaner, when finished. This new set up will utilize an AEM bypass valve and will not need the flap system. Luckily the cuts in the hood I made will work. I’ll just make a bigger hole for what I have planned next.
I’m hoping to get a temp gauge to mount someone in the system to get some readings before and after the fix. I’ll run the car with the stock air box back on and then with the upgrade.
Thanks for the input; the posts have given me some ideas to try out. Stay tuned!
I’m hoping to get a temp gauge to mount someone in the system to get some readings before and after the fix. I’ll run the car with the stock air box back on and then with the upgrade.
Thanks for the input; the posts have given me some ideas to try out. Stay tuned!
 02-26-2011, 02:42 PM
#39
Registered User
Thread Starter
Join Date: Feb 2011
Location: Charleston, SC
Posts: 94
Likes: 0
Received 0 Likes
on
0 Posts
I decided to put everything back to the way it was and cleaned the Scoop up a bit. The scoop is still open so at least it will let some cool air in. I repaired the Pop charger shield as well.


