Boosted Performance single turbo fabrication

 04-14-2012, 10:00 AM
#22

Thanks guys, and on that note mid day update:
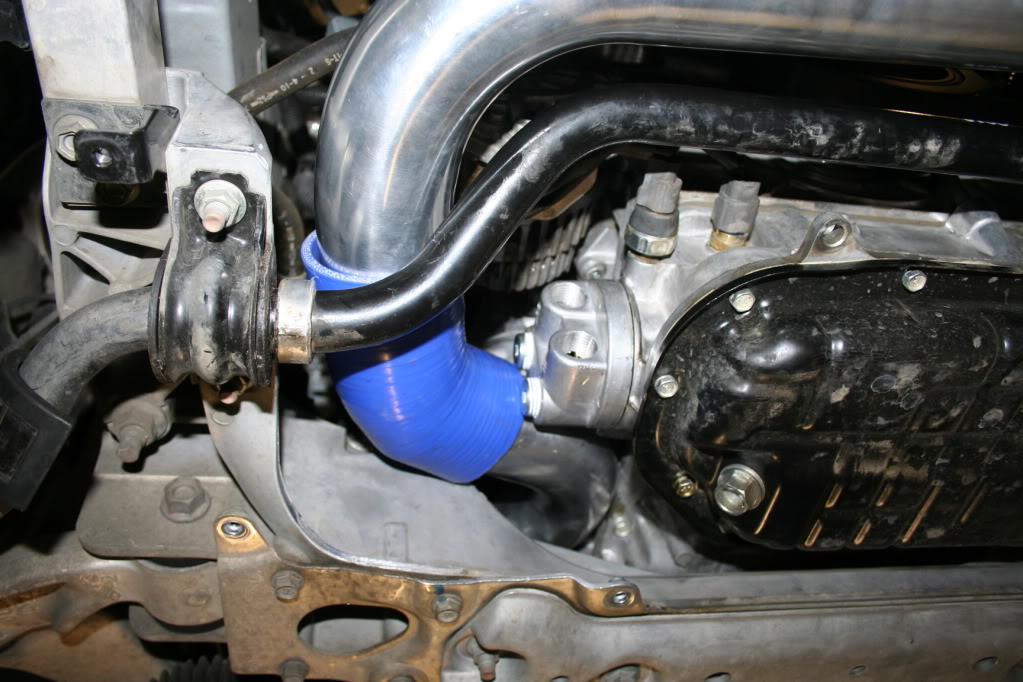
Since the F.I exhaust uses OEM rubber exhaust hangers I decided that it would be wise to upgrade them. The reason for this is me not wanting any of the exhaust weight on the headers, as they will be taking care of the turbo weight. In order to do that, some poly exhaust hangers are used:
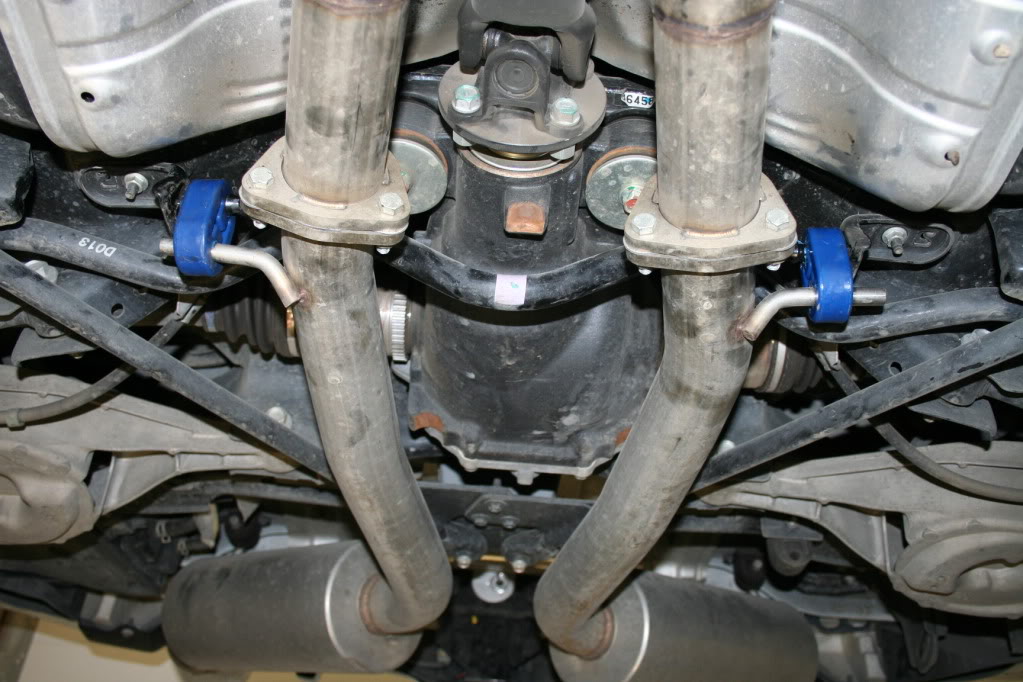
Since the F.I exhaust hanger rods are only welded on one side, it is easy to move them up a bit to get even more clearance using a large wrench:
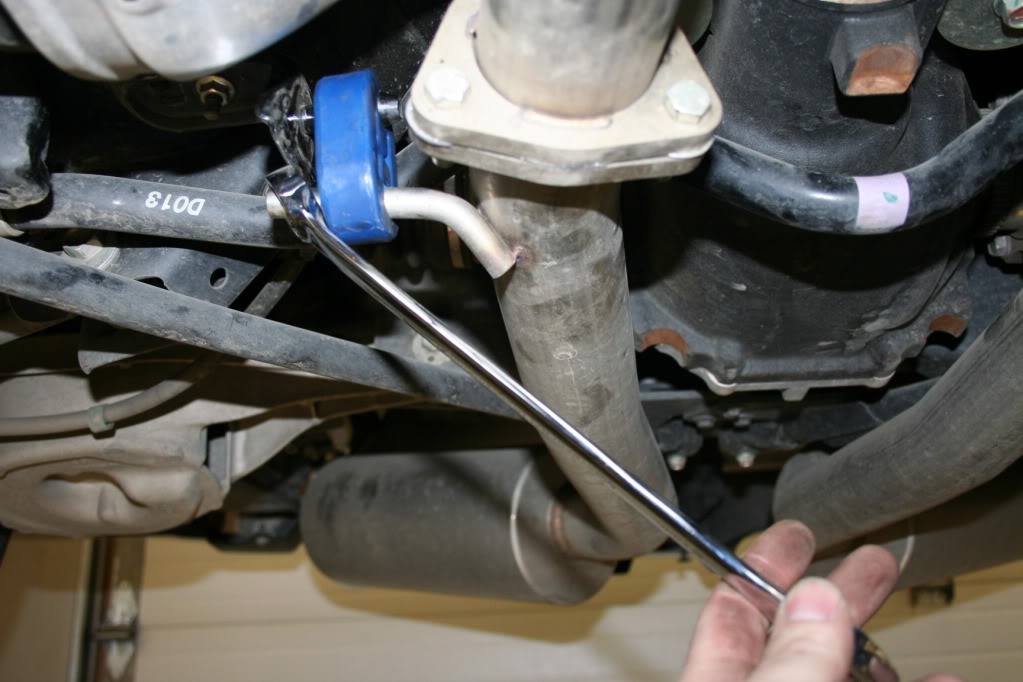
Really does not take much effort to move these if needed. Although I think they are fine left alone.
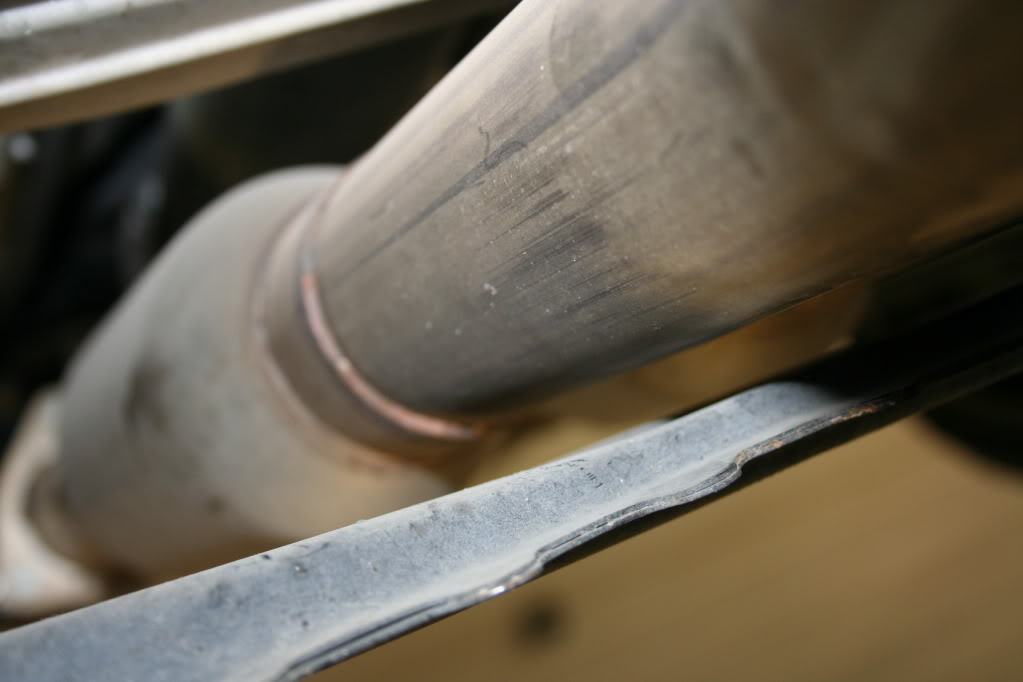
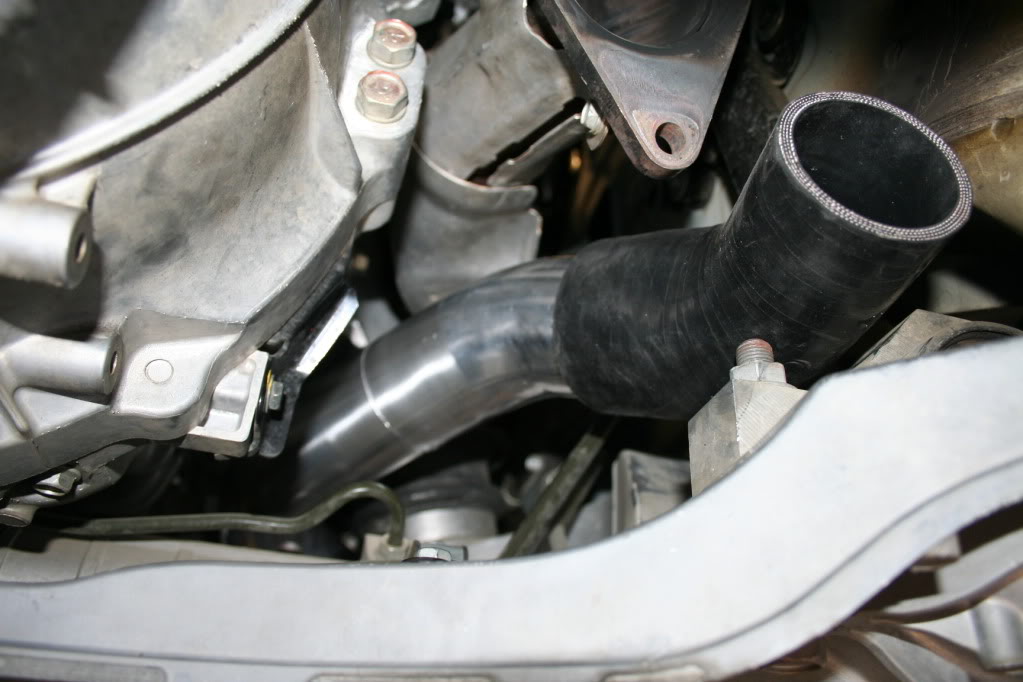
With the poly. hangers the exhaust now hangs up high, and does not touch the skid plate. With the OEM hangers the exhaust was resting on the skid plate. Here is the clearance with the poly. hangers:
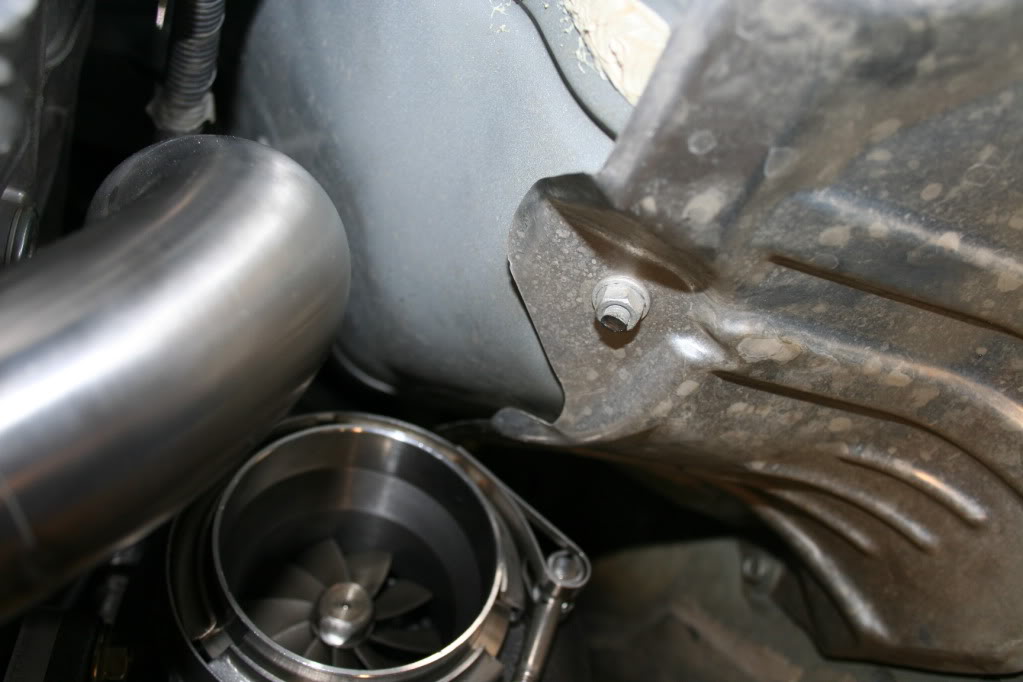
Working on the down pipe this morning I had to make a cut on something on the car:
The 6mm stud that holds the heat shield is very long, and needed to be trimmed back a bit. About thirty seconds later and we are good to go:
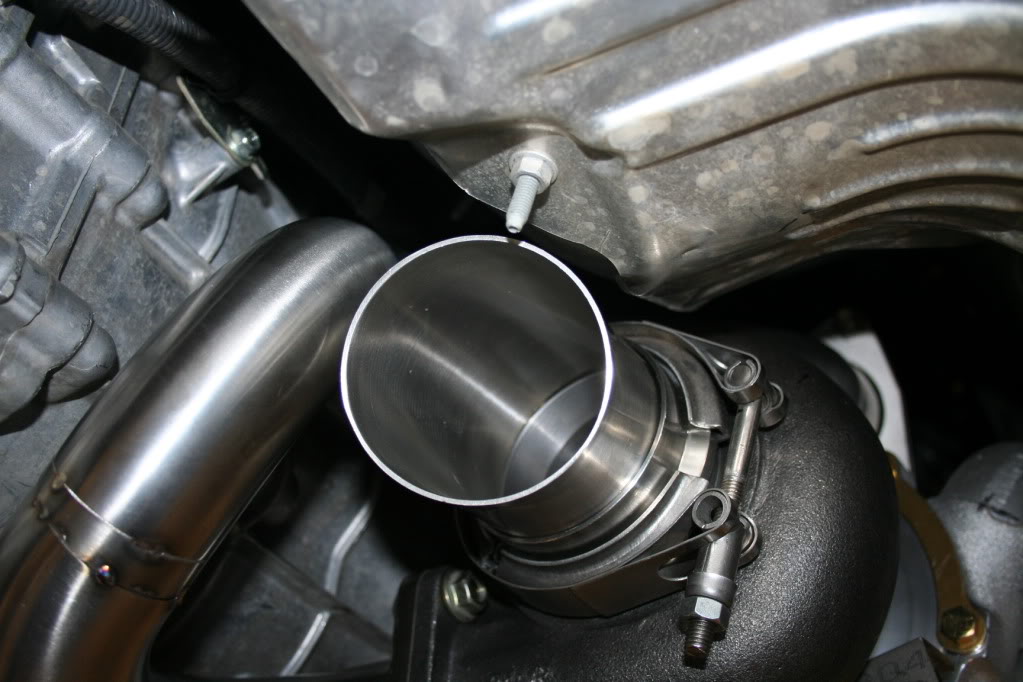
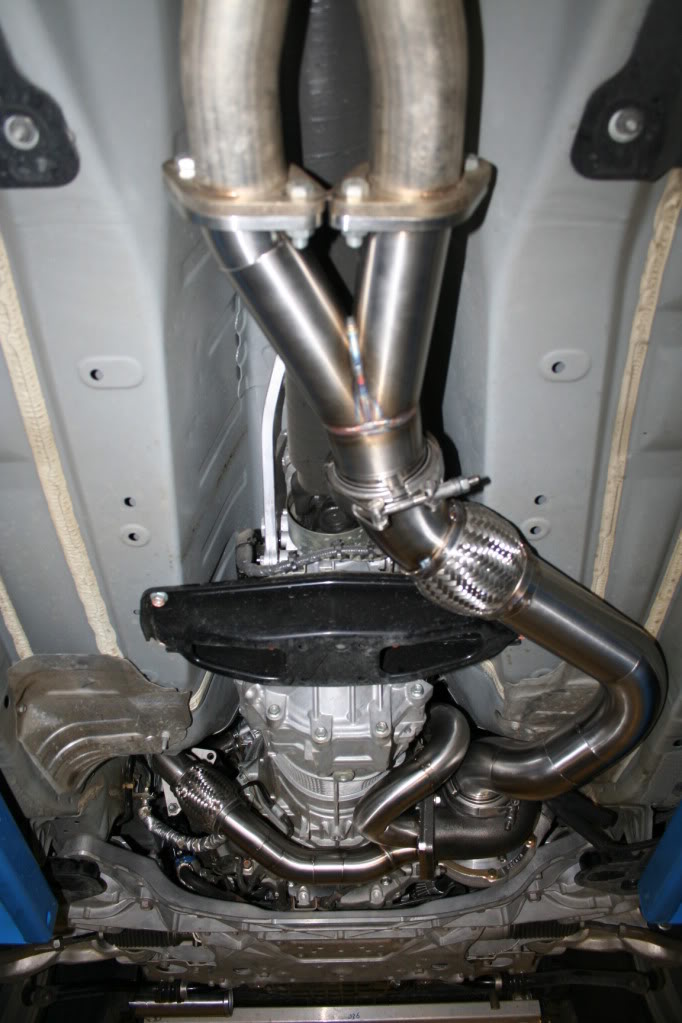
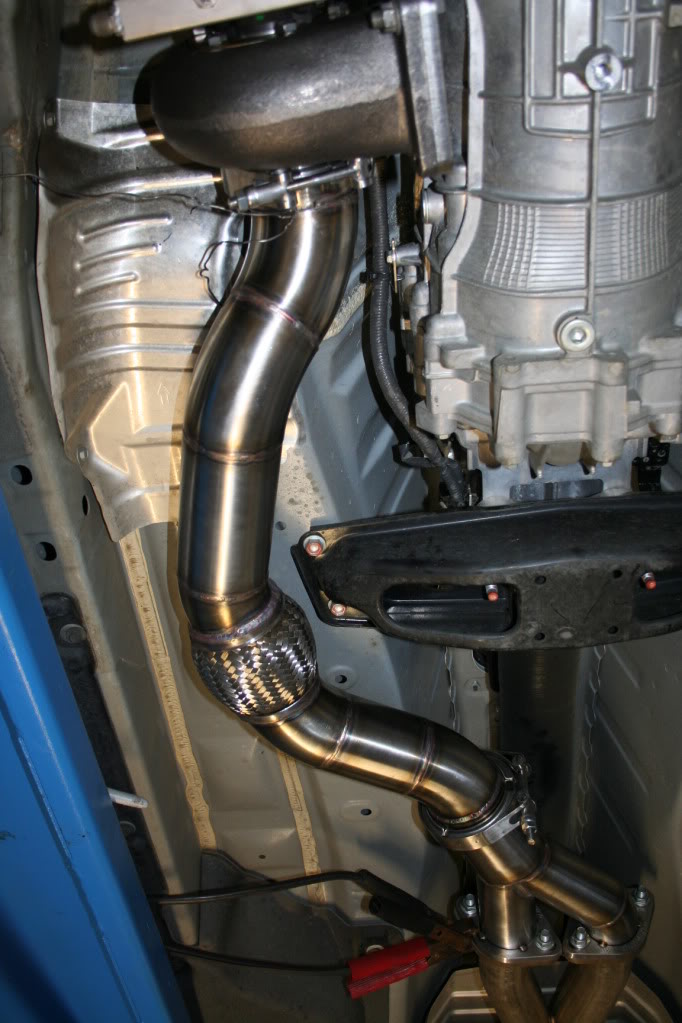
Shortly after that the 3" stainless down pipe was born:
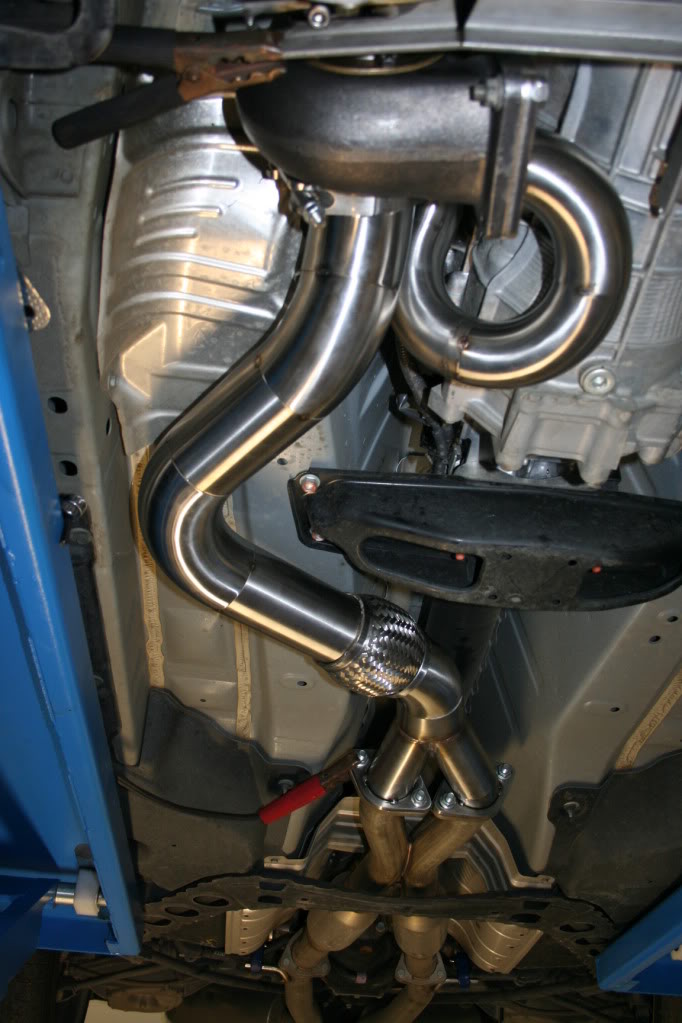
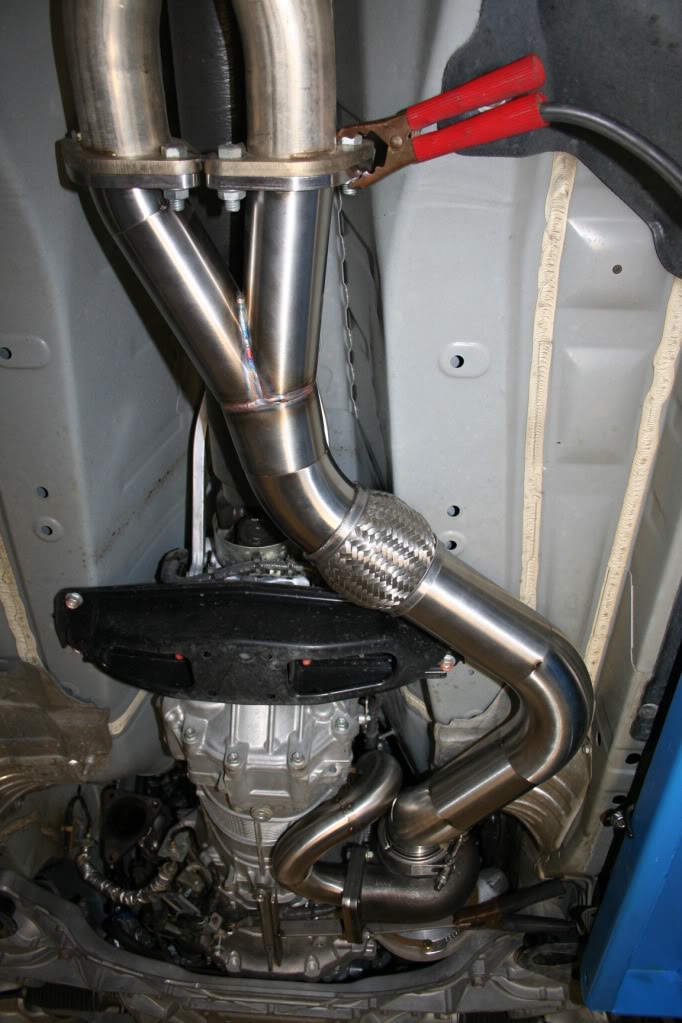
As you can see I am using a flex pipe. This is so that the rest of the exhaust does not move as much with engine twisting under acceleration. I plan on adding a V-band flange on the 3" section of the Y-pipe. This is where the OEM like exhaust to F.I exhaust conversion option will come in to play.
Since the F.I exhaust uses OEM rubber exhaust hangers I decided that it would be wise to upgrade them. The reason for this is me not wanting any of the exhaust weight on the headers, as they will be taking care of the turbo weight. In order to do that, some poly exhaust hangers are used:
Since the F.I exhaust hanger rods are only welded on one side, it is easy to move them up a bit to get even more clearance using a large wrench:
Really does not take much effort to move these if needed. Although I think they are fine left alone.
With the poly. hangers the exhaust now hangs up high, and does not touch the skid plate. With the OEM hangers the exhaust was resting on the skid plate. Here is the clearance with the poly. hangers:
Working on the down pipe this morning I had to make a cut on something on the car:
The 6mm stud that holds the heat shield is very long, and needed to be trimmed back a bit. About thirty seconds later and we are good to go:
Shortly after that the 3" stainless down pipe was born:
As you can see I am using a flex pipe. This is so that the rest of the exhaust does not move as much with engine twisting under acceleration. I plan on adding a V-band flange on the 3" section of the Y-pipe. This is where the OEM like exhaust to F.I exhaust conversion option will come in to play.
 04-14-2012, 03:08 PM
#24
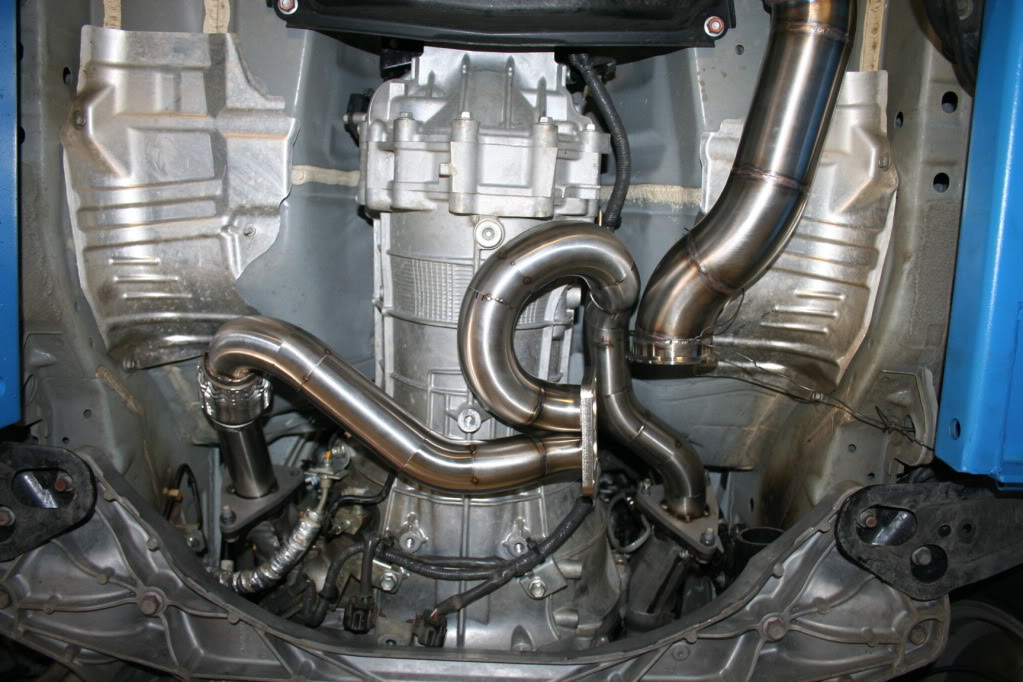
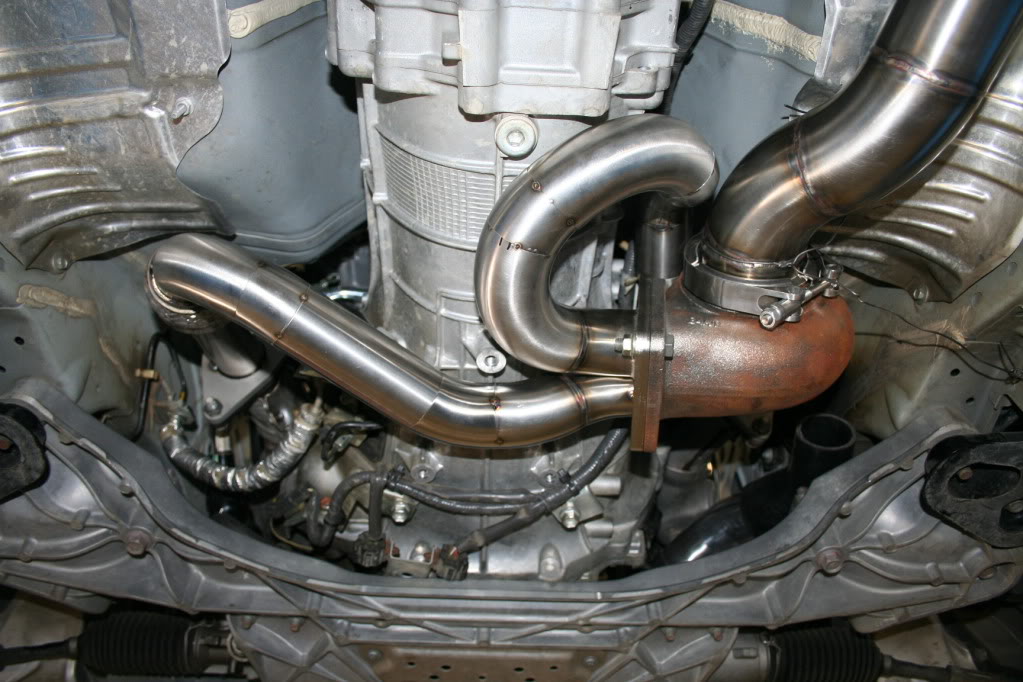
Got the other bank routed to the turbine:
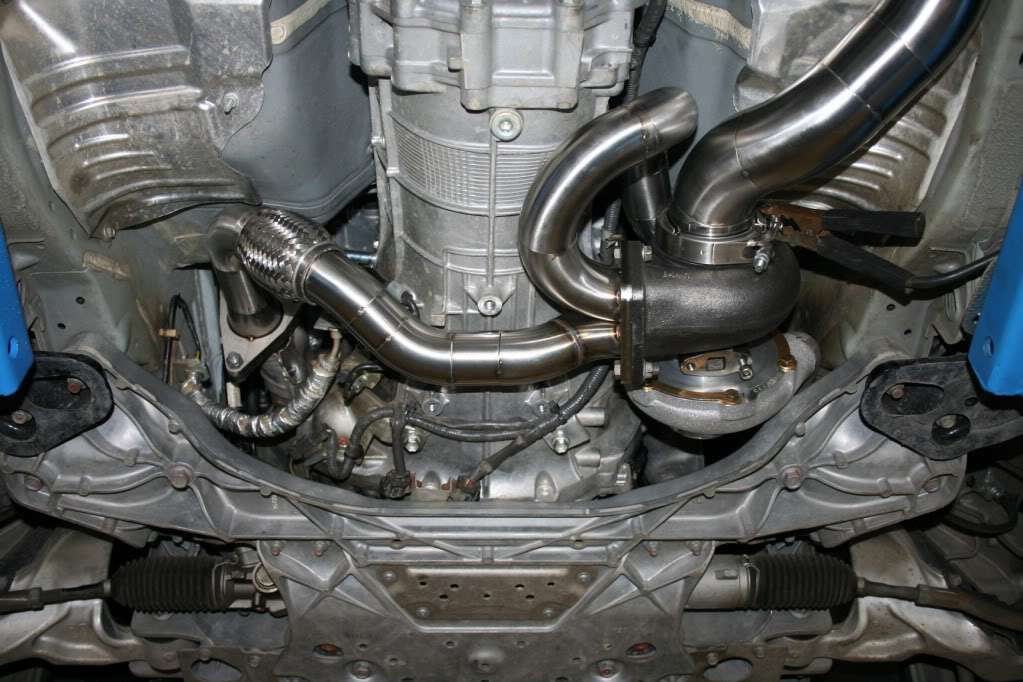
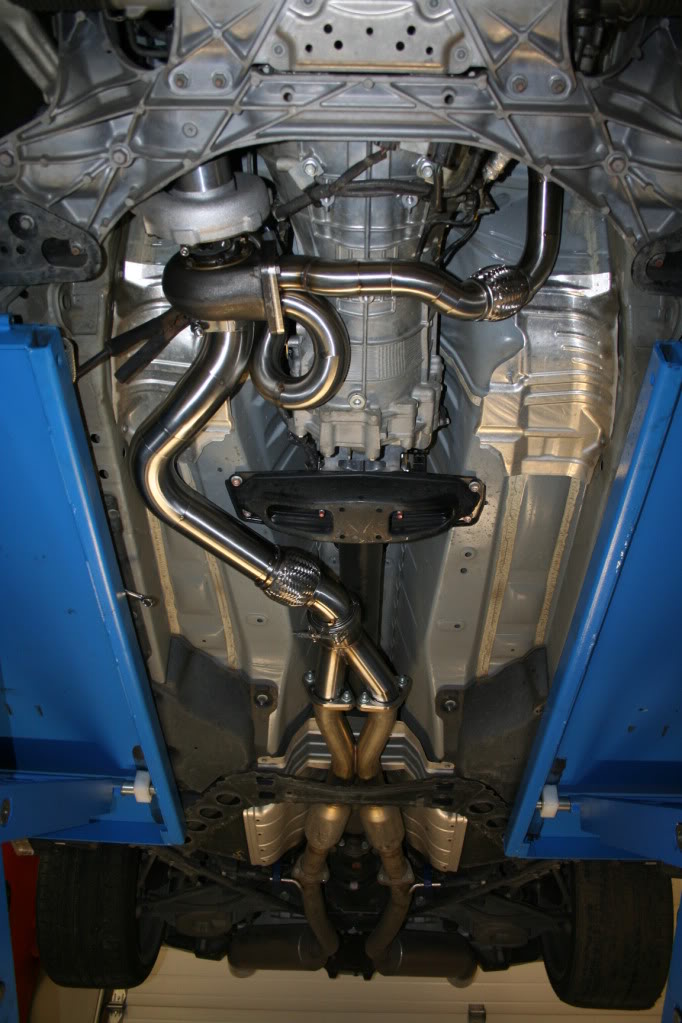
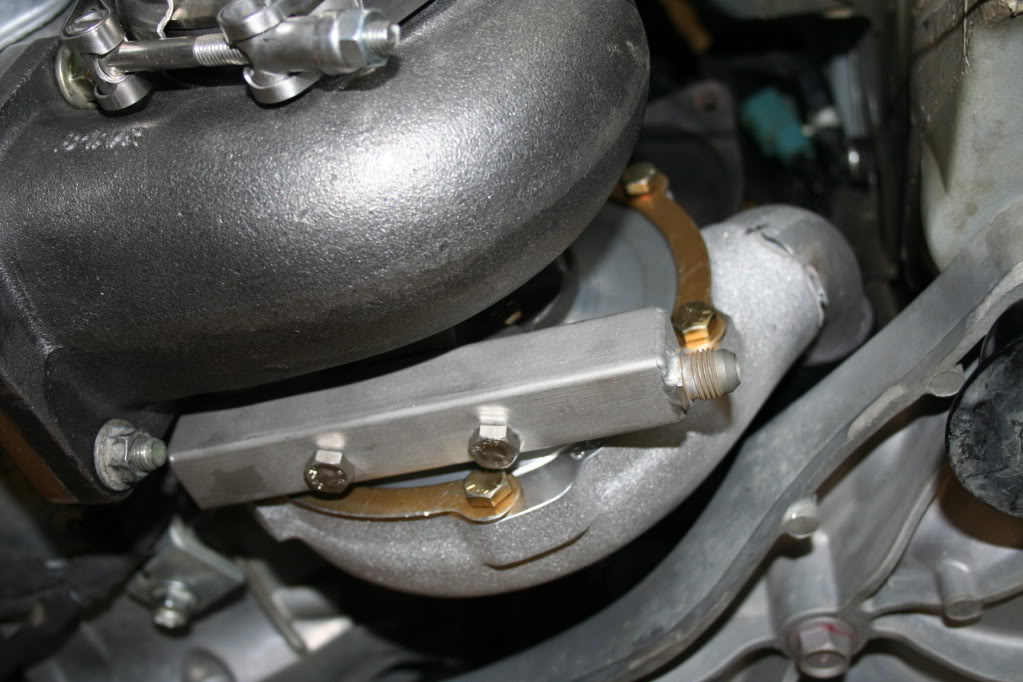
Three bolt flange transition:
So now it is time to hook up the back purge (pump argon gas on the inside of the piping) and weld it all up solid. There is 32 welds all together...and that translates in to a lot of argon gas, filler rod, and time.
After that, I will move on to the wastegates.
Three bolt flange transition:
So now it is time to hook up the back purge (pump argon gas on the inside of the piping) and weld it all up solid. There is 32 welds all together...and that translates in to a lot of argon gas, filler rod, and time.
After that, I will move on to the wastegates.

 04-16-2012, 08:27 PM
#26
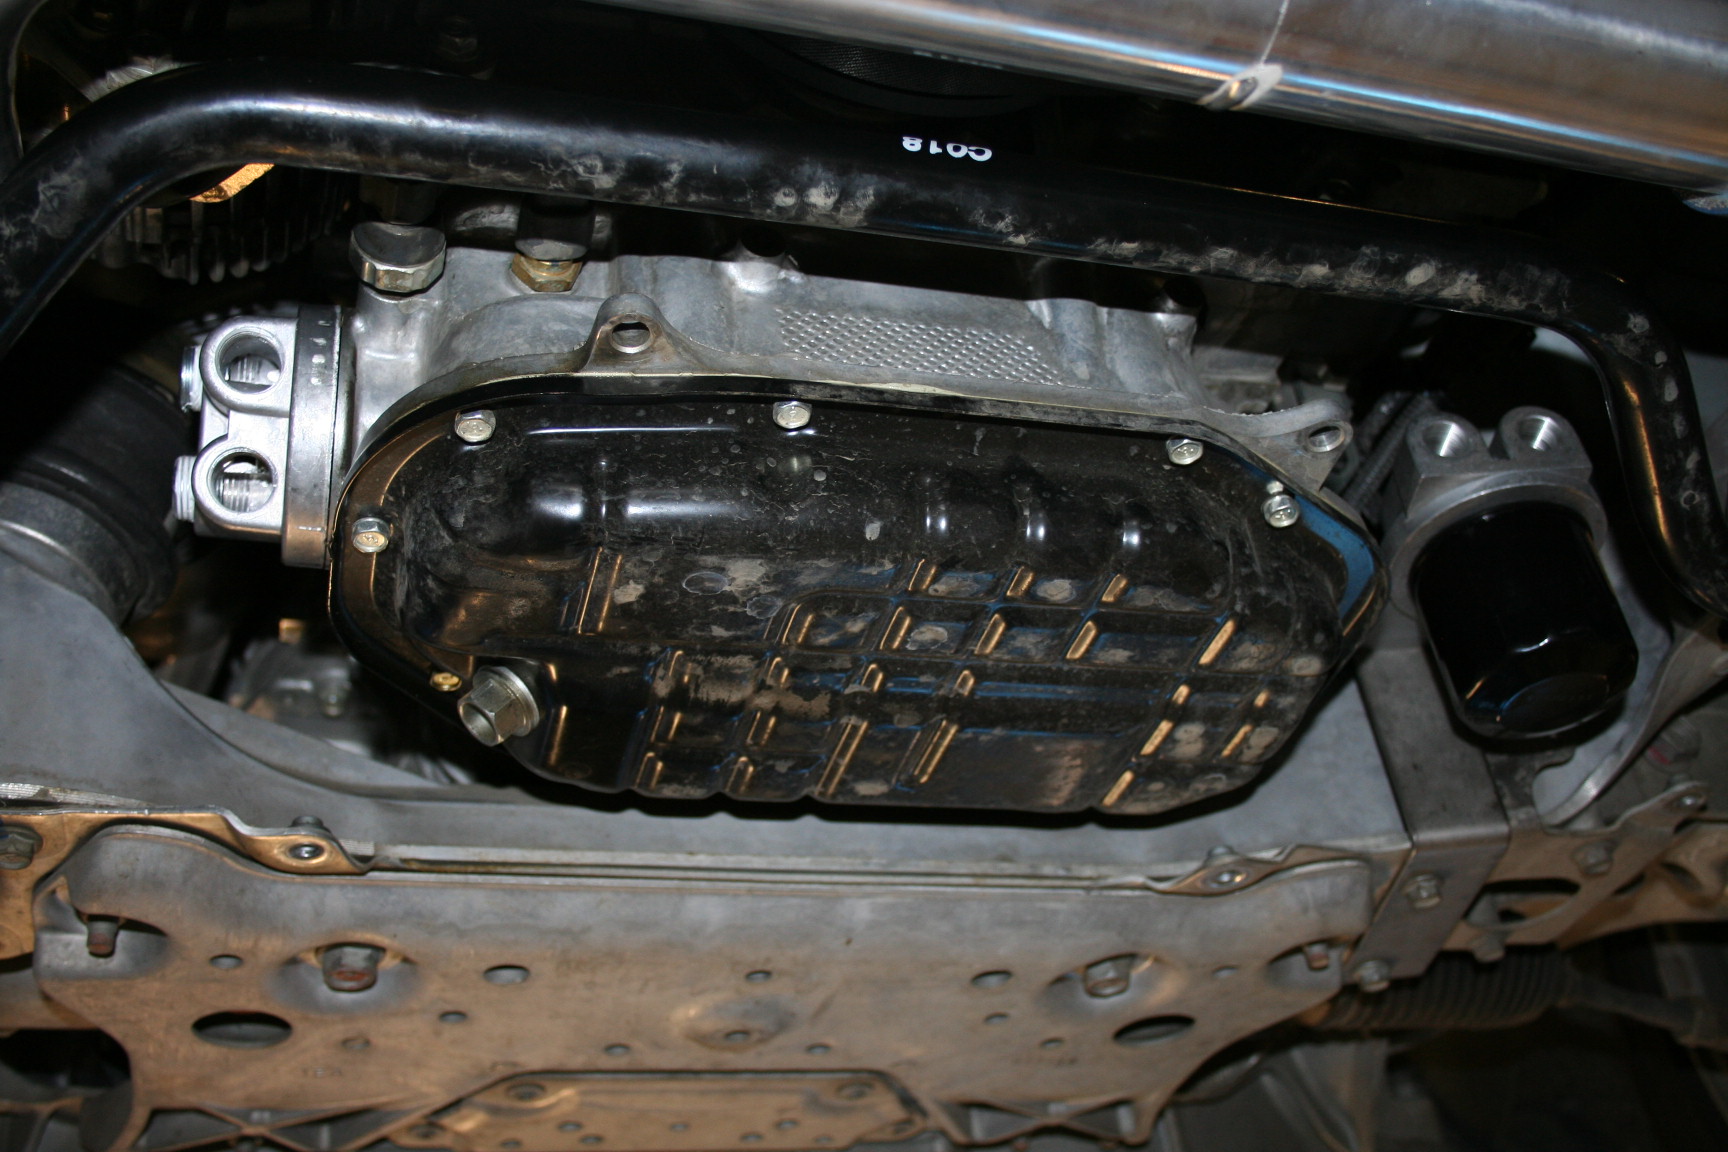
Small update today...I managed to get all the smaller stuff sorted out. The two main things being oil relocation, and scavenge pump mounting.
Oil filter relocation:
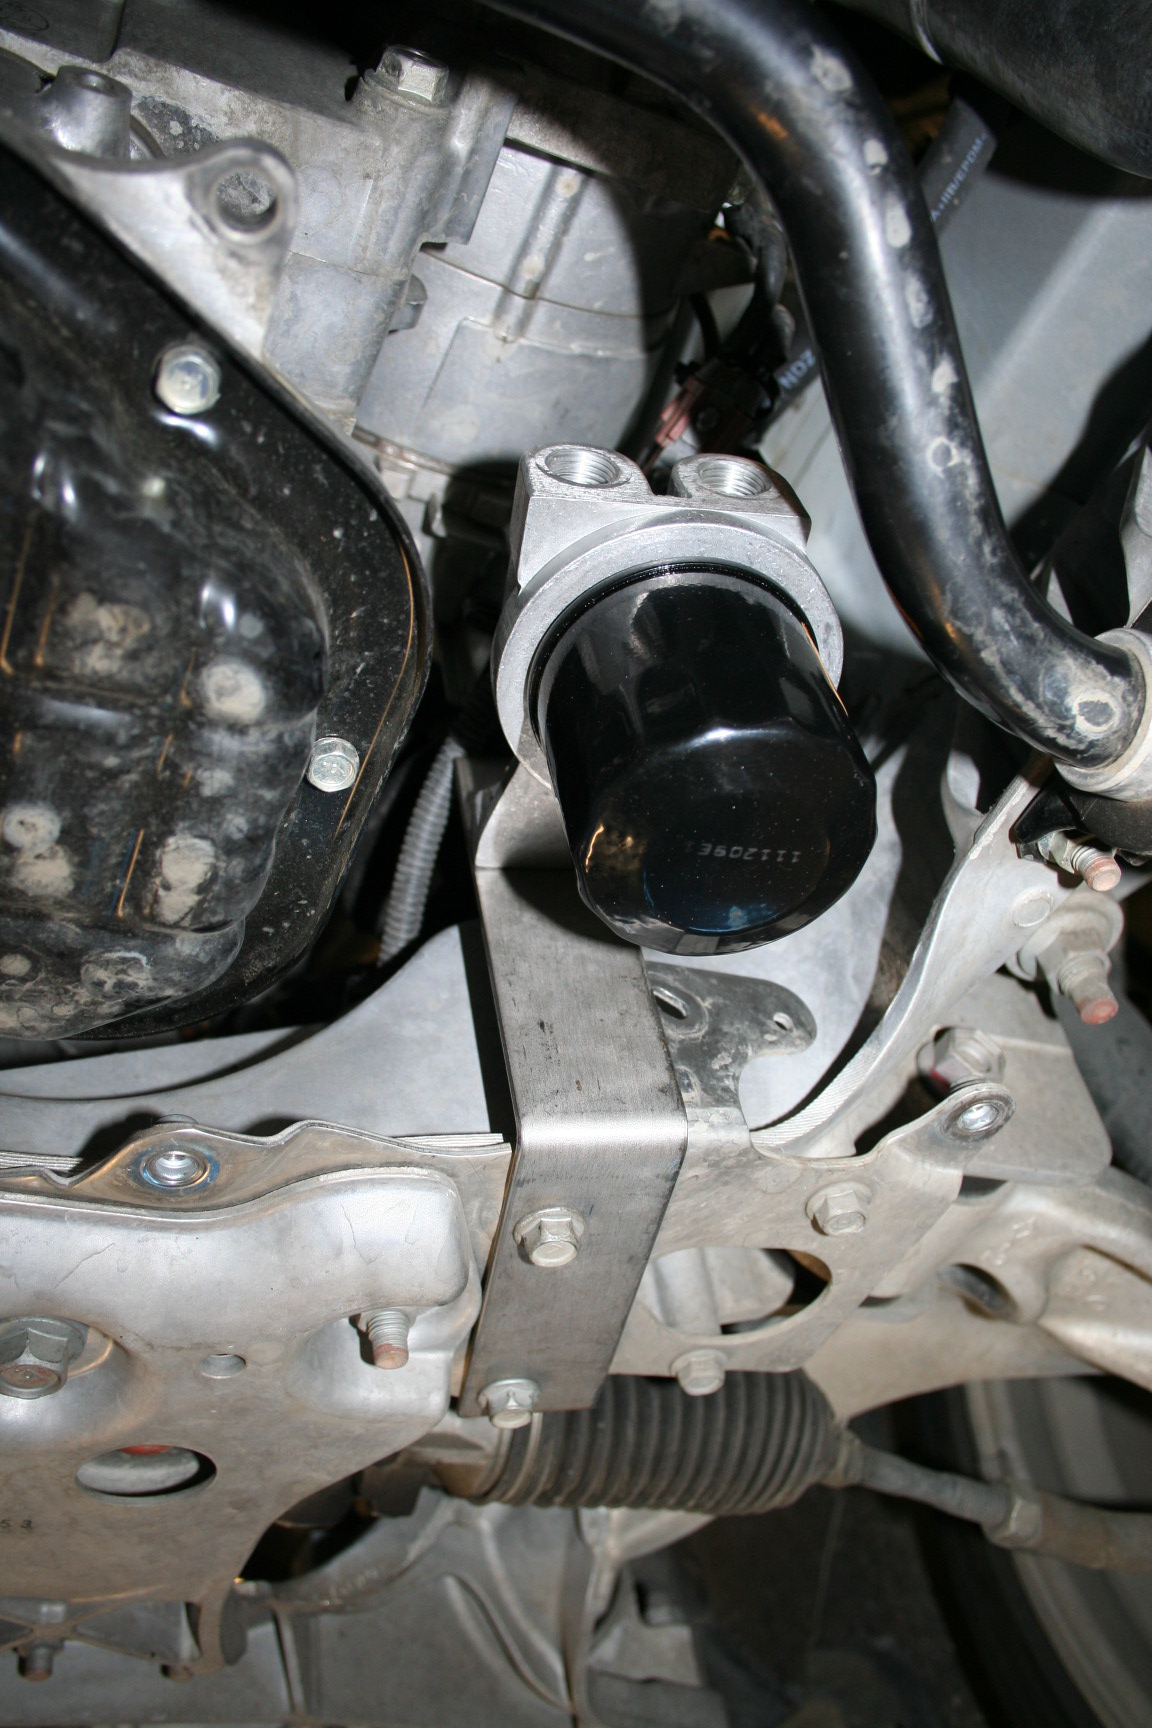
I made a bracket so that it bolts up using the OEM front skid plate bolts, and as you can see it worked out great..simple bolt on.
The oil system will go like so:
From oil filter sandwich plate to oil filter, from oil filter to oil cooler, from oil cooler back to oil filter sandwich plate.
Since the scavenge pump does not need servicing (10,000 hour life) it's final resting place will be behind the fender. Again, just a simple bolt on:
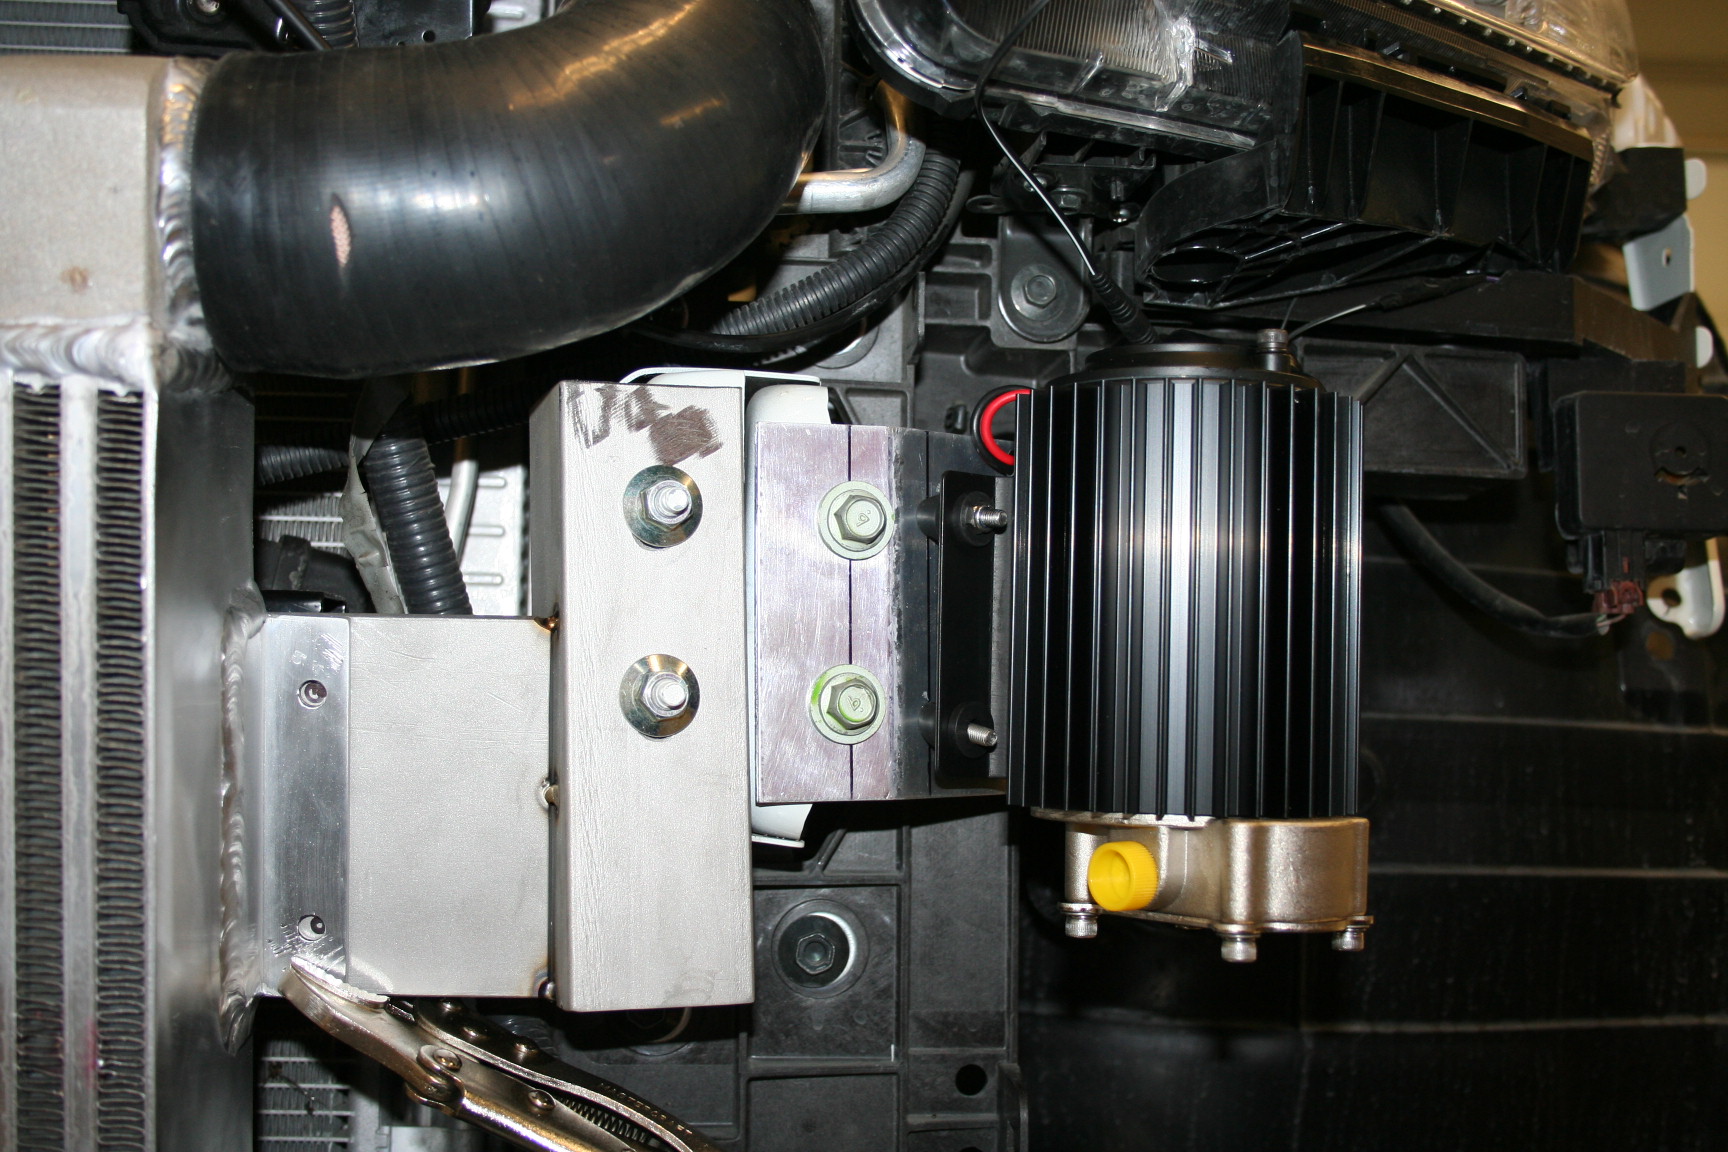
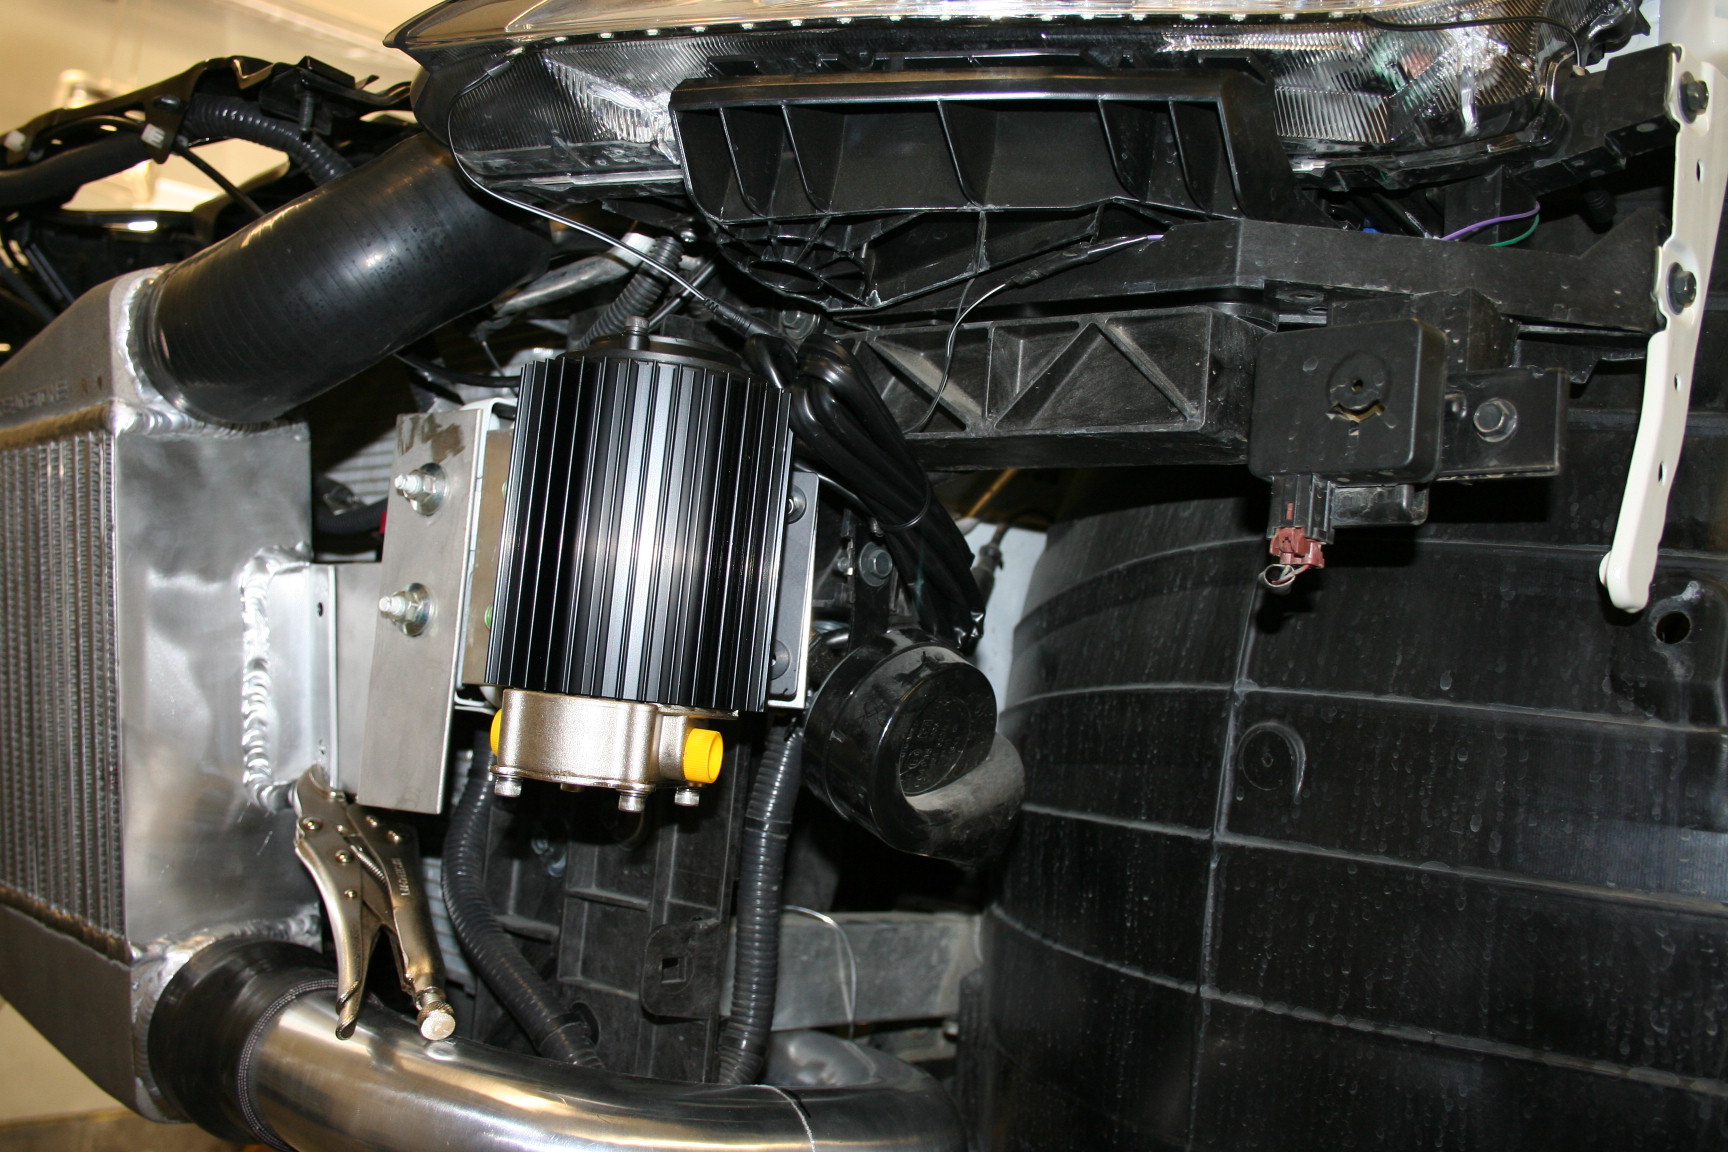
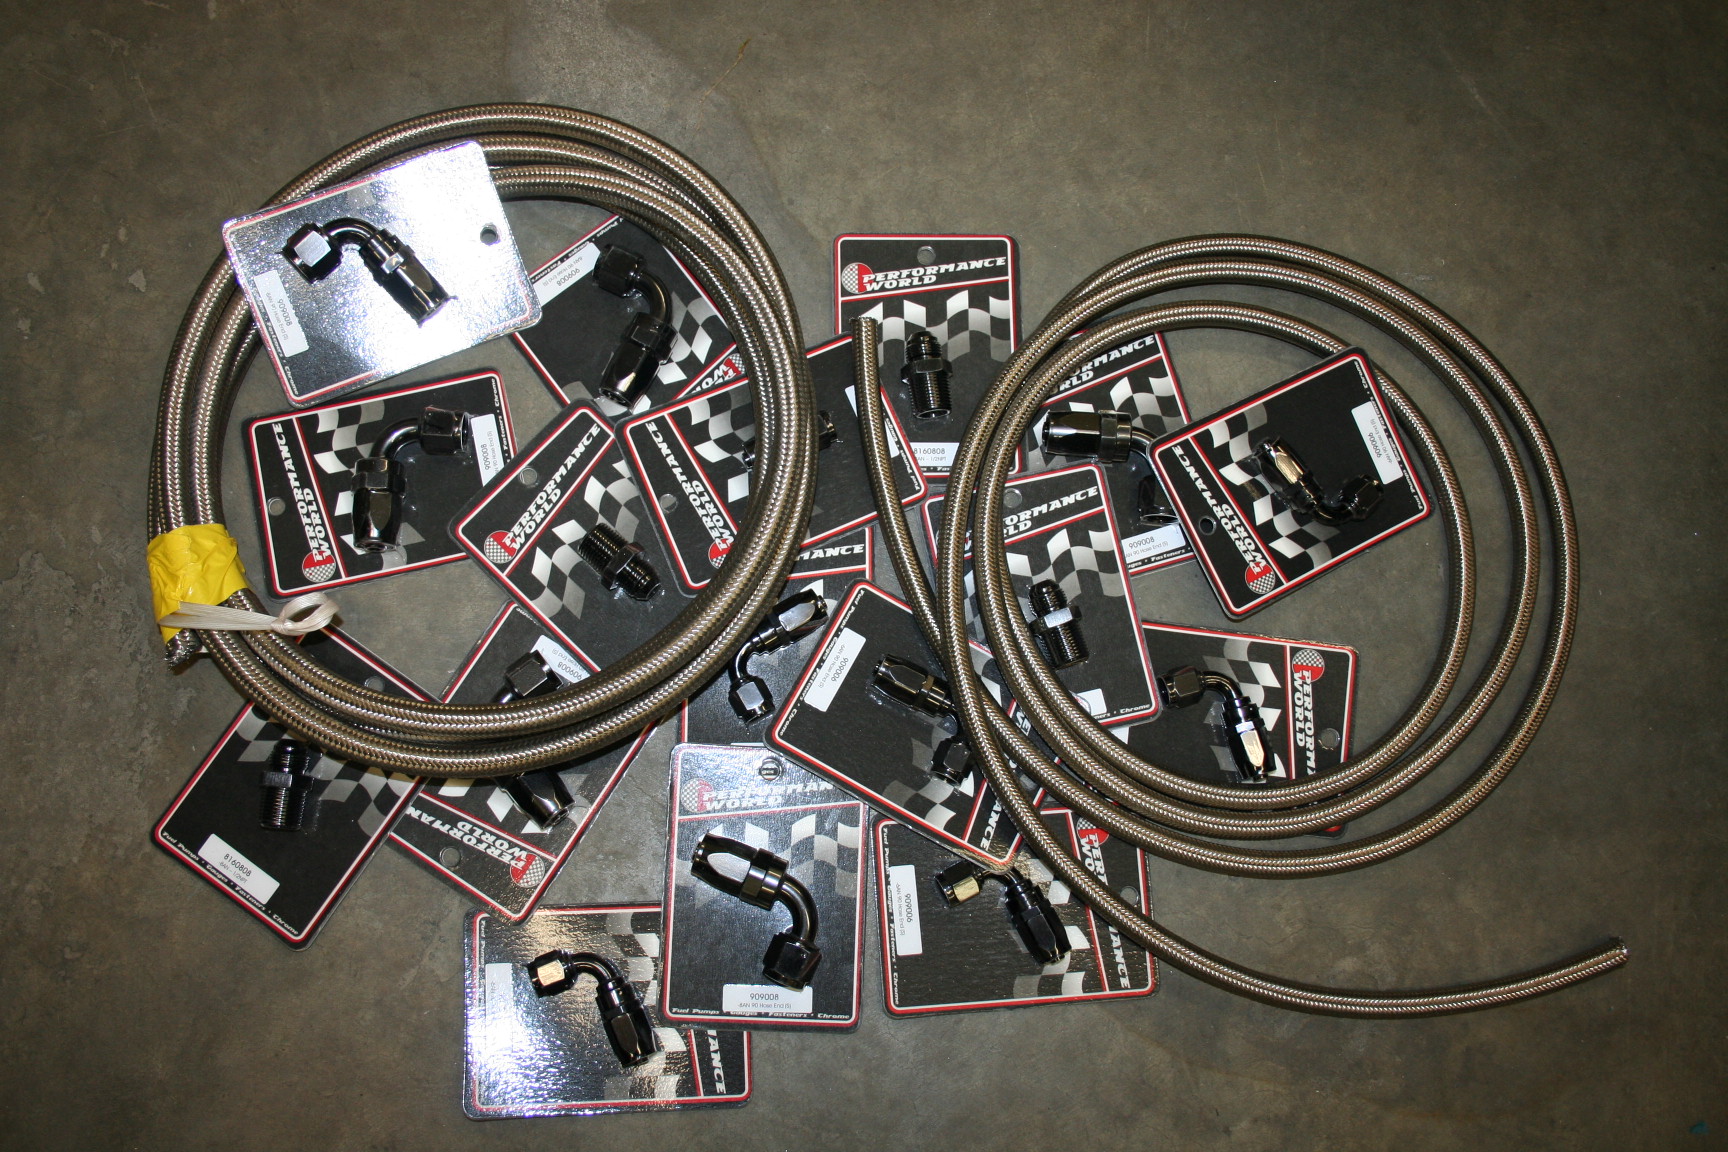
And I did some shopping today as well, $300 later and I have all that is needed for oil cooling, and oil scavenging. -8and for the oil cooler and -6an for the oil scavenge system. As you can see, there is no cheap rubber hose here:
Oil filter relocation:
I made a bracket so that it bolts up using the OEM front skid plate bolts, and as you can see it worked out great..simple bolt on.
The oil system will go like so:
From oil filter sandwich plate to oil filter, from oil filter to oil cooler, from oil cooler back to oil filter sandwich plate.
Since the scavenge pump does not need servicing (10,000 hour life) it's final resting place will be behind the fender. Again, just a simple bolt on:
And I did some shopping today as well, $300 later and I have all that is needed for oil cooling, and oil scavenging. -8and for the oil cooler and -6an for the oil scavenge system. As you can see, there is no cheap rubber hose here:


 04-22-2012, 01:29 PM
#33
At this time I am just making duplicates of everything built so far. These items will stay behind for me to copy for future kits.
I was also toying with the idea of having a single waste gate, but that does not look like it will work out. Room under there car is at a premium. I spend some more time with making the charge pipe coming out of the turbo compressor. There will be a bit of a trick to it when a customer installs it, as it has to go in together with the oil relocation plate. Not a big deal, I will make sure the instructions are good with a lot of pictures.
On with some pictures:
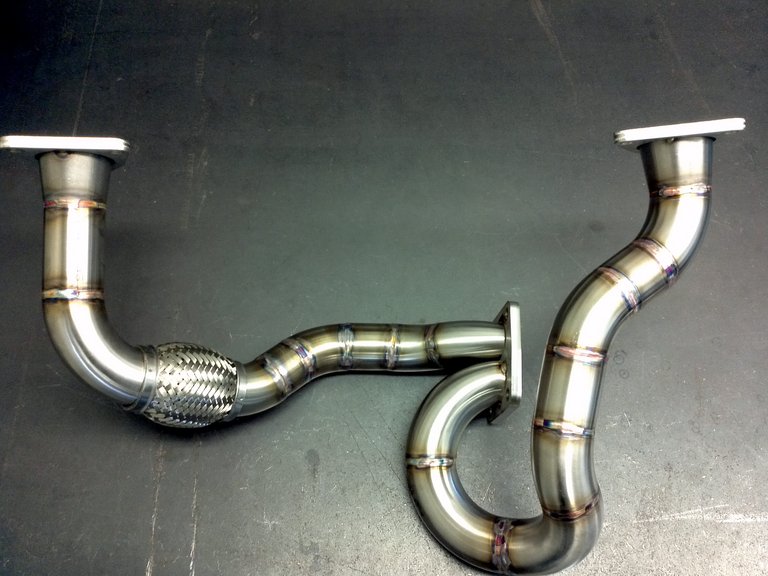
Twins (well, almost):
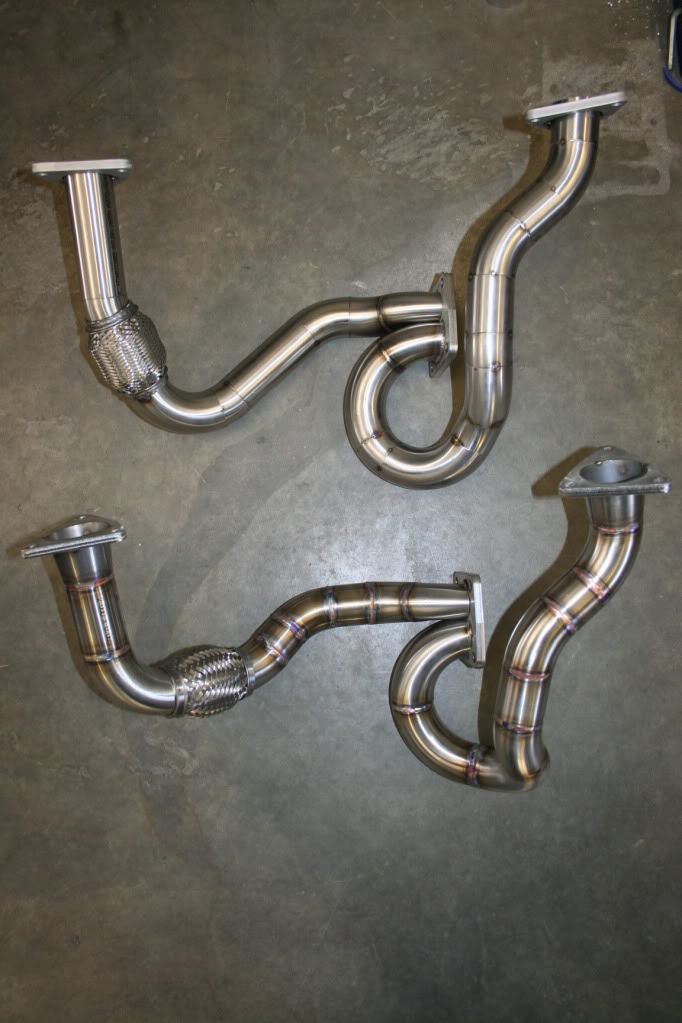
The second set installed
Charge pipe coming from the front:
Going through, you can see that it changed a bit from previous pictures:
New down pipe:
Oil reservoir in place, it allows the oil from the turbo to drain while the car is off. This is a very important part of the oiling system. Because the oil is allowed to drain, it does not sit in the turbo, and leak past the seals. This means no smoking at start-up. With this reservoir, it is as if the turbo is mounted up high in the engine bay.
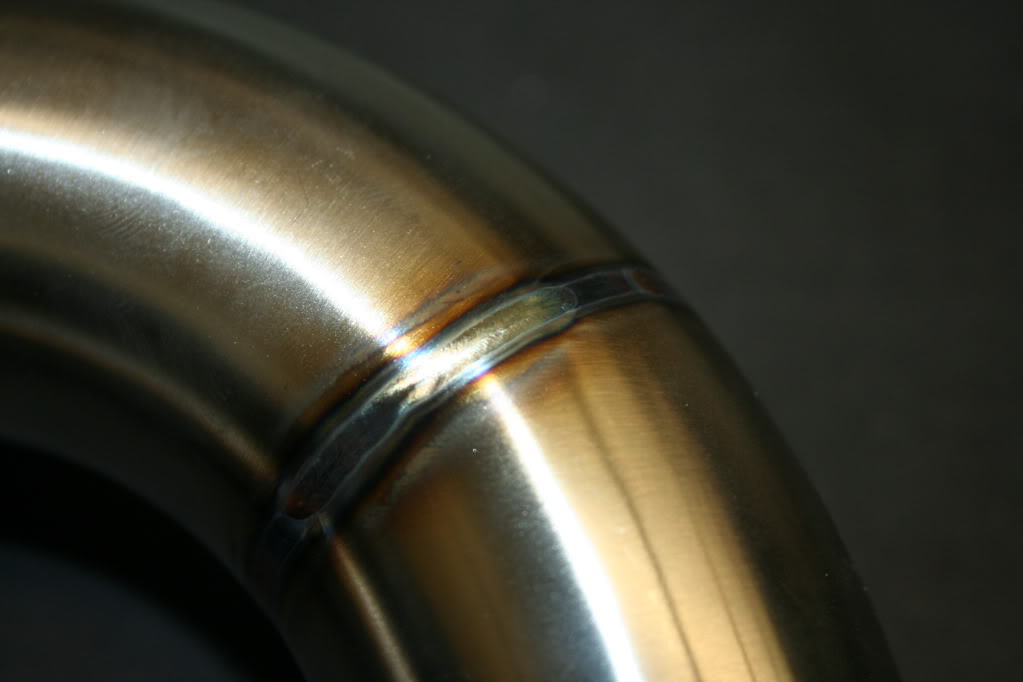
Weld up close:
I was also toying with the idea of having a single waste gate, but that does not look like it will work out. Room under there car is at a premium. I spend some more time with making the charge pipe coming out of the turbo compressor. There will be a bit of a trick to it when a customer installs it, as it has to go in together with the oil relocation plate. Not a big deal, I will make sure the instructions are good with a lot of pictures.
On with some pictures:
Twins (well, almost):
The second set installed
Charge pipe coming from the front:
Going through, you can see that it changed a bit from previous pictures:
New down pipe:
Oil reservoir in place, it allows the oil from the turbo to drain while the car is off. This is a very important part of the oiling system. Because the oil is allowed to drain, it does not sit in the turbo, and leak past the seals. This means no smoking at start-up. With this reservoir, it is as if the turbo is mounted up high in the engine bay.
Weld up close:

 04-24-2012, 09:14 PM
#37
OGPremierMafia

iTrader: (16)
Join Date: Feb 2005
Location: Cincinnati OH
Posts: 5,106
Likes: 0
Received 0 Likes
on
0 Posts
I know I Know, I just left Dynosty after having dinner with Hal and his wife. Lets just say after ZDayZ **** is going to get back on track. However, I think trading my Chopper for a new DD may be in order very soon.

 04-27-2012, 02:05 PM
#40
Thank you.
Turbo and waste gates are the only things under the car. They also sit higher than the aftermarket exhausts I have seen
What you are saying is that you would never put an HKS exhaust (which is more than a turbo and two wastegaes) on your car because you fear ???.