greddy twin build...

 02-25-2013, 08:20 AM
#22
350Z-holic

Thread Starter
iTrader: (13)

Tom,
You (and everyone else) have a point, I see what you're saying…what I want is air flow through the IC/Rad (obviously) and I want flow on both sides and the top to flow through the sides of the block, to the turbos and escape through the hood…I want a significant amount of air through the engine bay…
Air will flow through the IC and through the radiator, but I don't intend it to be the only passage…
I'm not saying I'm 100% right or that the consensus is 100% wrong…
Answer this…if you had to put more emphasis on one or the other which would it be…
more air flow to the IC to bring the intake charger closer to ambient temps or more air flow to the engine bay to dissipate heat?
I'm leaning towards what I have going now and finding a second bumper and isolating the the IC/Rad and seeing what flows best…
Possibly…but at $30 I'm ok hacking it up
thanks for the input guys
a little bit of an update:
I sourced another C&R radiator / oil cooler combo…If anyone is interested in the above C&R radiator(29"x18"x4") hit me up…
Up for discussion, I'd love to get your opinions on…going to add the oil pan spacer soon…which is better a standard 1piece gasket or the RTV sealant?
http://www.oreillyauto.com/site/c/de...2296&ppt=C0026
http://www.oreillyauto.com/site/c/de...2362&ppt=C1984
You (and everyone else) have a point, I see what you're saying…what I want is air flow through the IC/Rad (obviously) and I want flow on both sides and the top to flow through the sides of the block, to the turbos and escape through the hood…I want a significant amount of air through the engine bay…
Air will flow through the IC and through the radiator, but I don't intend it to be the only passage…
I'm not saying I'm 100% right or that the consensus is 100% wrong…
Answer this…if you had to put more emphasis on one or the other which would it be…
more air flow to the IC to bring the intake charger closer to ambient temps or more air flow to the engine bay to dissipate heat?
I'm leaning towards what I have going now and finding a second bumper and isolating the the IC/Rad and seeing what flows best…
thanks for the input guys
a little bit of an update:
I sourced another C&R radiator / oil cooler combo…If anyone is interested in the above C&R radiator(29"x18"x4") hit me up…
Up for discussion, I'd love to get your opinions on…going to add the oil pan spacer soon…which is better a standard 1piece gasket or the RTV sealant?
http://www.oreillyauto.com/site/c/de...2296&ppt=C0026
http://www.oreillyauto.com/site/c/de...2362&ppt=C1984
Last edited by bealljk; 02-25-2013 at 05:25 PM.
The following users liked this post:
NaaNee00 (03-11-2019)
02-25-2013, 01:37 PM
#23
Registered User

Join Date: Jun 2007
Location: ATL, FT Benning, North Cak
Posts: 498
Likes: 0
Received 1 Like
on
1 Post
Let me preface by saying I'm interested in seeing the results.
My opinion would be to focus on getting air through the IC and radiator. If you are getting a vented hood anyway the heat will rise and flow through the vents.
With a bumper mouth as big as you are making I would say you get ~50% of cooling air through the IC and radiator. The other 50% cooling the outside of the engine, but why do you need that when you can get 75-80% of cooling air through the IC and radiator with proper air ducts.
I would be more concerned about getting more cooling of the liquids flowing in the engine which will in turn should keep additional engine heat to a minimum. The engine will always generate heat it just depends on how much of a difference it is.
Less intercooler efficiency will mean less power, which will mean you will need to turn up the boost to get to a certain power level which in turn will mean more heat anyway.
If you want to control heat in the engine bay look at coating the manifolds or good wrapping material and/or getting turbo blankets. Turbos like heat but lose it to the engine bay, but turbo blankets help keep that heat in the hot side of the turbo.
I'm not an engineer but that is the way I see things.
Last edited by suprasam; 02-25-2013 at 01:59 PM.
The following users liked this post:
NaaNee00 (03-11-2019)
 03-02-2013, 03:59 PM
#25
350Z-holic
Thread Starter
iTrader: (13)
Got the exhaust back on�cleaned up the hardware of the rear sway bar, GT Spec brace. Also started the oil pan fab by draining oil and making hoses for the oil pan spacer�
Last edited by bealljk; 03-02-2013 at 09:31 PM.
03-26-2013, 08:56 PM
#26
350Z-holic
Thread Starter
iTrader: (13)
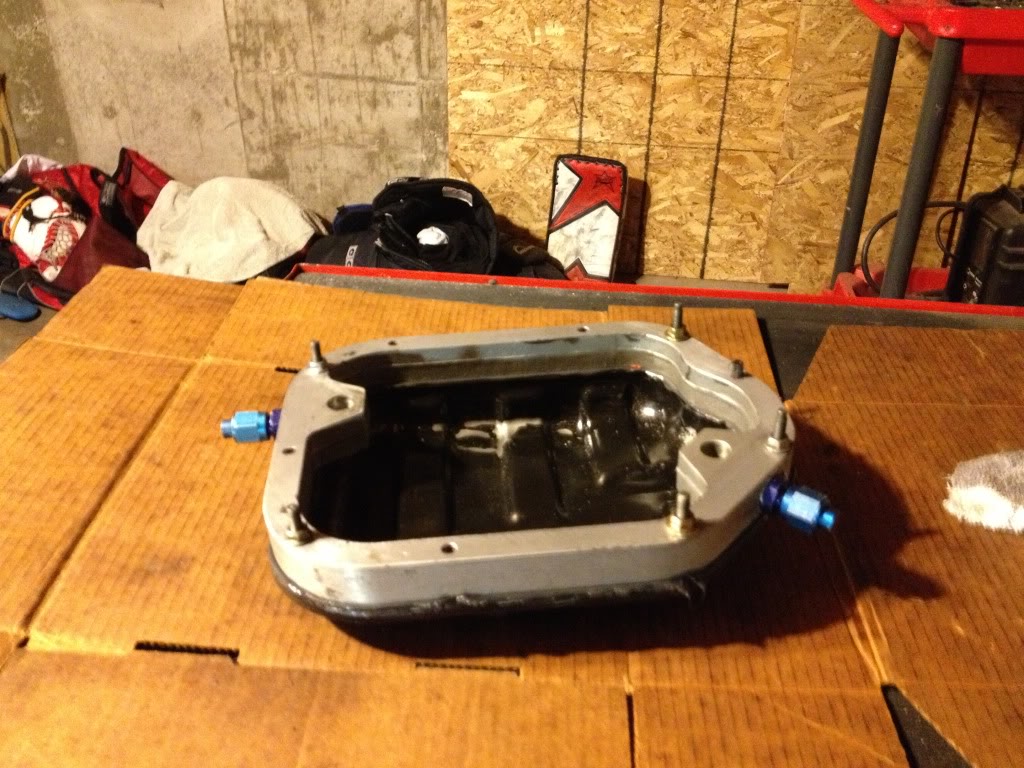
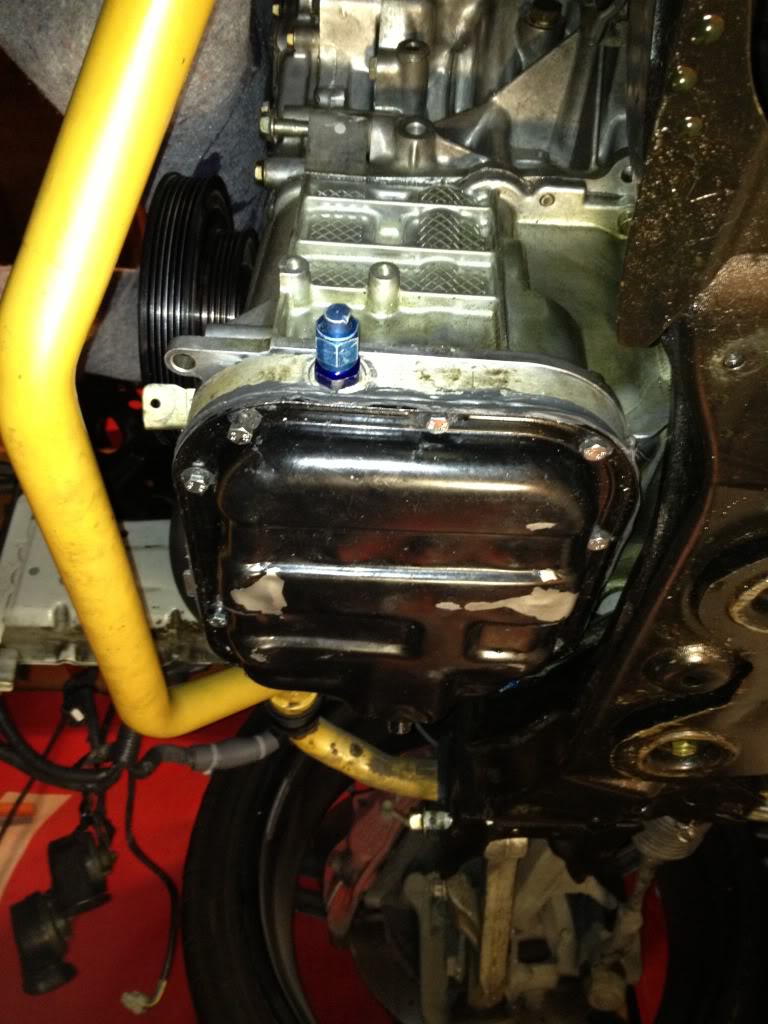
Got the oil pan spacer installed�had to order longer bolts but it was only a few days wait. Used liquid gasket and let it cure in a heated environment. Installed 1/4" AN6 adapters but they'll be replaced with AN8 soon here�
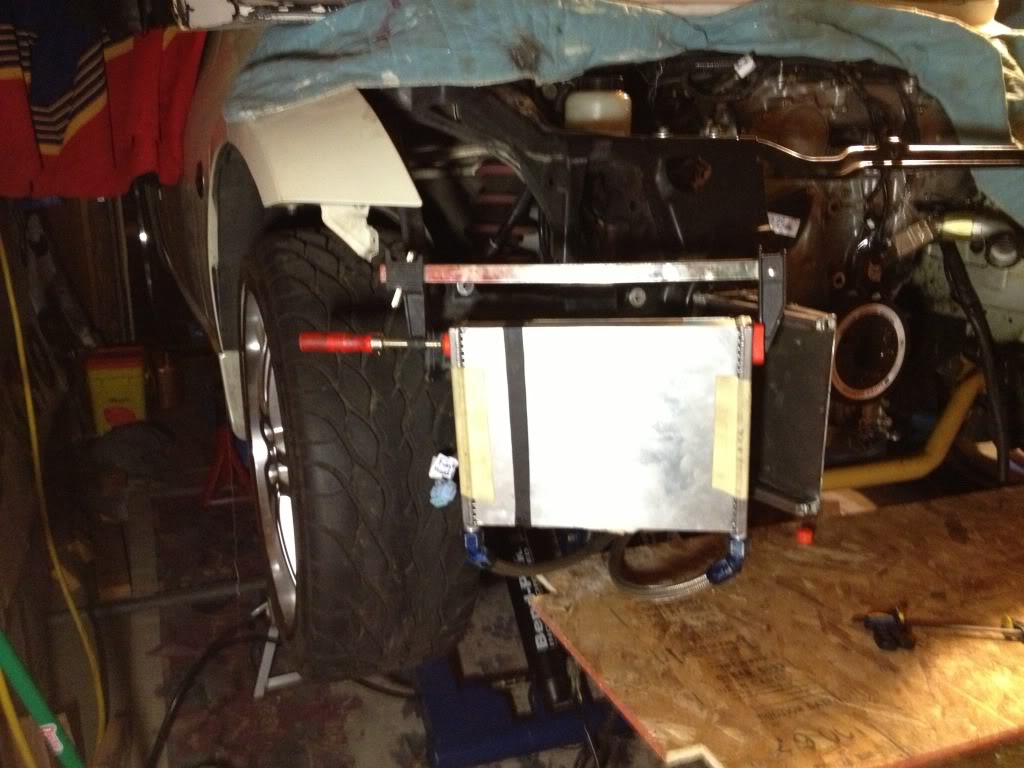
this past weekend I had some down time and fab'd up brackets for the radiator and intercooler - nothing special just some square-tube and 16ga steel plate. I'll have hardware welded to the radiator that will connect to the brackets and adjust up & down.
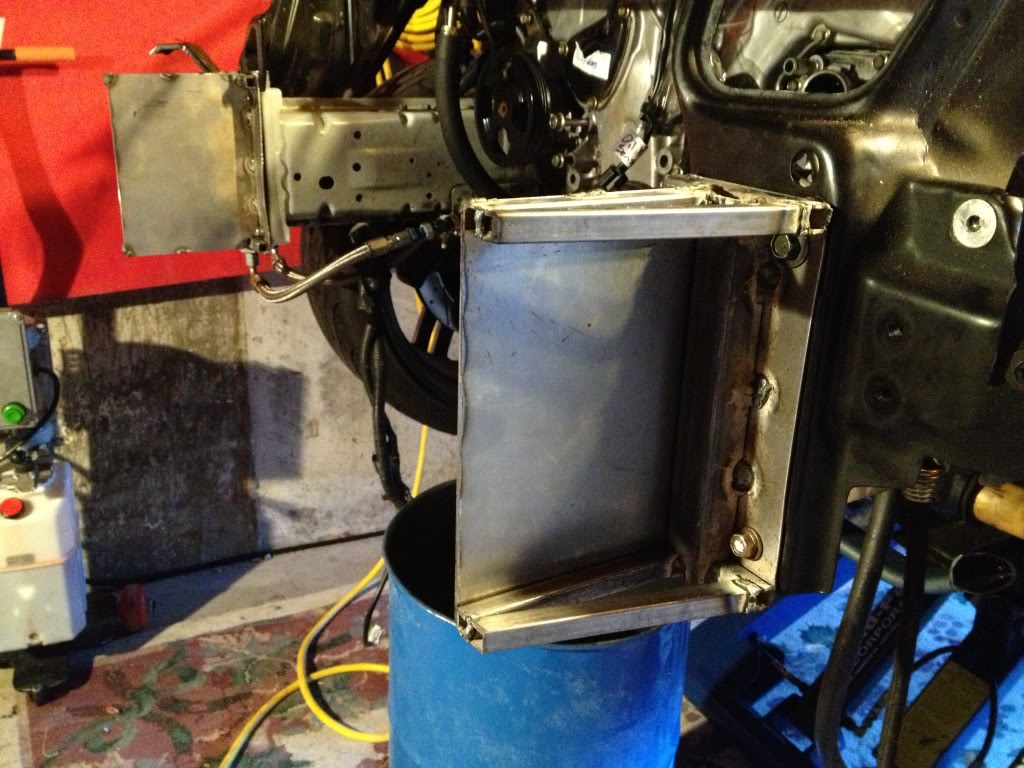
I will have hardware welded to the backside of the intercooler and mount it to a structural member that will span the brackets�not sure how exactly I will do this but I have a few ideas brewing�
also got the power steering cooler connected to the pump - pretty easy used AN 6 hose & connections. Also have my secondary oil cooler that runs off a sandwich plate installed - not sure if I'm going to place it behind the radiator or in-front of the ps cooler�feel free to chime in...
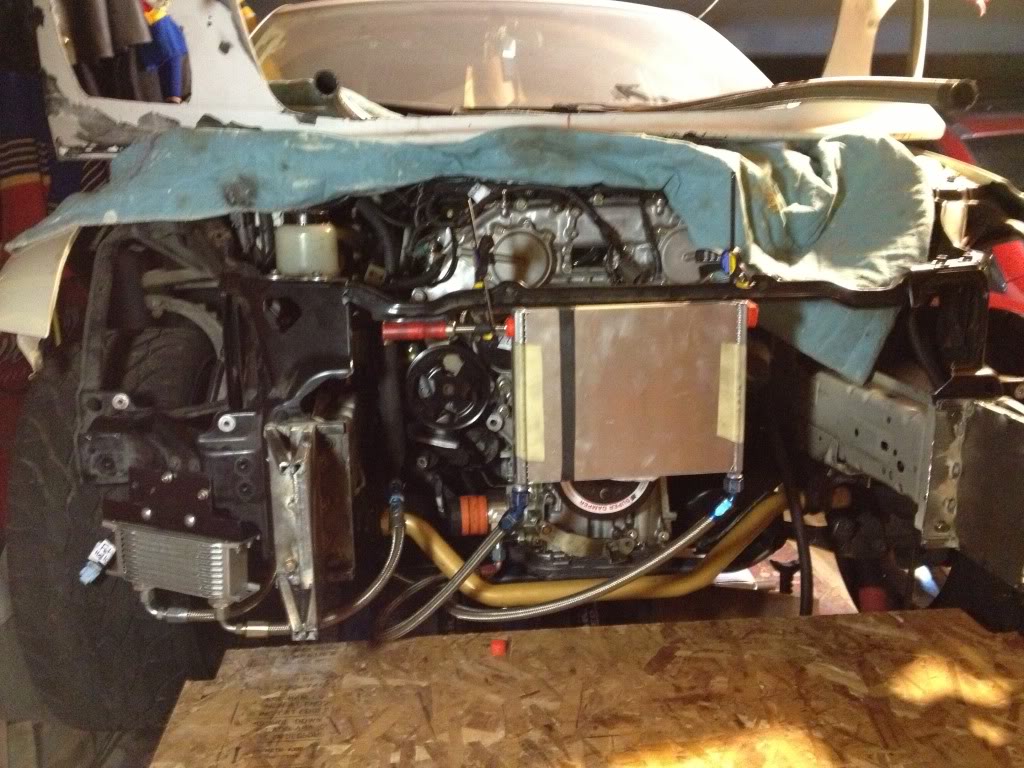
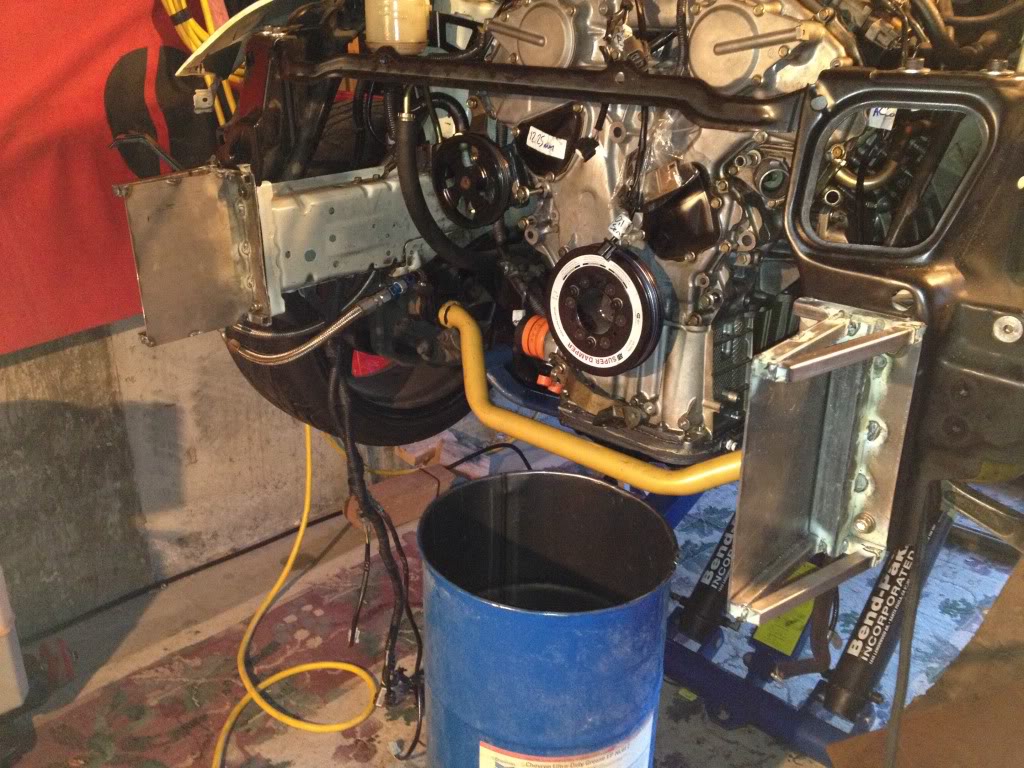
tonight had a chance to layout the radiator along with a few of the hoses I've made and fittings I've been ordering�still waiting on my AN8 stuff but it should be here in a week or so.
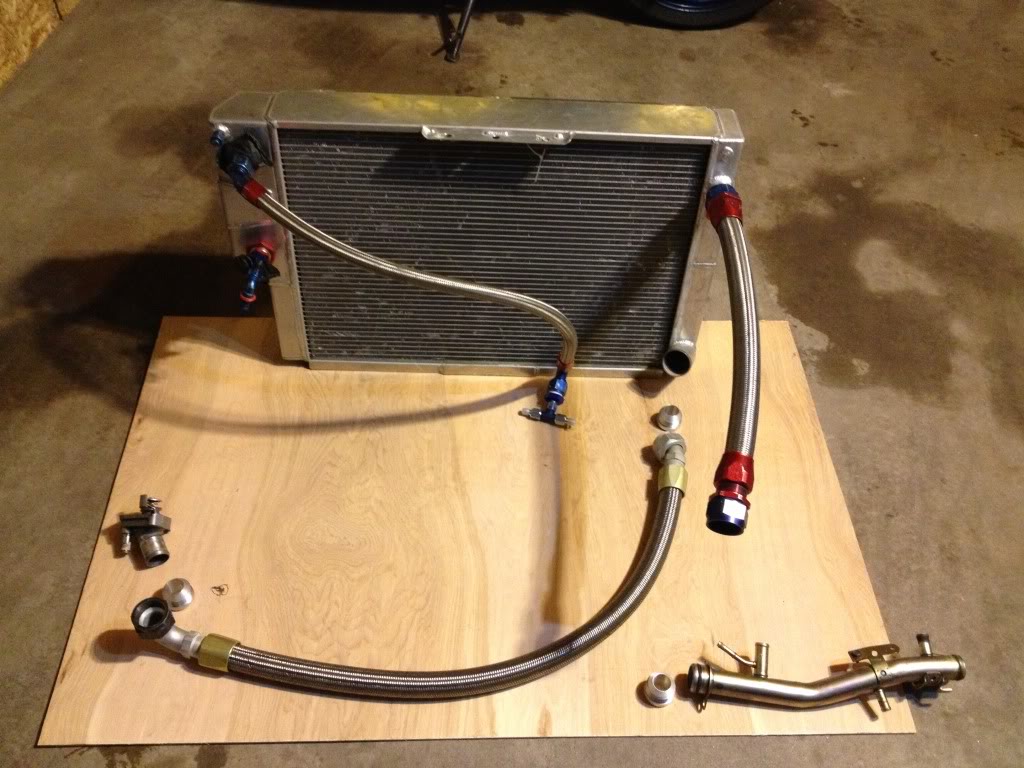
You can see the coolant in & out (on the right) to the OEM duct and thermostat - I will have those AN20 bungs welded in place and the hoses are a little long and will be cut down during the final install. The connections on the left are the oil cooler - the AN12 hose will feed the turbos and the the connection with no hose will tap into the oil pan. The second connection on the oil pan will take oil from the scavenger pumps before the turbos.
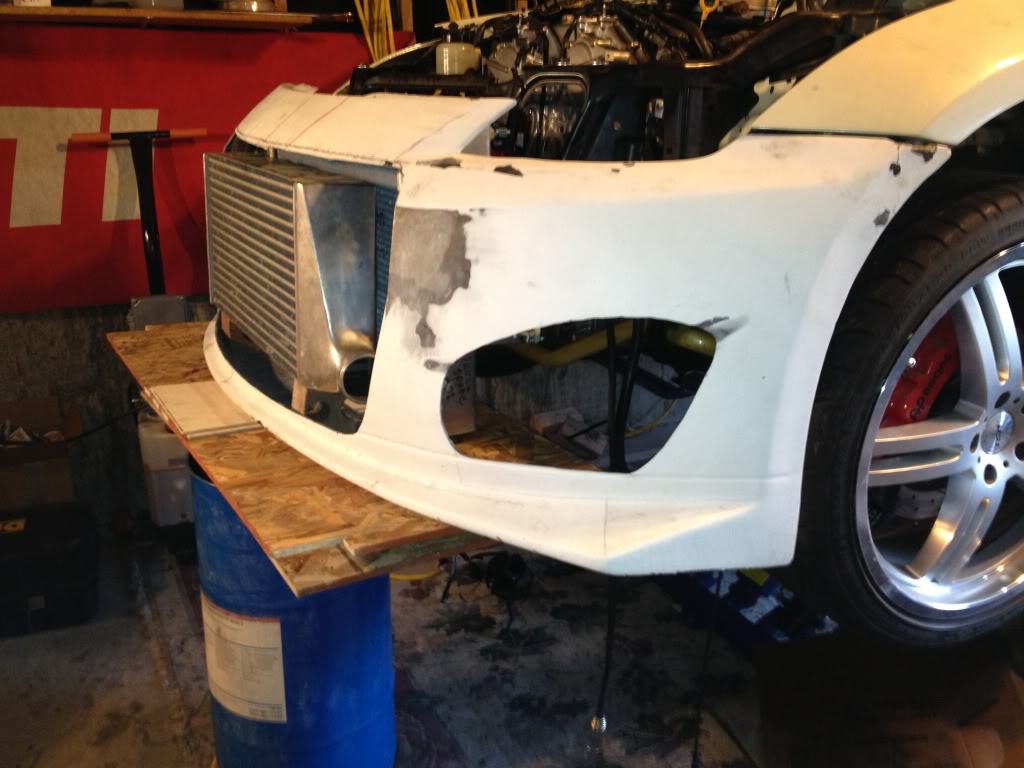
This is where I'm at now�not sure if I'm going to keep the intercooler towards the bottom of the bumper or raise it up a few inches�once again, feel free to give your opinion�
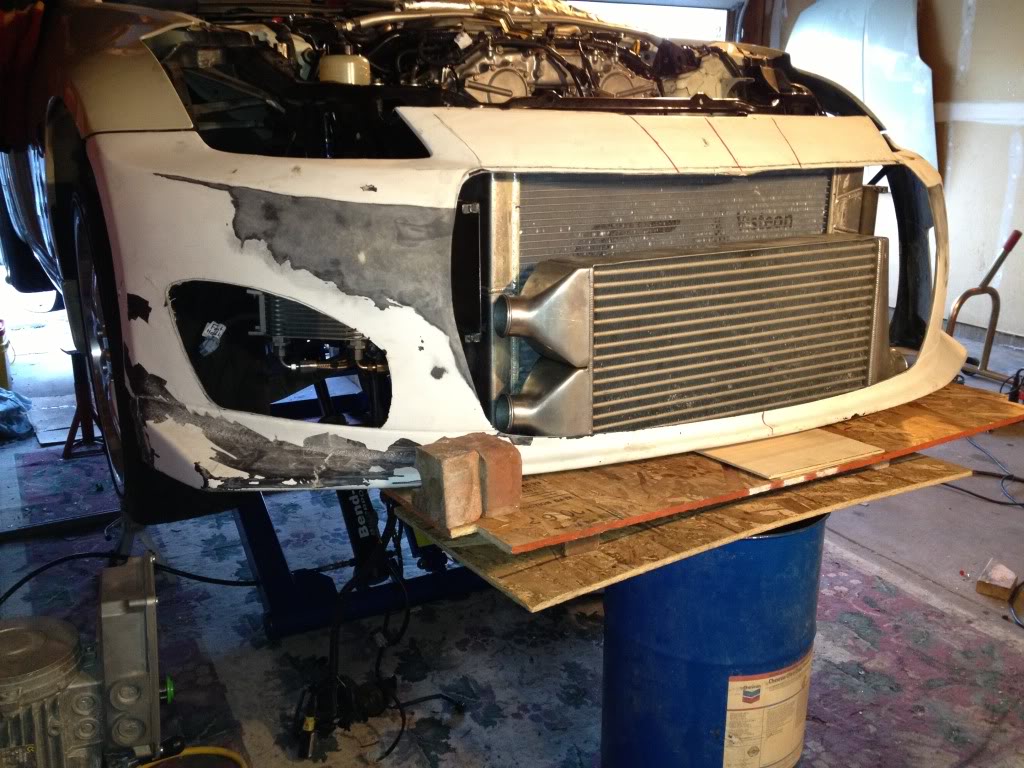
or
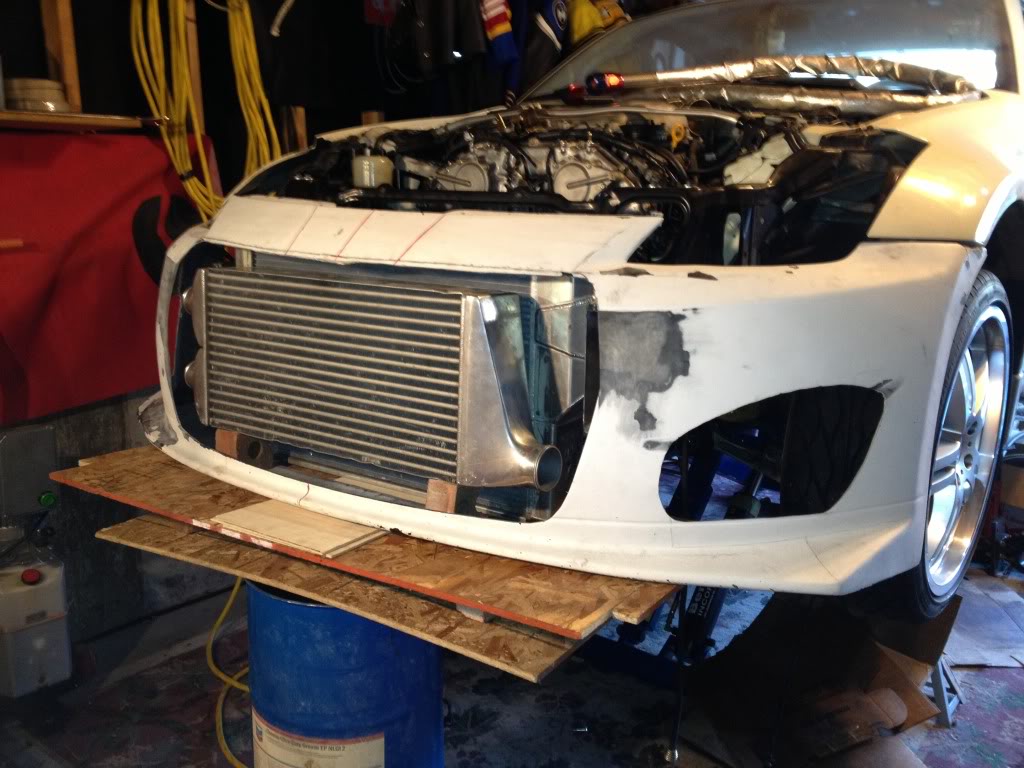
I do like how it protrudes out a little�
this past weekend I had some down time and fab'd up brackets for the radiator and intercooler - nothing special just some square-tube and 16ga steel plate. I'll have hardware welded to the radiator that will connect to the brackets and adjust up & down.
I will have hardware welded to the backside of the intercooler and mount it to a structural member that will span the brackets�not sure how exactly I will do this but I have a few ideas brewing�
also got the power steering cooler connected to the pump - pretty easy used AN 6 hose & connections. Also have my secondary oil cooler that runs off a sandwich plate installed - not sure if I'm going to place it behind the radiator or in-front of the ps cooler�feel free to chime in...
tonight had a chance to layout the radiator along with a few of the hoses I've made and fittings I've been ordering�still waiting on my AN8 stuff but it should be here in a week or so.
You can see the coolant in & out (on the right) to the OEM duct and thermostat - I will have those AN20 bungs welded in place and the hoses are a little long and will be cut down during the final install. The connections on the left are the oil cooler - the AN12 hose will feed the turbos and the the connection with no hose will tap into the oil pan. The second connection on the oil pan will take oil from the scavenger pumps before the turbos.
This is where I'm at now�not sure if I'm going to keep the intercooler towards the bottom of the bumper or raise it up a few inches�once again, feel free to give your opinion�
or
I do like how it protrudes out a little�
The following users liked this post:
XmgcustomsX (12-28-2018)
 04-11-2013, 07:32 PM
#28
350Z-holic
Thread Starter
iTrader: (13)
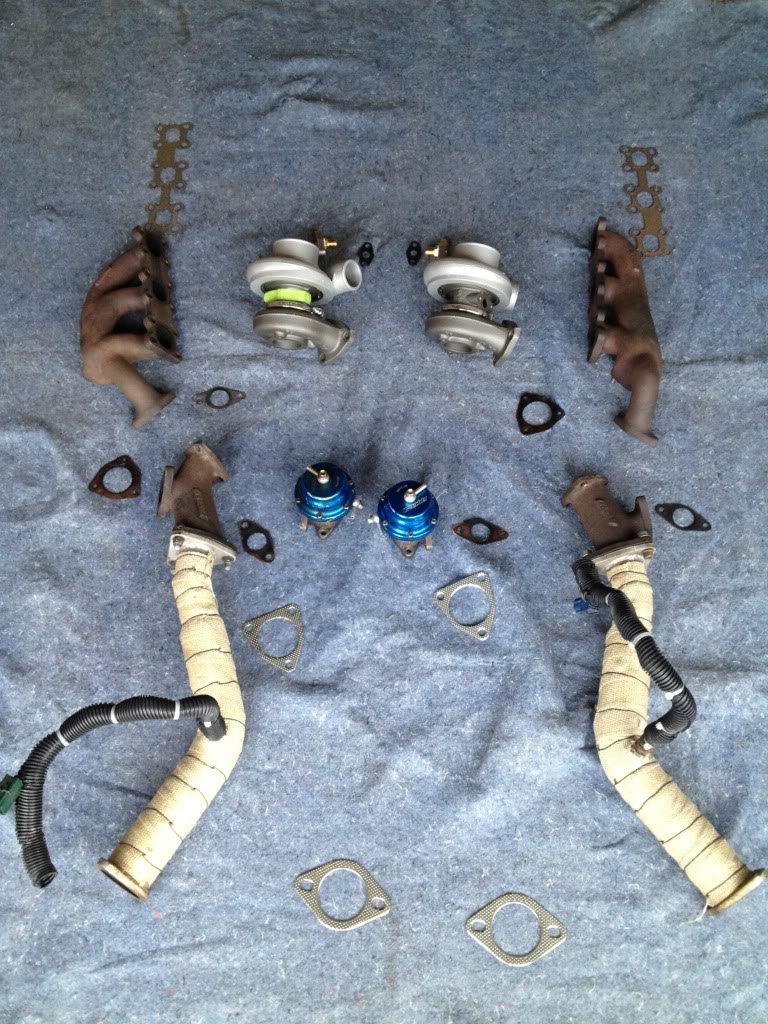
got the turbos packed up and will ship out tomorrow…

having them rebuilt at G Pop Shop out of Springdale Arkansas…a volvo buddy gave me a heads up on the shop. Surprising, not much in the realm of turbo-rebuild in the denver metro area…should have them back in a week or two...
http://gpopshop.com/

having them rebuilt at G Pop Shop out of Springdale Arkansas…a volvo buddy gave me a heads up on the shop. Surprising, not much in the realm of turbo-rebuild in the denver metro area…should have them back in a week or two...
http://gpopshop.com/
05-04-2013, 06:33 PM
#29
350Z-holic
Thread Starter
iTrader: (13)
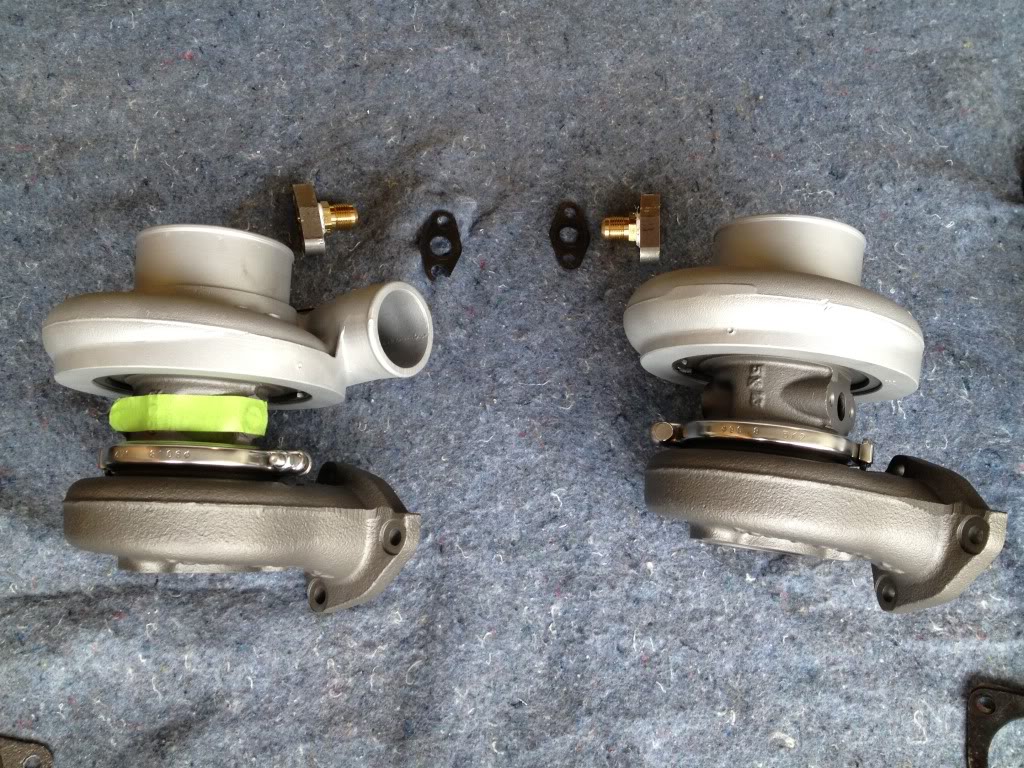
Ahhh good times...Turbos came back last week - very impressed with G-Pop shop out of Arkansas…if I didnt know better would have thought they were brand new...
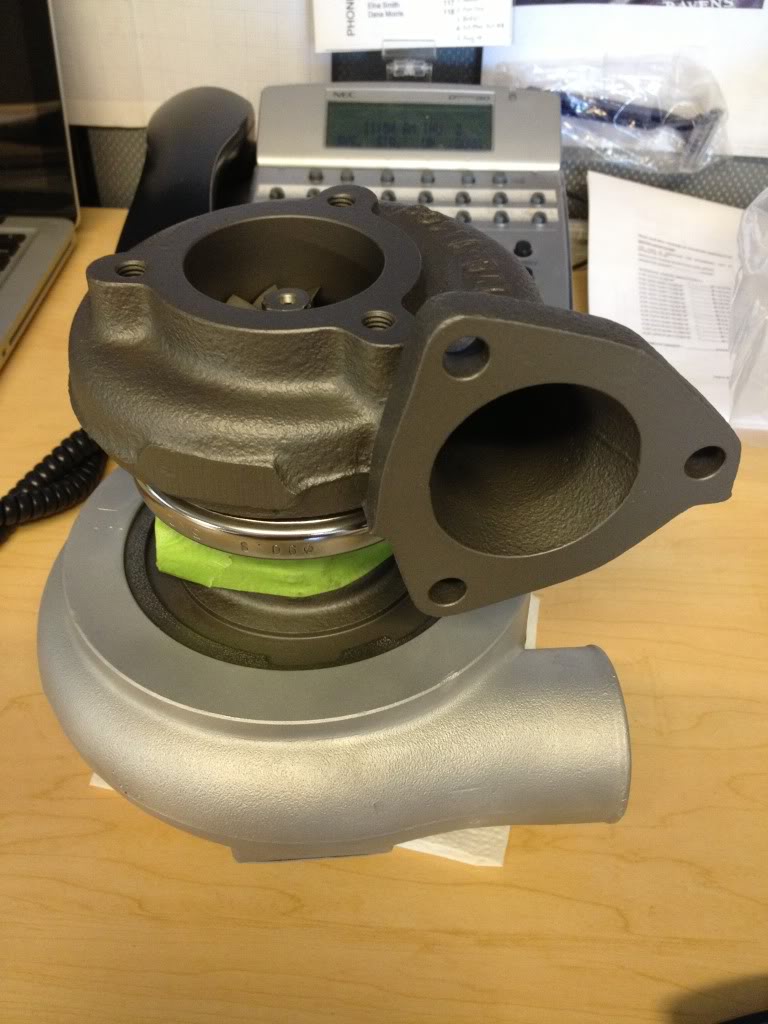
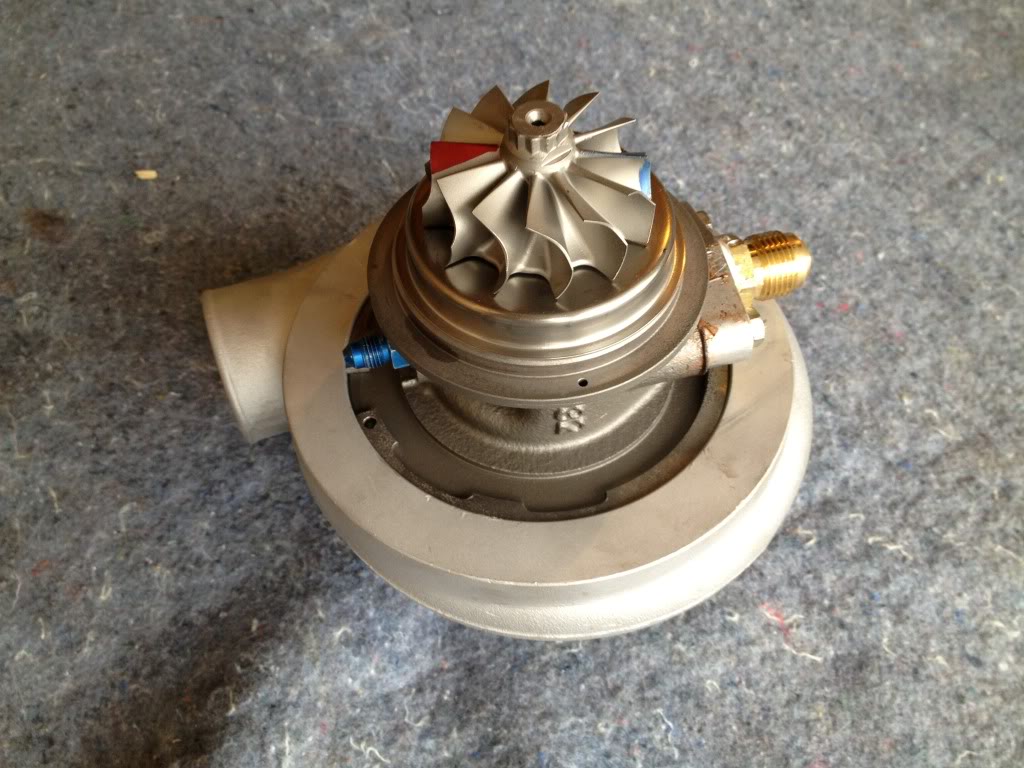
Assembled everything prior to bolting up - Wrapped & sprayed the headers and the downpipe adapter...
Did the driver's side first…assembled & tightened the hardware down…everything was good except a bunk thread in the waste gate - I used a smaller 10.9 nut & bolt...

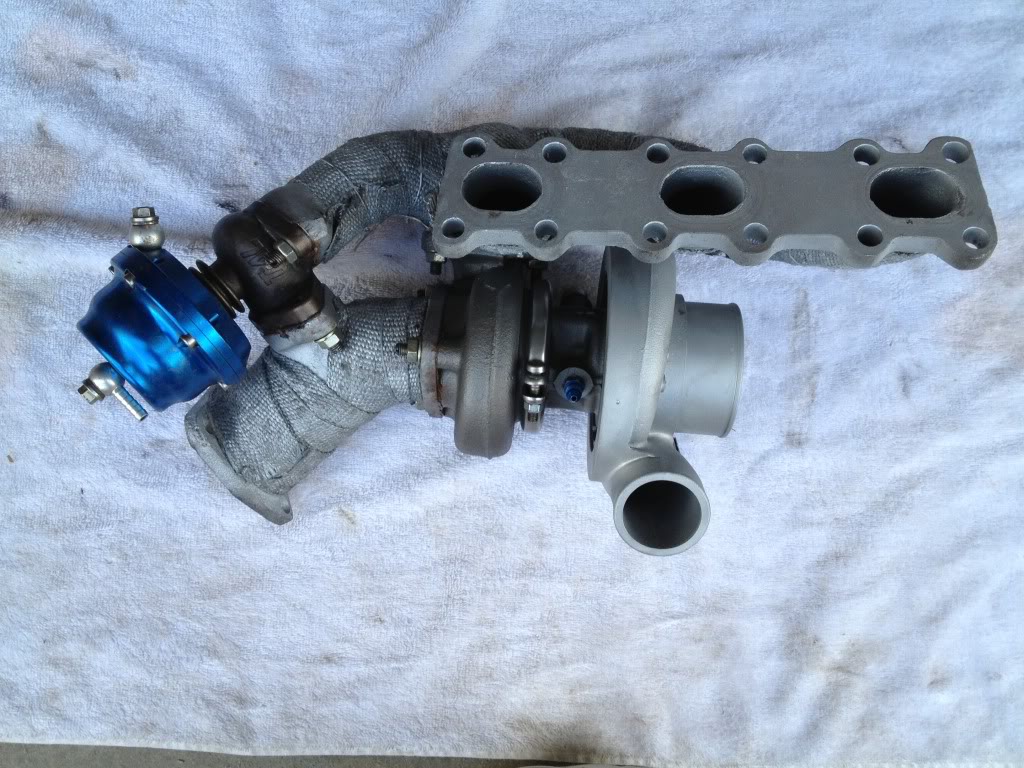
Got the header and exhaust housing bolted in…I believe I need to remove the lower half of my engine mount to fit the compressor in but I may be able to wiggle it in…if it doesnt slide in I will remove the engine mount…
Need some help/input here:
Has anyone removed the lower half engine mount? I did a little bit of research and it sounds like it's as easy as removing the nut on the underside of the frame cross-member?? I put about ~80 to ~90 ft*lbs of torque on it and couldnt get it…I stopped because the car slid about 3 inches on my lift when I was jacking up the engine a little earlier(freaked me out)..


Assembled everything prior to bolting up - Wrapped & sprayed the headers and the downpipe adapter...

Did the driver's side first…assembled & tightened the hardware down…everything was good except a bunk thread in the waste gate - I used a smaller 10.9 nut & bolt...


Got the header and exhaust housing bolted in…I believe I need to remove the lower half of my engine mount to fit the compressor in but I may be able to wiggle it in…if it doesnt slide in I will remove the engine mount…

Need some help/input here:
Has anyone removed the lower half engine mount? I did a little bit of research and it sounds like it's as easy as removing the nut on the underside of the frame cross-member?? I put about ~80 to ~90 ft*lbs of torque on it and couldnt get it…I stopped because the car slid about 3 inches on my lift when I was jacking up the engine a little earlier(freaked me out)..
Last edited by bealljk; 05-04-2013 at 07:11 PM.
05-04-2013, 07:55 PM
#31
350Z-holic
Thread Starter
iTrader: (13)
the shop has a OEM rebuild option for $350 flat rate and a performance rebuild option for $450�everything was included - no nickel & dime'ing, no up-sales�I was extremely satisfied�
http://gpopshop.com/services/rebuilding/
05-04-2013, 08:01 PM
#32
Registered User
 05-04-2013, 08:07 PM
#33
350Z-holic
Thread Starter
iTrader: (13)
05-06-2013, 05:10 PM
#34
Senior Super Moderator
MY350Z.COM
MY350Z.COM

iTrader: (13)
Oh hi there! Figure I'll get in on the progress pics and story.
 05-07-2013, 06:41 PM
#36
350Z-holic
Thread Starter
iTrader: (13)
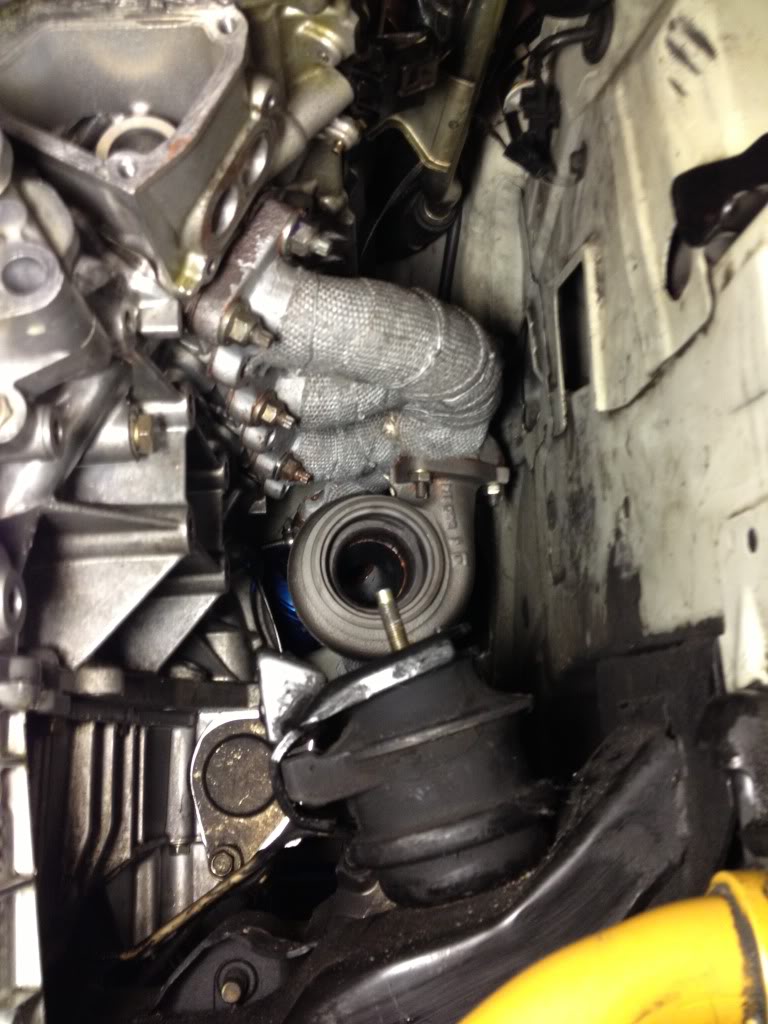
It did…I reset my engine lift jack to stabilize the engine, used the 1/2" drive with a 11/16" deep socket(not the 16mm?) it seemed to grip better…(my 1/2" drive metrics are 12 point versus the 1/2" drive imperial 6 point sockets) 24" breaker bar with maybe another 12" on a cheater bar and got it loose. The mount came right out…no tricks from nissan.
I was able to mount the turbo but I'll need to rotate my feed & scavenge lines appropriately before I can lock it in place.
Hey smooth…between the turb's and the weight redux I've got my hands full!!
what did you put down? how much boost did you run?
I was able to mount the turbo but I'll need to rotate my feed & scavenge lines appropriately before I can lock it in place.
Hey smooth…between the turb's and the weight redux I've got my hands full!!
what did you put down? how much boost did you run?
Last edited by bealljk; 05-07-2013 at 06:45 PM.
05-08-2013, 05:19 AM
#37
Senior Super Moderator
MY350Z.COM
MY350Z.COM
iTrader: (13)
Damn you guys, I'm beginning to think I don't have enough passing power for when I take the Z to the grocery store.
05-09-2013, 08:45 PM
#39
350Z-holic
Thread Starter
iTrader: (13)
Nice, any intention on dialing-up the boost? Are you running a stock block?
I had a chance to assembly the passenger side setup after work today. I bought two turbo blankets and the website didnt have a picture set of the greddy/mitsubishi 18g turbo with their jackets so their are doing a 2-for-1 in exchange for photos of my setup - so I'm pretty stoked�they should be in tomorrow...
I've got an issue with my oil feed-line fitting - it's not threading in like it should/like the driver's side did. I believe when the guys coated the CHRA they got the threads too much�It may thread but I'm not willing to risk the cross thread�I got a call into the turbo shop...

 05-10-2013, 03:01 PM
#40
Senior Super Moderator
MY350Z.COM
MY350Z.COM
iTrader: (13)
So are you running on a stock block? I've always read that the DE engine can handle up to 8 lbs and pump out no more than 400hp before one has to start upgrading internals and such.