Evolution of my G35 Drift Car (picture warning)


 02-18-2011, 11:22 PM
#23
Registered User
Thread Starter
iTrader: (1)

Join Date: Aug 2009
Location: Walnut, Ca
Posts: 121
Likes: 0
Received 0 Likes
on
0 Posts
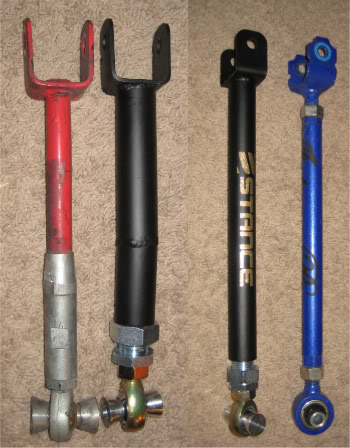
Okay so I ordered my suspension arms from Intense Power (www.intensepower.com). I chose to go with StanceUSA (www.StanceUSA.com) with all the good I've heard about them. Previously I asked if arms were going to be made but never asked one. Pete kept up on it for me and ordered them first chance we got. Pricing on them is reasonable for the quality. I didn't know much about Aurora Bearing company so I decided to check it out. The arms use Aurora Bearings and Rod Ends. "Aurora spherical rod ends are one of the most expensive and high quality rod ends on the market, and for good reason. Aurora ends are used in both military and NASA applications." You can see the quality and feel as you rotate the end.
I will do a complete write up and product feedback on these products. I feel very strongly about them. Previously I purchased private label camber arms and Megan toe arms (careful which you order from them, you might get the wrong arm). These are good for people who want great alignment for daily driving. Even for a year and a half of drifting the private label camber arms held up. I have no complaints. With the new power, I needed to upgrade my suspension arms. Probably didn't need to but I wanted too. Here are some pictures:
I shrunk down the images to compare them all but if you look at the arms, the Stance are thicker.
Here they are installed on the car. I took a pic of the right side as well so you can see the difference.
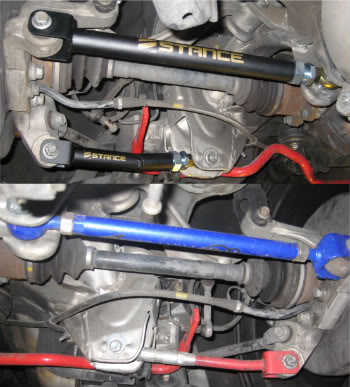
I will do a full write up and post on many sites. The install was easy. Make sure you drop the Sway bar and you are in and out in less than an hour on both sides as long as you don't have to look for your tools.
I will do a complete write up and product feedback on these products. I feel very strongly about them. Previously I purchased private label camber arms and Megan toe arms (careful which you order from them, you might get the wrong arm). These are good for people who want great alignment for daily driving. Even for a year and a half of drifting the private label camber arms held up. I have no complaints. With the new power, I needed to upgrade my suspension arms. Probably didn't need to but I wanted too. Here are some pictures:
I shrunk down the images to compare them all but if you look at the arms, the Stance are thicker.
Here they are installed on the car. I took a pic of the right side as well so you can see the difference.
I will do a full write up and post on many sites. The install was easy. Make sure you drop the Sway bar and you are in and out in less than an hour on both sides as long as you don't have to look for your tools.


 02-19-2011, 05:57 PM
#28
Super Moderator
MY350Z.COM
MY350Z.COM


iTrader: (8)
Nice build, and those Stance arms look very much like SPL arms.
02-19-2011, 08:00 PM
#29
Registered User
Thread Starter
iTrader: (1)
Join Date: Aug 2009
Location: Walnut, Ca
Posts: 121
Likes: 0
Received 0 Likes
on
0 Posts
I'm going to try and get some stuff done tonight on the car.
Last edited by AlexAZD; 02-19-2011 at 08:01 PM.
02-20-2011, 08:51 AM
#31
Registered User
Thread Starter
iTrader: (1)
Join Date: Aug 2009
Location: Walnut, Ca
Posts: 121
Likes: 0
Received 0 Likes
on
0 Posts
I don't know that they cost more. I will be honest, if I want a part bad enough I add it to my bill and try not to look at the receipt. It's never been a probably with Intense. I've been taken care of so well I never have to double check anything.
SPL is a great company, super quality. I just don't like having to wait to get stuff. The fact that it matches the coilovers is the best for me. If they made a front traction arm then I would buy that too no question.
So got some more work done last night. Got the other side arms put in. Removed the sound dampener from the firewall and more from the tunnel and passenger side. Used the mighty wire wheel on the floor to take off the rest of the garbage and seam sealer. Need to go buy a plug in drill. My battery operated dies in 5 minutes.
Pics to come tonight. Trying to make a big stride tonight on the car tonight with removing the sound dampener.
 02-27-2011, 09:22 AM
#34
Registered User
Thread Starter
iTrader: (1)
Join Date: Aug 2009
Location: Walnut, Ca
Posts: 121
Likes: 0
Received 0 Likes
on
0 Posts
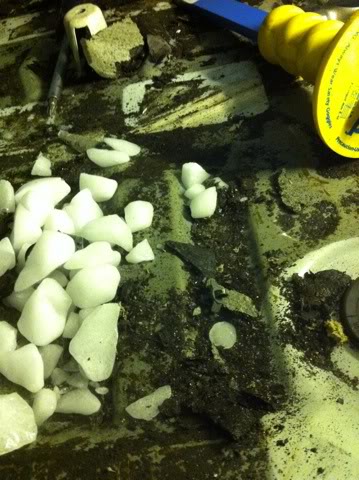
So I sent out last night with some dry ice, a chisel and a hammer. The verdict:
Dry Ice > Heat gun
I worked for hours with a heat gun and it was horrible. So much **** left to clean up in those sports. With dry ice I let it freeze and BAM. In about 2 hours I was done with 90% of the car. I will start sanding down the spots and prep the car for paint. Still trying to find my color. I really have no idea what I want to do. We have a couple of ideas but not sure. Pete's recommendation is the best so far. There is really no need for pics as its still dirty in there. I need to start sanding and once I clean that up I will post some more pics.


 03-01-2011, 08:44 AM
#39
Registered User
Thread Starter
iTrader: (1)
Join Date: Aug 2009
Location: Walnut, Ca
Posts: 121
Likes: 0
Received 0 Likes
on
0 Posts
sorry if I sounded rude in the earlier post, that was from my iphone. I will be honest, i never looked at filtration of any kind. I just drive. Tires smell good but I guess i should think about my health as well. hmm. I really don't know what know I want to do know. I need to worry about driving when it rains as well.
03-01-2011, 11:16 PM
#40
Registered User
Thread Starter
iTrader: (1)
Join Date: Aug 2009
Location: Walnut, Ca
Posts: 121
Likes: 0
Received 0 Likes
on
0 Posts
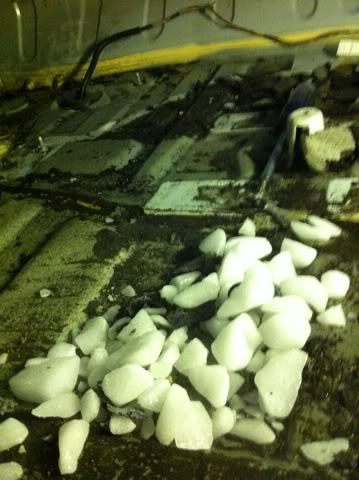
So here is some Dry Ice...
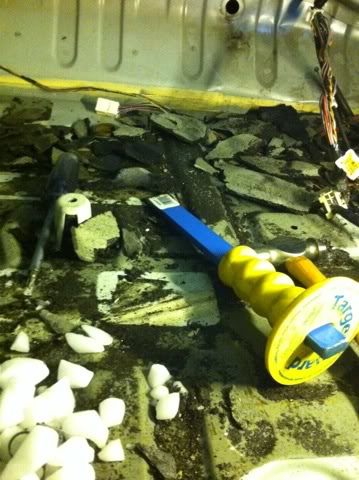
Here is some clean up work on some areas...
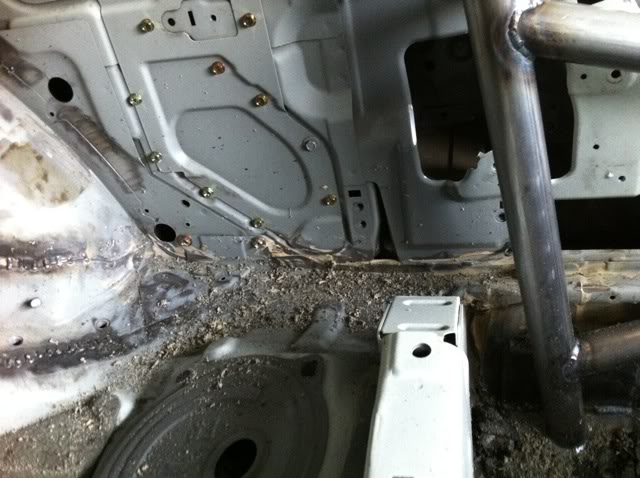

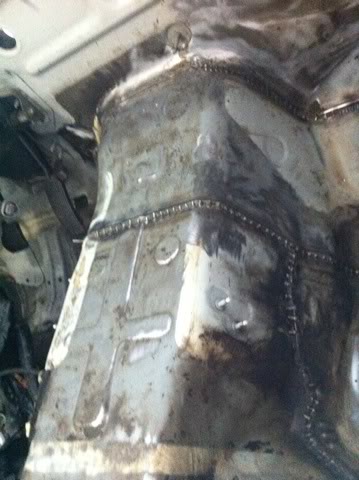
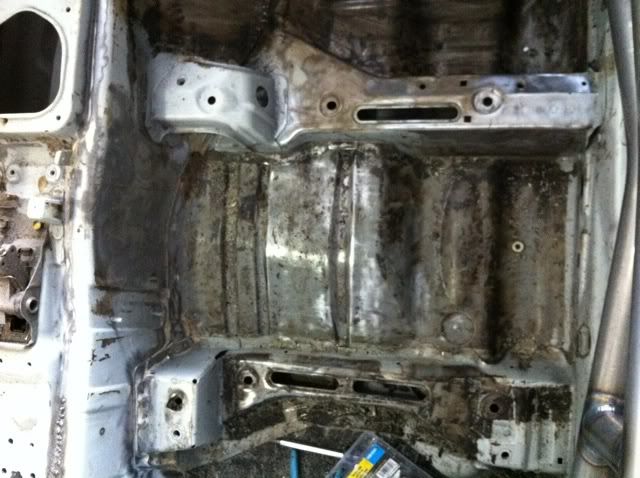
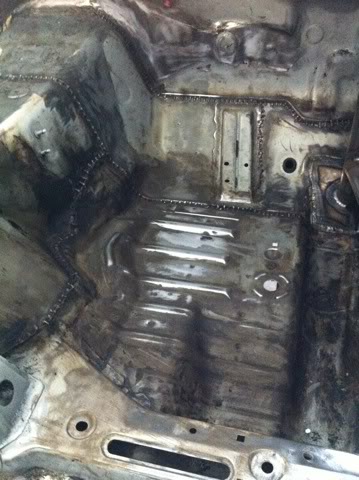
The dry ice was super quick... Hopefully I will have the interior clean this weekend to prep for some more welding then paint.
Here is some clean up work on some areas...
The dry ice was super quick... Hopefully I will have the interior clean this weekend to prep for some more welding then paint.