Notices
G35/G37 General discussion and news for Infiniti's G or for full Forums check out MyG37.com or G35Driver.com

Looking for those that have removed the secondary firewall.

Thread Tools
 
Search this Thread
 
Old 06-14-2016, 01:00 PM
  #21  
rustyschopshop
New Member
 
rustyschopshop's Avatar
 
Join Date: Mar 2014
Location: Watauga, Texas
Posts: 1,405
Received 373 Likes on 279 Posts
Default

Originally Posted by quickdiversion
I actually really want to but haven't found d ay pictures or many discussions about it yet. I do not wish to rip out the dash to do it though. Do you know of any articles or have any pictures?


Oh you mean the side harnesses? Or the cross harness?
The side harness that goes along the strut towers.
Old 06-14-2016, 06:04 PM
  #22  
quickdiversion
New Member
Thread Starter
 
quickdiversion's Avatar
 
Join Date: Aug 2015
Location: NJ
Posts: 141
Received 31 Likes on 26 Posts
Default

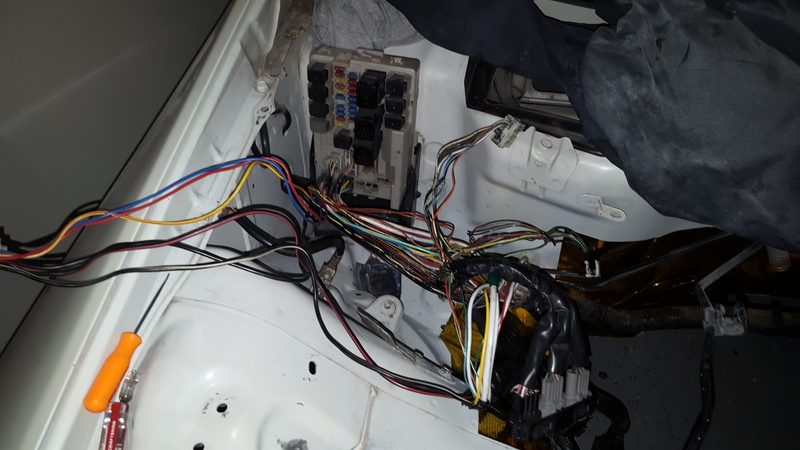
Hey I just looked back through your build thread and I saw where you took apart the loom but I can not tell where you went with the wiring to get it out of the engine bay and under the fenders. All the areas I looked at seem to small.
Old 06-15-2016, 08:33 AM
  #23  
rustyschopshop
New Member
 
rustyschopshop's Avatar
 
Join Date: Mar 2014
Location: Watauga, Texas
Posts: 1,405
Received 373 Likes on 279 Posts
Default

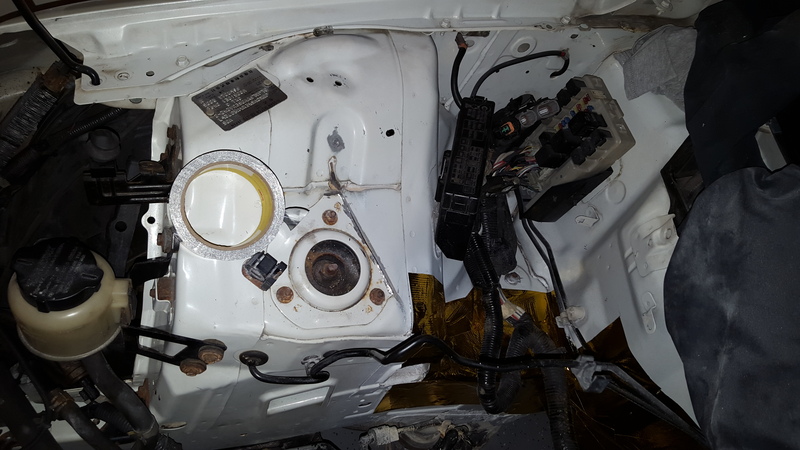
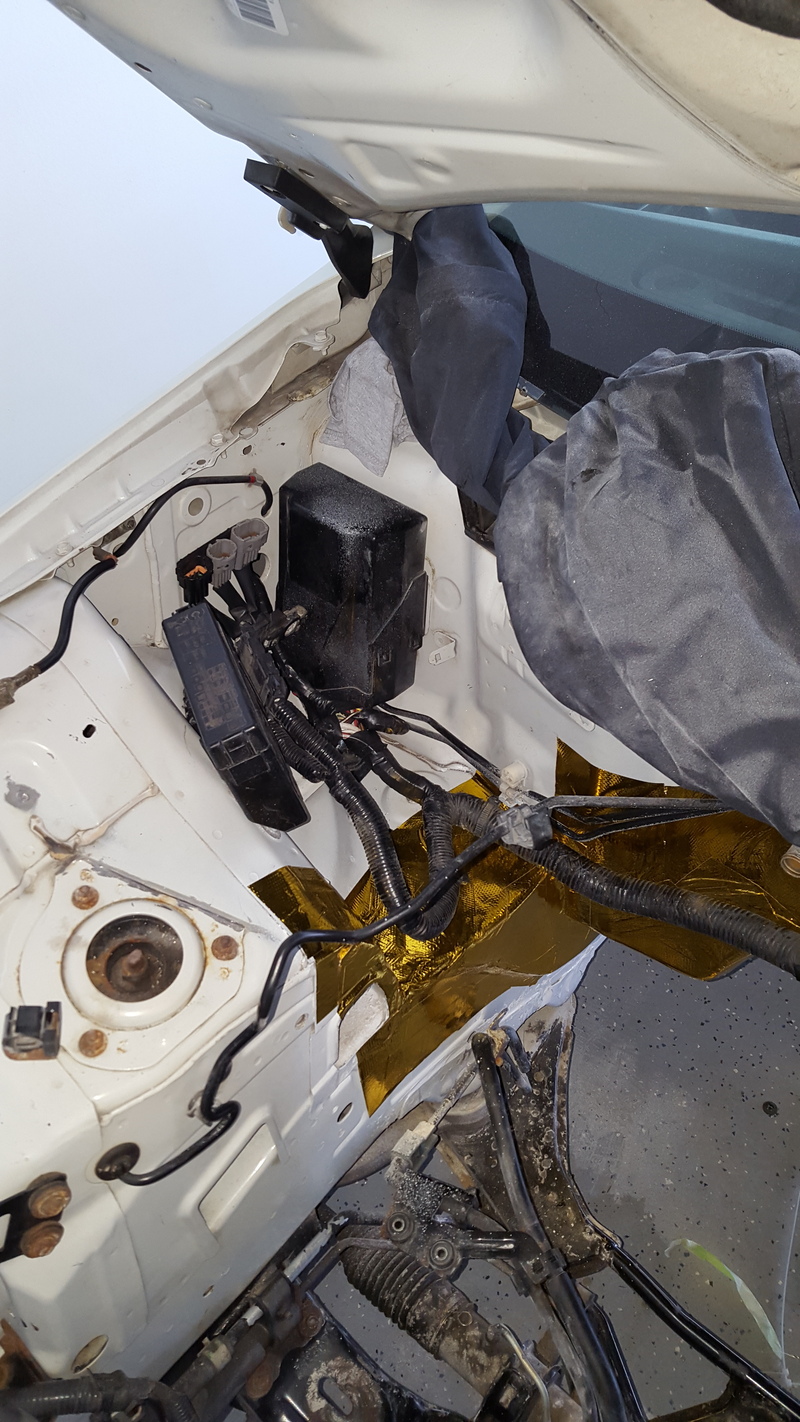
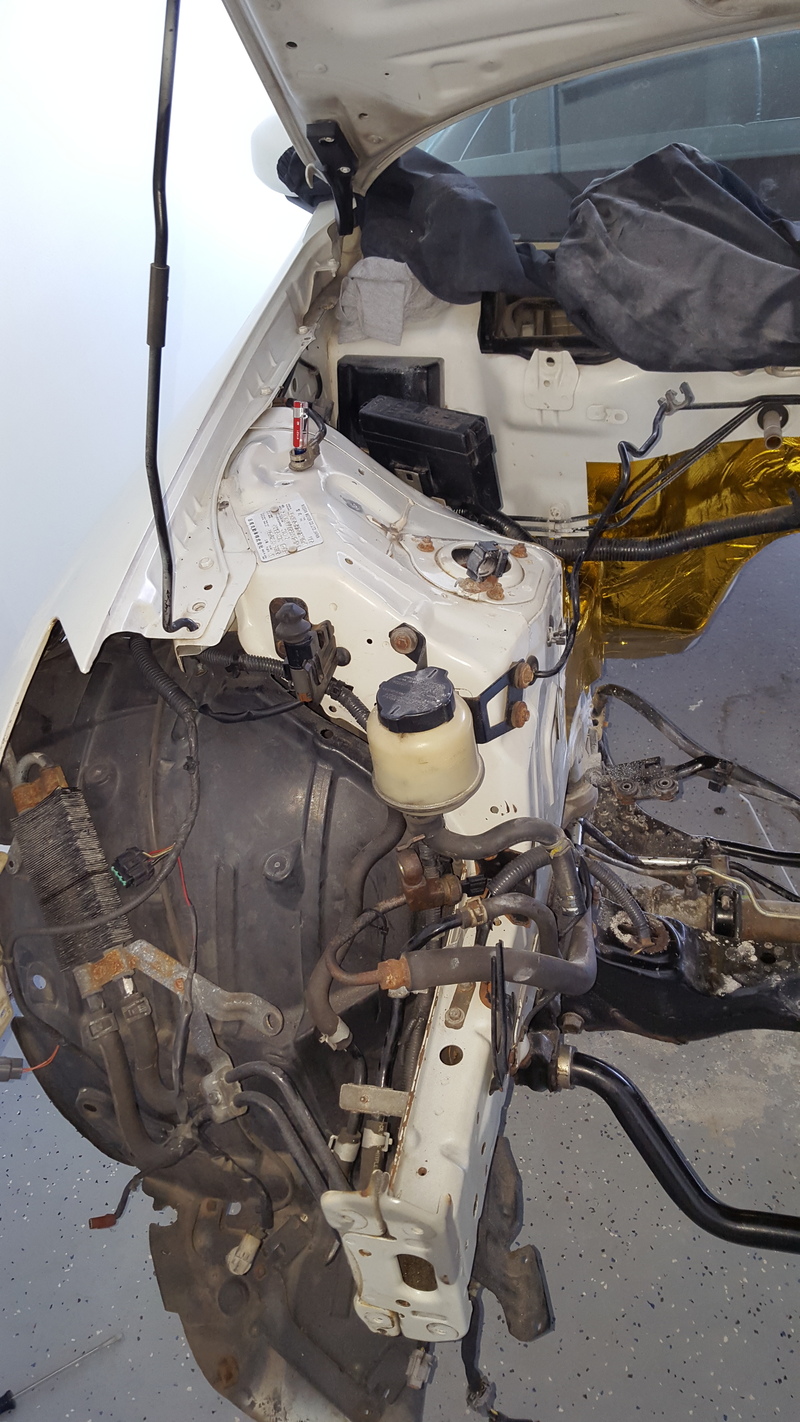
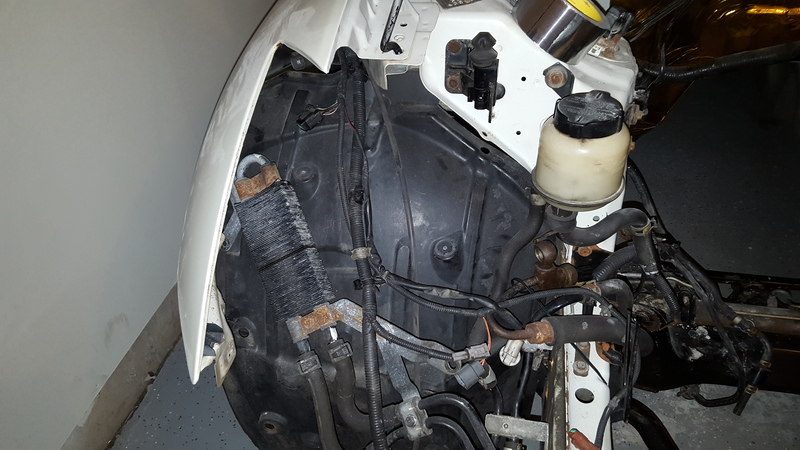
passenger side loom can be fully disconnected from in front of the radiator back to the battery box. There is a decent size hole below the smaller fuse box that I used to rerun the loom back to washer resevoir and such. I did have to relocate one ground but that should be easy seeing what you have been doing. Once that side is mounted to your liking reloom it and zip tie or cable strap all into place. The drivers side is a bit harder but can still be done without splicing. BTW both side involve pulling the fender liners if not already out. For the drivers harness, I rerouted near the abs module. This spot is a bit cumbersom but can be done!! Just take your time. The drivers harness doesn't do much more then abs sensor and headlight so it is much shorter and easier to route once through that abs hole. Reinstall new conduit and tie into place. I still wish I had some more pics. I may try to find a body harness tuck thread for you. Good luck.
Old 06-15-2016, 08:38 AM
  #24  
rustyschopshop
New Member
 
rustyschopshop's Avatar
 
Join Date: Mar 2014
Location: Watauga, Texas
Posts: 1,405
Received 373 Likes on 279 Posts
Default

https://my350z.com/forum/engine-driv...wire-tuck.html

This is an older thread but should give you the jist of how to run it. Some pics are missing but most of the OP pics are there. Hope this give you some more assistance.
If you have anymore questions about it please feel free to ask I will help where I can.
Old 06-19-2016, 03:23 AM
  #25  
quickdiversion
New Member
Thread Starter
 
quickdiversion's Avatar
 
Join Date: Aug 2015
Location: NJ
Posts: 141
Received 31 Likes on 26 Posts
Default

So I was looking through the thread and I kinda got bored with reading it on my phone, but I got the gist. So I did go back and read a bit and noticed that you de-loomed the entire side harness, I decided not to because it is running under the fender so I left it intact and pulled the knot of wires out between all the components where the battery tray is. After I did that. I now have plenty of slack and everything sites right back where it was.

Name:  20160615_142339.jpg
Views: 1297
Size:  153.9 KB

Name:  20160615_080157.jpg
Views: 1304
Size:  167.0 KB

Name:  20160616_131515.jpg
Views: 1161
Size:  486.0 KB

Name:  20160616_131508.jpg
Views: 1355
Size:  469.1 KB

Name:  20160615_080204.jpg
Views: 1220
Size:  169.4 KB
Old 06-19-2016, 03:28 AM
  #26  
quickdiversion
New Member
Thread Starter
 
quickdiversion's Avatar
 
Join Date: Aug 2015
Location: NJ
Posts: 141
Received 31 Likes on 26 Posts
Default

So a little clean up.

Name:  20160619_094515.jpg
Views: 1143
Size:  143.0 KB

Name:  20160619_094521.jpg
Views: 1209
Size:  128.1 KB

Name:  20160619_094531.jpg
Views: 1306
Size:  463.4 KB

Last edited by quickdiversion; 06-19-2016 at 07:50 AM. Reason: repost
Old 06-19-2016, 12:58 PM
  #27  
quickdiversion
New Member
Thread Starter
 
quickdiversion's Avatar
 
Join Date: Aug 2015
Location: NJ
Posts: 141
Received 31 Likes on 26 Posts
Default

And now the driver side.

Name:  20160619_144729.jpg
Views: 1158
Size:  475.7 KB

Name:  20160619_160344.jpg
Views: 1191
Size:  188.2 KB

Name:  20160619_160410.jpg
Views: 1120
Size:  173.7 KB

Name:  20160619_160417.jpg
Views: 1012
Size:  157.4 KB

Name:  20160619_160356.jpg
Views: 1383
Size:  211.8 KB
Old 06-21-2016, 10:07 AM
  #28  
rustyschopshop
New Member
 
rustyschopshop's Avatar
 
Join Date: Mar 2014
Location: Watauga, Texas
Posts: 1,405
Received 373 Likes on 279 Posts
Default

Great job!! That fits you build very well. Can't to see how everything looks after it is all back together.
Old 06-21-2016, 04:53 PM
  #29  
quickdiversion
New Member
Thread Starter
 
quickdiversion's Avatar
 
Join Date: Aug 2015
Location: NJ
Posts: 141
Received 31 Likes on 26 Posts
Default

I still and looking at a way to secure the harness behind the motor. It looks like I will bring a drill stop home from work and put to small holes in the firewall for anchoring zip ties and put some water tight putty on them.

Last edited by quickdiversion; 06-21-2016 at 10:28 PM.
Old 06-22-2016, 09:35 AM
  #30  
rustyschopshop
New Member
 
rustyschopshop's Avatar
 
Join Date: Mar 2014
Location: Watauga, Texas
Posts: 1,405
Received 373 Likes on 279 Posts
Default

sometimes small things like that make all the difference.
Old 06-28-2016, 05:39 AM
  #31  
quickdiversion
New Member
Thread Starter
 
quickdiversion's Avatar
 
Join Date: Aug 2015
Location: NJ
Posts: 141
Received 31 Likes on 26 Posts
Default

I am probably gonna stop updating this thread, because of the title. I have a build on another site, If you want to keep following it, I can mirror here as well if you are interested.
Old 06-28-2016, 07:33 AM
  #32  
rustyschopshop
New Member
 
rustyschopshop's Avatar
 
Join Date: Mar 2014
Location: Watauga, Texas
Posts: 1,405
Received 373 Likes on 279 Posts
Default

Sorry to see you leave here, but sure post a link.
Old 06-28-2016, 07:13 PM
  #33  
quickdiversion
New Member
Thread Starter
 
quickdiversion's Avatar
 
Join Date: Aug 2015
Location: NJ
Posts: 141
Received 31 Likes on 26 Posts
Default

For some reason the reply thing was not working and I thought my thread was closed.

I am not going g to leave the site, I will just start up a build thread here instead of continuing this.
Old 06-30-2016, 07:20 AM
  #34  
rustyschopshop
New Member
 
rustyschopshop's Avatar
 
Join Date: Mar 2014
Location: Watauga, Texas
Posts: 1,405
Received 373 Likes on 279 Posts
Default

Gotcha, will be looking for it
Old 07-20-2016, 05:41 AM
  #35  
quickdiversion
New Member
Thread Starter
 
quickdiversion's Avatar
 
Join Date: Aug 2015
Location: NJ
Posts: 141
Received 31 Likes on 26 Posts
Default

Its up!
Related Topics
Thread
Thread Starter
Forum
Replies
Last Post
Itsfredagain
Engine, Drivetrain & Forced-Induction (DIY)
24
05-28-2016 05:51 PM
Rev_Night
Exterior & Interior
42
05-11-2016 05:03 PM
quickdiversion
2003-2009 Nissan 350Z
5
04-26-2016 02:32 PM
natedogg713
2003-2009 Nissan 350Z
4
04-22-2016 02:40 PM
UZ_
Brakes & Suspension
5
04-21-2016 12:47 PM


Quick Reply: Looking for those that have removed the secondary firewall.


All times are GMT -8. The time now is 01:52 AM.