2004 ivory pearl, undergoing a vk56 swap

The following users liked this post:
KingBaby (03-19-2017)

 03-18-2017, 08:41 PM
#83
New Member
Thread Starter

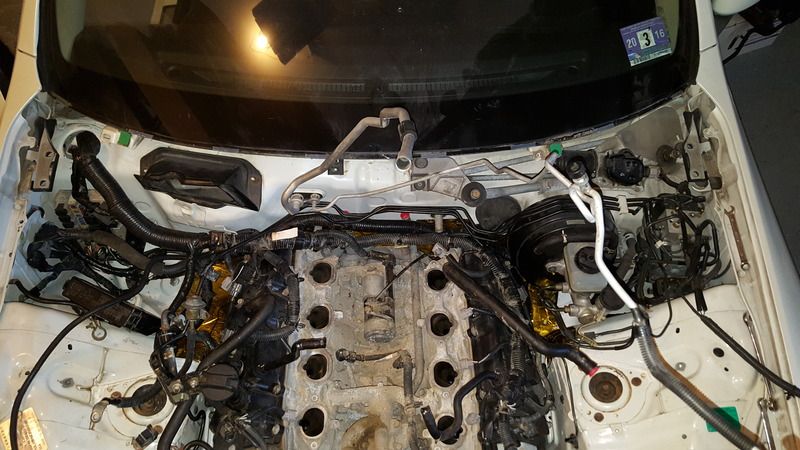
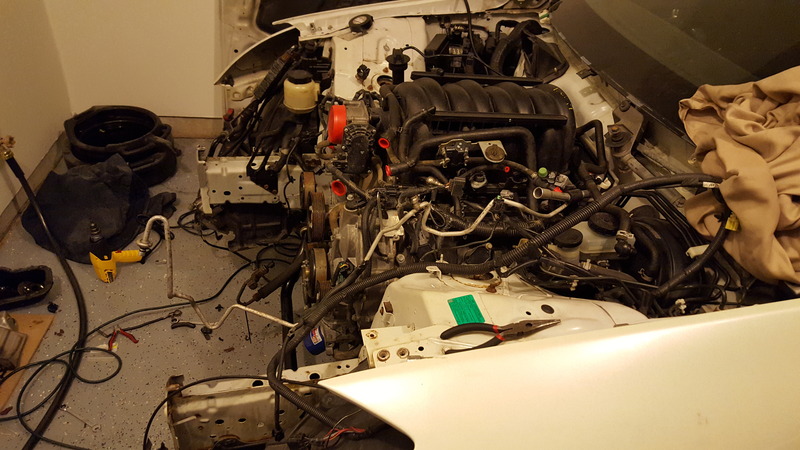
So today I started into new territory.
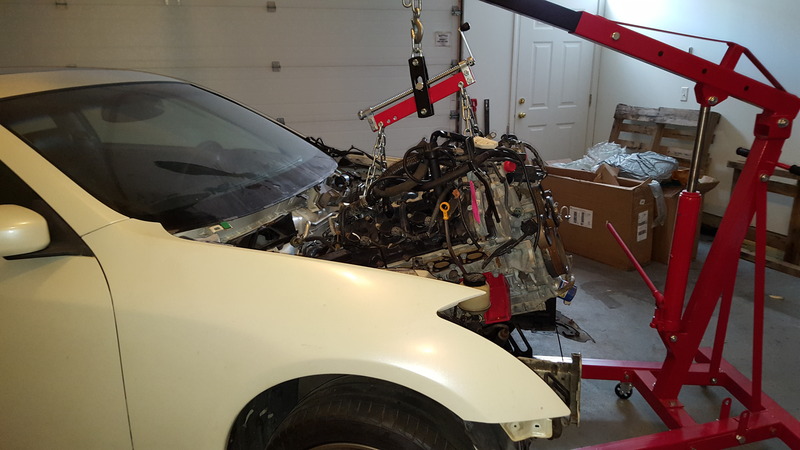
This motor is a huge pain in the D*ck to put in. Almost completely in and I notice that the oil pan will not clear, so I removed the oil pan, The motor slide in further, but not far enough! It was caught on the steering rack lines. SOooooooOOOoooo I pulled those also. Still did not go in.
I finally had to drop both pieces of forward subframe and than it slide in.

Next step was installing the headers. It was a good thing that I dropped all the subframe out, because the driver side header would not even slide in between the subframe and rocker.
I was kinda pissed that that the motor had no accessories at first, but it was a blessing in disguse. The a/c compressor would block the way to the driver side header for install and tightening. The passenger side was was much easier. Each had a single nut that was unable to be tightened at this point with all the support equipment.
Then after it is 98% in I notice that The subframe won't go back in. It slides up about and inch and then I am looking all over for hangups and I notice that the oil pan actually sit right on top of the rear half of the front subframe. ANd I mean with no pan and no strainer, about 1 inch off. SOOOOOOO not even a shallow oil pan will fix that.
SOOOOOO (again),I will be chopping and welding the rear part to not block the are and move the horizontal support further aft to accommodate the oil pan.

This motor is a huge pain in the D*ck to put in. Almost completely in and I notice that the oil pan will not clear, so I removed the oil pan, The motor slide in further, but not far enough! It was caught on the steering rack lines. SOooooooOOOoooo I pulled those also. Still did not go in.
I finally had to drop both pieces of forward subframe and than it slide in.

Next step was installing the headers. It was a good thing that I dropped all the subframe out, because the driver side header would not even slide in between the subframe and rocker.

I was kinda pissed that that the motor had no accessories at first, but it was a blessing in disguse. The a/c compressor would block the way to the driver side header for install and tightening. The passenger side was was much easier. Each had a single nut that was unable to be tightened at this point with all the support equipment.
Then after it is 98% in I notice that The subframe won't go back in. It slides up about and inch and then I am looking all over for hangups and I notice that the oil pan actually sit right on top of the rear half of the front subframe. ANd I mean with no pan and no strainer, about 1 inch off. SOOOOOOO not even a shallow oil pan will fix that.
SOOOOOO (again),I will be chopping and welding the rear part to not block the are and move the horizontal support further aft to accommodate the oil pan.
 03-19-2017, 03:26 PM
#84
New Member
Thread Starter
There you are everyone...
10 pounds of Sh*t in a 2 pound box
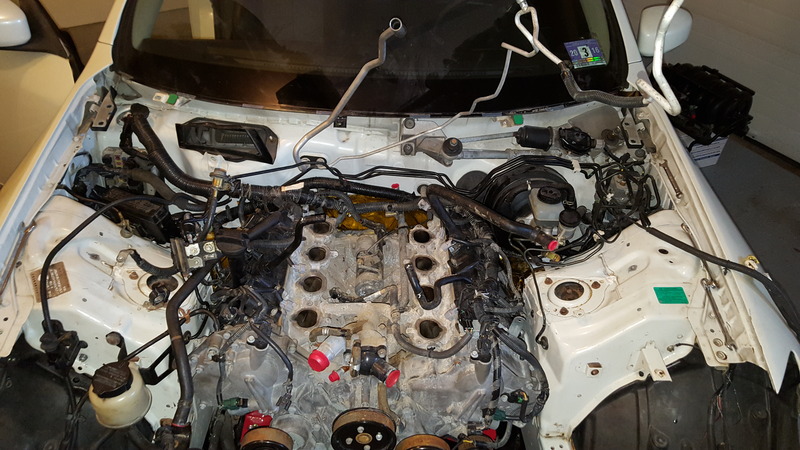
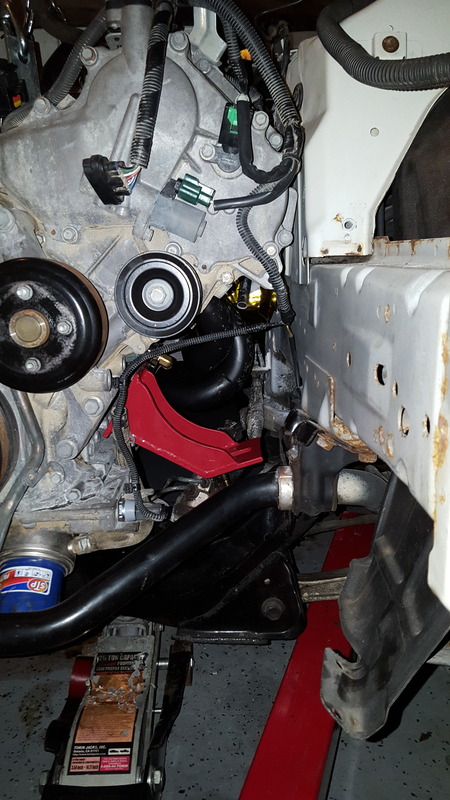
As you can see, there are no accessories on the motor....
I have to cut and manage the alt bracket, and if I do not want to cut into the frame rail and strut tower I am looking at using a Altima electric PS pump. I have a list of little **** to take care of next garage day.
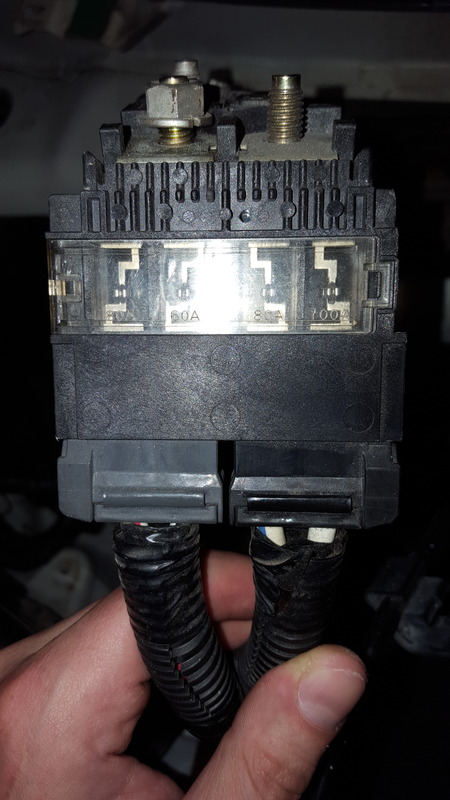
Esspecially this little gem. Zfever in there infinite wisedom rewired the sh*t to short, by aqbout 8 inches. So now I have to cut and splice all the lines......
Not Cool....
10 pounds of Sh*t in a 2 pound box


As you can see, there are no accessories on the motor....
I have to cut and manage the alt bracket, and if I do not want to cut into the frame rail and strut tower I am looking at using a Altima electric PS pump. I have a list of little **** to take care of next garage day.
Esspecially this little gem. Zfever in there infinite wisedom rewired the sh*t to short, by aqbout 8 inches. So now I have to cut and splice all the lines......
Not Cool....

 03-19-2017, 07:55 PM
#86
New Member
Thread Starter
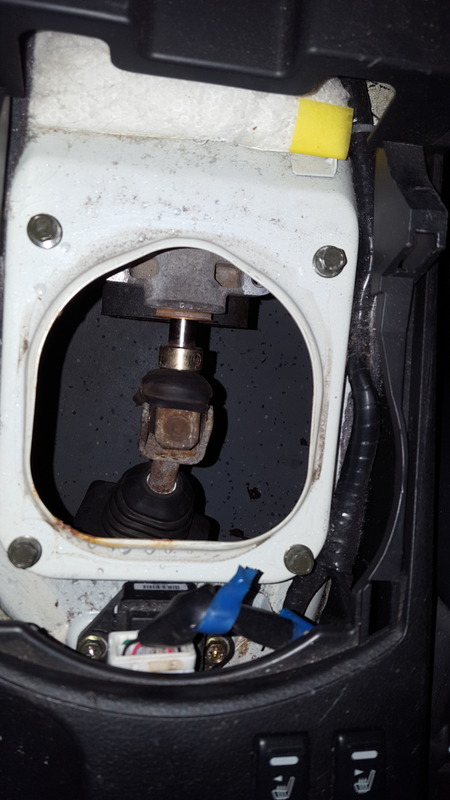
Bushings are all sorted for the rear cept for rhe pumpkin till I find a cleaner one.
There ia absolutely no room for the dipstick on the side of the motor. Plenty of room from under. So I might chop it all short instead of losing my mind. Hooking up the steering column is key on the list right now.
There ia absolutely no room for the dipstick on the side of the motor. Plenty of room from under. So I might chop it all short instead of losing my mind. Hooking up the steering column is key on the list right now.
04-12-2017, 04:45 PM
#87
New Member
Thread Starter
OK so update time.
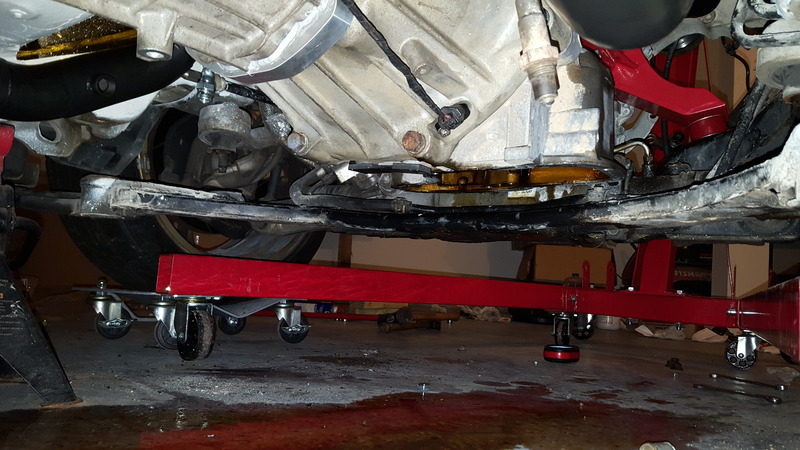
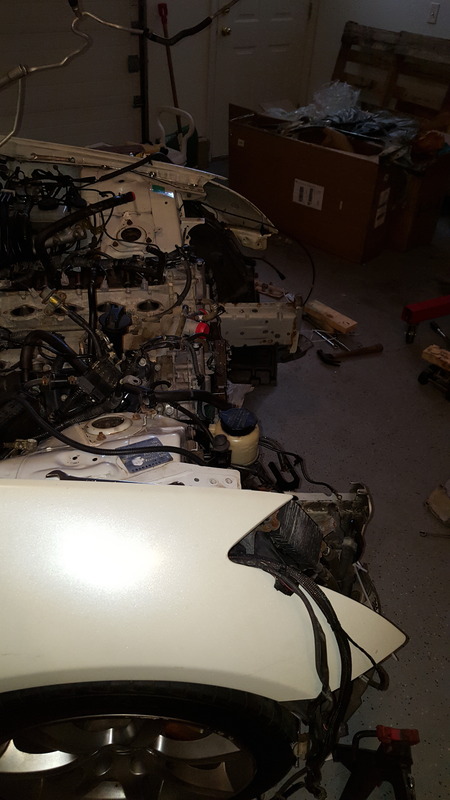
I let it be cause I looked and noticed that the adapter plate was rubbing on the tunnel and then I saw the trans harness was appearing to be pinched.
So because there is little to no room for movement to tip the engine. I had to drop the subframe, separate the motor and subframe and top the trans mount. and I actually pulled the headers and the entire motor/trans combo out of the car. I banged in the trans tunnels where it was rubbing and made some adjustments of the engine and firewall.
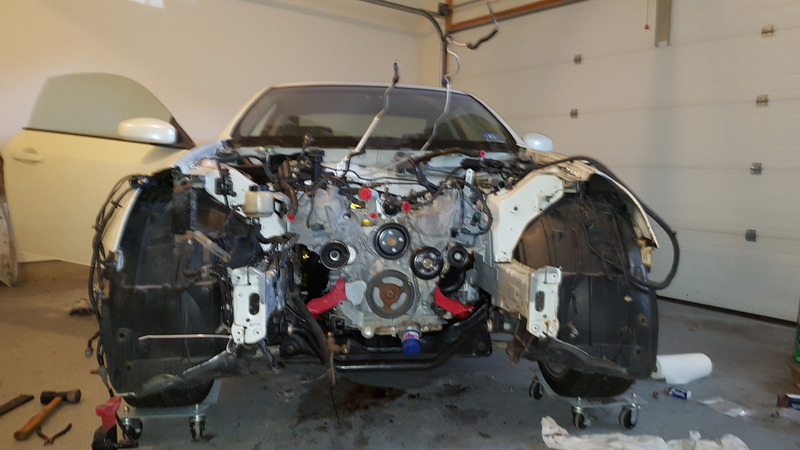
VK56de install on a G35 tips....
1. The even bank of the motor is on the passenger side and that means it sites further back. If you look at the firewall on a G35 you will notice that the passenger side of the firewall is further forward that the driver side. That means you are gonna be beating that sh*t in with a hammer to allow the motor to sit far enough back with the Mckinley mounts.
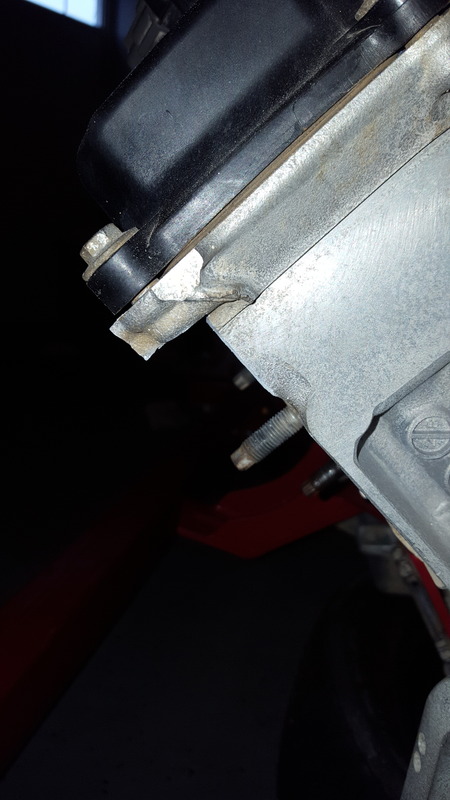
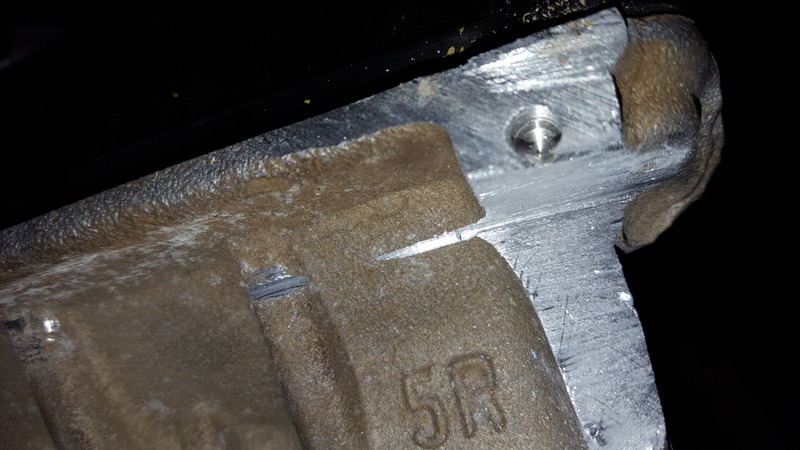
2. There are notches on each head of the motor outboard, aft of the top of the head which 2 metal brackets are mounted for holding the upper ox sensor wires, These mounts need to be removed and the chuck of aluminum that mounts them to the head cut off in order to clear the firewall on the passenger sides, and the steering column on the driver side. It will force the column down and not align if it chopped off.
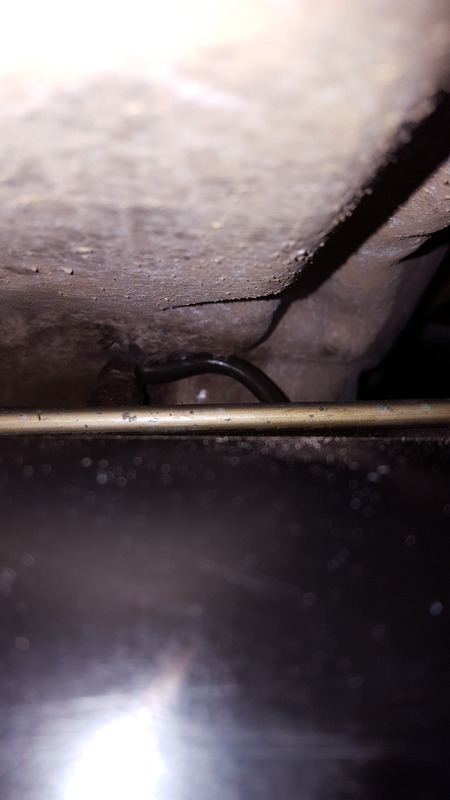
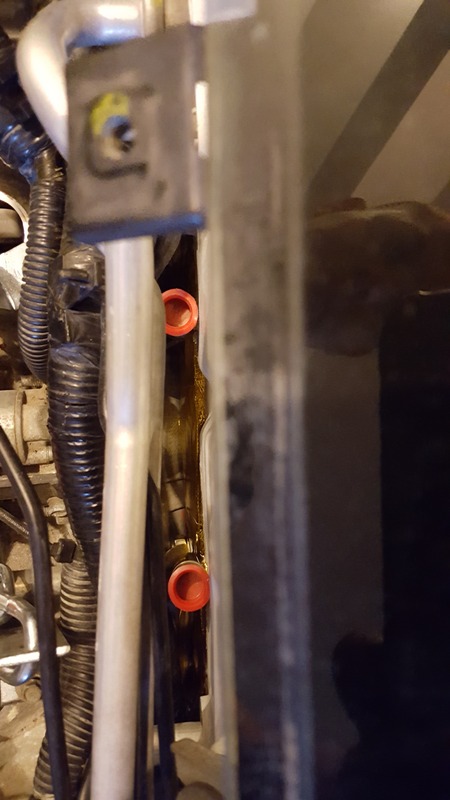
3. the rack and pinon needs to be removed and the and the top line input needs to be removed and replaced with a 90 degree line input and you must remake the line. I removed and crushed 4 different lines in including the stock line before I released this, trying different ways.
4. be patient. I put this motor in and took it out 3 times with no issue and the 4th time I did it I changed one thing I did and it pushed the motor over an inch further back and it did not fit right. Had to rip it all out and start over. sooooooooo
I let it be cause I looked and noticed that the adapter plate was rubbing on the tunnel and then I saw the trans harness was appearing to be pinched.
So because there is little to no room for movement to tip the engine. I had to drop the subframe, separate the motor and subframe and top the trans mount. and I actually pulled the headers and the entire motor/trans combo out of the car. I banged in the trans tunnels where it was rubbing and made some adjustments of the engine and firewall.
VK56de install on a G35 tips....
1. The even bank of the motor is on the passenger side and that means it sites further back. If you look at the firewall on a G35 you will notice that the passenger side of the firewall is further forward that the driver side. That means you are gonna be beating that sh*t in with a hammer to allow the motor to sit far enough back with the Mckinley mounts.
2. There are notches on each head of the motor outboard, aft of the top of the head which 2 metal brackets are mounted for holding the upper ox sensor wires, These mounts need to be removed and the chuck of aluminum that mounts them to the head cut off in order to clear the firewall on the passenger sides, and the steering column on the driver side. It will force the column down and not align if it chopped off.


3. the rack and pinon needs to be removed and the and the top line input needs to be removed and replaced with a 90 degree line input and you must remake the line. I removed and crushed 4 different lines in including the stock line before I released this, trying different ways.


4. be patient. I put this motor in and took it out 3 times with no issue and the 4th time I did it I changed one thing I did and it pushed the motor over an inch further back and it did not fit right. Had to rip it all out and start over. sooooooooo
04-12-2017, 04:52 PM
#88
New Member
Thread Starter
Spoke with Collins adapters and they are up to the task of doing my shifter.
My trans sits so far back that the entire shift linkage past the u-joint is junk. The are going to take the collar that holds the linkage to the shifter and make me a shifter.
Here is an idea of how short it will be.
Because of Nissan, in their infinite wisdom, decided this was a good idea.
I can not mount the battery upfront. SO I have to redesign this entire block in a manageable way that won't ark closer to the metal surface.
AND FINALLY, some glory shots.
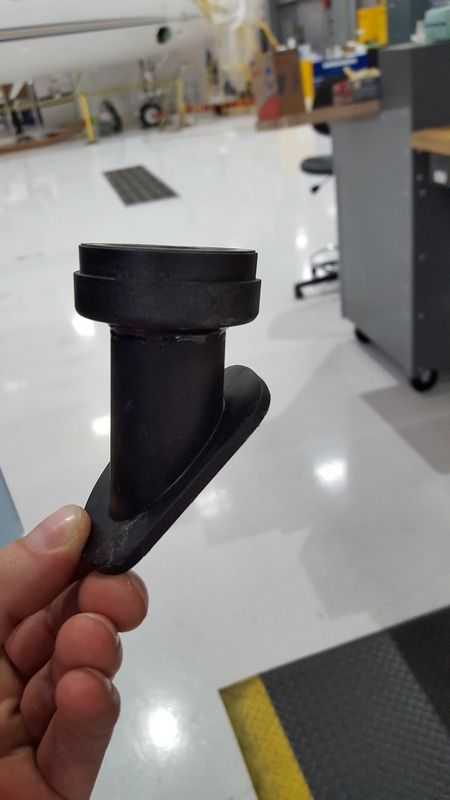
Oh yes and I did shorten the oil fill stack
My trans sits so far back that the entire shift linkage past the u-joint is junk. The are going to take the collar that holds the linkage to the shifter and make me a shifter.
Here is an idea of how short it will be.

Because of Nissan, in their infinite wisdom, decided this was a good idea.

I can not mount the battery upfront. SO I have to redesign this entire block in a manageable way that won't ark closer to the metal surface.
AND FINALLY, some glory shots.


Oh yes and I did shorten the oil fill stack
 05-02-2017, 01:42 PM
#90
Registered User
iTrader: (5)

Join Date: Apr 2008
Location: Cincinnati, Ohio
Posts: 230
Likes: 0
Received 0 Likes
on
0 Posts
I am doing a 6 speed VK in a Frontier for a customer who also made the mistake of using old Dougie Fresh from Fever Racing as well. Word of advice, look up the install process of the tilton. There is no limiter on how far they come out something Doug didnt tell us and he didnt bother to send us the directions that im sure came with the Tilton. If you dont add a stop/adjuster to the clutch pedal it will over extend and blow brake fluid all over the inside of your trans. I am on my 4th time dropping this freaking transmission because of Dougs antics and lack of communication.
05-03-2017, 01:57 AM
#91
New Member
Thread Starter
I did notice that the tilton pulled right out of itself, and was wondering wtf... I read through the manual for it cause I wanted to know the mounting distance and read about the clutch pedal stand off. I was doing my research before going nuts and trying to figure out if I have to use a premade bump stop, or make one, or what if I just thread the pedal adjustment all the way out and slowly go in till it disengages/engages?
I really appreciate the heads up.
Any other tips?
I really appreciate the heads up.
Any other tips?
05-03-2017, 10:00 AM
#92
Registered User
iTrader: (5)
Join Date: Apr 2008
Location: Cincinnati, Ohio
Posts: 230
Likes: 0
Received 0 Likes
on
0 Posts
I did notice that the tilton pulled right out of itself, and was wondering wtf... I read through the manual for it cause I wanted to know the mounting distance and read about the clutch pedal stand off. I was doing my research before going nuts and trying to figure out if I have to use a premade bump stop, or make one, or what if I just thread the pedal adjustment all the way out and slowly go in till it disengages/engages?
I really appreciate the heads up.
Any other tips?
I really appreciate the heads up.
Any other tips?
05-03-2017, 10:23 AM
#93
New Member
Thread Starter
when you put on the flexplate, then the 1" spacer, did you use the oem metal ring between there? This was the 2nd problem we ran into. I would have thought he would have replaced that ring and incorporated it in the making of the spacer as that makes the most sense but that wasn't the case which caused the flexplate to flex back so much (because the spacer was too wide in diameter) it rubbed against the back of the block. Be glad you didn't send your transmission to him. The trans we had sent to him came back with the sensors in hand tight and backwards, he didn't tighten down the lines to the tilton which was the first problem we had as it immediately leaked. Yes maybe we should have checked those but at the same time if you are going to send a customer a fully assembled transmission I would expect it to be ready to go with everything tight. I mean that's just how I would do things. He sent us a clutch that was supposed to be the same as yours but we found out it was actually a clutch for a maxima I mean the list just goes on and on
I did not use the metal ring. I went crank > flexplate > 1" spacer and flywheel.
I am not sure if you saw but i had the vq trigger wheel and crank ring removed and the back of the flywheel milled down.
My understanding of the 1 inch spacer was to offset the 1 in thick part of the adaptor plate bringing the throwout bearing and flywheel back into place for the tilton.
With just my bellhousing on and the full clutch installed, I placed the tilton on the clutch alignment tool, which held it in place, and a flat edge on the back of the bellhousing and measured with a micrometer. I was right in the recommended sweet spot, so I figured I am fine.
Do you want me to send you a copy of the tilton manual?
Did I miss something about the little metal ring?
05-04-2017, 06:21 AM
#94
Registered User
iTrader: (5)
Join Date: Apr 2008
Location: Cincinnati, Ohio
Posts: 230
Likes: 0
Received 0 Likes
on
0 Posts
I did not use the metal ring. I went crank > flexplate > 1" spacer and flywheel.
I am not sure if you saw but i had the vq trigger wheel and crank ring removed and the back of the flywheel milled down.
My understanding of the 1 inch spacer was to offset the 1 in thick part of the adaptor plate bringing the throwout bearing and flywheel back into place for the tilton.
With just my bellhousing on and the full clutch installed, I placed the tilton on the clutch alignment tool, which held it in place, and a flat edge on the back of the bellhousing and measured with a micrometer. I was right in the recommended sweet spot, so I figured I am fine.
Do you want me to send you a copy of the tilton manual?
Did I miss something about the little metal ring?
our setup, Fever racings setup goes: flexplate>metal ring>Fever Racing 1" spacer>flywheel >bolts>clutch
we have given up on the POS Fever Racing setup all together now. Doug initially gave us the same tilton setup and a clutch he claimed was for a 350z but was for a maxima. It was slipping all over the place and the clutch pedal was super soft. To top it off the tilton was leaking. So we bought what looks to be the same clutch as you or similar. Pulled the trans, rebuilt the tilton. Clutch pedal feeling returned to a normal feeling but would not go into gear while running and the tilton started leaking again immediately. Pulled the trans again checked the clearance of the clutch to throwout according to tilton specs with a caliper, tilton was just slightly out of range. Shimmed the tilton back into spec, uninstalled clutch, checked everything, reinstalled clutch and torqued to specs. Reinstalled trans. Still the same **** won't go into gear while running and tilton started leaking again. So at this point either the flywheel he provided is not that of a 350z like he said it was and is hanging up on the clutch or the tilton does not have enough strength to push in the clutch due to the increased surface area of the portion that Doug machined to fit. My money is on the tilton being used for something it wasn't designed to do. Either way I'm not pulling the trans again until we get a better adapter.
05-04-2017, 07:02 AM
#95
New Member
Thread Starter
The small metal plate goes on after the flexplate in order to reinforce the bolting of the flexplate cause it is so thin, the torque converter mounts to the outer flexplate bolts. All auto trans have a metal plate like that over the flex plate for rigidity.
In essence the 1 inche spacer is that metal ring or plate now. That metal ring has nothing to do with a manual setup from my experience doing vh45 swaps in 240sx. You use that metal ring behind the pressure plate to space it off. The flex plate does not need to be spaced off.
Im pretty sure its not supposed to be there.
Do you currently have the metal ring out?
Can you put a micrometer on it for me and I'll do the math.
How old is the setup your working on.
According to doug my tilton was modified for a larger throwout bearing due to issuses he had in the past with the bearing getting caught in the teeth, it is supposed to be the 68mm, I think, throwout bearing from the frontier and not the 350, which is more narrow.
That maybe why I am spaced differently without the ring.
Can you mic the ring for me please, if its out?
05-04-2017, 07:45 AM
#96
New Member
Thread Starter
Oh, if you had a maxima clutch, your chances of having a maxima flywheel are very high. The vq35de fwd setup is much more shallow than the rwd.
I could send you part numbers of my stuff.
I could send you part numbers of my stuff.
05-04-2017, 08:06 AM
#97
Registered User
iTrader: (5)
Join Date: Apr 2008
Location: Cincinnati, Ohio
Posts: 230
Likes: 0
Received 0 Likes
on
0 Posts
Right. I don't think you understanding what I'm saying. How you have described the 1" spacer being used in your setup is exactly how I thought the setup was used initially. What we found is the spacer is wider in diameter than the original metal ring which caused the flex plate to bend here maybe this pic will better explain what I'm saying
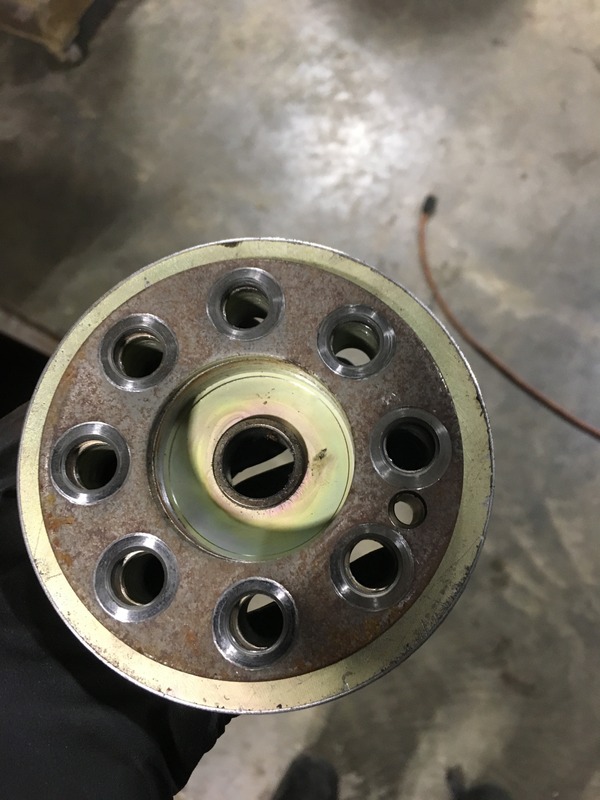
Being that it's so wide it pushes down where the timing ring starts to come away from the flexplate

Being that it's so wide it pushes down where the timing ring starts to come away from the flexplate
Last edited by SinisterSntra91; 05-04-2017 at 08:12 AM.
05-04-2017, 08:19 AM
#98
New Member
Thread Starter
Right. I don't think you understanding what I'm saying. How you have described the 1" spacer being used in your setup is exactly how I thought the setup was used initially. What we found is the spacer is wider in diameter than the original metal ring which caused the flex plate to bend here maybe this pic will better explain what I'm saying
Being that it's so wide it pushes down where the timing ring starts to come away from the flexplate
Being that it's so wide it pushes down where the timing ring starts to come away from the flexplate
I see what your saying now though. Width. Not depth. I got ya. I was not seeing an issue and I made to spin the motor a few times and didnt see or here a problem.

 05-04-2017, 08:45 AM
#100
Registered User
iTrader: (5)
Join Date: Apr 2008
Location: Cincinnati, Ohio
Posts: 230
Likes: 0
Received 0 Likes
on
0 Posts
Time mostly. Above all when you spend the kind of money the customer spent on the setup it shouldn't have to be done. He's filing a PayPal claim because as you know getting Doug on the phone is not easy. At this point it's either the wrong flywheel or the tilton that's the issue. Either thing is going to cost more money which he doesn't want to spend any more on a over engineered full of flaws adapter. When there is a absolute better way