A/C Lines
 03-26-2012, 06:50 PM
#1

Need some help, tried searching. My JWT Pop charger successfully rubbed enough and put a hole in my High Pressure A/C line. My plan is to replace the line myself and then have it re-charged, however I can't for the freaking life of me figure out what the high pressure line is called or any type of DIY walkthrough. Is it the Discharge line or the Suction line? Thanks for any help or tips you can provide.
As you can imagine I'm pretty freaking bummed this happened...Just hated I didn't run across this a year ago when I got my intake...

As you can imagine I'm pretty freaking bummed this happened...Just hated I didn't run across this a year ago when I got my intake...
 03-27-2012, 02:26 AM
#3
After doing some research it's looking like it's not the Discharge line or the Suction line...
Here is the Suction Line reference (#15 within image)
http://www.DealerDirectParts.com/200...502-350z-2.htm
Here is the Discharge Line reference (#11 within image)
http://www.DealerDirectParts.com/200...504-350z-2.htm
What I need is #13 in the images...The high pressure hard line...is this a dealer only part? I really need some help on this, especially if there's a DIY anywhere...
03-27-2012, 03:01 AM
#4
More and more I hunt the more I find...Mods, if you want to keep this thread open for reference it may be a good idea...I never could find what I needed on here
Per the Service manual (for my '03) I need High-Pressure Pipe 1 in the engine compartment.
I'll do my best to turn this into a DIY w/images so people can do this themselves. Procedure seems straightforward and shouldn't be too much of a pain. Most of the work appears to be removal of pieces to get to it.
Updates to come.
03-31-2012, 10:10 AM
#5
Alright guys, did the line swap today so figured I'd throw a few pics and some info on here...
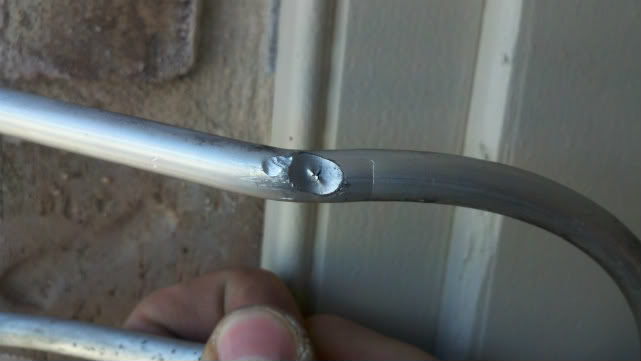
Problem: Aftermarket intake vibrated against the line and caused this...
You will need this part (It is a dealer part only, I got it through a buddy in parts for about $45)...
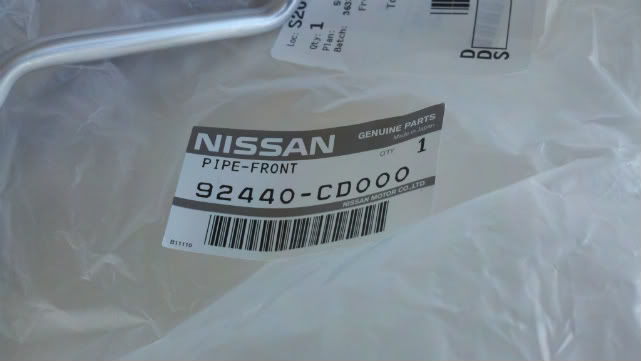
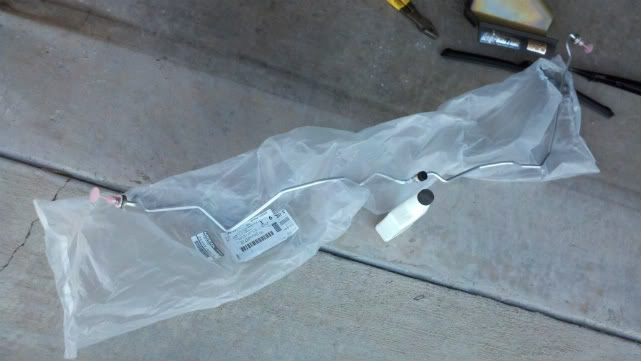
Looks like this...
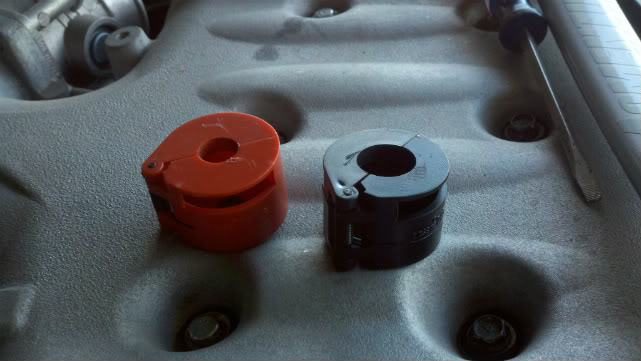
Use THESE quick disconnect tools (They have a "lip" that pushes back the garter spring and allows for the connection to disconnect)...
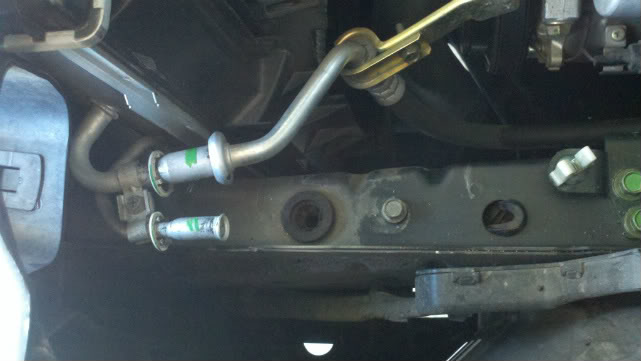
Remove intake and disconnect here with red disconnect tool...BE PATIENT, rotate your disconnect tool as you pull towards the rear of the car...
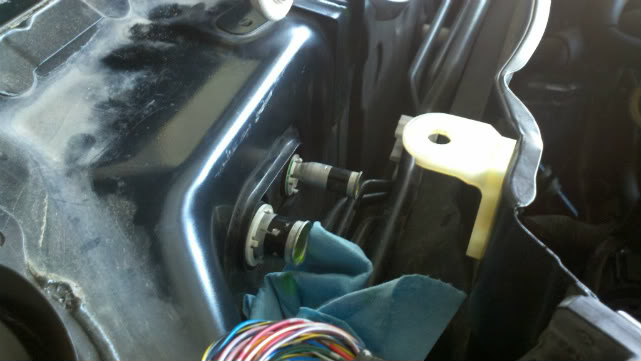
Disconnect the larger line with the black disconnect tool FIRST and move away gently...this will allow a little more room to work on the smaller line next to the firewall (I would suggest cutting off some of the excess line of your ruptured line so it's not in the way)...then use the red disconnect tool and pull towards the front of the car...remember to be patient
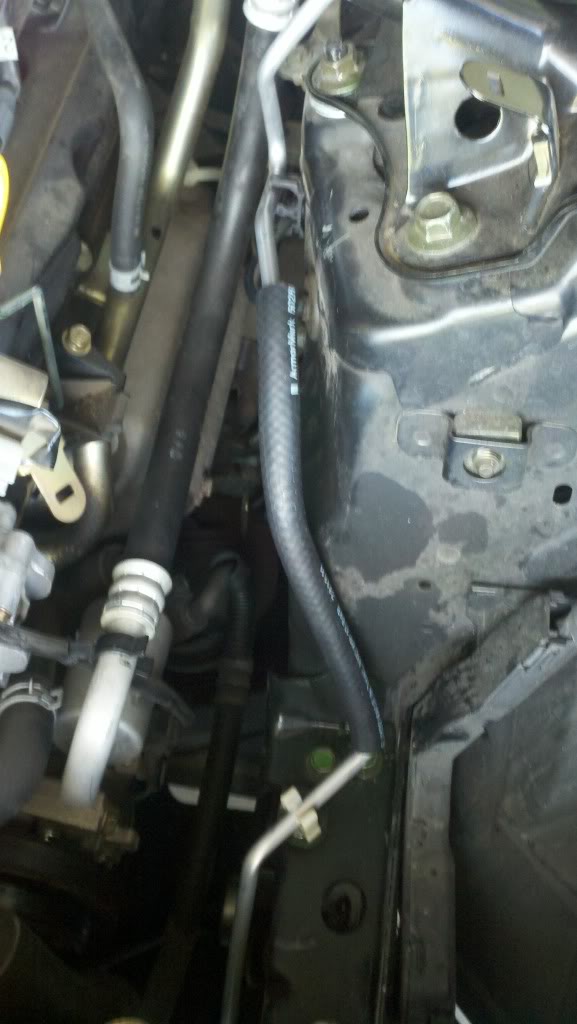
Take your time, and install new line...place a small amount of compressor oil on the o-rings on each end...the line will audibly click into place...
I would HIGHLY recommend doing this if you intend to keep your aftermarket intake...
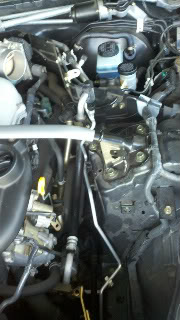
Re-assemble your engine bay...
All in all, this job wasn't too difficult...however, it is a fragile line, so be sure to just chill out and take your time...I CAN'T STRESS THAT ENOUGH. Everything will fit and come apart with patience. Add some rubber hose to parts you think may come into contact with the new line. If this happens to you, save some money and time and replace the line yourself! I'm going to have it re-charged at the dealer, but I probably saved some pricey labor costs doing this myself.
Hope this was helpful!
Problem: Aftermarket intake vibrated against the line and caused this...
You will need this part (It is a dealer part only, I got it through a buddy in parts for about $45)...
Looks like this...
Use THESE quick disconnect tools (They have a "lip" that pushes back the garter spring and allows for the connection to disconnect)...
Remove intake and disconnect here with red disconnect tool...BE PATIENT, rotate your disconnect tool as you pull towards the rear of the car...
Disconnect the larger line with the black disconnect tool FIRST and move away gently...this will allow a little more room to work on the smaller line next to the firewall (I would suggest cutting off some of the excess line of your ruptured line so it's not in the way)...then use the red disconnect tool and pull towards the front of the car...remember to be patient
Take your time, and install new line...place a small amount of compressor oil on the o-rings on each end...the line will audibly click into place...
I would HIGHLY recommend doing this if you intend to keep your aftermarket intake...
Re-assemble your engine bay...
All in all, this job wasn't too difficult...however, it is a fragile line, so be sure to just chill out and take your time...I CAN'T STRESS THAT ENOUGH. Everything will fit and come apart with patience. Add some rubber hose to parts you think may come into contact with the new line. If this happens to you, save some money and time and replace the line yourself! I'm going to have it re-charged at the dealer, but I probably saved some pricey labor costs doing this myself.
Hope this was helpful!
03-31-2012, 11:27 AM
#6
Registered User
iTrader: (59)
Join Date: Feb 2007
Location: Raleigh, North Carolina
Posts: 8,517
Likes: 0
Received 4 Likes
on
4 Posts
same thing happened to one of my Zs. bought the part brand new from nissan for about 185 bucks, bought a special tool to pop off the ends of the lines. wans't too hard t all if you are mechanically inclined. then go get it recharged for about 100 bucks. costly mistake though.
03-31-2012, 11:35 AM
#7
Yeah totally know what you mean...I felt pretty stupid considering all the warning threads were out there about it I just never saw them until I looked it up after having hot air blowing in my face instead of a/c. Way easier than my brakes, test pipes, exhaust etc...
Trending Topics
04-03-2012, 08:50 AM
#8
Followup...I'm getting the a/c recharged later today...but this morning I noticed that I can't hear the a/c pump kicking on anymore, that audible click and change of rpm's is gone. Is this a fuse or relay? When the line was ruptured with no freon in the system I could still hear it kicking on...all I did was replace the line and now I can't hear it kicking on, is this a safety thing that doesn't allow it to come on when the system is completely empty? Kind of lost on this one
 04-03-2012, 01:33 PM
#11
ah roger, thanks guys. and yes I confirmed with them they will be vacuuming the whole system first. It's actually a tech up at Nissan, I just got the hookup off the books. A/C vacuum, recharge, and mount and balance my new wheels/tires all for $100. Chaching
02-12-2013, 03:22 PM
#12
Registered User

i would like to bump this tread because i spend at least an hour looking for the part number,and so far is the best post that i could find,good job OP,i just did the same job myself ,thanks a lot
08-19-2014, 03:56 PM
#13
Registered User

Join Date: May 2011
Location: Sacramento
Posts: 12
Likes: 0
Received 0 Likes
on
0 Posts
Do you guys know what the other line is called right next to it?? The fatter line? That's the one that popped off in mine after I added a jwt but I think it was because it didn't have that looped bracket holding it in place.
07-28-2016, 05:14 AM
#14
Registered User

I'll be doing this, this weekend. Thanks for the write up. They actually have splice kits now for the black rubber hose. I'll be splicing that one together and replacing the high pressure line.
 07-14-2023, 01:49 PM
#16
New Member

Join Date: Jan 2023
Location: utah
Posts: 2
Likes: 0
Received 0 Likes
on
0 Posts
Alright guys, did the line swap today so figured I'd throw a few pics and some info on here...
Problem: Aftermarket intake vibrated against the line and caused this...
Attachment 433726
You will need this part (It is a dealer part only, I got it through a buddy in parts for about $45)...
Attachment 433727
Looks like this...
Attachment 433728
Use THESE quick disconnect tools (They have a "lip" that pushes back the garter spring and allows for the connection to disconnect)...
Attachment 433729
Remove intake and disconnect here with red disconnect tool...BE PATIENT, rotate your disconnect tool as you pull towards the rear of the car...
Attachment 433730
Disconnect the larger line with the black disconnect tool FIRST and move away gently...this will allow a little more room to work on the smaller line next to the firewall (I would suggest cutting off some of the excess line of your ruptured line so it's not in the way)...then use the red disconnect tool and pull towards the front of the car...remember to be patient
Attachment 433731
Take your time, and install new line...place a small amount of compressor oil on the o-rings on each end...the line will audibly click into place...
Attachment 433732
I would HIGHLY recommend doing this if you intend to keep your aftermarket intake...
Attachment 433733
Re-assemble your engine bay...
All in all, this job wasn't too difficult...however, it is a fragile line, so be sure to just chill out and take your time...I CAN'T STRESS THAT ENOUGH. Everything will fit and come apart with patience. Add some rubber hose to parts you think may come into contact with the new line. If this happens to you, save some money and time and replace the line yourself! I'm going to have it re-charged at the dealer, but I probably saved some pricey labor costs doing this myself.
Hope this was helpful!
is there no way to patch this without buying and removing the whole thing. or lay some type of sealant or something over it?


Thread
Thread Starter
Forum
Replies
Last Post
Gruppe-S
Body Interior
13
05-16-2016 10:42 PM

