Write-Up: 53mm Racing Radiator Install (HEAVY PICS)
 11-15-2013, 02:23 AM
#1
Sorry for the delay... 
I had to wait for my film to get developed before I could post this with all of the pictures.
First of all, a little background on what happened on the way to work the other day.
As you know, we had an Excessive Heat Warning for a week solid.
The highest recorded temperature was 121 degrees:

This, along with my supercharger "hot air pump" was all my factory radiator could take.
So there I was stranded on the side of the road with no air conditioning and no more coolant for my engine.

After I got the car back home, I waited and debated about what to get.
Should I get an OEM replacement? Or, perhaps an all aluminum upgrade?
Well, in the end I decided to GO BIG and got the KOYORAD 53mm Racing Radiator.

I also got a full set of silcone hoses and a new 1.3 bar radiator cap as well.

Now for the dismantle...
I was hoping that it was just a hose. But upon closer examination, I found the factory radiator had cracked
on the top where the aluminum meets the plastic. It shot WaterWetter all over the inside of my engine bay.


I jacked the car up and then pulled out the factory fan assembly and the factory radiator core.
I drained the remaining fluid from the block following the directions in the Nissan 350Z Service Manual.
And, I've found that the Max Cat Clumping Kitty Litter makes for a quick and easy cleanup.


The KOYORAD was nicely wrapped and securely padded inside the box.

I was completely without words when I saw how much bigger the racing unit was compared to the factory core.
My first thought was, how the hell did this thing ever keep my engine cool in the summer?
My second thought was, how the hell is the new one going to fit with my double-stack supercharger pulley?
And, this was where the problems began...
This is as far as the radiator would go in before hitting the pulleys.
And, I couldn't get it to slide up from underneath the car either.
My jack could not lift the front end high enough to get it into place.

I was finally able to get it into place by dropping the passenger side in first and then
rotating it around 90 degrees partially sticking out the bottom of the front bumper.
But first, I had to cut off the tabs for the A/C condenser with my grinder.
There are two bolts at the top on either side, so it's not going anywhere.
Besides, the thickness of the new core kind of "sandwiched" it into place as well.

Once I got that all squared away it was on to the next issue...
How the hell was I going to get the factory fan assembly back in place?
There was barely enough room to fit your hand between the new radiator core and the pulleys.
Yet, there was PLENTY of room on either end - where the edges meet the headlights.

Why couldn't they have made the stupid thing curved - like the front of the car?
That's how my 53mm aluminum FMIC is - designed to fit directly behind the bumper. What's the difference?
It works just fine. So, I tried cramping down the middle part to see if I could get the center to bend a little.
But, it was too thick. Clearly, I was going to need A LOT more pressure just in the middle.

So, this got me thinking...
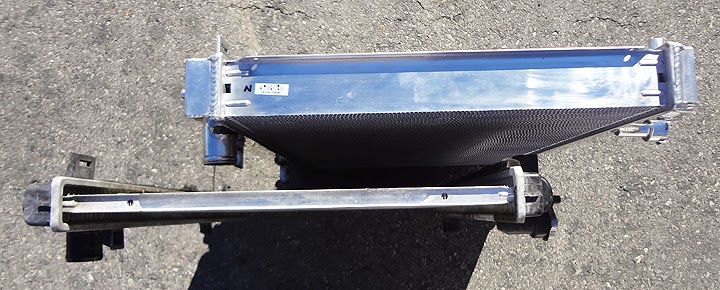
Using some of the thick corrugated packing material from the shipping box,
I was able to construct a cardboard "mock up" of the new radiator.
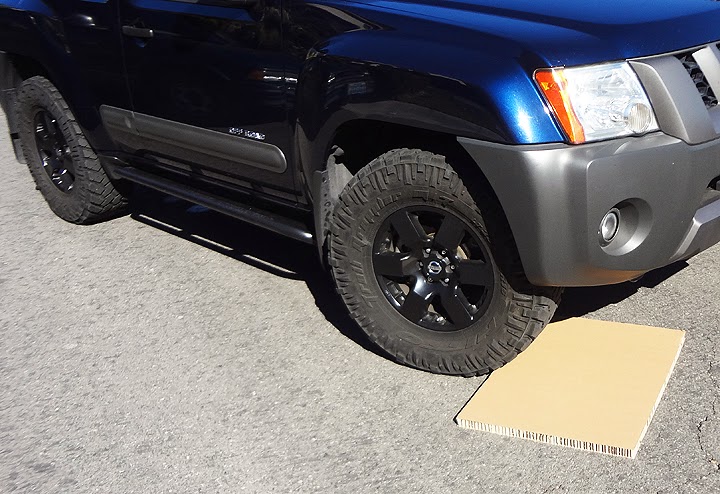
I was then able to slightly curve the material using the front wheel of my XTerra.

Perfect. Now for the test fit...
After about 2 hours, I had everything back out and the carboard "mock up" in place.
I was even able to test fit the factory fan assembly as well. Next up, the new raditor!!!

I was a bit concerned about damage. So, I aired the tire down just a little bit.
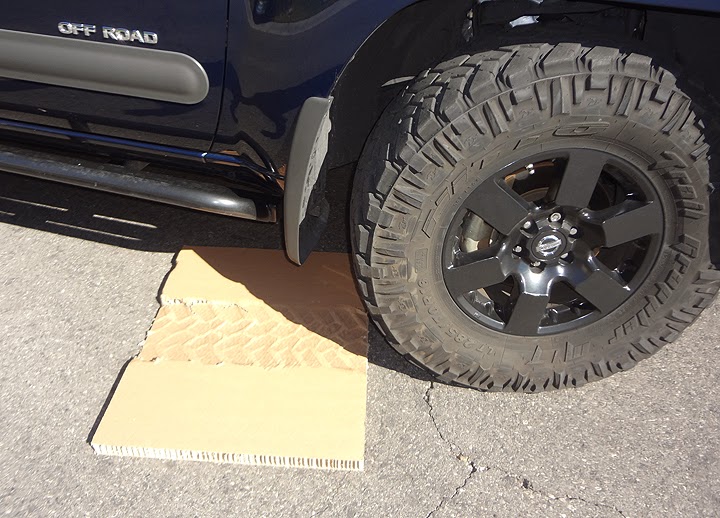
Plus, I didn't want it to slide around while I was trying to roll over it evenly.


PERFECT!!! I couldn't have wished for a better result!!!

Now for the final assembly and pressure test...
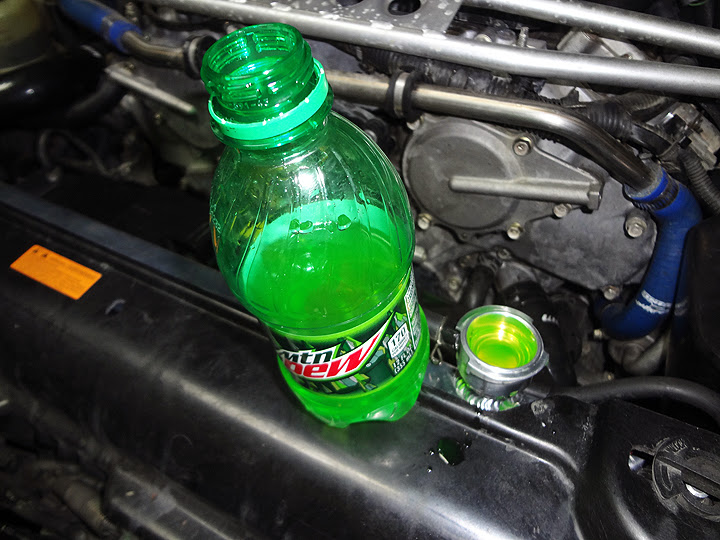
My thanks to RogerThat for his "Mt. Dew Burping Trick"
for those of us who do not have a Lisle Spill-Free Funnel.
Although there were A LOT more modifications than I orginally expected for a "Direct OEM Drop-In"
I am happy to say my 350Z is up and running again with no more overheating issues!!!

I had to wait for my film to get developed before I could post this with all of the pictures.
First of all, a little background on what happened on the way to work the other day.
As you know, we had an Excessive Heat Warning for a week solid.
The highest recorded temperature was 121 degrees:
This, along with my supercharger "hot air pump" was all my factory radiator could take.
So there I was stranded on the side of the road with no air conditioning and no more coolant for my engine.
After I got the car back home, I waited and debated about what to get.
Should I get an OEM replacement? Or, perhaps an all aluminum upgrade?
Well, in the end I decided to GO BIG and got the KOYORAD 53mm Racing Radiator.
I also got a full set of silcone hoses and a new 1.3 bar radiator cap as well.
Now for the dismantle...
I was hoping that it was just a hose. But upon closer examination, I found the factory radiator had cracked
on the top where the aluminum meets the plastic. It shot WaterWetter all over the inside of my engine bay.
I jacked the car up and then pulled out the factory fan assembly and the factory radiator core.
I drained the remaining fluid from the block following the directions in the Nissan 350Z Service Manual.
And, I've found that the Max Cat Clumping Kitty Litter makes for a quick and easy cleanup.
The KOYORAD was nicely wrapped and securely padded inside the box.
I was completely without words when I saw how much bigger the racing unit was compared to the factory core.
My first thought was, how the hell did this thing ever keep my engine cool in the summer?
My second thought was, how the hell is the new one going to fit with my double-stack supercharger pulley?
And, this was where the problems began...
This is as far as the radiator would go in before hitting the pulleys.
And, I couldn't get it to slide up from underneath the car either.
My jack could not lift the front end high enough to get it into place.
I was finally able to get it into place by dropping the passenger side in first and then
rotating it around 90 degrees partially sticking out the bottom of the front bumper.
But first, I had to cut off the tabs for the A/C condenser with my grinder.
There are two bolts at the top on either side, so it's not going anywhere.
Besides, the thickness of the new core kind of "sandwiched" it into place as well.
Once I got that all squared away it was on to the next issue...
How the hell was I going to get the factory fan assembly back in place?
There was barely enough room to fit your hand between the new radiator core and the pulleys.
Yet, there was PLENTY of room on either end - where the edges meet the headlights.
Why couldn't they have made the stupid thing curved - like the front of the car?
That's how my 53mm aluminum FMIC is - designed to fit directly behind the bumper. What's the difference?
It works just fine. So, I tried cramping down the middle part to see if I could get the center to bend a little.
But, it was too thick. Clearly, I was going to need A LOT more pressure just in the middle.
So, this got me thinking...
Using some of the thick corrugated packing material from the shipping box,
I was able to construct a cardboard "mock up" of the new radiator.
I was then able to slightly curve the material using the front wheel of my XTerra.
Perfect. Now for the test fit...
After about 2 hours, I had everything back out and the carboard "mock up" in place.
I was even able to test fit the factory fan assembly as well. Next up, the new raditor!!!
I was a bit concerned about damage. So, I aired the tire down just a little bit.
Plus, I didn't want it to slide around while I was trying to roll over it evenly.
PERFECT!!! I couldn't have wished for a better result!!!
Now for the final assembly and pressure test...
My thanks to RogerThat for his "Mt. Dew Burping Trick"
for those of us who do not have a Lisle Spill-Free Funnel.
Although there were A LOT more modifications than I orginally expected for a "Direct OEM Drop-In"
I am happy to say my 350Z is up and running again with no more overheating issues!!!
 11-15-2013, 02:44 AM
#2
Super Moderator
MY350Z.COM
MY350Z.COM


iTrader: (8)
Glad it worked out, guess some measuring should have happened.


Trending Topics
11-18-2013, 08:40 PM
#9
Registered User

Join Date: Nov 2013
Location: vallejo
Posts: 3
Likes: 0
Received 0 Likes
on
0 Posts
Having same cooling issues but I only have access to a ford ranger. Should I go and rent a truck like the one in your write up or can I just use my ranger and add sang bags to the bed.
11-18-2013, 10:22 PM
#10
You could probably just add dirt, rocks or bricks to your Ranger, but then you would have to backup over the radiator.
I'm not sure that would work the same - as I drove FORWARD over the radiator to make sure the "curved"
part was at the top of the radiator. You know, the middle part just this side of the filler neck.
I'm not sure that would work the same - as I drove FORWARD over the radiator to make sure the "curved"
part was at the top of the radiator. You know, the middle part just this side of the filler neck.


Thread
Thread Starter
Forum
Replies
Last Post
Tochigi_236
Feedback & Suggestions for Our Forum
8
09-27-2015 03:40 PM