Black suede Baby!!!!...Headliner
 09-23-2009, 08:23 AM
#41
Registered User
iTrader: (78)

Join Date: May 2007
Location: S.A. TX/SO-CAL
Posts: 1,700
Likes: 0
Received 0 Likes
on
0 Posts
Looks good, I need to check it out in person.....
You still painting the roll cage gold???
Rudy I need Erics dremels lol....how many times do I have to ask you sir
You still painting the roll cage gold???
Rudy I need Erics dremels lol....how many times do I have to ask you sir
 09-23-2009, 09:23 AM
#42

Thank yall for the kind words
SA Z-boi,
Well I decided to paint the cage pearl white with gold flakes in it. Since my interior is so dark now with the black headliner I think the white will make it pop. Taking it to my paint guy tonight so hopefully by Friday it will be done.
Side note putting together the DIY right now<<<
SA Z-boi,
Well I decided to paint the cage pearl white with gold flakes in it. Since my interior is so dark now with the black headliner I think the white will make it pop. Taking it to my paint guy tonight so hopefully by Friday it will be done.
Side note putting together the DIY right now<<<
 09-23-2009, 10:02 AM
#44
<<<<Headliner DIY>>>>
Ok there will be no pics for this, since I did not know everyone wanted a DIY for it. Would have taken pics if I knew..
Tools needed:
1. Your hands..
2. Phillips screw driver
3. Flat head screw driver
4. 14mm socket
5. Wrench
Material needed:
1. Black suede (3 yards so you have plenty left over)
2. Du-Pont vinyl black spray paint (you can get it at AutoZone) Buy 2 cans
Step:
1. Start by removing all the weather striping around the door. All you have to do is give it a little pull.
2. Next you will be removing the front two pillars. This is pretty easy, all you have to do is pull at the top and it should pop. Then just remove it by pulling towards your body.
3. This steep will be a little different for you then it was for me. Start by removing the set belt cover to reveal the bolt. Use the 14mm socket and wrench to remove the bolt. Once remove just let the seatbelt fall away from the rear pillar.
4. Time to remove the rear pillars. Just like the fronts give it a little pull until you hear that pop. You will also have to detach the rear panel connected to the pillar. Just enough so you can slide the pillar out from under it.
5. Now we can remove the visors. Pop the cover over the visor where it attaches to the headliner. You should see two screws. Use your Phillips screw driver to remove both screws. Once remover disconnect the wire that is connected to the visors. Now do the same to the other side
6. Remove the visor clips by turning them to the right and then pull out, easy as pie.
7. Next is the glasses holder and light. You are not going to remove it completely just snap it out of place so the headliner becomes lose. All you have to do is give it a little pull until you here a pop and you should be good. Leave it there until you take out your headliner.
8. Now you have to remove the 4 clips in the back of the headliner. Just use your flat head screw driver to pop them out. Bam done.
9. Now the headliner is ready to take out. Open your hatch and turn the headliner to the right or left and pull from there.
10. Now that every thing is out of the car and ready to wrap or paint. Grab a beer and take a break.
11. Take your headliner and pillar to your local Auto Upholstery shop and let them wrap it for you. Should be pretty cheap since you have material and you took it out of the car. It took me 4 tries to find a shop that wanted to use my material but it only cost me $90
12. Now since your headliner is at the shop, you can now paint visors, and other plastic goodies. I gave my visors a good 5 coats of paint so that they were nice and black.
13. Now once every thing is wrapped and painted just do everything in reverse and your now are all black out. Good Job
For $105 you should be pretty darn happy
Last edited by Royal_T; 09-23-2009 at 10:04 AM.


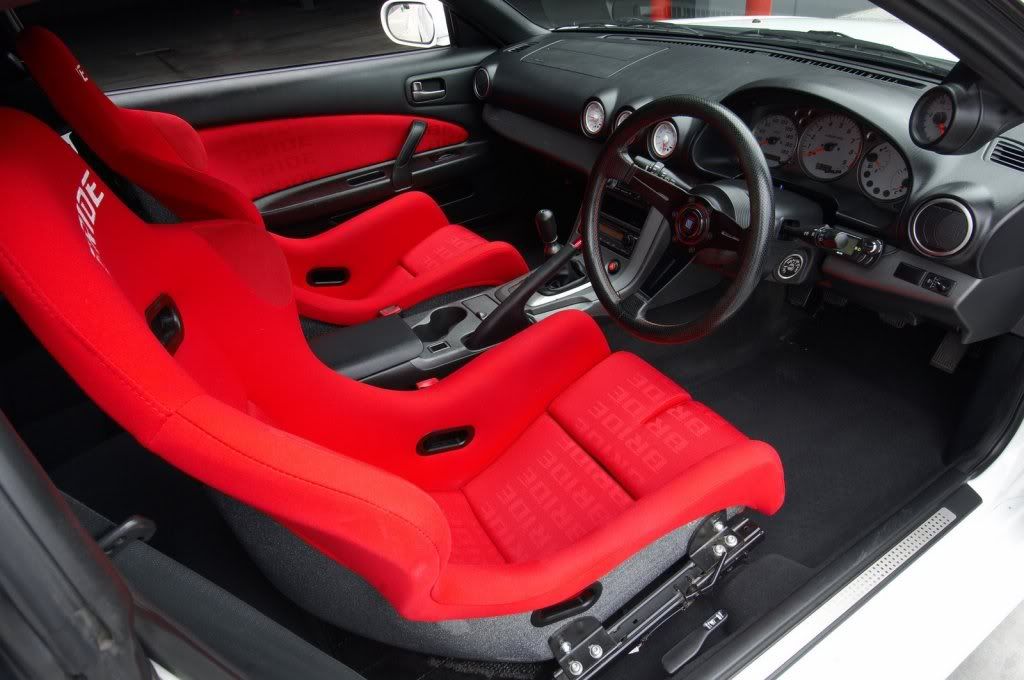 ...kinda looks like my car already...lol

 08-13-2010, 07:14 PM
#59
Registered User
iTrader: (3)

Join Date: Jan 2008
Location: 45 min from the Gaaden
Posts: 1,465
Likes: 0
Received 0 Likes
on
0 Posts
Looks great, I just did a DIY on the headliner over on G35Driver. Doing black suede on mine had been a huge facelift inside.
I used the duplicolor paint on my visors till I can find real black ones.
I used the duplicolor paint on my visors till I can find real black ones.
08-18-2010, 01:56 PM
#60
Finished up my headliner last weekend. Turned out great!
There's really no need to repost another DIY since there is plenty of info and insight in THIS THREAD as well as others.
To remove the headliner, just follow the DIY HERE.
Here are the products you'll need:
Duplicolor: Vinyl and Fabric Paint (Flat Black) - I purchased it at O'Reilly Auto ($7)
3M Hi-Strength 90 Spray Adhesive - Purchased at Home Depot ($12)
Woven Suede - Purchased at a Hancock Fabrics store ($13/yard). I bought 5 yards since I am going to be doing my pillars and the center portion of my dash, but you'd be safe to buy a yard and a half. It takes just over one yard to complete the headliner. DO NOT get the butter suede mentioned in other threads! It looks and feels like absolute dookie compared to this stuff.
Adhesion promoter - I didn't use this but will be when I repaint my plastics since mine are chipping already.
Here are a few tips that I'll share from my experience:
1. Use the 3M 90 adhesive! It has the perfect working time for this project. After spraying, you wait about a minute or so for the glue to get tacky, then just start smoothing the fabric over it. It dries fast and hard enough to hold down any crease that you are smoothing out (you'll just need to press and hold the fabric to cover the tough areas). Also, the three days after I installed my headliner were in the high 90's and not a single spot loosened up.
2. Start with the center 1/3 then work toward one side at a time. Work your way until out you are about an inch from the edge, then cut the excess fabric down to about 1.5-2 inches to wrap over the edge. Also, it helped to cut notches on the fabric that wraps around the back (relieves some of the stress on the fabric).
3. If you happen to mess up a spot, you can peel it up and re-glue. just be careful not to pull the stock headliner apart.
4. This is my best advise: Don't be afraid! When you are getting towards the edges, you will start to doubt that the fabric is going to lie perfectly flat. But just take your time, and don't be scared to force the fabric. Some of the curves at the front of the headliner are a bit complex, but the fabric handled them better than I would have imagined.
5. When you paint the plastic parts, you NEED to clean them first as well as use a primer or adhesion promoter. I am going to have to re-spray some of mine because I didn't prime them. I used the Duplicolor vinyl and fabric paint that I got from O'Reilly auto. And remember that the time you spend to prep everything is much more important than the time you spend spraying.
6. Since I drove my car while the headliner was out, I had to reset the airbag light after I reinstalled everything. The procedure is HERE.
So that's about all I can think of to share. Hope it helps!

