ChriZTT's Pikes Peak White 350Z Build Thread


 04-17-2014, 09:08 PM
#23

Thanks for the kind words!
Thanks Chris. I'd love to have it all sorted by then, lets see if I can make it happen. Finding a tire shop willing to remove TPMS from stock wheels, install them on the Weds, and mount/ balance the new tires is proving more difficult than I thought. After that its just the suspension install and alignment.
Thanks man! This build has been a long time in the making. Plenty of hours spent here on the boards over the years. So, thanks for the kind words.
Thanks man! This build has been a long time in the making. Plenty of hours spent here on the boards over the years. So, thanks for the kind words.
 04-22-2014, 11:18 AM
#26
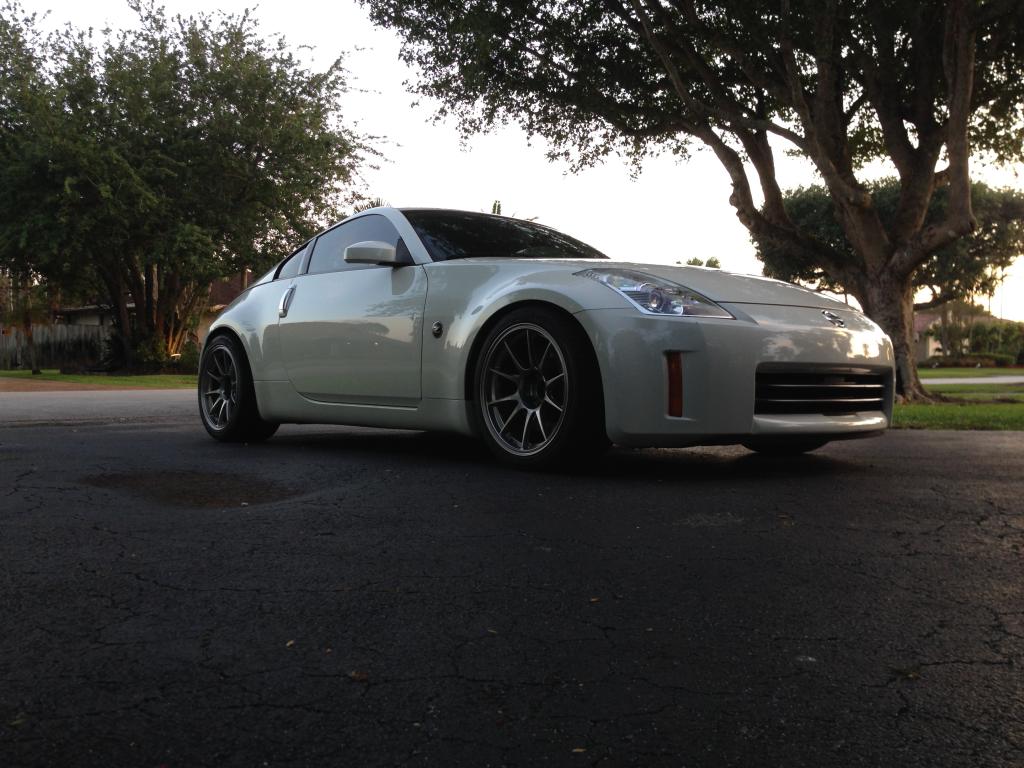
I finally got around to mounting and balancing the new wheels and tires yesterday. I also had the TPMS (tire pressure sensors) swapped over to the Weds and thankfully they are working great!
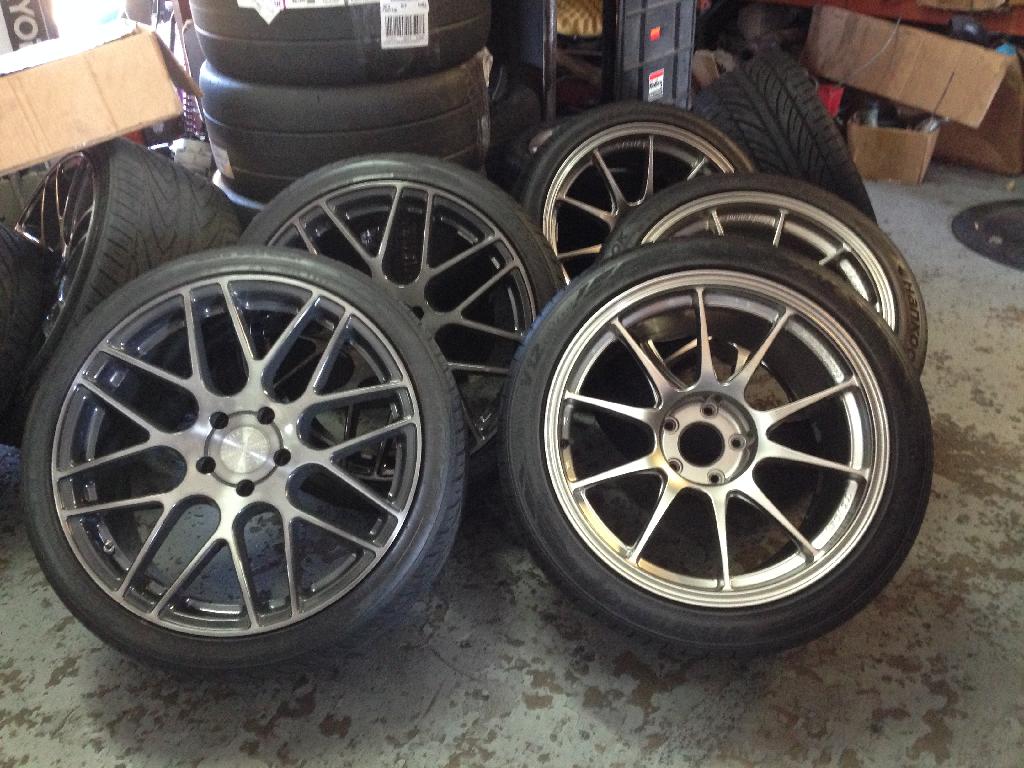
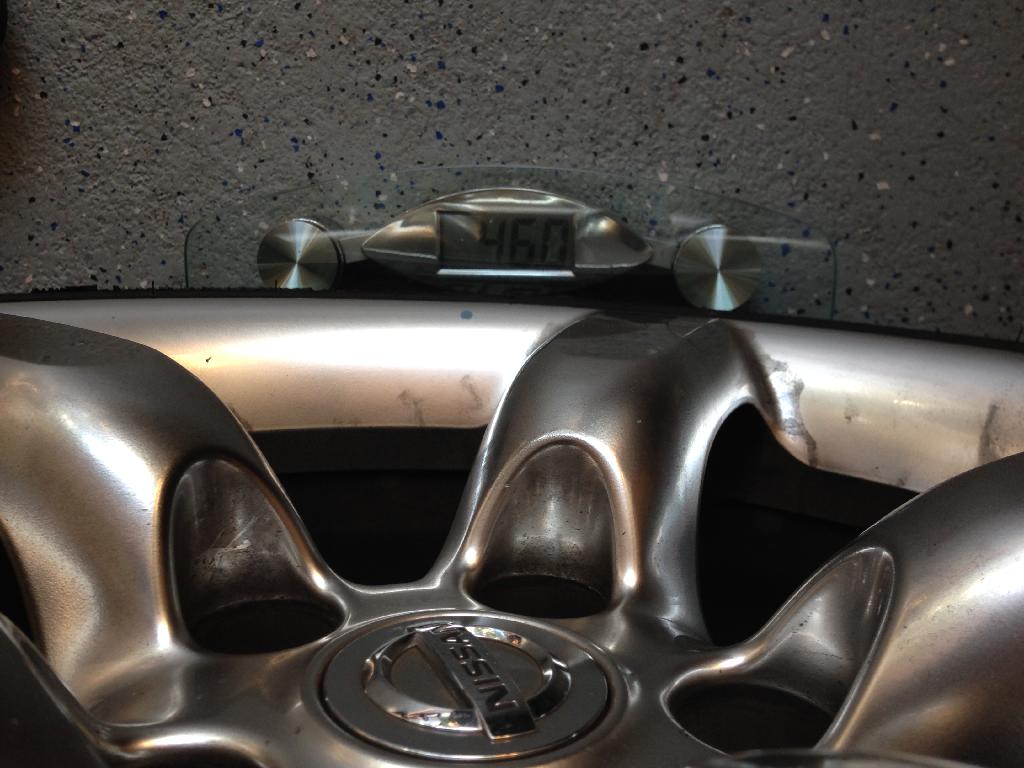
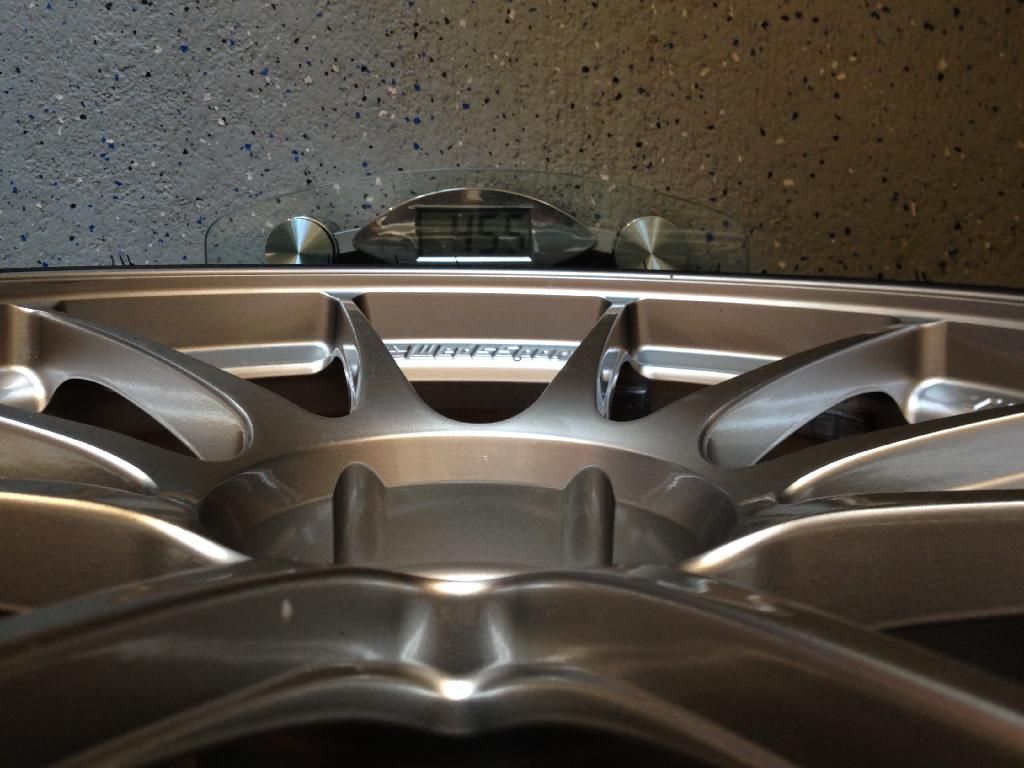
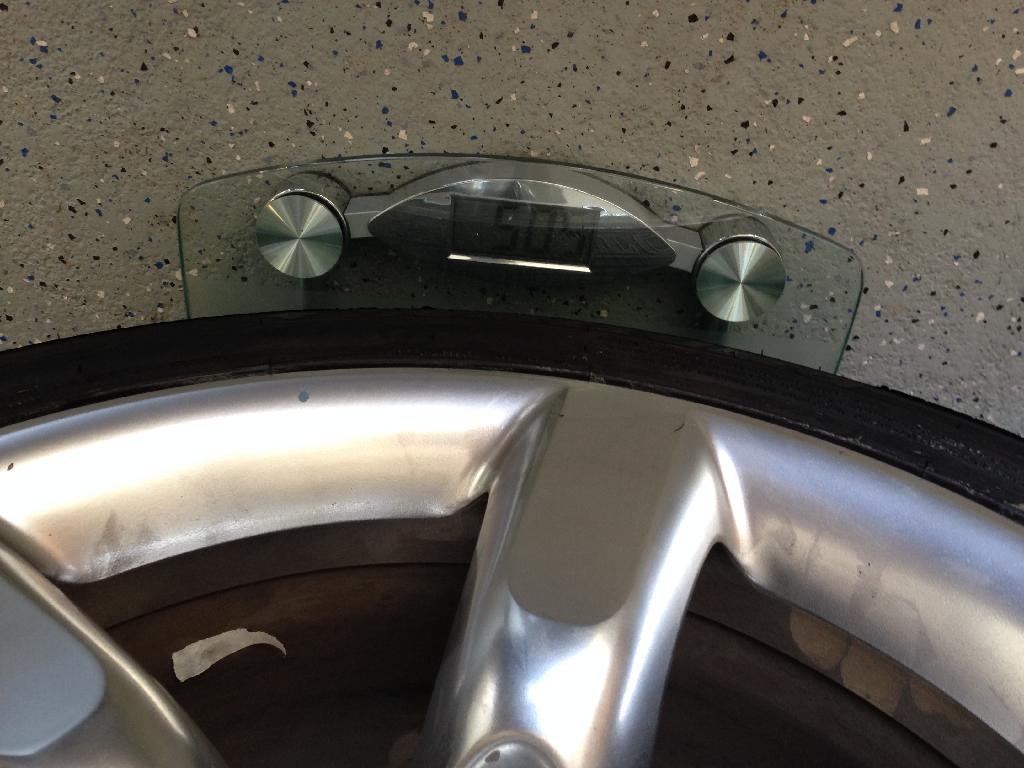
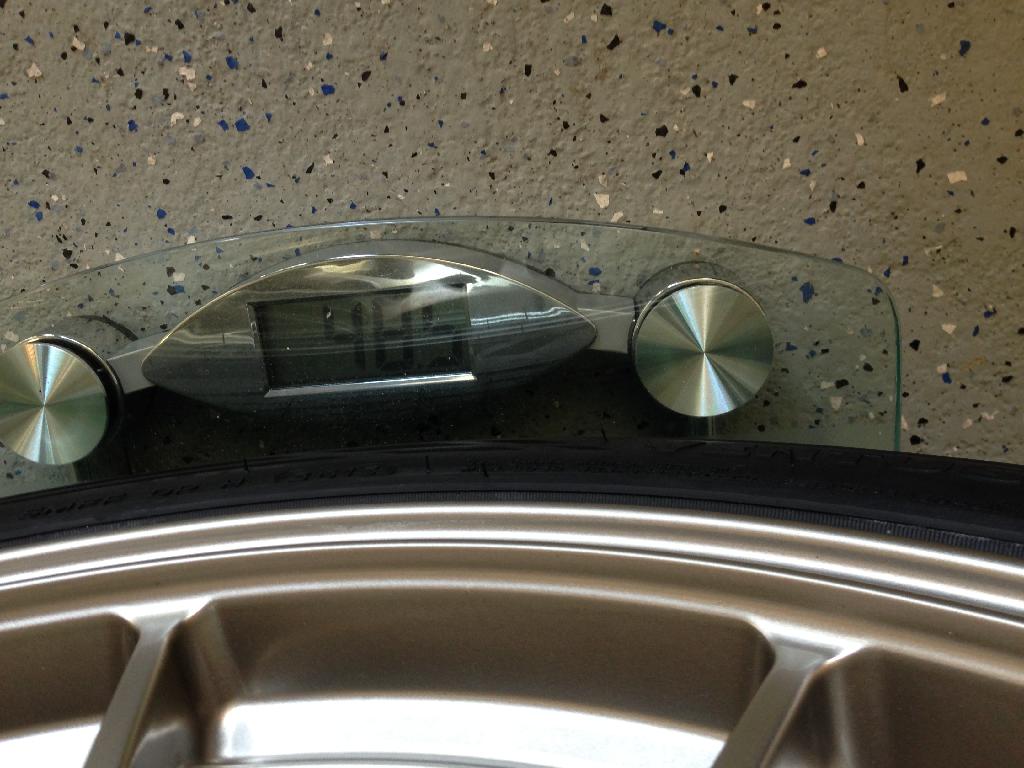
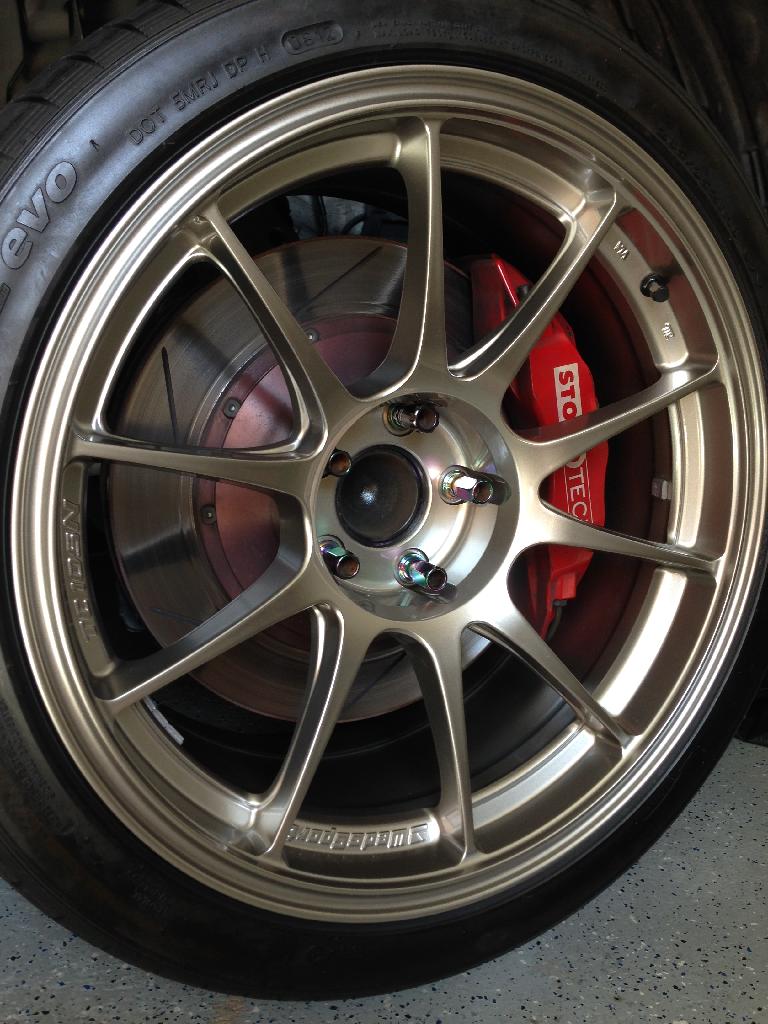
Took out the weight scale to compare stock vs Weds. I saved 2 lbs per corner! Remember '06-'08 stock wheels are 18x8 225/45/18 front and 18x8.5 245/45/18 rear. The Weds are 18x9.5 265/35/18 front and 18x10.5 285/35/18 rear. Here are some pictures for reference. (NOTE: front tires on stock wheels were bald, so I figured a new tire would add at least 0.5 lbs if not more).
Stock Front:
Weds Front:
Stock Rear:
Weds Rear:
Getting started on the suspension install later this week. But I'll leave you with a sneak peak.

Took out the weight scale to compare stock vs Weds. I saved 2 lbs per corner! Remember '06-'08 stock wheels are 18x8 225/45/18 front and 18x8.5 245/45/18 rear. The Weds are 18x9.5 265/35/18 front and 18x10.5 285/35/18 rear. Here are some pictures for reference. (NOTE: front tires on stock wheels were bald, so I figured a new tire would add at least 0.5 lbs if not more).
Stock Front:

Weds Front:

Stock Rear:

Weds Rear:

Getting started on the suspension install later this week. But I'll leave you with a sneak peak.


 04-30-2014, 10:17 PM
#30
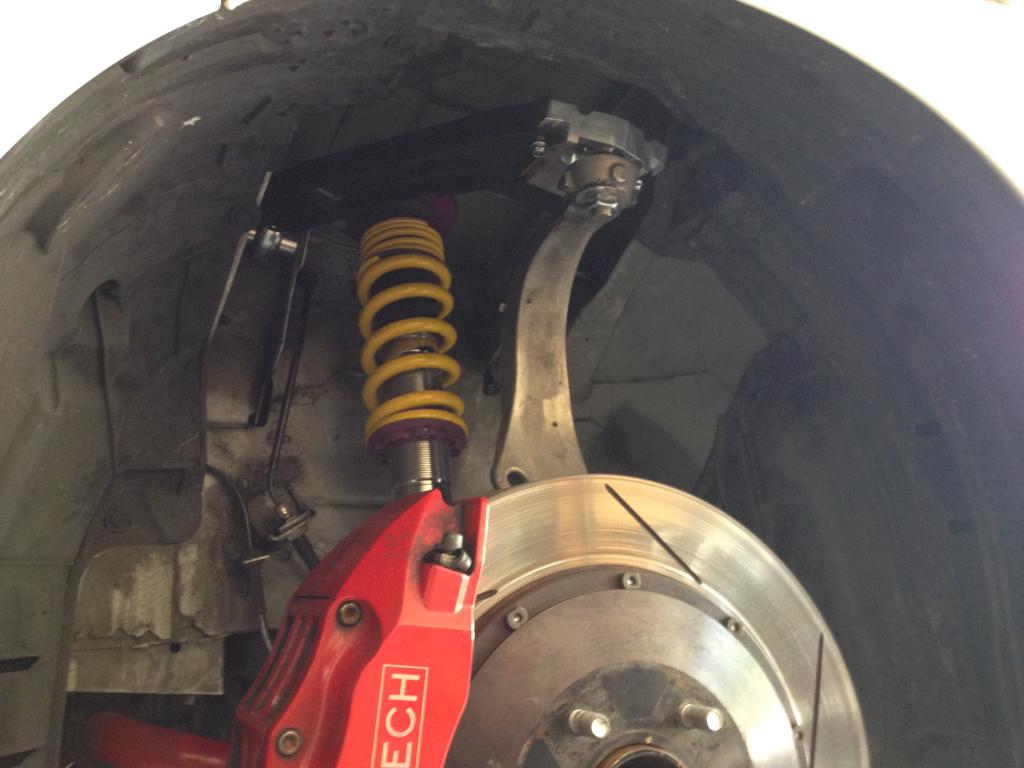
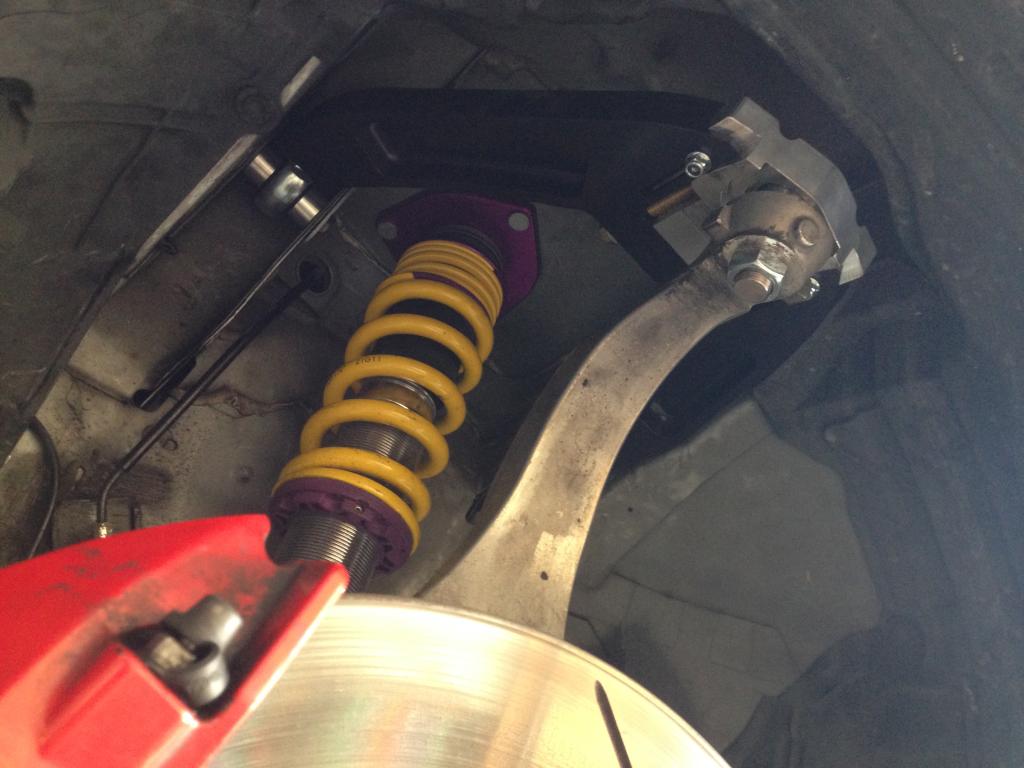
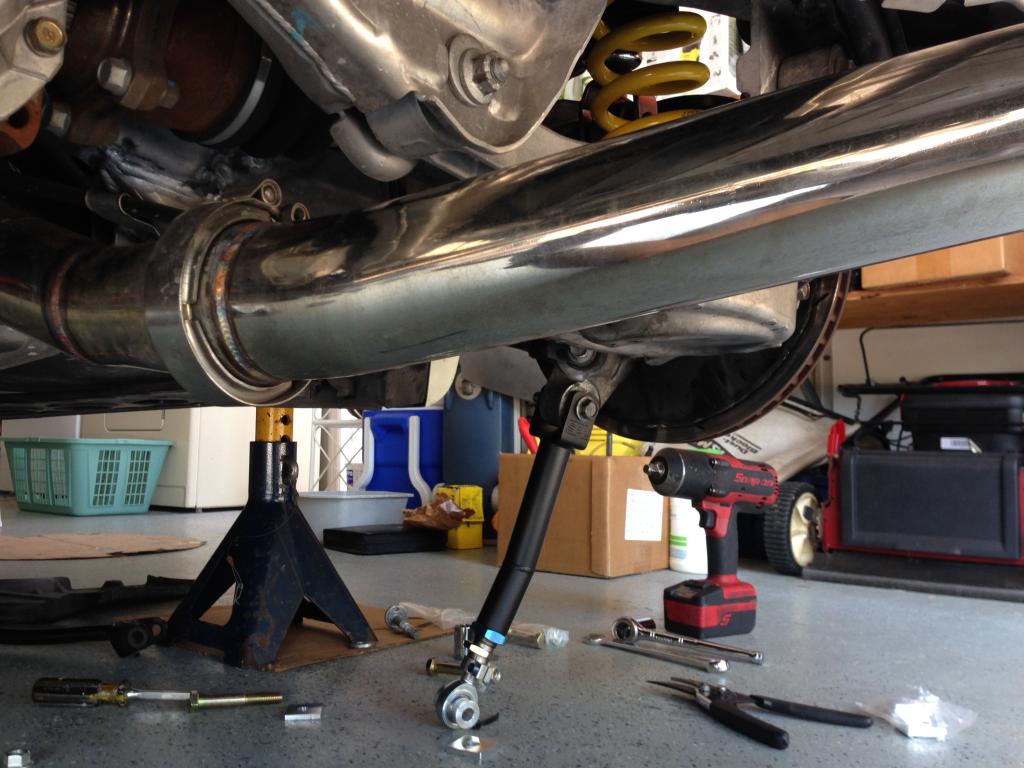
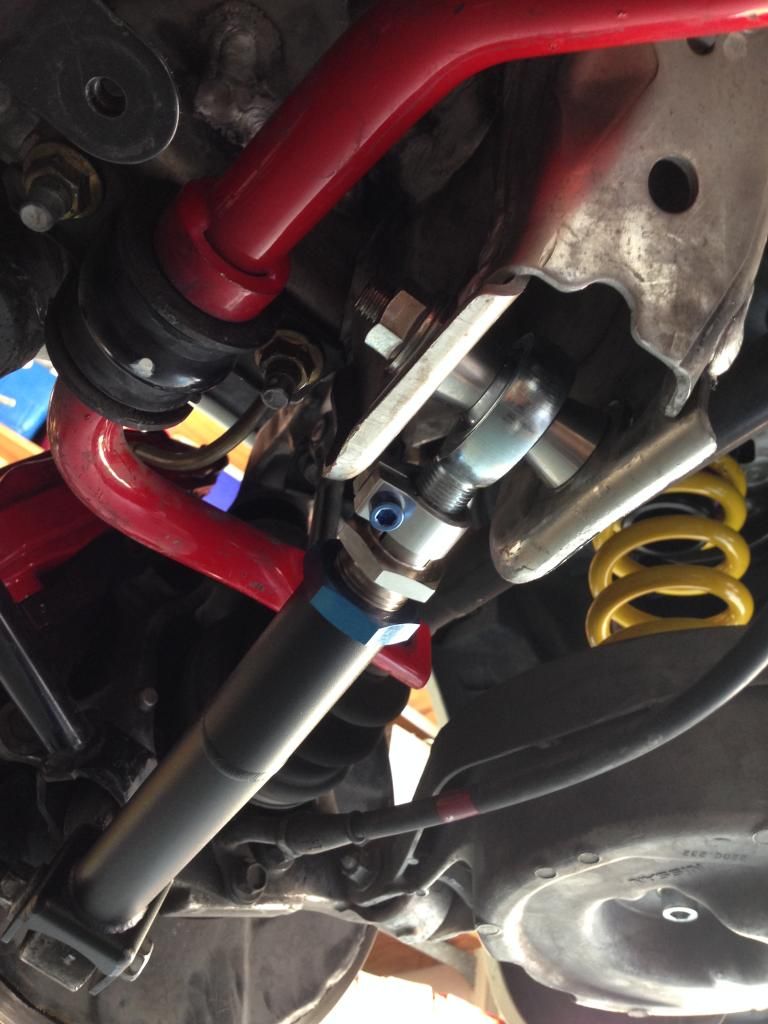
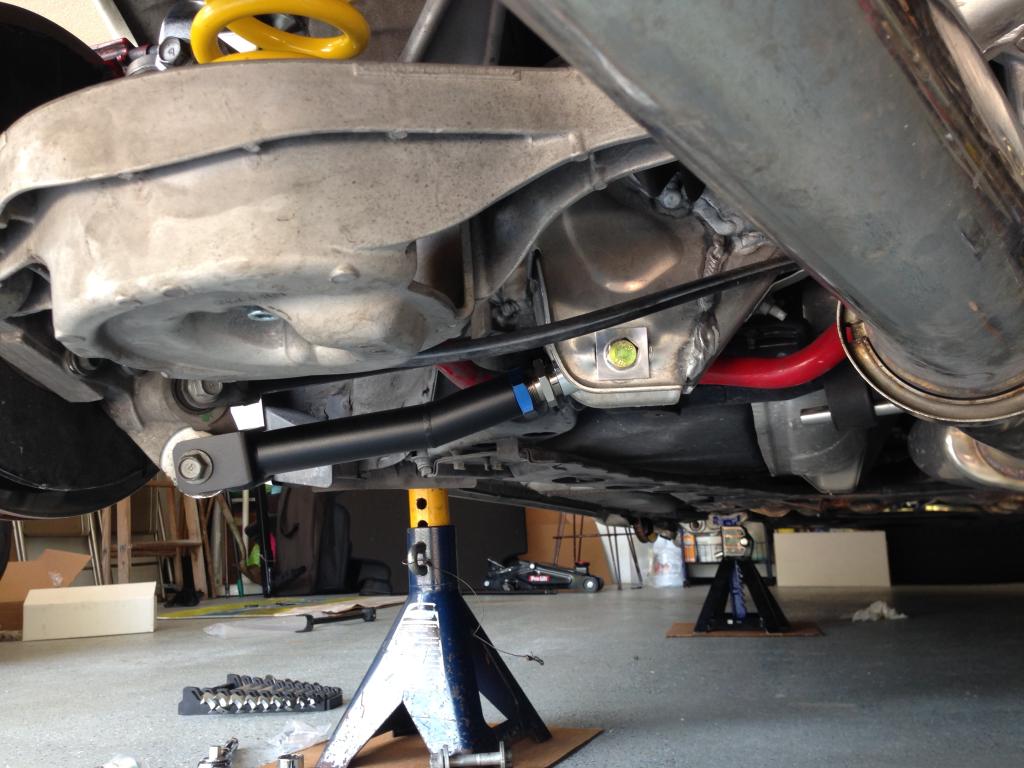
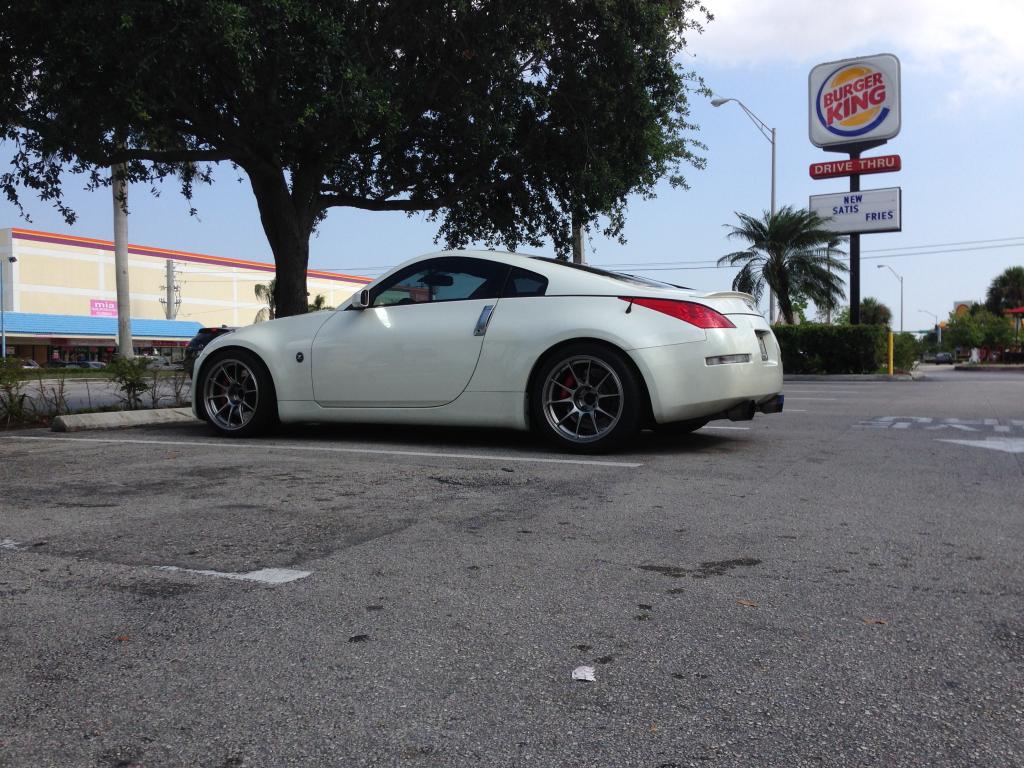
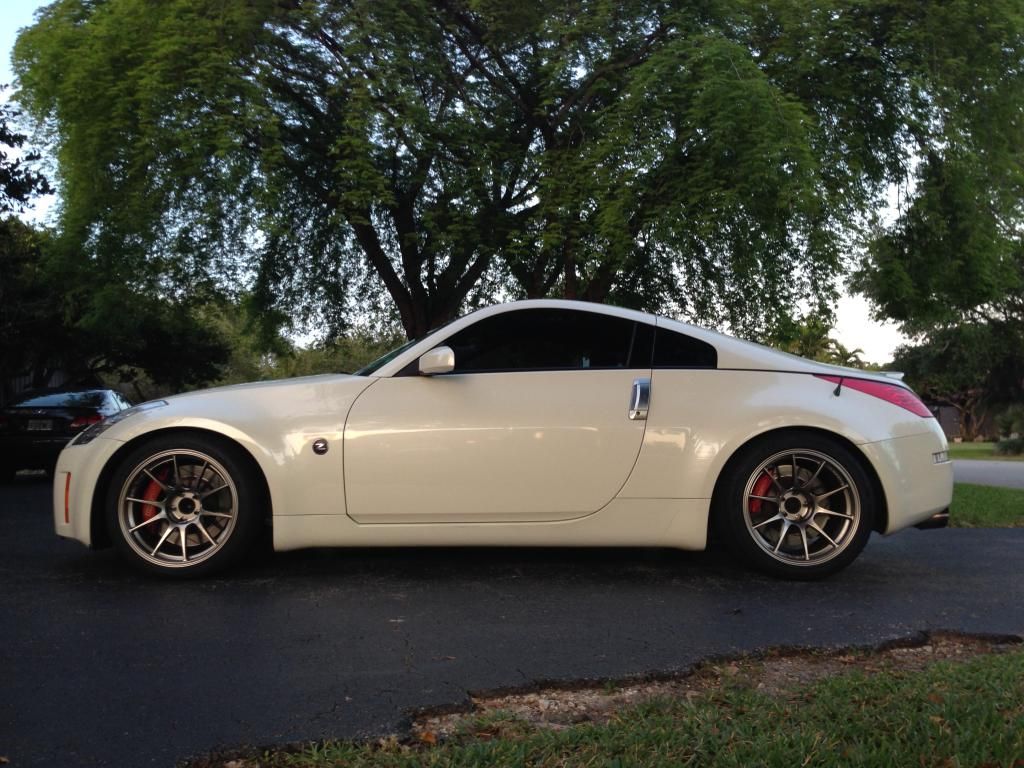
So last week I finally bolted up all the suspension components and set a preliminary ride height. This past Monday I took the car to the alignment rack to dial in my street alignment. Camber, Toe, and front Caster were all put back within spec. My goal for my street alignment was to achieve a solid balance between performance and expected future tire wear characteristics. Overall, with the higher spring rates, wider tires, and lighter wheels the car feels far more nimble, precise, and composed in the corners. This is a huge improvement and I couldn't be more pleased. Further fine tuning the suspension is something I am looking forward to doing in the future. It can be a lengthy trial and error process because so many variables have to be considered, but I'm in no rush. It'll definitely be an awesome learning experience.
Regarding the installation of the suspension, it was pretty straight forward and a lot of fun to get done. As with all the work I've ever done on the car, once your done the feelings of satisfaction and pride are irreplaceable. Here are some of the pictures from the install.
A before and after of the Front Left side of the suspension:

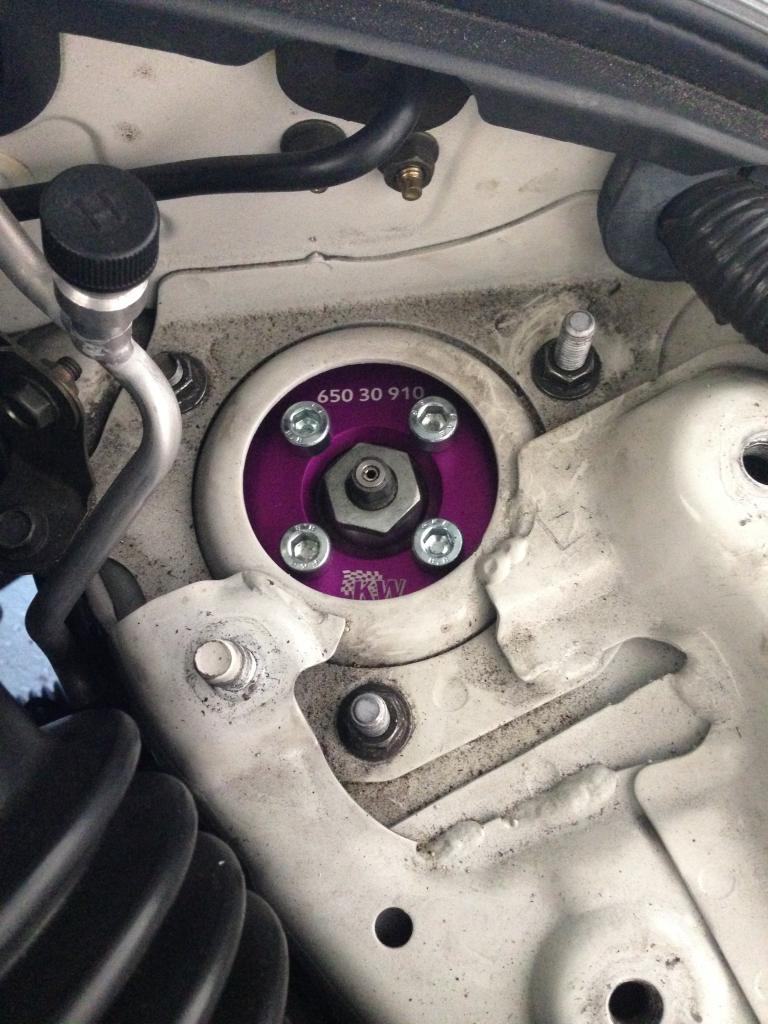
Fitting the new springs to the Right Rear spring bucket:
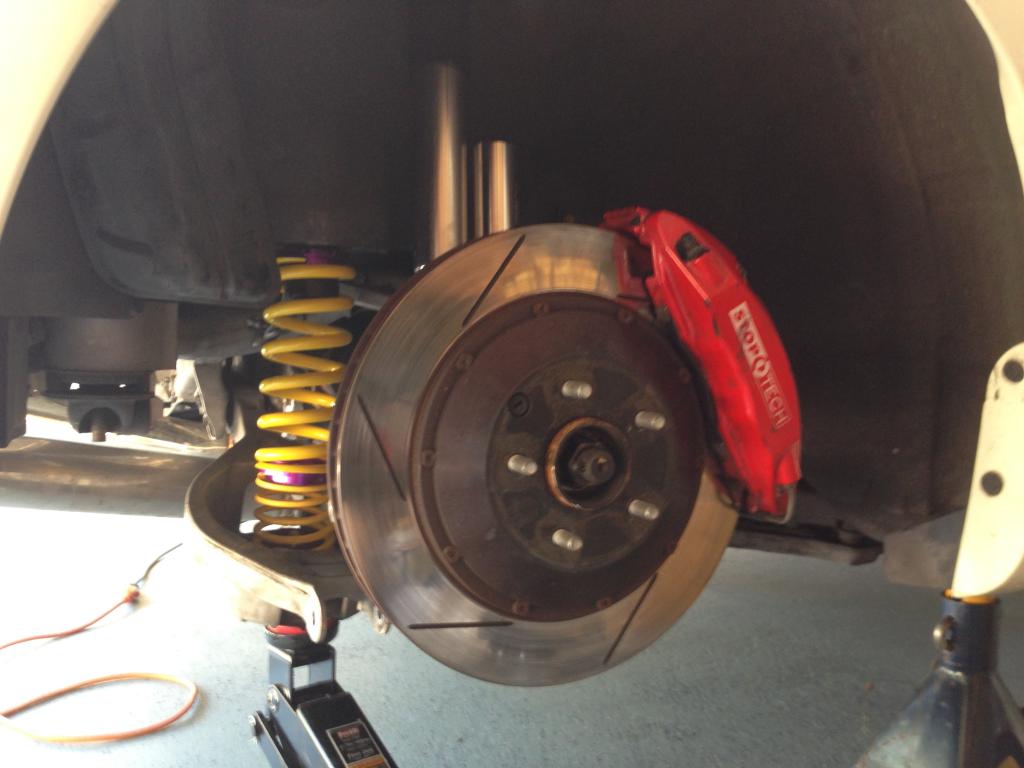
Completed Left Rear side:
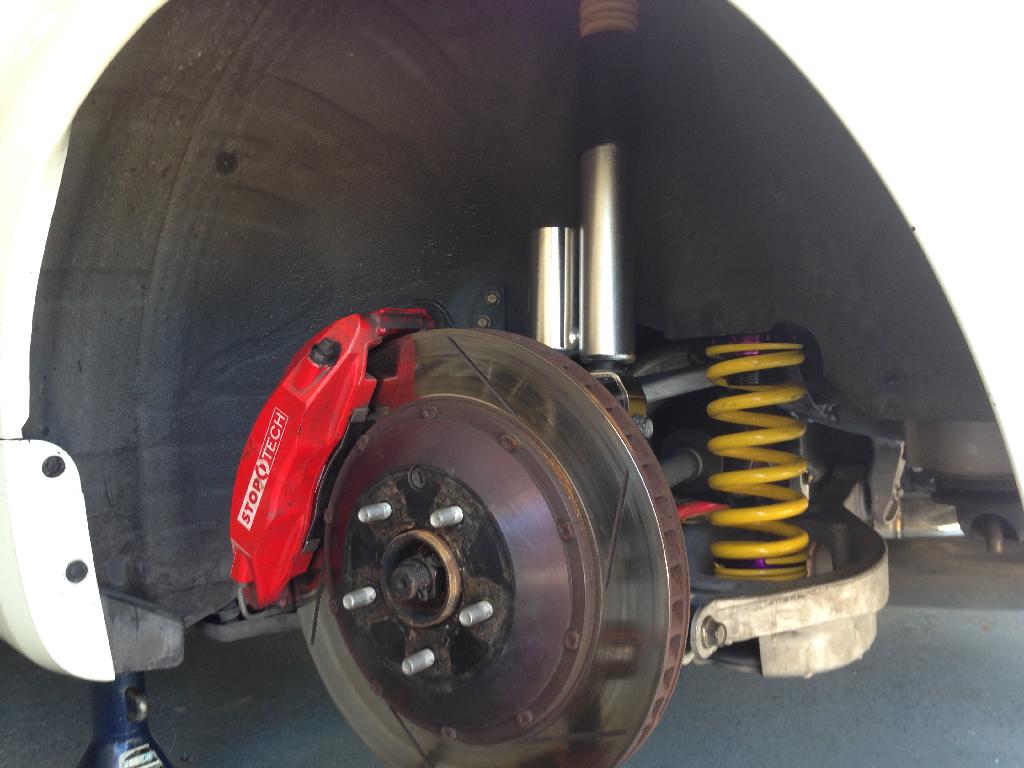
Bolting up the SPL Camber Arms:
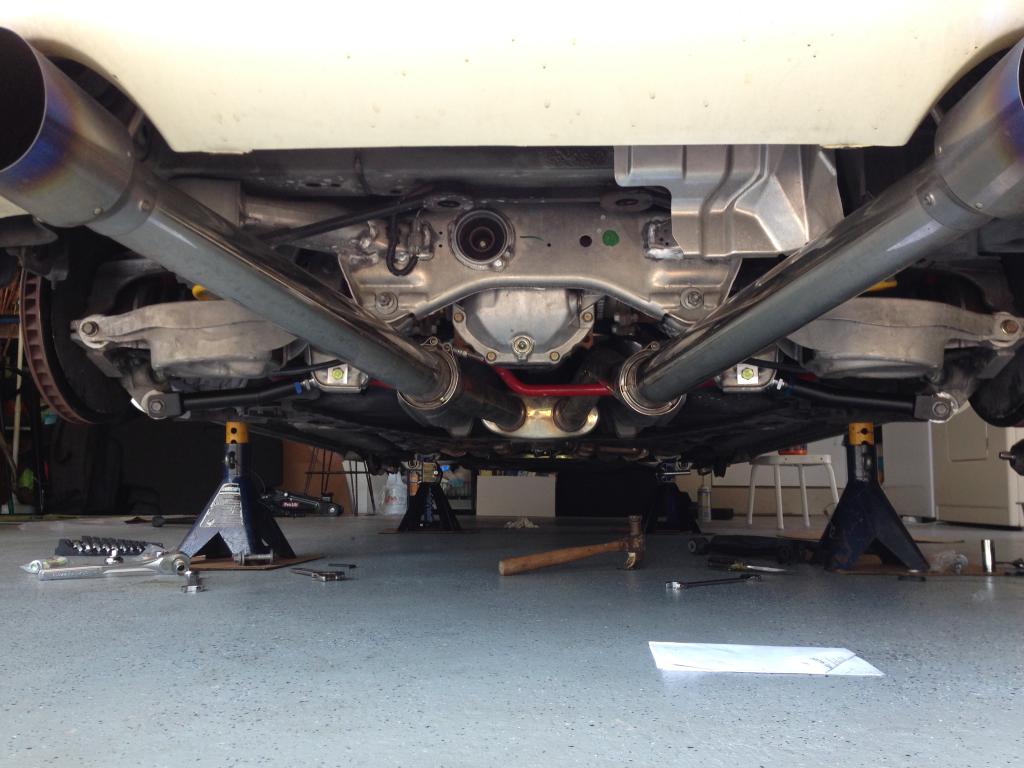
 And finally a few pictures of final product:

I'll be attending some car related activities this weekend so hopefully I can get some more pictures up.
Regarding the installation of the suspension, it was pretty straight forward and a lot of fun to get done. As with all the work I've ever done on the car, once your done the feelings of satisfaction and pride are irreplaceable. Here are some of the pictures from the install.
A before and after of the Front Left side of the suspension:


Fitting the new springs to the Right Rear spring bucket:

Completed Left Rear side:

Bolting up the SPL Camber Arms:


 And finally a few pictures of final product:


I'll be attending some car related activities this weekend so hopefully I can get some more pictures up.
05-01-2014, 05:49 AM
#31
So last week I finally bolted up all the suspension components and set a preliminary ride height. This past Monday I took the car to the alignment rack to dial in my street alignment. Camber, Toe, and front Caster were all put back within spec. My goal for my street alignment was to achieve a solid balance between performance and expected future tire wear characteristics. Overall, with the higher spring rates, wider tires, and lighter wheels the car feels far more nimble, precise, and composed in the corners. This is a huge improvement and I couldn't be more pleased. Further fine tuning the suspension is something I am looking forward to doing in the future. It can be a lengthy trial and error process because so many variables have to be considered, but I'm in no rush. It'll definitely be an awesome learning experience.
Regarding the installation of the suspension, it was pretty straight forward and a lot of fun to get done. As with all the work I've ever done on the car, once your done the feelings of satisfaction and pride are irreplaceable. Here are some of the pictures from the install.
I'll be attending some car related activities this weekend so hopefully I can get some more pictures up.

Btw, how difficult was the suspension install? I was wondering if that was something I'd be able to tackle, with my limited knowledge and modest amount of tools.
05-01-2014, 10:56 AM
#32
Thanks lifekenophobic! The install was very straight forward. As with any car related job you do, the more tools you have at your disposal the better off you'll be. Aside from basic hand tools I used a cordless impact gun and a Dremel. The impact is really worth its weight in gold because it saves you time and energy that you would otherwise be spending trying to undo bolts and nuts. That said, use it wisely, as it is not always necessary. Hope that helps!


") hahahaha
hahahaha


 05-05-2014, 02:35 PM
#39
Thanks! I appreciate the kind words.
Thanks pyshin! It's been a lot of fun putting it all together. There is still more to do though. I want to mess around with the ride height a bit and go just a hair lower both front and rear, but the car has already been aligned, so I'm a little hesitant at the moment. Not sure how much of a margin (if at all) without screwing up the current alignment.
05-05-2014, 03:28 PM
#40
Thanks pyshin! It's been a lot of fun putting it all together. There is still more to do though. I want to mess around with the ride height a bit and go just a hair lower both front and rear, but the car has already been aligned, so I'm a little hesitant at the moment. Not sure how much of a margin (if at all) without screwing up the current alignment.
