ChriZTT's Pikes Peak White 350Z Build Thread
 07-12-2015, 10:18 AM
#121

Thanks bud. I'm really liking how 0385 is coming along!
Thanks King! What new with you? Hope all is well!
Thanks Quinton! Your build is moving along quickly! Love the look of the Momentum kit. Looking forward to seeing it done, get to it!
 Any progress on the conversion, Chris? Btw I went to see Albert at Apex and he told me that you guys met at Sebring lol.
Thanks jhc! I love the tc105n's. They are hard to beat weight-wise for an 18" wheel.
Hey Peter! Nice to see you around, it's been a while lol. Hope all is well and that you grace us with an update on your Z soon!
Thanks for the kind words pfregeolle it's always nice to read!
Thanks Godfoot! How's that Z treating you?
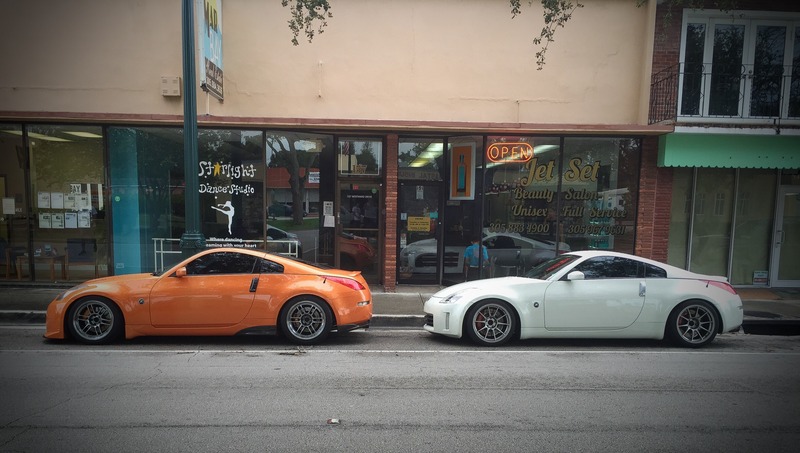
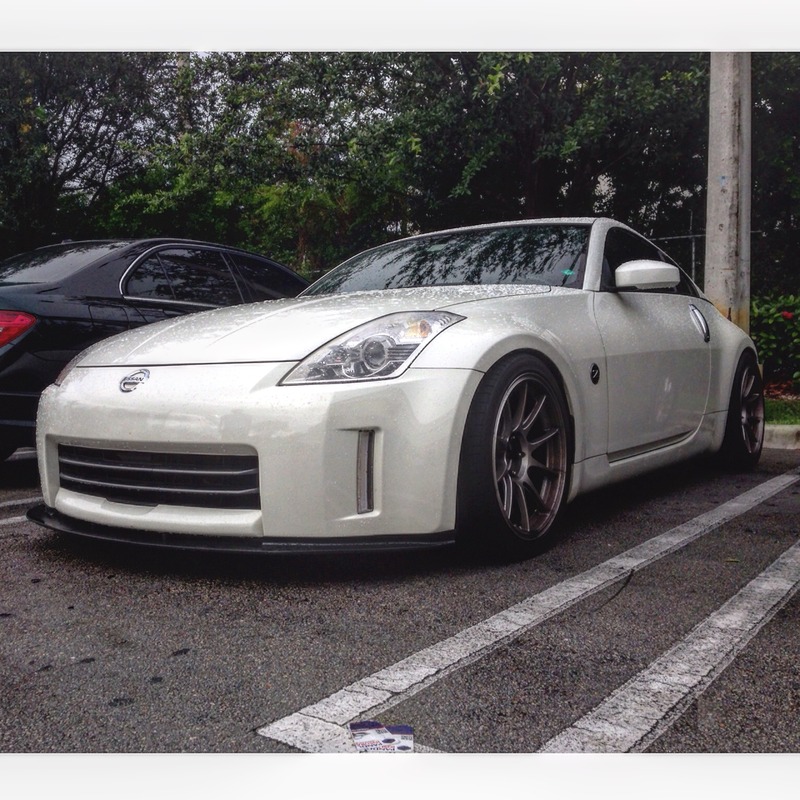
And beacuse this is a thread in the Media Share forum here's a pic from a few weeks back with Kyle and his clean Solar Orange Z.
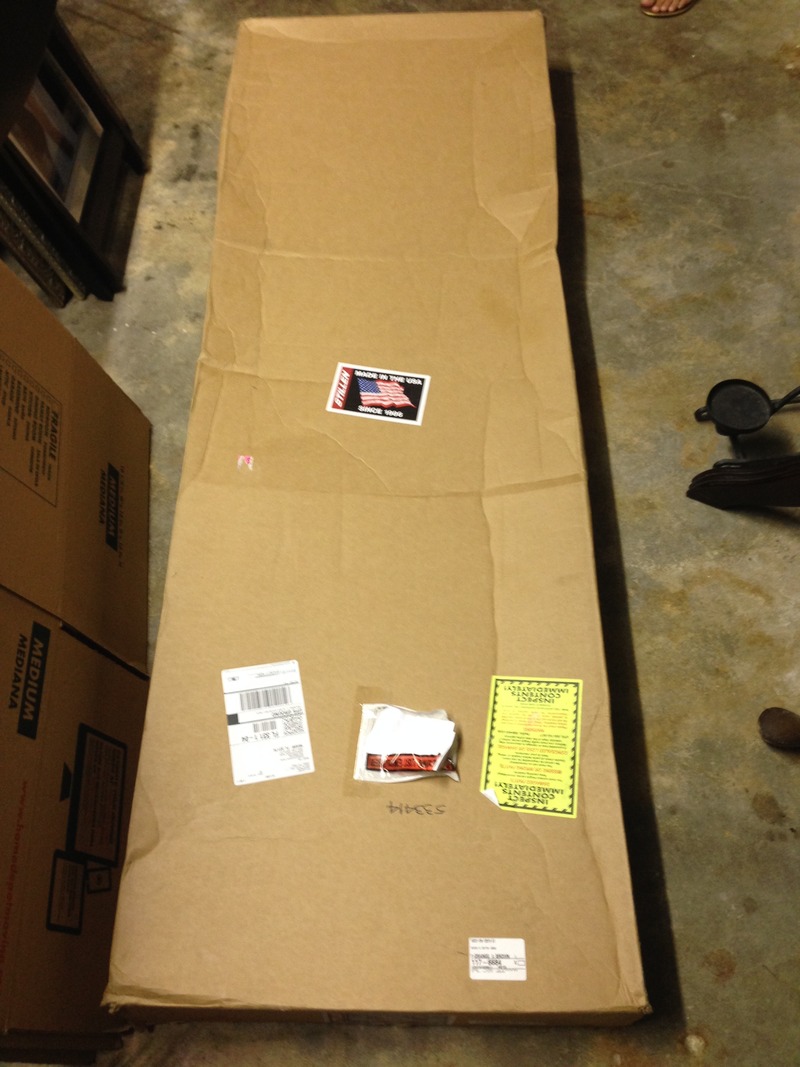
Annnnd lastly... I'll be receiving a package this upcoming week so stay tuned for that
Thanks King! What new with you? Hope all is well!
Thanks Quinton! Your build is moving along quickly! Love the look of the Momentum kit. Looking forward to seeing it done, get to it!
Any progress on the conversion, Chris? Btw I went to see Albert at Apex and he told me that you guys met at Sebring lol. Thanks jhc! I love the tc105n's. They are hard to beat weight-wise for an 18" wheel.
Hey Peter! Nice to see you around, it's been a while lol. Hope all is well and that you grace us with an update on your Z soon!
Thanks Godfoot! How's that Z treating you?
And beacuse this is a thread in the Media Share forum here's a pic from a few weeks back with Kyle and his clean Solar Orange Z.

Annnnd lastly... I'll be receiving a package this upcoming week so stay tuned for that

 07-26-2015, 11:57 AM
#124
So that package I hinted at in my last update arrived!
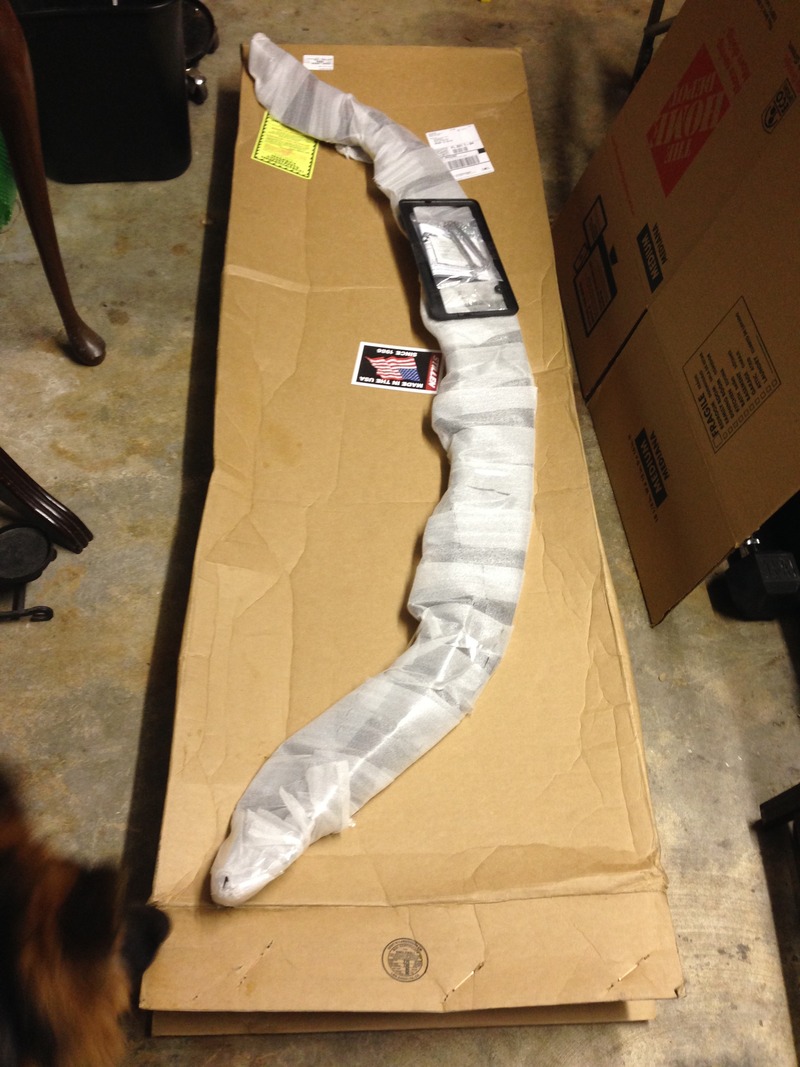
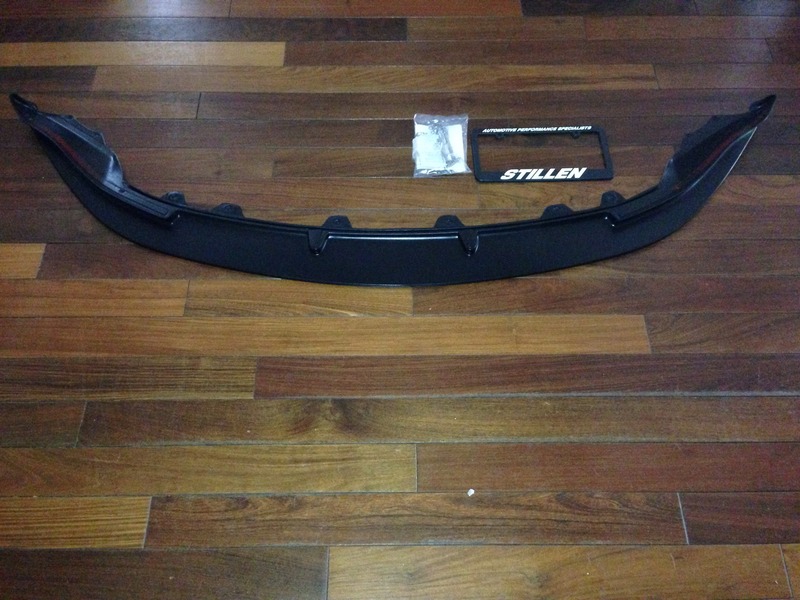
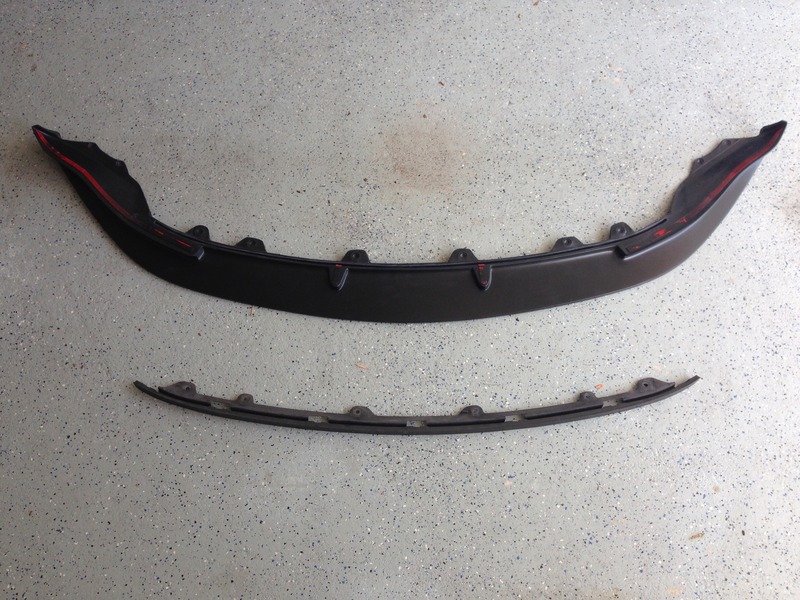
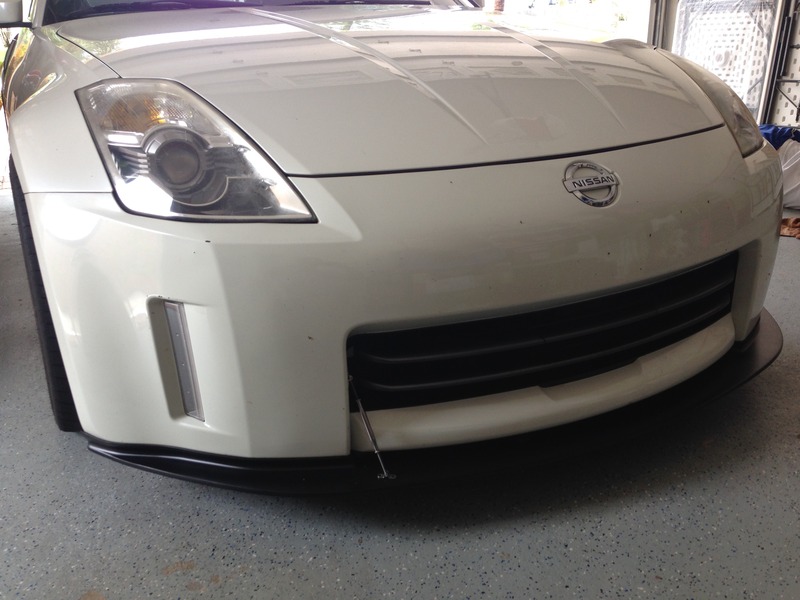
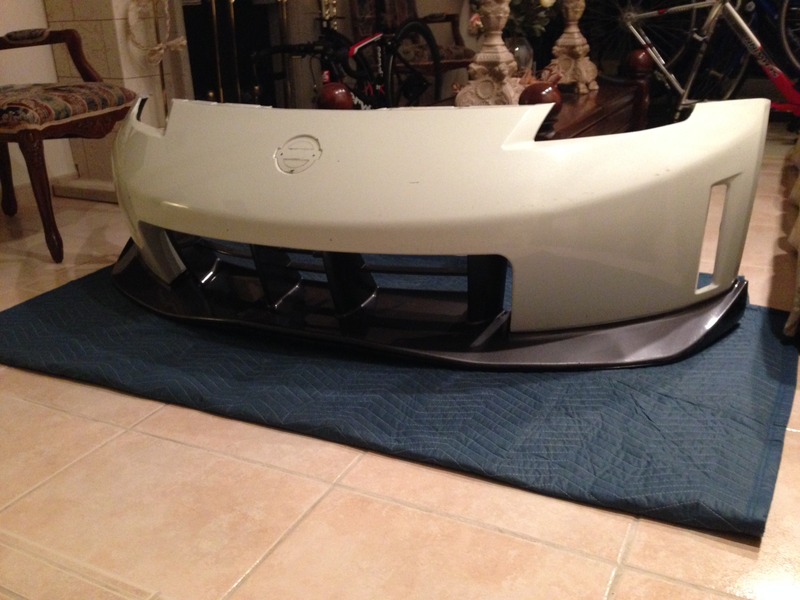
Stillen front splitter! The way I see it is as a street friendly/daily driver friendly downforce solution.
Here is a comparison of the Stillen splitter and the OEM front bumper scratch guard moulding.
Install was very straight forward, but I did have another set of hands which was a HUGE help. A shout out to my buddy Marcell, thanks for the help!
Marcell not pictured here
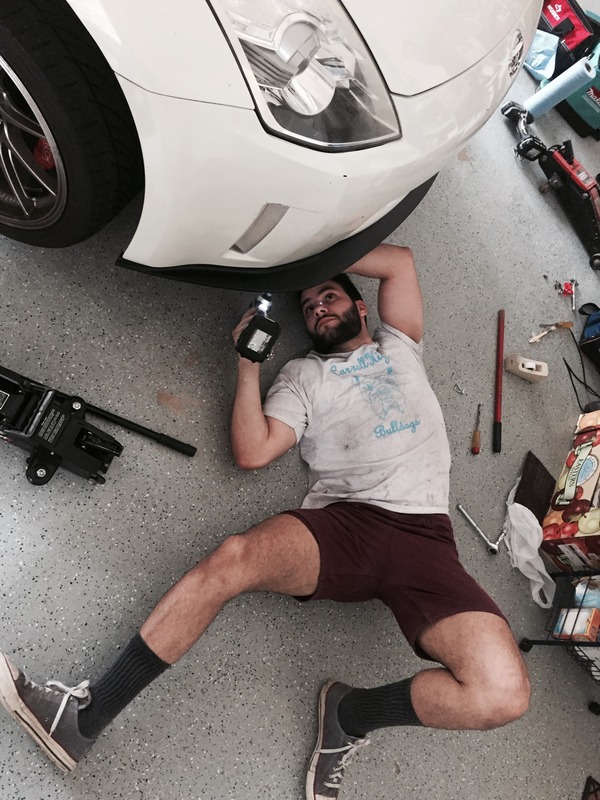
Here I'm just trying to mock up where I want the turnbuckles before marking my spots for the holes.
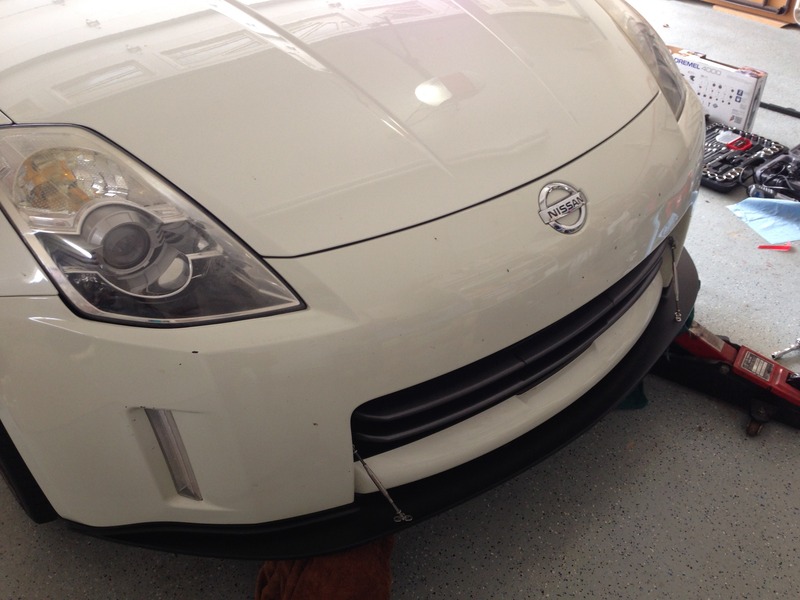
I ran out of time that day and decided I didn't want to rush the install of the turnbuckles. So it's been about a week with the splitter installed without the turnbuckles and it's holding up just fine.
All that said, I have every intension of getting those turnbuckles on the car very soon for two reasons. First, I do believe that they serve to stiffen the splitter and prevent most of the deflection that would take place at speed. Secondly, I think it fits the overall "theme" of my Z very well.
All thoughts and comments are welcomed.
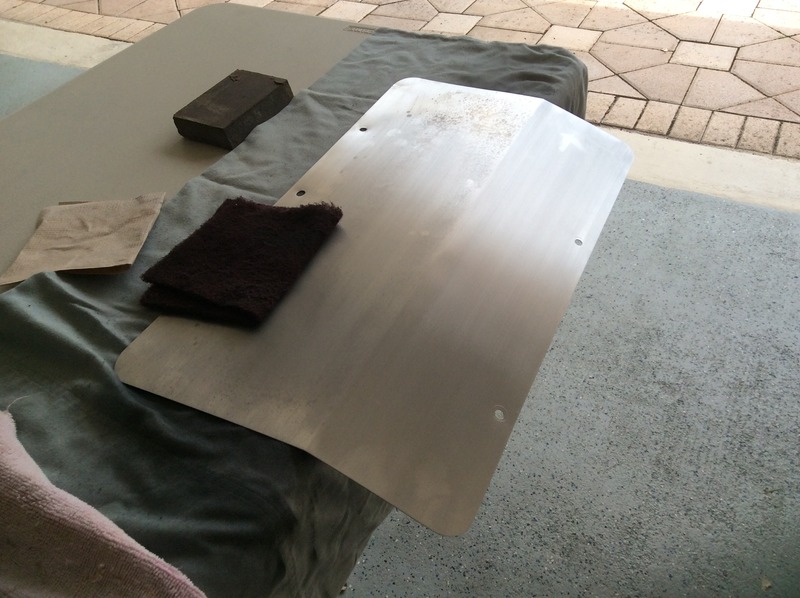
On a bit of a side note, bare aluminum is a major pain to maintain looking clean as it stains very easily with water, sweat, and oils. Ask me how I know LOL.
Ironically I permanently stained one of the covers while trying to clean it, and so I had to re-sand and brush it to remove the stain. Here you can see the stain spots:
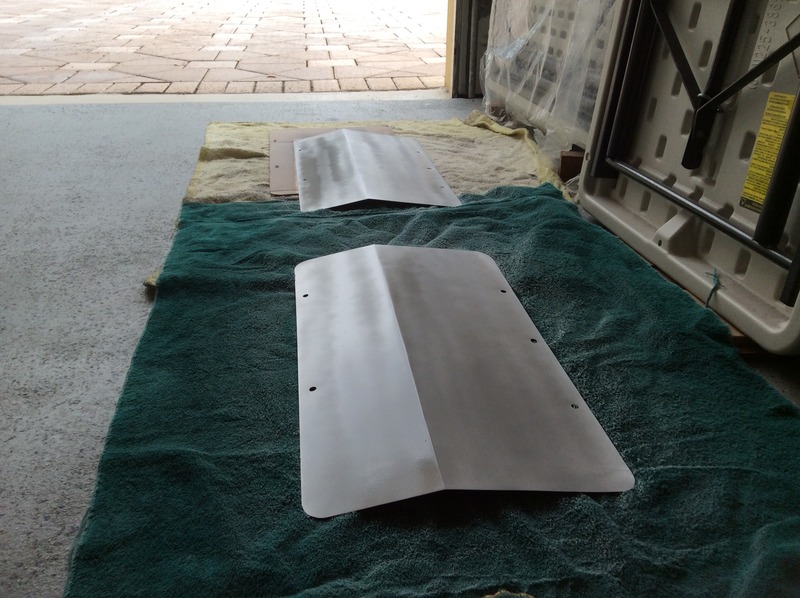
Not wanting to have to repeat this in the future I decided to clear coat the covers. The clear went on a little thick so after they fully dried I brush finish the covers again to even it all out.
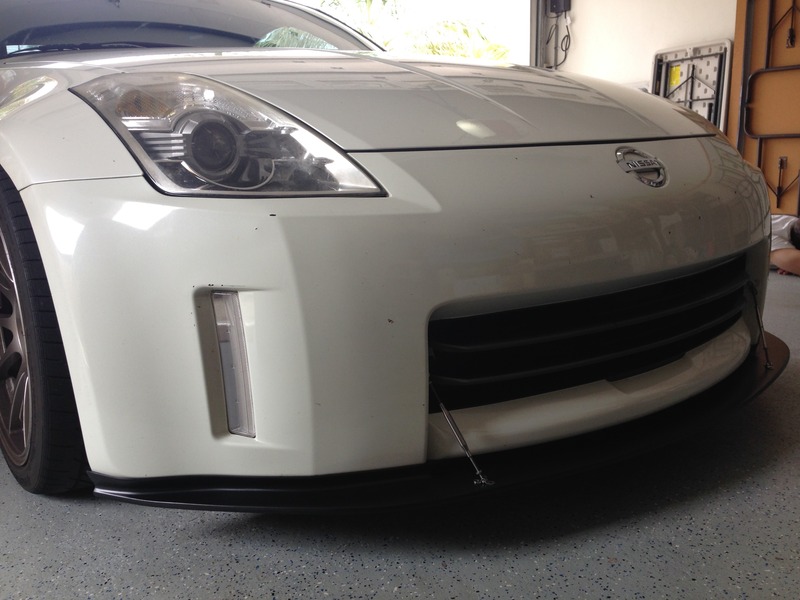
Installed! (hopefully for the last time lol)


Stillen front splitter! The way I see it is as a street friendly/daily driver friendly downforce solution.
Here is a comparison of the Stillen splitter and the OEM front bumper scratch guard moulding.

Install was very straight forward, but I did have another set of hands which was a HUGE help. A shout out to my buddy Marcell, thanks for the help!
Marcell not pictured here

Here I'm just trying to mock up where I want the turnbuckles before marking my spots for the holes.


I ran out of time that day and decided I didn't want to rush the install of the turnbuckles. So it's been about a week with the splitter installed without the turnbuckles and it's holding up just fine.

All that said, I have every intension of getting those turnbuckles on the car very soon for two reasons. First, I do believe that they serve to stiffen the splitter and prevent most of the deflection that would take place at speed. Secondly, I think it fits the overall "theme" of my Z very well.
All thoughts and comments are welcomed.
On a bit of a side note, bare aluminum is a major pain to maintain looking clean as it stains very easily with water, sweat, and oils. Ask me how I know LOL.
Ironically I permanently stained one of the covers while trying to clean it, and so I had to re-sand and brush it to remove the stain. Here you can see the stain spots:

Not wanting to have to repeat this in the future I decided to clear coat the covers. The clear went on a little thick so after they fully dried I brush finish the covers again to even it all out.

Installed! (hopefully for the last time lol)


 07-27-2015, 05:33 PM
#127

Did the rear toe bolts give you enough adjustment that you didnt need toe arms?
I have rear toe arms but am not happy with them. I would rather have toe bolts but im much lower than you and would like to not use both, if that makes sense lol.
ps: This build thread is insane lol..
I have rear toe arms but am not happy with them. I would rather have toe bolts but im much lower than you and would like to not use both, if that makes sense lol.
ps: This build thread is insane lol..
 01-03-2016, 08:28 PM
#130
350Z-holic

iTrader: (13)


 11-22-2016, 09:58 PM
#135
Hey peeps! To say that this post is overdue would be a massive understatement, so apologies in advance! 2016 was NOT a good year for the Z (more on that later). The following is in chronological order. That said, there is plenty to cover so lets get to it!
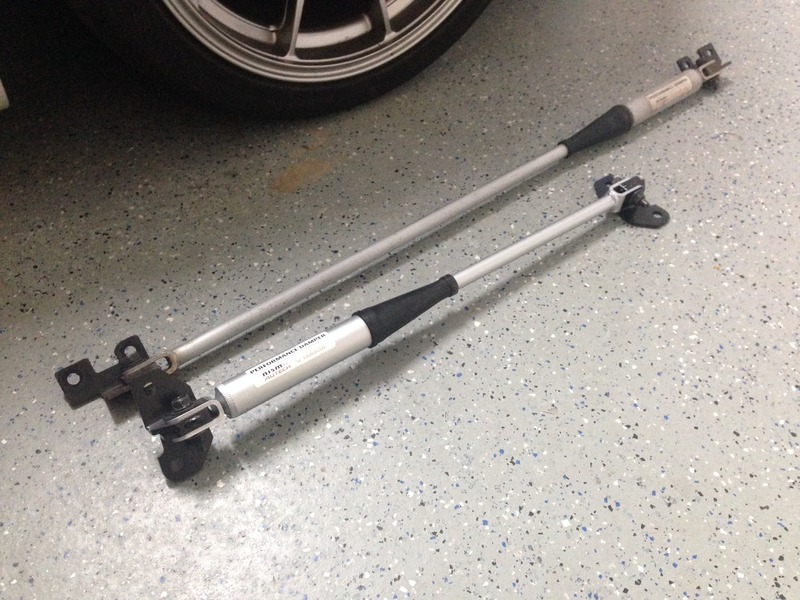
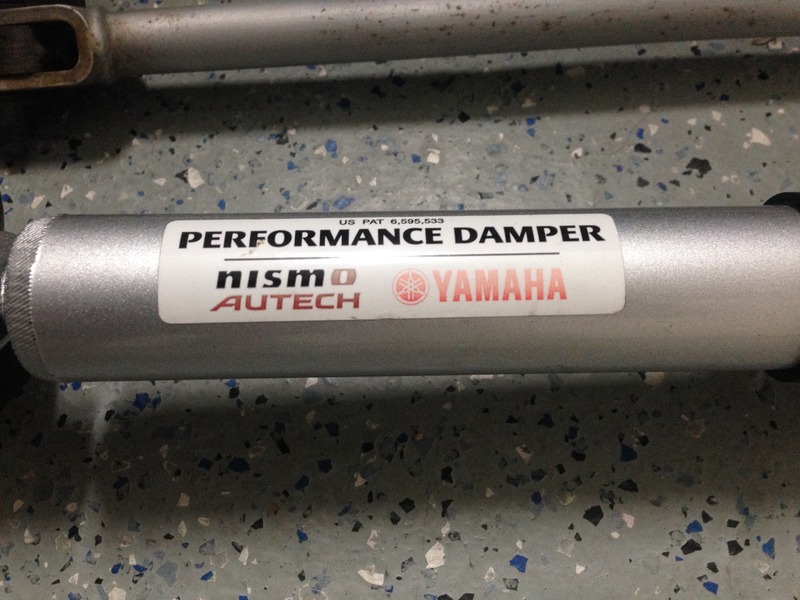
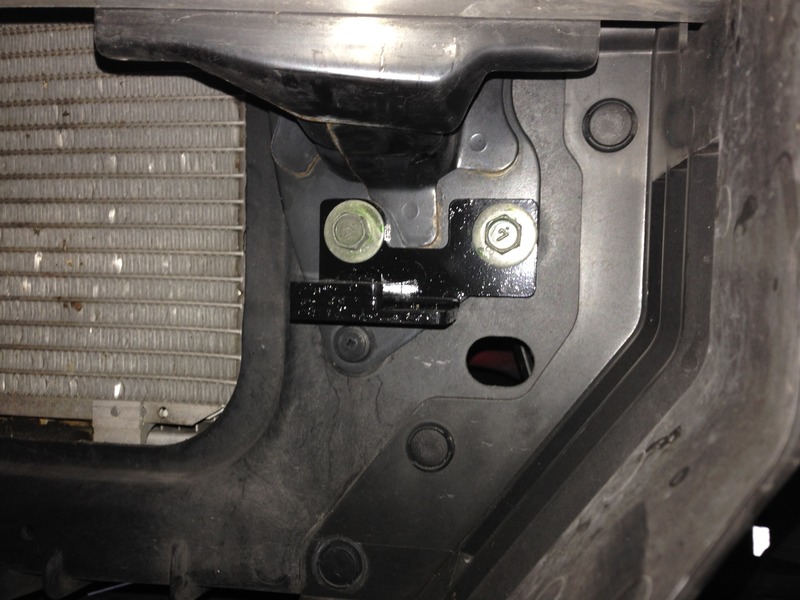
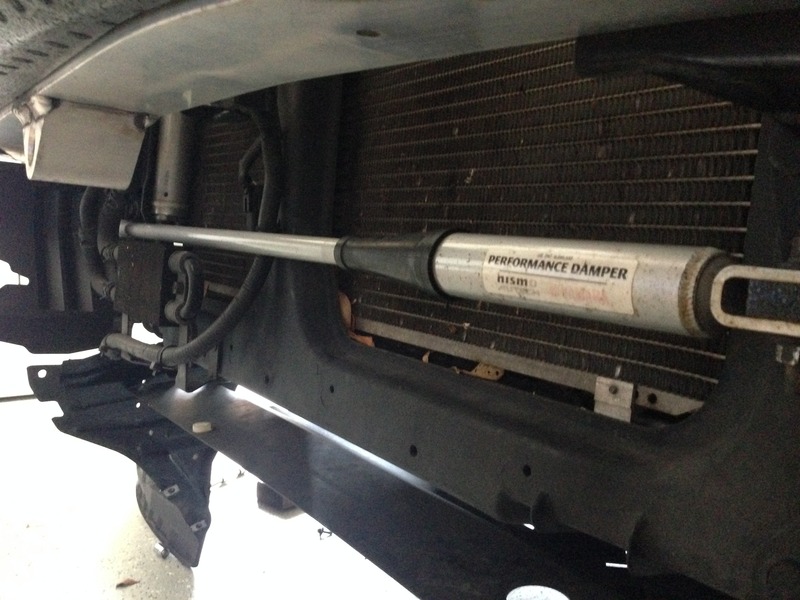
Picked up a set of Nismo/Autech/Yamaha J dampers with brackets off of a Nismo Z that was being traded in. The front damper is exposed to the elements so there was a bit of surface rust present. I prepped and painted the brackets in black. I gave the damper a few coats of clear just to prevent further surface rust.
Pair:
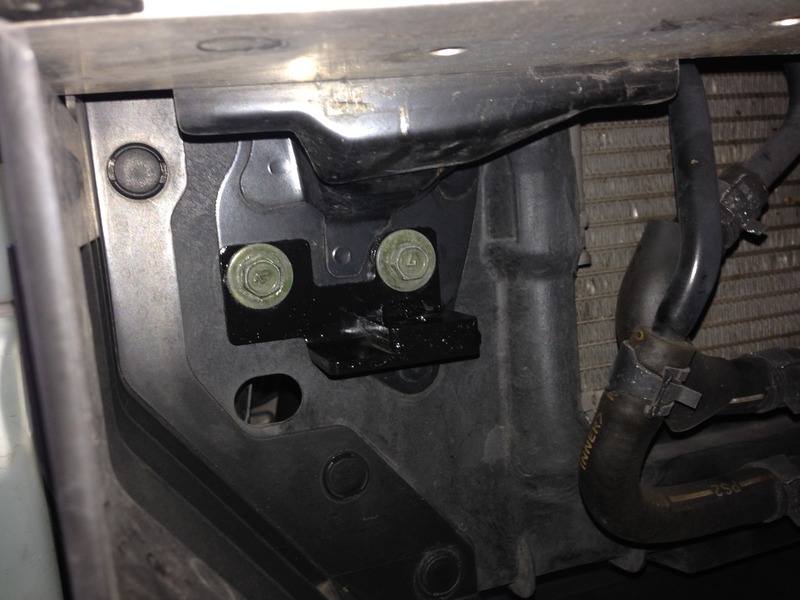
Front:
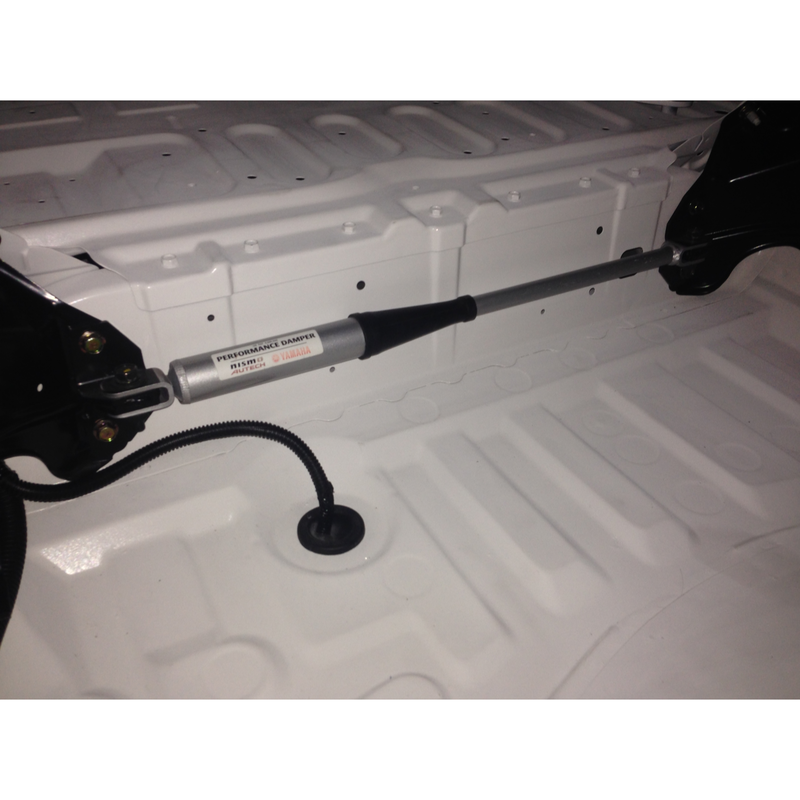
Rear:
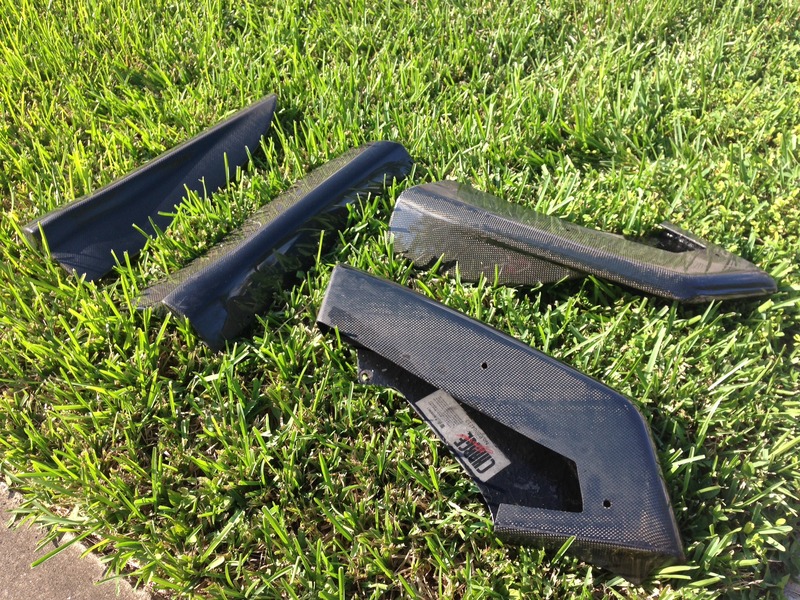
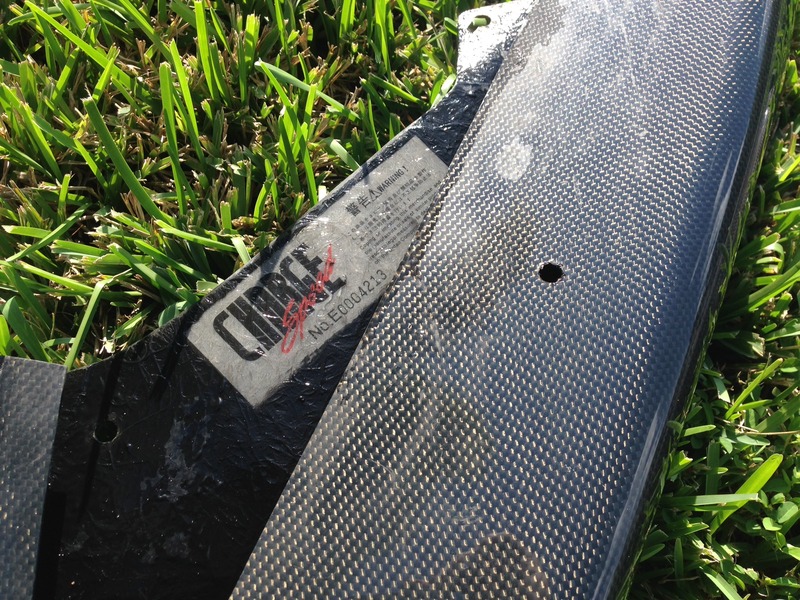
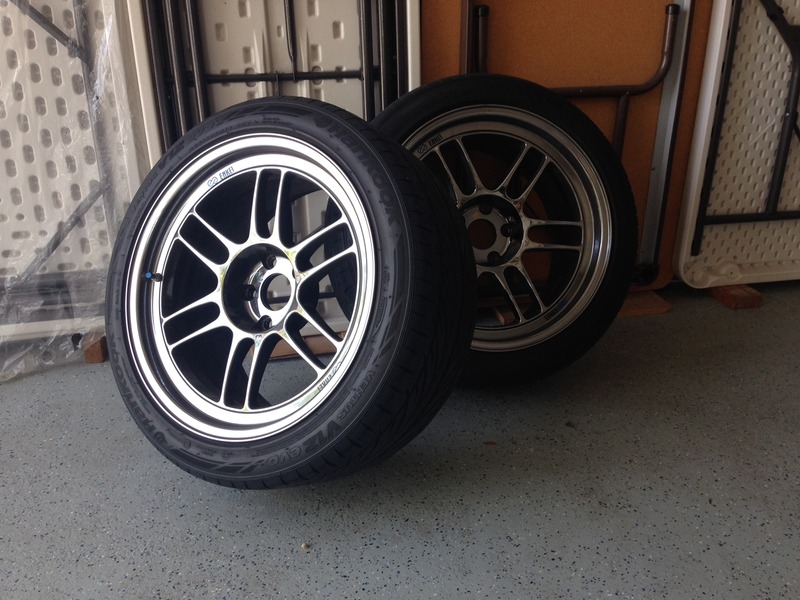
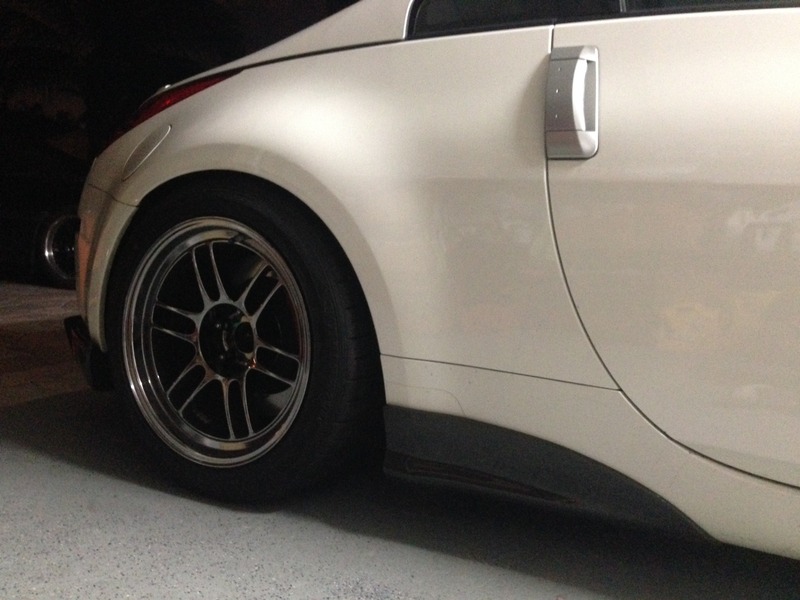
Picked up some Chargespeed carbon goodness and a set of Enkei RPF1's in SBC from a good friend of mine.
So at this point I was satisfied with this evolution of the Z and had no further plans for it. I was in a transitional phase career wise and needed to focus on that, but things don't always go to plan...
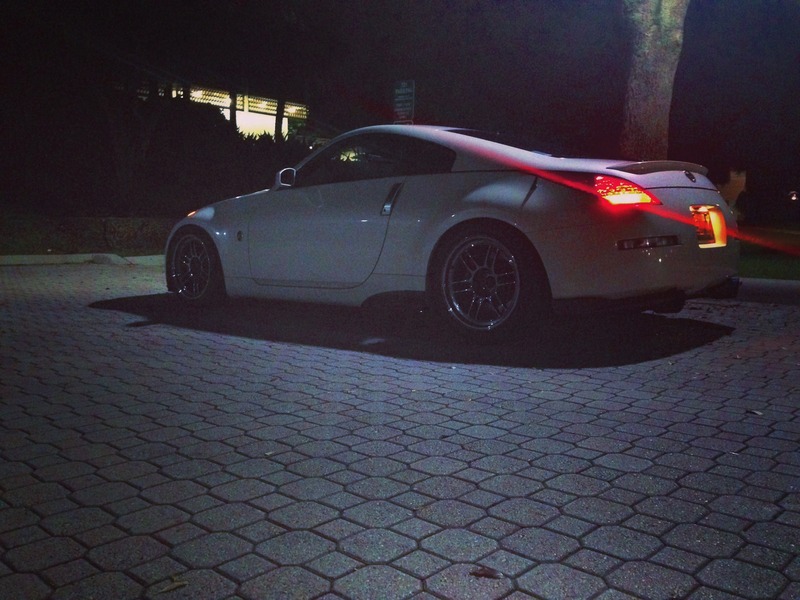
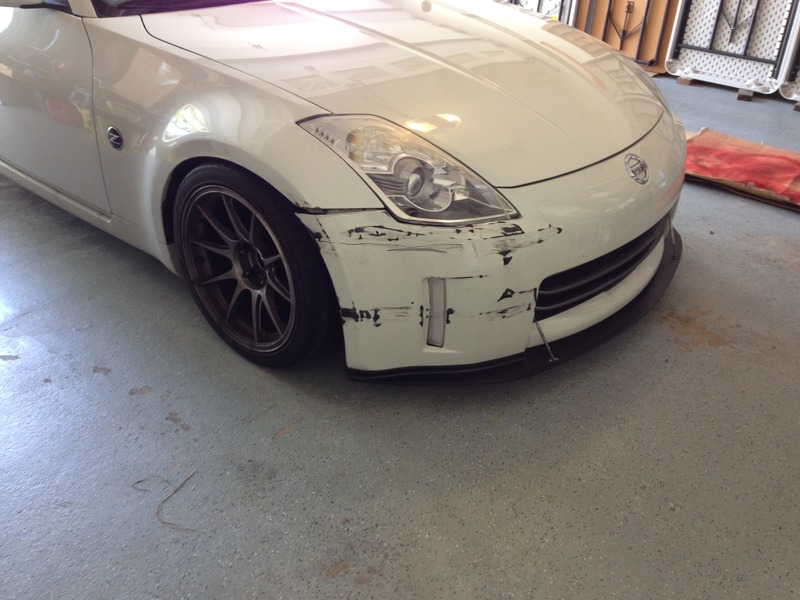
First shunt in the Z ever! Not a great day, but **** happens. Cracked the right headlight and dinged the right fender a bit. Thankfully it wasn't too bad...
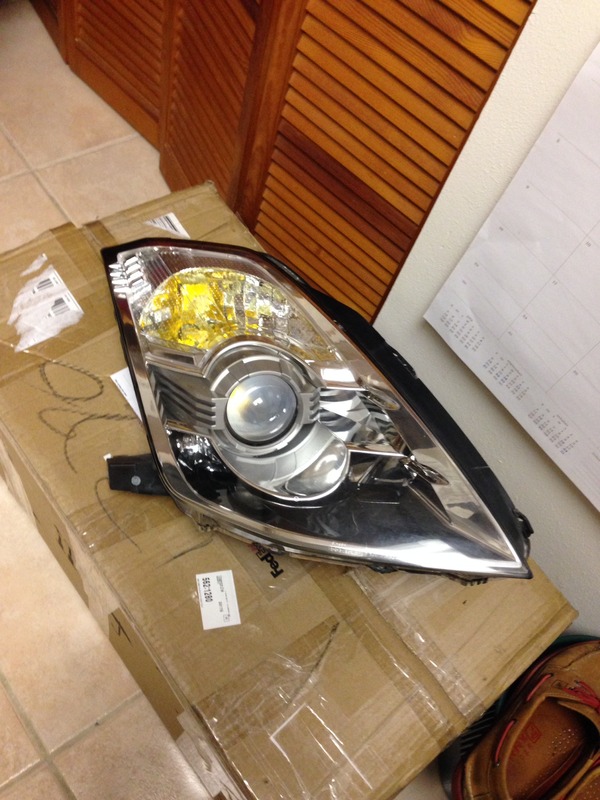
Found a OEM headlight to replace the cracked one, and then started to consider my options for the front end. Somehow I stumbled upon a guy selling an OEM PPW V3 Nismo front bumper in my area!
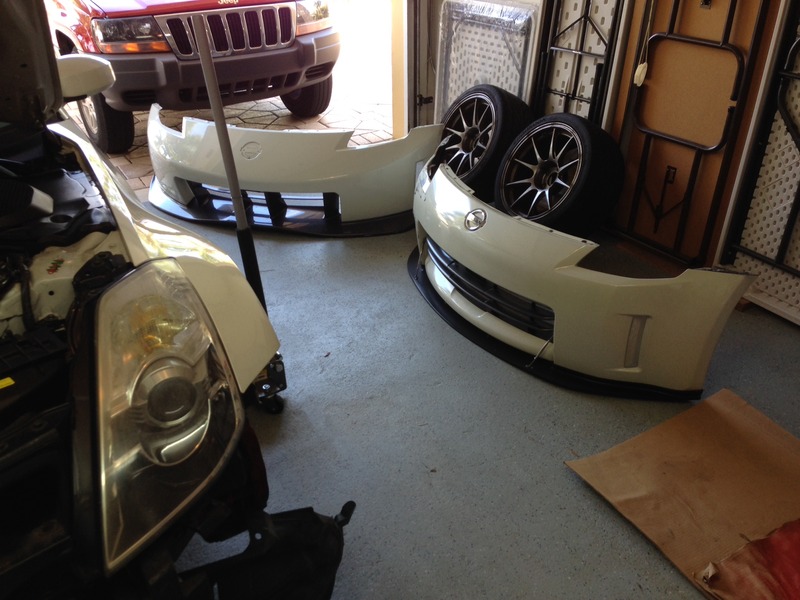
And this is how she sat for the next few months:
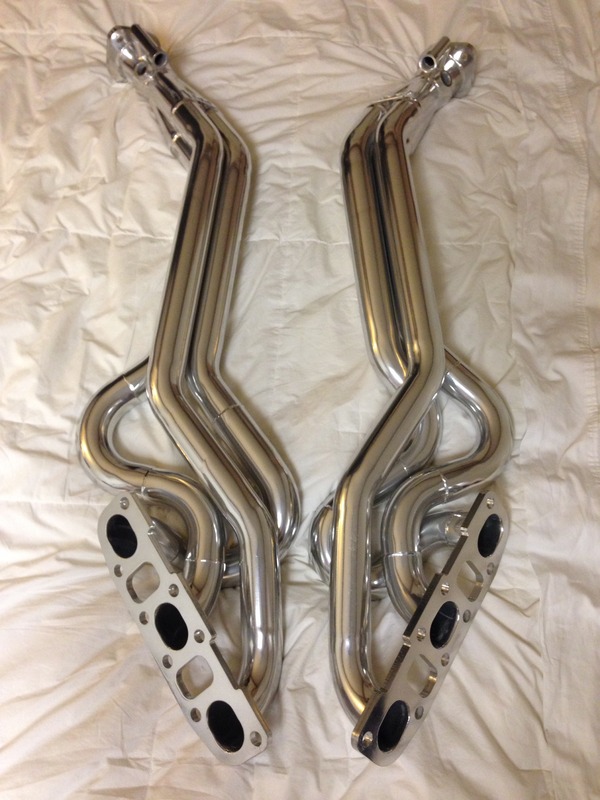
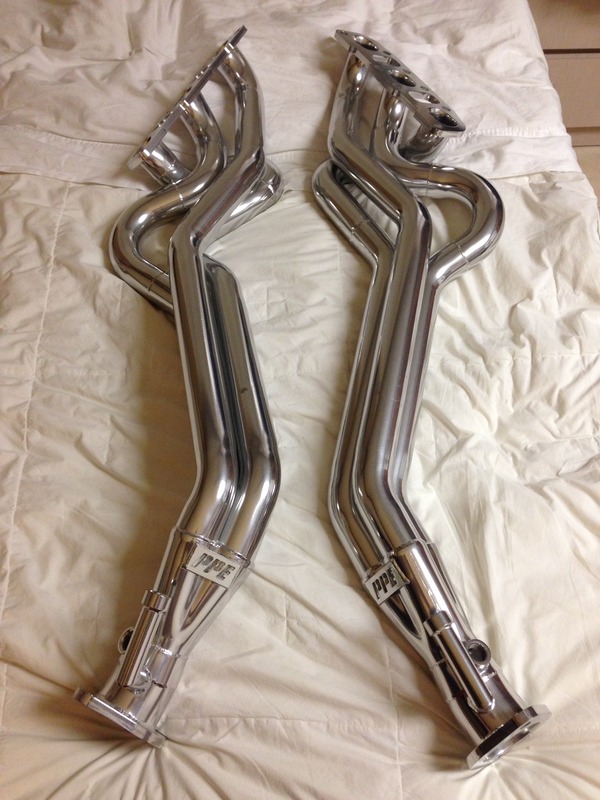
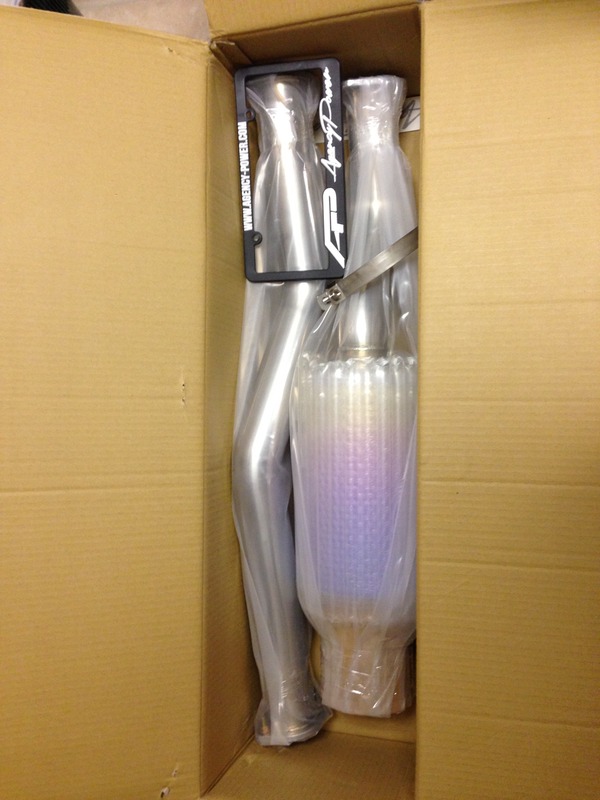
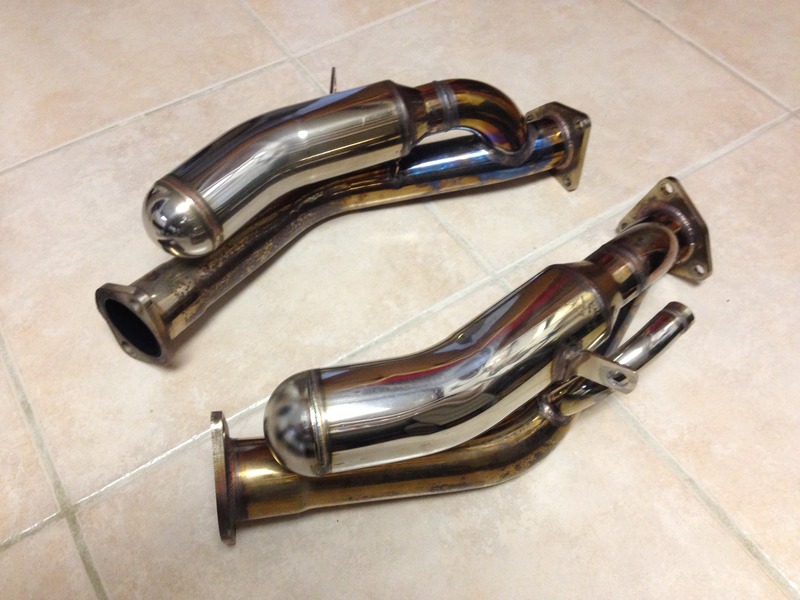
Came across these and couldn't resist, so I pulled the trigger! Brand new set of PPE longtube headers. I unpacked them, snapped a few pics and contemplated hanging or placing them as decor somewhere in the house haha. Ultimately I stored them in the safest place I know, under my bed lol.
Fast forward a few more months and this happens!
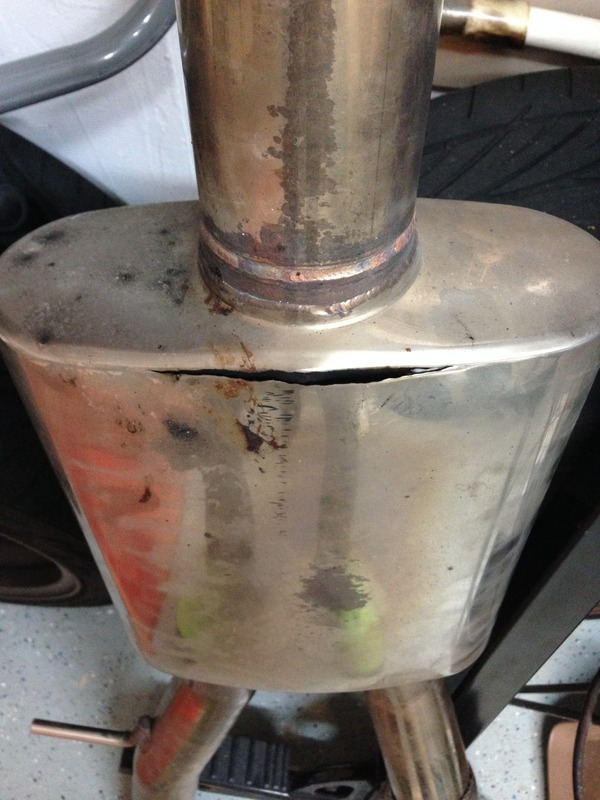
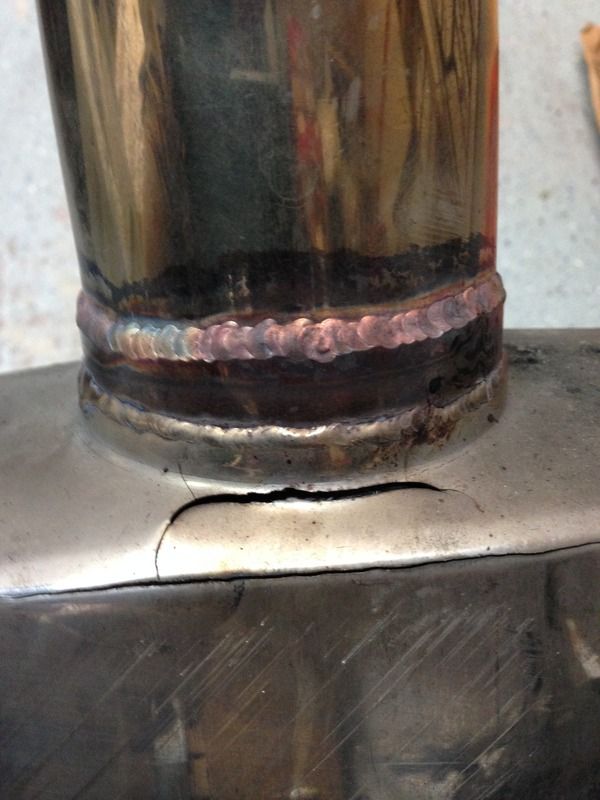
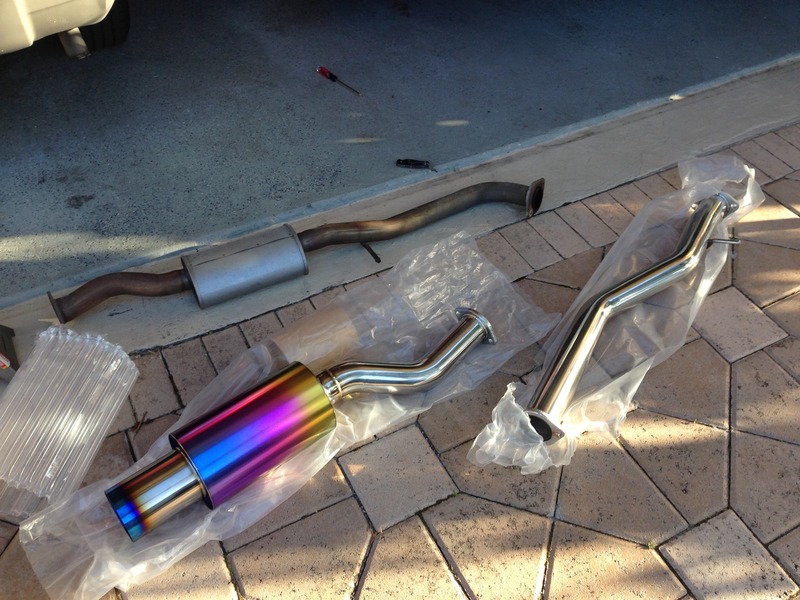
Cracked Motordyne mid-pipe Bolted up the stock mid-pipe to the Motordyne y-pipe for the time being and kept motoring along while I tried to decide between fixing the mid-pipe or going a different route.
During this time the Z suffered another accident. I was rear ended on the way home from work on a Friday. I had everything ready the plan was to start on the PPE header install project that weekend. It wasn't to be though. Thankfully I was only running the mid-pipe (nothing in the rear) so I didn't suffer any exhaust damage.
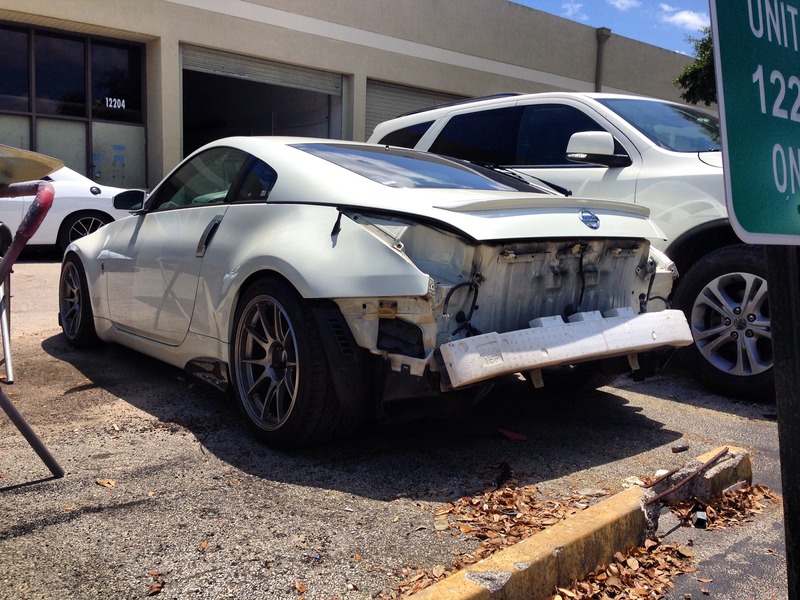
It was a painfully slow process getting the Z fixed and dealing with the insurance. Plenty of lesson where learned through the experience. As far as how the Z turned out... its okay, but its not perfect. Its a hard fact to accept after owning and working on the car for the past 10 years.
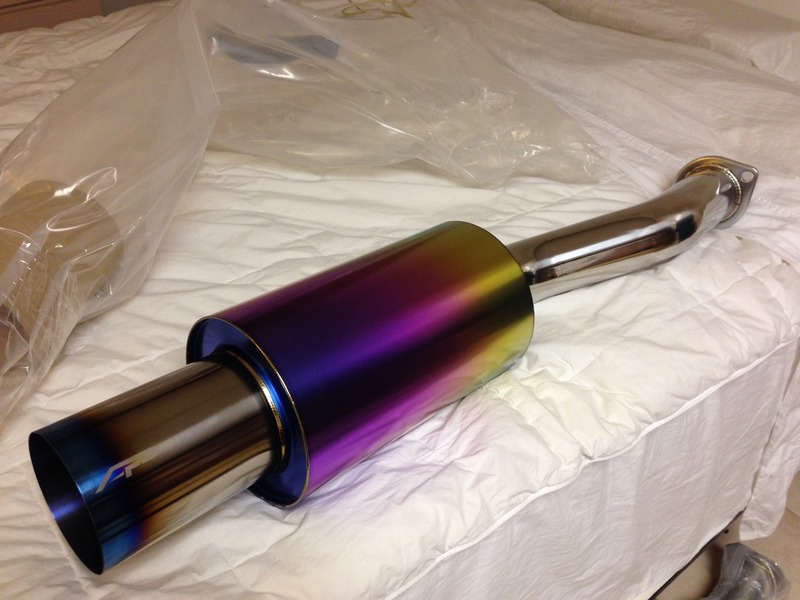
Got the car back and had this piece waiting to go on:
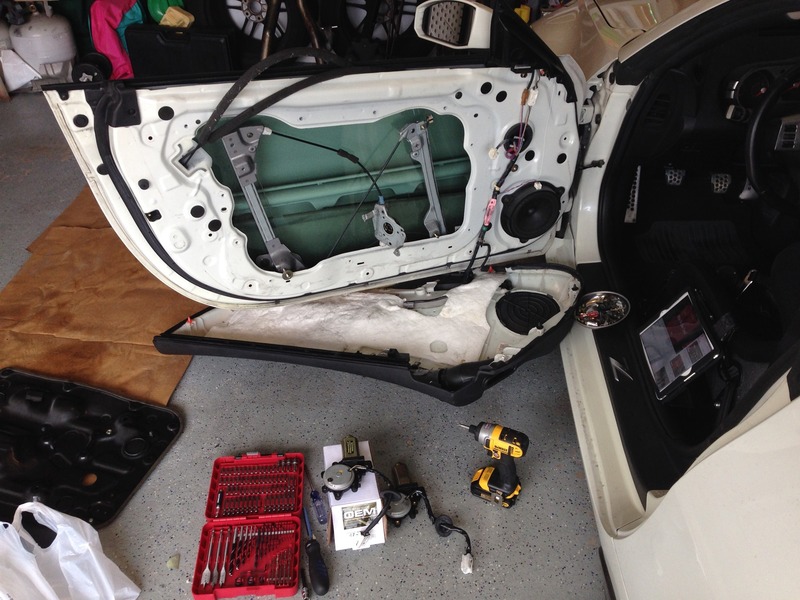
Also had to change out the drivers side window motor because it literally died the moment I pulled into the garage after picking the Z up from the body shop. Unreal lol.
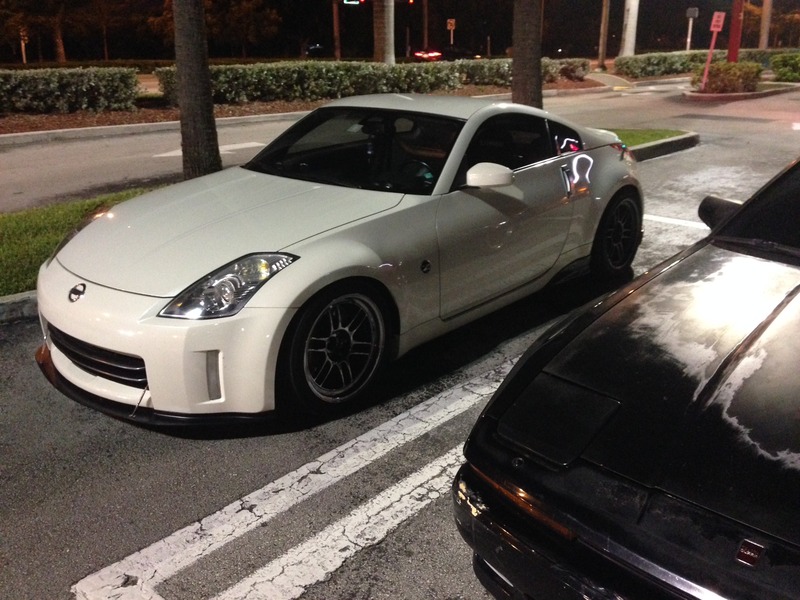
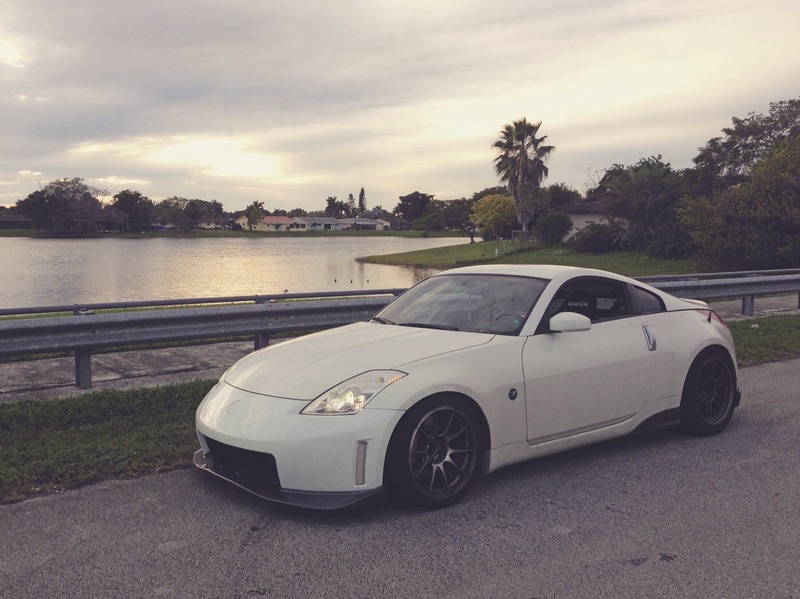
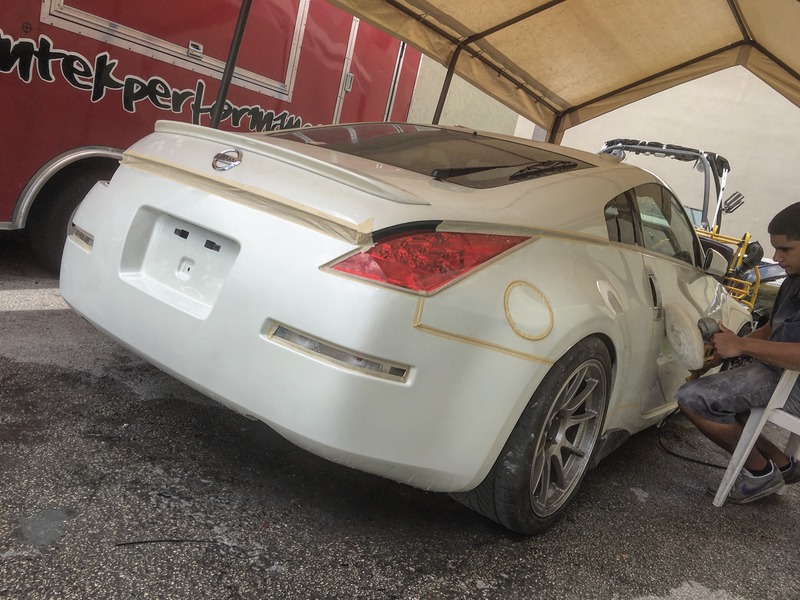
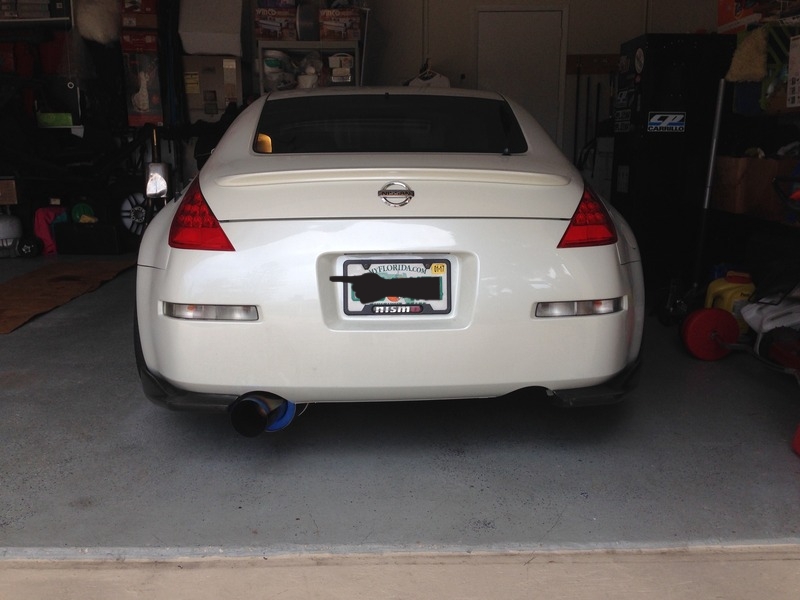
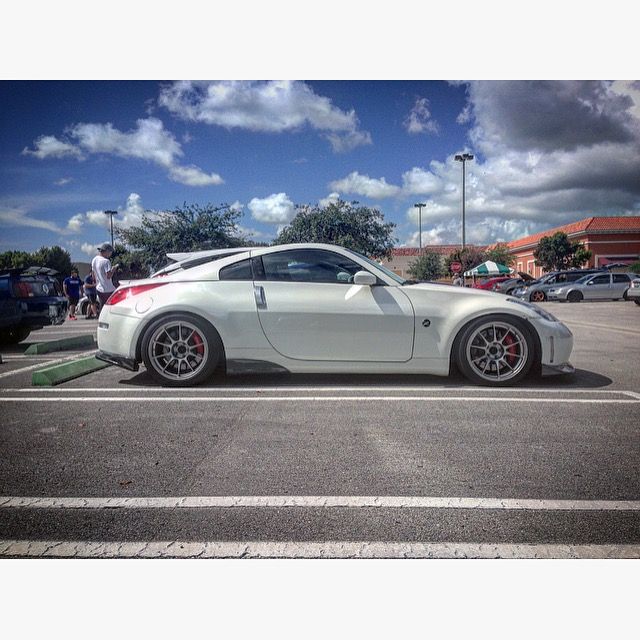
At a local cars and coffee event. At this point the Z was back together and more complete than it had been in many months.
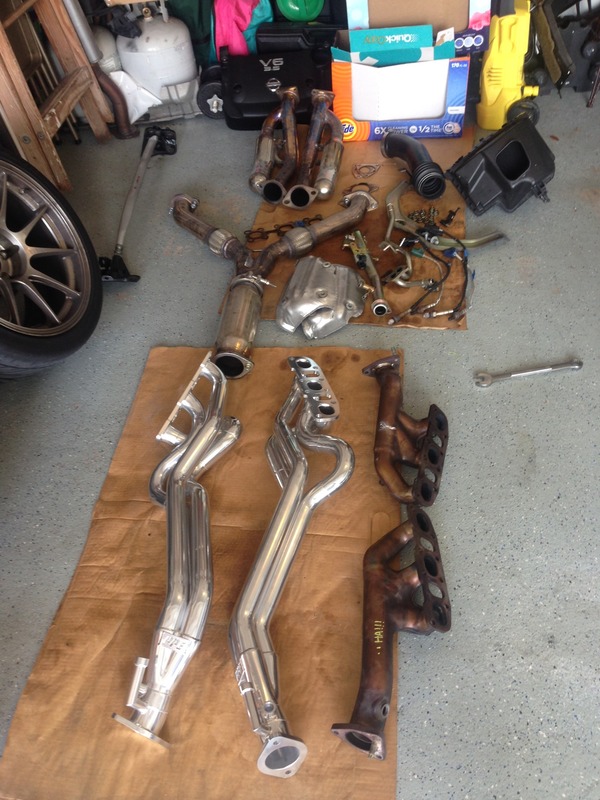
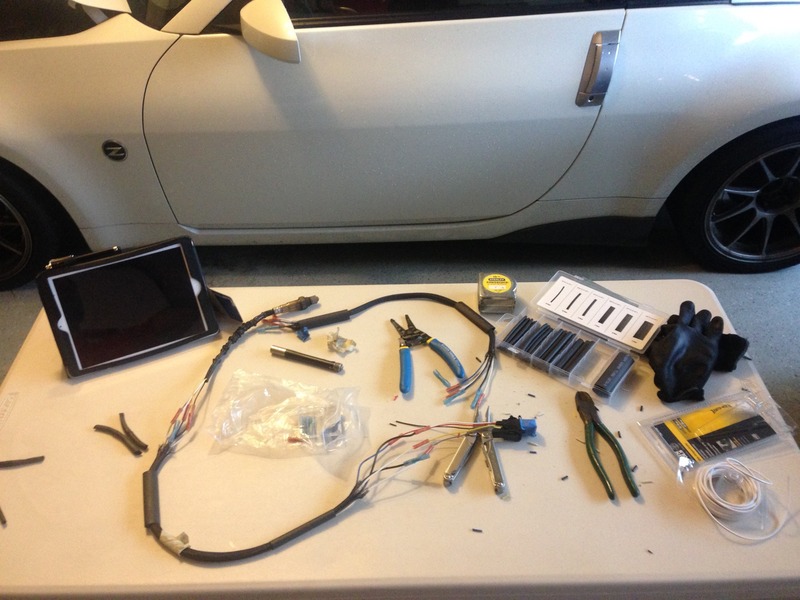
Eventually I found some time and got to work on the longtube header install. I gotta say I didn't find it too difficult, but I did take my time. I removed both stock manifolds by myself which requires the removal of many things, reference pics below. I had the help of a friend when it came time to squeeze the PPE's into place. Its virtually impossible to guide the longtubes into place without another set of hands because they have to go in from the bottom of the car. I'm happy to say that the fitment is on point perfect! No issues with the drivers side header rubbing the steering column (which seems to be a problem others have had). The other major part of this project was extending the O2 sensor wires. Lets just say the ECU still isn't happy with it, but the car drives so I'll deal with that at a later date.
How to turn a two car garage into a mess, part one:
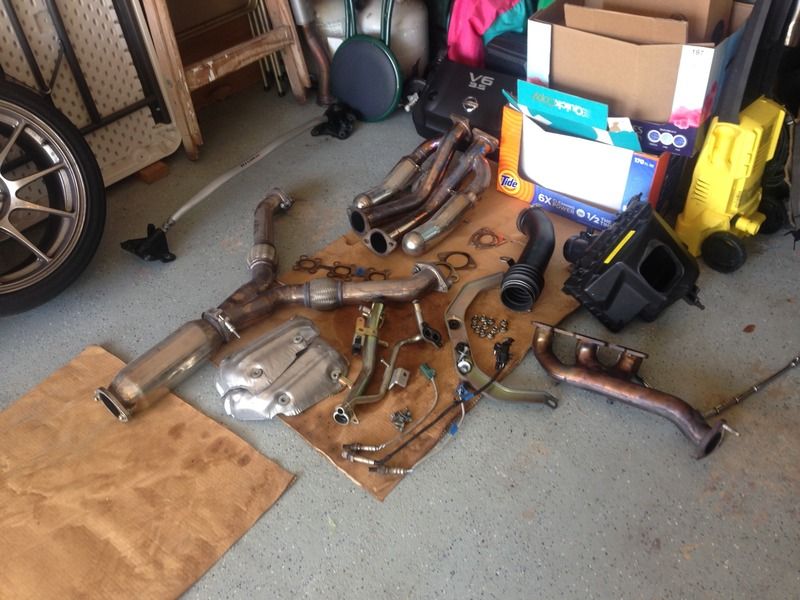
part two:
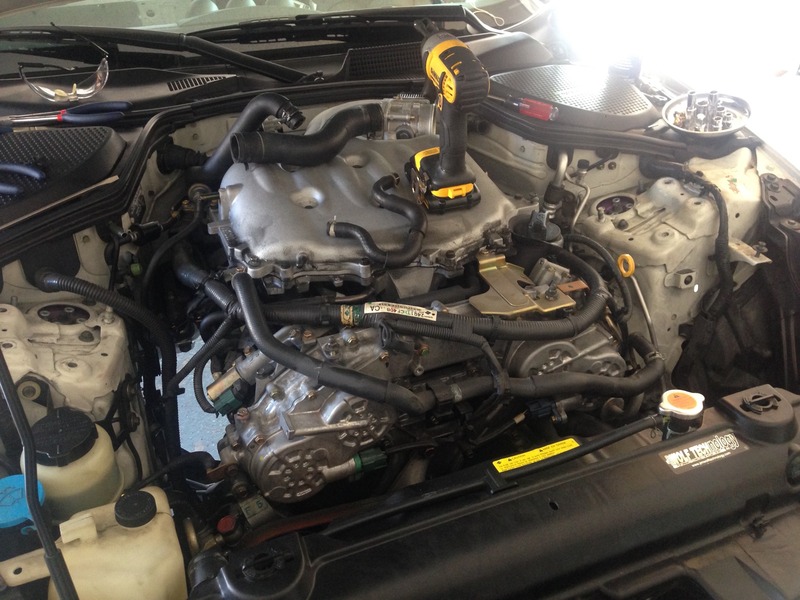
Motordyne ART Pipes removed:
Wrapped the fuel lines on passengers side to protect them from the heat.

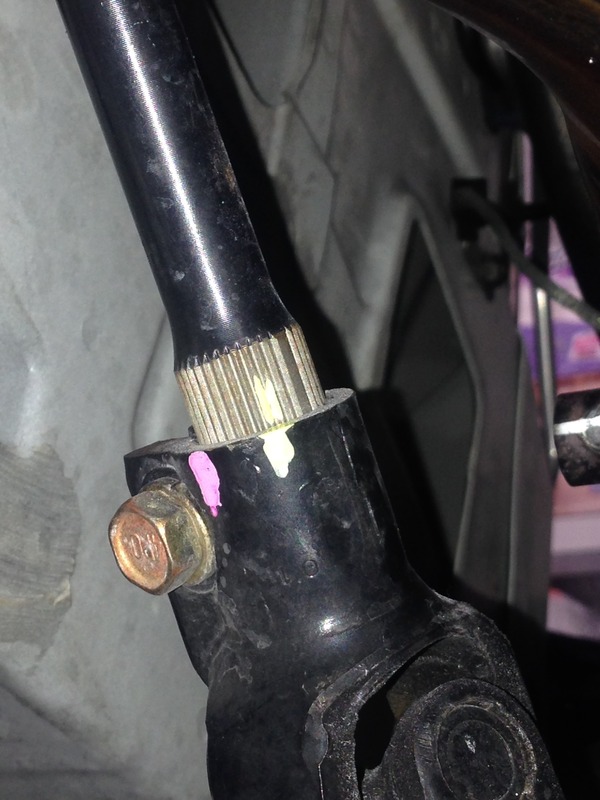
I marked the steering column with a paint pen before undoing the u-joint and disconnecting the column so that I could put it all back together in the correct orientation. Column needs to be disconnected to make room for the LTH.
Driver's side LTH installed:

Wiring up the O2 sensors:
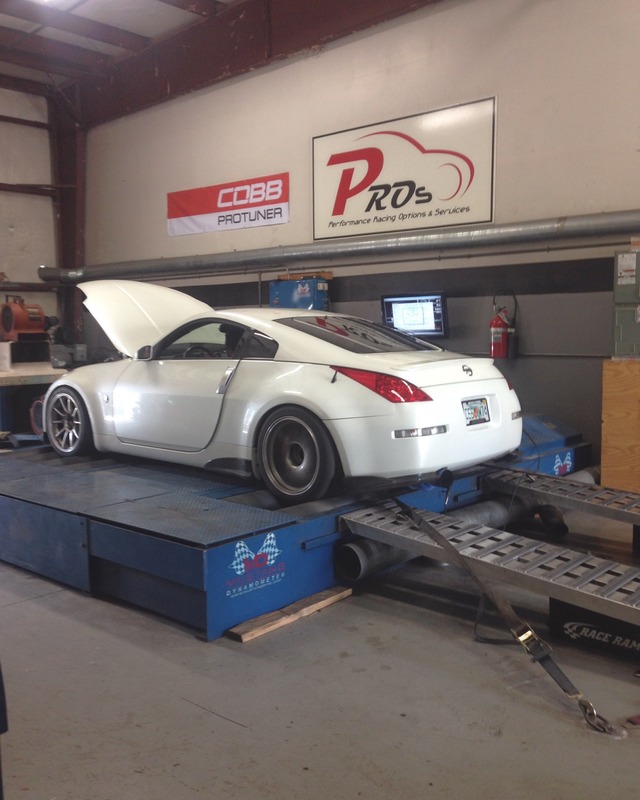
Got the Z retuned and was very happy with the butt dyno results lol. Car pulls much harder up top and the sound is glorious!!
Spinning the rollers at PRO's:
Well thats about it I think! If you read through all of that, thank you! Let me know what you think!
If you want to see more of the Z check out my IG: griptomakeitstick_z33
Picked up a set of Nismo/Autech/Yamaha J dampers with brackets off of a Nismo Z that was being traded in. The front damper is exposed to the elements so there was a bit of surface rust present. I prepped and painted the brackets in black. I gave the damper a few coats of clear just to prevent further surface rust.
Pair:


Front:


Rear:

Picked up some Chargespeed carbon goodness and a set of Enkei RPF1's in SBC from a good friend of mine.


So at this point I was satisfied with this evolution of the Z and had no further plans for it. I was in a transitional phase career wise and needed to focus on that, but things don't always go to plan...
First shunt in the Z ever! Not a great day, but **** happens. Cracked the right headlight and dinged the right fender a bit. Thankfully it wasn't too bad...

Found a OEM headlight to replace the cracked one, and then started to consider my options for the front end. Somehow I stumbled upon a guy selling an OEM PPW V3 Nismo front bumper in my area!


And this is how she sat for the next few months:

Came across these and couldn't resist, so I pulled the trigger! Brand new set of PPE longtube headers. I unpacked them, snapped a few pics and contemplated hanging or placing them as decor somewhere in the house haha. Ultimately I stored them in the safest place I know, under my bed lol.


Fast forward a few more months and this happens!


Cracked Motordyne mid-pipe
Bolted up the stock mid-pipe to the Motordyne y-pipe for the time being and kept motoring along while I tried to decide between fixing the mid-pipe or going a different route. During this time the Z suffered another accident. I was rear ended on the way home from work on a Friday. I had everything ready the plan was to start on the PPE header install project that weekend. It wasn't to be though. Thankfully I was only running the mid-pipe (nothing in the rear) so I didn't suffer any exhaust damage.

It was a painfully slow process getting the Z fixed and dealing with the insurance. Plenty of lesson where learned through the experience. As far as how the Z turned out... its okay, but its not perfect. Its a hard fact to accept after owning and working on the car for the past 10 years.

Got the car back and had this piece waiting to go on:


Also had to change out the drivers side window motor because it literally died the moment I pulled into the garage after picking the Z up from the body shop. Unreal lol.

At a local cars and coffee event. At this point the Z was back together and more complete than it had been in many months.

Eventually I found some time and got to work on the longtube header install. I gotta say I didn't find it too difficult, but I did take my time. I removed both stock manifolds by myself which requires the removal of many things, reference pics below. I had the help of a friend when it came time to squeeze the PPE's into place. Its virtually impossible to guide the longtubes into place without another set of hands because they have to go in from the bottom of the car. I'm happy to say that the fitment is on point perfect! No issues with the drivers side header rubbing the steering column (which seems to be a problem others have had). The other major part of this project was extending the O2 sensor wires. Lets just say the ECU still isn't happy with it, but the car drives so I'll deal with that at a later date.
How to turn a two car garage into a mess, part one:

part two:


Motordyne ART Pipes removed:

Wrapped the fuel lines on passengers side to protect them from the heat.

I marked the steering column with a paint pen before undoing the u-joint and disconnecting the column so that I could put it all back together in the correct orientation. Column needs to be disconnected to make room for the LTH.

Driver's side LTH installed:

Wiring up the O2 sensors:

Got the Z retuned and was very happy with the butt dyno results lol. Car pulls much harder up top and the sound is glorious!!
Spinning the rollers at PRO's:

Well thats about it I think! If you read through all of that, thank you! Let me know what you think!
If you want to see more of the Z check out my IG: griptomakeitstick_z33
Last edited by ChriZTT; 06-03-2017 at 10:58 AM.
11-23-2016, 11:00 AM
#136
Registered User
iTrader: (2)

Bad ***!
Looks like you two have had an eventful year haha.
Always loved this build, it's a shame when people tear up your stuff. Happened to me last year, bumper is slightly dented and the hatch is far from perfect now. BUT - racecar, so I got over it pretty quickly haha.
Glad to see you're back!
Looks like you two have had an eventful year haha.
Always loved this build, it's a shame when people tear up your stuff. Happened to me last year, bumper is slightly dented and the hatch is far from perfect now. BUT - racecar, so I got over it pretty quickly haha.
Glad to see you're back!
The following users liked this post:
ChriZTT (11-26-2016)
11-23-2016, 01:21 PM
#137
Good to hear from you and read through your progress, Chris. Glad to see that you're still at it strong.
The accidents/incidents are rough I've had similar but you're right, sh*t happens it's all about moving forward after and keeping the Z proper.
I'll be posting an update on my page after I get my new exhaust fabricated, should be cool

The accidents/incidents are rough I've had similar but you're right, sh*t happens it's all about moving forward after and keeping the Z proper.
I'll be posting an update on my page after I get my new exhaust fabricated, should be cool
The following users liked this post:
ChriZTT (11-26-2016)
11-26-2016, 11:58 AM
#138
Bad ***!
Looks like you two have had an eventful year haha.
Always loved this build, it's a shame when people tear up your stuff. Happened to me last year, bumper is slightly dented and the hatch is far from perfect now. BUT - racecar, so I got over it pretty quickly haha.
Glad to see you're back!
Looks like you two have had an eventful year haha.
Always loved this build, it's a shame when people tear up your stuff. Happened to me last year, bumper is slightly dented and the hatch is far from perfect now. BUT - racecar, so I got over it pretty quickly haha.
Glad to see you're back!
The following users liked this post:
QuintonC (11-26-2016)
11-26-2016, 12:01 PM
#139
Good to hear from you and read through your progress, Chris. Glad to see that you're still at it strong.
The accidents/incidents are rough I've had similar but you're right, sh*t happens it's all about moving forward after and keeping the Z proper.
I'll be posting an update on my page after I get my new exhaust fabricated, should be cool
The accidents/incidents are rough I've had similar but you're right, sh*t happens it's all about moving forward after and keeping the Z proper.
I'll be posting an update on my page after I get my new exhaust fabricated, should be cool
The following users liked this post:
pyshin (11-26-2016)
11-27-2016, 05:37 AM
#140
I knew those rears look familiar hahaha. Car is looking awesome. I just haven't seen this machine at autox yet  We need to heat those brakes up
Someone(myhead) told me you were selling those TC105 
On a serious note did you scrap the oem front or selling that?
Car has made awesome progress bud!
Chris
We need to heat those brakes up Someone(myhead) told me you were selling those TC105
On a serious note did you scrap the oem front or selling that?
Car has made awesome progress bud!
Chris