How To: Paint Your Brembos
 12-09-2006, 12:41 PM
#1

After reading a couple of threads where people were asking about this I decided "what the hell"
Step 1: Deciding on a color and brand of Caliper paint.
I went with Dupli-colors Caliper Paint and decided to go Red. You can choose what ever brand color you want though.

Step 2: Clean your calipers with the brake cleaner provided. I went over everything twice to make sure it was clean. I also allowed it time to make sure everything was dry afterwards.
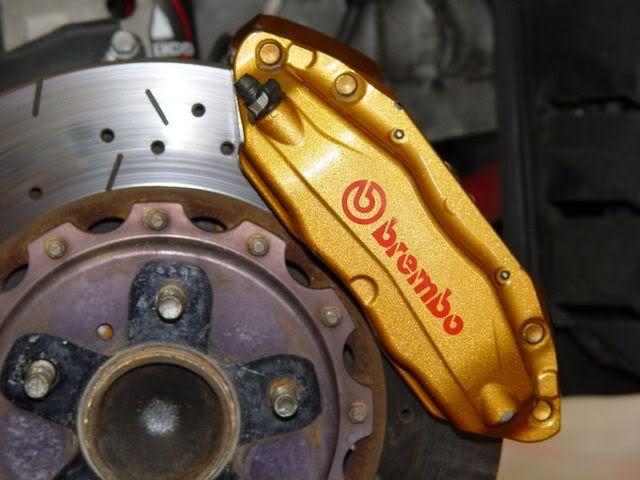
Step 3: Using the provided tape mask off the areas you dont want to paint. Used some 400 grit sand paper to scuff up the paint.

Step 4: Now comes the good stuff. Open your can of paint and stir it for 1 minute with the stir stick that was provided. Now with the brush apply a light coating to your calipers. I did a very light coat, since I was going to be doing multiple coatings. Here is what it looked like (please forgive the photos, there was a lot of glare)
1st coat

2nd coat
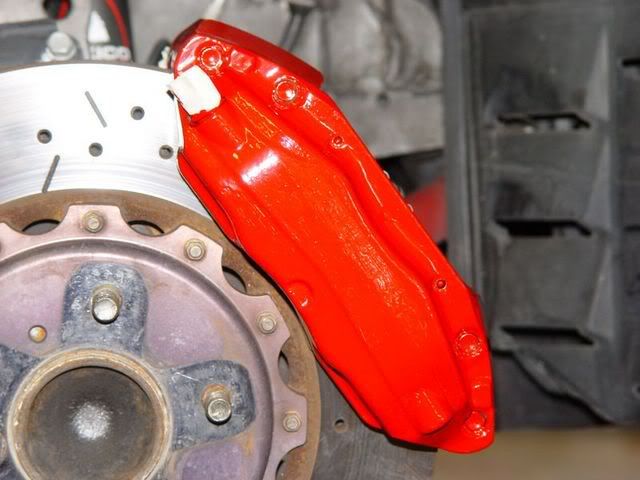
3rd coat

4th and final coat

Allow 20-30 minutes between coats to allow then to start to set up.
Allow 2 hours after final coat before putting the wheels back on.
And last but not least allow at least 24 hours for everything to harden before washing of anything of that sort.
Here is the end result. I will be applying new Brembo Stickers after everything is set up.
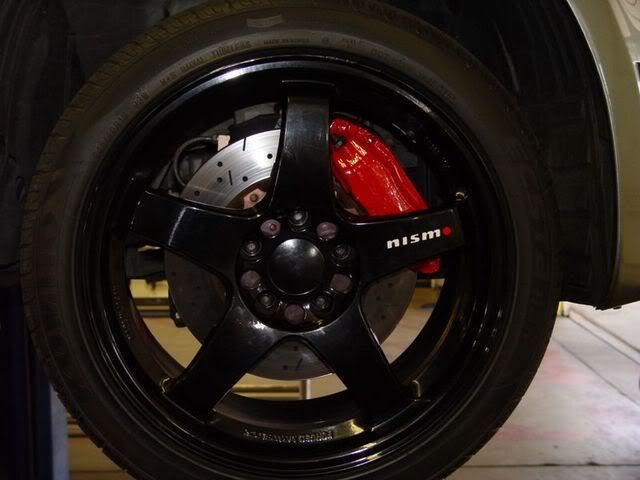

That's it. You could get way more indepth with this whole things by removing the caliper, but you can only see so much with the wheel on.
Step 1: Deciding on a color and brand of Caliper paint.
I went with Dupli-colors Caliper Paint and decided to go Red. You can choose what ever brand color you want though.
Step 2: Clean your calipers with the brake cleaner provided. I went over everything twice to make sure it was clean. I also allowed it time to make sure everything was dry afterwards.
Step 3: Using the provided tape mask off the areas you dont want to paint. Used some 400 grit sand paper to scuff up the paint.
Step 4: Now comes the good stuff. Open your can of paint and stir it for 1 minute with the stir stick that was provided. Now with the brush apply a light coating to your calipers. I did a very light coat, since I was going to be doing multiple coatings. Here is what it looked like (please forgive the photos, there was a lot of glare)
1st coat
2nd coat
3rd coat
4th and final coat
Allow 20-30 minutes between coats to allow then to start to set up.
Allow 2 hours after final coat before putting the wheels back on.
And last but not least allow at least 24 hours for everything to harden before washing of anything of that sort.
Here is the end result. I will be applying new Brembo Stickers after everything is set up.
That's it. You could get way more indepth with this whole things by removing the caliper, but you can only see so much with the wheel on.
Last edited by Mike Wazowski; 12-09-2006 at 04:41 PM.
 12-09-2006, 04:17 PM
#2
Registered User
iTrader: (19)

Join Date: Apr 2004
Location: San Luis Obispo, CA
Posts: 948
Likes: 0
Received 0 Likes
on
0 Posts
Nice job man. How did the paint lay down? Is there brush strokes or is it pretty smooth? Also what kind of rotors are those? They look real nice too.
Gary
Gary


 12-09-2006, 04:47 PM
#4
Originally Posted by Gary King
Nice job man. How did the paint lay down? Is there brush strokes or is it pretty smooth? Also what kind of rotors are those? They look real nice too.
Gary
Gary
http://www.stillen.com/product_detai...?sku=NIS3600XS
My pads are almost done so I will be switching to the new EBC Rotors and see how those work.
 12-10-2006, 09:42 AM
#6
Registered User
Join Date: Sep 2005
Location: Houston, Texas
Posts: 668
Likes: 0
Received 0 Likes
on
0 Posts
Originally Posted by USN HM 350Z
Brake Pros Rotors.
http://www.stillen.com/product_detai...?sku=NIS3600XS
My pads are almost done so I will be switching to the new EBC Rotors and see how those work.
http://www.stillen.com/product_detai...?sku=NIS3600XS
My pads are almost done so I will be switching to the new EBC Rotors and see how those work.
Dude, those are the rotors I have. I have not seen anyone else with them.

Trending Topics

 12-13-2006, 06:49 PM
#10
Registered User
iTrader: (3)
Join Date: Dec 2003
Location: Chicago
Posts: 529
Likes: 0
Received 0 Likes
on
0 Posts
Originally Posted by Jokestrap
Dude, those are the rotors I have. I have not seen anyone else with them.
12-17-2006, 11:18 AM
#13
Registered User
iTrader: (8)
Join Date: Nov 2005
Location: Boston
Posts: 330
Likes: 0
Received 0 Likes
on
0 Posts
Thanks for the DIY. I'm going to paint mine black.
I found another brand of paint that is similar. tireRack says says its "suitable for Racecars" so it must be good right.
http://g2usa.com/brake_caliper_paint.shtml
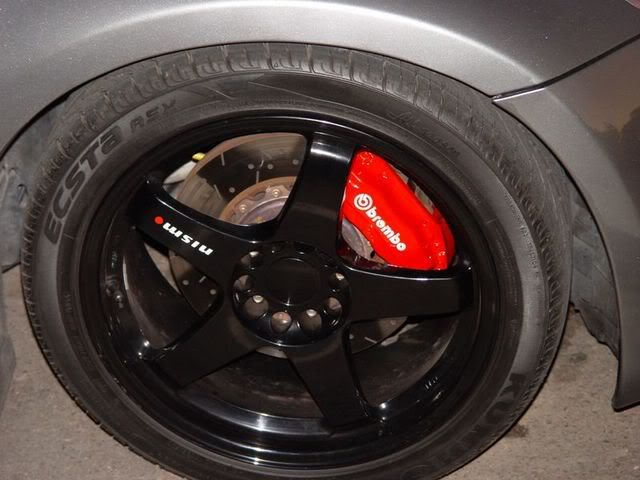
any chance of seeing a pic of the front quarter of the car? Like the one above? So we can see how the color works with the Z's styling?
I found another brand of paint that is similar. tireRack says says its "suitable for Racecars" so it must be good right.
http://g2usa.com/brake_caliper_paint.shtml
any chance of seeing a pic of the front quarter of the car? Like the one above? So we can see how the color works with the Z's styling?
Last edited by Scarab440; 12-17-2006 at 11:20 AM.
12-17-2006, 11:32 AM
#14
Registered User
iTrader: (24)

Join Date: Jan 2006
Location: Long Island
Posts: 408
Likes: 0
Received 0 Likes
on
0 Posts
hmm. i never understood why some would want to paint over the gold brembos. I think it gives it a unique look only had by the G/Z, sentra, and STI i believe. Everyone has red, and black brembos. but to each his own. Good luck with it
12-17-2006, 11:49 AM
#15
Registered User
iTrader: (8)
Join Date: Nov 2005
Location: Boston
Posts: 330
Likes: 0
Received 0 Likes
on
0 Posts
Originally Posted by ESPO 774
hmm. i never understood why some would want to paint over the gold brembos. I think it gives it a unique look only had by the G/Z, sentra, and STI i believe. Everyone has red, and black brembos. but to each his own. Good luck with it
12-18-2006, 03:18 AM
#18
Registered User
iTrader: (8)
Join Date: Nov 2005
Location: Boston
Posts: 330
Likes: 0
Received 0 Likes
on
0 Posts
Originally Posted by Abishop
what did you do about the brembo decals on the rear calipers?

