DIY - Lower Control Arm Bushing Replacement - Translink


 04-08-2012, 06:36 PM
#146

I was thinking about doing the energy suspension bushing in this spot which is a 2 piece. Anyone have one of these and can make a comment on quality?
Also was wondering about the outer sleeve from the stock bushing when installing the energy bushing as it does not seem to come with its own outer metal sleeve. Do you just remove and run without it? Seems like installation will be much easier also.
Also was wondering about the outer sleeve from the stock bushing when installing the energy bushing as it does not seem to come with its own outer metal sleeve. Do you just remove and run without it? Seems like installation will be much easier also.
04-09-2012, 05:36 AM
#147

I was thinking about doing the energy suspension bushing in this spot which is a 2 piece. Anyone have one of these and can make a comment on quality?
Also was wondering about the outer sleeve from the stock bushing when installing the energy bushing as it does not seem to come with its own outer metal sleeve. Do you just remove and run without it? Seems like installation will be much easier also.
Also was wondering about the outer sleeve from the stock bushing when installing the energy bushing as it does not seem to come with its own outer metal sleeve. Do you just remove and run without it? Seems like installation will be much easier also.
If you want a major improvement do the rear bushings and subframe mounts. Replacement of the eliminated any wheel hop wet or dry. It's definetly a pain but worth it IMO. I'm still running oem 54k mile shocks and springs as well.
04-11-2012, 05:56 AM
#148
I'm running the ES bushings everywhere except the compression arm and diff mounts (Spl there). I ran the front 1st and it made a significant difference in tightening up the front end. And yes the 3 piece bushings ( 2 urethane halfs and metal sleeve) are very easy to instal with some all thread and washers. Just make sure to grease the sides of the bushings and mating surfaces for a squeek free install.
So you just disregard that outer metal sleeve that the stock and whiteline bushings use?
 07-19-2012, 10:01 AM
#151
Registered User
iTrader: (3)

Join Date: May 2011
Location: Cupertino, CA
Posts: 58
Likes: 0
Received 0 Likes
on
0 Posts
I was wondering if it's possible to press the bushings in without F-Socket by having a metal plate sit on top of polyurethane bushing and press it it. (I believe the purpose of F-socket was to push the metal sleeve only however I think I saw a photo in this thread that one member pushed it in by pressing on the polyurethane part.) Did anybody try it? Does the bushing slide from the sleeve? and does it damage the bushing in anyway? I'm thinking about going to a shop to put these in, however I doubt that they will use F-Socket and guess they might just press it from the top. Let me know what you guys think! thanks.
07-19-2012, 10:04 AM
#152
Registered User
iTrader: (3)
Join Date: May 2011
Location: Cupertino, CA
Posts: 58
Likes: 0
Received 0 Likes
on
0 Posts
Look Familiar?

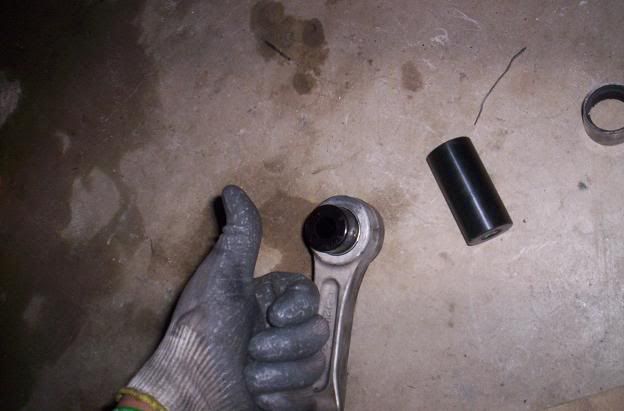
A pic of metal to metal wear since I had to drive it like this for over 3 wks..
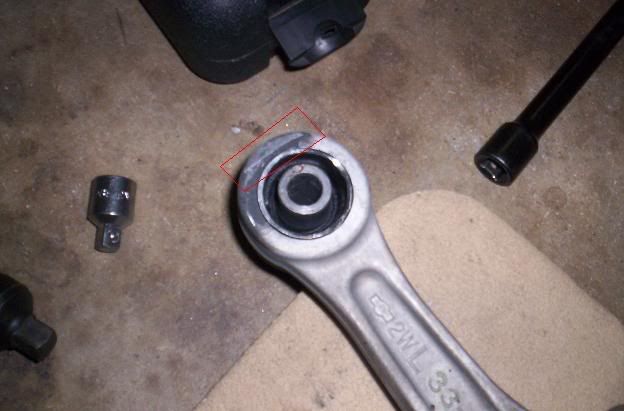
Old CRAPTASTIC OEM Bushing
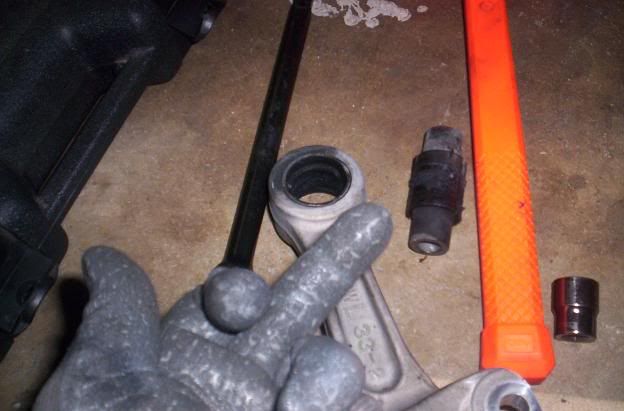
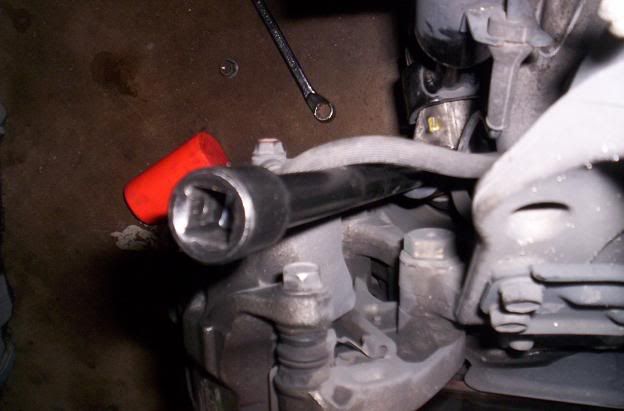
Getting that hoe bag out
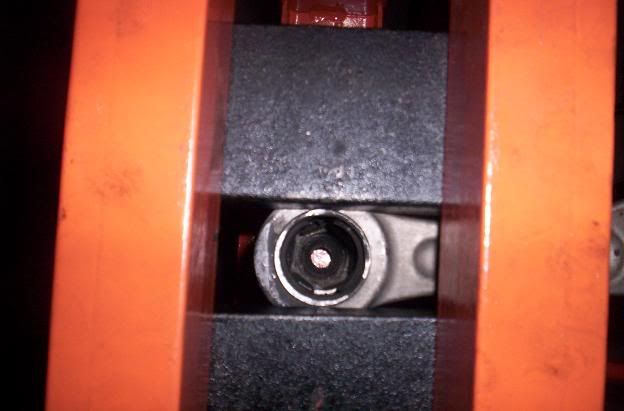
New one installed - if you cant tell Im a happy camper
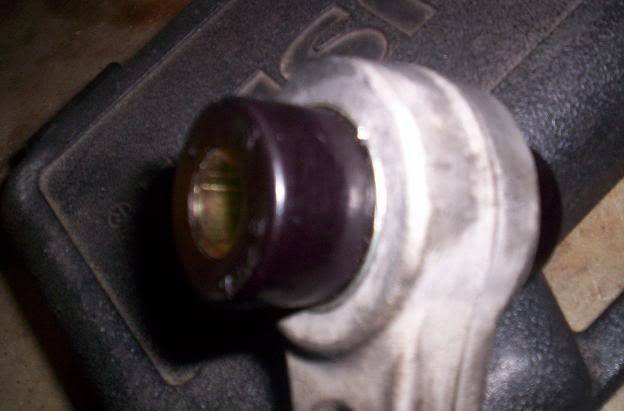
DONE
Win for this DIY since I believe the whole arm costs like 200 bucks.. I got the bushings for 50 bucks (give or take) and labor was all me..
THX AGAIN Z-YA!
A pic of metal to metal wear since I had to drive it like this for over 3 wks..
Old CRAPTASTIC OEM Bushing
Getting that hoe bag out
New one installed - if you cant tell Im a happy camper
DONE
Win for this DIY since I believe the whole arm costs like 200 bucks.. I got the bushings for 50 bucks (give or take) and labor was all me..
THX AGAIN Z-YA!
07-19-2012, 10:09 AM
#153
350Z-holic

Thread Starter
iTrader: (60)
Join Date: Jan 2006
Location: San Antonio/I miss DFW, TX
Posts: 11,204
Likes: 0
Received 28 Likes
on
19 Posts
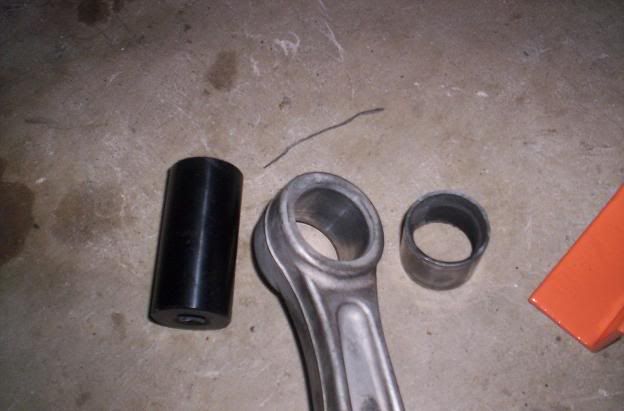
dude, that is acid jakes install, you can NOT press just the polyurethane in...
you dont need to weld a franksocket but you do Need a metal pipe that fits and connects to the outer race of the whileine bushing and a metal plate across the metal pipe to push the bushing in by attaching to the metal outer race of the whiteline bushings.
if you do what your suggesting - putting a plate across the poly - you will just rib the poly right off its own outer race..
the pics posted in the post above me dont show the f-socket jake used to press the bushing into the translink.....
-J
Last edited by JasonZ-YA; 07-19-2012 at 10:11 AM.
07-19-2012, 10:19 AM
#154
350Z-holic
Thread Starter
iTrader: (60)
Join Date: Jan 2006
Location: San Antonio/I miss DFW, TX
Posts: 11,204
Likes: 0
Received 28 Likes
on
19 Posts
read post 6:
https://my350z.com/forum/7852215-post6.html
and omit the welding, just slap a plate across the steel tube that pushes the outer race of the bushing into place..
-J
https://my350z.com/forum/7852215-post6.html
and omit the welding, just slap a plate across the steel tube that pushes the outer race of the bushing into place..
-J
07-19-2012, 10:30 AM
#155
Registered User
iTrader: (3)
Join Date: May 2011
Location: Cupertino, CA
Posts: 58
Likes: 0
Received 0 Likes
on
0 Posts
dude, that is acid jakes install, you can NOT press just the polyurethane in...
you dont need to weld a franksocket but you do Need a metal pipe that fits and connects to the outer race of the whileine bushing and a metal plate across the metal pipe to push the bushing in by attaching to the metal outer race of the whiteline bushings.
if you do what your suggesting - putting a plate across the poly - you will just rib the poly right off its own outer race..
the pics posted in the post above me dont show the f-socket jake used to press the bushing into the translink.....
-J
you dont need to weld a franksocket but you do Need a metal pipe that fits and connects to the outer race of the whileine bushing and a metal plate across the metal pipe to push the bushing in by attaching to the metal outer race of the whiteline bushings.
if you do what your suggesting - putting a plate across the poly - you will just rib the poly right off its own outer race..
the pics posted in the post above me dont show the f-socket jake used to press the bushing into the translink.....
-J
 07-19-2012, 10:33 AM
#156
350Z-holic
Thread Starter
iTrader: (60)
Join Date: Jan 2006
Location: San Antonio/I miss DFW, TX
Posts: 11,204
Likes: 0
Received 28 Likes
on
19 Posts
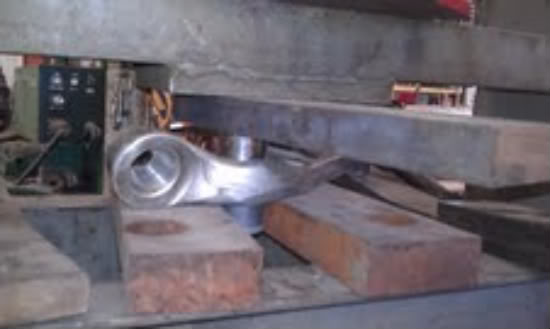
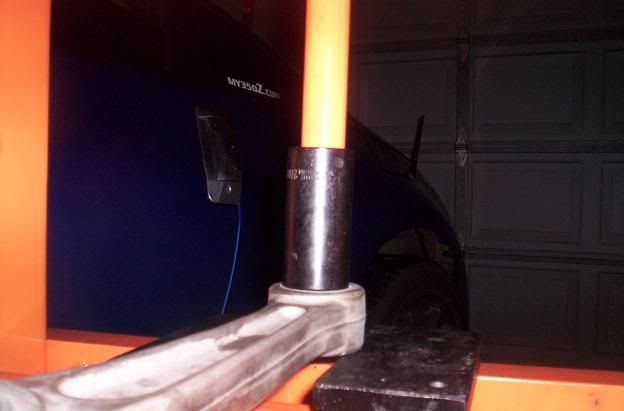
^ ya man, any local metal yard or even a neighborhood welder will have a piece of 2 inch OD with .25 inch wall steel pipe laying around. That will result in a 1.5" Inner diameter working piece.
have them cut it to a 1-1/2 inch long segment and then slap any thick steel plate across it and press away.
I welded mine together to be a quick shop tool.....i have installed i swear about 30 of these whiteline bushings on peoples 350z's...
-J
have them cut it to a 1-1/2 inch long segment and then slap any thick steel plate across it and press away.
I welded mine together to be a quick shop tool.....i have installed i swear about 30 of these whiteline bushings on peoples 350z's...
-J
07-19-2012, 03:58 PM
#157
350Z-holic
Thread Starter
iTrader: (60)
Join Date: Jan 2006
Location: San Antonio/I miss DFW, TX
Posts: 11,204
Likes: 0
Received 28 Likes
on
19 Posts
IMAG0671.jpg?t=1342728628
-J
10-14-2012, 04:37 AM
#158
Registered User

Join Date: Sep 2012
Location: Ontario
Posts: 1
Likes: 0
Received 0 Likes
on
0 Posts
JasonZ - thanks for an awesome write-up!
I'm getting into auto mechanics, and learning my way around a 350Z, so these how-to threads are incredibly useful. I learned a couple things in the process of replacing my lower control arm yesterday - hopefully no more creaking and grinding . Had a couple questions that might help other newbies to the process...
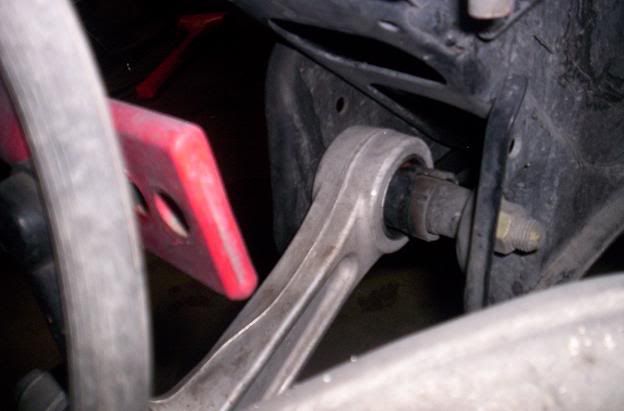
I had a heck of a time removing the bolt holding the sway bar connecting rod to the control arm (location #3), until I got a jack under the control arm and cranked it up to take the load off the bolt. I'm realizing now that this is probably because I only had one side of the car on a stand, so the sway bar was loaded by the wheel on the ground on the other side. Does this make sense - should both sides be jacked up to make this easier?
The ball joint (location #1) caused me some grief, because the bolt in the ball joint just spins when I turn the (somewhat corroded) nut on the top. I ended up getting it off by disconnecting the rest of the control arm and hauling down on the joint to make it bind while turning the nut. But it leaked some grease out of the boot, and I fear I damaged the ball joint in the process. How do you best keep the bolt from spinning when you take that nut off?
I'm getting into auto mechanics, and learning my way around a 350Z, so these how-to threads are incredibly useful. I learned a couple things in the process of replacing my lower control arm yesterday - hopefully no more creaking and grinding
. Had a couple questions that might help other newbies to the process...I had a heck of a time removing the bolt holding the sway bar connecting rod to the control arm (location #3), until I got a jack under the control arm and cranked it up to take the load off the bolt. I'm realizing now that this is probably because I only had one side of the car on a stand, so the sway bar was loaded by the wheel on the ground on the other side. Does this make sense - should both sides be jacked up to make this easier?
The ball joint (location #1) caused me some grief, because the bolt in the ball joint just spins when I turn the (somewhat corroded) nut on the top. I ended up getting it off by disconnecting the rest of the control arm and hauling down on the joint to make it bind while turning the nut. But it leaked some grease out of the boot, and I fear I damaged the ball joint in the process. How do you best keep the bolt from spinning when you take that nut off?

