DIY – How to polish your plenum (many pics)
 04-09-2010, 10:16 AM
#1

I am not an expert or a pro, I am not telling you this is the way it is done or has to be done.
This is what I did and used to polish my plenum, I made this thread to help others.
If you know a better or faster way to do this by all means post how, we are all here just to help each other.
---
---
This job took me 25 hours over 4-5 days. If I had done it over 2 days and had a larger compressor I think I could have done it in much less time, around 16 hours possibly.
---
---
Before:

after:
----------
before:
after:

--------
before:
after:
This is what I did and used to polish my plenum, I made this thread to help others.
If you know a better or faster way to do this by all means post how, we are all here just to help each other.
---
---
This job took me 25 hours over 4-5 days. If I had done it over 2 days and had a larger compressor I think I could have done it in much less time, around 16 hours possibly.
---
---
Before:
after:
----------
before:
after:
--------
before:
after:
Last edited by XERMAN2001; 04-09-2010 at 10:28 AM.
 04-09-2010, 10:17 AM
#2
I have seen a few zeds online here with a polished oem upper plenum and liked it so I decided to do mine. Some have done them themselves others have paid around $300 to get them done professionally.
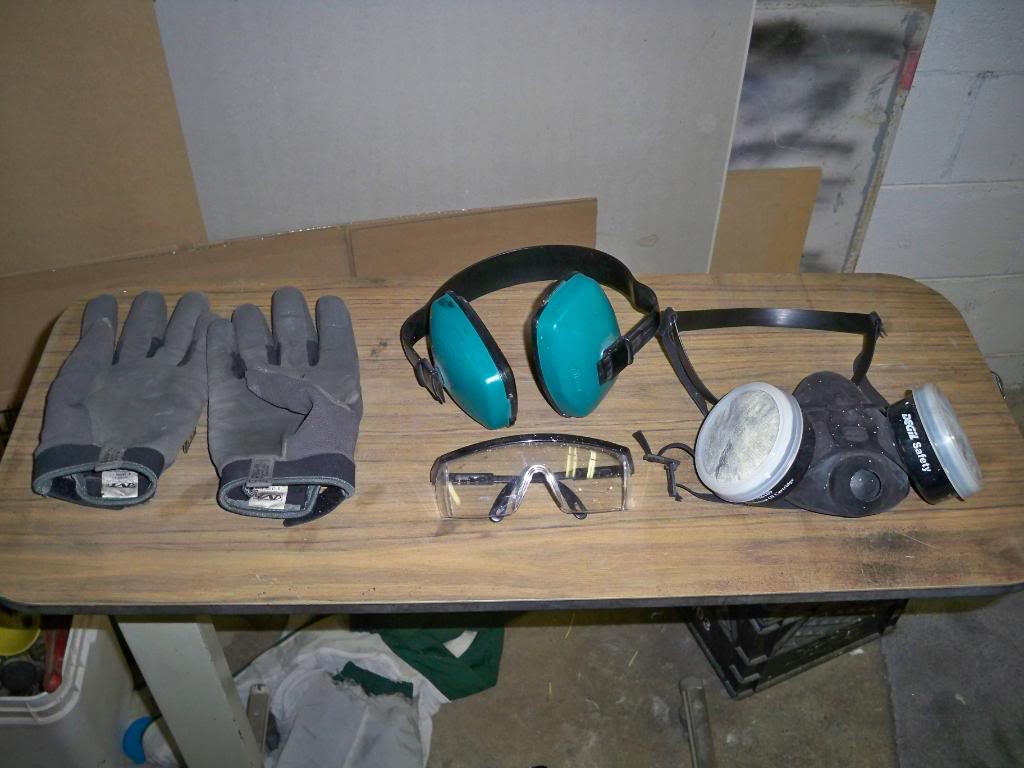
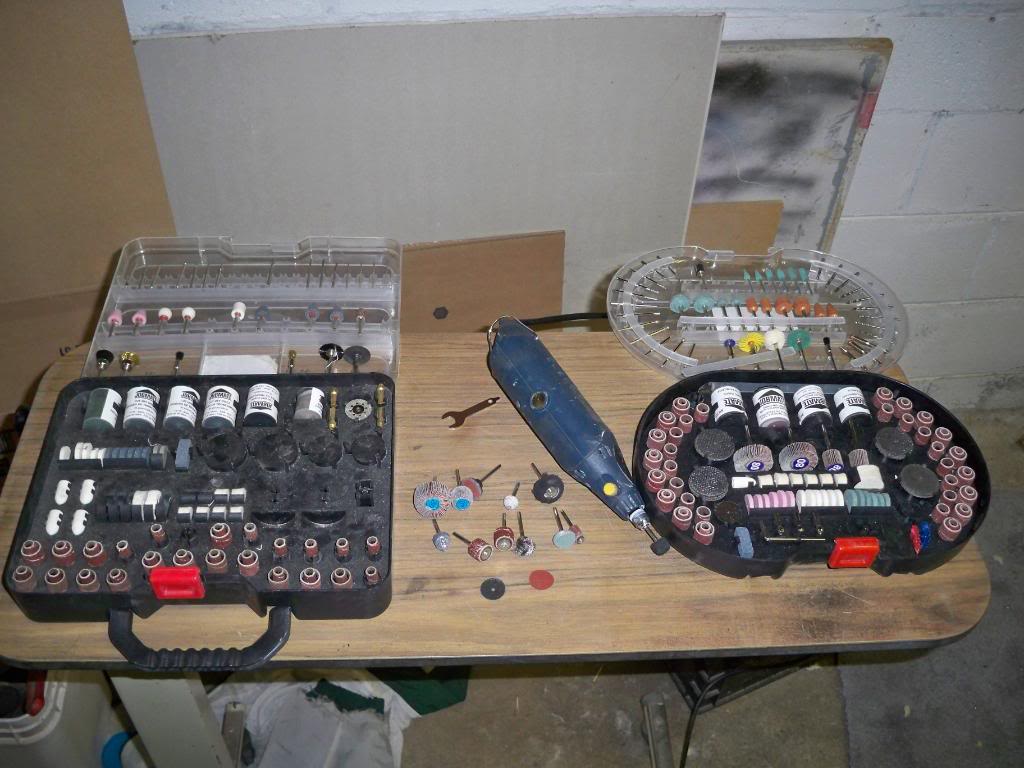
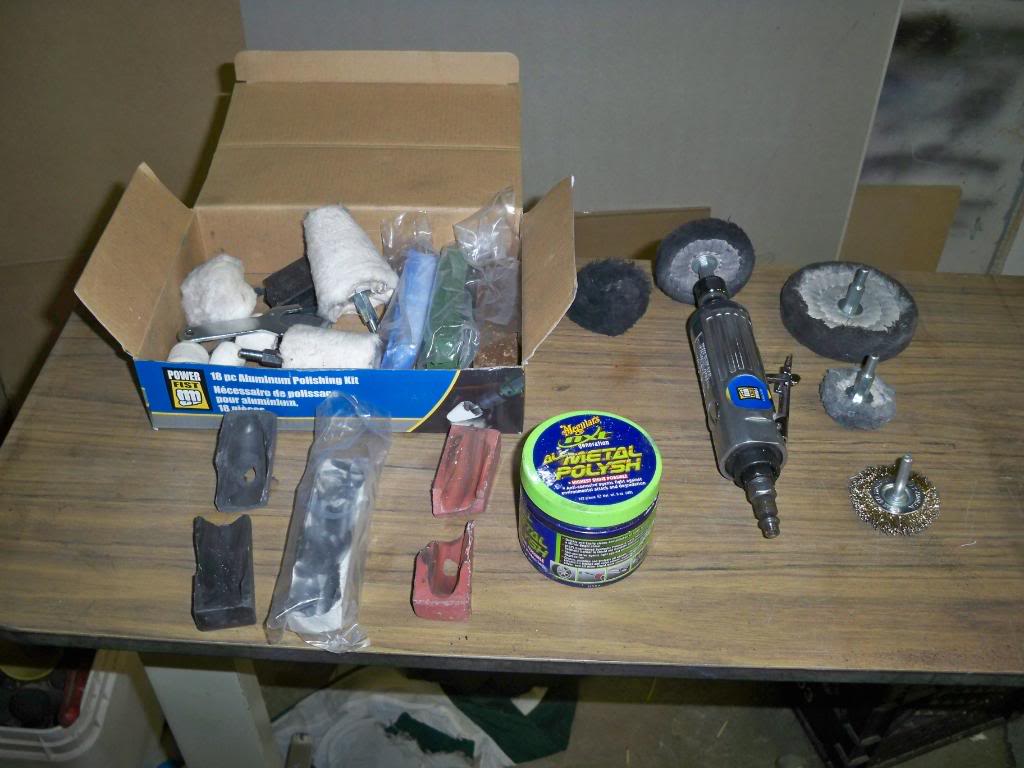
Here is some of the equipment I needed to complete this project
-Safety glasses
-respirator
-ear protection
-gloves
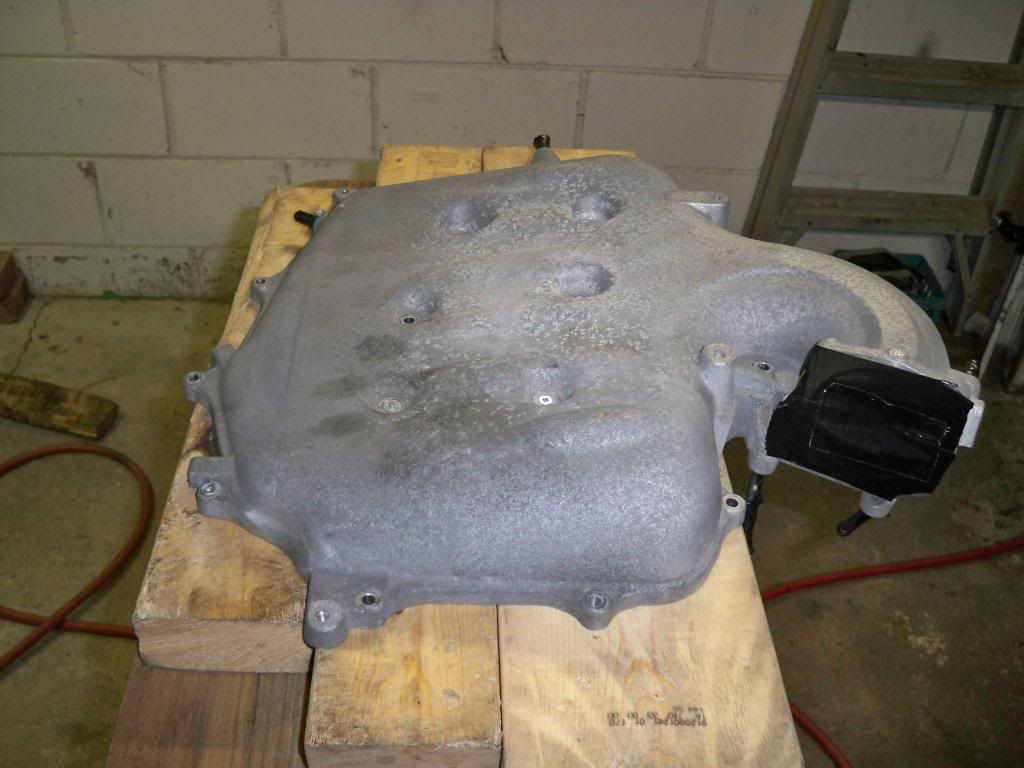
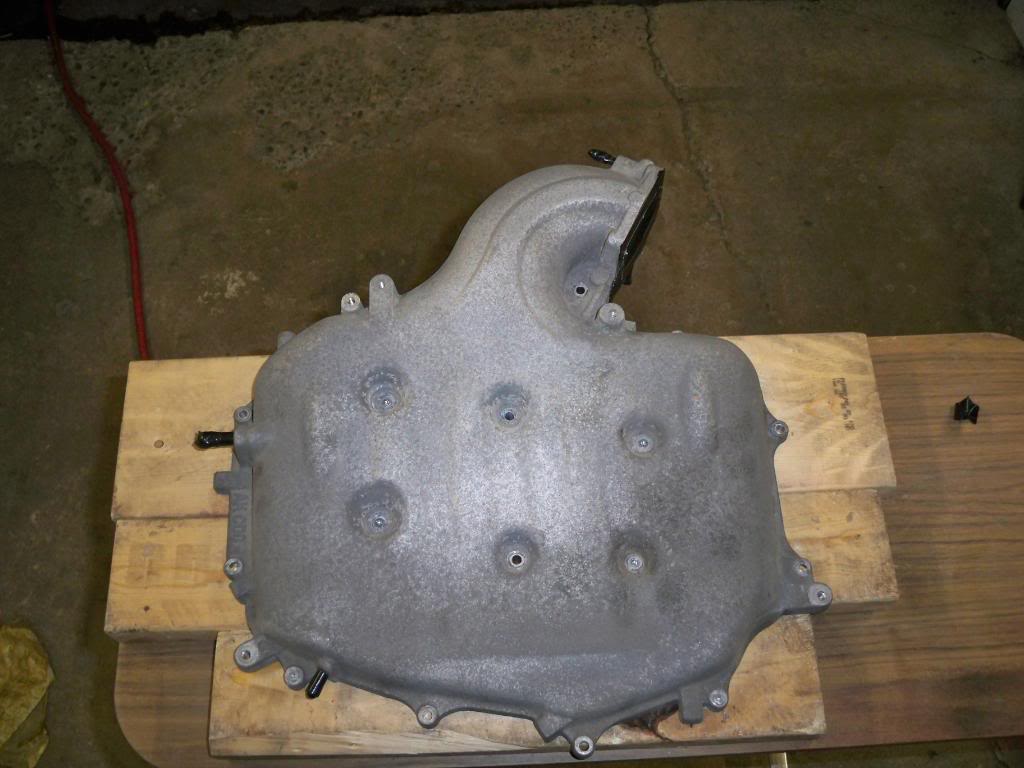
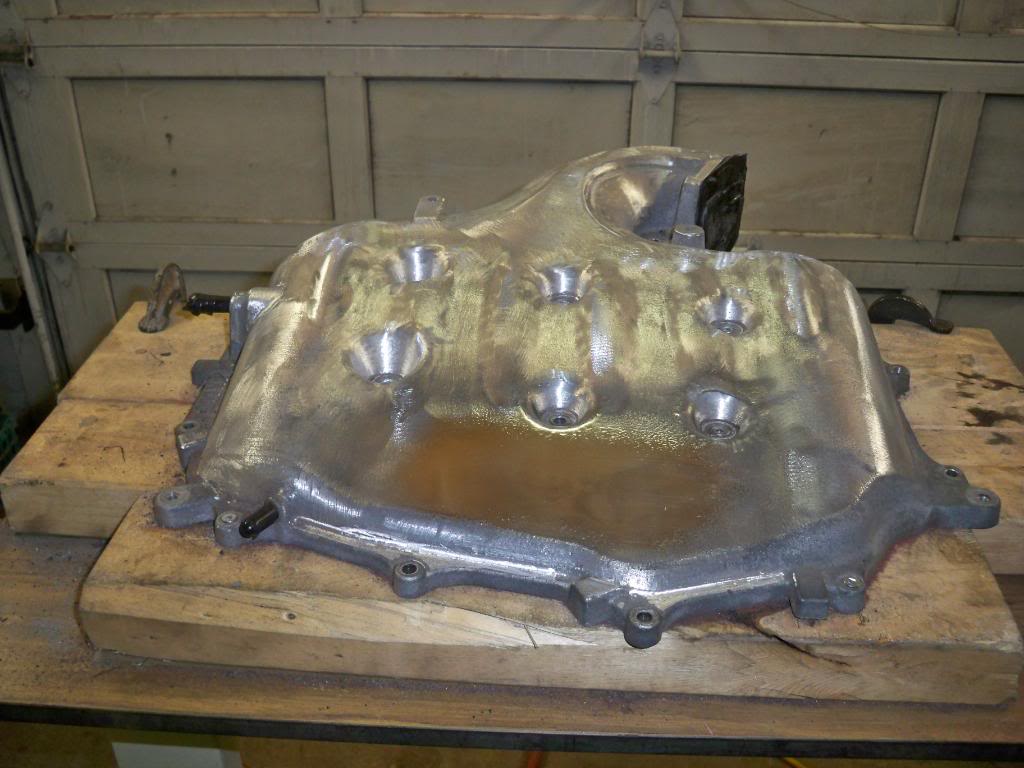
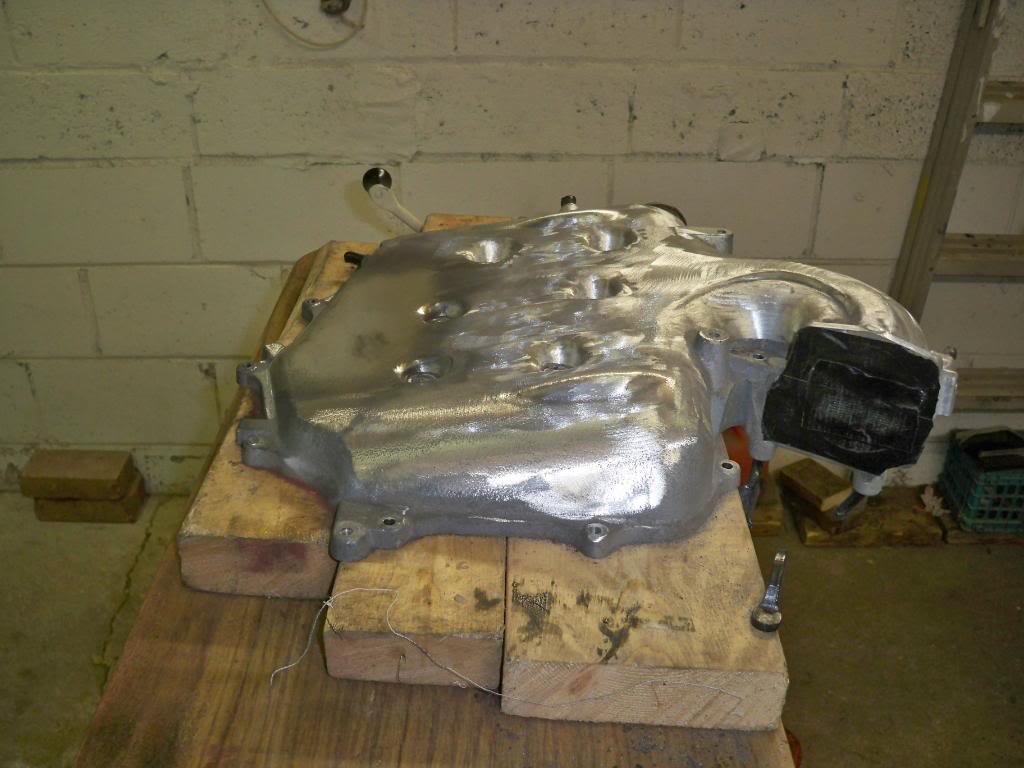
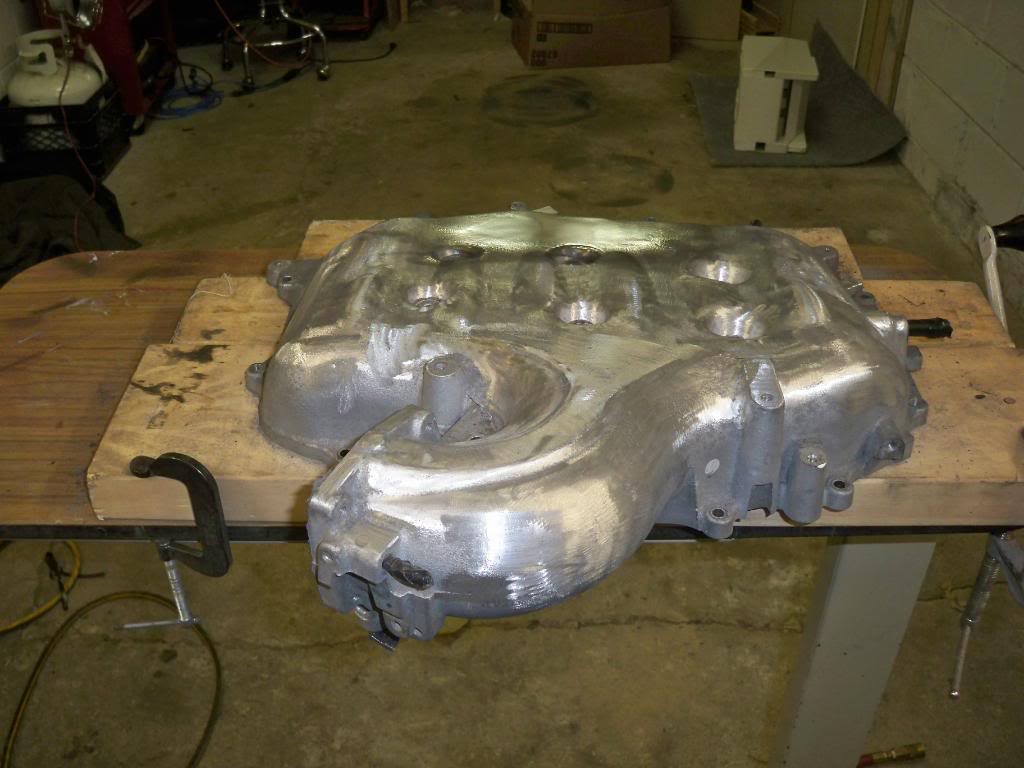
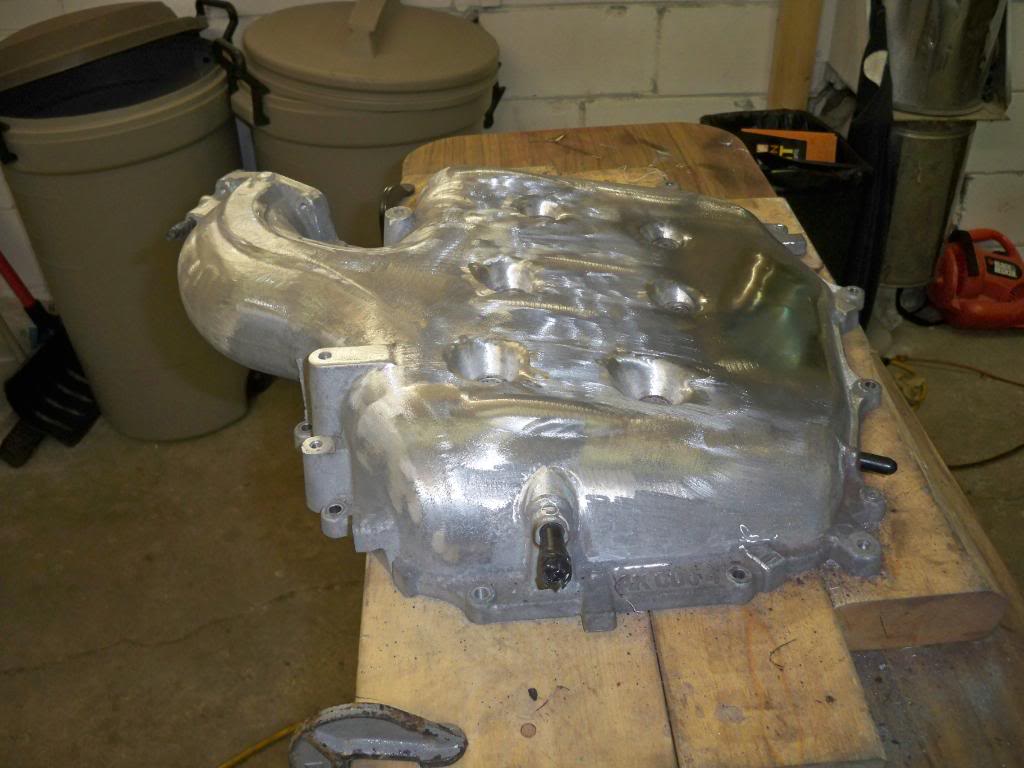
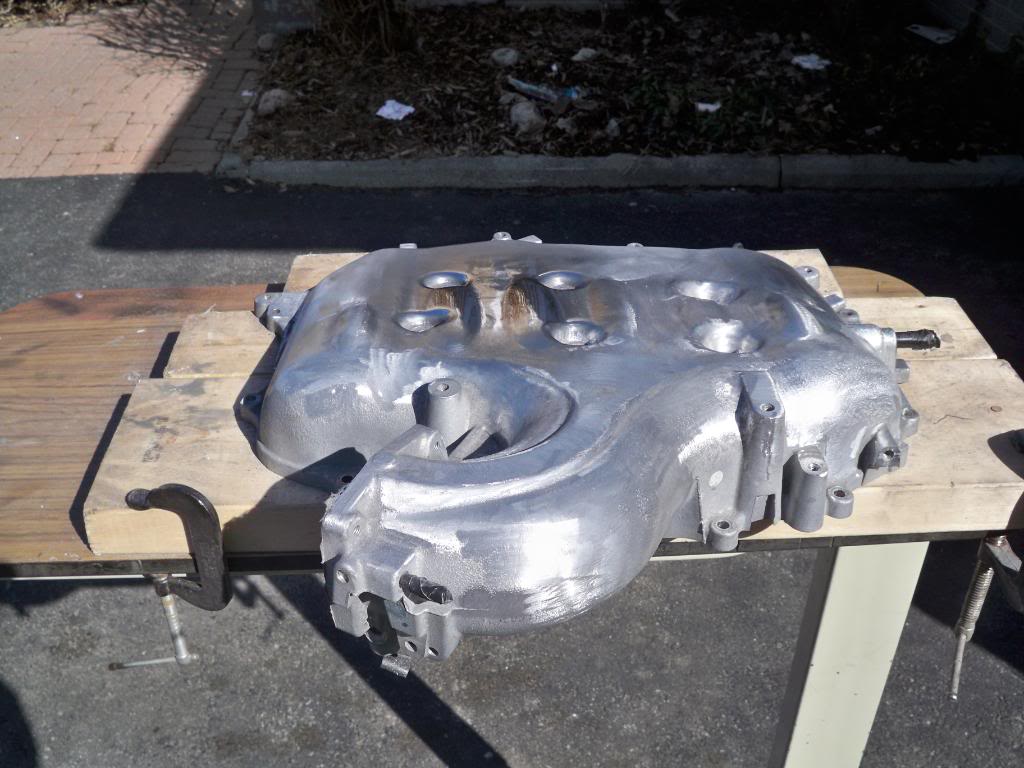
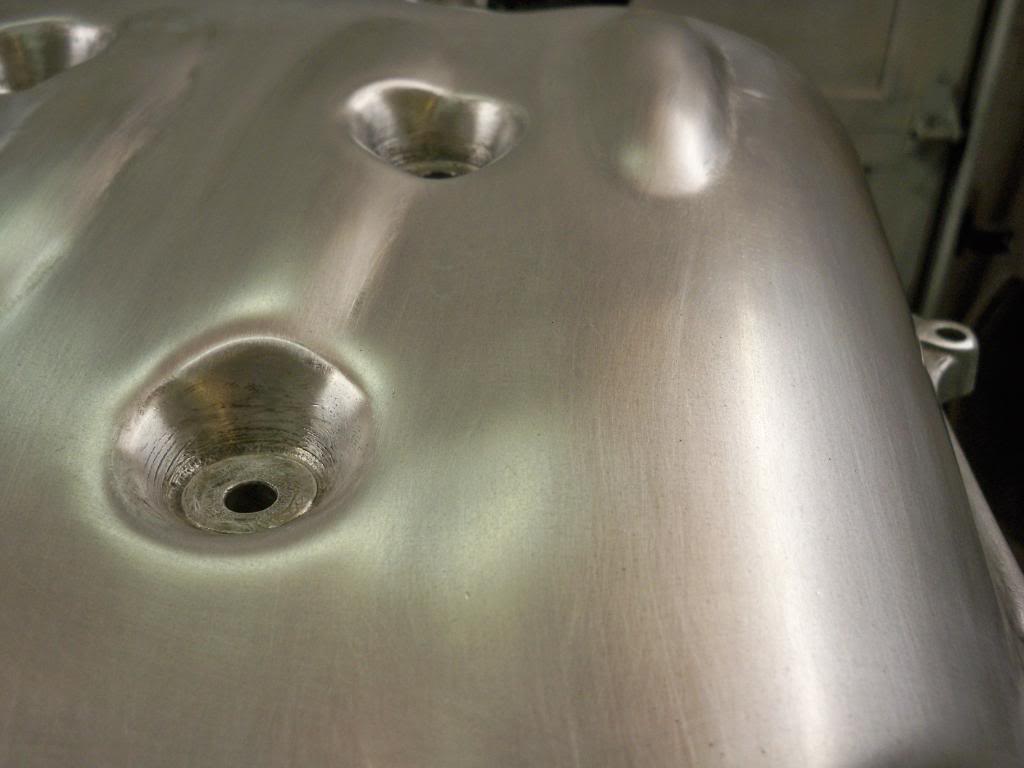
I bought an extra plenum to polish that way my car would still be drivable. What it looked like when I stared, rough and dirty.


---
---
---
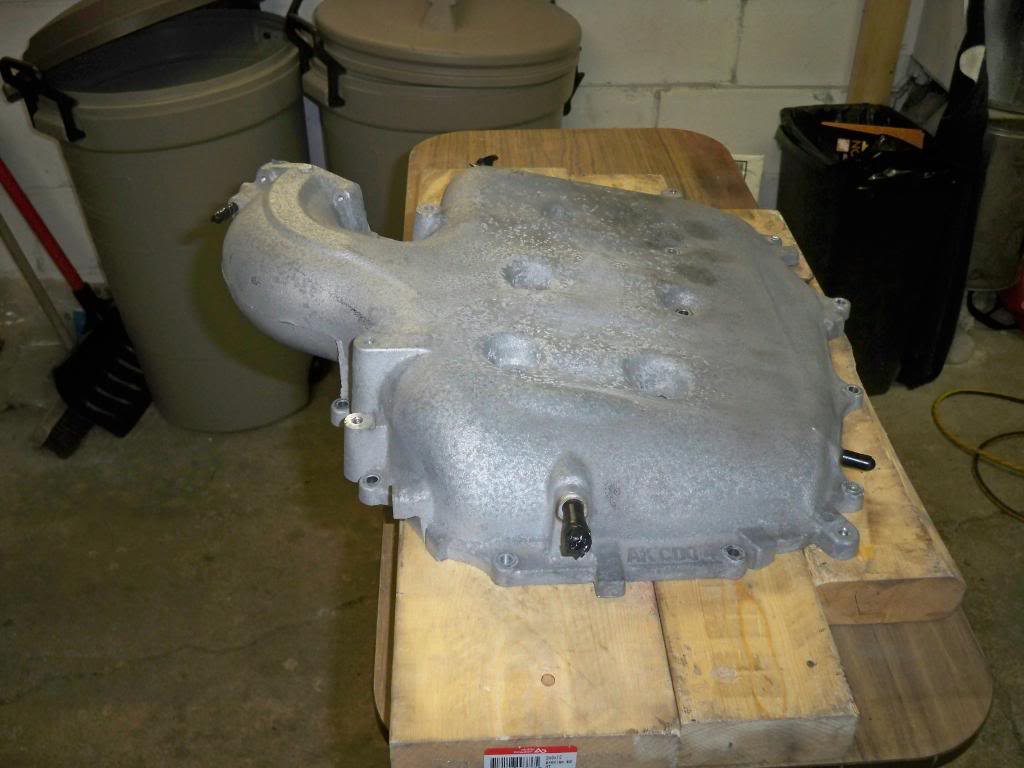
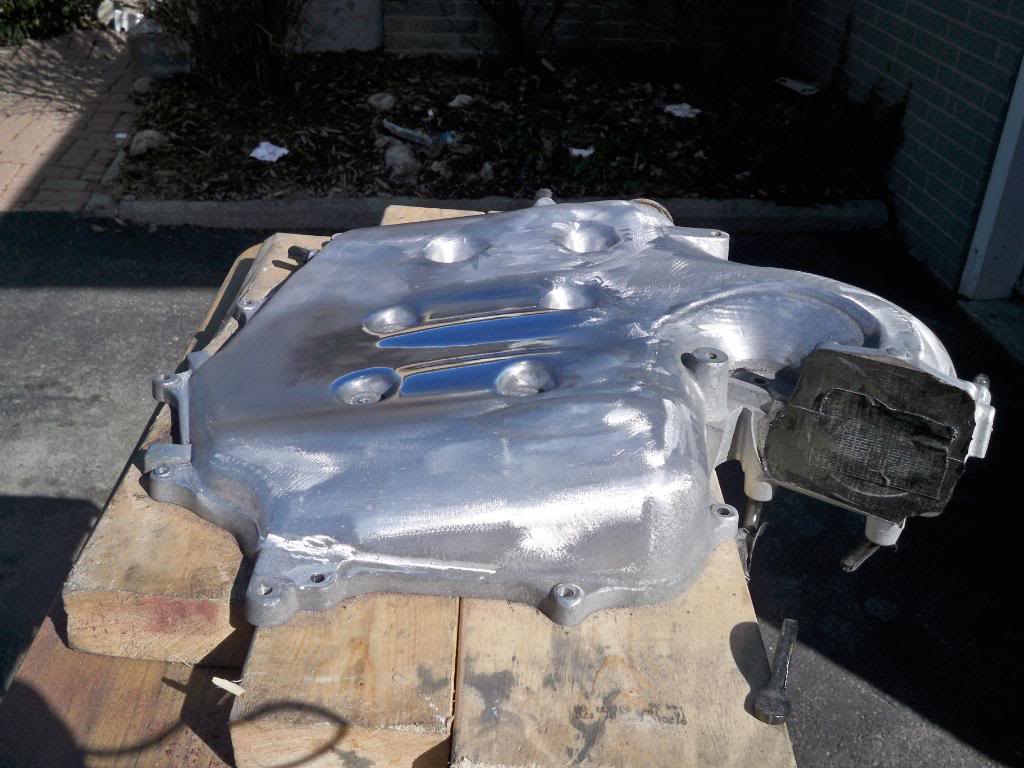
After 4 hours of using an air grinder with a 40 grit flap disk and a Rotary tool with a grinding stone. (should have took less time but even with 2 compressors I still had to wait for them to keep up)
Here is some of the equipment I needed to complete this project
-Air grinder
-40 grit flap disk
-Rotary tool with and assortment of grinding stones

On a small part of the plenum you can see I did a few more steps to see some shine, (I wanted some motivation lol)
---
---
--
--
Here is some of the equipment I needed to complete this project
-Safety glasses
-respirator
-ear protection
-gloves
I bought an extra plenum to polish that way my car would still be drivable. What it looked like when I stared, rough and dirty.
---
---
---
After 4 hours of using an air grinder with a 40 grit flap disk and a Rotary tool with a grinding stone. (should have took less time but even with 2 compressors I still had to wait for them to keep up)
Here is some of the equipment I needed to complete this project
-Air grinder
-40 grit flap disk
-Rotary tool with and assortment of grinding stones
On a small part of the plenum you can see I did a few more steps to see some shine, (I wanted some motivation lol)
---
---
--
--
Last edited by XERMAN2001; 04-09-2010 at 10:19 AM.
04-09-2010, 10:19 AM
#3
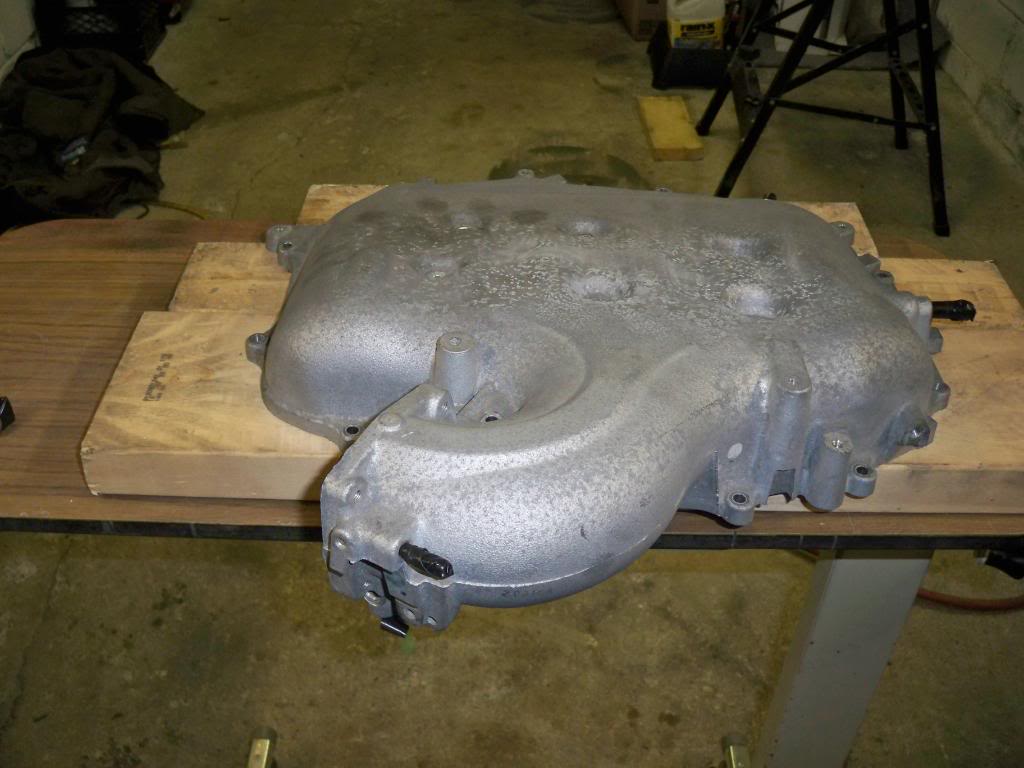
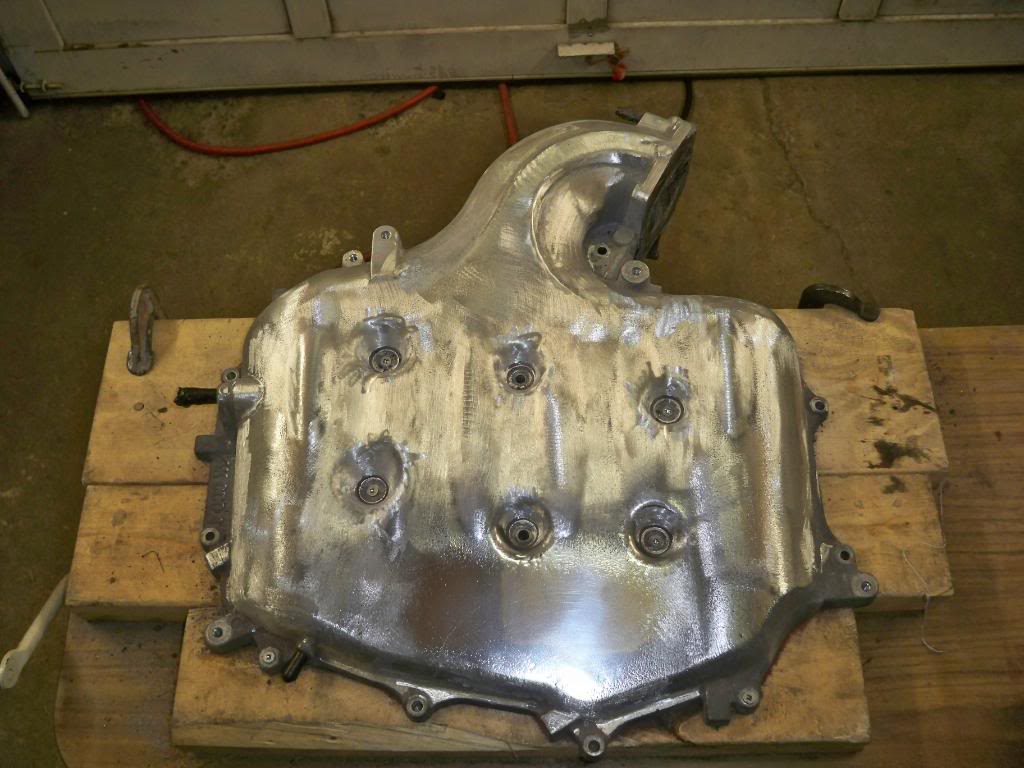
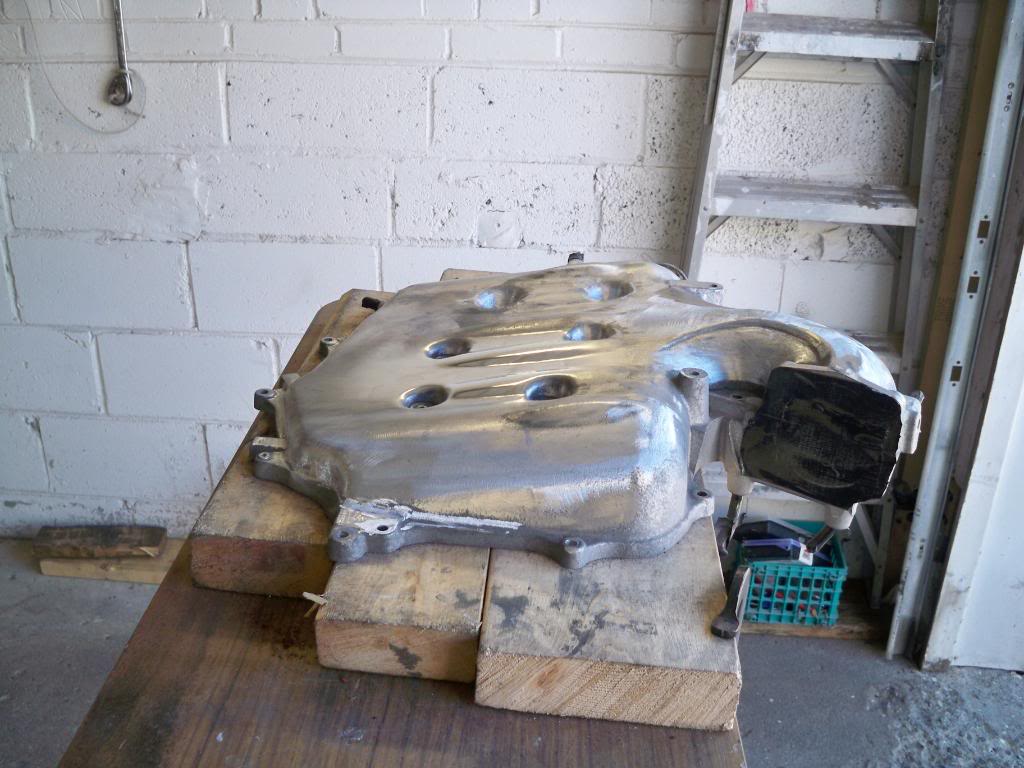
After another 4 hours of using an air grinder with a 80 grit flap disk and a Rotary tool with a grinding stone and 80 grit flap wheel. (should have took less time but even with 2 compressors I still had to wait for them to keep up)
Here is some of the equipment I needed to complete this project
-Air grinder
-80 grit flap disk
-Rotary tool with and assortment of grinding stones, sanding wheels and flap wheels.


On a small part of the plenum you can see I did a few more steps to see some shine, (I wanted some motivation lol)
Here is some of the equipment I needed to complete this project
-Air grinder
-80 grit flap disk
-Rotary tool with and assortment of grinding stones, sanding wheels and flap wheels.
On a small part of the plenum you can see I did a few more steps to see some shine, (I wanted some motivation lol)
04-09-2010, 10:20 AM
#4
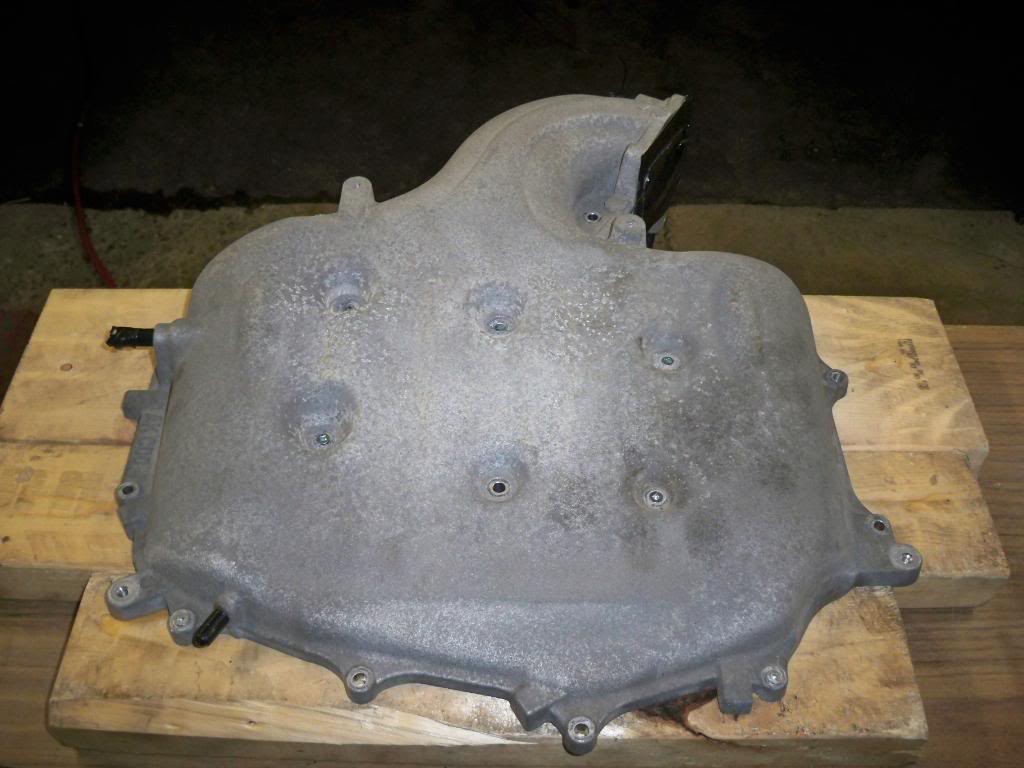
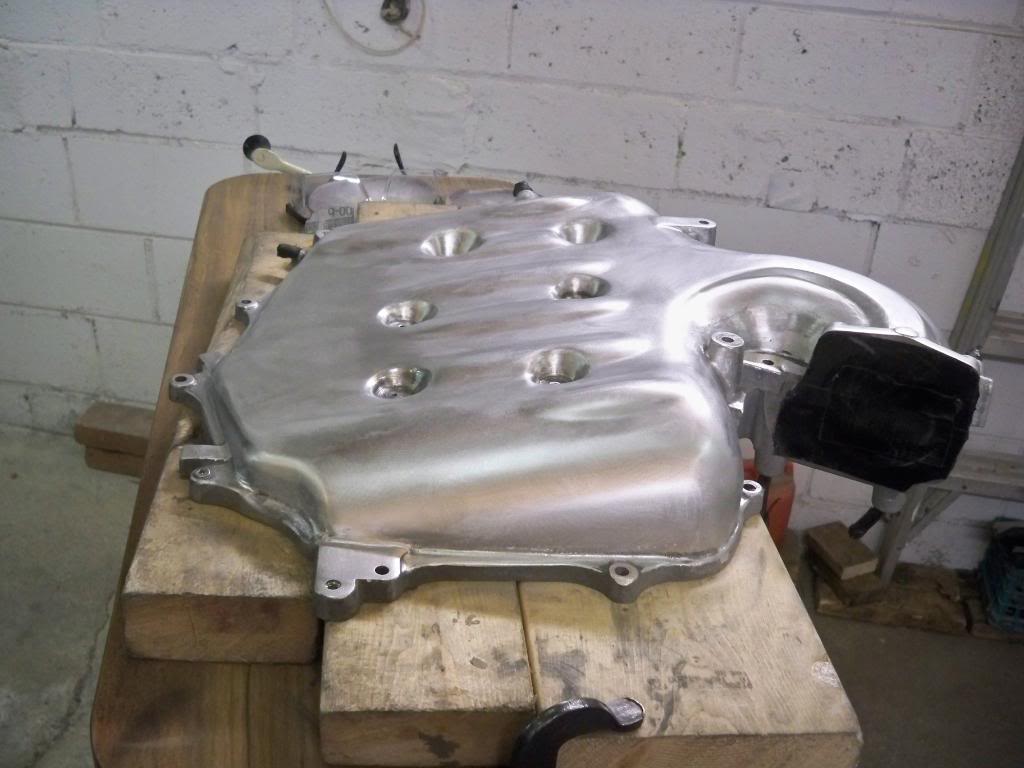
After another 6 hours of using an electric orbital sander with 80 grit sand paper, 120 grit sand paper and 220 grit sand paper. A Rotary tool with a 80 grit flap wheel and wire wheel. (should have took less time but even with 2 compressors I still had to wait for them to keep up)
Here is some of the equipment I needed to complete this project
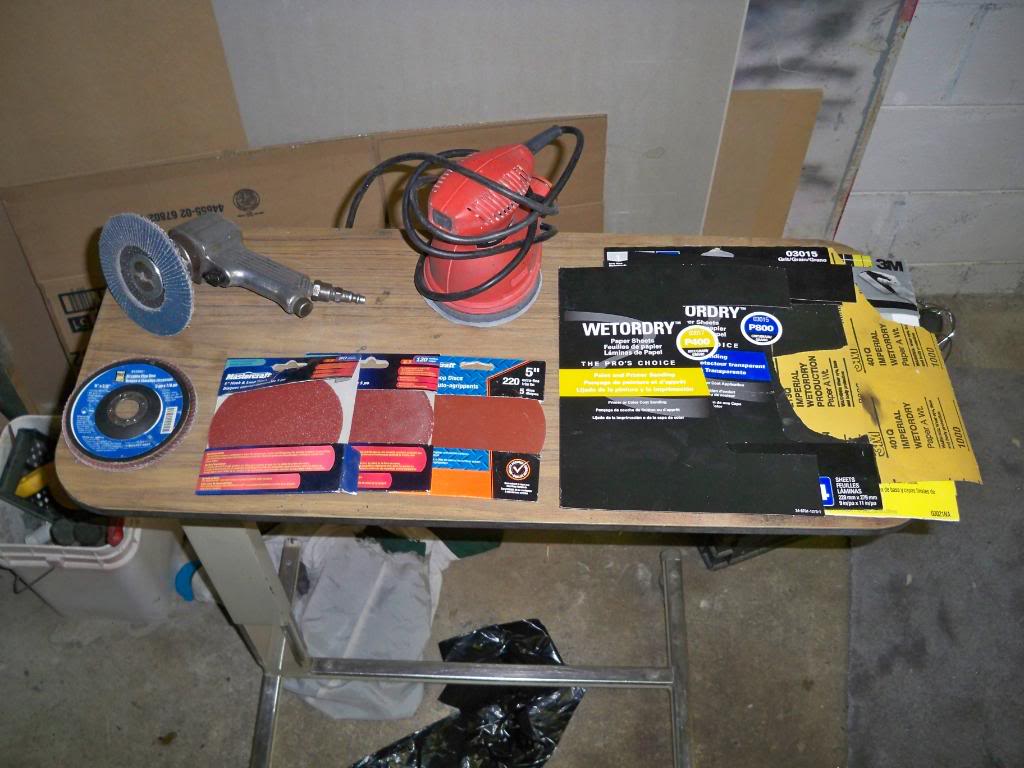
-5 inch electric orbital sander
-80 grit sand paper
-120 grit sand paper
-220 grit sand paper
-Rotary tool with and assortment sanding wheels, flap wheels and wire wheels.

--
--
--
--
Here is some of the equipment I needed to complete this project
-5 inch electric orbital sander
-80 grit sand paper
-120 grit sand paper
-220 grit sand paper
-Rotary tool with and assortment sanding wheels, flap wheels and wire wheels.
--
--
--
--
04-09-2010, 10:21 AM
#5
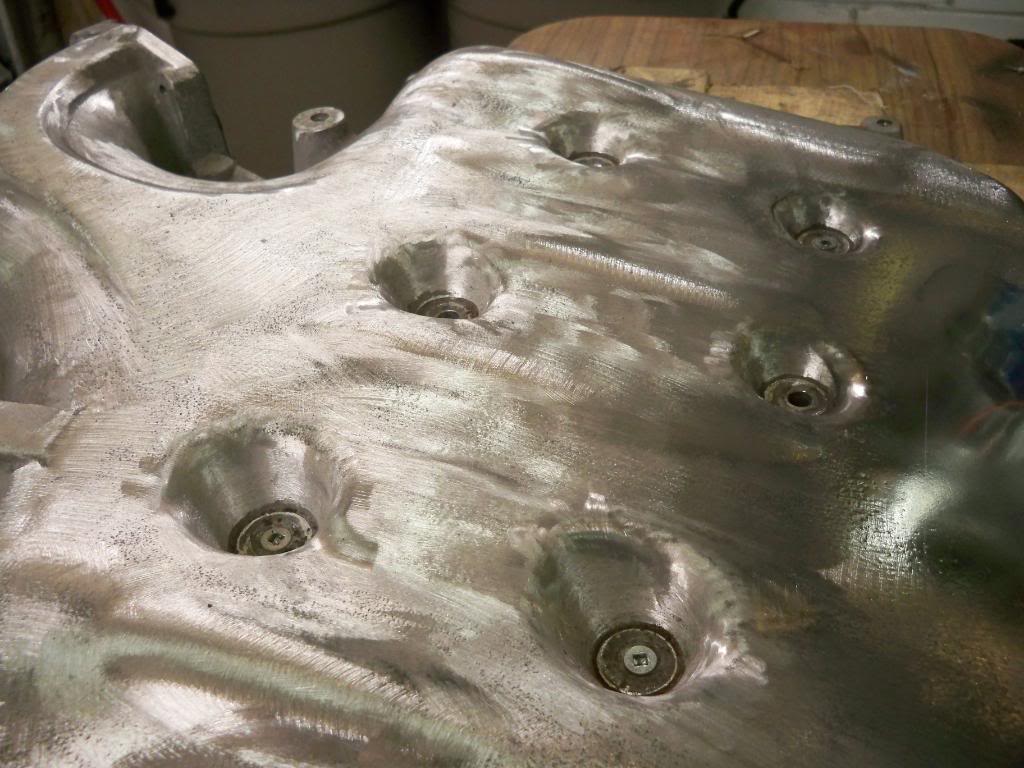
After another 3 hours of wet sanding by hand with 400 grit and 800 grit. A Rotary tool with a 80 grit flap wheel, wire wheel and sanding wheel.
Here is some of the equipment I needed to complete this project
-400 grit wet sand paper
-800 grit wet sand paper
-Rotary tool with and assortment sanding wheels, flap wheels and wire wheels.


Here is some of the equipment I needed to complete this project
-400 grit wet sand paper
-800 grit wet sand paper
-Rotary tool with and assortment sanding wheels, flap wheels and wire wheels.
04-09-2010, 10:21 AM
#6
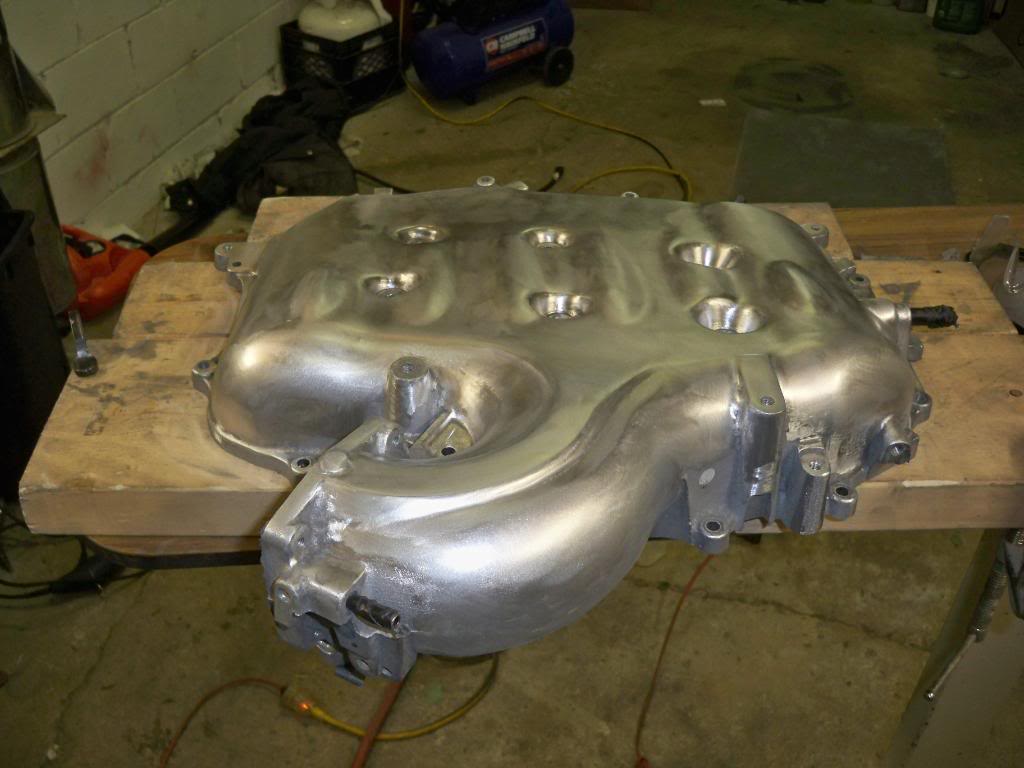
After another 2 hours of using an air die grinder with a felt/cloth wheel and a black compound/bar.
Here is some of the equipment I needed to complete this project
-Air grinder
-an assortment of felt/cloth wheels
-black compound/bar

Here is some of the equipment I needed to complete this project
-Air grinder
-an assortment of felt/cloth wheels
-black compound/bar
04-09-2010, 10:22 AM
#7
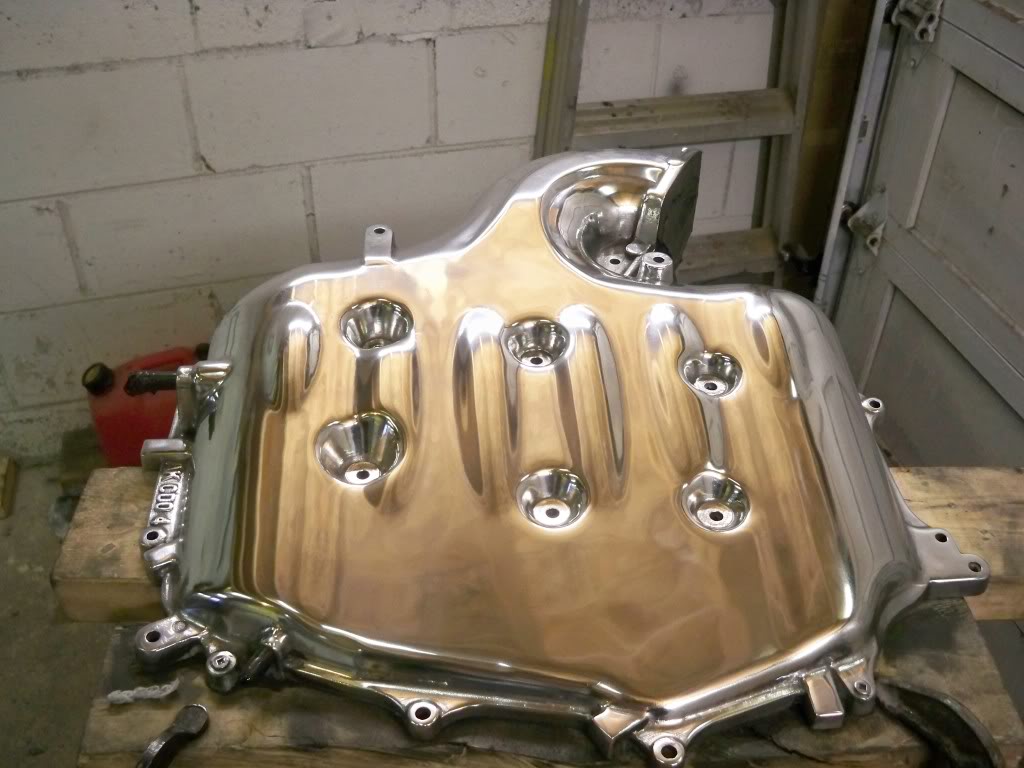
After another 2 hours of using an air die grinder with a felt/cloth wheel and a White compound/bar.
After another 2 hours of using an air die grinder with a felt/cloth wheel and a Red compound/bar.
After another 2 hours of using an air die grinder with a felt/cloth wheel and Metal polish
--- another 6 Hours total---
Here is some of the equipment I needed to complete this project
-Air grinder
-an assortment of felt/cloth wheels
-White compound/bar
-Red compound/bar
-Metal polish

--
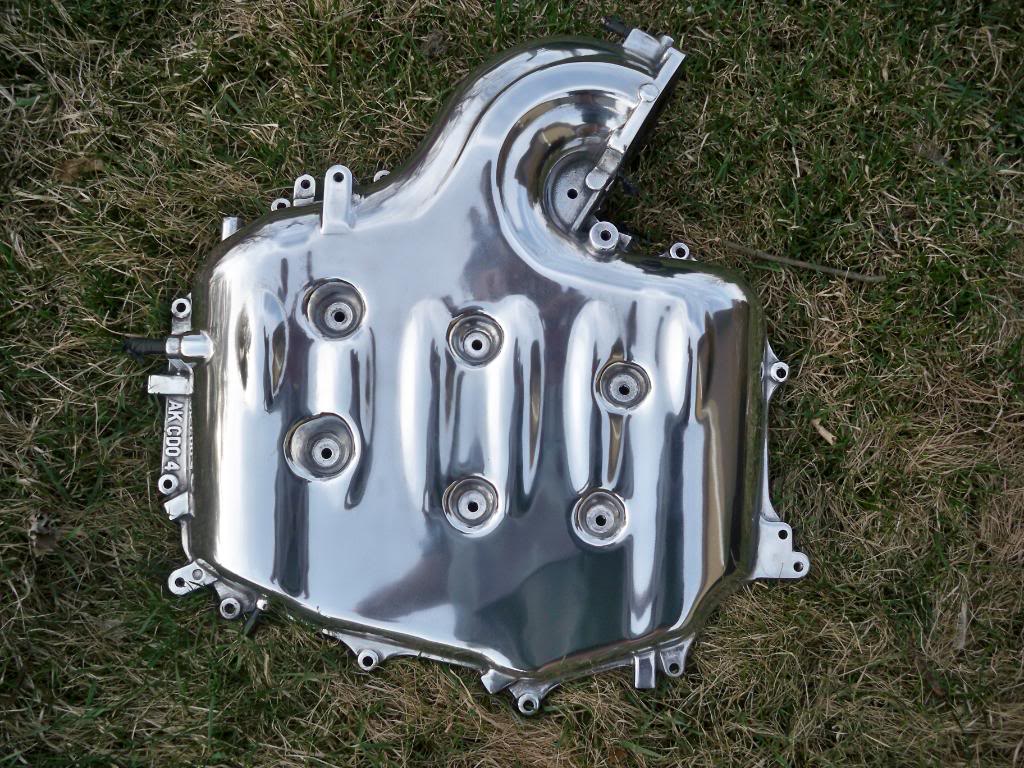
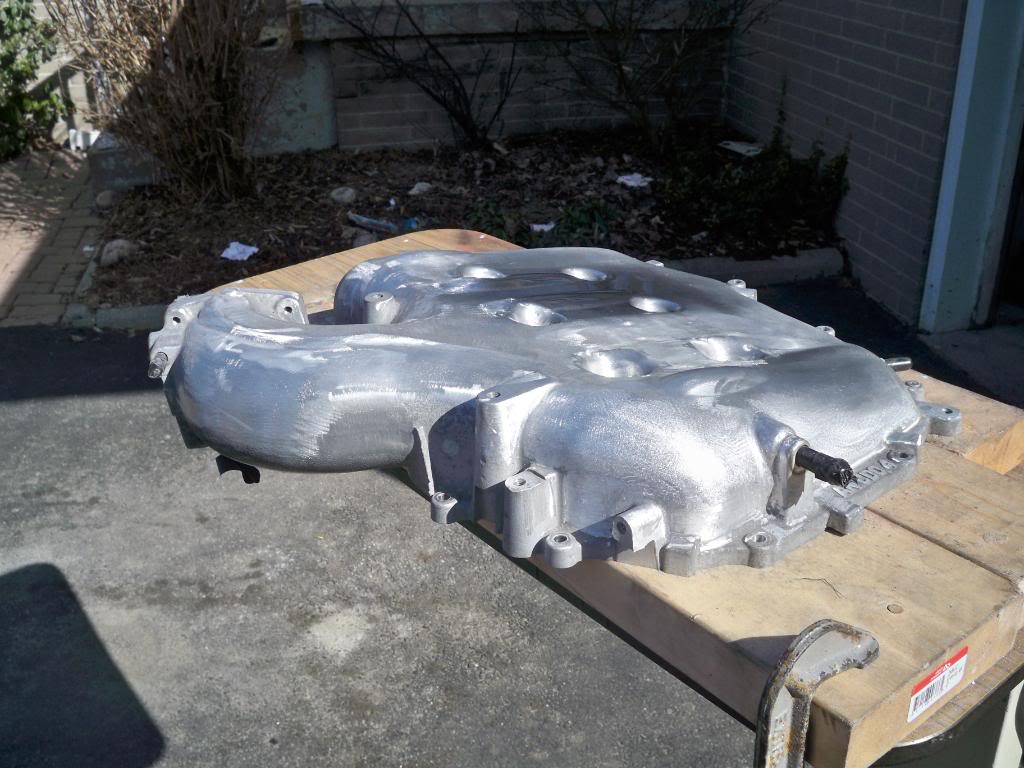
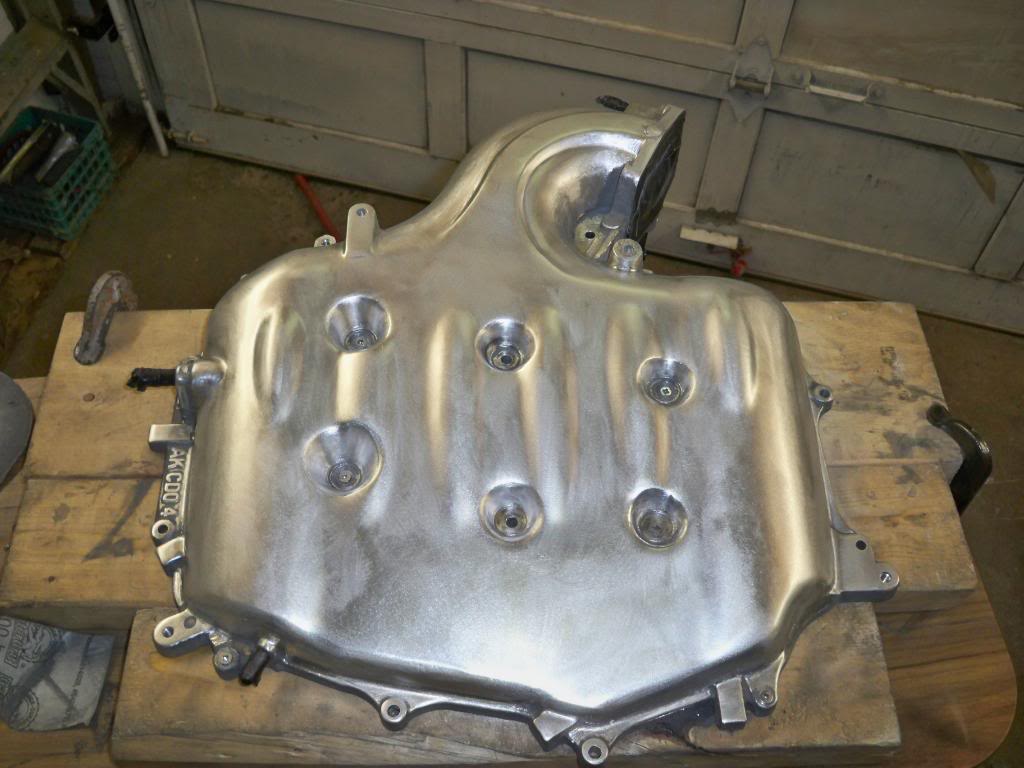
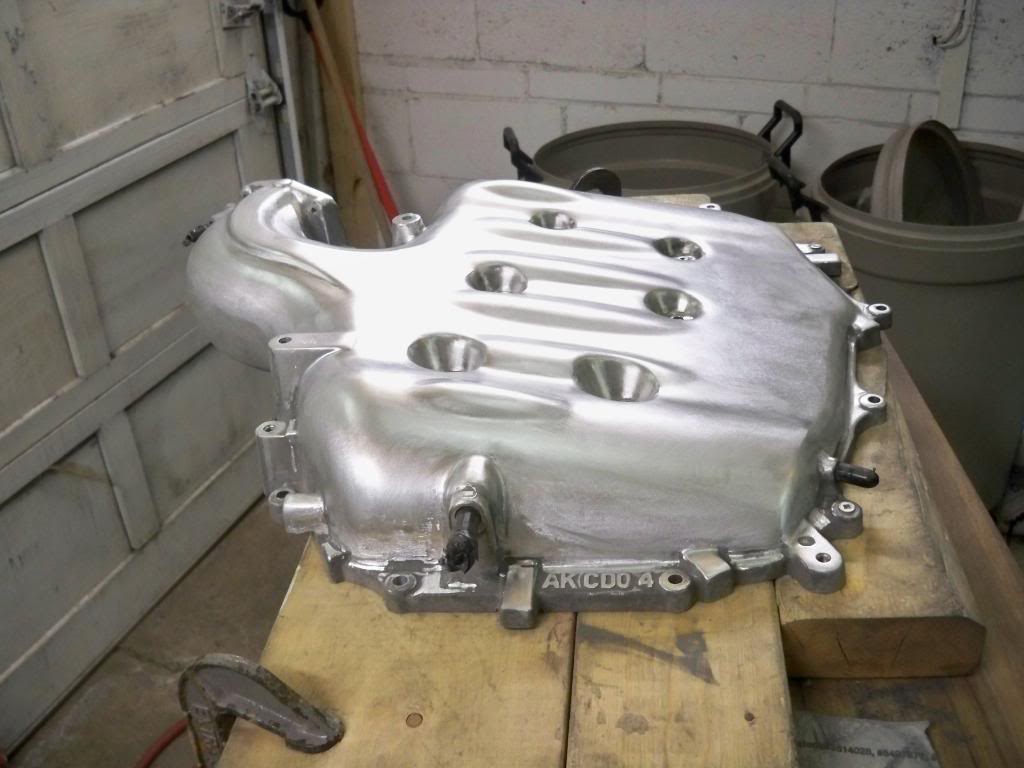
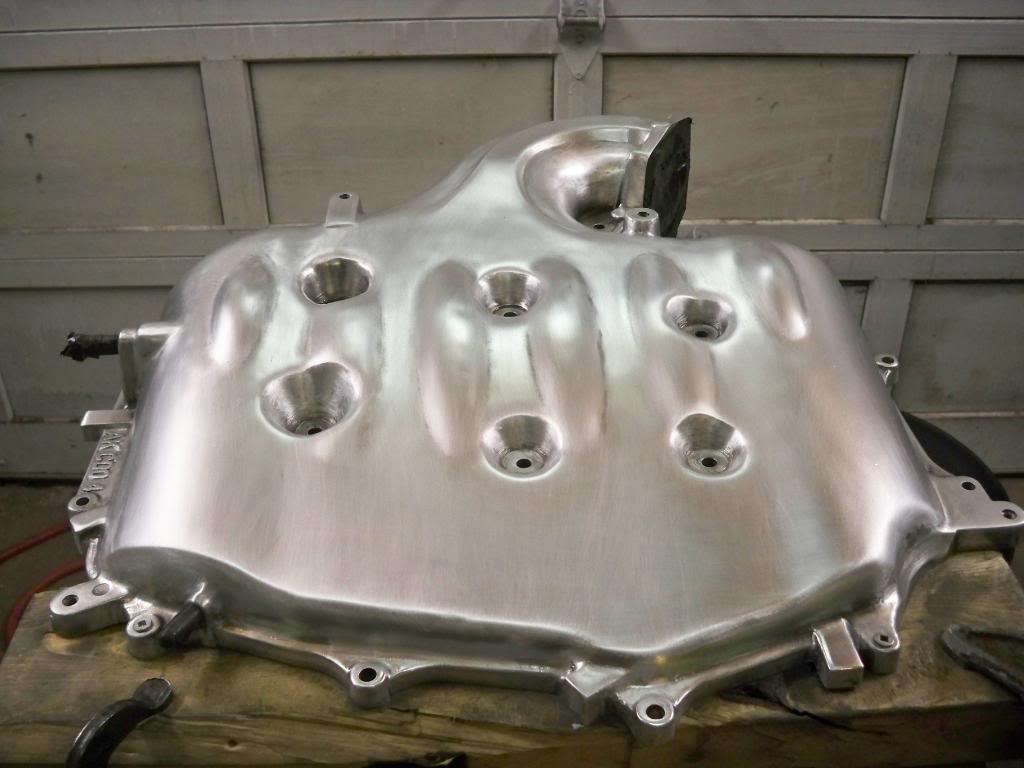
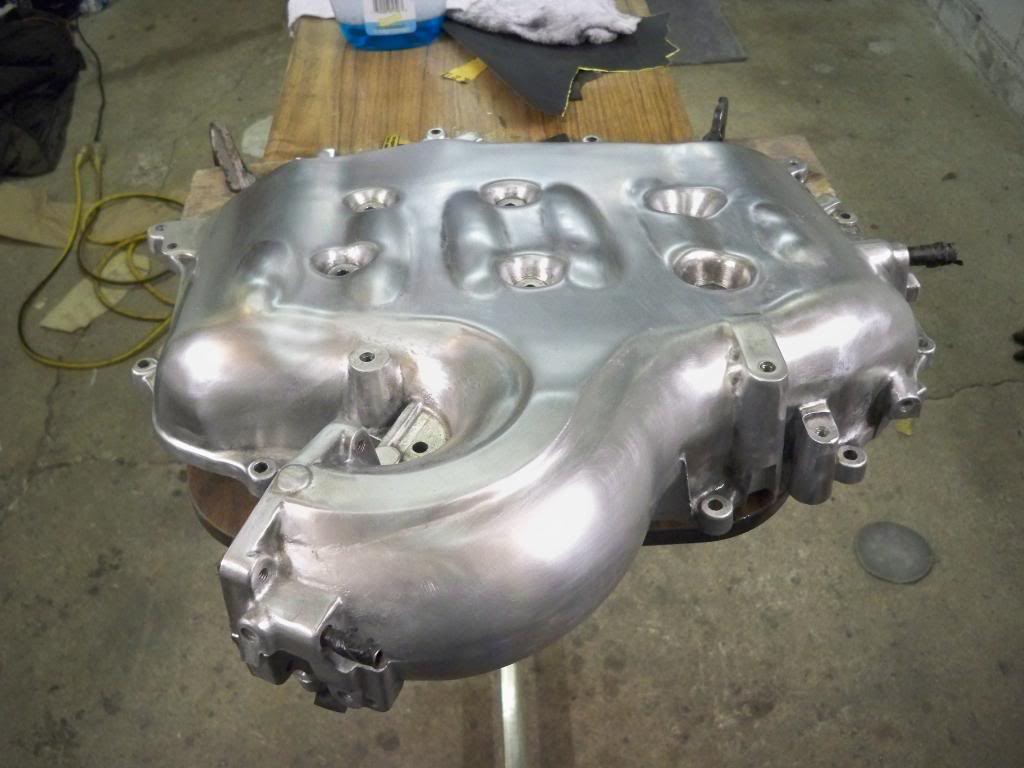
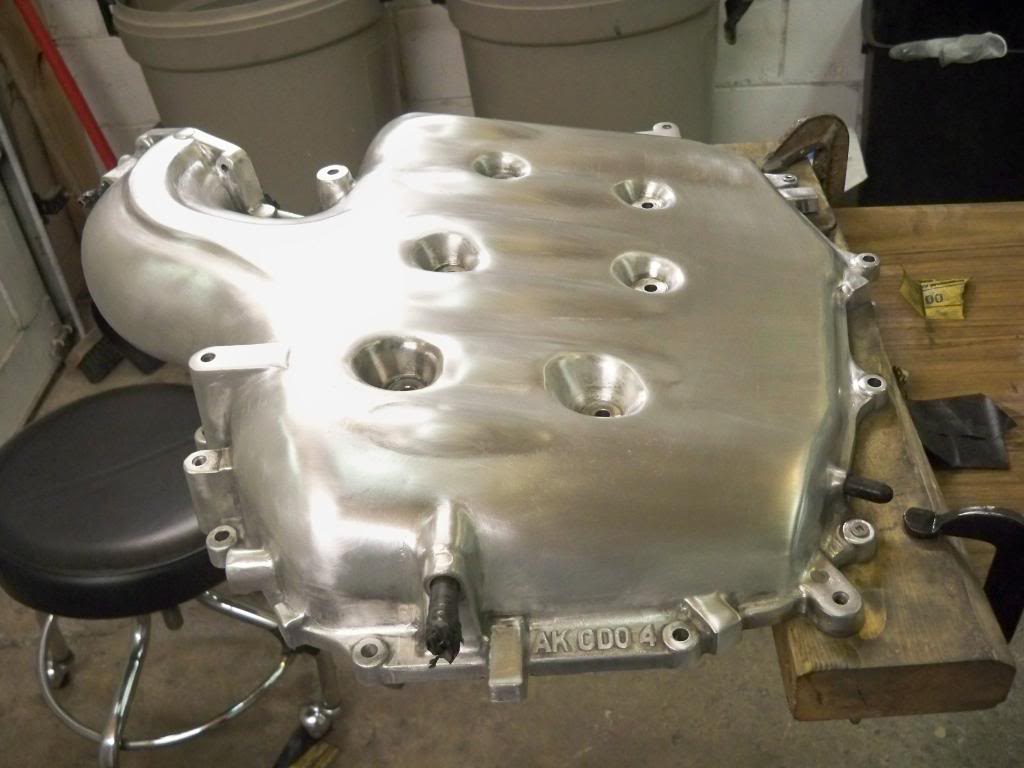
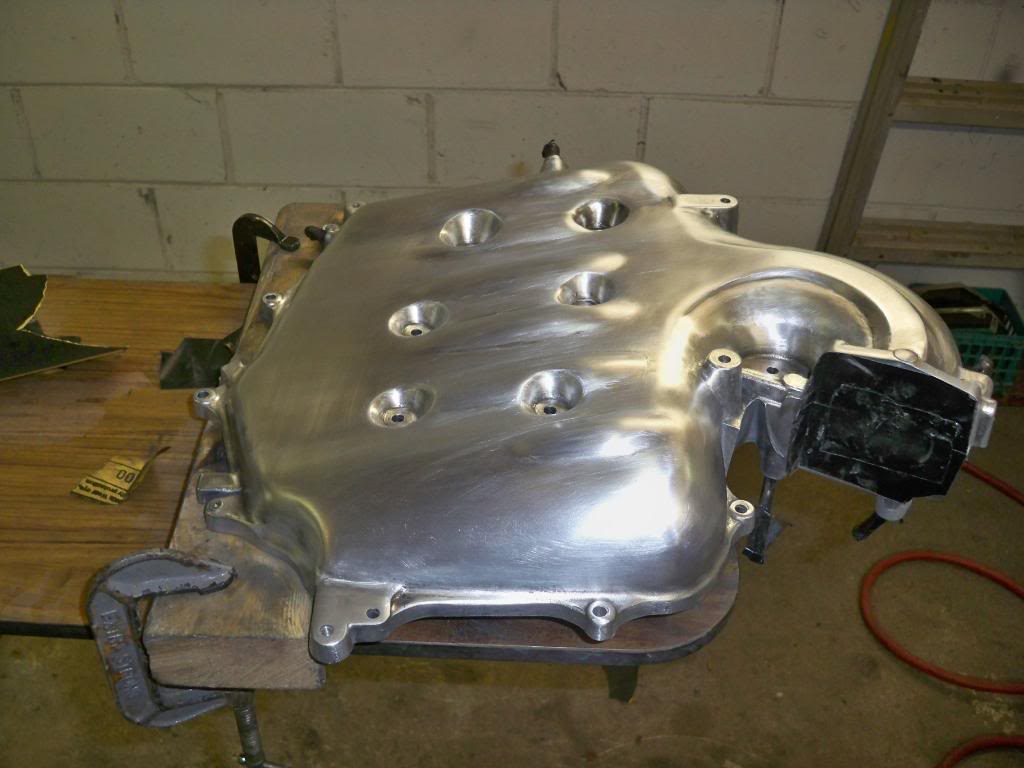
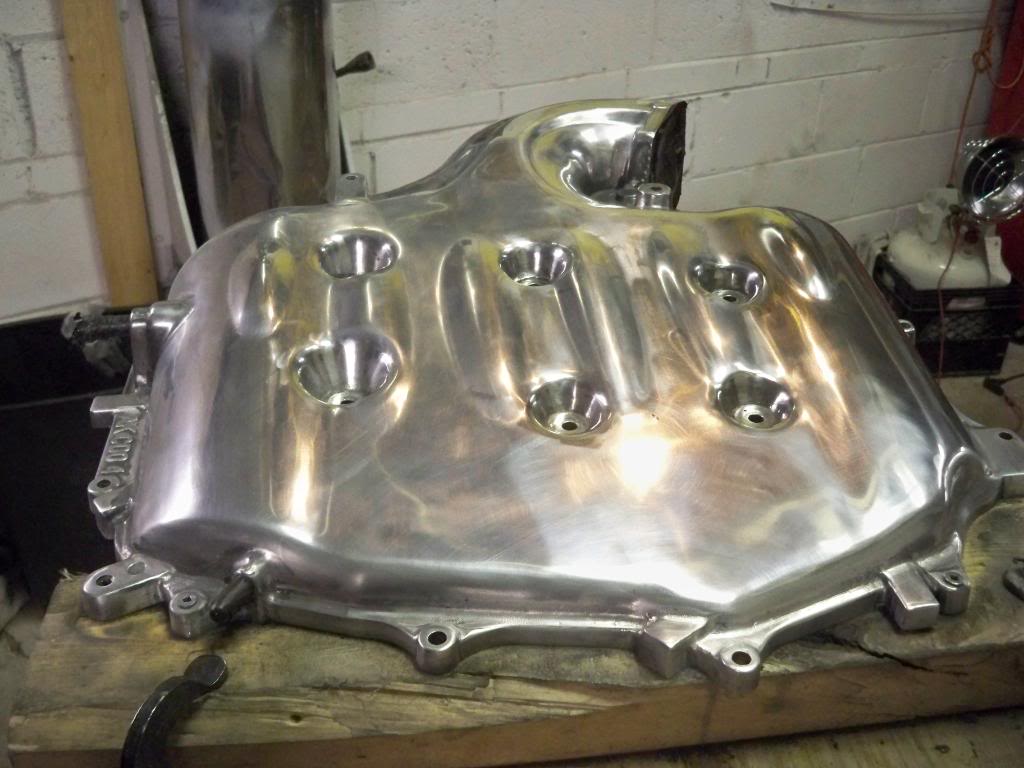
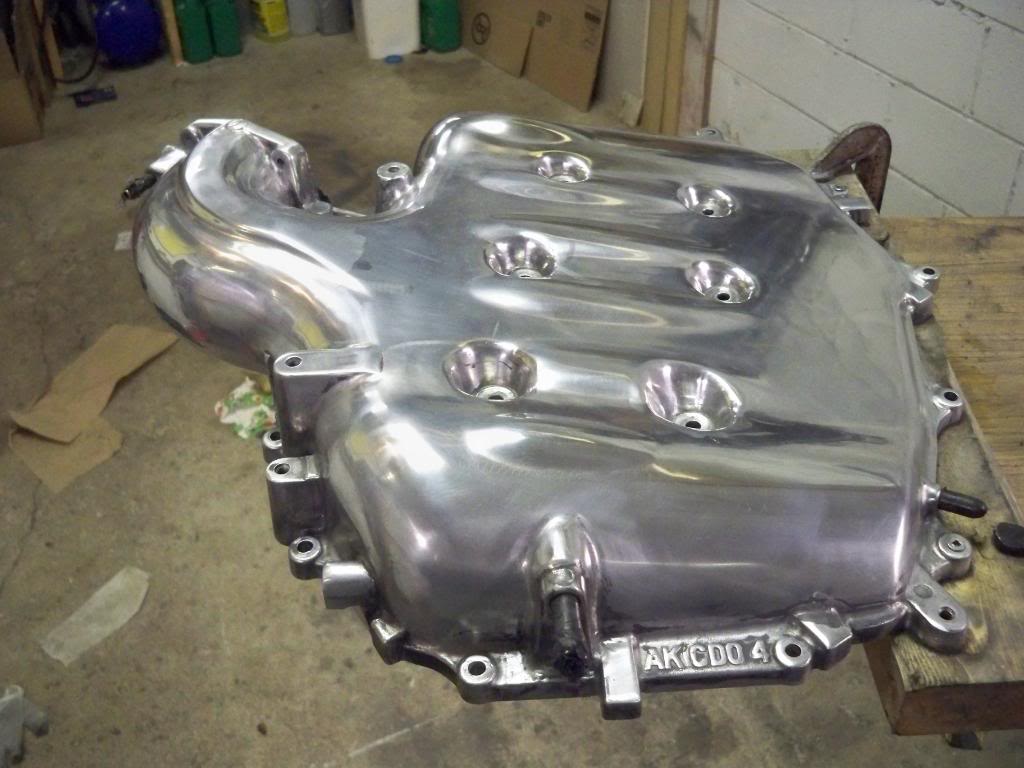
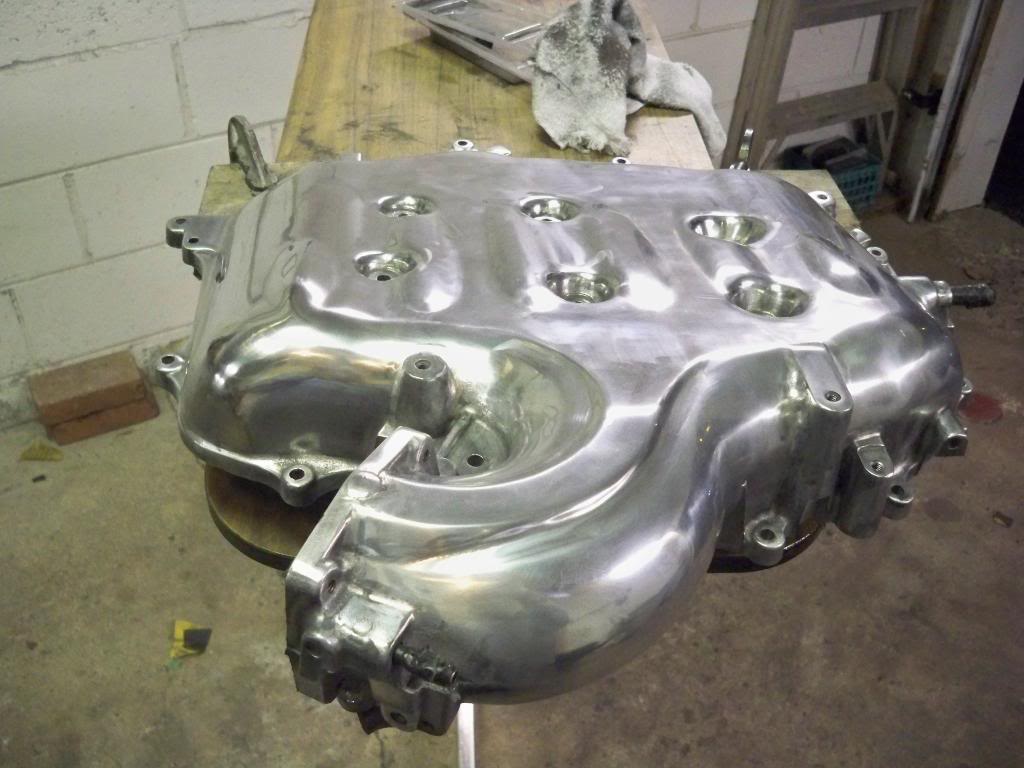
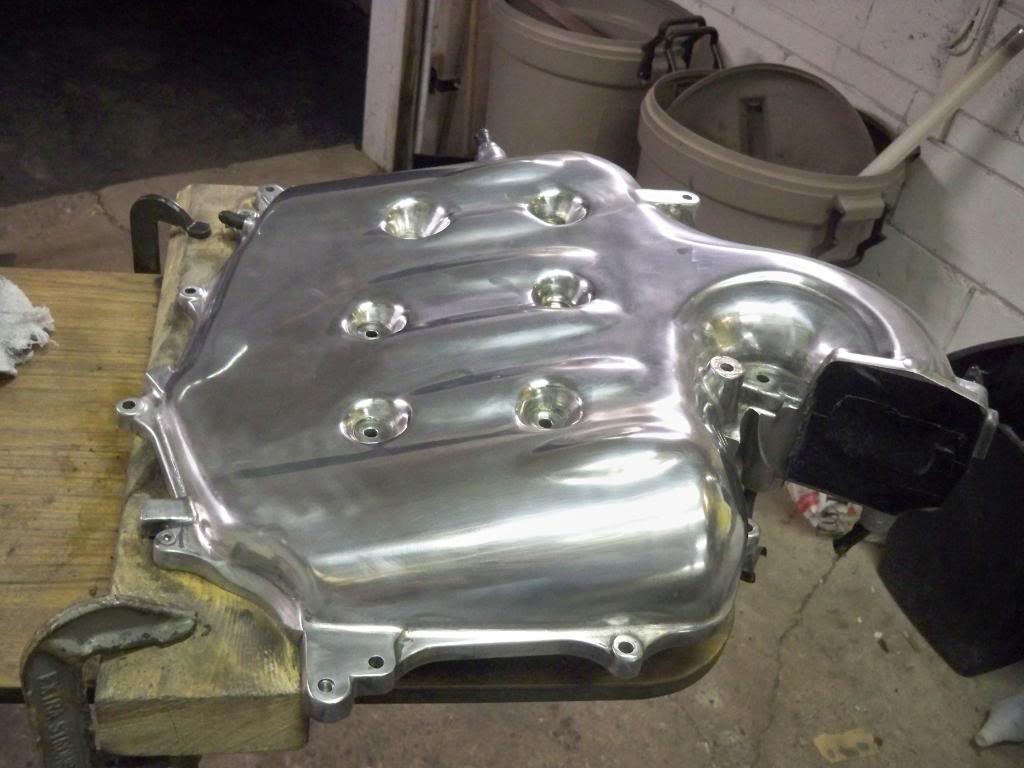
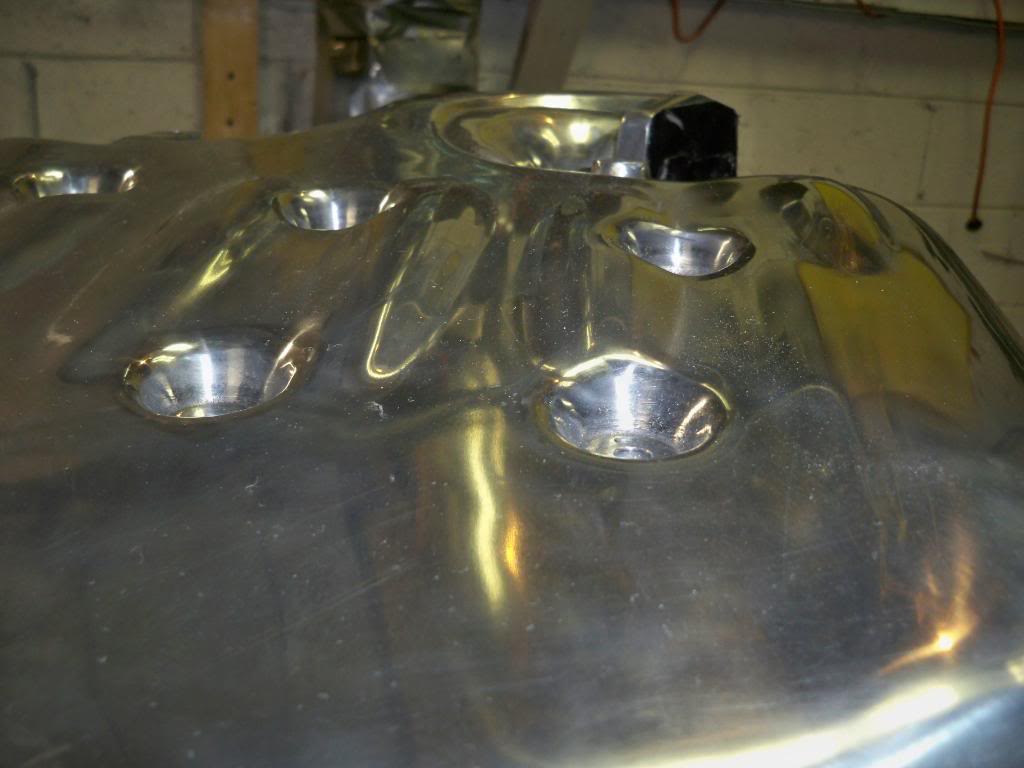
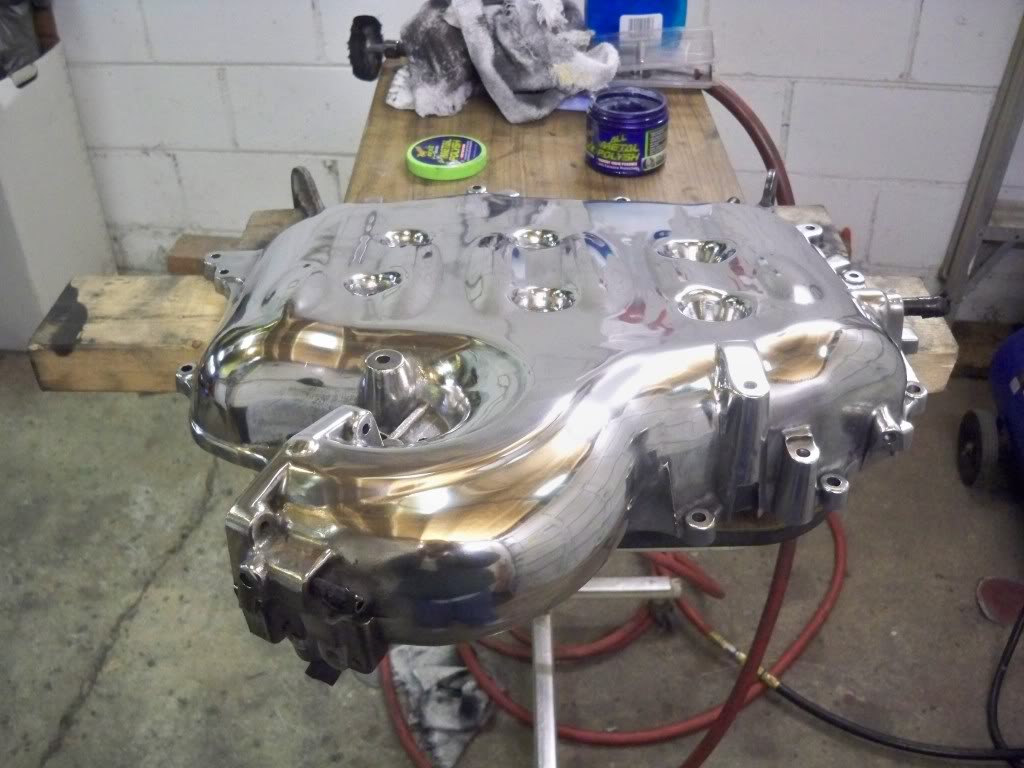
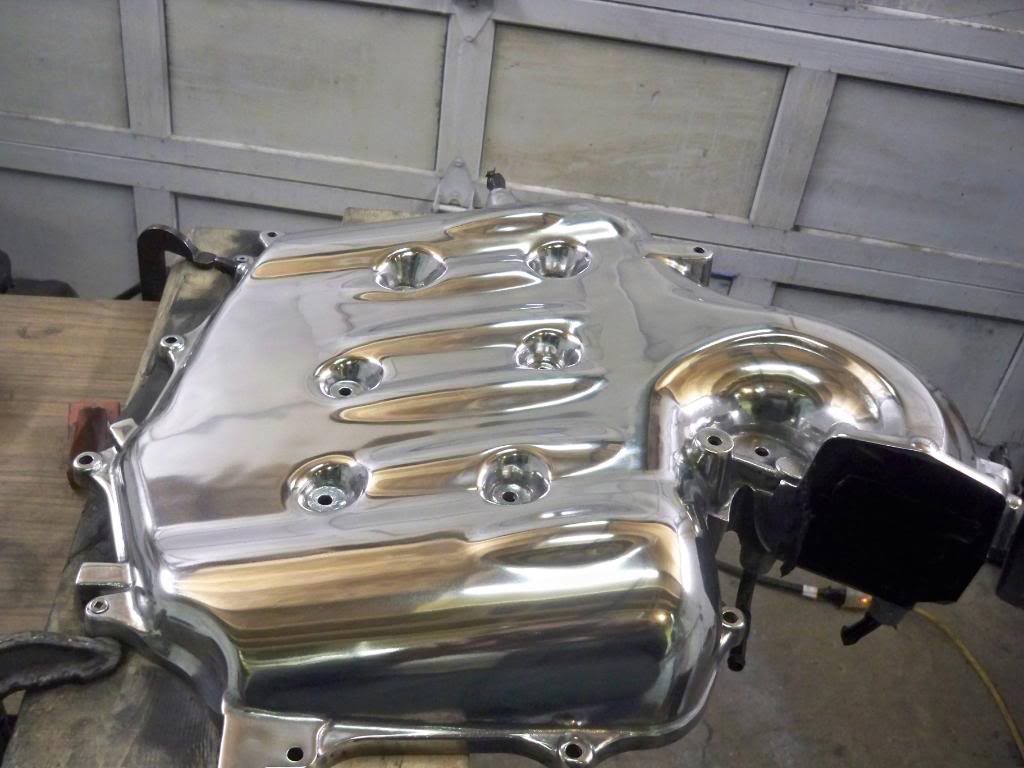
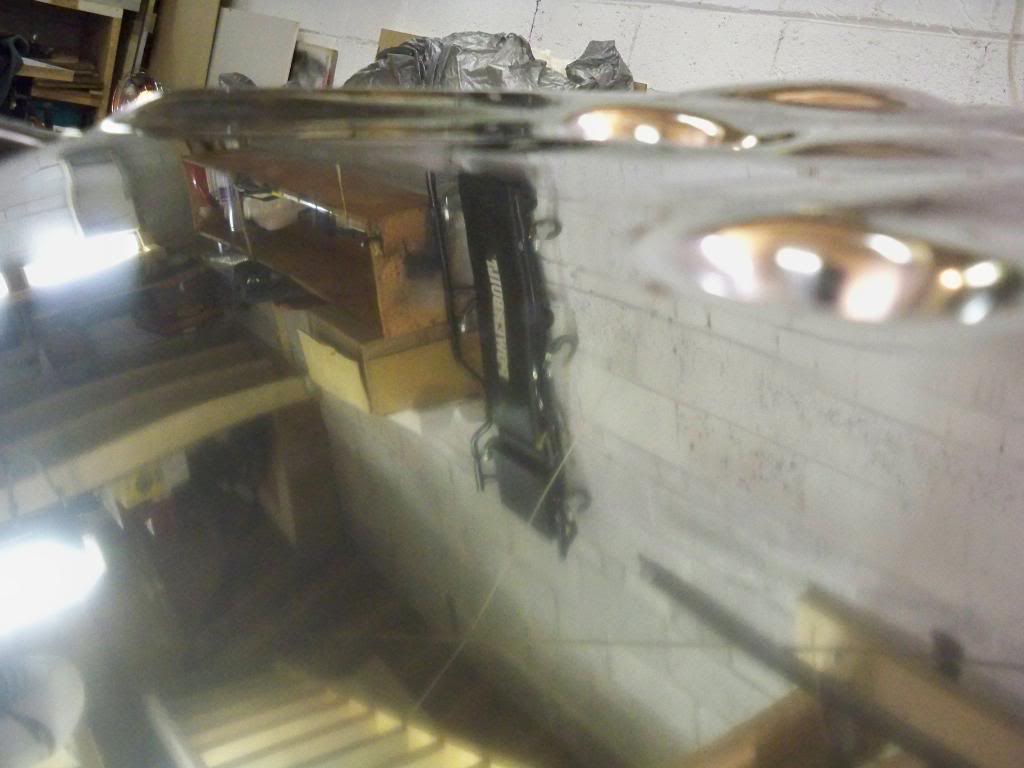
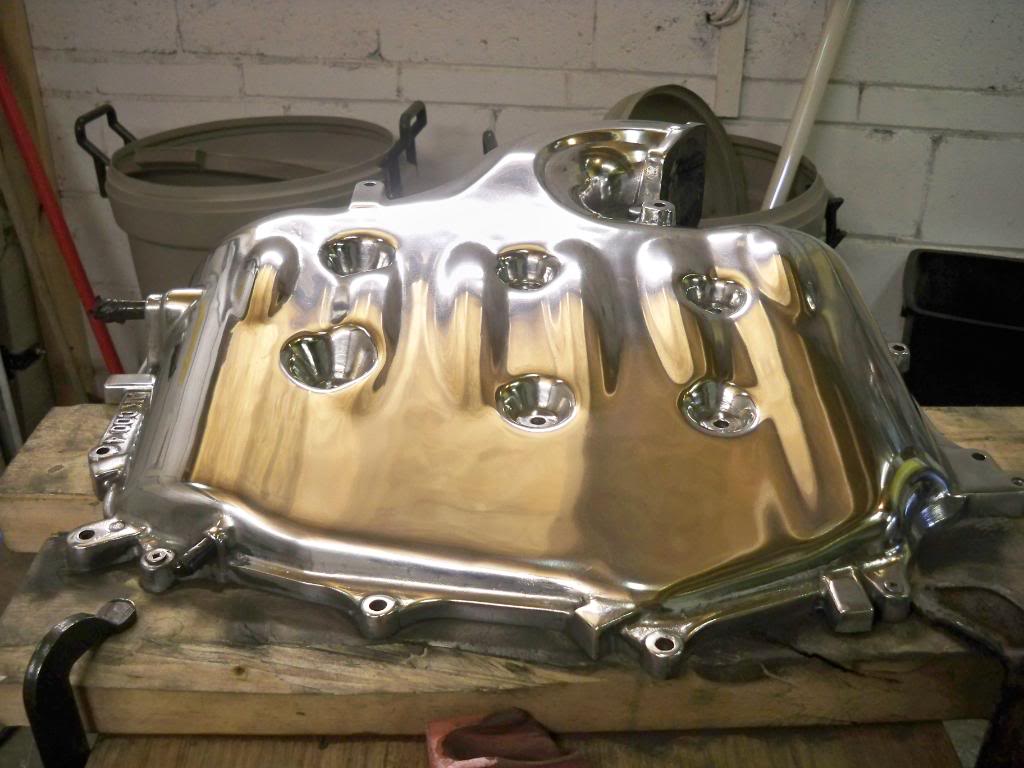
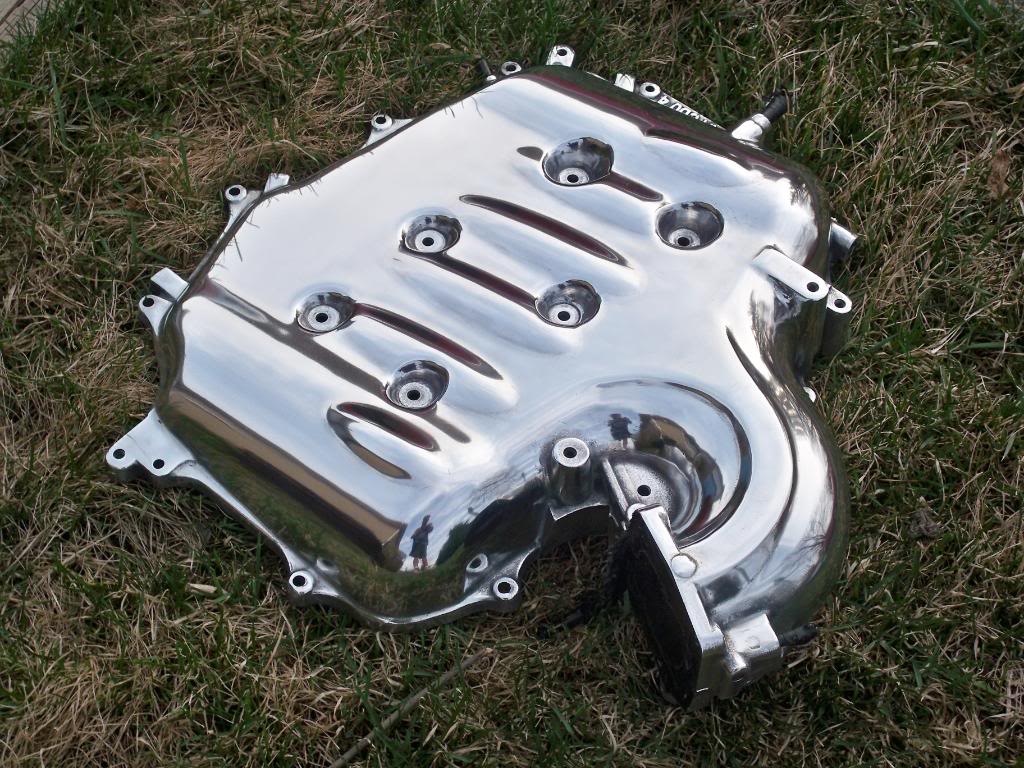
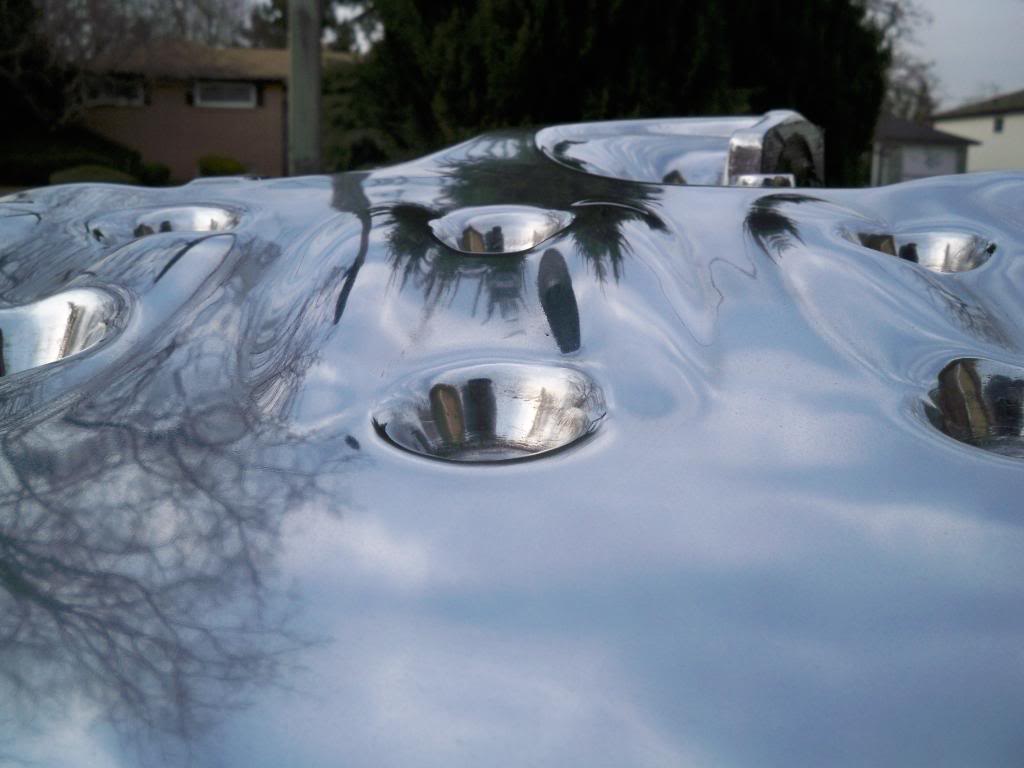
--HERE ARE THE PICS AFTER 25 HOURS OF WORK---


After another 2 hours of using an air die grinder with a felt/cloth wheel and a Red compound/bar.
After another 2 hours of using an air die grinder with a felt/cloth wheel and Metal polish
--- another 6 Hours total---
Here is some of the equipment I needed to complete this project
-Air grinder
-an assortment of felt/cloth wheels
-White compound/bar
-Red compound/bar
-Metal polish
--
--HERE ARE THE PICS AFTER 25 HOURS OF WORK---
Trending Topics


 04-09-2010, 01:42 PM
#12

Looks good ! I just did one for a buddy but I dont have air tools  so i did it mostly by hand
  took me all winter!! I do more sanding with finer grits and less buffing (due to the lack of tools) I finish mine off with a big electric buffer
  they are a ton of work but the finished product makes it well worth it IMO.
so i did it mostly by hand took me all winter!! I do more sanding with finer grits and less buffing (due to the lack of tools) I finish mine off with a big electric buffer they are a ton of work but the finished product makes it well worth it IMO.
04-09-2010, 01:45 PM
#13
Looks good ! I just did one for a buddy but I dont have air tools so i did it mostly by hand took me all winter!! I do more sanding with finer grits and less buffing (due to the lack of tools) I finish mine off with a big electric buffer they are a ton of work but the finished product makes it well worth it IMO.
so i did it mostly by hand took me all winter!! I do more sanding with finer grits and less buffing (due to the lack of tools) I finish mine off with a big electric buffer they are a ton of work but the finished product makes it well worth it IMO.
04-09-2010, 01:46 PM
#14
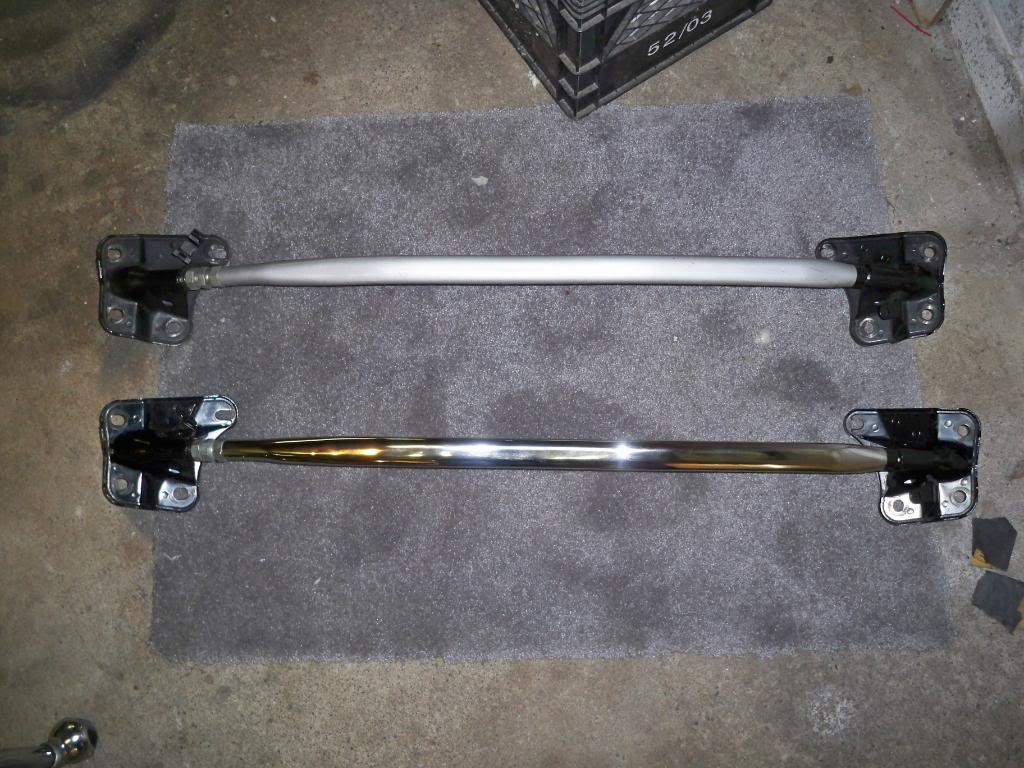
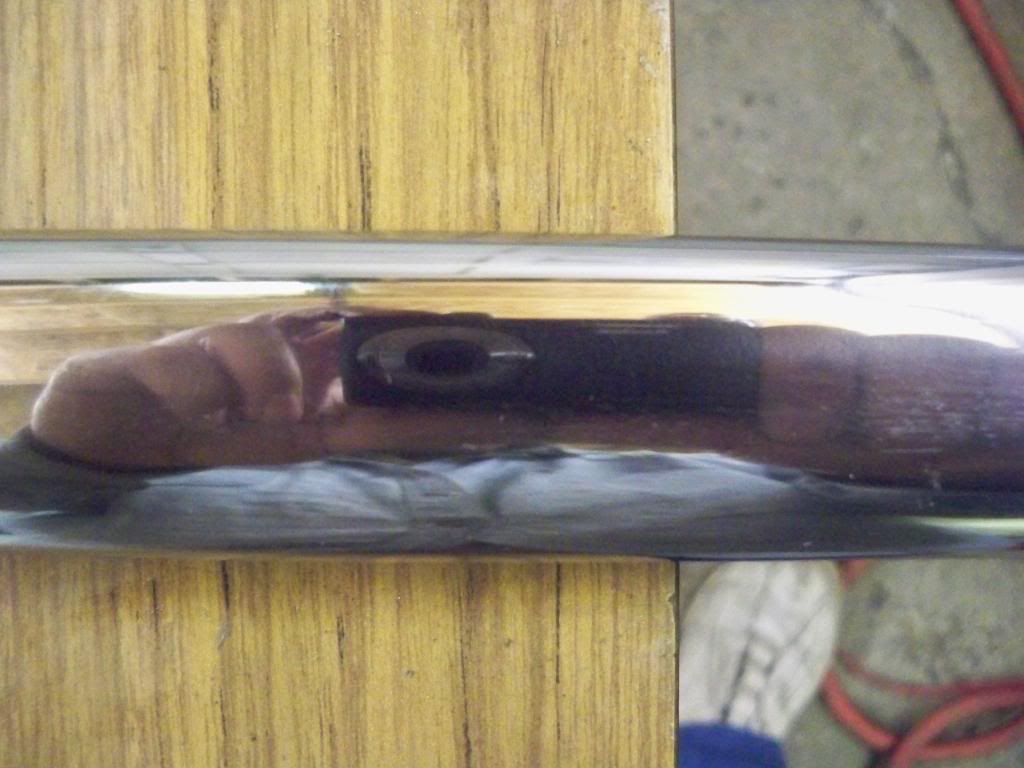
I also polished my strut bar. The bar is made of steel not aluminum so it can rust. The bar is not on the bar and was finished 4 weeks ago. It has been stored in the garage since then and shows no signs of rust. I am thinking/hoping that if I keep a protective coating of polish on the car it will not rust. If it does rust I will sand it again and clear coat it, or just reinstall my other oem bar.
Here is some of the equipment I needed to complete this project
-5 inch electric orbital sander
-Rotary tool with and assortment sanding wheels, flap wheels and wire wheels.
-Air grinder
-an assortment of felt/cloth wheels
-220 grit sand paper
-400 grit wet sand paper
-800 grit wet sand paper
-1000 grit wet sand paper
-black compound/bar
-Red compound/bar
-Metal polish
---------
i am not sure how long this took me, maybe 2-4 hours total.
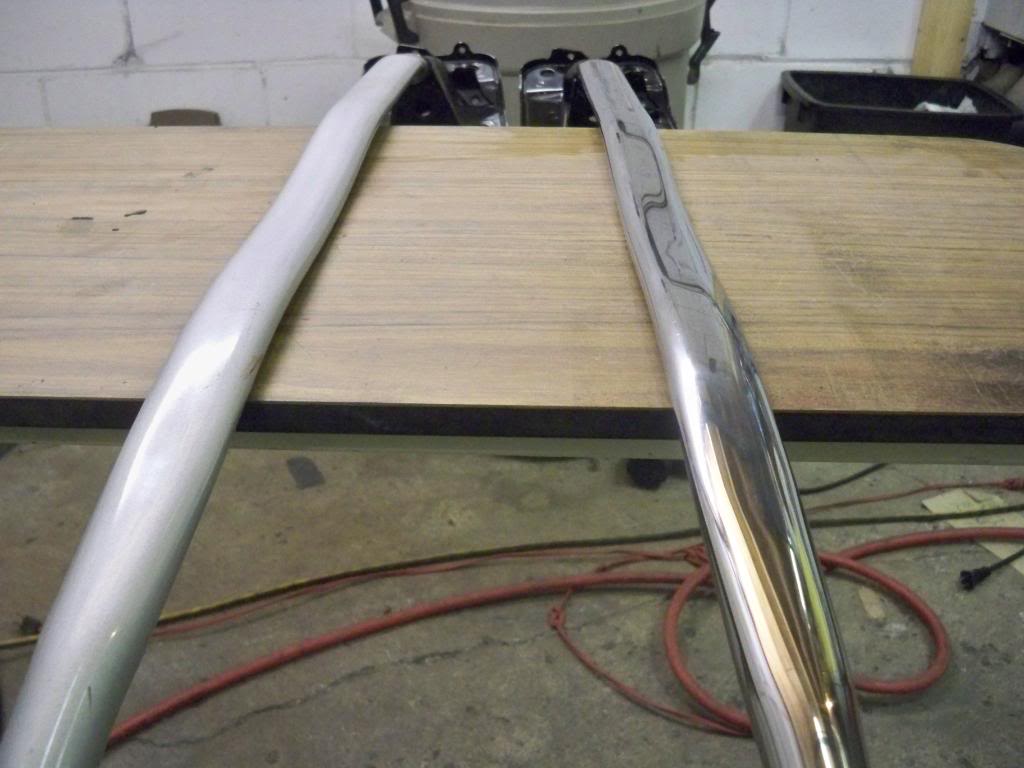
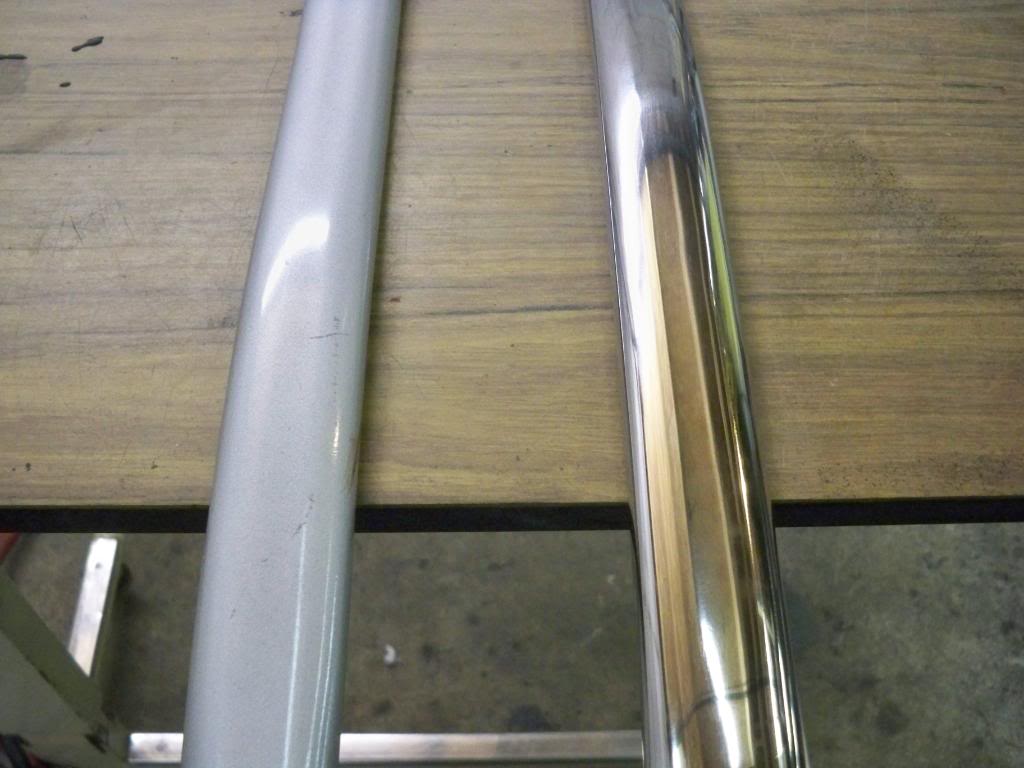
before and after pics
Here is some of the equipment I needed to complete this project
-5 inch electric orbital sander
-Rotary tool with and assortment sanding wheels, flap wheels and wire wheels.
-Air grinder
-an assortment of felt/cloth wheels
-220 grit sand paper
-400 grit wet sand paper
-800 grit wet sand paper
-1000 grit wet sand paper
-black compound/bar
-Red compound/bar
-Metal polish
---------
i am not sure how long this took me, maybe 2-4 hours total.
before and after pics


