
Just another SC'd ZR
 07-20-2013, 08:39 AM
#21

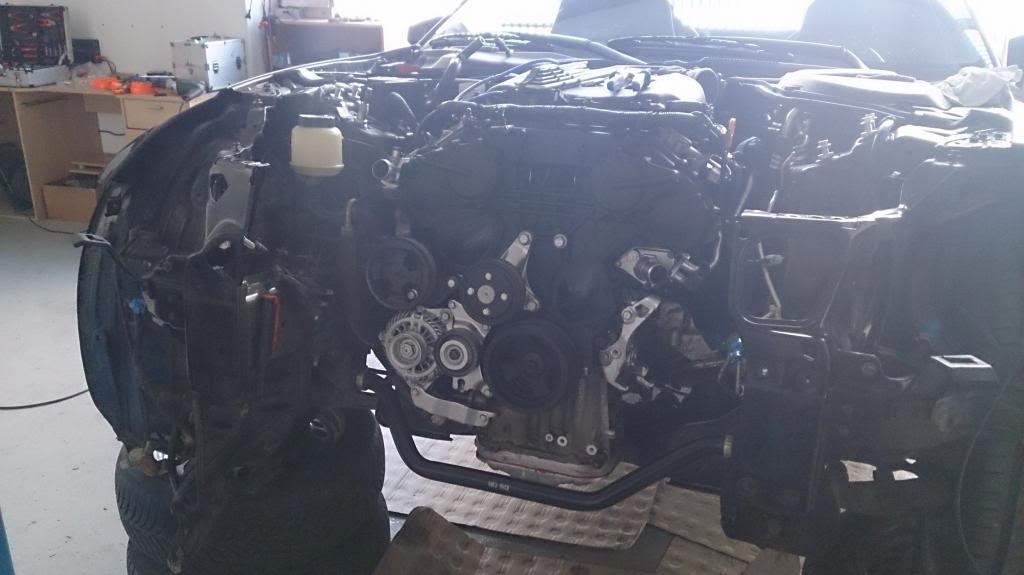
I see you don't have a front radiator support... if you have a 3" intercooler piping I have a race intercooler from treadstone (brand spanking new) I'm trying to sell (bought it and realized it wouldn't fit like a dumb***). Rated for 1200hp, but would probably really help your setup if you're running higher boost levels. Same side entrance and exit like yours. PM me if you're interested. Price can be negotiated (need $ now lol).
BTW you should just get a breather for your pcv and just drill it out.
BTW you should just get a breather for your pcv and just drill it out.
Now, about bracket mod. It works!! Did long 800 mile trip to some sort of drag strip. Two days of beating the car, countless reving up to 7500 rpm and 14 psi of boost. Belt wear was unnoticeable. Then I removed driver side bracket. The belt lasted exactly two 7500 rpm revs. It broke at third attempt.
There's one downside too. When hot, blower bearings vibrations are transferred to the car chassis through bracket. It sounds bad on idle, like it will break apart in any second. Might be better once I rebuild blower (will do DIY soon), since there are lots of kmiles on blower already (bought it used).
Last edited by tcode; 07-20-2013 at 08:53 AM.


 05-01-2014, 03:19 PM
#23

^ damn...
i'm still keeping an eye on these ProCharged threads... thanks for the bracket idea! i'll keep them in mind if i ever get my SC'r installed.
1. try running the main belt to the underside of the top-center idler pulley... you will pick up more belt contact with the cogs. i've seen this done multiple times, check youtube.
2. may or may not help, pull the rubber gasket off the chassis at the backside of the hood. it will create a 1-2" gap, helping hot air exit when stationary and i'm pretty sure it creates a backwards draft when moving, basically sucking the hottest air out from under the hood! i've been running my stock setup like this for years, no overheating issues when beating on her.
Last edited by Zquicksilver; 05-01-2014 at 03:25 PM.
 05-03-2014, 02:03 PM
#25

Well hell, I was going to ask if you would send me a better picture of the Supercharger bracket braces but it looks like you ended up going a different route. Im only asking because I'm currently deployed and cant look at the bracket for my self to see where its possible to tap and mount to the motor.
 05-04-2014, 06:23 AM
#27
Well hell, I was going to ask if you would send me a better picture of the Supercharger bracket braces but it looks like you ended up going a different route. Im only asking because I'm currently deployed and cant look at the bracket for my self to see where its possible to tap and mount to the motor.
Edit: found it
 . Not pretty, but effective.
https://www.dropbox.com/s/tg6tqoxr3i...2019.27.37.jpg
Overall, so far I'm very happy with your turbo kit. Thank you!
Last edited by tcode; 05-04-2014 at 06:37 AM.
05-04-2014, 09:14 AM
#28
I'll look for you better pics of brackets. Quite sure having them somewhere.
Edit: found it. Not pretty, but effective.
https://www.dropbox.com/s/tg6tqoxr3i...2019.27.37.jpg
Edit: found it
. Not pretty, but effective.https://www.dropbox.com/s/tg6tqoxr3i...2019.27.37.jpg


 11-18-2014, 01:31 AM
#37
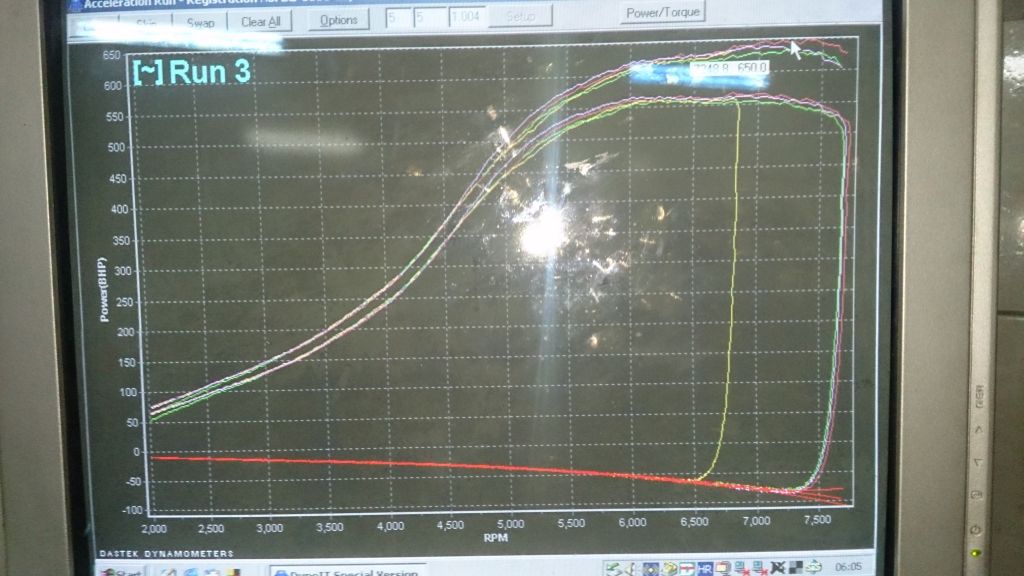
Update..
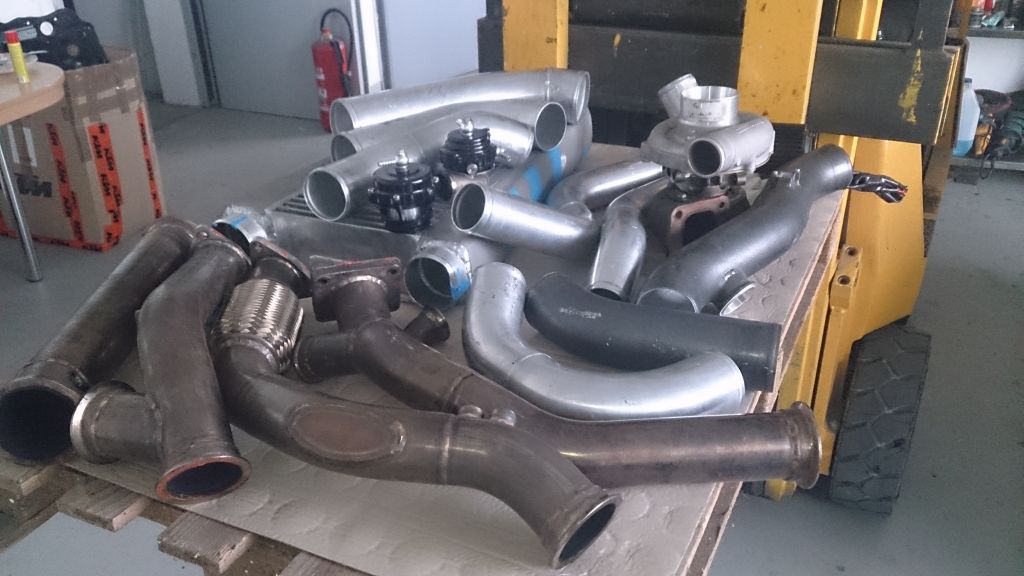
finally finished tuning on dyno. Boost is set to 25 PSI and I'm definitely hitting limit of this small A/R 0.68 exhaust housing. Already ordered bigger one , it should be delivered soon.
Also, was fighting strange fuel starvation on low load (high vacuum) and low to mid rpms for a loooong time. No matter what I tried through tuning, and I really tried everything, I always had a 4-5 lean spots where engine hesitates and misfires.
Then I found out that high flow injectors can do that wired things causing fuel pressure pulsations in fuel rails. There are on the market high flow fuel rails with integrated fuel pressure pulsation dampers (CJM), but didn't feel comfortable spending $500 for such a basic and simple objects.
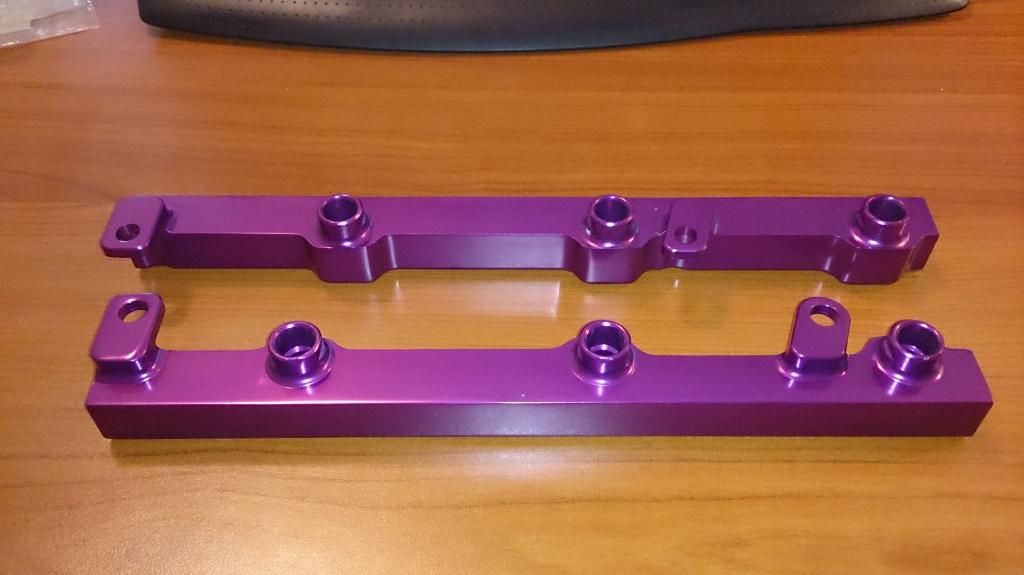
Instead, I went through small DIY project. Bought cheap http://www.ebay.com/itm/Aluminum-High-Flow-Fuel-Injector-Inject-Rail-FOR-350Z-G35-VQ35-VQ35DE-Z33-V35-RD-/271635413192?pt=Motors_Car_Truck_Parts_Accessories&fits=Model%3A350Z&hash=item3f3ebb78c8&vxp=mtrhigh flow aluminium fuel rails, and two http://www.ebay.com/itm/Auto-7-401-0012-Fuel-Pressure-Damper-/171457490464?pt=Motors_Car_Truck_Parts_Accessories&fits=Make%3AHyundai&hash=item27eba9ae20&vxp=mtr "bolt" style with thread.
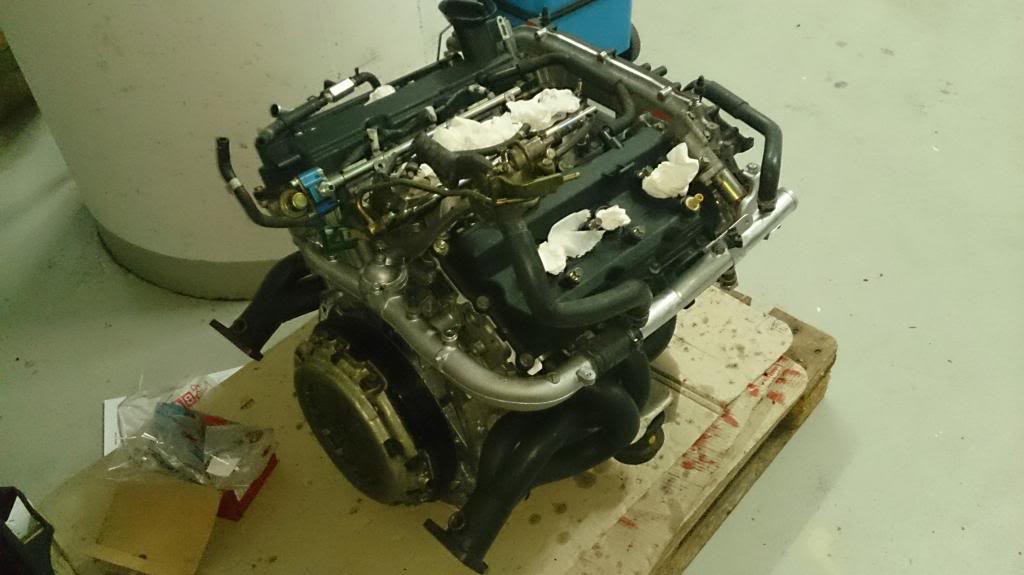
Soon got them:
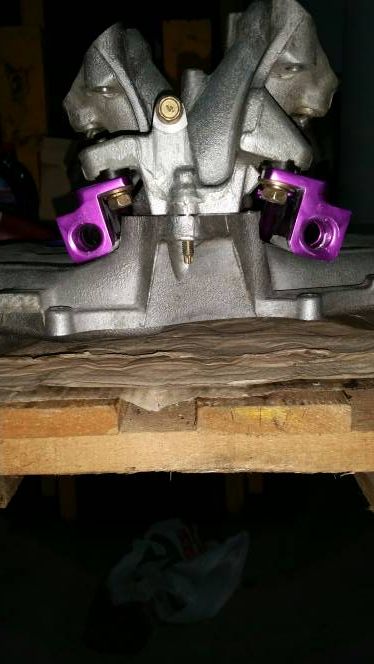
and the rest seemed easy, drill rails, make threads for FPD's
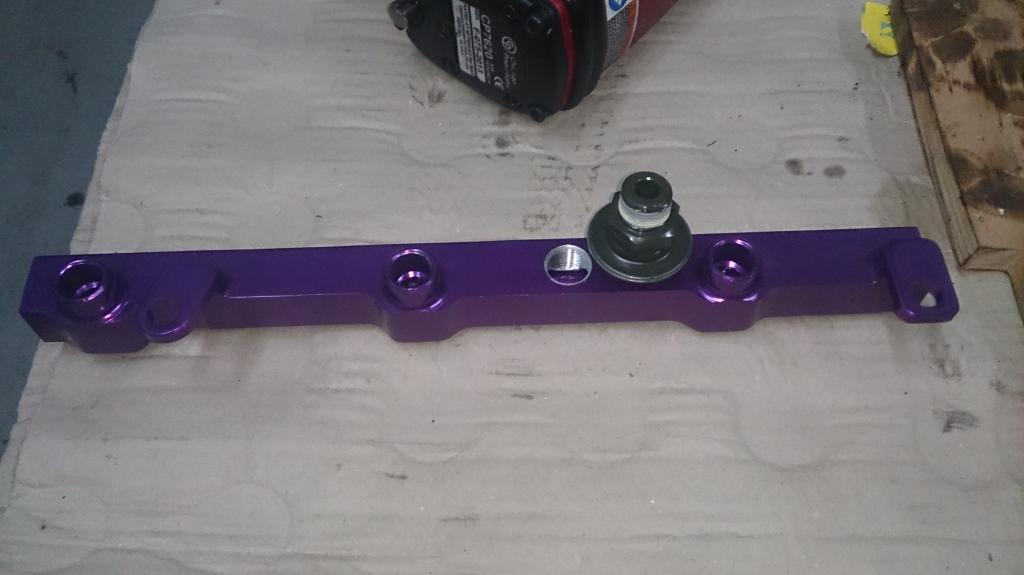
assembly
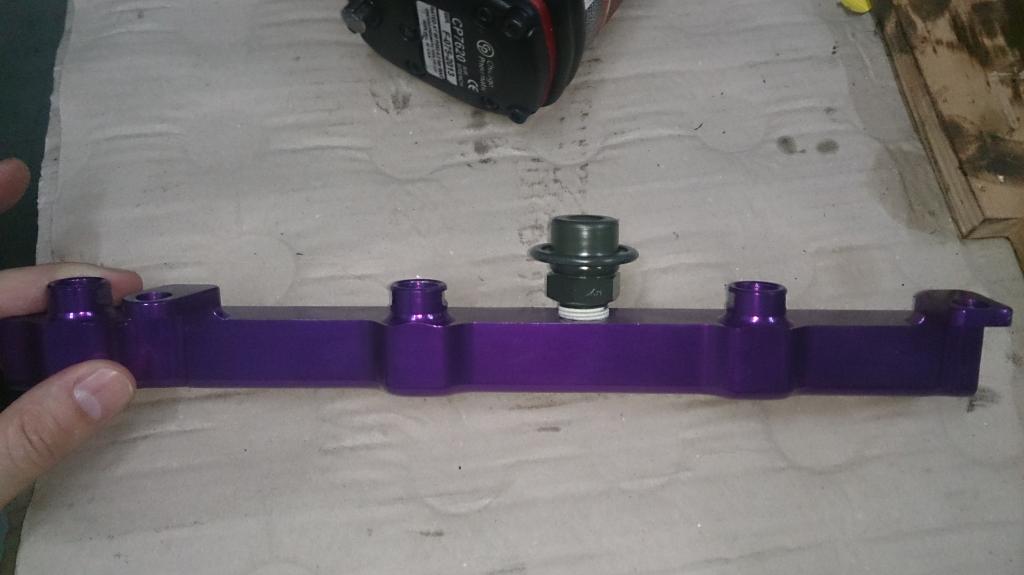
make fuel lines, put rails on the motor
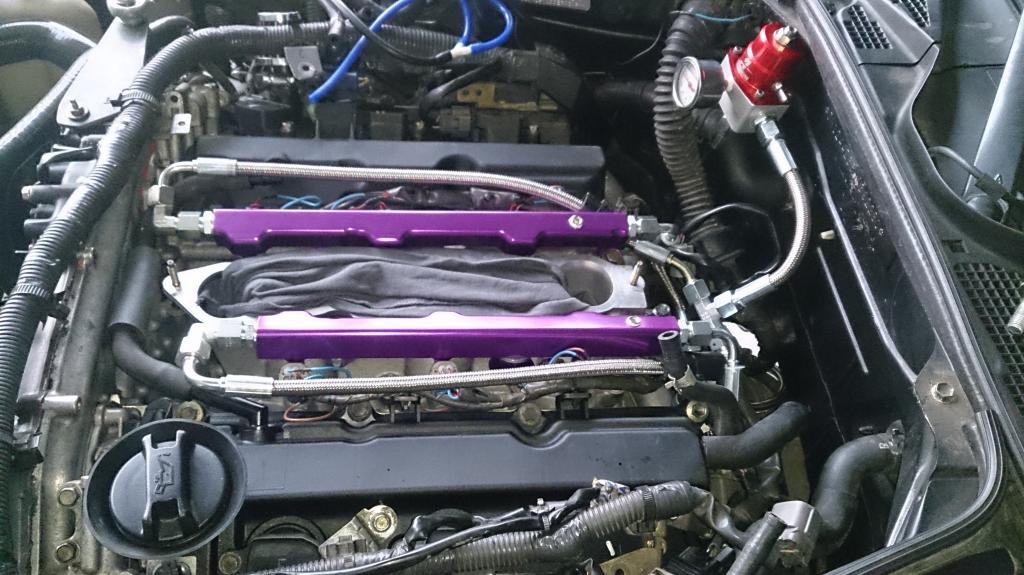
Then I realized that lower intake plenum does not fit . There are not enough clearance between rails and it. After a while, managed to get clearance by grinding lower intake manifold, luckily there were a plenty of material to do it.
Once everything assembled, got it running again. I have lost 4 of 5 lean spots and that one remained isn't so bad, lambda goes up to 1.05 which is close enough to 1 and motor do not hesitate because of that. Adding two additional FPD's between 2nd and 3rd injector should probably fix this too.
finally finished tuning on dyno. Boost is set to 25 PSI and I'm definitely hitting limit of this small A/R 0.68 exhaust housing. Already ordered bigger one
, it should be delivered soon.Also, was fighting strange fuel starvation on low load (high vacuum) and low to mid rpms for a loooong time. No matter what I tried through tuning, and I really tried everything, I always had a 4-5 lean spots where engine hesitates and misfires.
Then I found out that high flow injectors can do that wired things causing fuel pressure pulsations in fuel rails. There are on the market high flow fuel rails with integrated fuel pressure pulsation dampers (CJM), but didn't feel comfortable spending $500 for such a basic and simple objects.
Instead, I went through small DIY project. Bought cheap http://www.ebay.com/itm/Aluminum-High-Flow-Fuel-Injector-Inject-Rail-FOR-350Z-G35-VQ35-VQ35DE-Z33-V35-RD-/271635413192?pt=Motors_Car_Truck_Parts_Accessories&fits=Model%3A350Z&hash=item3f3ebb78c8&vxp=mtrhigh flow aluminium fuel rails, and two http://www.ebay.com/itm/Auto-7-401-0012-Fuel-Pressure-Damper-/171457490464?pt=Motors_Car_Truck_Parts_Accessories&fits=Make%3AHyundai&hash=item27eba9ae20&vxp=mtr "bolt" style with thread.
Soon got them:
and the rest seemed easy, drill rails, make threads for FPD's
assembly
make fuel lines, put rails on the motor
Then I realized that lower intake plenum does not fit
. There are not enough clearance between rails and it. After a while, managed to get clearance by grinding lower intake manifold, luckily there were a plenty of material to do it.Once everything assembled, got it running again. I have lost 4 of 5 lean spots and that one remained isn't so bad, lambda goes up to 1.05 which is close enough to 1 and motor do not hesitate because of that. Adding two additional FPD's between 2nd and 3rd injector should probably fix this too.
The following users liked this post:
thatv35guy (01-31-2016)


