My multi-point rear roll cage thread!
 09-28-2011, 11:53 AM
#1
Registered User
Thread Starter

Guys I've been keeping a log thread running from stripping down to cage going in here : https://my350z.com/forum/exterior-an...rea-out-4.html
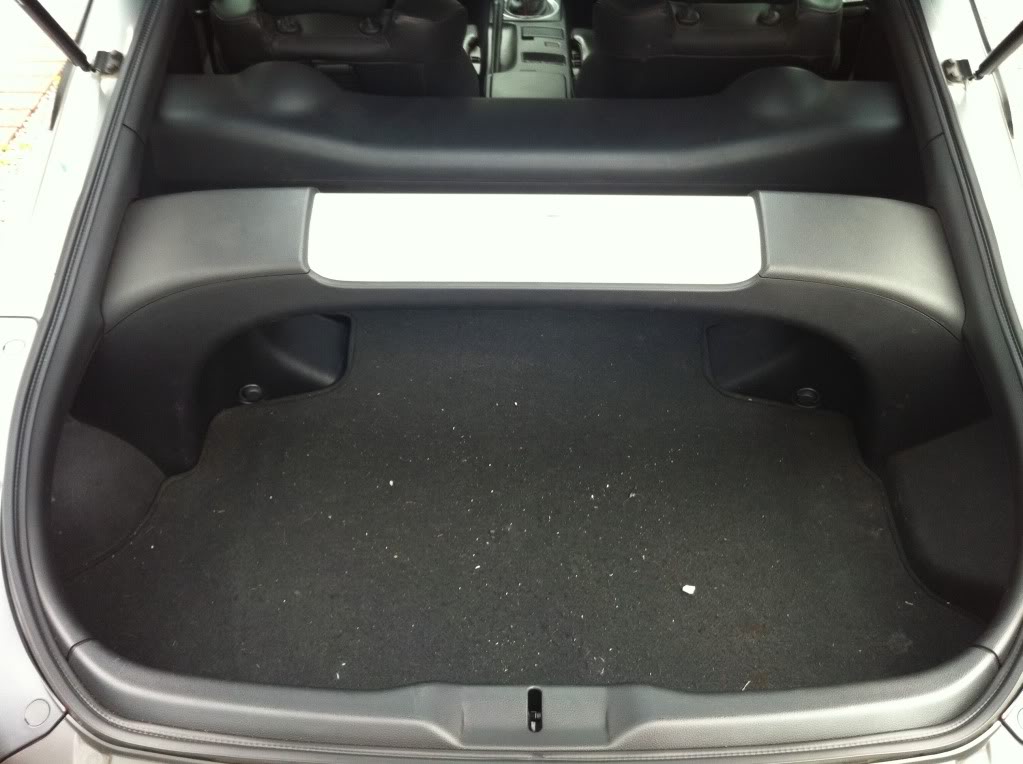
Starting point!
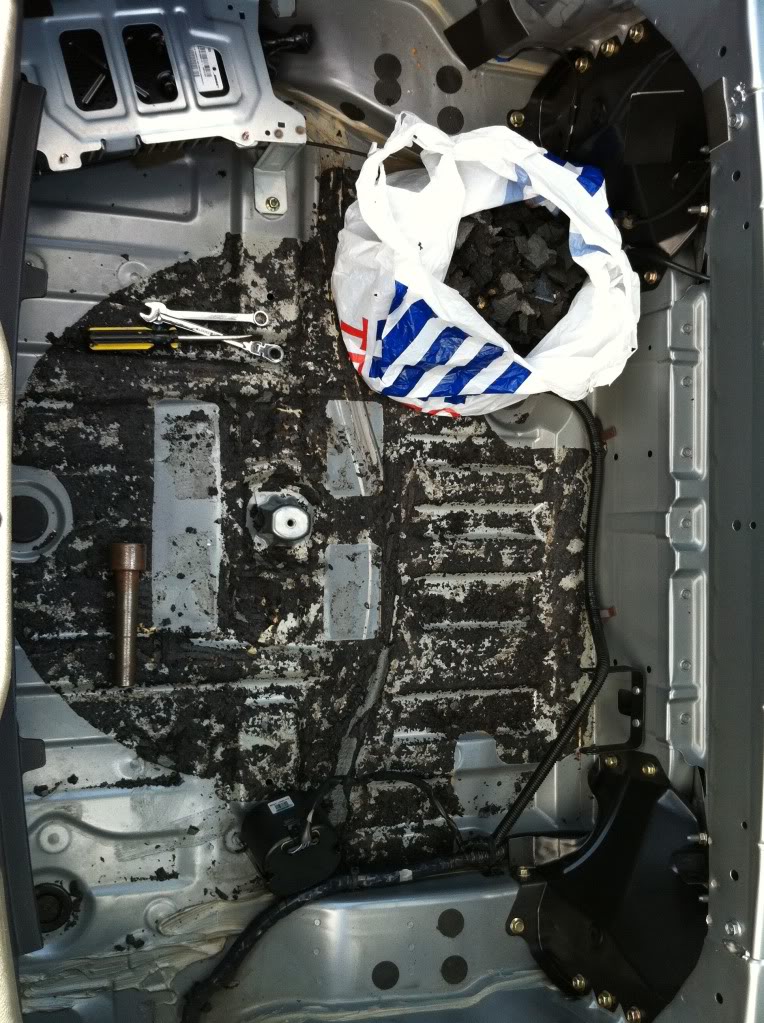
Messy tar removal!
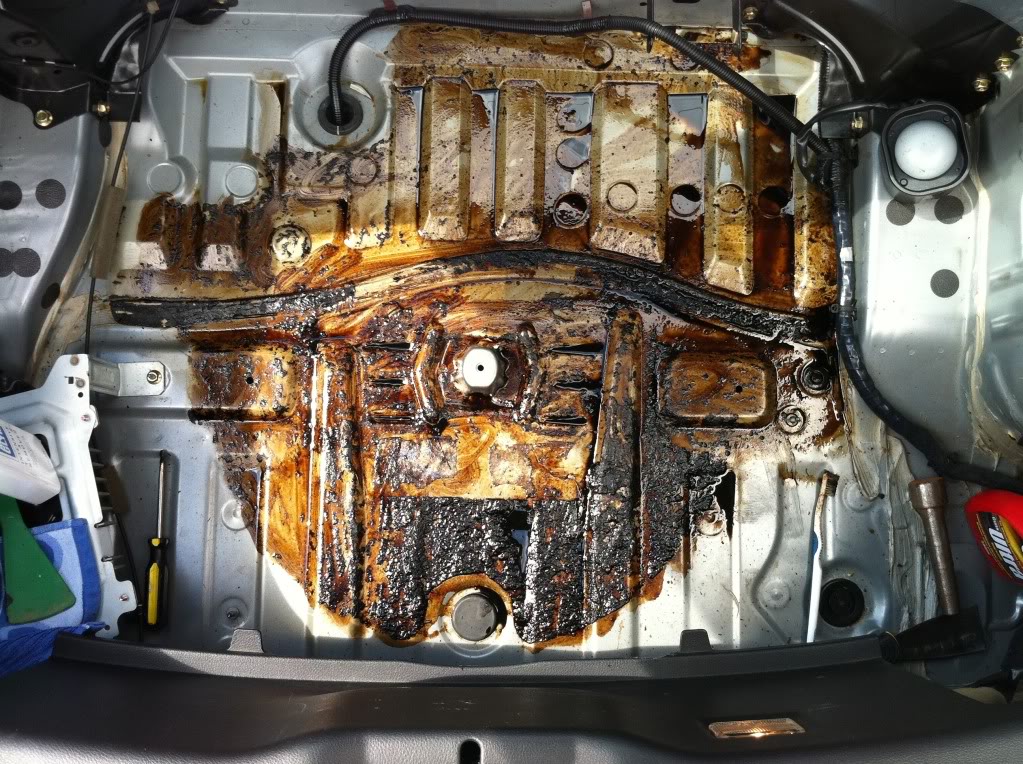
After lots of cutting!
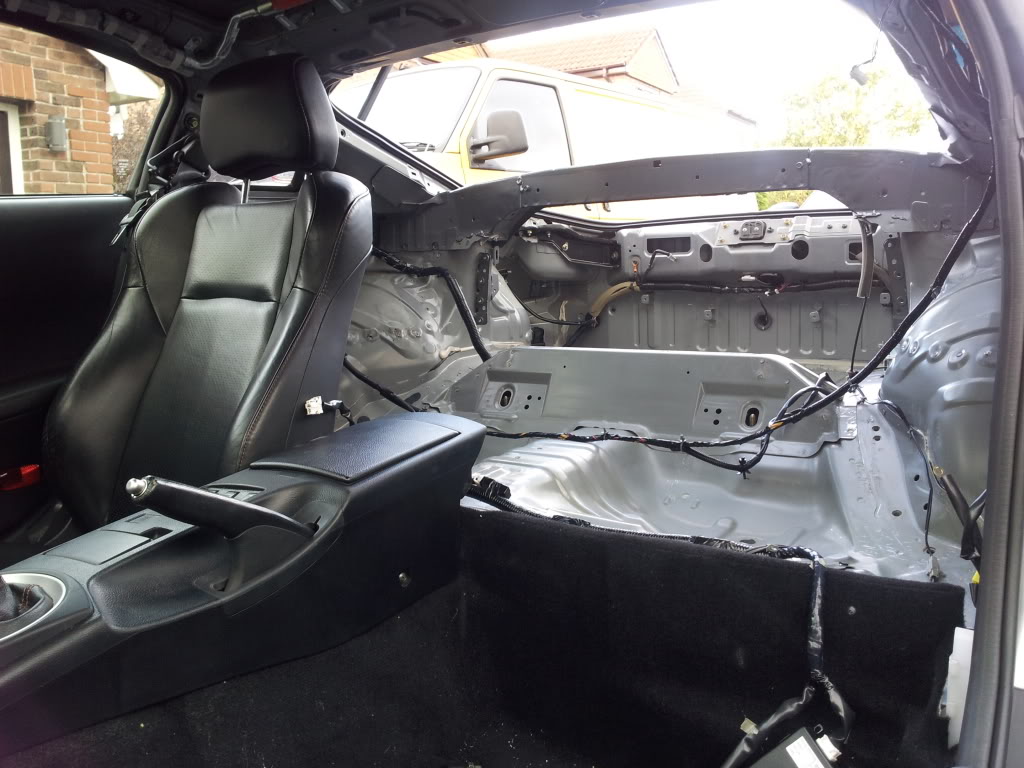
Now this thread is the roll cage progress and interior set up!
ell made the trip down to custom cages to pick the zed up yesterday! Nice trip down on the train and an easy (ish, ill tell you in a sec) drive home!
Well theres some good points and bad points about this bit, the good bits are, Im very happy with the cage and workman ship but customer service and a few other things a not to great.
The bad bits are, I get a quote from them before I bring the car to them, plenty of emails back and forward to confirm price and what I wanted doing etc. I pick an email up from them the day before Im coming to collect the car saying my bill is double what they quoted me before I dropped the car of with them!
I got straight on the phone and said there must be a mistake as this was not what I agreed and there come back was it took them over 10 hours to drop the rear suspension out and refit and they had to remove the strut bar! They said that I had removed the "easy bit" of metal and left them the hard parts and thats why the price has gone up!
I had asked them to box in the area around the turret top to neaten that area up and they were asking for another 2 hours labour, I said ill leave it!
Went down to pick the car up and spent 30mins "telling them its not right" and they said they could have charged me by the hour and the quote would have been 3 times my first quote so they doing me a favour!
End of the story is I said that its not right for you to quote a price and then say when you come to pay that they had to do extra work and charge more! The first quote from them should be the total price and not just a guide.
I bent over and paid as I need to get the car home to fix it up before the national
Get down to collect my car and find they bloody areal has been snapped off!!!! :angry: :angry: They try to "fix" the snapped off areal but its in need of a new part so they have agreed to pay for the parts I need now.
Well rant over and on to the pic's!
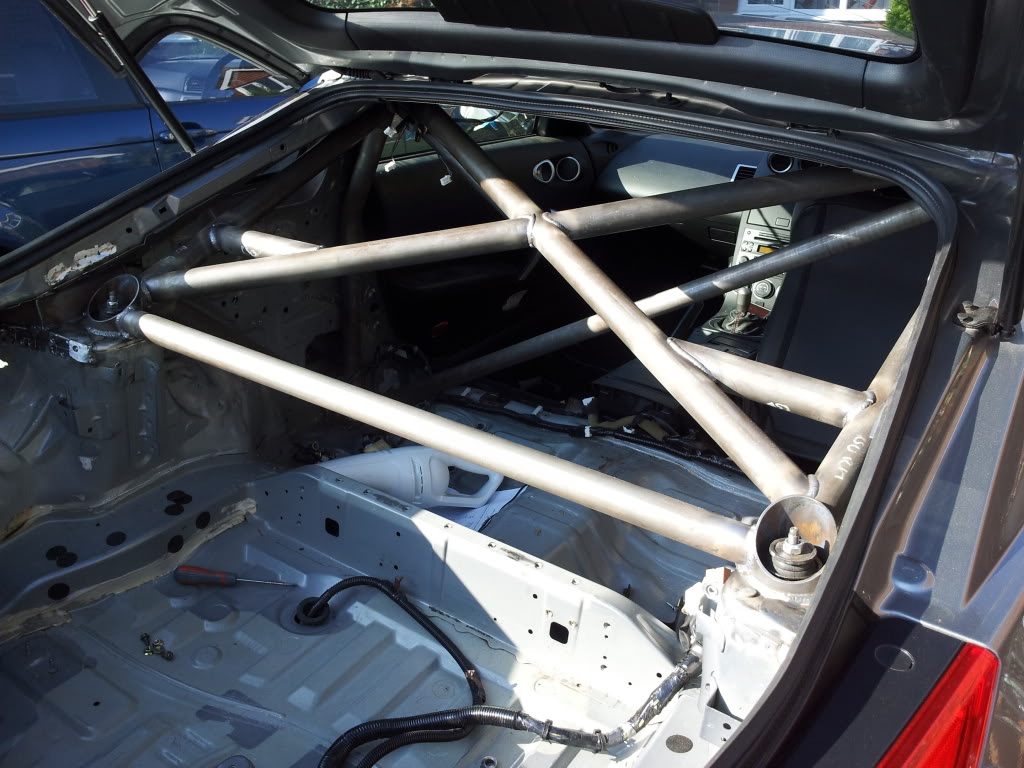
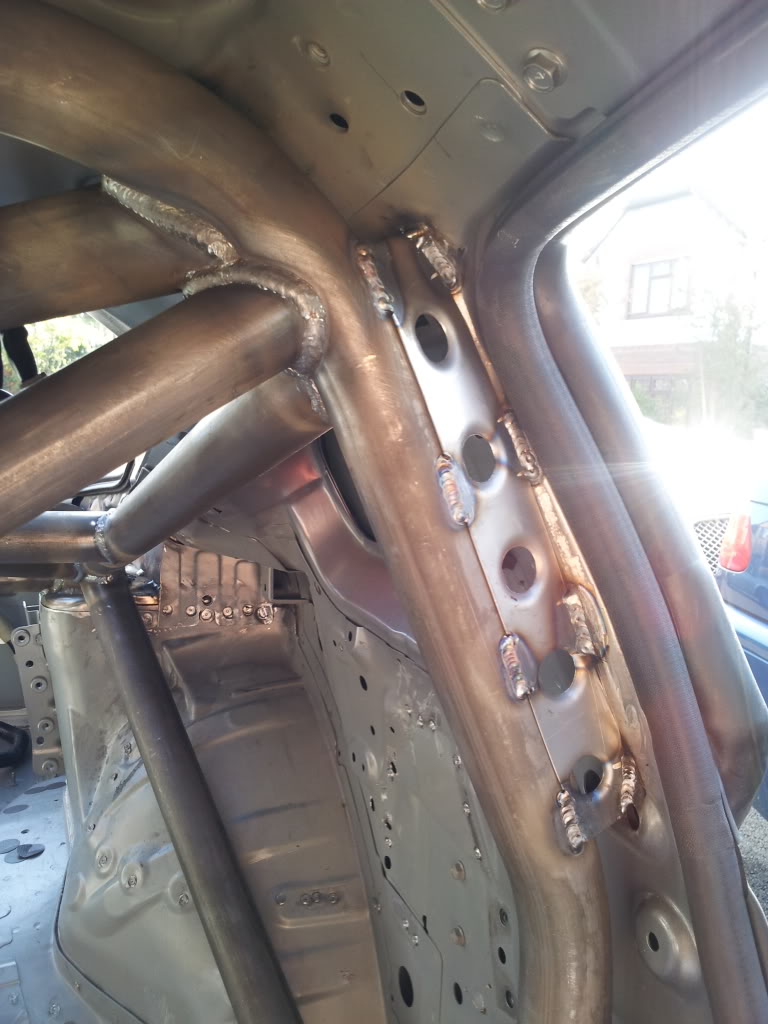
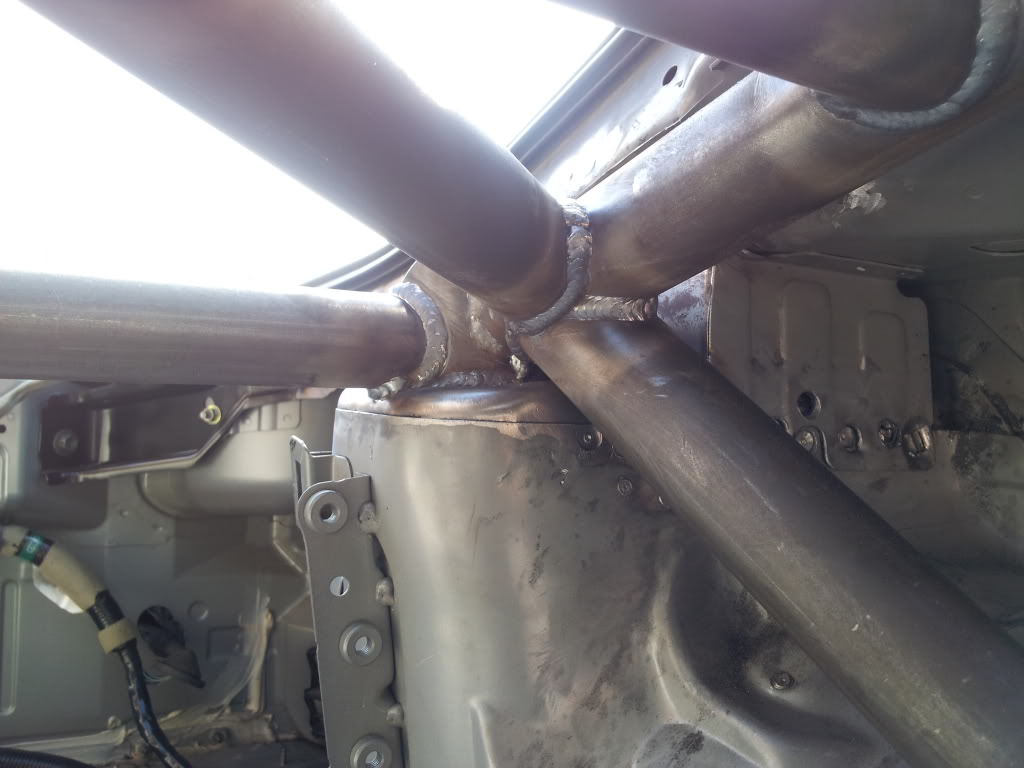
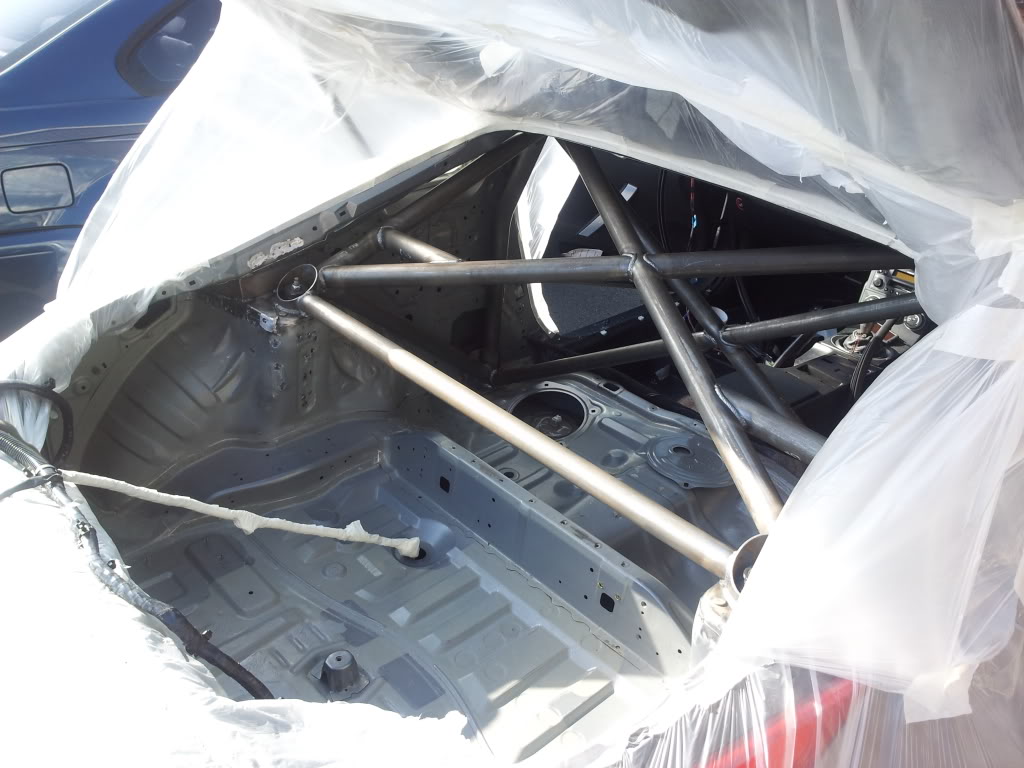
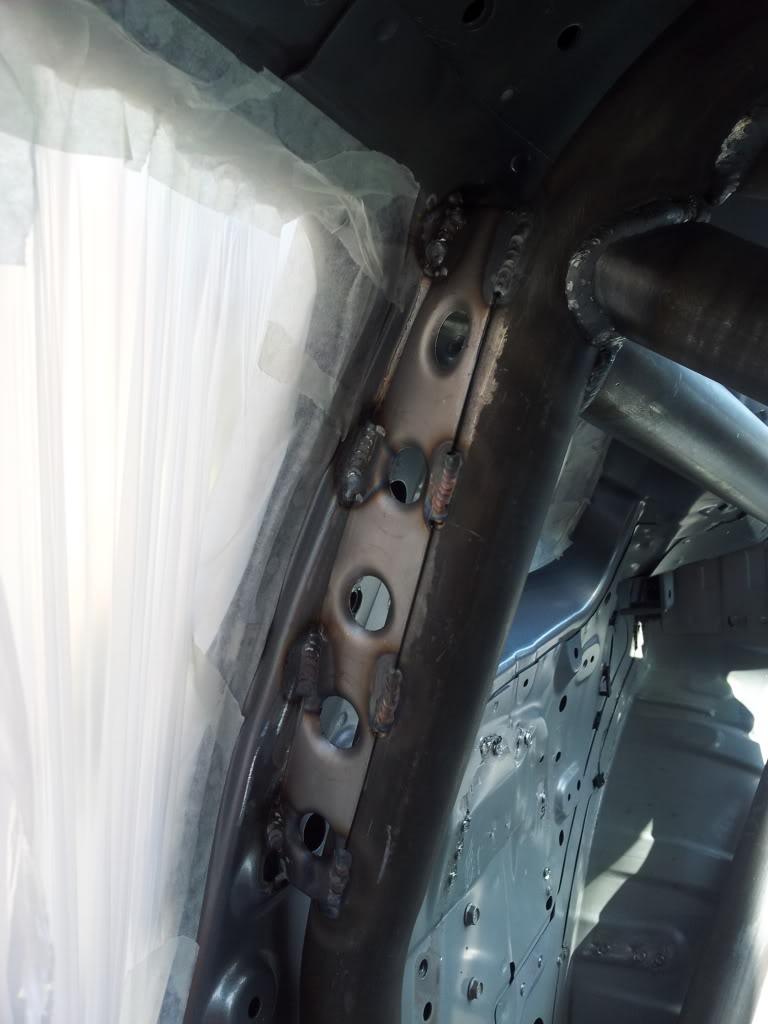
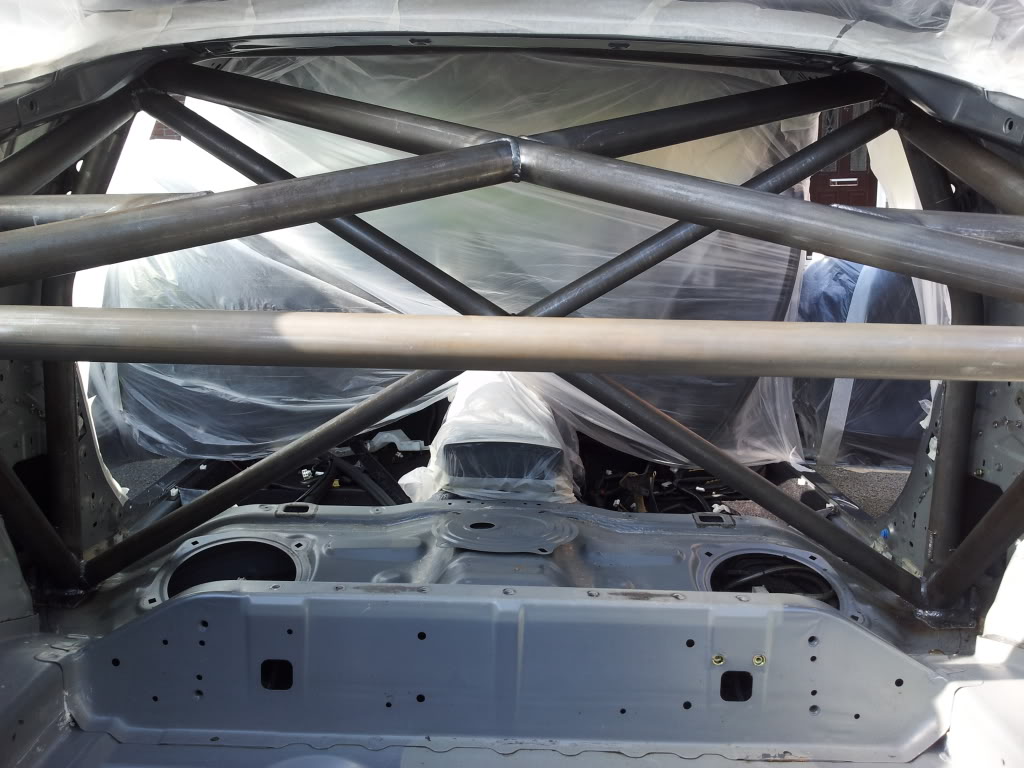
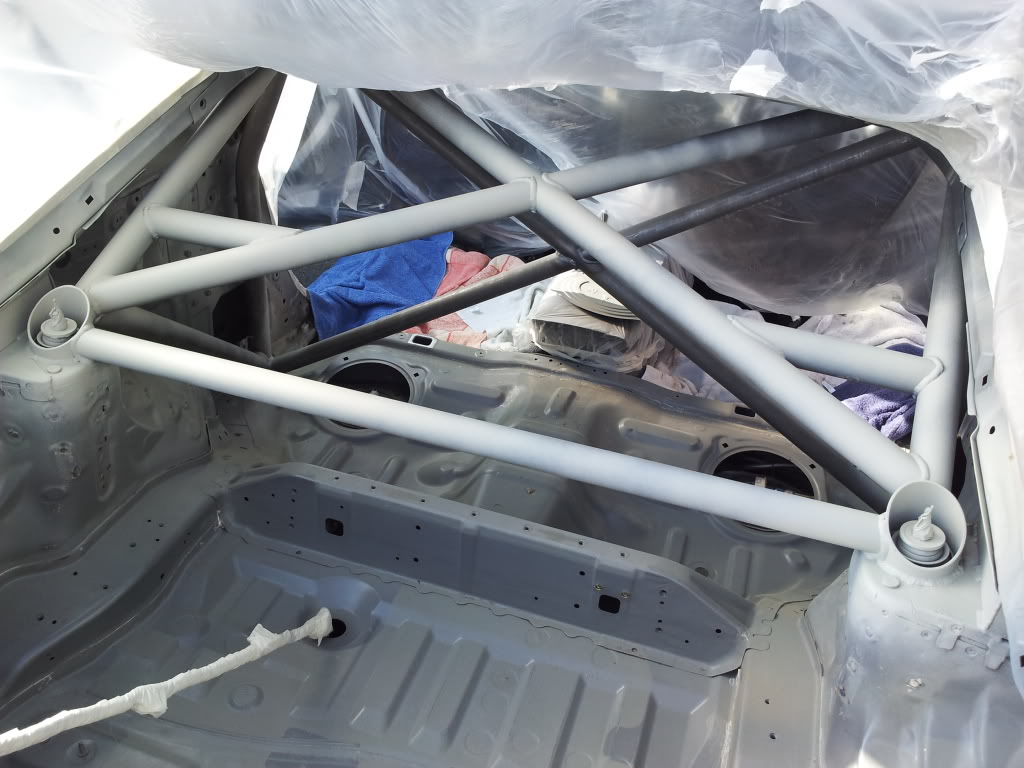
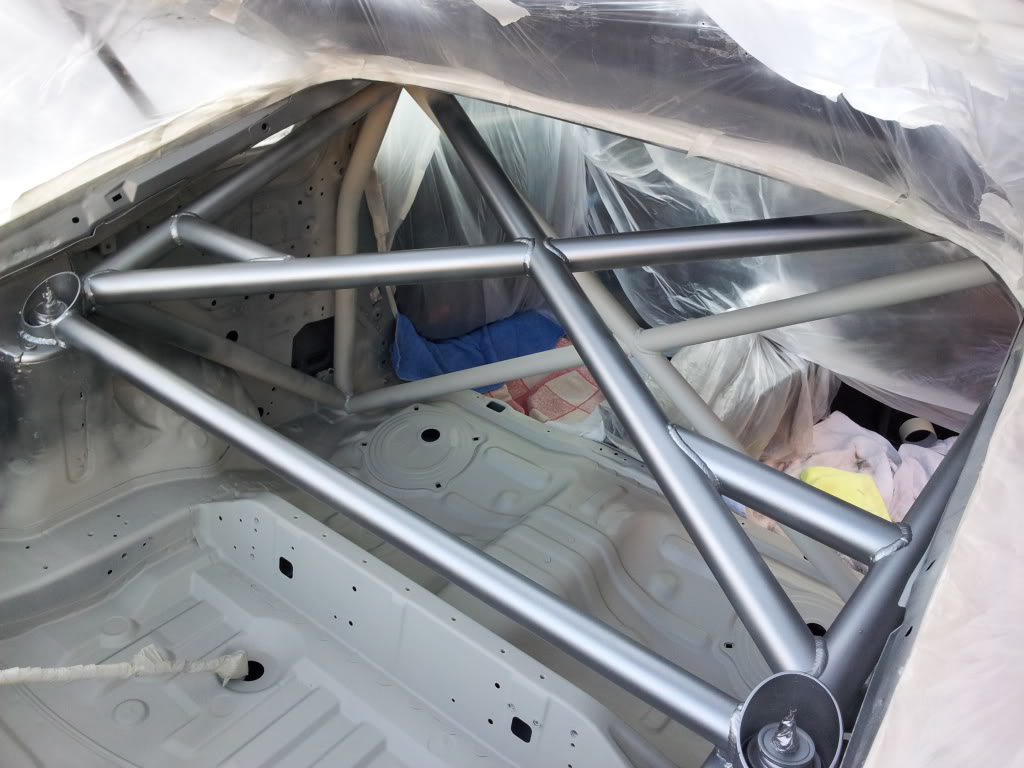
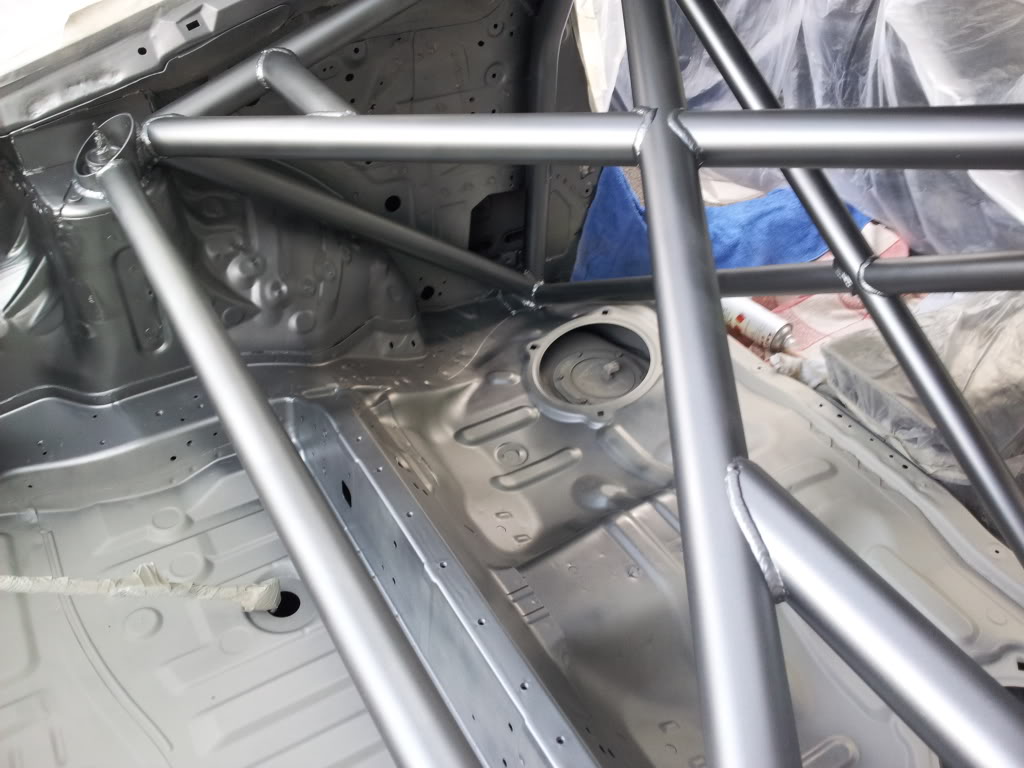
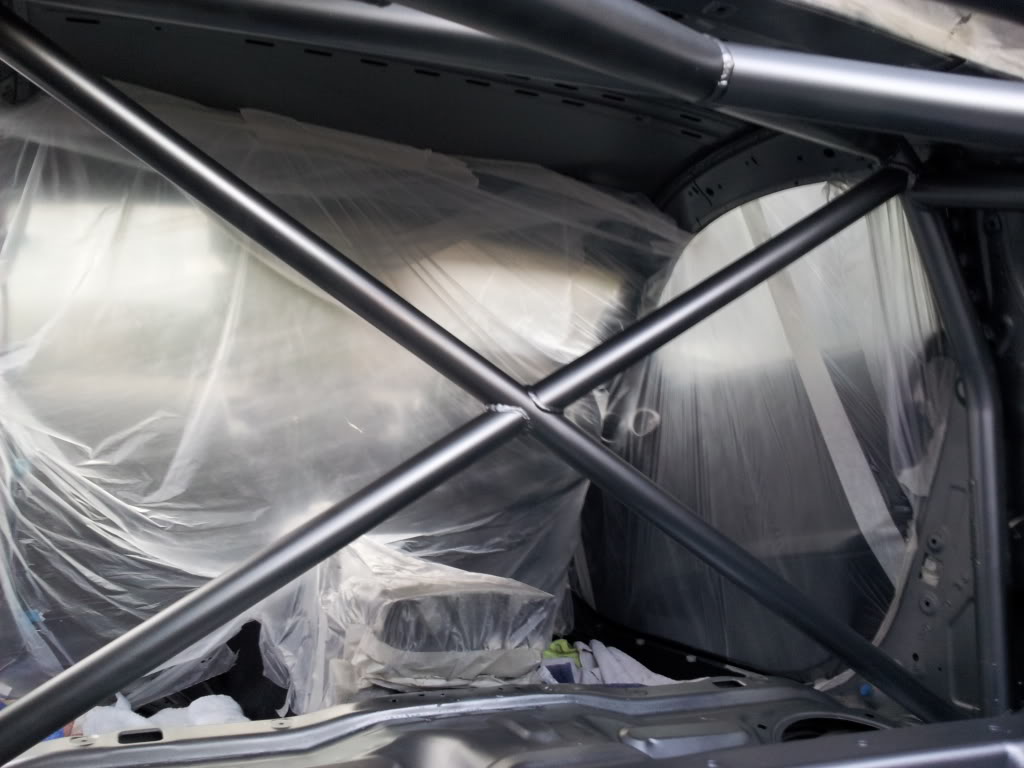
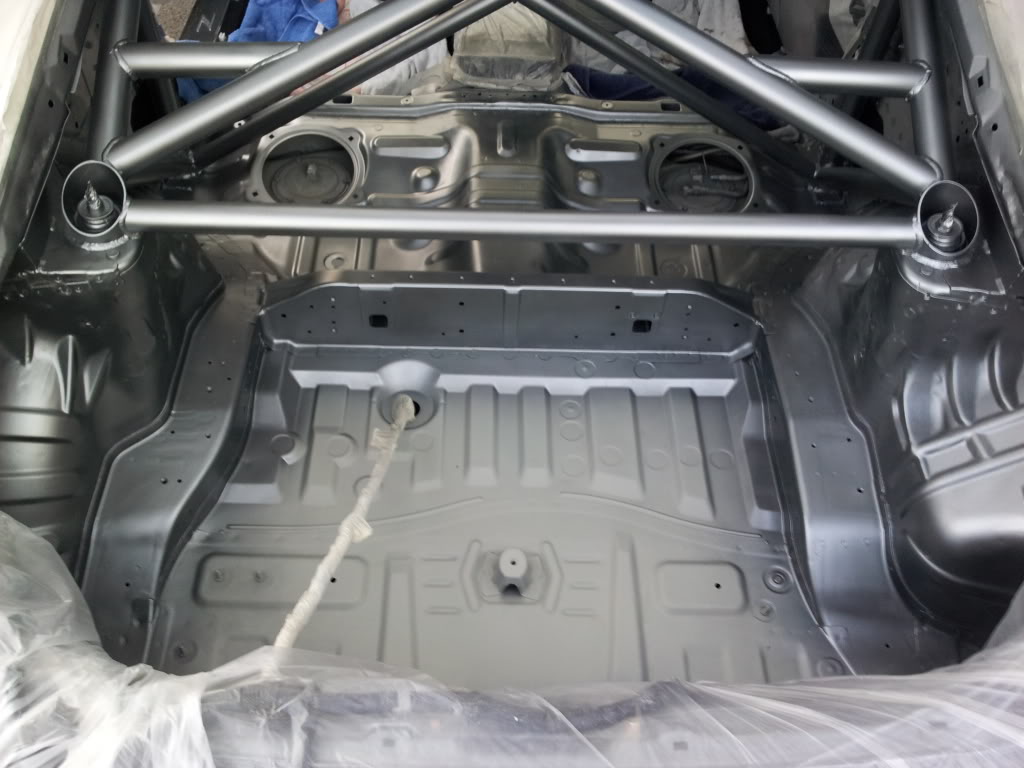
Dimple plate chassis gussets. Ties the main hoop into the car to add stiffness.
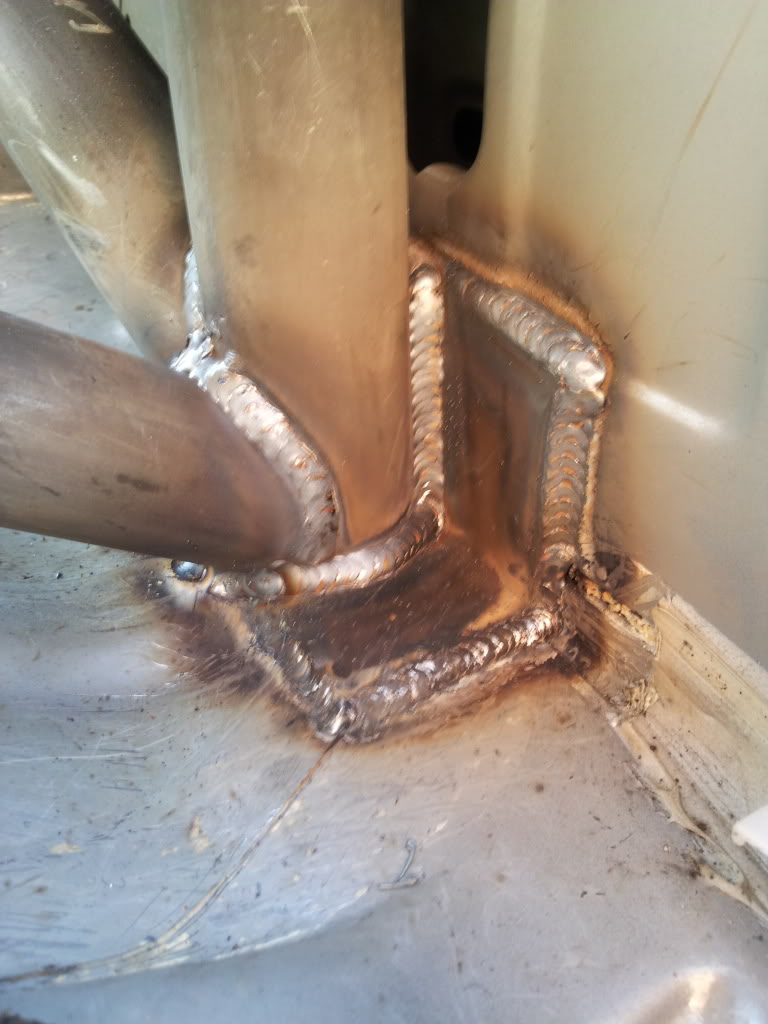
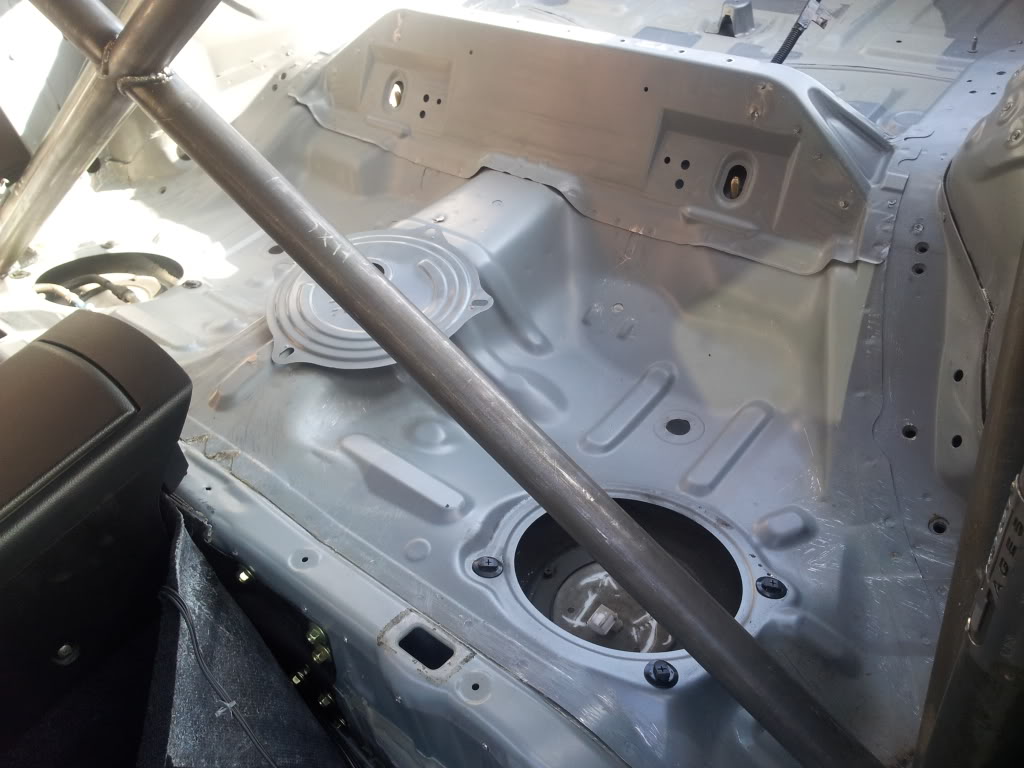
Foot plates nice and beefy going onto the chassis rails.
Ill post up todays clean up efforts and prep later! Time for a shower and to go get some tea! :#1:
Starting point!
Messy tar removal!
After lots of cutting!
Now this thread is the roll cage progress and interior set up!
ell made the trip down to custom cages to pick the zed up yesterday!
Nice trip down on the train and an easy (ish, ill tell you in a sec) drive home! Well theres some good points and bad points about this bit, the good bits are, Im very happy with the cage and workman ship but customer service and a few other things a not to great.
The bad bits are, I get a quote from them before I bring the car to them, plenty of emails back and forward to confirm price and what I wanted doing etc. I pick an email up from them the day before Im coming to collect the car saying my bill is double what they quoted me before I dropped the car of with them!
I got straight on the phone and said there must be a mistake as this was not what I agreed and there come back was it took them over 10 hours to drop the rear suspension out and refit and they had to remove the strut bar! They said that I had removed the "easy bit" of metal and left them the hard parts and thats why the price has gone up!
I had asked them to box in the area around the turret top to neaten that area up and they were asking for another 2 hours labour, I said ill leave it!
Went down to pick the car up and spent 30mins "telling them its not right" and they said they could have charged me by the hour and the quote would have been 3 times my first quote so they doing me a favour!
End of the story is I said that its not right for you to quote a price and then say when you come to pay that they had to do extra work and charge more! The first quote from them should be the total price and not just a guide.
I bent over and paid as I need to get the car home to fix it up before the national
Get down to collect my car and find they bloody areal has been snapped off!!!! :angry: :angry: They try to "fix" the snapped off areal but its in need of a new part so they have agreed to pay for the parts I need now.
Well rant over and on to the pic's!
Dimple plate chassis gussets. Ties the main hoop into the car to add stiffness.
Foot plates nice and beefy going onto the chassis rails.
Ill post up todays clean up efforts and prep later! Time for a shower and to go get some tea! :#1:
Last edited by djtimodj; 09-28-2011 at 12:05 PM.
 09-28-2011, 11:55 AM
#2
Registered User
Thread Starter
ell today's progress was to clean up the MASSIVE MESS that the car was in! lol... the inside was in a state, covered in black metal bits and dust from grinding etc.
Started with hoovering up all the lose dust and crap, wiped the whole car/cage out with rags to remove the heavy stuff. Then wiped the car out with degreaser fluid again.
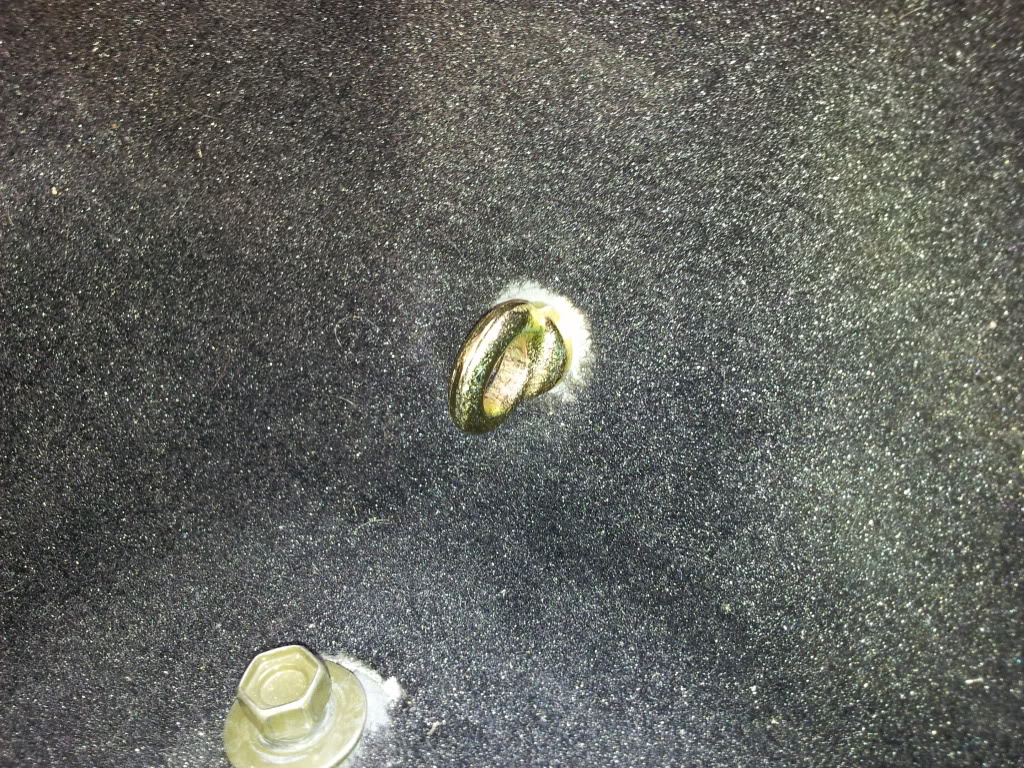
I still had some left over metal that need to come out. So I wipped these tabs off.
Gone, maybe another 0.5kg gone! lol.. both sides now removed.
Spent about an hour wire brushing every weld, and making sure it was as clean as I could get it.
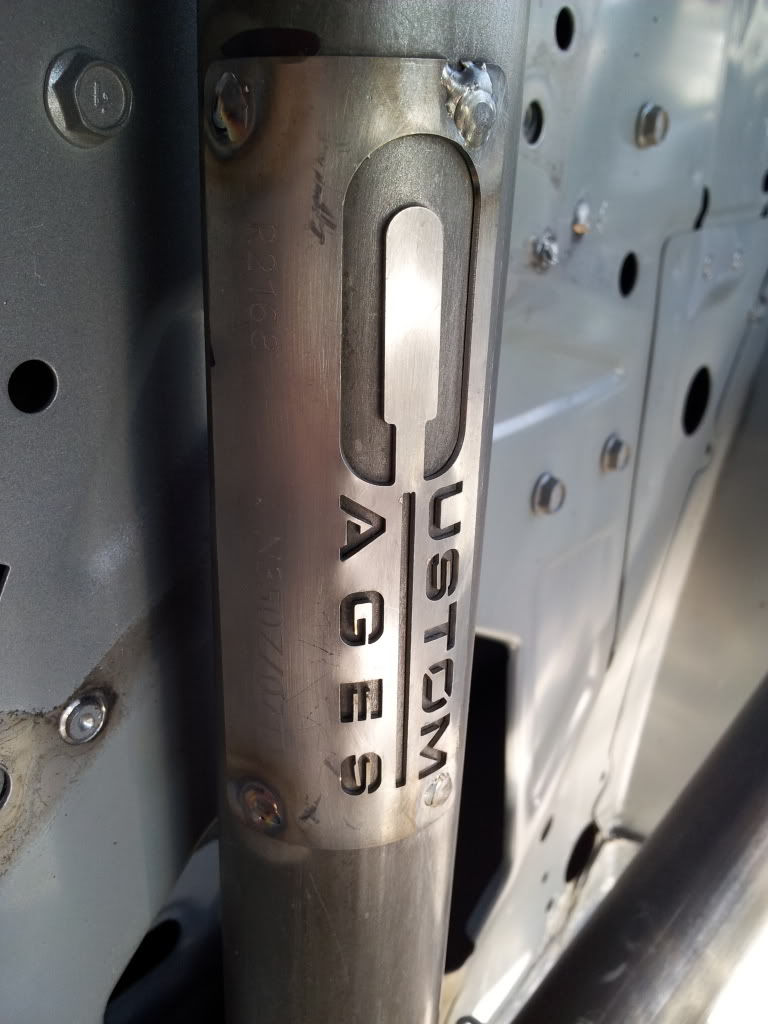
Cleaned up the custom cage logo's and Cage Tags..

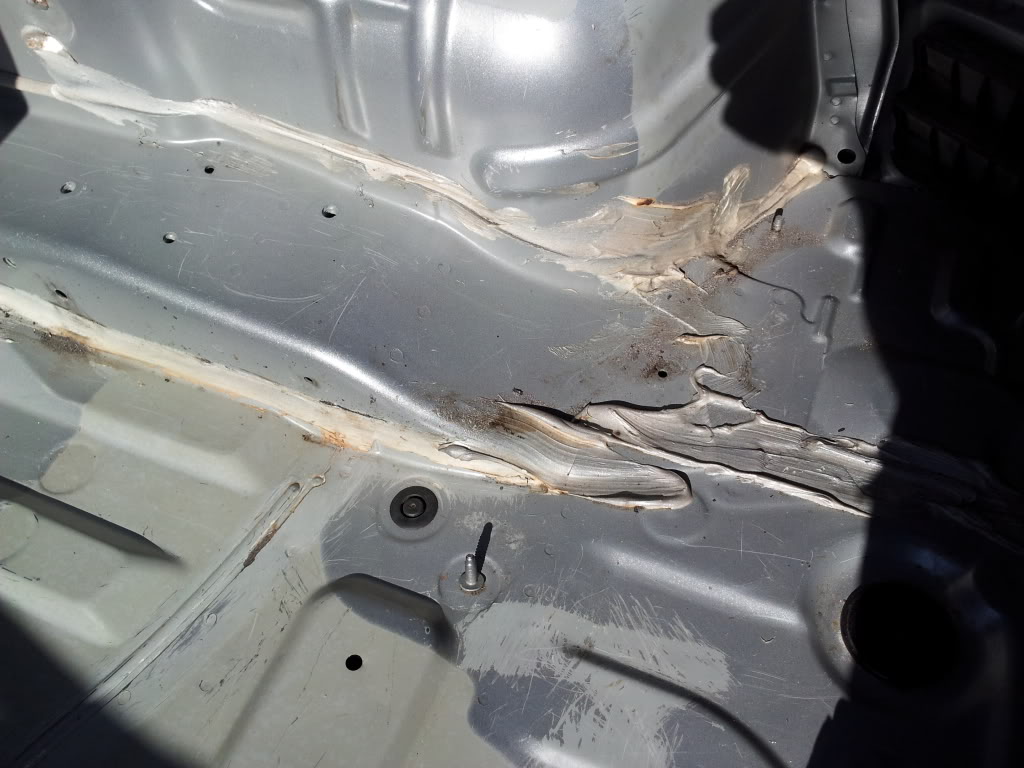
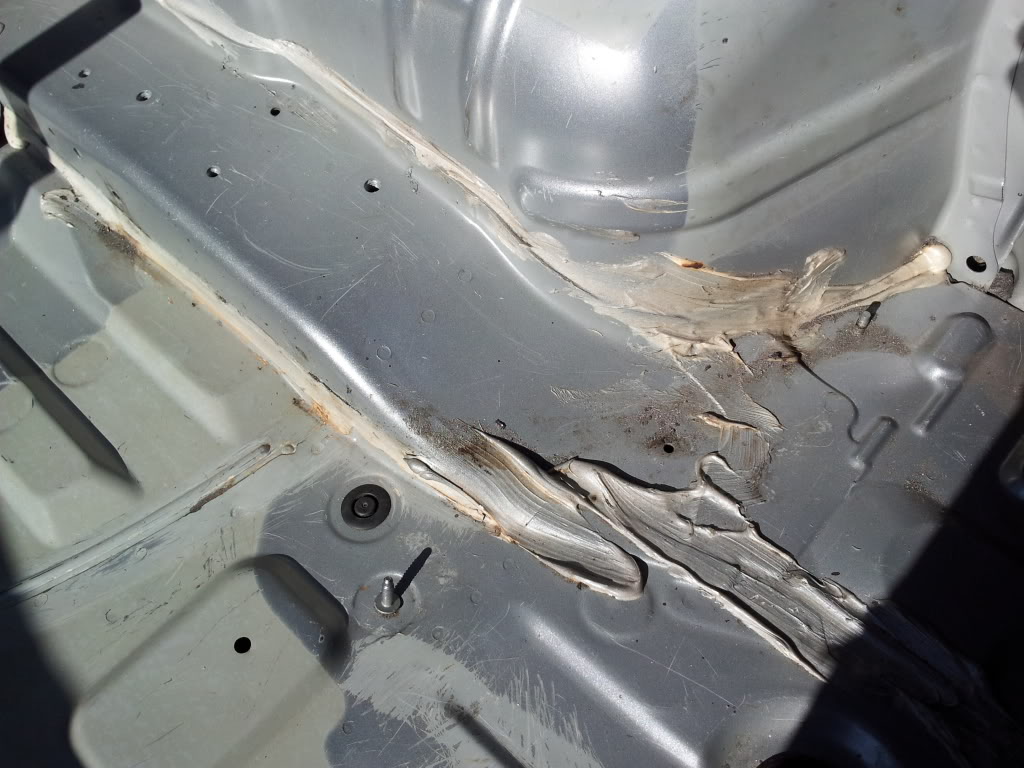
Spent ages, taking even more seam sealer off! Bloody had job and even thinners wont help! lol...Just have to mash it off with a screw driver/scraper.
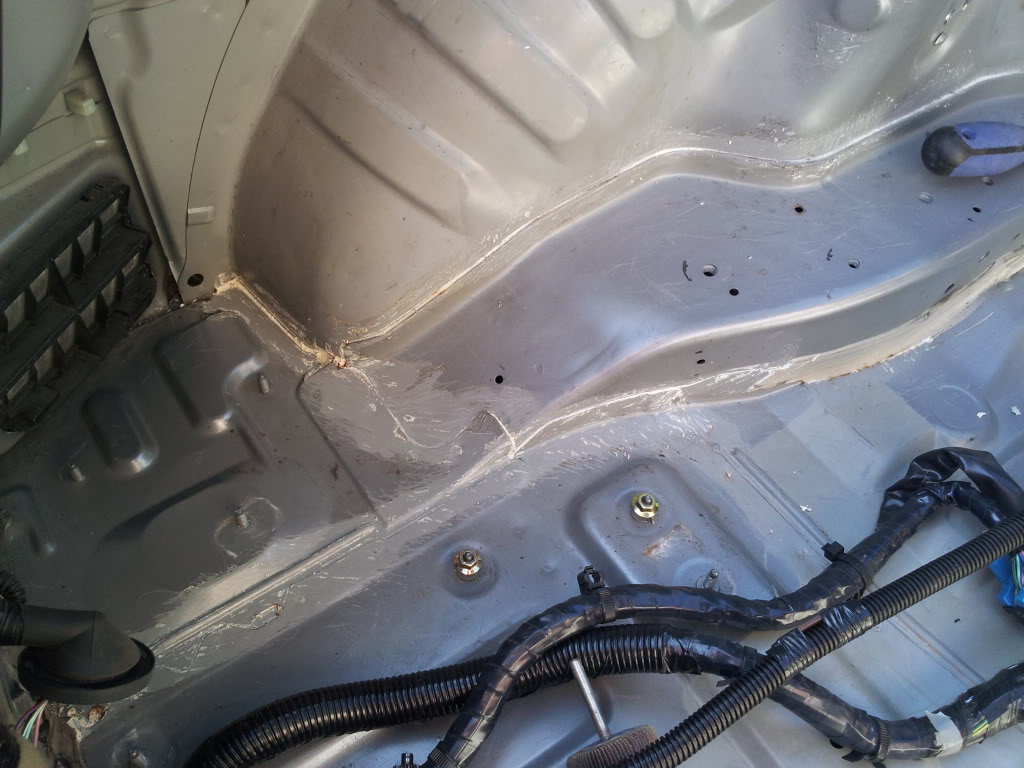
Nissan dont expect you to see the messy sealer! lol... Not really put on with any care.
Cleaned up now. Still needs more work but not far off now.

Moved on to removing the last bits of foam and glue off the front chassis rail behind the seats.
Cleaned up.
Quick test fit of the lap bet eye bolt fixing for my harness. The out side (door side) fits perfect into the OEM seat belt captive bolt but the trans tunnel side needs a bracket making as the OEM seat belt clip is fastened to the seat rail! I've cut some 3mm stainless plate up and just need to drill it and added a nylock nut to it.
Started with hoovering up all the lose dust and crap, wiped the whole car/cage out with rags to remove the heavy stuff. Then wiped the car out with degreaser fluid again.
I still had some left over metal that need to come out. So I wipped these tabs off.
Gone, maybe another 0.5kg gone! lol.. both sides now removed.
Spent about an hour wire brushing every weld, and making sure it was as clean as I could get it.
Cleaned up the custom cage logo's and Cage Tags..
Spent ages, taking even more seam sealer off! Bloody had job and even thinners wont help! lol...Just have to mash it off with a screw driver/scraper.
Nissan dont expect you to see the messy sealer! lol... Not really put on with any care.
Cleaned up now. Still needs more work but not far off now.
Moved on to removing the last bits of foam and glue off the front chassis rail behind the seats.
Cleaned up.
Quick test fit of the lap bet eye bolt fixing for my harness. The out side (door side) fits perfect into the OEM seat belt captive bolt but the trans tunnel side needs a bracket making as the OEM seat belt clip is fastened to the seat rail! I've cut some 3mm stainless plate up and just need to drill it and added a nylock nut to it.
09-28-2011, 11:56 AM
#3
Registered User
Thread Starter
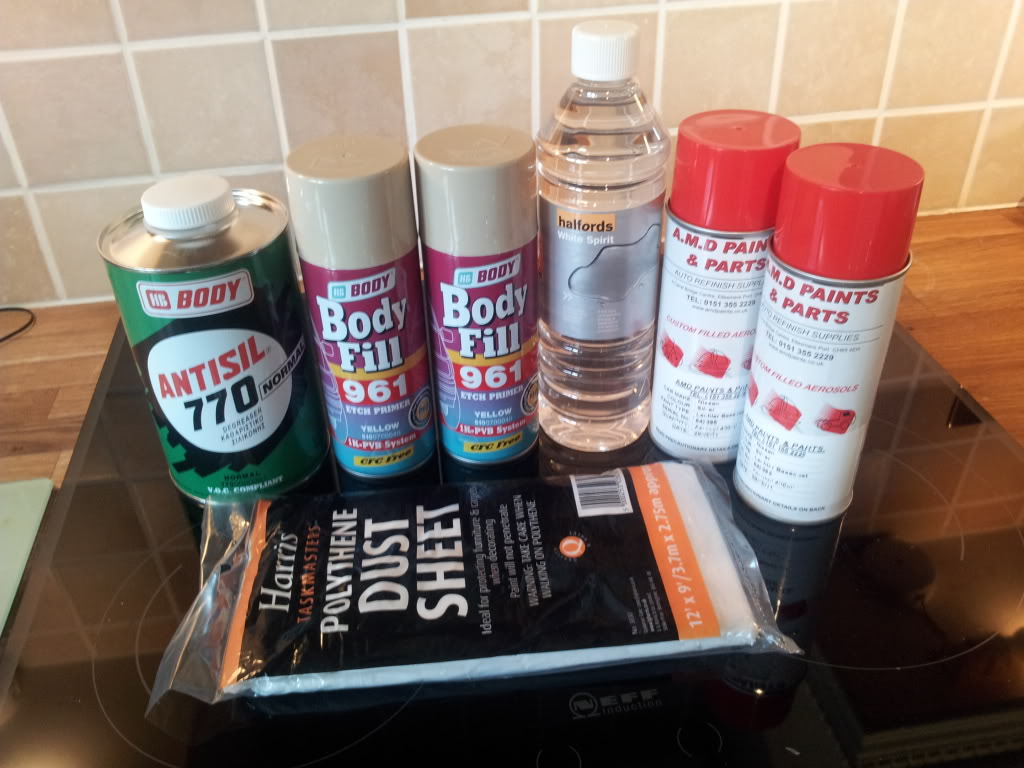
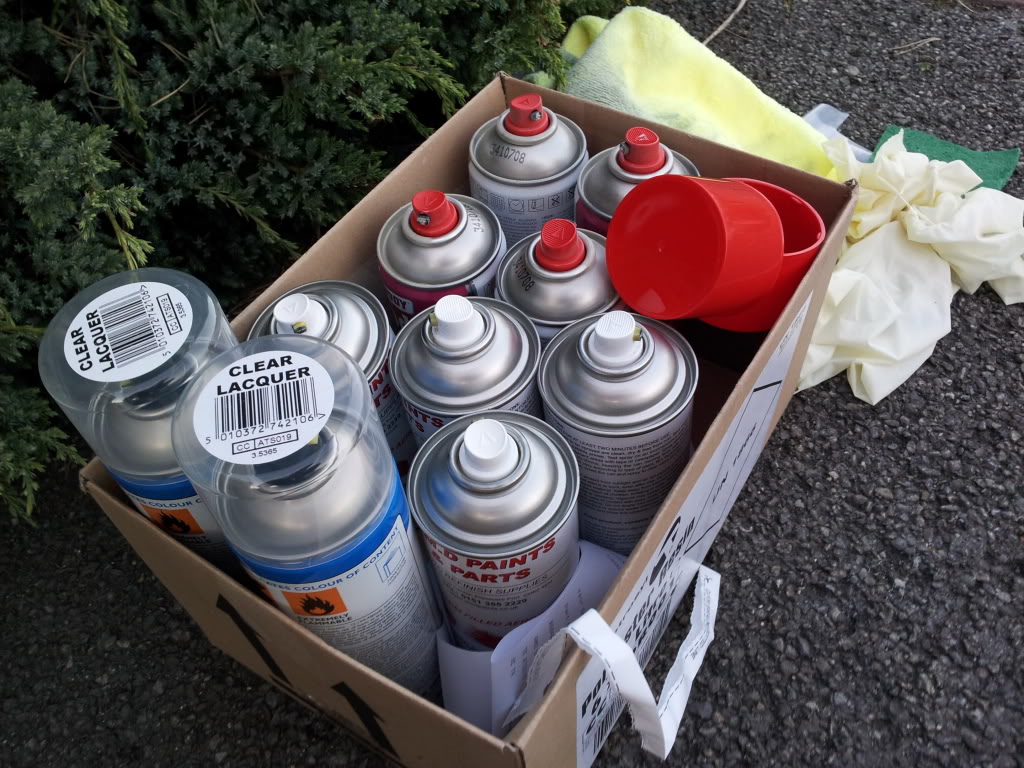
I went to our local paint supplier and picked up the stuff I need to paint the inside.
1L of panel wipe
2 X Etch primer
2 X nissan WV2 spray cans
I also need to make a trip out tomorrow and pick up for emetal (belzona or such like) to fix a few small tears in the metal work that happened while pulling it to bits. Need to do a bit of work filing down some more spot welds too :blink:
I got the car prepped last thing today as there was not much else I could do! lol.
Not fully done but every little bit done makes less work tomorrow! ha.
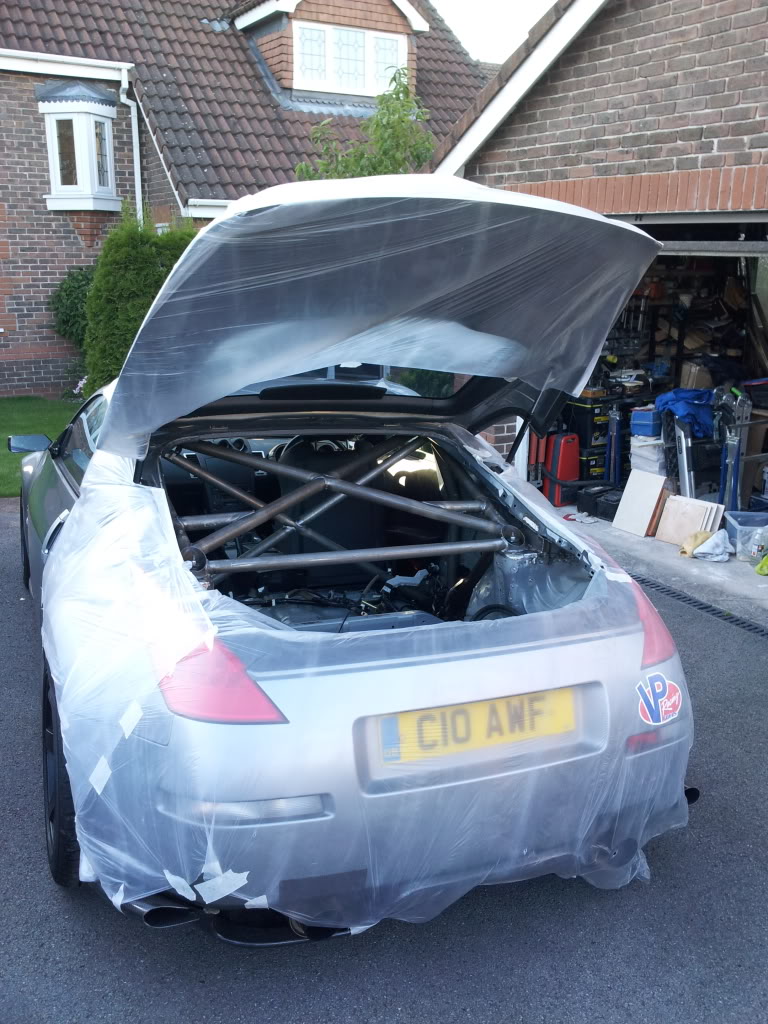

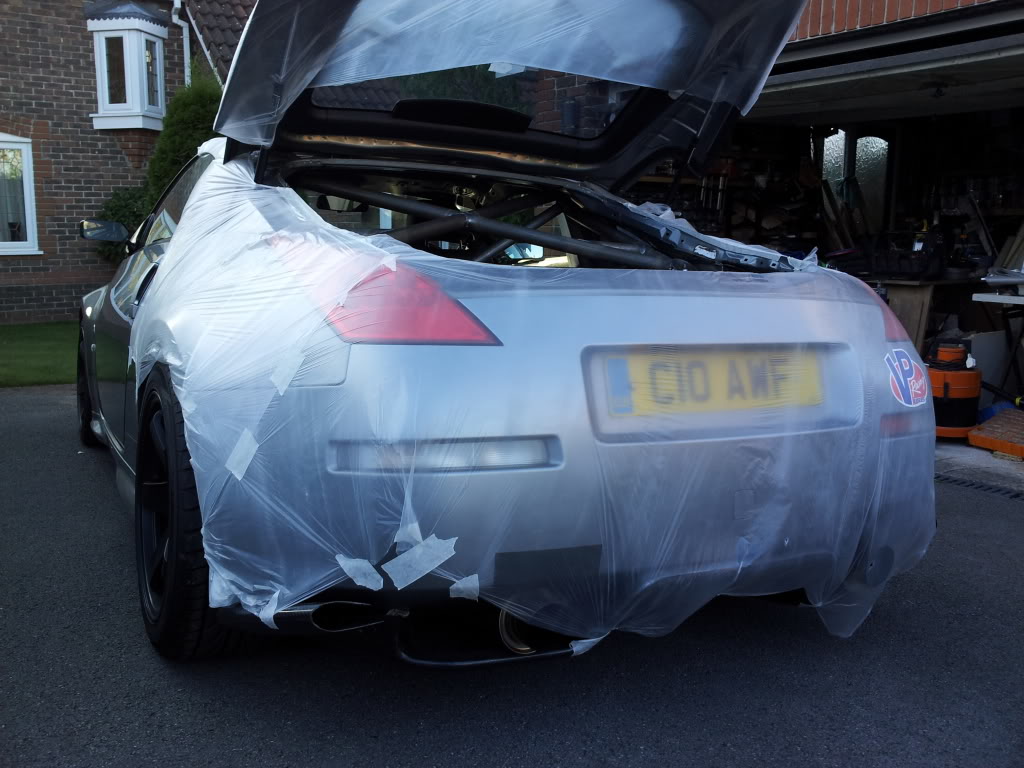
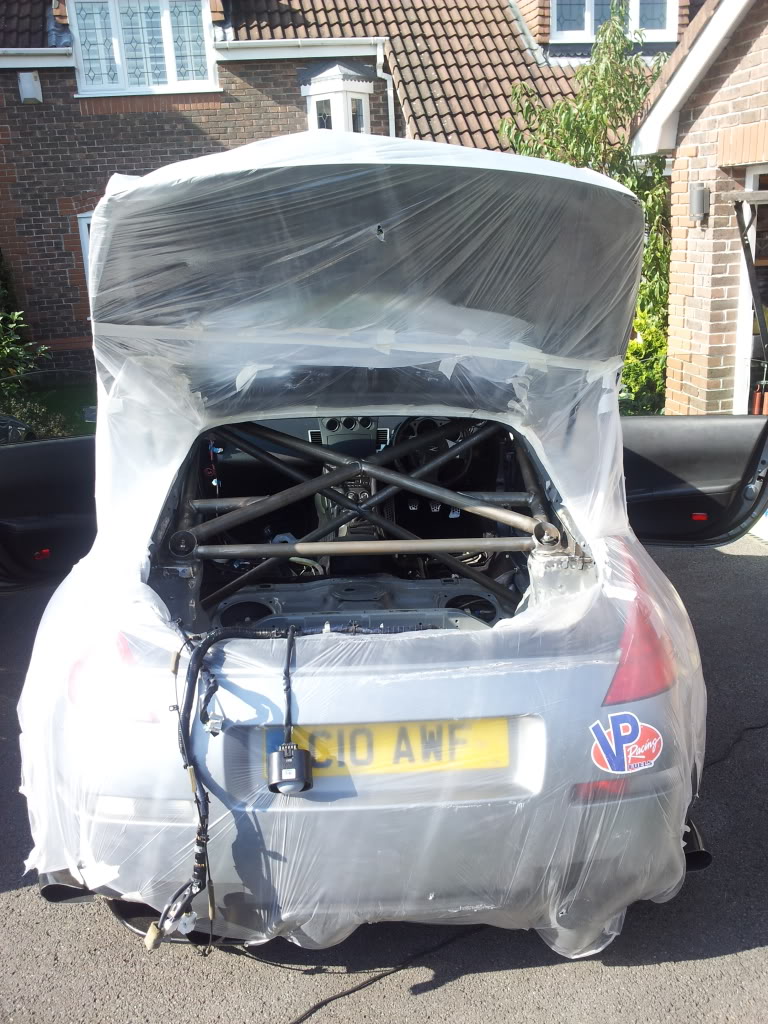
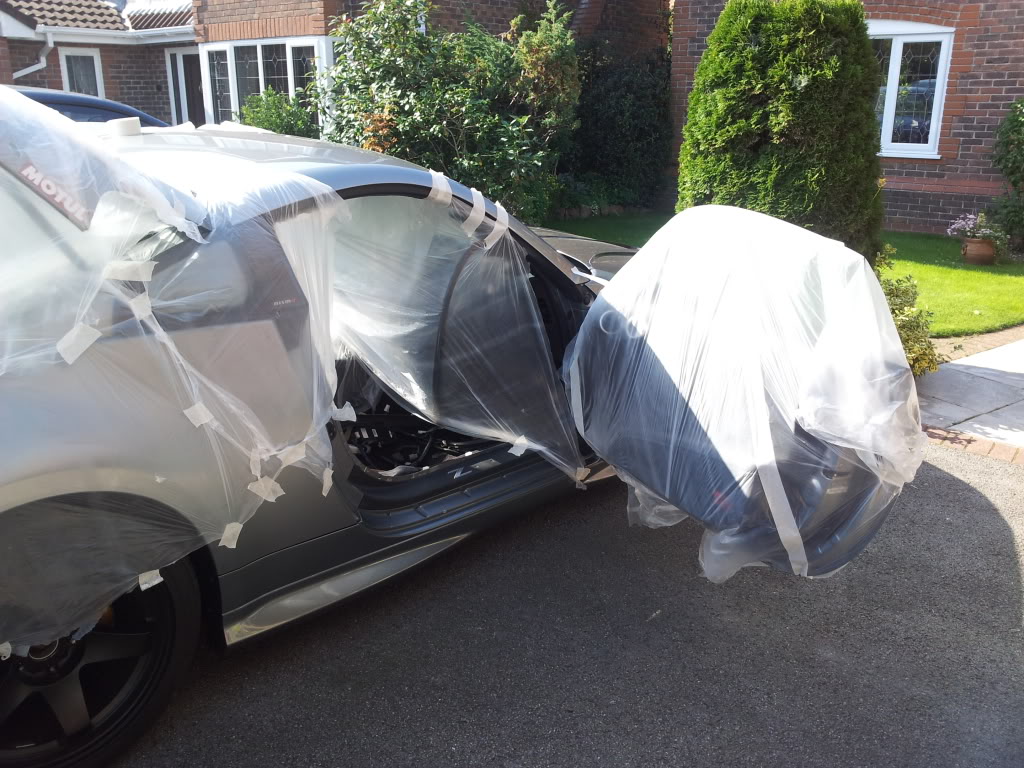
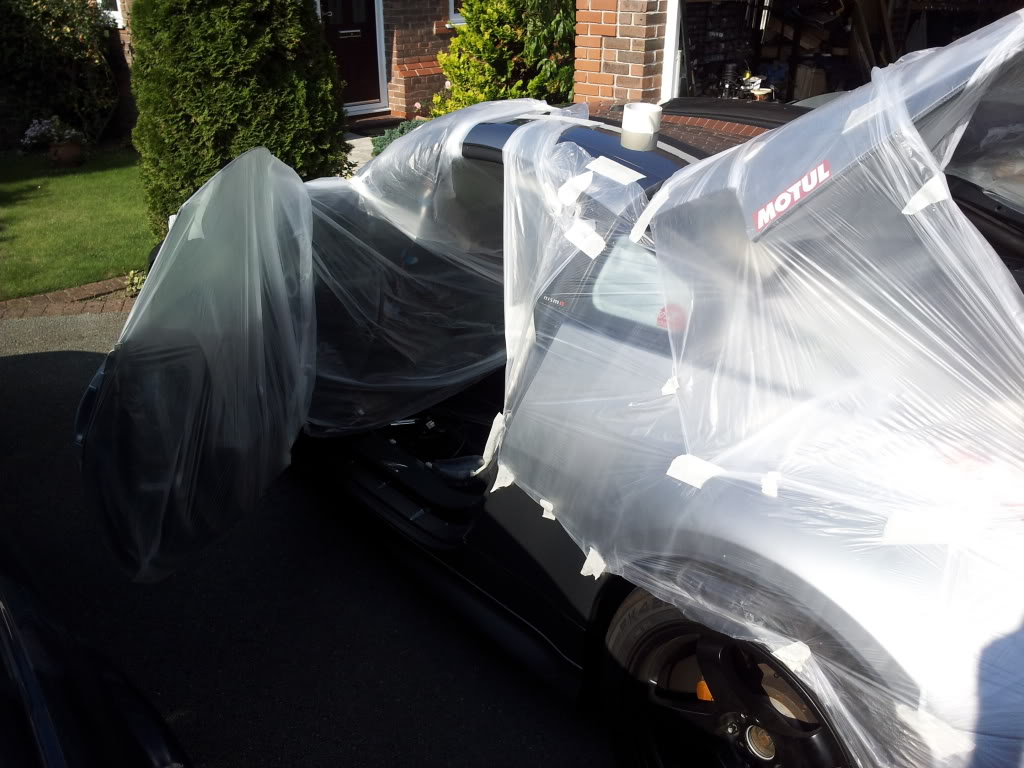
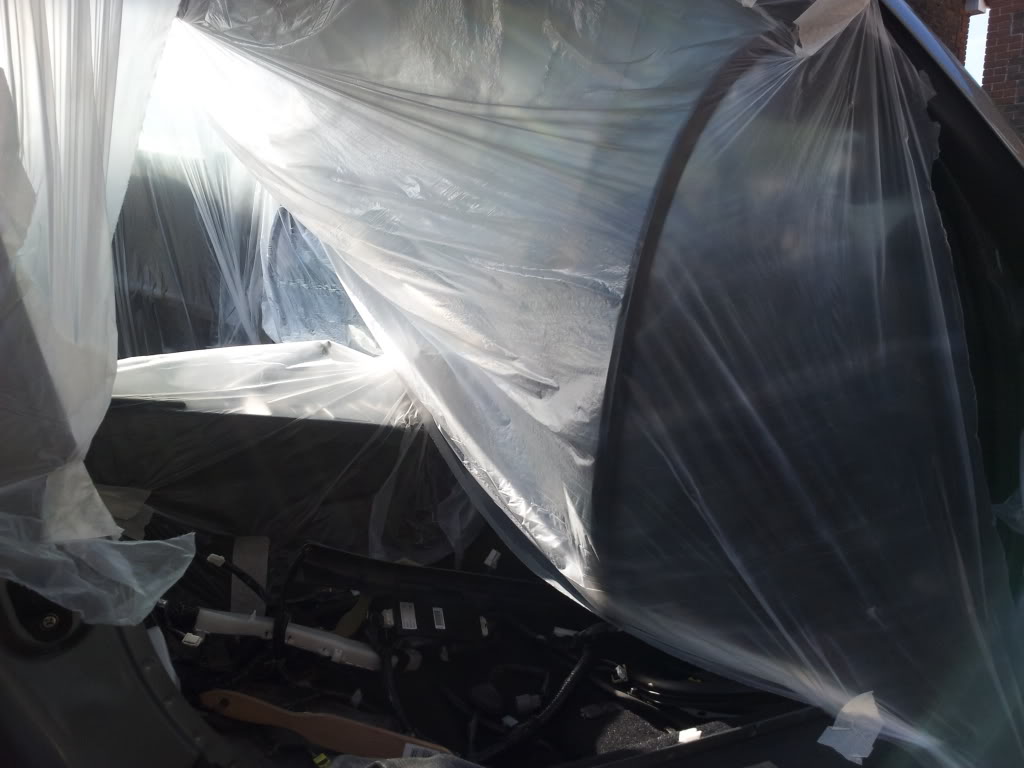
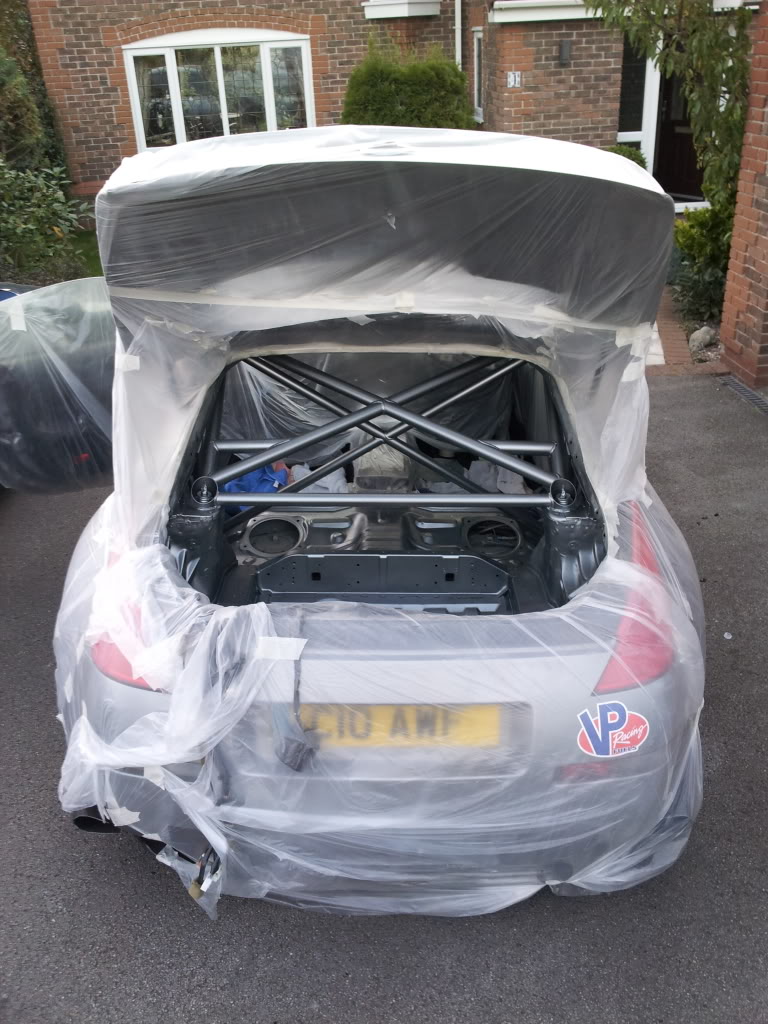
How the zeds sleeping to night! In a big plastic bag! ha...

Until tomorrow! :blush:
1L of panel wipe
2 X Etch primer
2 X nissan WV2 spray cans
I also need to make a trip out tomorrow and pick up for emetal (belzona or such like) to fix a few small tears in the metal work that happened while pulling it to bits. Need to do a bit of work filing down some more spot welds too :blink:
I got the car prepped last thing today as there was not much else I could do! lol.
Not fully done but every little bit done makes less work tomorrow! ha.
How the zeds sleeping to night! In a big plastic bag! ha...
Until tomorrow! :blush:

 09-28-2011, 12:16 PM
#6

There are laws in the states that prevent people whom receive quotes
from getting gouged on the backend. Sounds like they wanted a few
more quid after a short quote without enough profit built in to feed the
families.
Overall it looks pretty sharp. I'd imagine functional.
How much total weight did they weld in there?
from getting gouged on the backend. Sounds like they wanted a few
more quid after a short quote without enough profit built in to feed the
families.
Overall it looks pretty sharp. I'd imagine functional.
How much total weight did they weld in there?
Trending Topics

 09-28-2011, 04:43 PM
#10
Registered User
iTrader: (8)

Join Date: Sep 2007
Location: newbury park, CA
Posts: 414
Likes: 0
Received 0 Likes
on
0 Posts
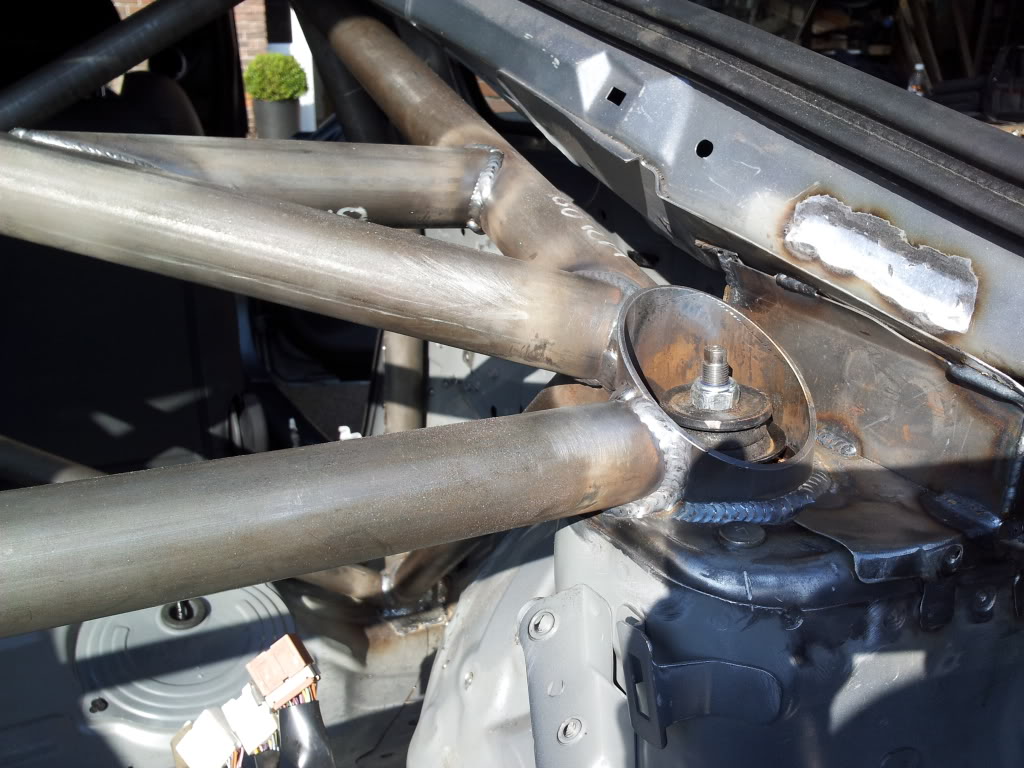
Rear down tubes need to go to the shock tower not the strut bar or those little vertical tubes you have going there. id have that fixed before you get too far along.
Not trying to be a dick by any means but it looks like you spent a lot of money and id hate for you to go through all that and it need to be re-done later.
Not trying to be a dick by any means but it looks like you spent a lot of money and id hate for you to go through all that and it need to be re-done later.


 09-29-2011, 12:41 PM
#15
Registered User
Thread Starter
Well proper back breaker of a day!
Started off by sorting out what I needed for painting.
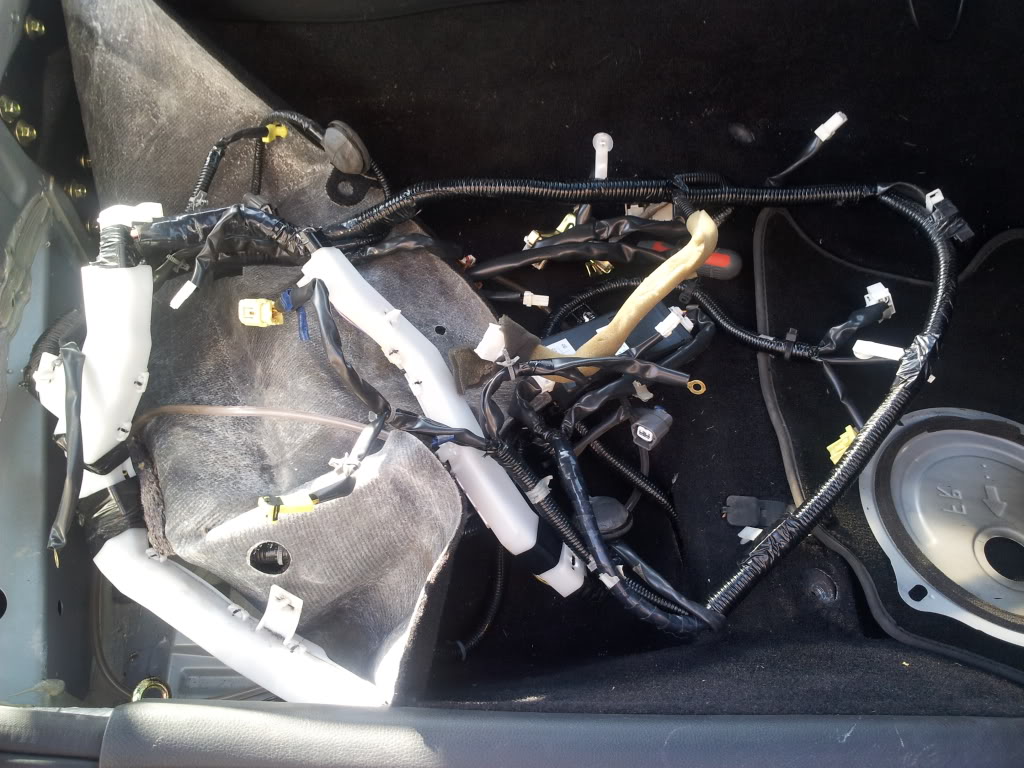
Removed the driver seat again and pulled the wiring harness out fully and got that out the way!
Spent about 2 hours masking off again! Takes a long time and being windy today did not help!
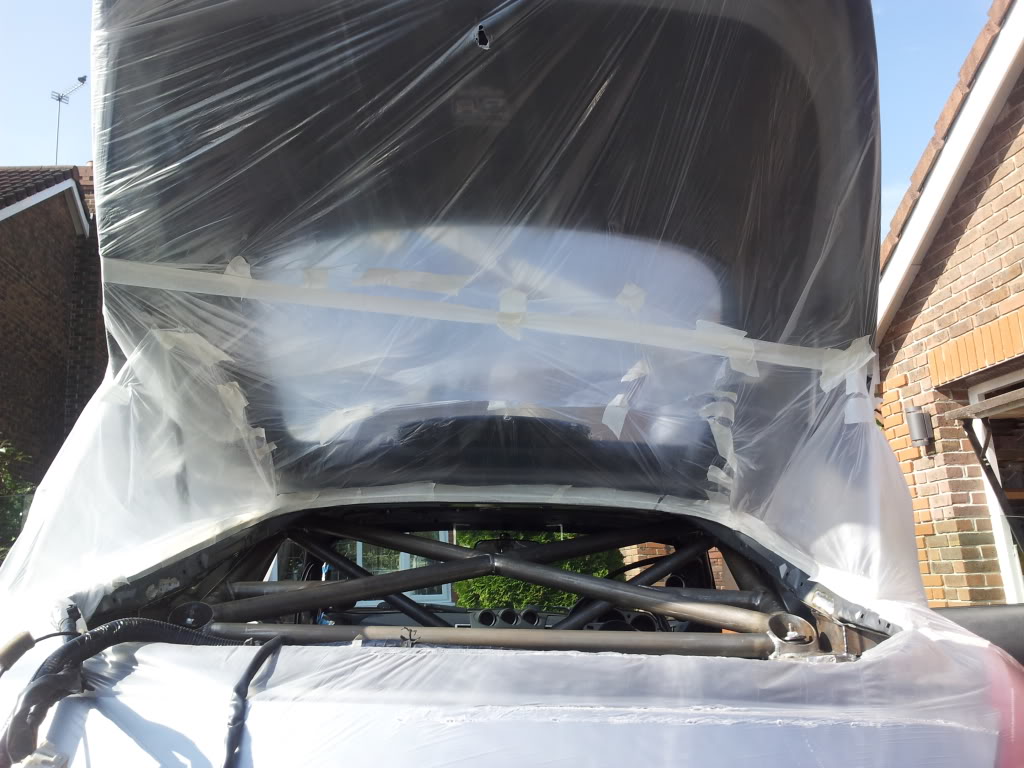
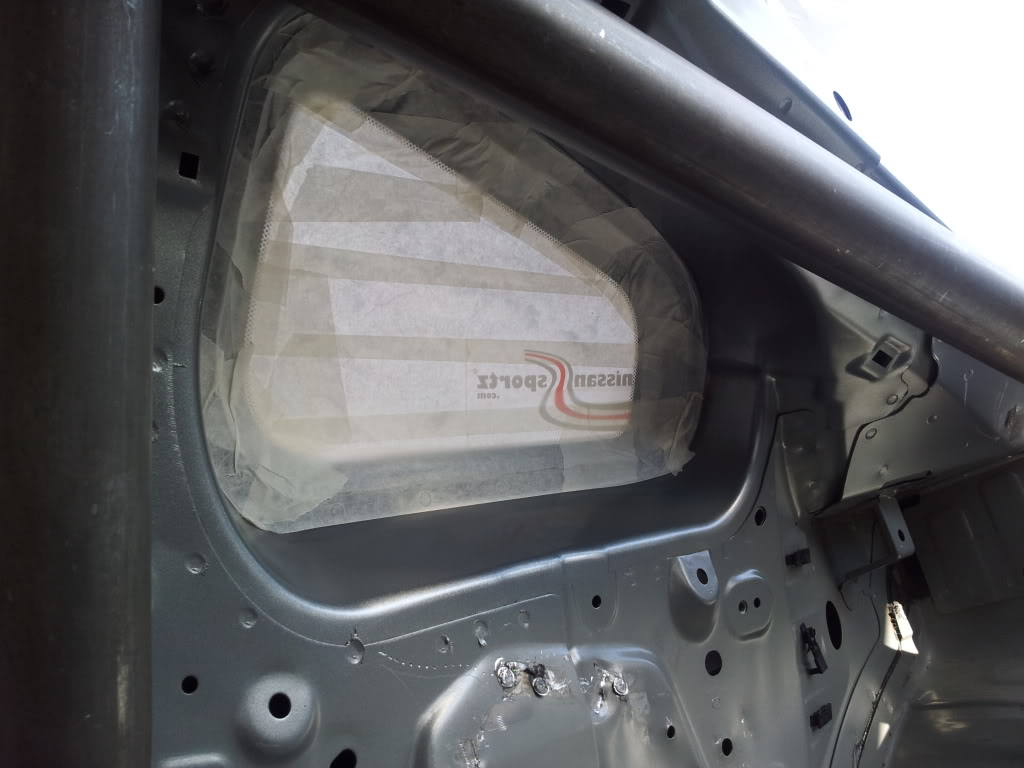
Masked off the windows too.
Removed the door and boot seals and masked off the trans tunnel and whole dash board.
After the masking off was done, I broke out the angle grinder and de-nibbed the last few spot welds, I've not taken most of them flush as the metal around the back end is thin! Don't to go through it!
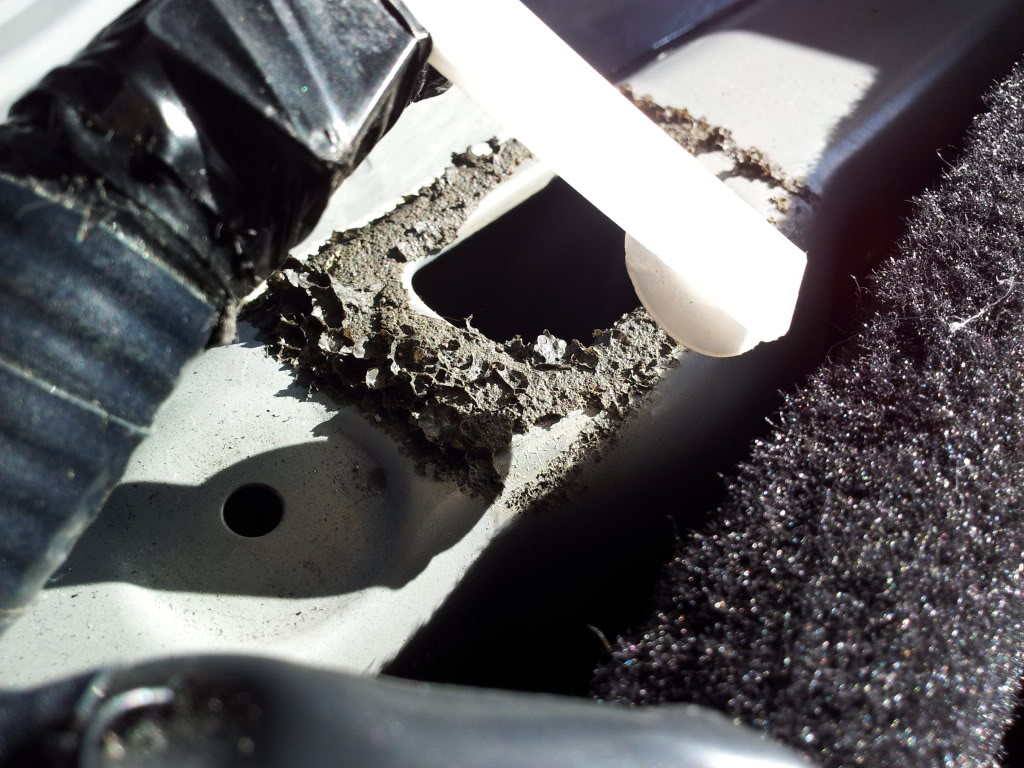
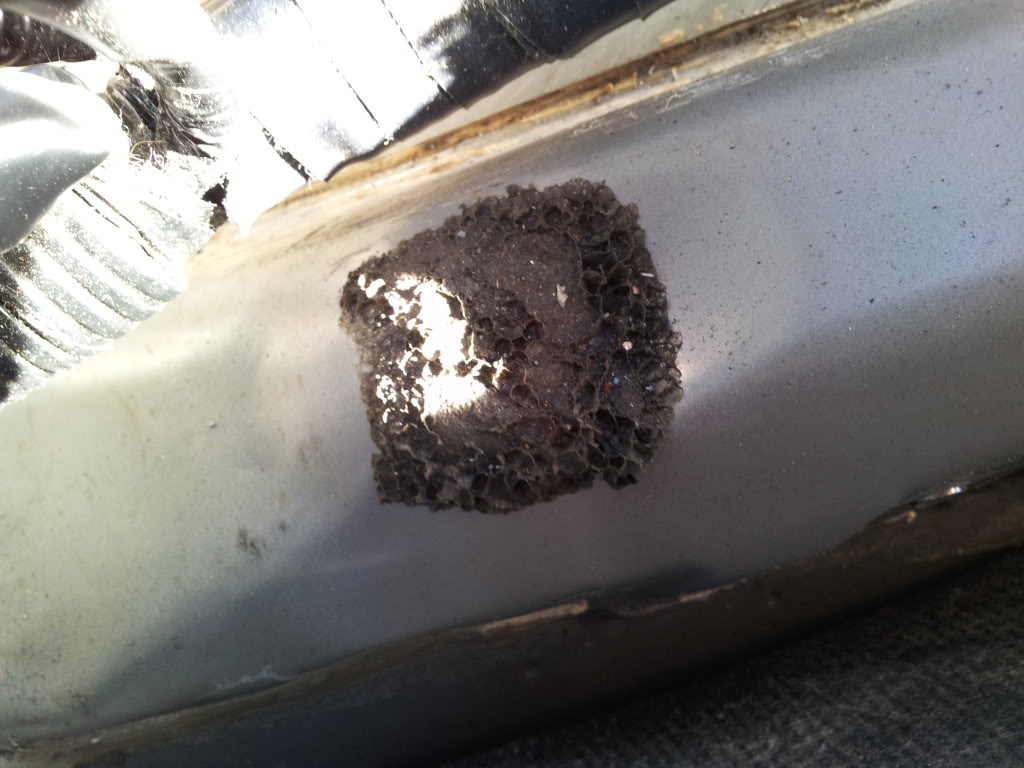
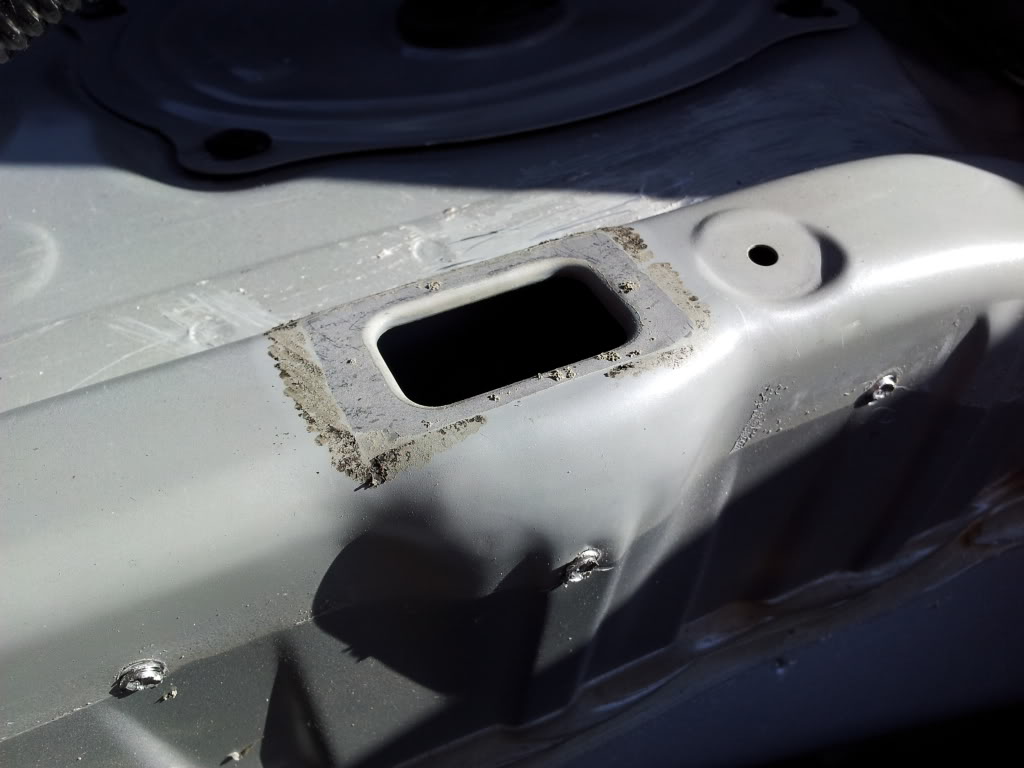
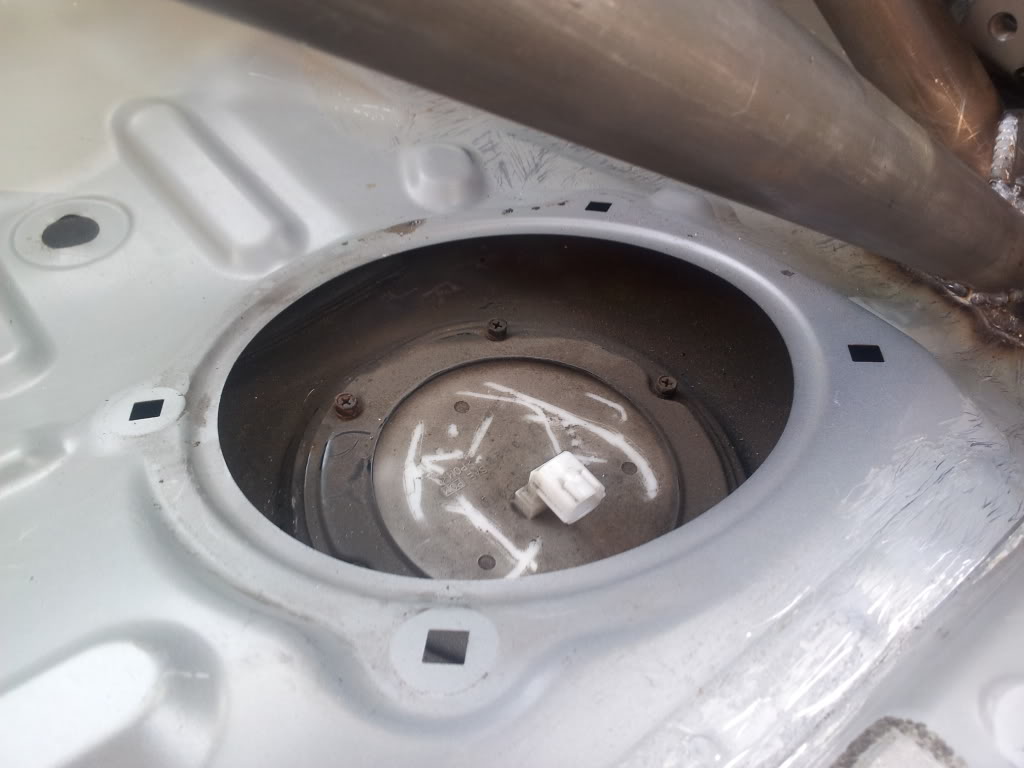
I've hoover it out about ten times today, Next job was to remove the fuel tank doors.
Nice and dirty on the syphon side!
Started off by sorting out what I needed for painting.
Removed the driver seat again and pulled the wiring harness out fully and got that out the way!
Spent about 2 hours masking off again! Takes a long time and being windy today did not help!
Masked off the windows too.
Removed the door and boot seals and masked off the trans tunnel and whole dash board.
After the masking off was done, I broke out the angle grinder and de-nibbed the last few spot welds, I've not taken most of them flush as the metal around the back end is thin! Don't to go through it!
I've hoover it out about ten times today, Next job was to remove the fuel tank doors.
Nice and dirty on the syphon side!
09-29-2011, 12:41 PM
#16
Registered User
Thread Starter
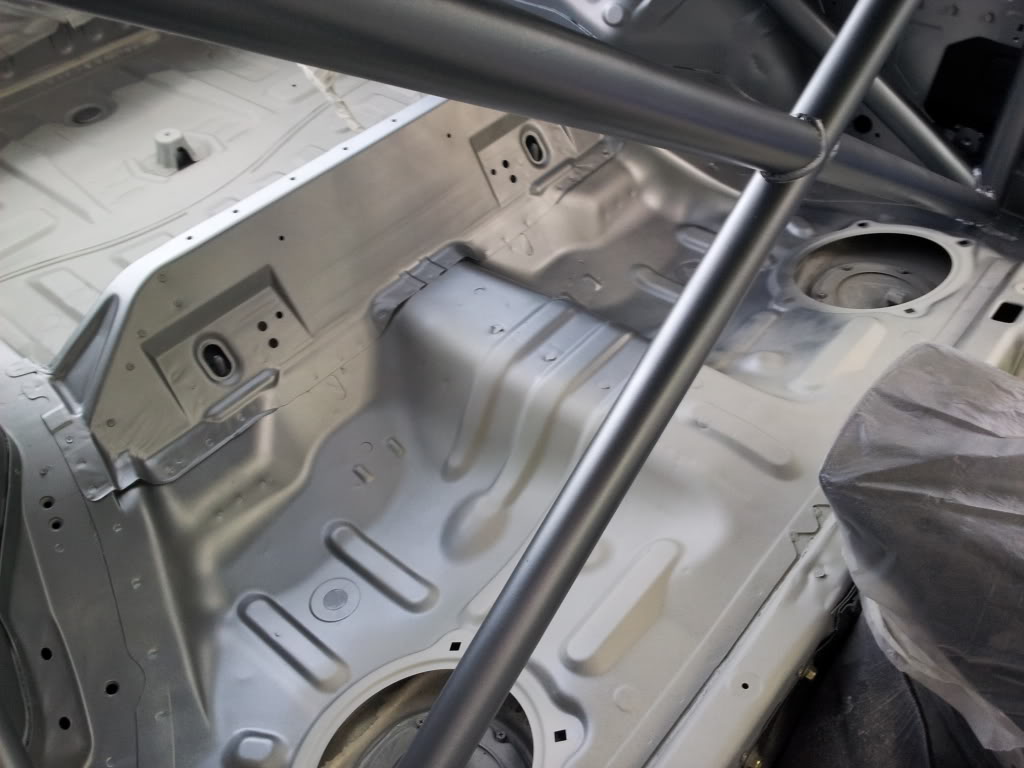
Before pain I wiped the inside out again and then went on to wiping it out all over with panel wipe. Then a final hoover!
First shot of 961 etch primer going on!
Getting there!

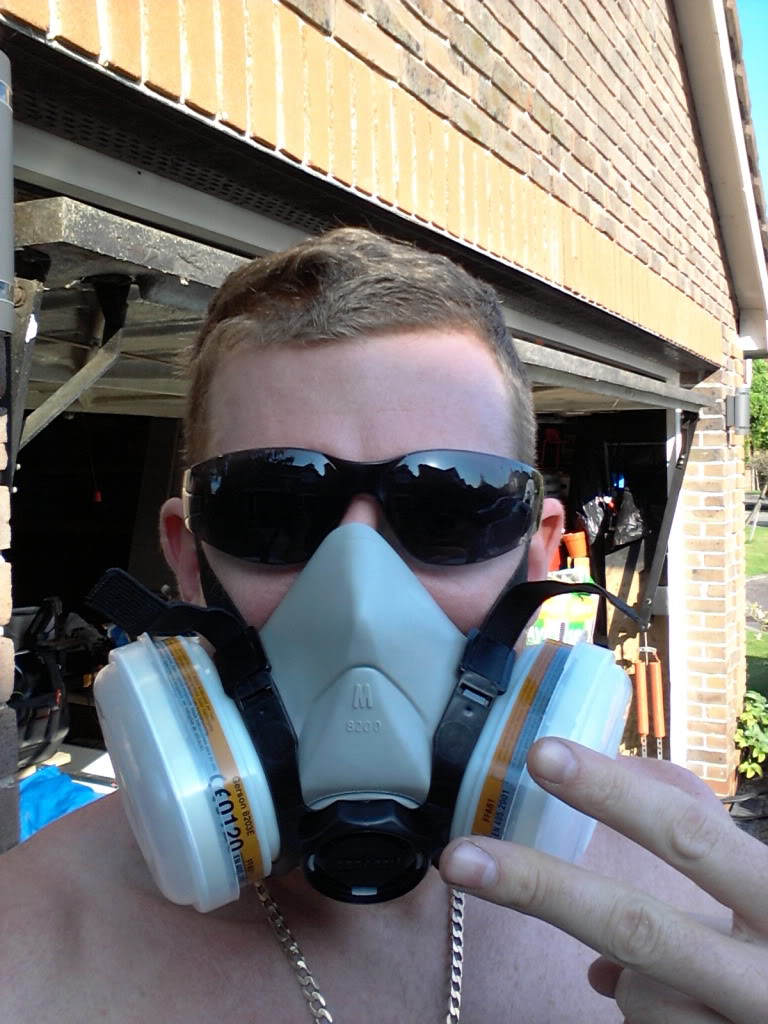
Now was a bad time to realise that I had WAY under estimated the amount of paint needed! Quick trip down to the paint supplier and came back with a load more! also picked up a mask as I had been using the "hold your breath" technique! Not a good idea as the fumes were getting to me! ha..
Fist coat of primer done!
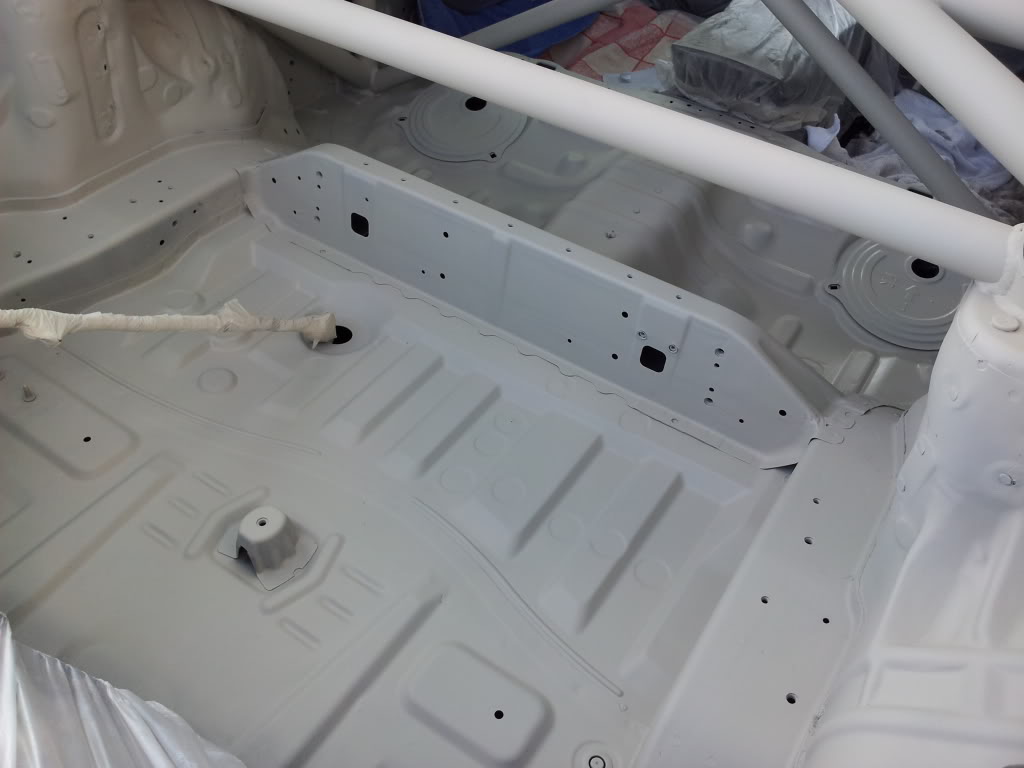
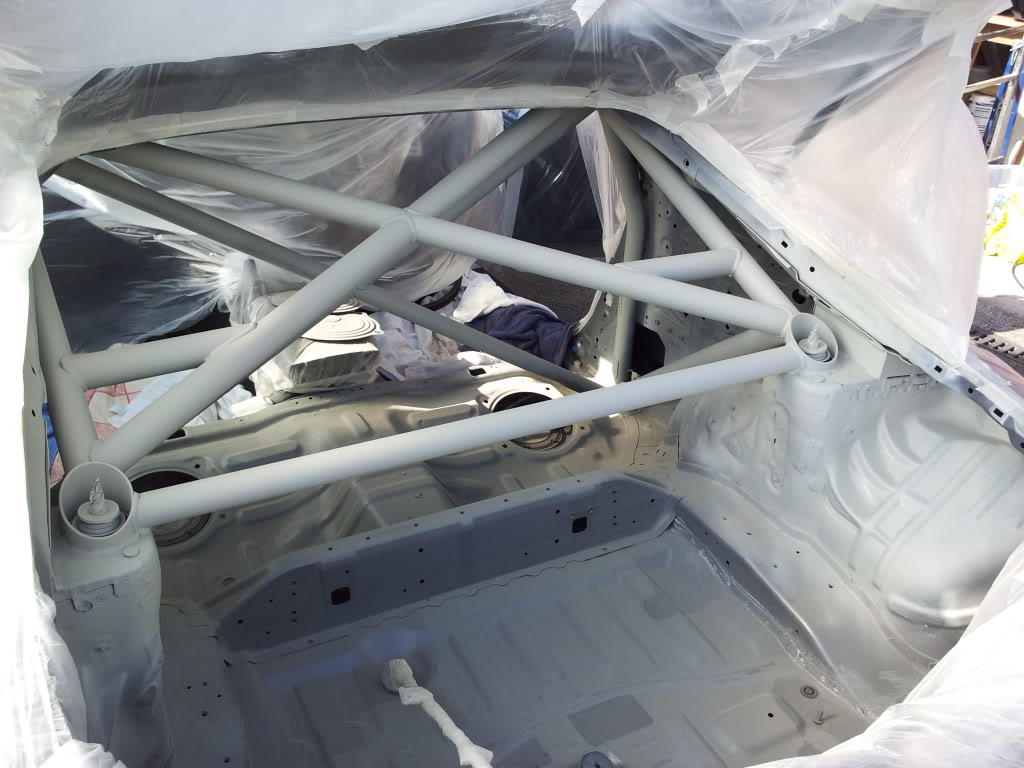
After the primer had dried, panel wiped the whole inside out again. Then keyed the primer with a scotch pad. The very first coat of Nissan WV2 silver going on!
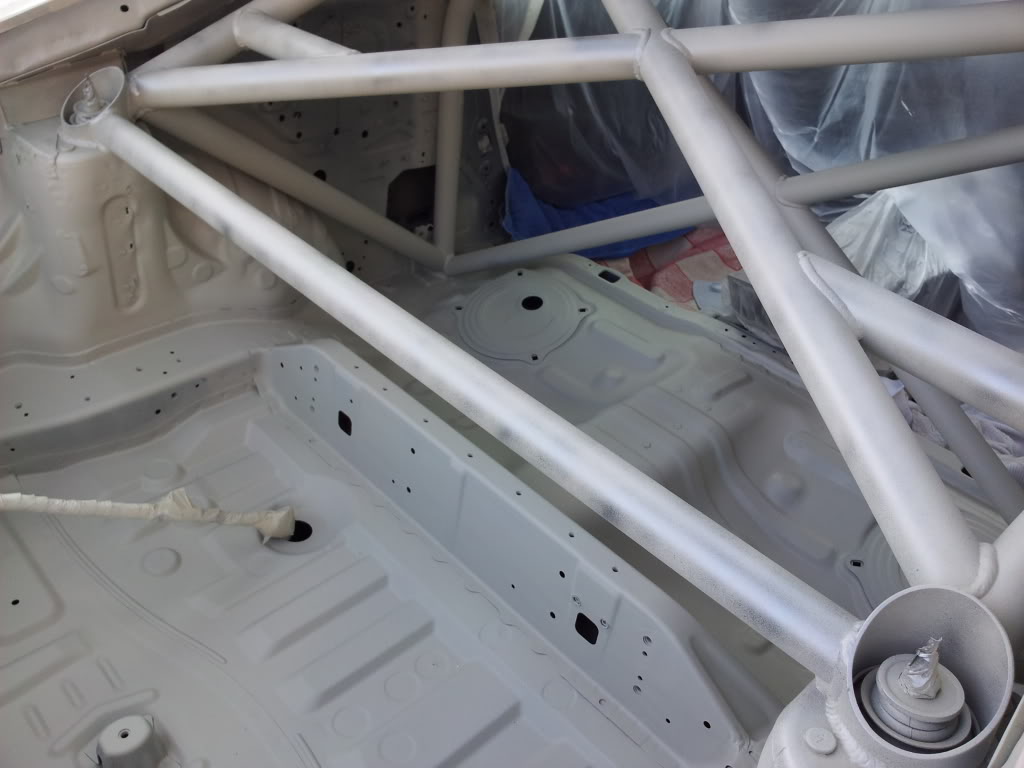
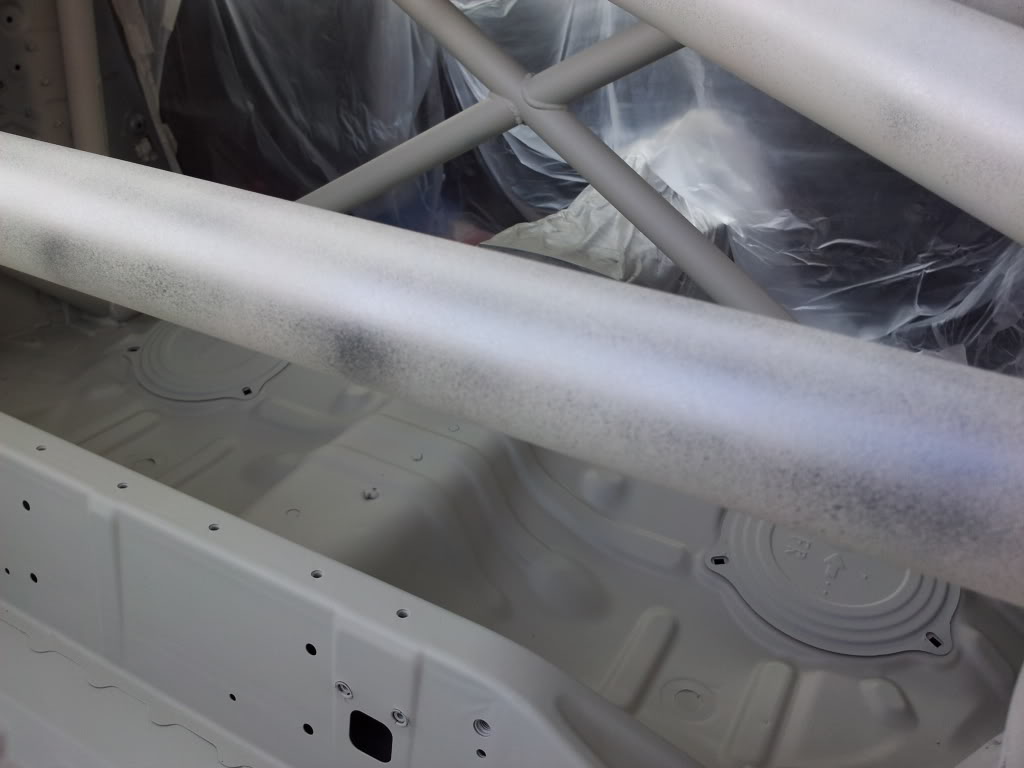
Nice and dirty! Over spray goes everywhere!
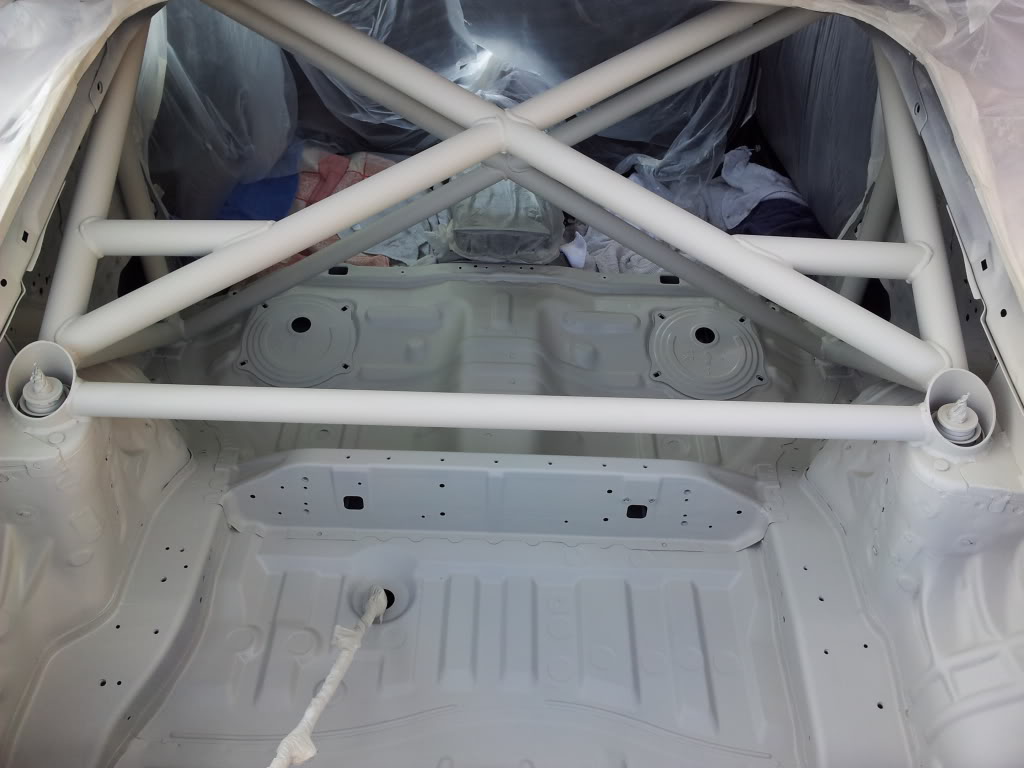
Starting to look less like a load of scaffolding! ha.
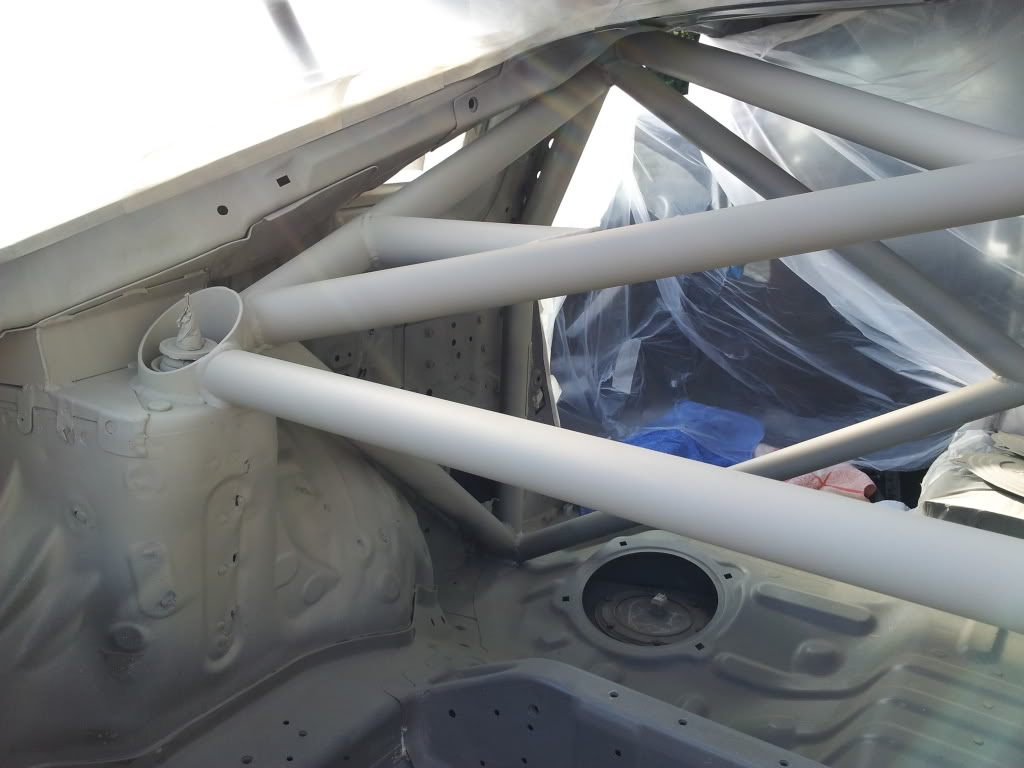
Masked off the tops of the KW V3's too, just the thread and the adjusters.
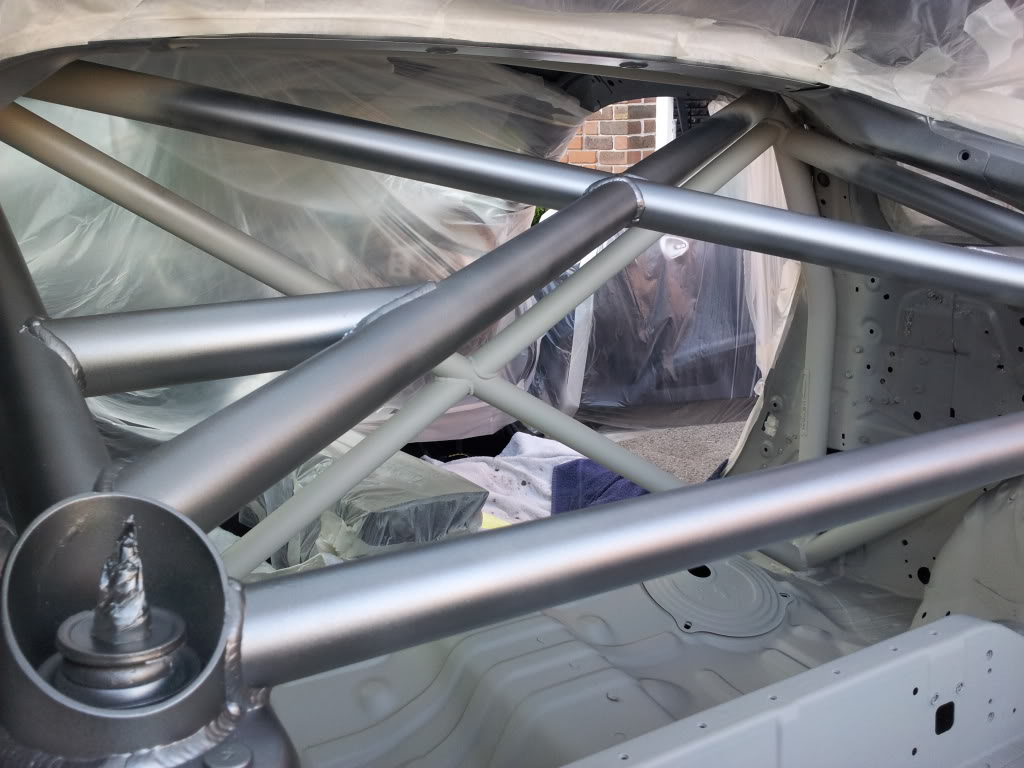
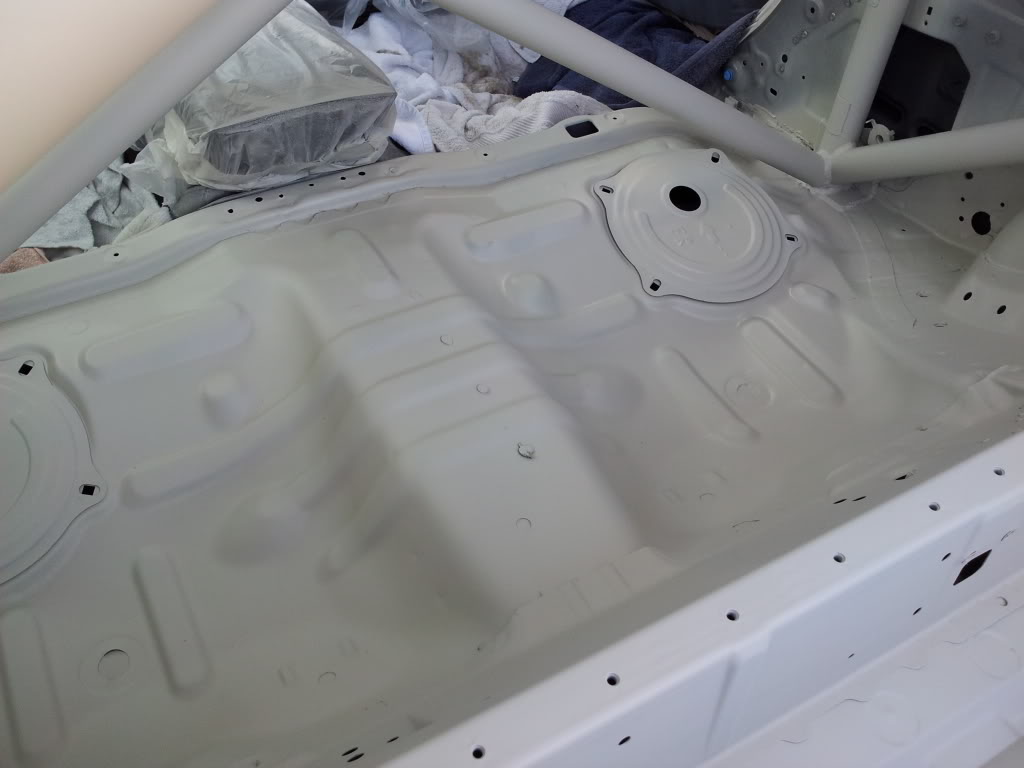
More coats going on!
Ran out of paint! LOL....AGAIN! last bit left to do...
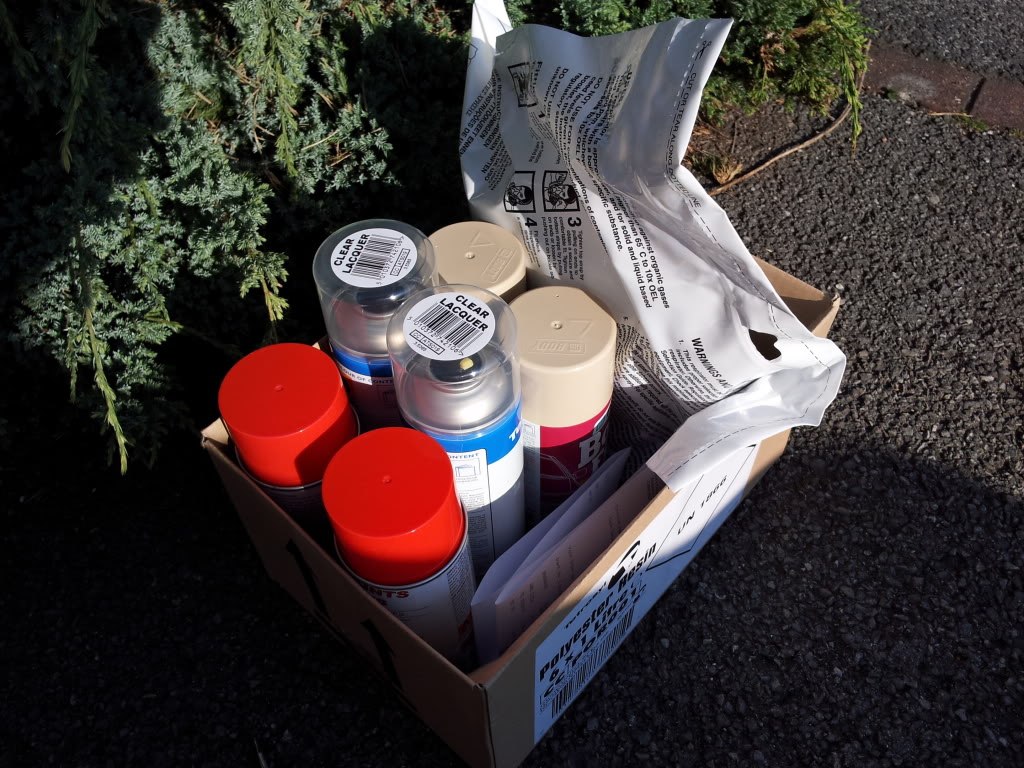
Used paint cans! My spraying fingers killing me!
Ready for me to start again in the morning!
Well thats it for today again! Ill have it done tomorrow! Fingers crossed! :P :P
First shot of 961 etch primer going on!
Getting there!
Now was a bad time to realise that I had WAY under estimated the amount of paint needed! Quick trip down to the paint supplier and came back with a load more! also picked up a mask as I had been using the "hold your breath" technique! Not a good idea as the fumes were getting to me! ha..
Fist coat of primer done!
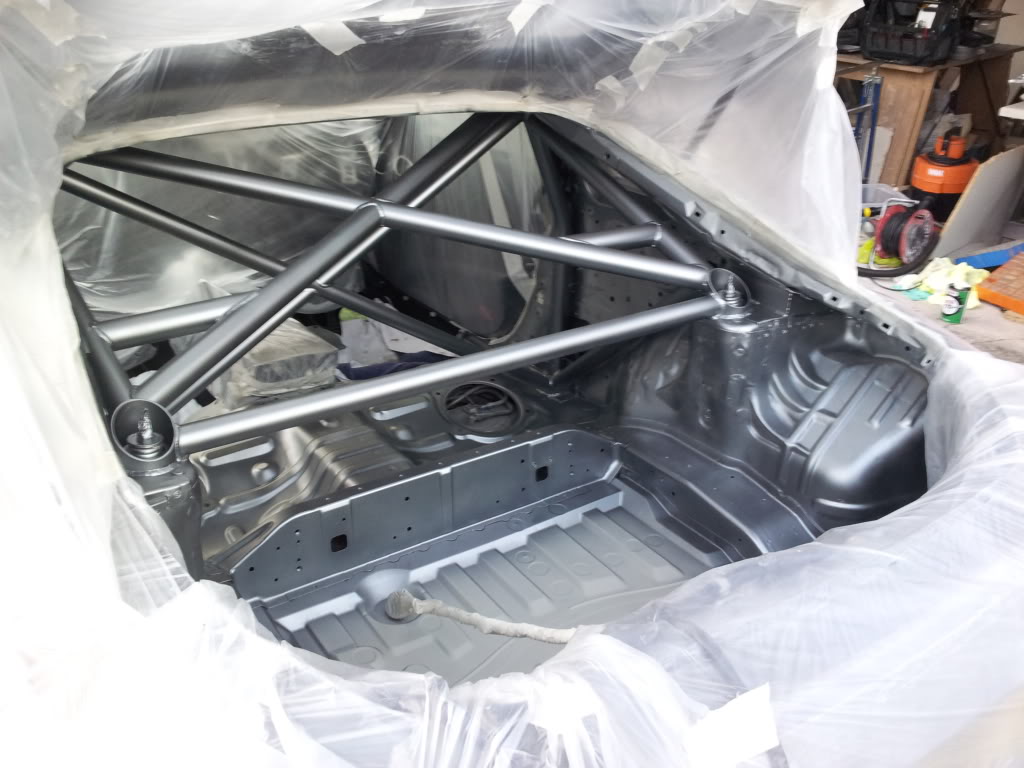
After the primer had dried, panel wiped the whole inside out again. Then keyed the primer with a scotch pad. The very first coat of Nissan WV2 silver going on!
Nice and dirty! Over spray goes everywhere!
Starting to look less like a load of scaffolding! ha.
Masked off the tops of the KW V3's too, just the thread and the adjusters.
More coats going on!
Ran out of paint! LOL....AGAIN! last bit left to do...
Used paint cans! My spraying fingers killing me!
Ready for me to start again in the morning!
Well thats it for today again! Ill have it done tomorrow! Fingers crossed! :P :P
The following users liked this post:
bmccann101 (06-06-2017)
 09-29-2011, 01:36 PM
#19
Registered User
Thread Starter
Thanks guys, im made up how its going so far. Just neeed to finish the colour tomorrow, and shoot the clear. Im wondering if I need to colour sand between doing the clear coat?
