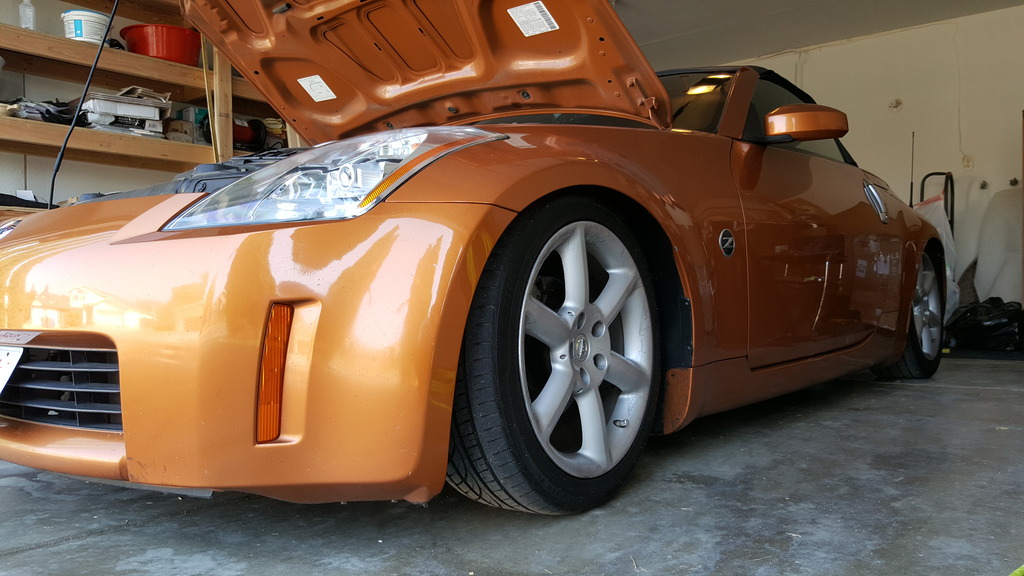
05 vs 19x12 -29
 09-06-2016, 03:07 PM
#61
Registered User
Thread Starter

Well... After a 10 day stretch I'm finally off.
I'm going to start with the fronts since I those are expendable.
I'm going to take my time with the rears
Here goes
I'm going to start with the fronts since I those are expendable.
I'm going to take my time with the rears

Here goes
 09-06-2016, 09:17 PM
#62
Registered User
Thread Starter
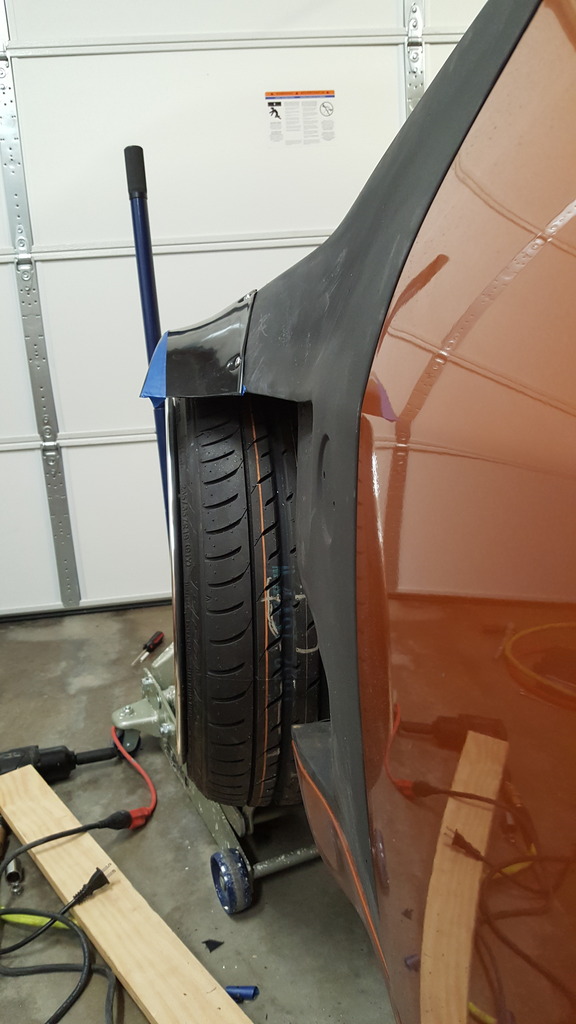
Well...
Looks like I'm just gonna be on pause until my rivet nuts and setter tool get here.
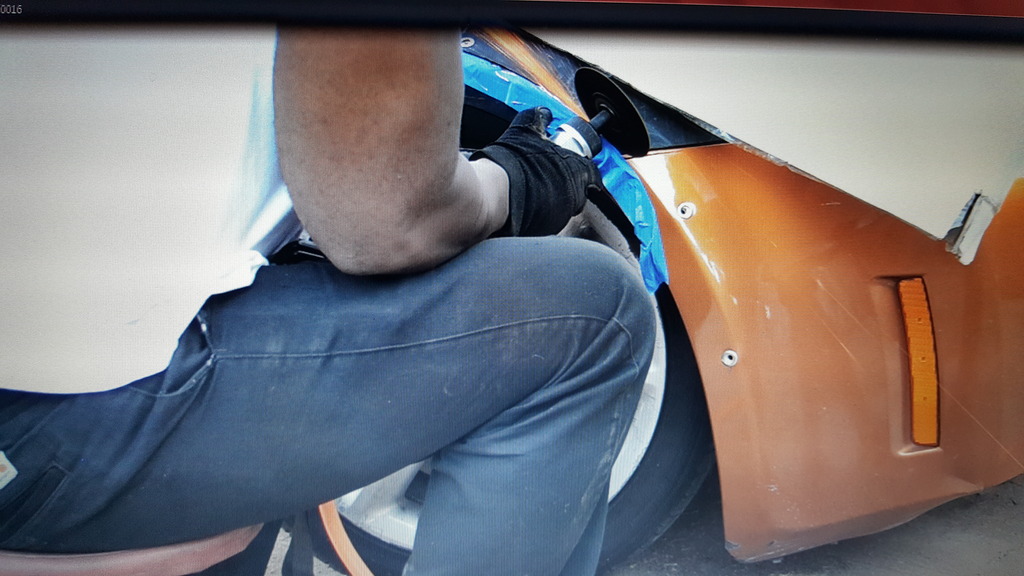
I put the front fenders on and measured it... And I adopted another fabrication project. I'm going to have to fab some discrete diffusers of some kind for the fender vent.
I spent most the evening looking at it and designing crap in my head... It took like 40 minutes to put them on... Nothing worth pictures at all.
Tomorrow I'm just going to spend the day tryingvto make some of the stuff I thought up today. Unless things show up early then I'll just pick up where I stopped today and chop the car up
Looks like I'm just gonna be on pause until my rivet nuts and setter tool get here.
I put the front fenders on and measured it... And I adopted another fabrication project. I'm going to have to fab some discrete diffusers of some kind for the fender vent.
I spent most the evening looking at it and designing crap in my head... It took like 40 minutes to put them on... Nothing worth pictures at all.
Tomorrow I'm just going to spend the day tryingvto make some of the stuff I thought up today. Unless things show up early then I'll just pick up where I stopped today and chop the car up
09-14-2016, 12:54 PM
#63
Registered User
Thread Starter
Its incredible that "NOBODY" in the state of California stock "rivet nutserts".
I found "6" at ace hardware... But I have today and tomorrow to get this done... Or ill have to wait ANOTHER week....
I need 40...
I found "6" at ace hardware... But I have today and tomorrow to get this done... Or ill have to wait ANOTHER week....
I need 40...
09-14-2016, 03:02 PM
#64
Registered User
Thread Starter
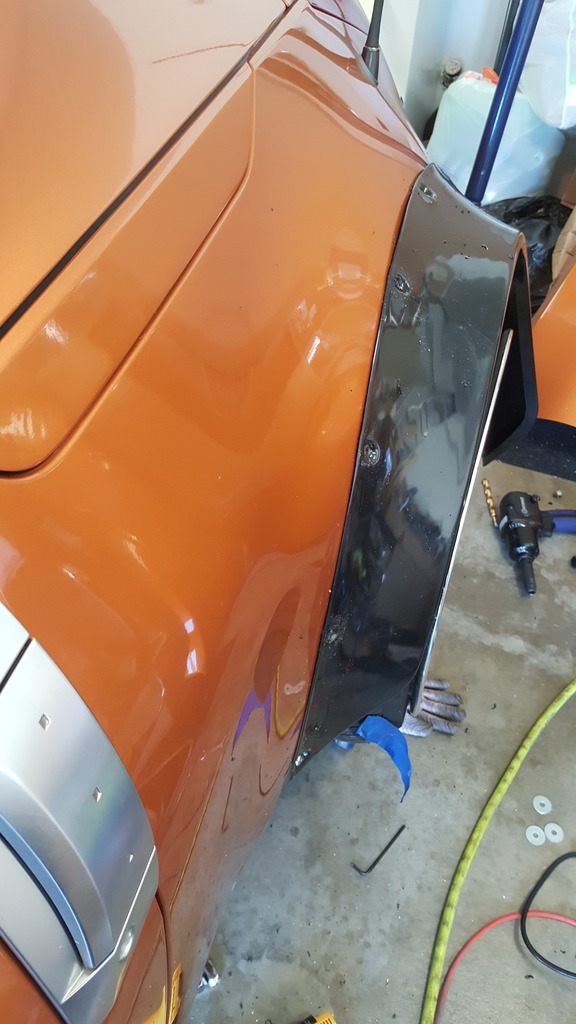
OK..... for anyone looking to do this work who like me has never done it before....
Be advised, lots of trivial BS awaits you.
I have been waiting for about two and a half weeks now to get all of these materials together needed to install these fender flares. I started out by making the mistake of ordering 3/8 inch rivet nuts, which once in my hand looked unreasonably enormous. Uncomfortable with the thought of punching half inch holes in the body of my car I went back and ordered 5/16 rivet nuts assuming the diameter of the actual rivet would be smaller. Well my 5/16 rivet nuts have arrived..... with the exact same diameter as the 3/8 rivet nuts. The only thing smaller was the threads.
Not only that, but the rivet setting tool I waited 2 weeks for to get here has a max setting bit 1/4 inch( this tool is useless to me at this point).
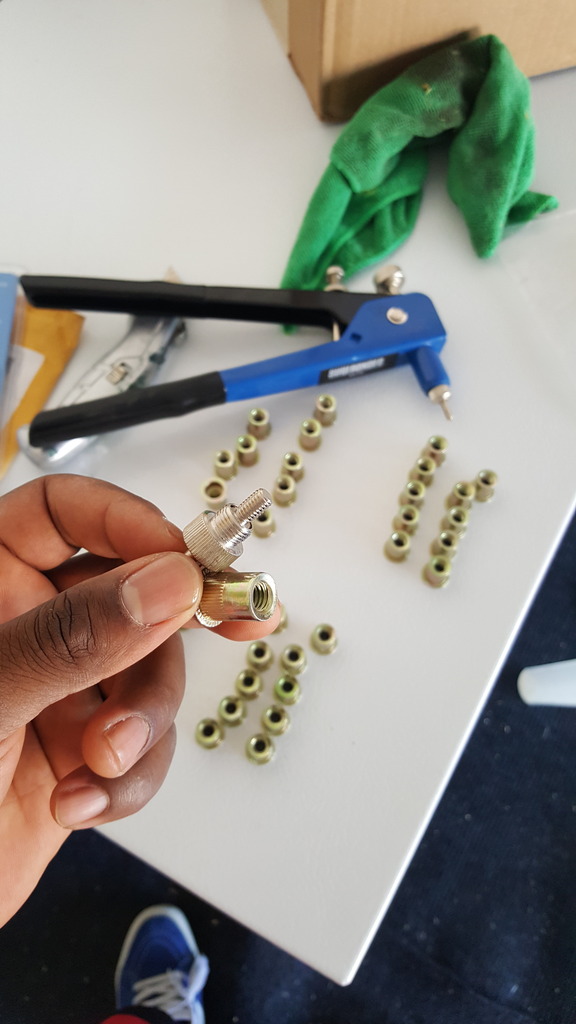
So what I am now going to do is go to my local hardware store and grab a 5/16 inch hex head bolt that I can use as a torque point to set the rivets with my pneumatic ratchet. I just need to figure out at what foot-pound the rivets bead.
Last edited by Riff; 09-14-2016 at 03:30 PM.
09-15-2016, 01:15 AM
#65
Registered User
Thread Starter
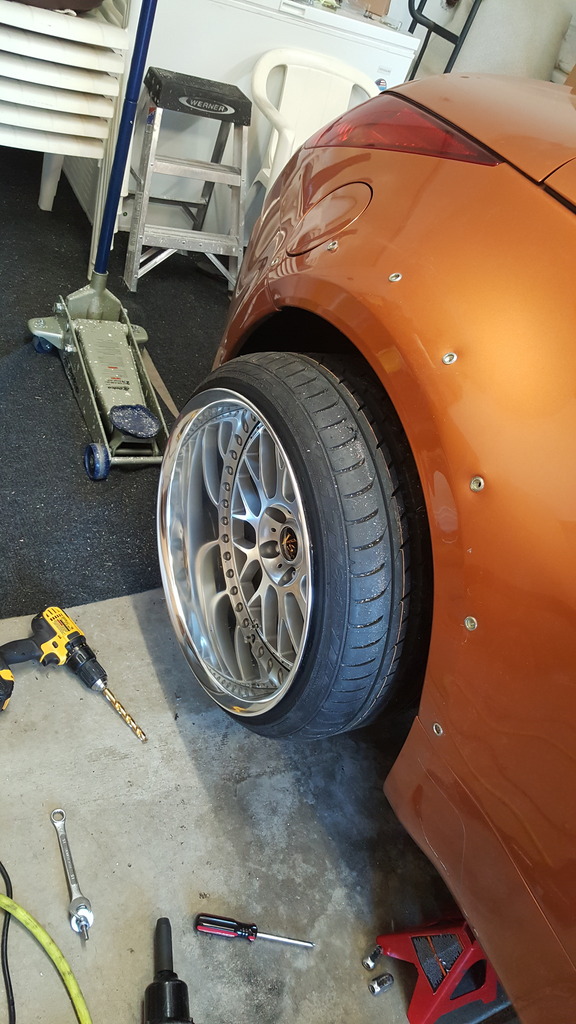
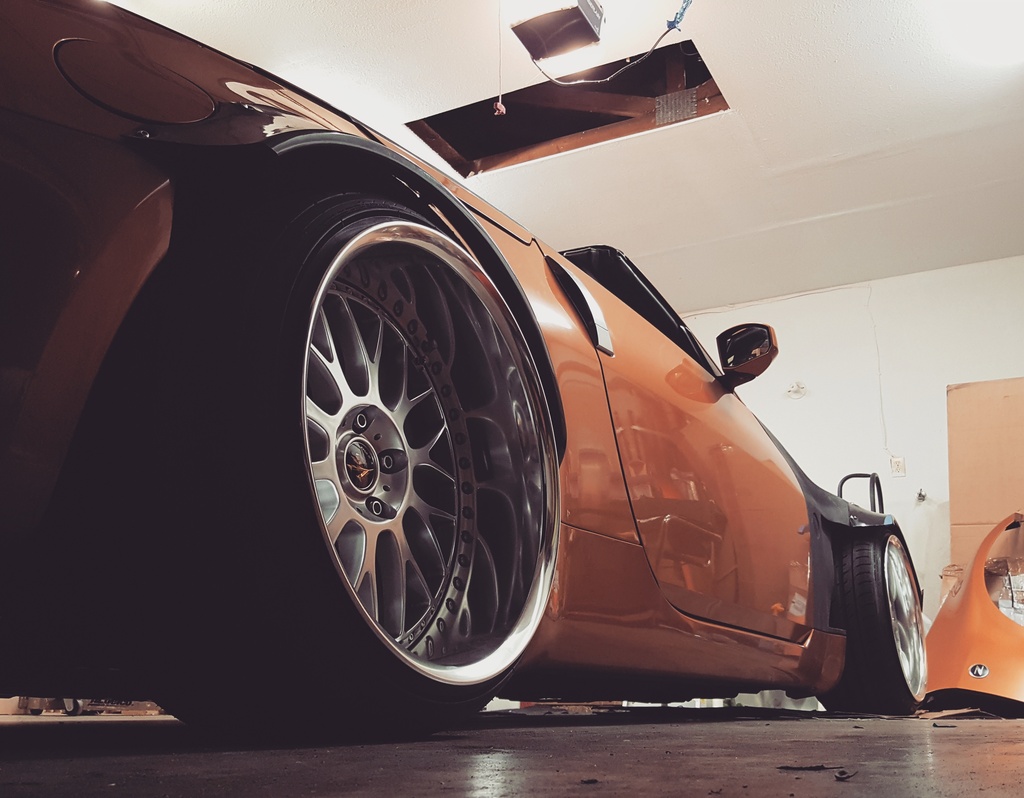
Not as big a holes as I thought... That's a relief

I am learning that universal is the furthest thing from "plug and play". There is a good 7/8 kick out in the rear of the fender. So I'm going to have to trim out what I marked with tape and fuse it with some plastic epoxy, and see if I can iorn out those pesky wrinkles from the heat gun. But other then that, I Think its coming together in tge front alright. I was dead on with the spacers.
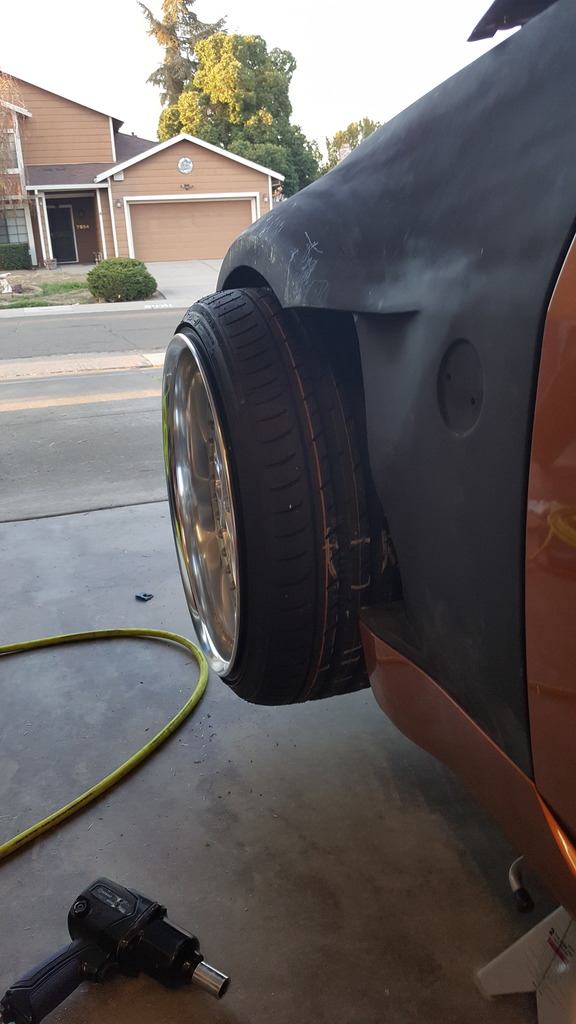
2-1/2 spacer
I haven't cut the fenders yet that's why the tires all the way up yet

I am learning that universal is the furthest thing from "plug and play". There is a good 7/8 kick out in the rear of the fender. So I'm going to have to trim out what I marked with tape and fuse it with some plastic epoxy, and see if I can iorn out those pesky wrinkles from the heat gun. But other then that, I Think its coming together in tge front alright. I was dead on with the spacers.

2-1/2 spacer

I haven't cut the fenders yet that's why the tires all the way up yet
 09-16-2016, 10:31 AM
#66
Registered User
Thread Starter
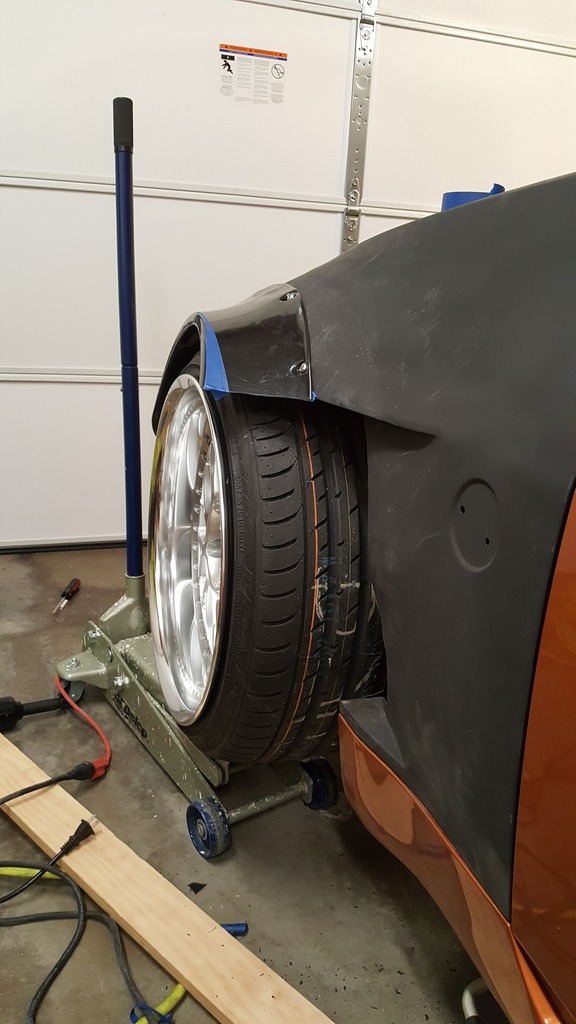
Got the rears fitted, just need to cut the excess off the rear which will take me 20 seconds...
Iv been looking for weeks and before I start butchering my panels is there a link anyone knows of or can put up to give me an idea of the PROPER way to "cut and seal"?. I've seen 3 videos and they look very dodgy. They don't really address the sealing factor at all... I don't gaps for water to get in on the bottom. I could just put a gallon of silicone... But I don't think that's the way either...

Iv been looking for weeks and before I start butchering my panels is there a link anyone knows of or can put up to give me an idea of the PROPER way to "cut and seal"?. I've seen 3 videos and they look very dodgy. They don't really address the sealing factor at all... I don't gaps for water to get in on the bottom. I could just put a gallon of silicone... But I don't think that's the way either...

 09-16-2016, 03:03 PM
#68
Is this what your looking for???
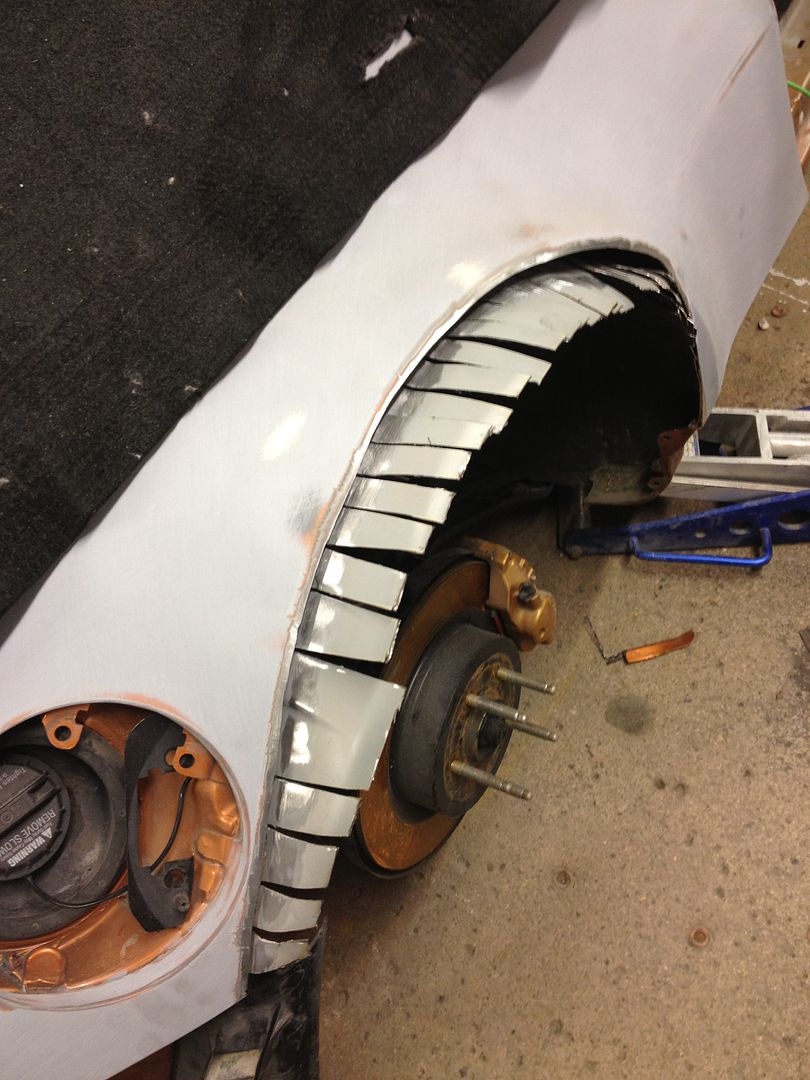
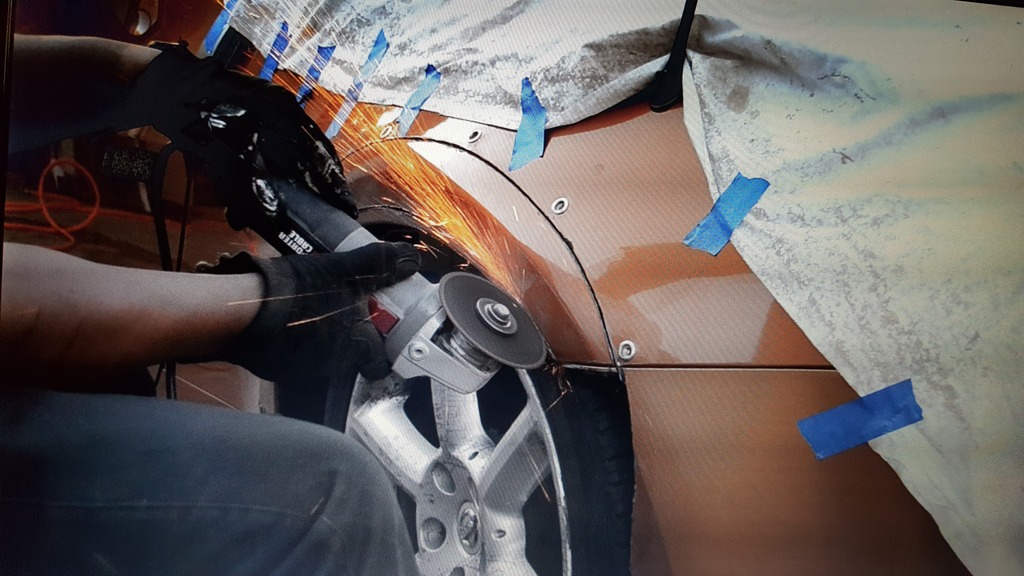
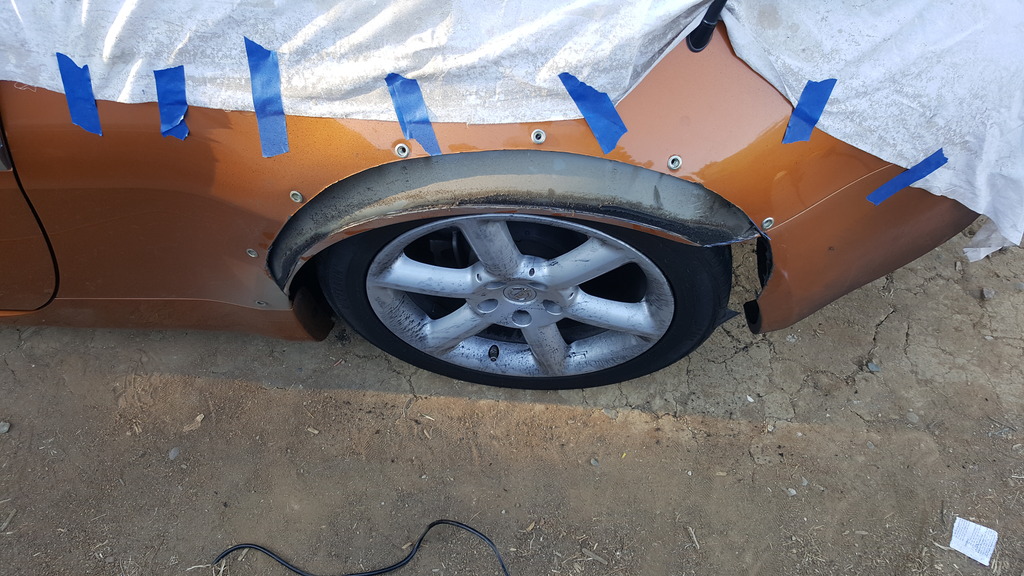
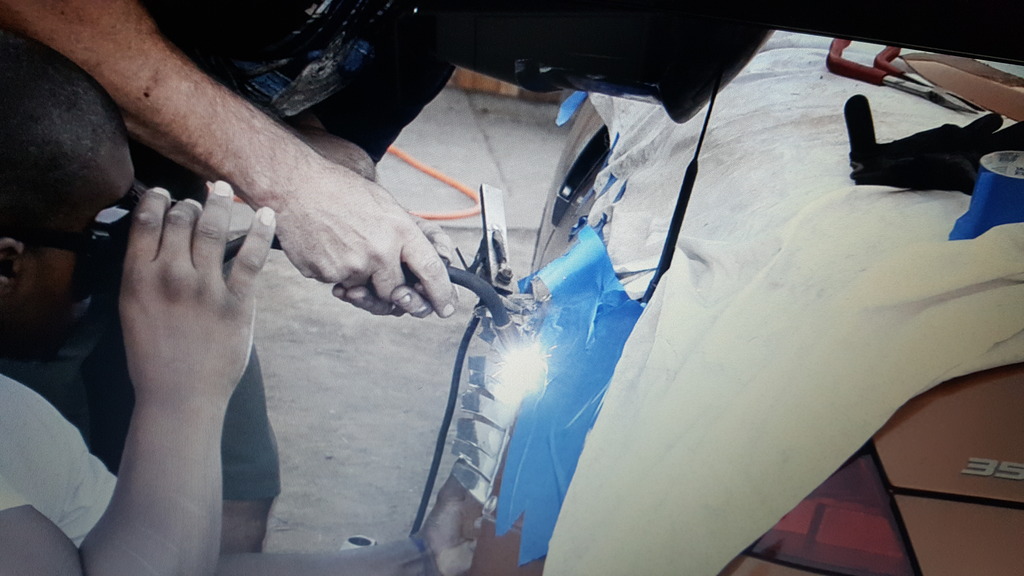
Here are a few pics of cutting up the passenger rear. I ended up taking reference measurements every 1" from the other side of the car that was done and transferring them to this side so the curves matched. I tweaked this side just a bit where the curve goes vertical because I ****ed the other side up and it was ugly lol.
First cut, separate the inner and outer, it's a bit wavy but that gets fixed up along the way.
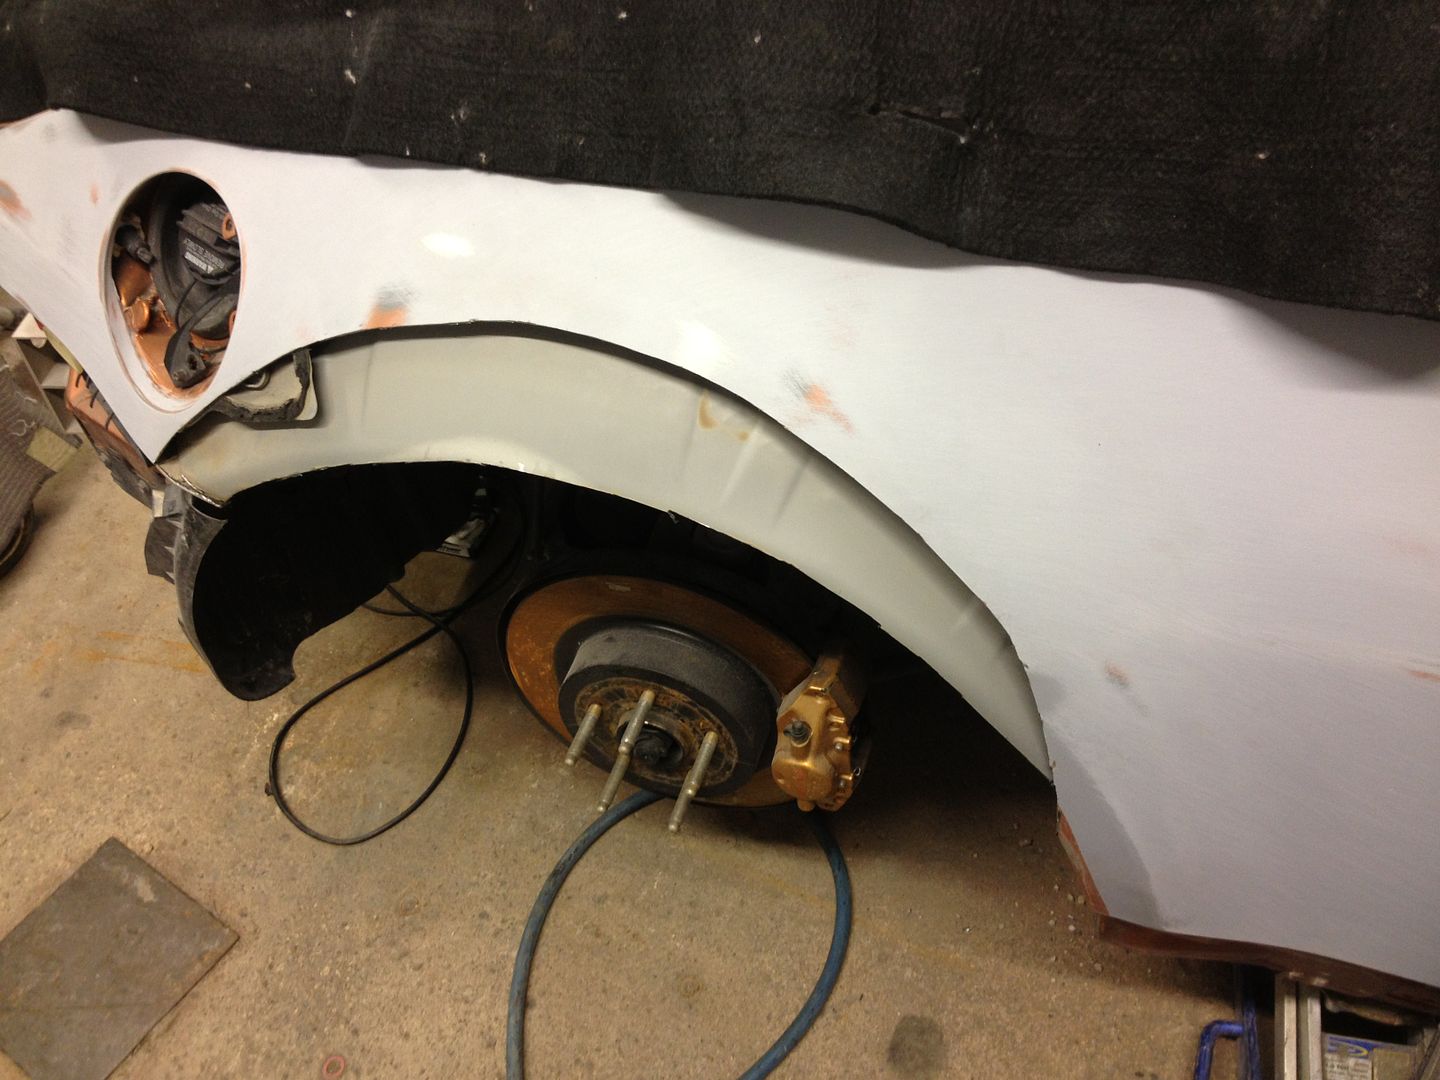
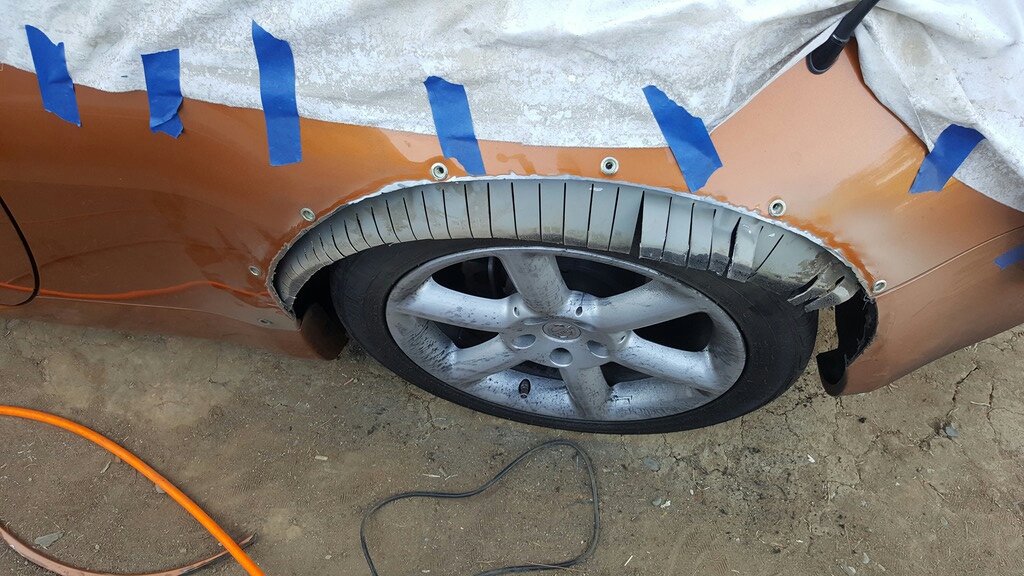
Second cut, pie cut the inner. I did more pie cuts this time so it would fold up nicer and have a nicer curve on the inside of the wheel well. First time doing this, so learning as I go.

Clean up the edge and prep for welding:
Tack welded & wheel put back on for some reason:
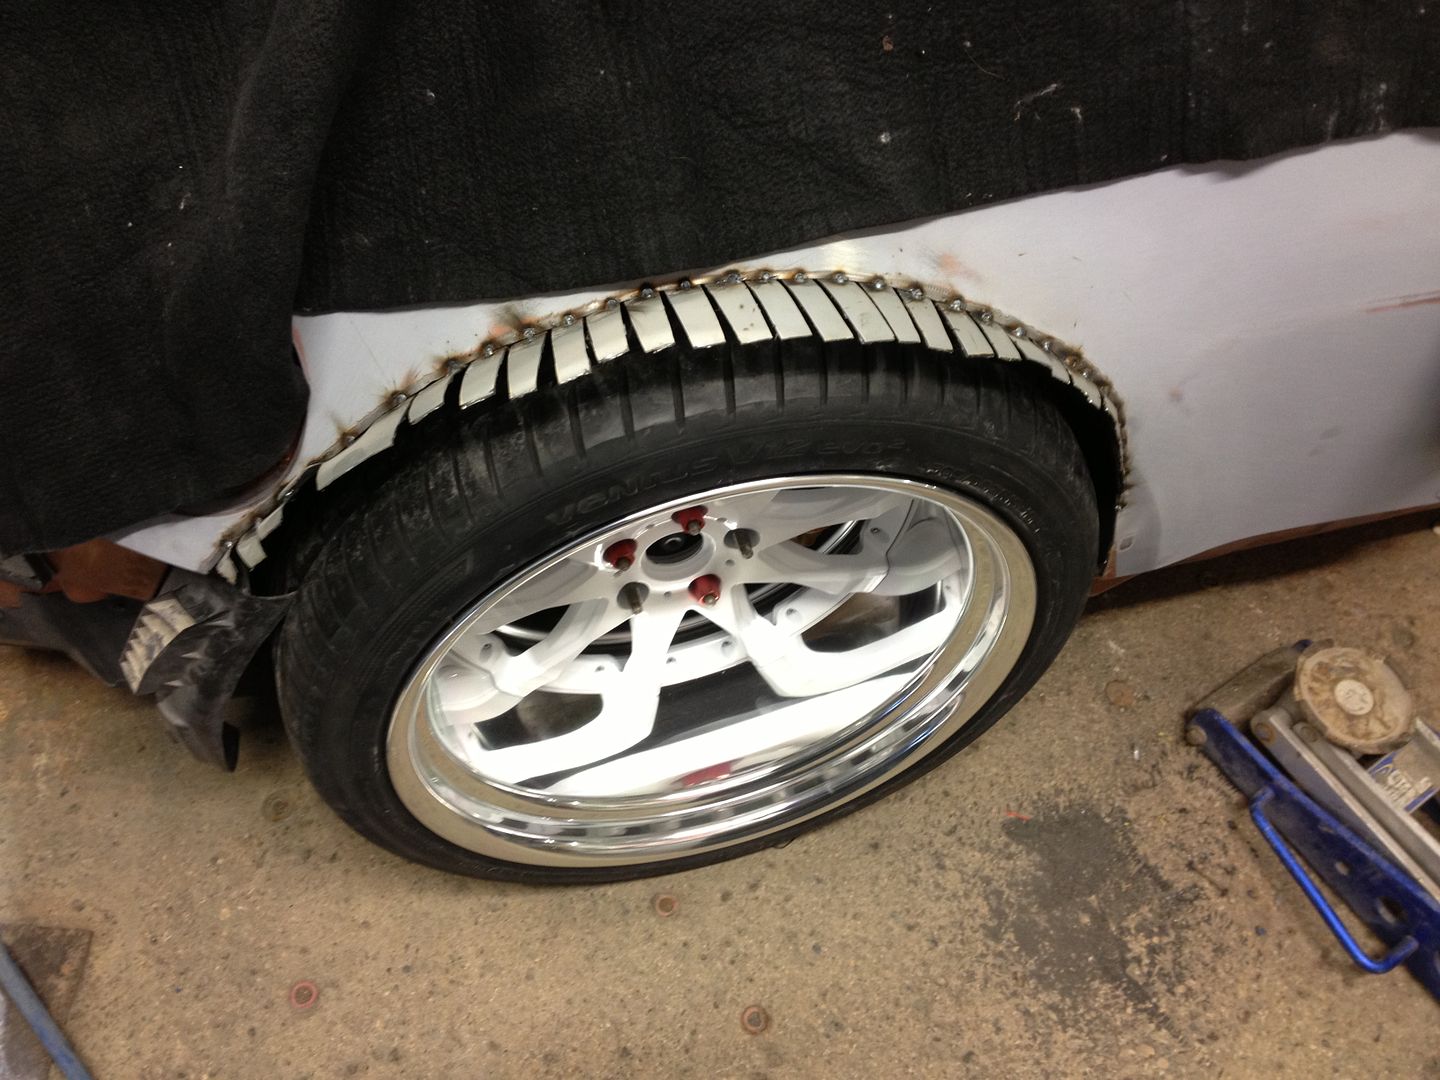
Welded the rest of the inner to the outer:
I'm proud to say I did about half the welding on this one so far with my buddy doing the other half. You can definitely see the difference between my welds and his, but I'm getting better lol
First cut, separate the inner and outer, it's a bit wavy but that gets fixed up along the way.

Second cut, pie cut the inner. I did more pie cuts this time so it would fold up nicer and have a nicer curve on the inside of the wheel well. First time doing this, so learning as I go.

Clean up the edge and prep for welding:

Tack welded & wheel put back on for some reason:

Welded the rest of the inner to the outer:

I'm proud to say I did about half the welding on this one so far with my buddy doing the other half. You can definitely see the difference between my welds and his, but I'm getting better lol
The following users liked this post:
bmccann101 (11-16-2016)
09-16-2016, 03:37 PM
#69
Registered User
Thread Starter
09-19-2016, 09:47 PM
#70
Registered User
Thread Starter
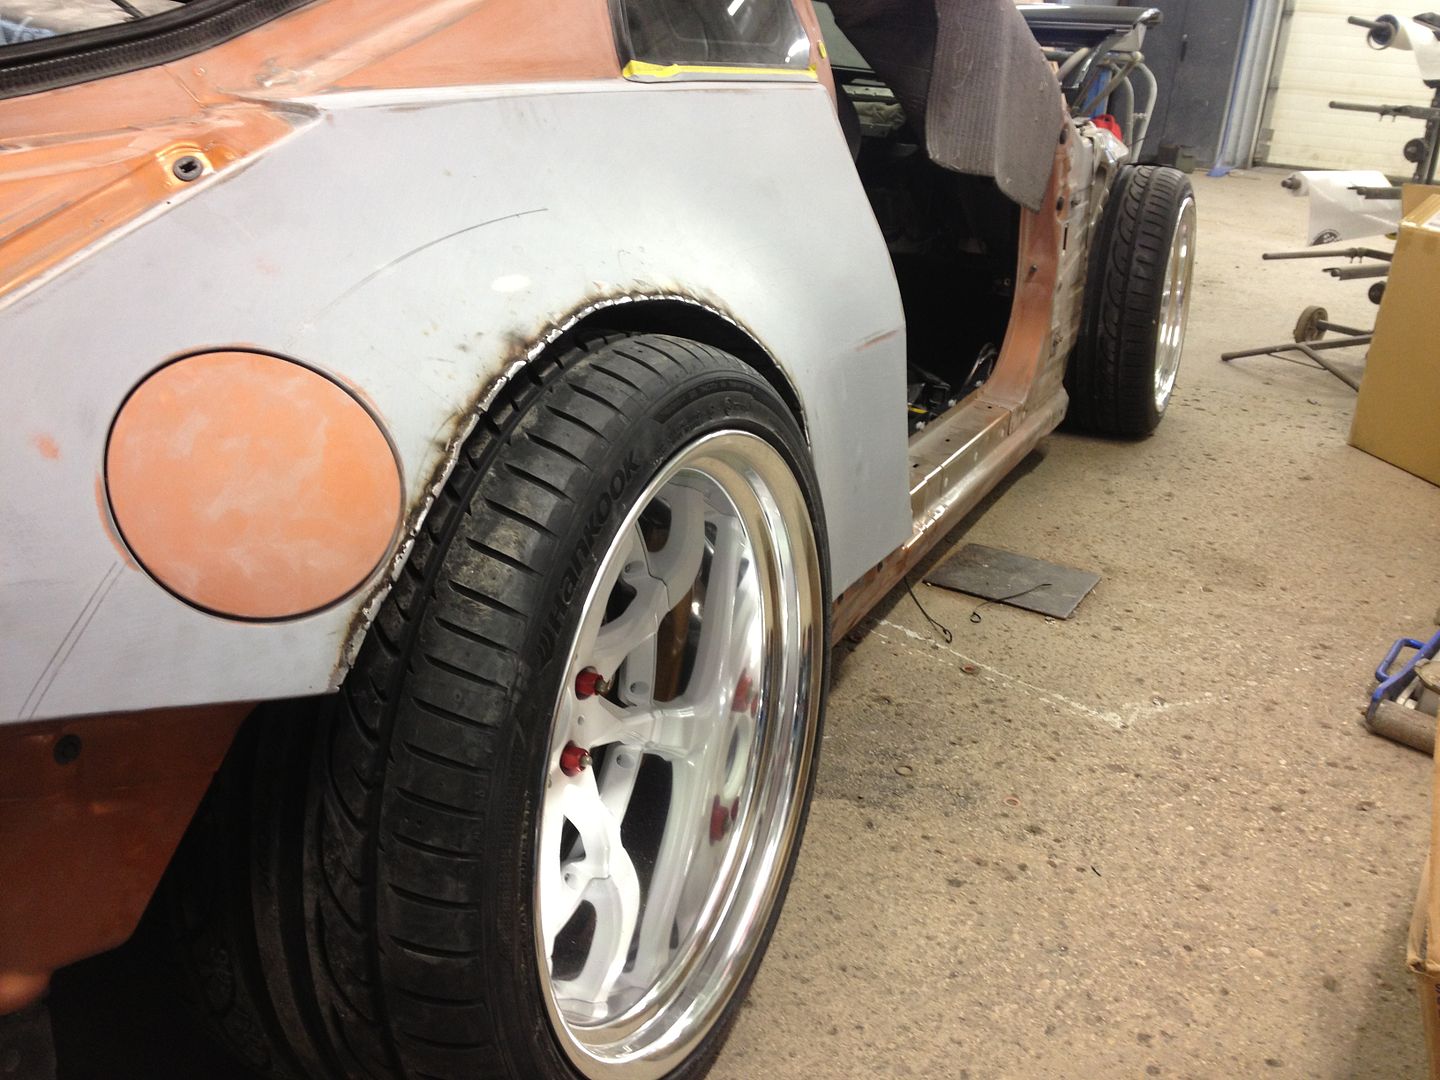
Today's accomplishments
Finally started cutting
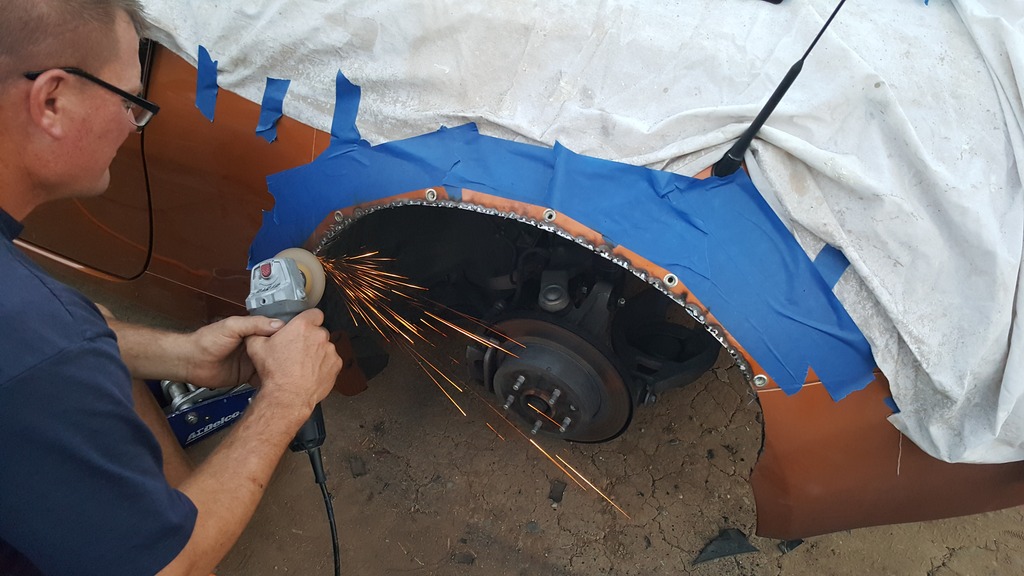
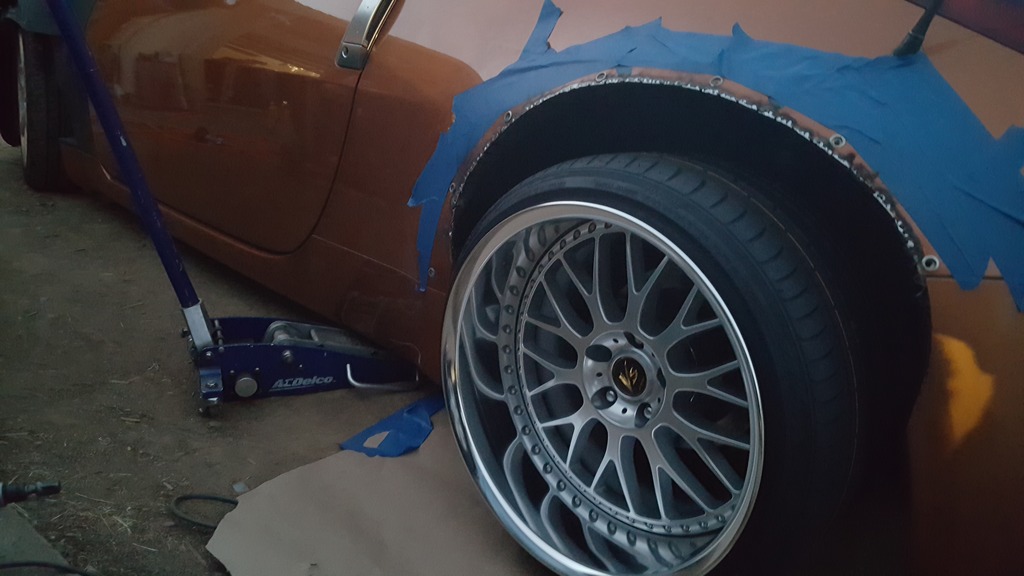
Plenty of clearance for a 300 series tire. The more I see them on Zs like that's "Bryce sumsum(brown rocket bunny/ Hawaii)"... The more I know that is going to be my next fit. When I lifted the tires to see where the fenders needed to be, I stopped right at the contact point with the rear panel. I "assumed" I had about another 1/4 to 1/2 inch drop and set the flares right at stock height. Turns out it was more like a 1/8 of a drop to go. If I want the tucked look, I'll have to drop it another 1/2 inch to where I thought it would be.... But I'm good at this right height for now. Bigger tires will close the gap.
 09-20-2016, 08:05 PM
#71
Registered User
Thread Starter
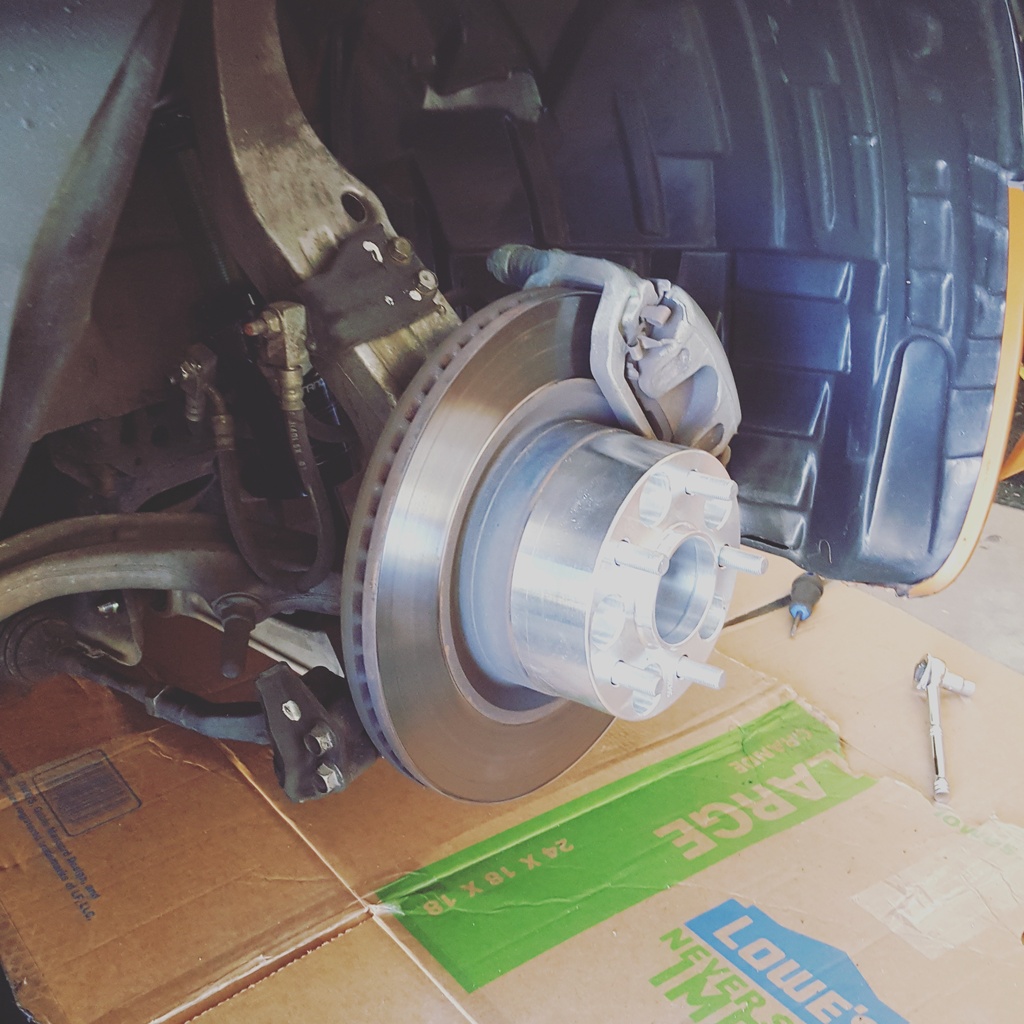
2-1/2" spacer in the front
1-1/2" rear
Torqued to 90
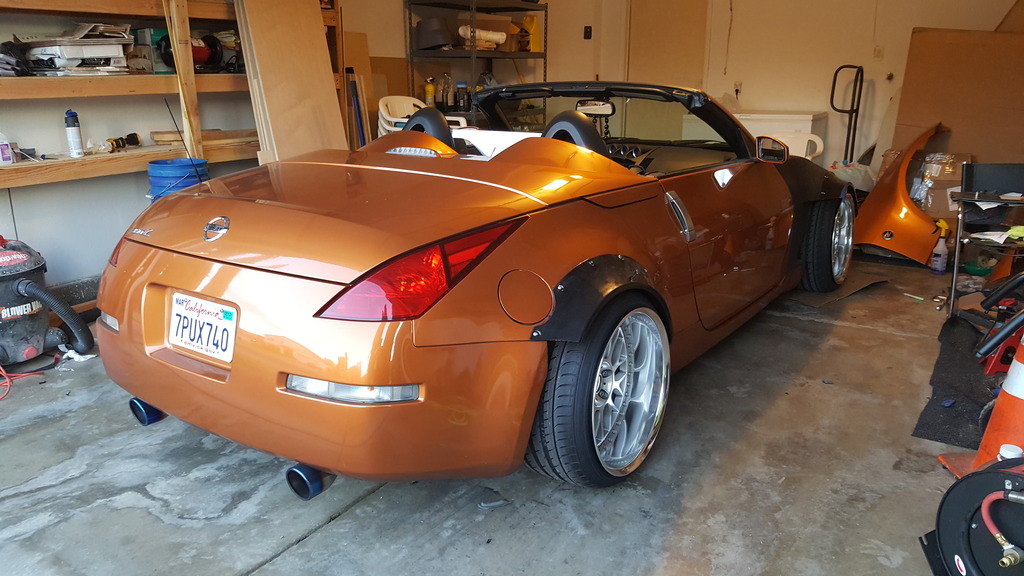
6 months later... And the wheels are FINALLY mounted and on the ground!
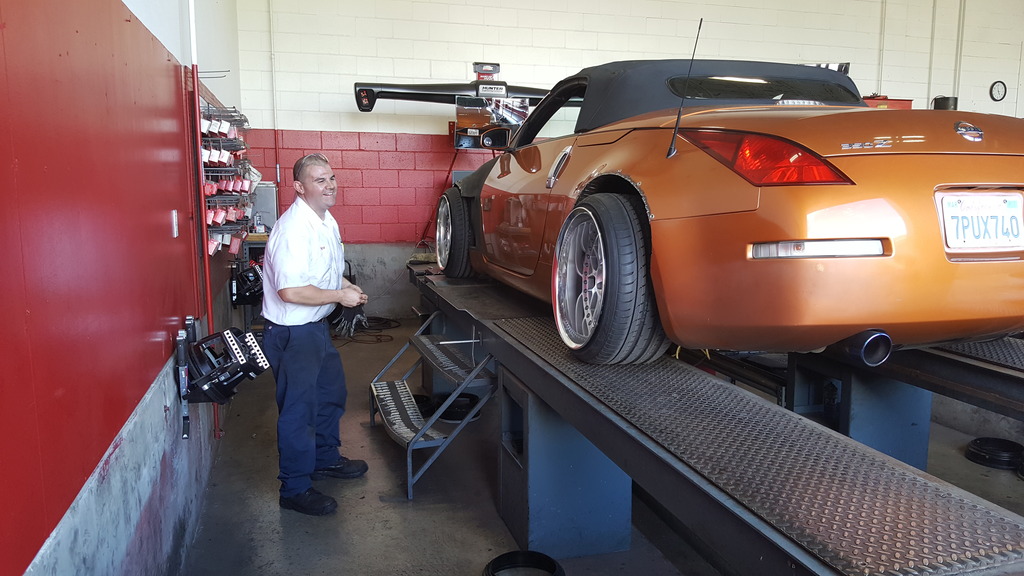
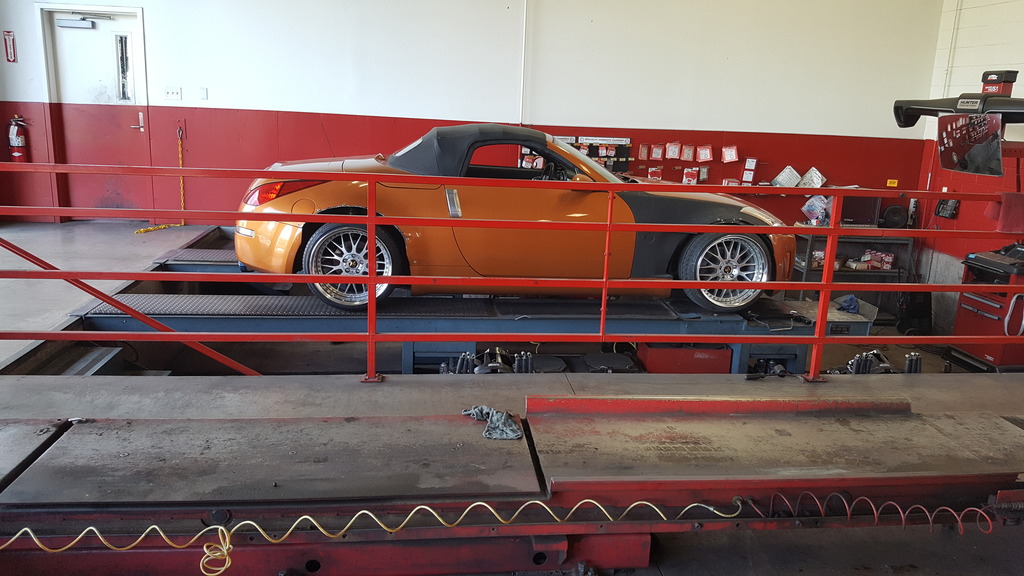
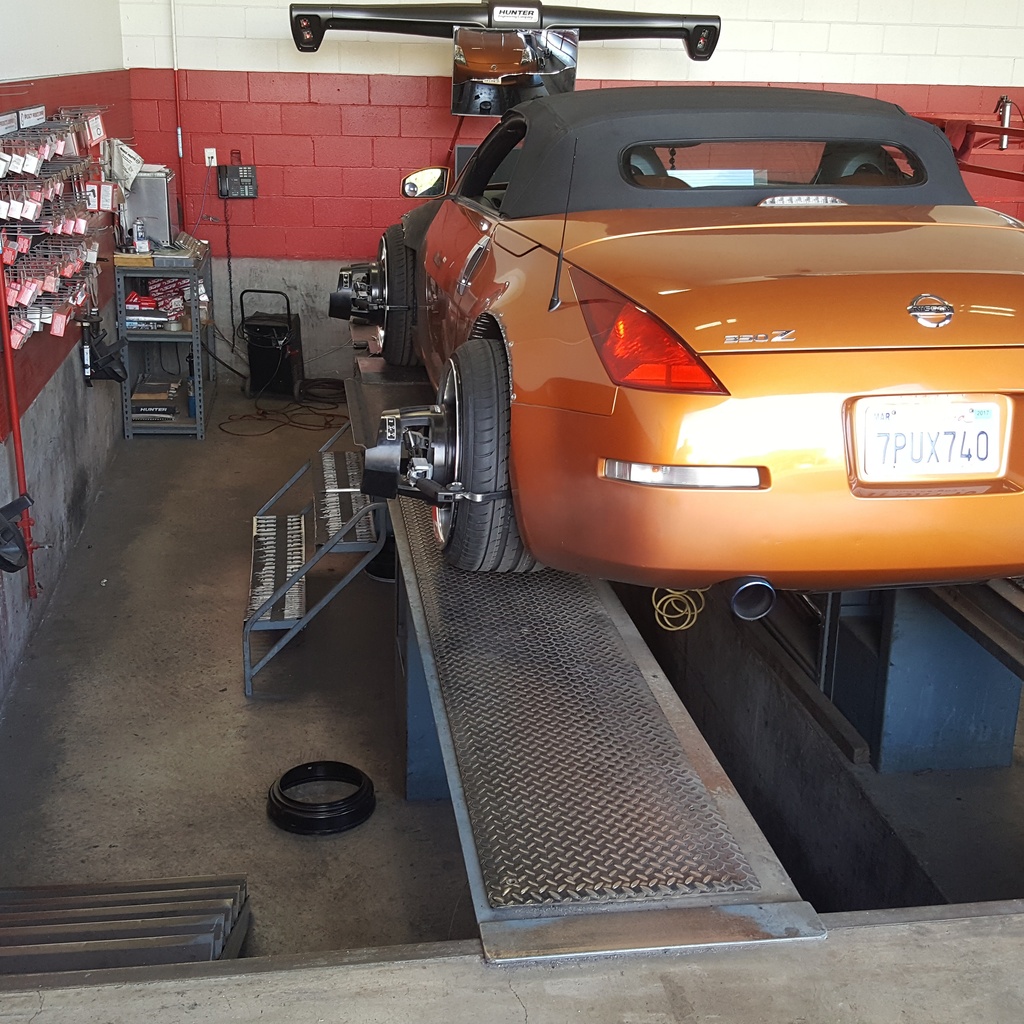
alignment
Threaded Rivets where a great idea, had to take them off for the clamps to clear( that's petro, he has a slammed g35, so he knows what's good).
All done. (For now)
He got me to -2� on the rear. But I'm going to have to file the cam holes out a little more( no template came with the arms) And raise the driver side up a 1/4" to get the driver side down another .75�.
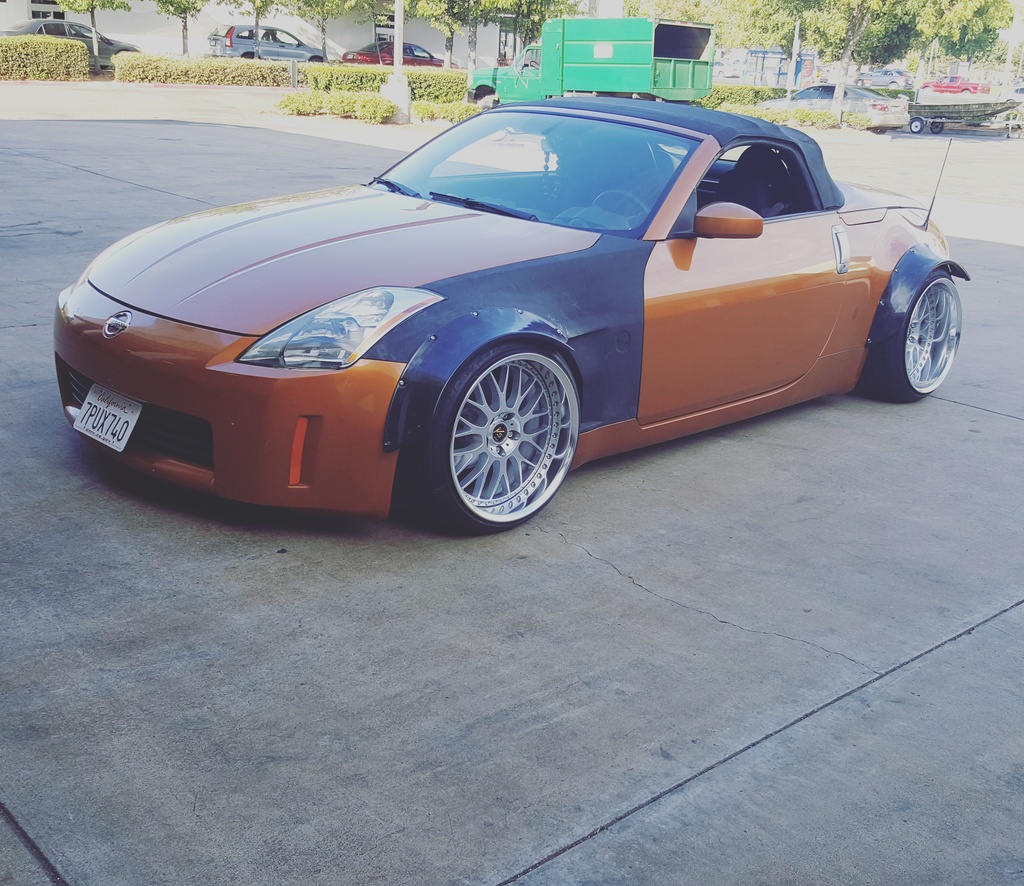
Back home and I'm done for the day. This weekend I'm going to rustoleum and rubber flex seal the welds on the rear.
1-1/2" rear
Torqued to 90

6 months later... And the wheels are FINALLY mounted and on the ground!

alignment
Threaded Rivets where a great idea, had to take them off for the clamps to clear( that's petro, he has a slammed g35, so he knows what's good).


All done. (For now)
He got me to -2� on the rear. But I'm going to have to file the cam holes out a little more( no template came with the arms) And raise the driver side up a 1/4" to get the driver side down another .75�.

Back home and I'm done for the day. This weekend I'm going to rustoleum and rubber flex seal the welds on the rear.

Last edited by Riff; 09-22-2016 at 03:32 PM.
09-21-2016, 09:31 AM
#73
Registered User
Thread Starter
..... Its been 100 F-N DEGREES for MONTHS...
97 YESTERDAY
NO REPORTS, NO NOTHING
I leave my exposed metal like "it will be fine, its gonna be MONTHS be for it ra---......
97 YESTERDAY
NO REPORTS, NO NOTHING
I leave my exposed metal like "it will be fine, its gonna be MONTHS be for it ra---......
 09-21-2016, 09:39 AM
#74
Registered User
Thread Starter
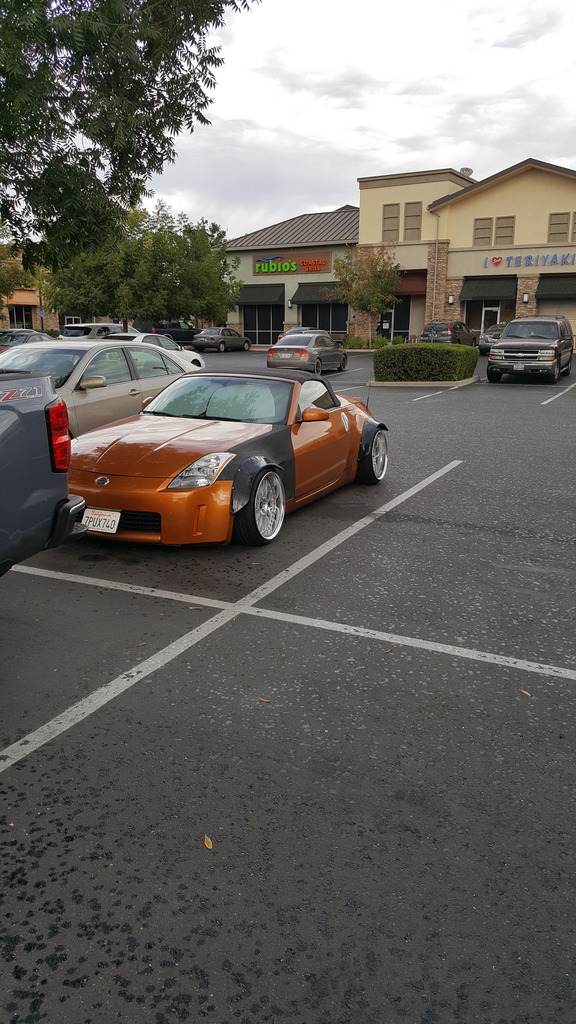
Turns are wider... But I haven't noticed anything like "crazy". I only drive 30 miles round trip a day, then to and fro within 10.
I am going to go with a bigger tire though. I think I lost 5mph.... That or we "all" where doing 85 this morning lol. Plus that gap is startingbto bug me already.
I am going to go with a bigger tire though. I think I lost 5mph.... That or we "all" where doing 85 this morning lol. Plus that gap is startingbto bug me already.
09-21-2016, 11:19 AM
#75

Turns are wider... But I haven't noticed anything like "crazy". I only drive 30 miles round trip a day, then to and fro within 10.
I am going to go with a bigger tire though. I think I lost 5mph.... That or we "all" where doing 85 this morning lol. Plus that gap is startingbto bug me already.
I am going to go with a bigger tire though. I think I lost 5mph.... That or we "all" where doing 85 this morning lol. Plus that gap is startingbto bug me already.
09-21-2016, 01:46 PM
#76
Registered User
Thread Starter
09-21-2016, 04:23 PM
#78
Registered User
Thread Starter
09-21-2016, 05:44 PM
#80
Registered User
Thread Starter
On pause," again"
I tried to use the ABS glue like I thought. But with abs glue, you need a rotation to create friction, a bead to seal It at the part, and a good amount of pressure to hold in place while the very very very light fusion activates
I need "MEK"... But California kicked it out... And asetone will dissolve whatever dissolve whatever it touches.
Now I have to figure out a way to fuse it together in a way where it will expand and contract With temperature as one solid piece so it won't separate from the bonding agent like it would if I used an epoxy......
Sigh....
Last edited by Riff; 09-21-2016 at 05:53 PM.