sintaxeror's build log - tons of PICS/No 56k!
 03-14-2008, 09:54 PM
#141
Registered User
Thread Starter
iTrader: (3)

Join Date: Jun 2005
Location: St. Petersburg, FL
Posts: 670
Likes: 0
Received 0 Likes
on
0 Posts
Originally Posted by hiz-n-herz
Wow! This thread blows me away! and is extremely motivating...
I have installed my own systems in every car I have ever owned and have been very proud of them. That's five cars so far. I am in my late-30's and have been putting this off with my z because of less time (stupid career!), too many hobbies (mountian biking, road biking, Photography, z-stuff) all the unknowns of ripping apart another car, adding weight to the car, blah, blah, blah...
This thread has snapped out of it... Getting the car audio bug again... Plus I am a DIY 'till I die kinda guy. THANKS!
A few questions and observations with your install...
1. I like the idea of routing the speaker wire through the door wire moulding. Has anyone thought about getting some extra pins and recepticals - like the larger of the two that are on the wiring harness and having your aftermarket wires become part of the wiring harness ather than running through it? I know the fewer the connections the better, but if your door ever had to be removed... Anyway.
Originally Posted by hiz-n-herz
2. Where did you get the inset face/bezel thing that allows you to set the head-unit back? Looks better than the metra kit. Looks very clean.
Originally Posted by hiz-n-herz
3. I have not done any fiberglass, but I want to learn - both for speaker enclosures and I also want to make a custom front bumper clip for my z. I don't like any of the after-market ones. What's a good resource for learning?
As for resources, when I wanted to learn I literally googled "fiberglass tutorial" and just started reading everything I could find. Also check out fiberglassforums.com, and places like that. Tons of info and lots of help.
Originally Posted by hiz-n-herz
4. The last system I did was a 97 M3. before that, a 91 CRX. I am very impressed by how well Nissan has sealed off the metal on the inside of the door (when you take the interior off). I am used to gaping holes there that had to be sealed with ABS plastic or wood and sound damping material.
5. Those front midrange speakers have a neodymium magnet structure and a plastic frame - wow! talk about light-weight. Yeah, sucky sound too, but it's cool from an engineering perspective. Is the mounting piece integrated into the speaker frame?
5. Those front midrange speakers have a neodymium magnet structure and a plastic frame - wow! talk about light-weight. Yeah, sucky sound too, but it's cool from an engineering perspective. Is the mounting piece integrated into the speaker frame?
Originally Posted by hiz-n-herz
6. What are the exact measurements of the chamber behind the driver's seat? Width-wise anyway? wondering how wide of an amp I can fit in there.
Originally Posted by hiz-n-herz
7. No offense, but I hope your RCA's are twisted pair and not coaxial in nature. Coax is FTL when it comes to minimizing inductance noise in a car environment.
Originally Posted by hiz-n-herz
8. What kind of camera are you using?
Originally Posted by hiz-n-herz
You are doing an awesome job on this install and write-up and I really enjoy the pics and your sense of humor - the beer tools, the "car looks scared - it should be", "you're no child of mine" LOL. This is hands-down one of the top-10 best threads on this entire board
EDIT: Oops, I messed up the more-pics-than-posts mixture... forgive me
EDIT: Oops, I messed up the more-pics-than-posts mixture... forgive me
 .
.
 03-14-2008, 11:40 PM
#142
Registered User
iTrader: (11)

Join Date: Apr 2006
Location: SF South Bay area
Posts: 1,145
Likes: 0
Received 0 Likes
on
0 Posts
Regarding Coax interconnects FTL...
I suppose this is not as big of an issue with high-end amps' input stages. If you have a balanced differetial input stage on your amp, it can provide a lot of noise-rejection for noise that is induced into the cable between the head-unit and the amp. This is also known as common-mode noise rejection.
But it is still better to have a cable that picks up less noise in the first place. No matter how much shielding you have on your coaxial cable (single, double, and tripple shielding) these foil shields cannot block noise in the range of frequencies we are concerned with in a car audio system! Foil shields block signals in the Megahertz frequency ranges.
Saying that a cable has tripple shielding against noise sells a lot of expensive tripple-shielded cables, but it does not block the noise we are trying to block - most commonly "alternator whine". Marketing BS and hype FTL!
I used to LOL at the back-in-the-day cabling HYPE of having a directional coaxial cable! Yep, the marketeers wanted us to believe that electrons flowed better in one direction than the other . So spend that $150 on a directional RCA coaxial cable! And don't let that sticker with the directional arrows fall off or your cable is ruined - you'll never know which end should be pointed downstream - LOL
A twisted-pair cable is very good at rejecting the type of inductance noise we humans can hear. Twisted pair can reject this noise by as much as 60 Decibels. This is approximatly a factor of 1000!
It's the twisted-pair that does the trick. The shielding does almost nothing. However the shielding hype is so high that you will have not found an unshielded twisted pair cable a few years ago (Although I am just starting to see some now). You could even twist your own interconnects and solder them to an RCA termination. I have seen people braid their own with custom colors.
Interconnect cables are one of those areas where you can spend hundreds of dollars. But even the cheapest twisted pair RCA's will provide the same noise rejection. The only advantage to a more expensive cable is getting a prettier RCA termination - which is fine if you want that.
I have had great results with these cheap cables (Have never used this vendor BTW):
http://www.theinstallationshop.com/i...PROD&ProdID=20

Look, Ma! No shields (I have not tried these):
http://www.theinstallationshop.com/i...PROD&ProdID=79

Now, these cheapest cables are not too robust and could be damaged more easily, but if you use grommets and sheathing appropriately, you'll be fine. The thinner the cable, the easier it is to route around tight bends though.
I suppose this is not as big of an issue with high-end amps' input stages. If you have a balanced differetial input stage on your amp, it can provide a lot of noise-rejection for noise that is induced into the cable between the head-unit and the amp. This is also known as common-mode noise rejection.
But it is still better to have a cable that picks up less noise in the first place. No matter how much shielding you have on your coaxial cable (single, double, and tripple shielding) these foil shields cannot block noise in the range of frequencies we are concerned with in a car audio system! Foil shields block signals in the Megahertz frequency ranges.
Saying that a cable has tripple shielding against noise sells a lot of expensive tripple-shielded cables, but it does not block the noise we are trying to block - most commonly "alternator whine". Marketing BS and hype FTL!
I used to LOL at the back-in-the-day cabling HYPE of having a directional coaxial cable! Yep, the marketeers wanted us to believe that electrons flowed better in one direction than the other
. So spend that $150 on a directional RCA coaxial cable! And don't let that sticker with the directional arrows fall off or your cable is ruined - you'll never know which end should be pointed downstream - LOLA twisted-pair cable is very good at rejecting the type of inductance noise we humans can hear. Twisted pair can reject this noise by as much as 60 Decibels. This is approximatly a factor of 1000!
It's the twisted-pair that does the trick. The shielding does almost nothing. However the shielding hype is so high that you will have not found an unshielded twisted pair cable a few years ago (Although I am just starting to see some now). You could even twist your own interconnects and solder them to an RCA termination. I have seen people braid their own with custom colors.
Interconnect cables are one of those areas where you can spend hundreds of dollars. But even the cheapest twisted pair RCA's will provide the same noise rejection. The only advantage to a more expensive cable is getting a prettier RCA termination - which is fine if you want that.
I have had great results with these cheap cables (Have never used this vendor BTW):
http://www.theinstallationshop.com/i...PROD&ProdID=20
Look, Ma! No shields (I have not tried these):
http://www.theinstallationshop.com/i...PROD&ProdID=79
Now, these cheapest cables are not too robust and could be damaged more easily, but if you use grommets and sheathing appropriately, you'll be fine. The thinner the cable, the easier it is to route around tight bends though.
Last edited by hiz-n-herz; 03-14-2008 at 11:54 PM.
 03-15-2008, 03:38 AM
#144
Registered User
iTrader: (7)

Join Date: Aug 2006
Location: NJ
Posts: 2,136
Likes: 0
Received 0 Likes
on
0 Posts
In regards to what hiz-n-herz is saying about rca cables:
The statements made are correct in theory and practice. One correction I would make (and it's just my semantical nature) that twisted pair cables do not REJECT , but rather CANCEL introduced noise due to the helix construction.
As for using a coax design cable, if you are careful on your install and keep it away from other wires that carry an electrical current you will be fine. Also the output voltage of the headunit can make a difference, a high enough output allows you to keep the sensitivity turned down on the amp and thereby making the inputs of the amp less sensitive to the noise.
I have made my own cables out of MANY different types of cable, coax, mic wire, cat5, and others, and have even thought about offering custom length/colors as my own branded cable. But there are so many good cables for cheap that I couldn't really compete in the price arena. I would have to rely on my cable looking nicer (which it would ) to sell. I mean, look at me....despite having made my own cables for years, I am using Directed Audio Graphite cables in my own car right now - why? they were cheap! lol (BTW, I think cat5 cable works very well for twisted pair rca's)
Anyway, enough OT stuff, I enjoy reading this thread each and every day. I kind of have my own build log going, but I'm at a stand still with a lot going on right now, so I am living vicariously through sintaxeror at the moment. KEEP UP THE GOOD WORK!
The statements made are correct in theory and practice. One correction I would make (and it's just my semantical nature) that twisted pair cables do not REJECT , but rather CANCEL introduced noise due to the helix construction.
As for using a coax design cable, if you are careful on your install and keep it away from other wires that carry an electrical current you will be fine. Also the output voltage of the headunit can make a difference, a high enough output allows you to keep the sensitivity turned down on the amp and thereby making the inputs of the amp less sensitive to the noise.
I have made my own cables out of MANY different types of cable, coax, mic wire, cat5, and others, and have even thought about offering custom length/colors as my own branded cable. But there are so many good cables for cheap that I couldn't really compete in the price arena. I would have to rely on my cable looking nicer (which it would
) to sell. I mean, look at me....despite having made my own cables for years, I am using Directed Audio Graphite cables in my own car right now - why? they were cheap! lol (BTW, I think cat5 cable works very well for twisted pair rca's)Anyway, enough OT stuff, I enjoy reading this thread each and every day. I kind of have my own build log going, but I'm at a stand still with a lot going on right now, so I am living vicariously through sintaxeror at the moment. KEEP UP THE GOOD WORK!
Last edited by StreetOC192; 03-15-2008 at 03:44 AM.
03-15-2008, 05:05 AM
#145
Registered User
Thread Starter
iTrader: (3)
Join Date: Jun 2005
Location: St. Petersburg, FL
Posts: 670
Likes: 0
Received 0 Likes
on
0 Posts
Even though hiz-n-herz stated this already, it should be made abundantly clear for those of you trying to follow that twisted pair RCA's are primarily for balanced signaling, which 95% of our non super high end amps are not set up for. There is no common-mode rejection for unbalanced signaling (which is why balanced signaling is better).
I would consider myself very knowledgeable on general electronics, although I am not an expert in signals and cables directly..
Now, assuming an unbalanced system:
As far as i know, the shielding on the coaxial cable does still reject interference down to levels still audible to us, but even if that is not true, it certainly isn't any worse than twisted pair cables. If you assume that the noise rejection of the coaxial shielding is not doing anything for you (which I do not believe is true), then you can just treat both the coaxial and twisted cabling as just two adjacent conductors in terms of noise picked up externally, I don't think they would be much different.
Also, it should be noted for others here that if you do decide to use twisted pair cabling for an unbalanced system, buy one like the yellow/black one hiz-n-herz shows in the picture. If you buy the type that is also shielded, you are actually introducing more noise into the system by adding more capacitance to the cable itself.
A good rule of thumb, in my opinion, is coaxial for unbalanced signaling, and twisted pair for balanced signaling.
Edit: just wanted to make my view on this clearer... the noise rejection provided by the outside (grounded) conductor in the coaxial cable should provide protection from EMI all the way down to the the hundreds of hz level (and very possibly even lower). Since our ears are not quite as sensitive down below that, noise picked up at that level is not TOO much a of a worry, but the higher end of the audible noise is (which is why the whine you always here is...well.. a whine). Coaxial cables will provide some protection here, more so than twisted pair (again, must stress unbalanced system), although the best bet here is just to run your wires properly.
Last edited by sintaxeror; 03-15-2008 at 05:27 AM.
03-15-2008, 06:07 AM
#147
Registered User
iTrader: (1)

Join Date: Apr 2007
Location: Houston
Posts: 61
Likes: 0
Received 0 Likes
on
0 Posts
There is a new forum folder called Audio Builds. You should definatly be the first one to post.
https://my350z.com/forum/audio-builds-496/
BTW-this thread has helped me NUMEROUS WAYS with all the pictures. Thank you again!!
https://my350z.com/forum/audio-builds-496/
BTW-this thread has helped me NUMEROUS WAYS with all the pictures. Thank you again!!
03-15-2008, 06:28 AM
#148
Registered User
Thread Starter
iTrader: (3)
Join Date: Jun 2005
Location: St. Petersburg, FL
Posts: 670
Likes: 0
Received 0 Likes
on
0 Posts
Yeah I saw that =) Looks cool.. when I am finished I may ask a mod to move it there but as of now I think it will get more traffic in the regular audio forum..
03-15-2008, 10:13 AM
#150
Registered User
Thread Starter
iTrader: (3)
Join Date: Jun 2005
Location: St. Petersburg, FL
Posts: 670
Likes: 0
Received 0 Likes
on
0 Posts
Originally Posted by sosojeffcc
I can't wait to see how you're going to mount the tweeters 
03-15-2008, 10:28 AM
#151
Registered User
iTrader: (11)
Join Date: Apr 2006
Location: SF South Bay area
Posts: 1,145
Likes: 0
Received 0 Likes
on
0 Posts
Thanks, Syntaxeror and streetoc192 for the clarifications. I'll admit I only know the basics about this stuff. I have actually managed to pick up noise even with a balanced signal and twisted-pair interconnects - I routed them too close to a passive crossover once (!?) - or maybe it was too close to my kick-panel midrange magnet. So proper routing is FTW.
Back on topic - Where will you mount the passive crossovers? I suppose it depends on where you are mounting the tweeters, but if your tweets are going into the doors...
Can't wait for more updates...
Cmon, cmon, cmon - get to work
Back on topic - Where will you mount the passive crossovers? I suppose it depends on where you are mounting the tweeters, but if your tweets are going into the doors...
Can't wait for more updates...
Cmon, cmon, cmon - get to work
Last edited by hiz-n-herz; 03-15-2008 at 10:37 AM.
03-15-2008, 10:46 AM
#152
Registered User
Thread Starter
iTrader: (3)
Join Date: Jun 2005
Location: St. Petersburg, FL
Posts: 670
Likes: 0
Received 0 Likes
on
0 Posts
Originally Posted by hiz-n-herz
Thanks, Syntaxeror and streetoc192 for the clarifications. I'll admit I only know the basics about this stuff. I have actually managed to pick up noise even with a balanced signal and twisted-pair interconnects - I routed them too close to a passive crossover once (!?) - or maybe it was too close to my kick-panel midrange magnet. So proper routing is FTW.
Back on topic - Where will you mount the passive crossovers? I suppose it depends on where you are mounting the tweeters, but if your tweets are going into the doors...
Can't wait for more updates...
Cmon, cmon, cmon - get to work
Back on topic - Where will you mount the passive crossovers? I suppose it depends on where you are mounting the tweeters, but if your tweets are going into the doors...
Can't wait for more updates...
Cmon, cmon, cmon - get to work
The crossovers are going in the doors, its just easier to route into the door that way, not to have to put in two pairs of wire.
03-15-2008, 01:34 PM
#154
Registered User
iTrader: (20)

Join Date: May 2006
Location: Costa Mesa, CA
Posts: 369
Likes: 0
Received 0 Likes
on
0 Posts
Originally Posted by sintaxeror
Try to contain yourself =) I'm going to put them in the stock location... but I have some mods in mind... stay tuned! =)

Last edited by sosojeffcc; 03-15-2008 at 01:44 PM.
03-15-2008, 01:52 PM
#155
Registered User
Thread Starter
iTrader: (3)
Join Date: Jun 2005
Location: St. Petersburg, FL
Posts: 670
Likes: 0
Received 0 Likes
on
0 Posts
Originally Posted by sosojeffcc
you know, that actually makes me even more excited to hear. I'm actually lookin at the UP6's now myself, and would like to keep it lookin as stock as possible, so really interested in the components portion of the install. Not to say the amps and sub portion isn't excellent work as well
03-15-2008, 02:30 PM
#156
Registered User
Thread Starter
iTrader: (3)
Join Date: Jun 2005
Location: St. Petersburg, FL
Posts: 670
Likes: 0
Received 0 Likes
on
0 Posts
UPDATE 3/15/08 Evening
Well its Saturday, lets get started! I am anxious to make my car usable again..
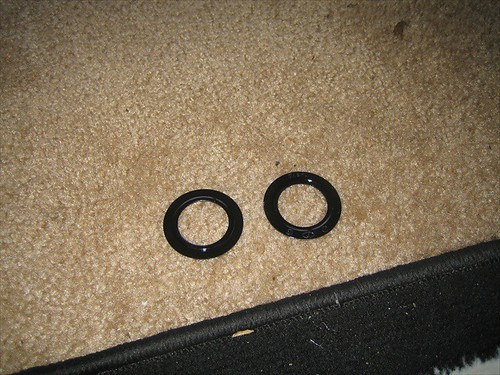
First of all.. why did I buy these?
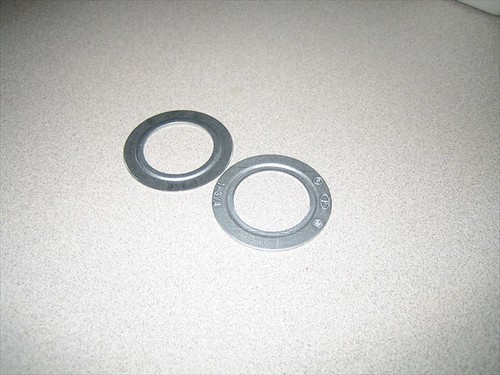
Laying them out...
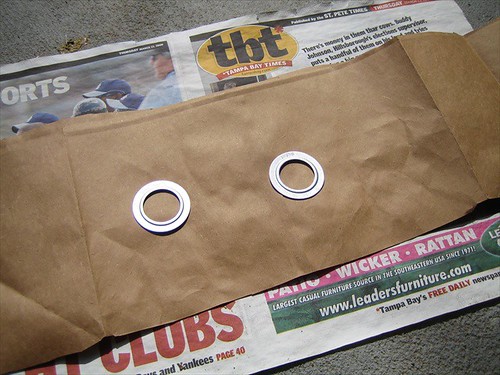
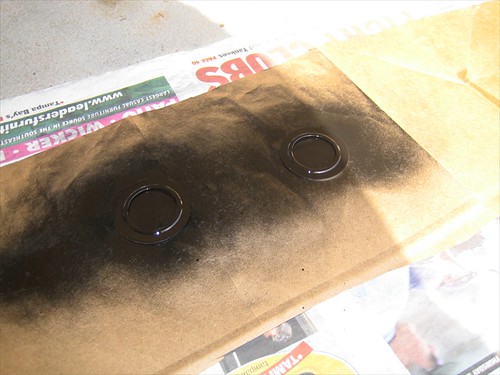
Painting them black... any guesses as to their purpose?
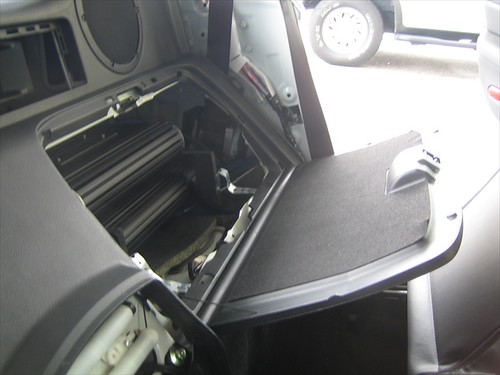
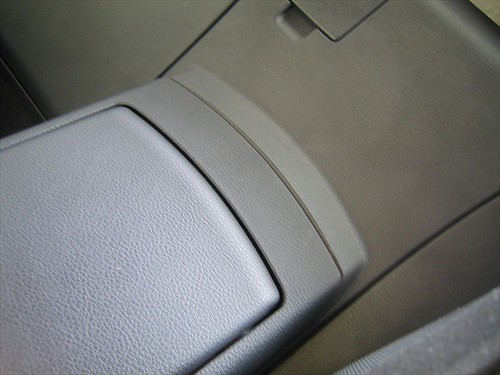
Now that those are drying, I'll get back to the car... installed the catch with the bolts I got yesterday..
Looks good.. I don't know why Nissan didn't do this to begin with.
Ah crap.. the latch doesn't catch... I can open it like this..
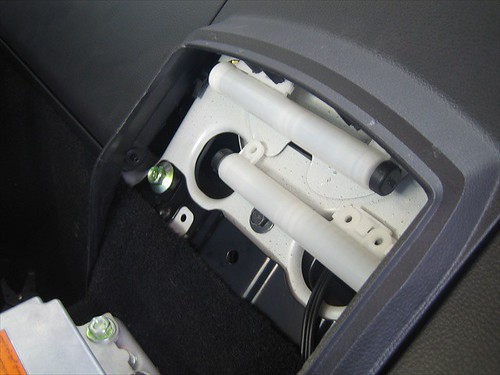
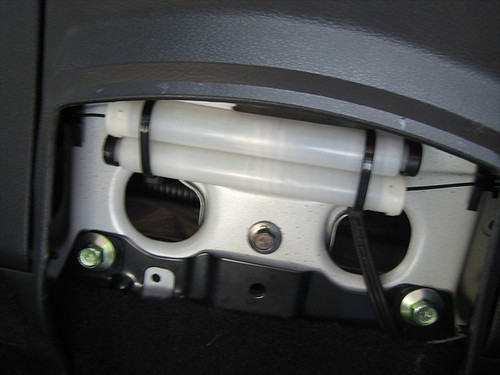
That catch I installed needs to be spaced out a little so the latch can grab it. I'll deal with that later...I need to figure out how to mount this spring/string jobbie... Nissan only has a mount for one.
Screwed into place..That ought to work.
And the string holds the door well.. Seriously why didn't nissan do this to begin with?
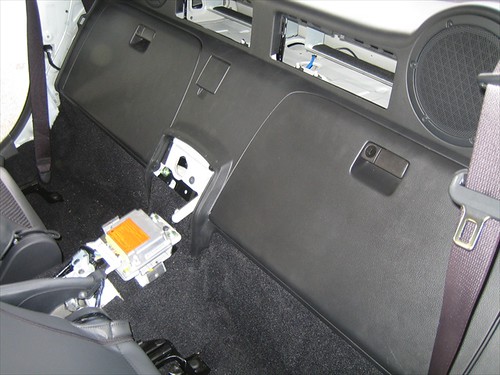
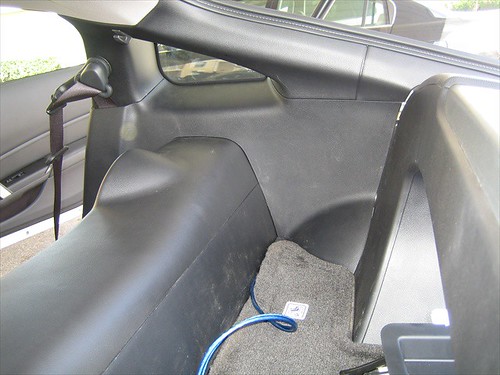
I had the lower console back in so that I could drive around a little yesterday to pick stuff up.. here it is removed again so I can put the center console back in.
Center console back in... hmm.. doesn't look right..
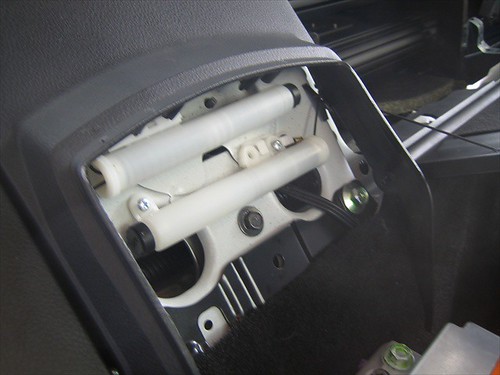
It doesn't clear the second jobbie. Son of a Bee.

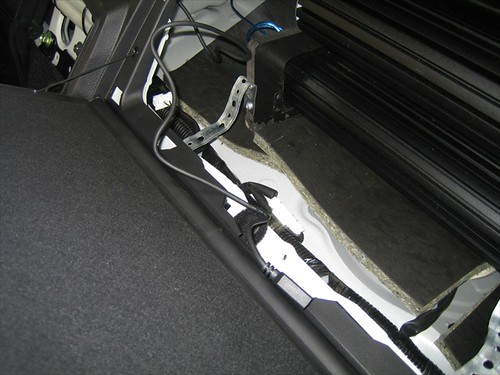
So now lets try this... Zip tied to the stock one. I don't know why I didn't do this in the first place...
Ahh, there we go.
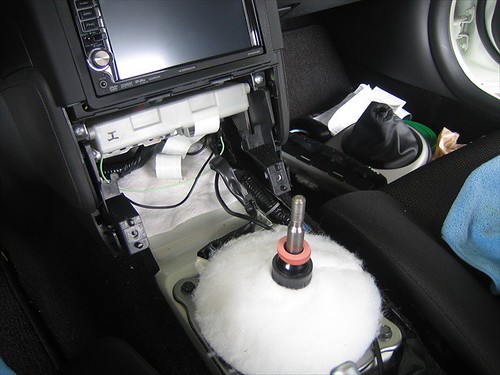
Ah crap I forgot something... back off with the center console.. I need to run this USB cable for the 5120 somewhere that I can get to..
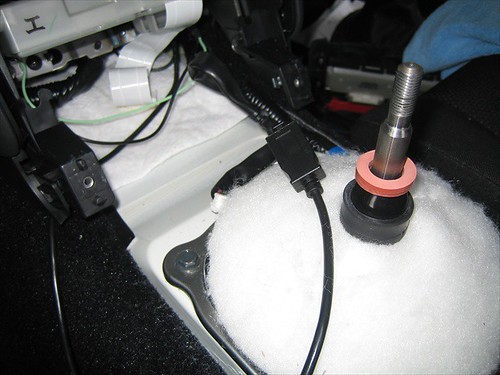
Need to extend it to get it into the cubby..
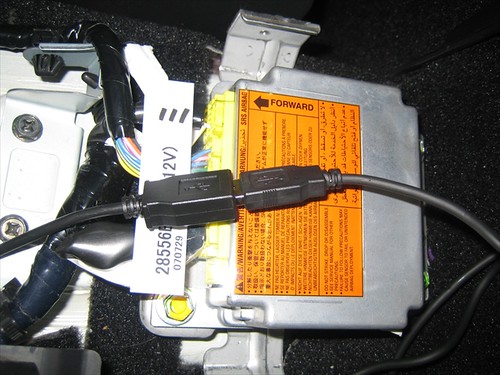
Now in the cubby! I only have an iPod nano that I use for running, so no current plans for iPod control. However, I do plan on getting a nice big USB thumbdrive to load music on for the car. That feature is super convenient.
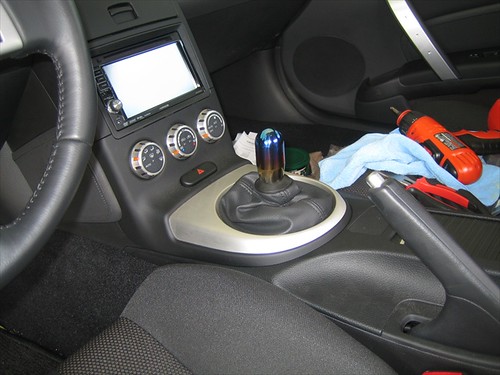
Console back in, lower console back on, shift **** installed.. starting to look like a car again.
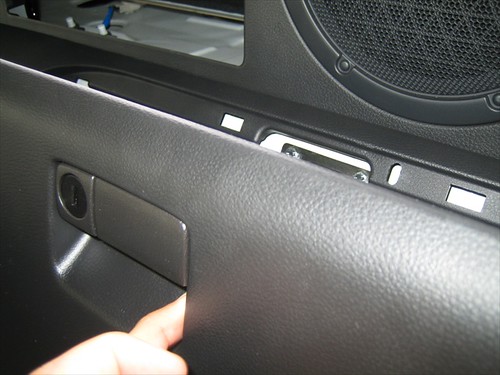
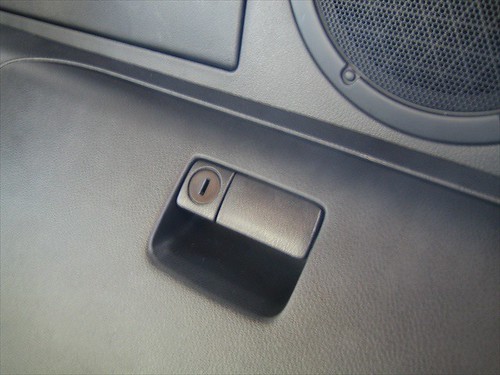
Looks good with the door... now I just need to figure out if I can order a lock for it that matches my key...
Mailboxes reinstalled... it should be noted that the door has to be open to put it back in.
Drivers side quarter panel back in...
Passenger side too..
After a quick trip to home depot, back to that latch...
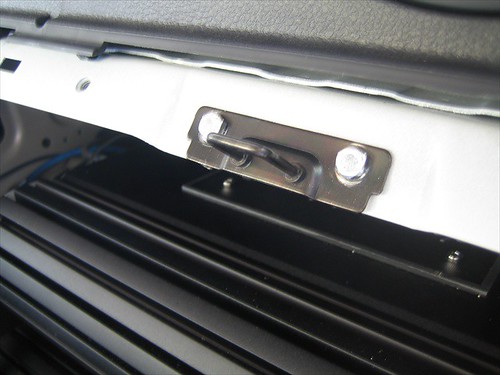
I bought these to space it out..
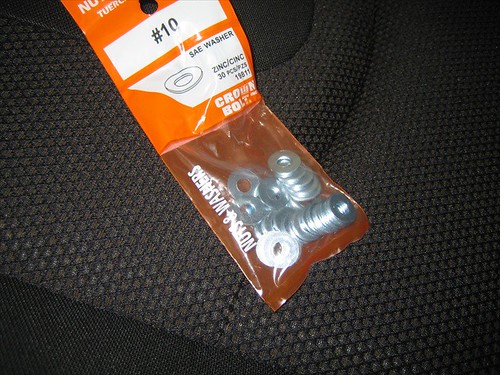
Reinstalled with two washers under each bolt...
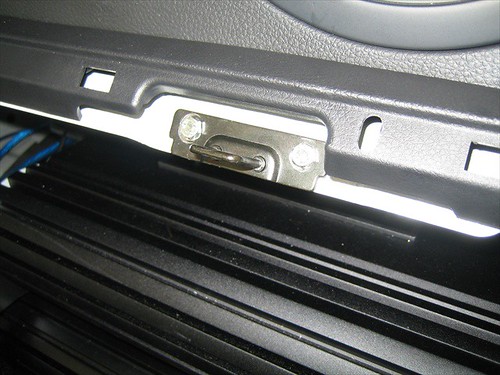
Locks into place properly now..
And thats it inside the car for a while! Happy this stage of the build is over with...
Hmm.. paint dried on the mystery rings..
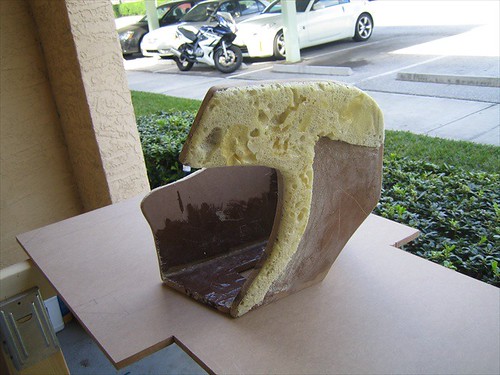
Lets revisit this.. don't worry I didn't forget!
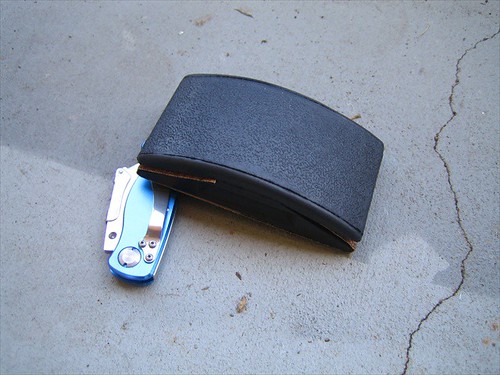
Some needed tools..
Trimmed and sanded an edge.. I am beginning to think this might work...
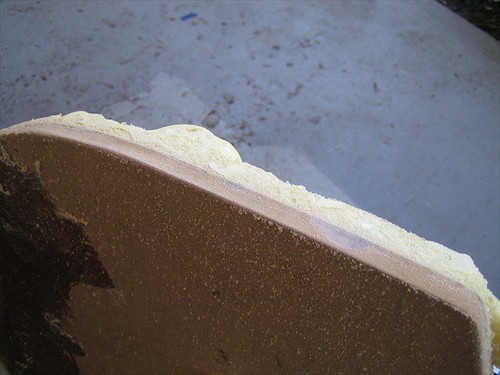
Trimmed some more...
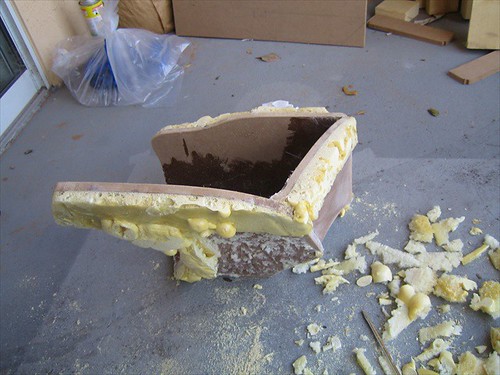
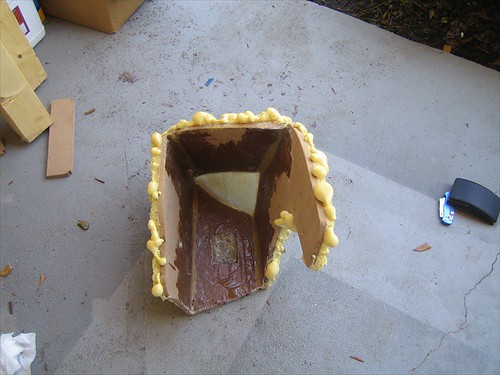
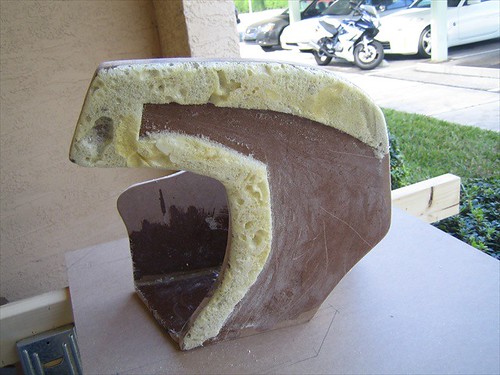
Another shot.. I removed a lot of the unnecessary foam as you can see...
All trimmed up... looks pretty good huh?
Clean edge...
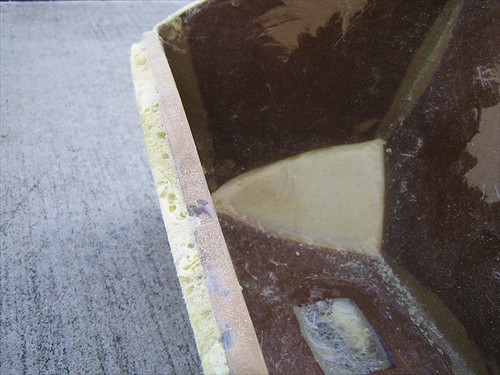
Another shot..
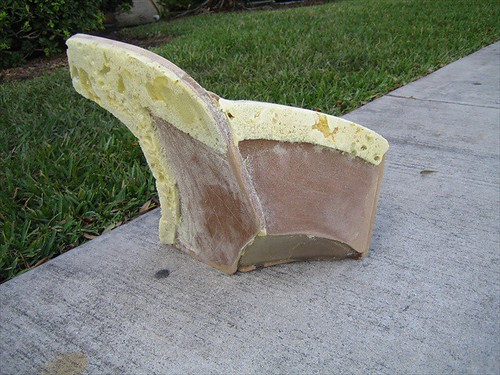
cut out the stray glass in the terminal cup hole..

And test fit... I don't think this could have come out any better... I really am starting to believe.
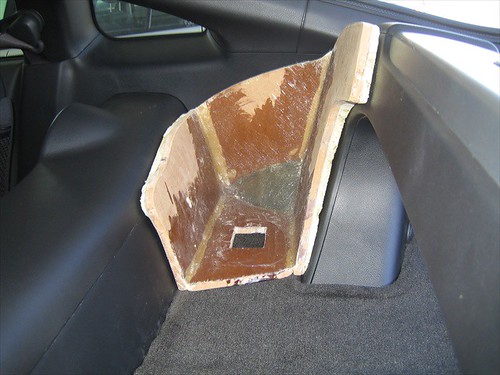
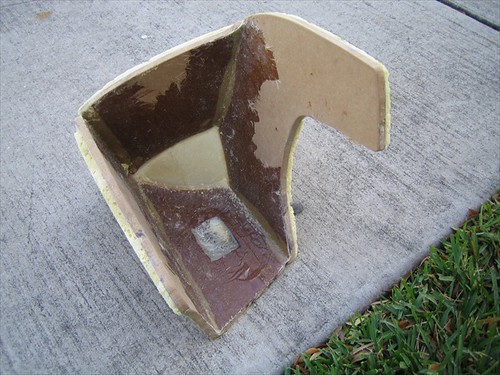
Shot of the side with just a little gap to clearance some fleece/carpet, etc...

Other side...
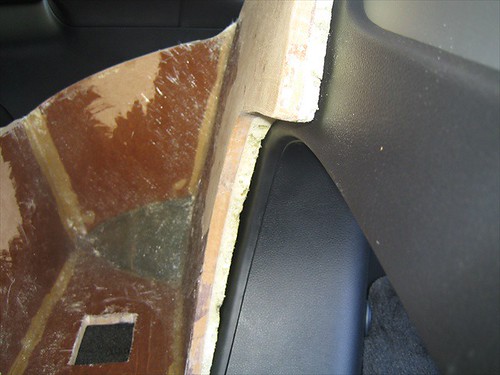
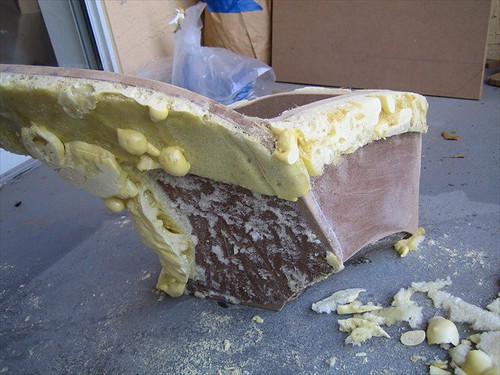
Here is the only bad imperfection in the foam, this part in the corner broke off during sanding.. I will have to patch it back up.. another advantage to the foam -- very forgiving of mistakes..

Look at the mess I made...
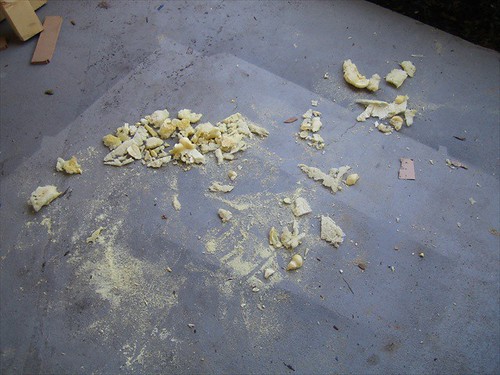
Cleaning up..

Set up my "work bench" .. you know.. I could stand to remove a little more of that foam.
So easy.. just score with a utility knife, then dig in and lift with a screw driver...
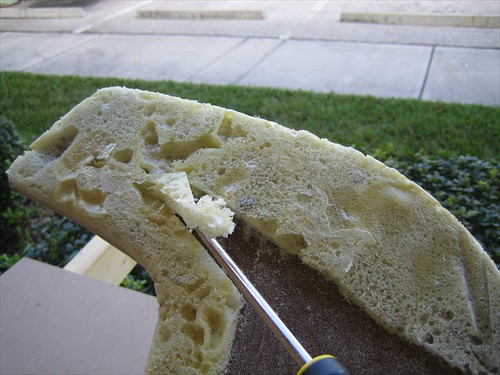
Thats better..
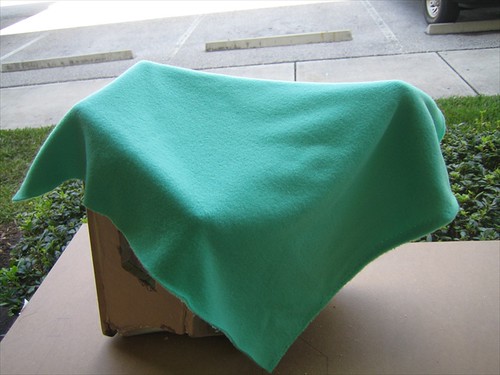
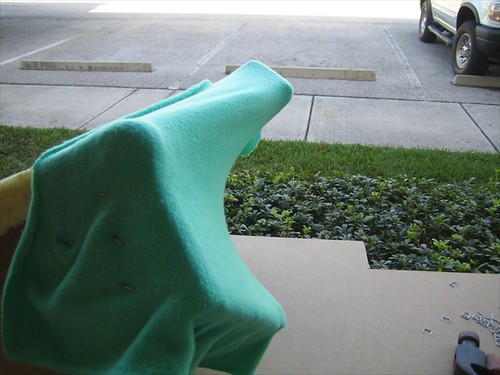
Cut out a nice piece of fleece.. I went with a bright color because it would be easier to spread resin more evenly...
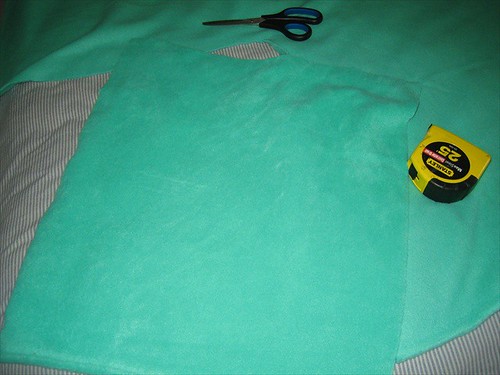
Yeah.. something like that.
One day a few years ago I yoinked this from my dad because he never used it.. now I finally have a use for it myself.. YOINK!
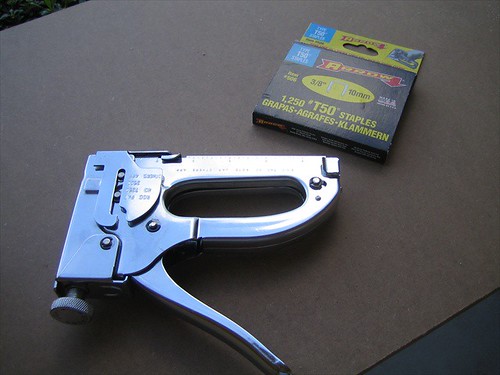
Staples...
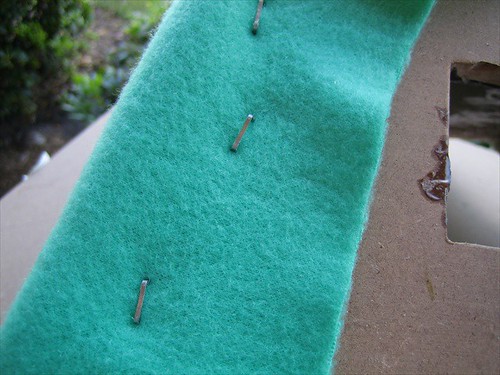
Stretched over..
Another shot.. don't worry about that little wrinkle at the top.. I am only doing the side now and when its done I will trim all of that away...
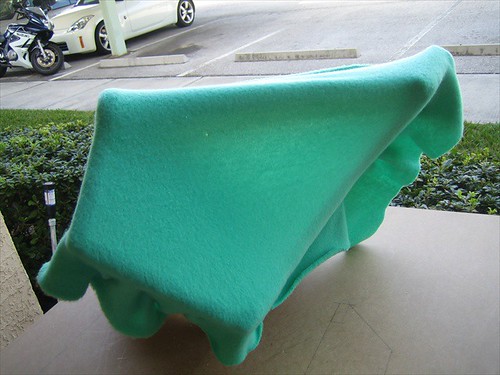
Bring out the funny smelling stuff...
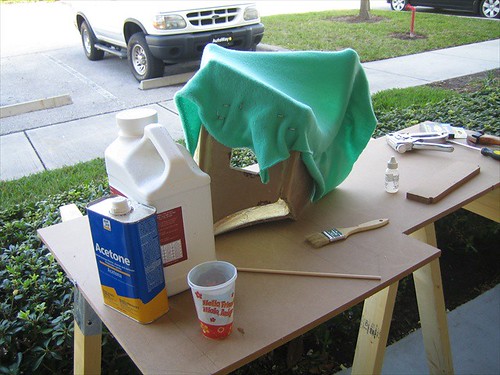
Wet down with resin..
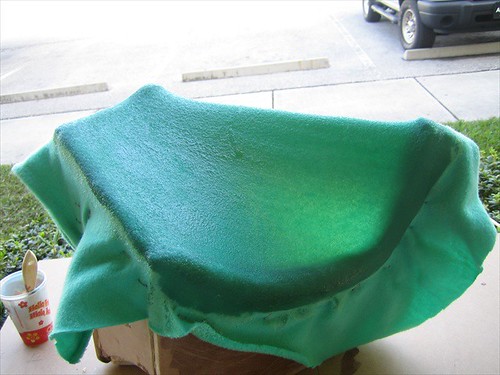
And thats where I am now... I'm going to run to the store and get some more foam to patch up that corner. Also the fleece isn't shaping up exactly how I want so I will probably use some more just to sculpt it a little better... we'll see how it shakes out. MAN I wish I had my components in.. I really want to get those installed. Will probably be another week and a half before I have them =/
Questions? Comments?
Well its Saturday, lets get started! I am anxious to make my car usable again..
First of all.. why did I buy these?
Laying them out...
Painting them black... any guesses as to their purpose?
Now that those are drying, I'll get back to the car... installed the catch with the bolts I got yesterday..
Looks good.. I don't know why Nissan didn't do this to begin with.
Ah crap.. the latch doesn't catch... I can open it like this..
That catch I installed needs to be spaced out a little so the latch can grab it. I'll deal with that later...I need to figure out how to mount this spring/string jobbie... Nissan only has a mount for one.
Screwed into place..That ought to work.
And the string holds the door well.. Seriously why didn't nissan do this to begin with?
I had the lower console back in so that I could drive around a little yesterday to pick stuff up.. here it is removed again so I can put the center console back in.
Center console back in... hmm.. doesn't look right..
It doesn't clear the second jobbie. Son of a Bee.
So now lets try this... Zip tied to the stock one. I don't know why I didn't do this in the first place...
Ahh, there we go.
Ah crap I forgot something... back off with the center console.. I need to run this USB cable for the 5120 somewhere that I can get to..
Need to extend it to get it into the cubby..
Now in the cubby! I only have an iPod nano that I use for running, so no current plans for iPod control. However, I do plan on getting a nice big USB thumbdrive to load music on for the car. That feature is super convenient.
Console back in, lower console back on, shift **** installed.. starting to look like a car again.
Looks good with the door... now I just need to figure out if I can order a lock for it that matches my key...
Mailboxes reinstalled... it should be noted that the door has to be open to put it back in.
Drivers side quarter panel back in...
Passenger side too..
After a quick trip to home depot, back to that latch...
I bought these to space it out..
Reinstalled with two washers under each bolt...
Locks into place properly now..
And thats it inside the car for a while! Happy this stage of the build is over with...
Hmm.. paint dried on the mystery rings..
Lets revisit this.. don't worry I didn't forget!
Some needed tools..
Trimmed and sanded an edge.. I am beginning to think this might work...
Trimmed some more...
Another shot.. I removed a lot of the unnecessary foam as you can see...
All trimmed up... looks pretty good huh?
Clean edge...
Another shot..
cut out the stray glass in the terminal cup hole..
And test fit... I don't think this could have come out any better... I really am starting to believe.
Shot of the side with just a little gap to clearance some fleece/carpet, etc...
Other side...
Here is the only bad imperfection in the foam, this part in the corner broke off during sanding.. I will have to patch it back up.. another advantage to the foam -- very forgiving of mistakes..
Look at the mess I made...
Cleaning up..
Set up my "work bench" .. you know.. I could stand to remove a little more of that foam.
So easy.. just score with a utility knife, then dig in and lift with a screw driver...
Thats better..
Cut out a nice piece of fleece.. I went with a bright color because it would be easier to spread resin more evenly...
Yeah.. something like that.
One day a few years ago I yoinked this from my dad because he never used it.. now I finally have a use for it myself.. YOINK!
Staples...
Stretched over..
Another shot.. don't worry about that little wrinkle at the top.. I am only doing the side now and when its done I will trim all of that away...
Bring out the funny smelling stuff...
Wet down with resin..
And thats where I am now... I'm going to run to the store and get some more foam to patch up that corner. Also the fleece isn't shaping up exactly how I want so I will probably use some more just to sculpt it a little better... we'll see how it shakes out. MAN I wish I had my components in.. I really want to get those installed. Will probably be another week and a half before I have them =/
Questions? Comments?
03-15-2008, 02:51 PM
#157
Registered User
iTrader: (2)

Join Date: Jul 2006
Location: Dallas, TX
Posts: 1,324
Likes: 0
Received 0 Likes
on
0 Posts
very nice.
I always wanted to put my subs there.
props for doing it in an apartment. when you have all the space and tools it's one thing trying to do a good install.
But when you're cramped for space, lighting, and limited by location, and STILL kick out a very good install done properly...
dude you deserve some cake when this is all done.
03-15-2008, 06:16 PM
#159
 03-15-2008, 07:37 PM
#160
Registered User
iTrader: (11)
Join Date: Apr 2006
Location: SF South Bay area
Posts: 1,145
Likes: 0
Received 0 Likes
on
0 Posts
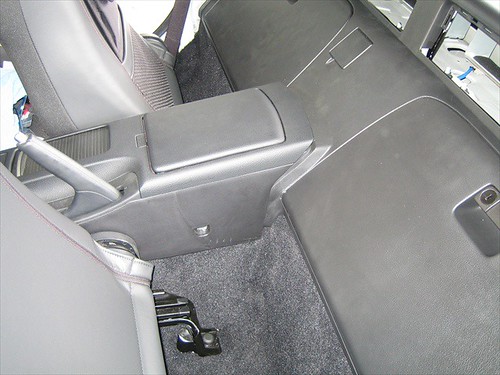
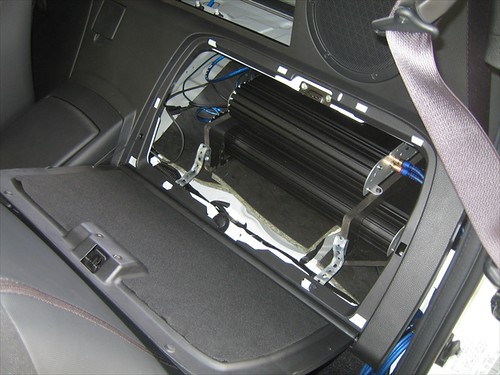
Looking good! Are you using an 8" or 10" sub?
I would be tempted to use a box like that because I have a suitcase that fits under the strut bar nice and snugly. It slides all the way up and i can still use my net and get to my spare. It's great for weekend trips and it does not slide around at all in the corners.
I need a sub box that's out of the way like that...