How to mold the Nazar Pods to the door...
 03-26-2007, 03:09 PM
#21
Registered User
iTrader: (16)

Join Date: Nov 2005
Location: nashville
Posts: 437
Likes: 0
Received 0 Likes
on
0 Posts
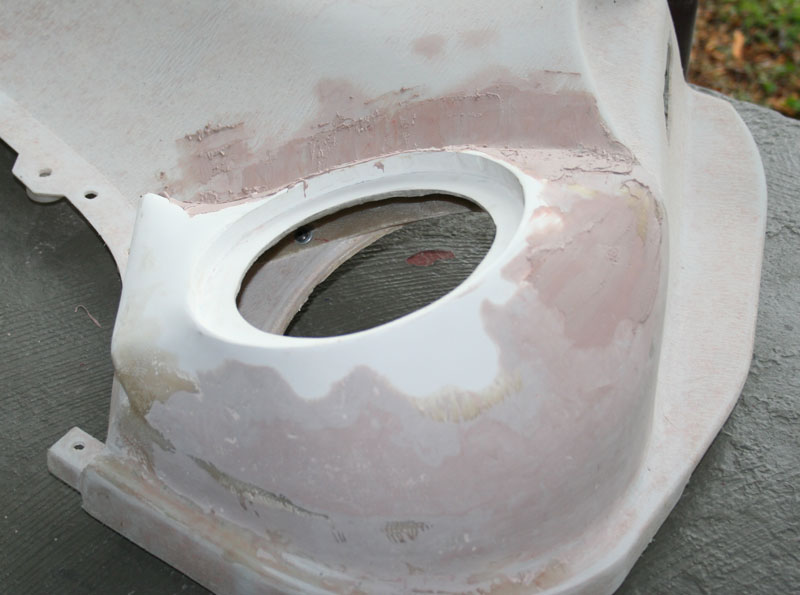
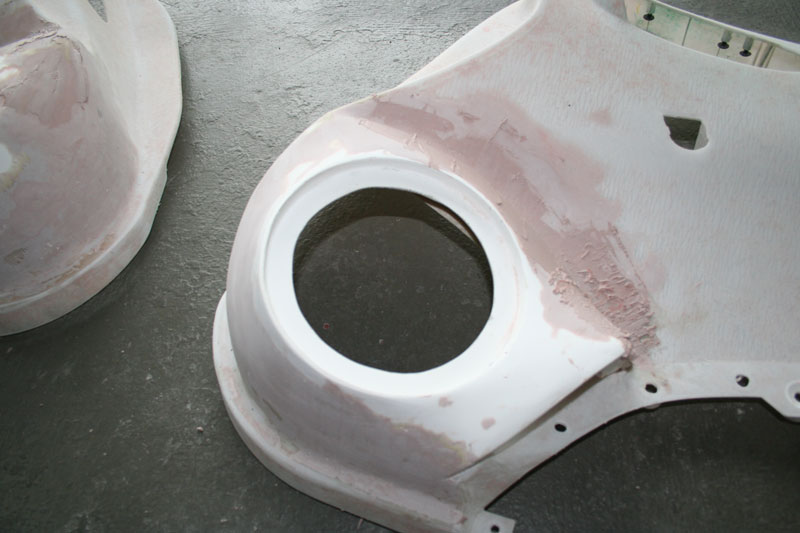
I'm at the bondo stage on one door and not even started on the other. So I'm about to peel the other door panel off and strap the pod on and rip the vinyl off. I bought some putty/glaze to fill all the pin holes and I also bought the gallon body filler. I'm actually just now starting to work on it, I've been asking questions while hanging out at work. Thanks for all the help. I'm sure ill have more questions!
 03-27-2007, 04:02 AM
#22
Registered User
Thread Starter
iTrader: (2)

Join Date: Aug 2004
Location: Bronx N.Y.
Posts: 1,055
Likes: 0
Received 0 Likes
on
0 Posts
hey man....no problem...ummm...I did both doors one after the other...meaning...once i finished one stage like fiberglassing...I then went to the other door and fiberglassed it while the other was drying...this was so that the both came out pretty much equal, but the doors are so far apart...lol...nobody could see if they were different anyway...keep up the good work man...
03-27-2007, 07:24 AM
#24
Registered User
Thread Starter
iTrader: (2)
Join Date: Aug 2004
Location: Bronx N.Y.
Posts: 1,055
Likes: 0
Received 0 Likes
on
0 Posts
lol...no...not just sanding...what i did was...sand it till it was pretty scuffed up, then I used a very very thin layer of body filler to get rid of the little hexagons, and then primer...a couple coats, and some more wet sanding, and primer, and paint...
see people always ask me how I afford to do all the stuff i did to my car, and they don't understand that I don't GET it done.... I do it myself...I just read for a couple weeks...test on something that has no value, and then dive in. THAT IS HOW YOU SAVE MONEY.
see people always ask me how I afford to do all the stuff i did to my car, and they don't understand that I don't GET it done.... I do it myself...I just read for a couple weeks...test on something that has no value, and then dive in. THAT IS HOW YOU SAVE MONEY.
03-27-2007, 08:21 AM
#25
Registered User
iTrader: (16)
Join Date: Nov 2005
Location: nashville
Posts: 437
Likes: 0
Received 0 Likes
on
0 Posts
Well I feel like I can do everything just fine up until paint. I'll leave that to someone who has the gear and the knowledge to do it right. I think having a pro do it will end up with it being more durable. Lots of coats of clear!
03-27-2007, 10:17 AM
#27
Registered User
iTrader: (16)
Join Date: Nov 2005
Location: nashville
Posts: 437
Likes: 0
Received 0 Likes
on
0 Posts
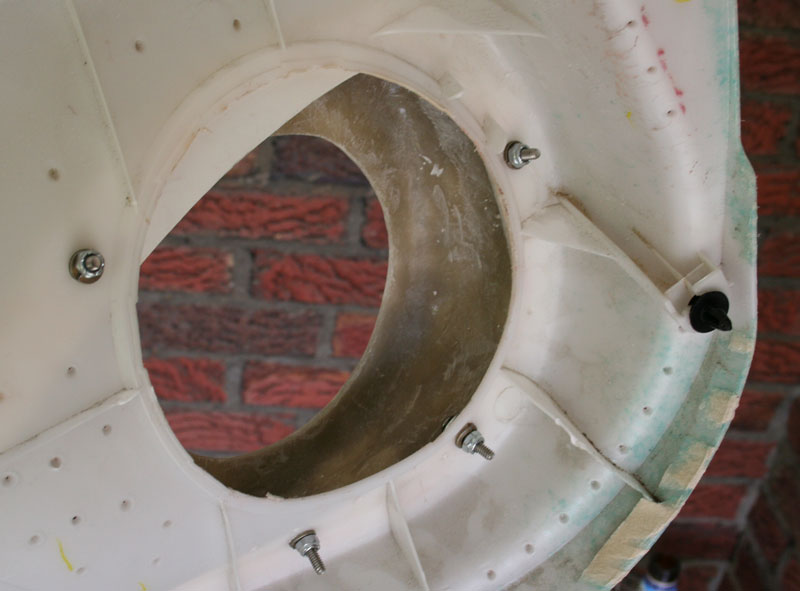
yeah I'd easily be $600-$700 in the hole right now if wasnt doing this part myself. When you put the bottom portion of the door back on did you just use the two screws toward the front of the assembly? I was thing of using a self tapping screw and some big washers to thread into the black plastic of the lower door assembly where you have to dremel to get them apart!?
03-27-2007, 10:22 AM
#28
Registered User
Thread Starter
iTrader: (2)
Join Date: Aug 2004
Location: Bronx N.Y.
Posts: 1,055
Likes: 0
Received 0 Likes
on
0 Posts
lol...umm to be honest you can do anything with that part...I put the stock screw where they belonged, and I used epoxy for the other holes. I wasn't to worried about that part too much now that you mention it...but i'm going to go back and check it...also...you may want to use Raamat or Dynamat extreme on the door itself, becuase now the speakers are mounted to the door cover, and not the metal door. just a thought...I'm going to add the Raamat, and the Ensolite...just one simple layer should do the trick...you know? ...damn you're moving fast man...show me some pics man...WTF 
03-27-2007, 10:27 AM
#29
Registered User
iTrader: (16)
Join Date: Nov 2005
Location: nashville
Posts: 437
Likes: 0
Received 0 Likes
on
0 Posts
I'm not ready to reassemble yet...just like to think ahead. I just finished fiberglassing the passenger panel. I have some fatmat on the way right now to do the doors/floor pan, rear wheel wells. I also ordered an Alpine mrpf250 to power my type r's along with a wiring kit. I'll snap some pics...I can't upload them yet cause my woman lost the usb cord to our $800 badass camera. She brainfarted.
03-27-2007, 10:43 AM
#30
Registered User
Thread Starter
iTrader: (2)
Join Date: Aug 2004
Location: Bronx N.Y.
Posts: 1,055
Likes: 0
Received 0 Likes
on
0 Posts
lol...niiiiiiiiiice..........this feels like a private thread since it's only us doing this modification. lol...atleast it will be pretty unique.


 03-28-2007, 05:19 AM
#34
Registered User
iTrader: (16)
Join Date: Nov 2005
Location: nashville
Posts: 437
Likes: 0
Received 0 Likes
on
0 Posts
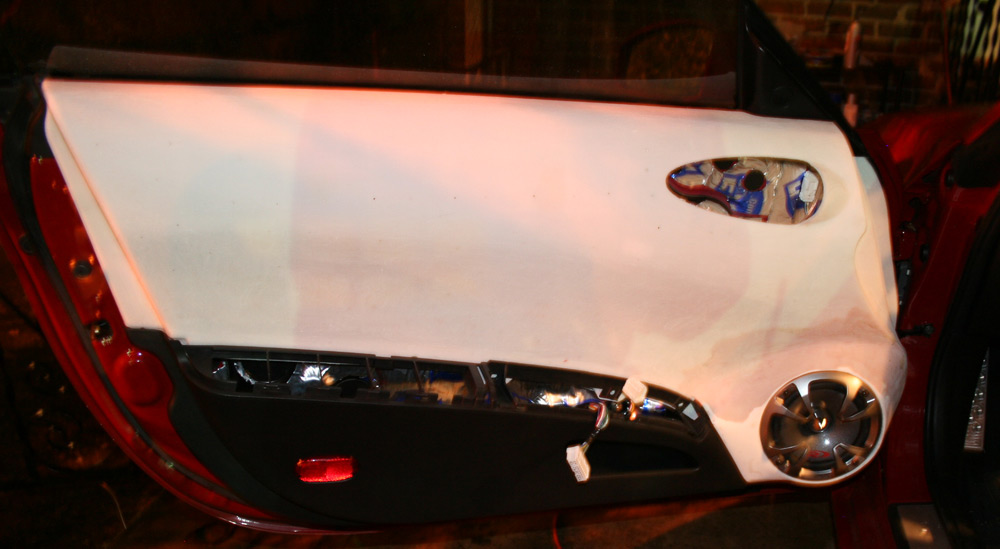
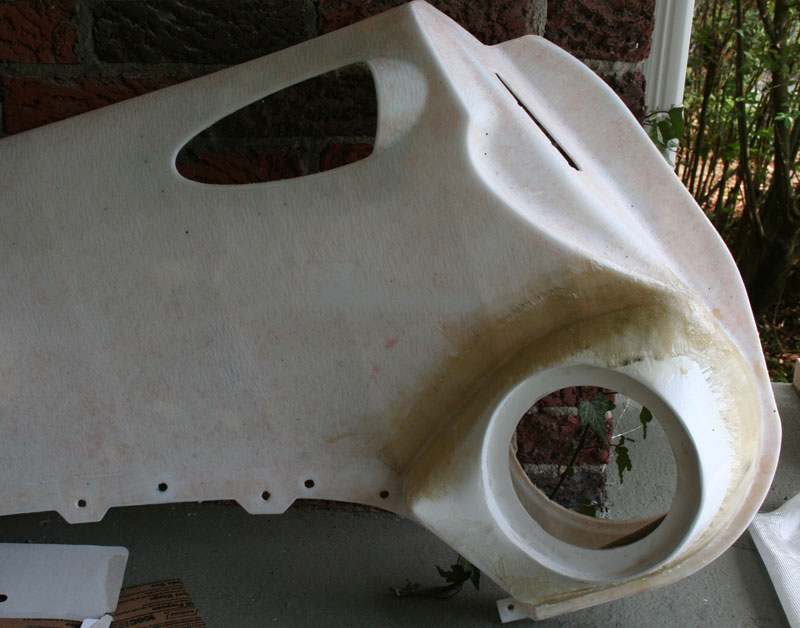
I'm trying to determine what to do with the door texture. I'm thinking I'm going to let the primer take care of it after a little more sanding. My worst nightmare is having it look wavy. I was going to bondo the whole thing but after using the stuff I think it'll look worse. I'm going to end up doing a thousand coats of bondo on the pods before I finish. What do you think?

 04-03-2007, 11:23 AM
#36
Registered User
Thread Starter
iTrader: (2)
Join Date: Aug 2004
Location: Bronx N.Y.
Posts: 1,055
Likes: 0
Received 0 Likes
on
0 Posts
lol...cute pooch....so what stage are you at now....by now you should be able to see your door shaping up, and looking pretty damn good right?
04-03-2007, 05:33 PM
#37
CF God

iTrader: (67)
Join Date: May 2004
Location: NJ
Posts: 1,578
Likes: 0
Received 0 Likes
on
0 Posts
hey POTTER, a real man would wrap them in CF...and throw a tv in there...heres mine before and after the cf. i put a 6 1/2" speaker, 5 1/4" speaker, and a 7" tv in my doors...whatcha think?