DIY: Rear Strutbar Cover Removal & Paint


Great write up, thanks!
Sub'd!
worth it indeed, that looks awesome! 
Killer. I love it
That's a really cool look- how difficult was the wrap to work with?
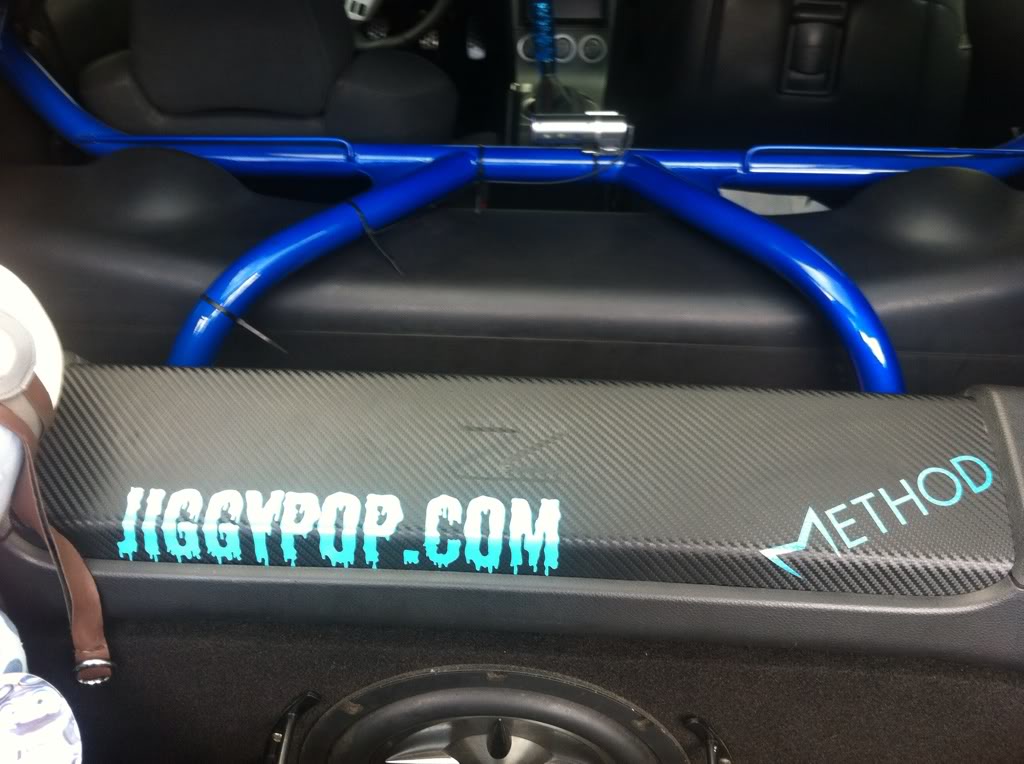
What cage setup is that?
Sub'd!
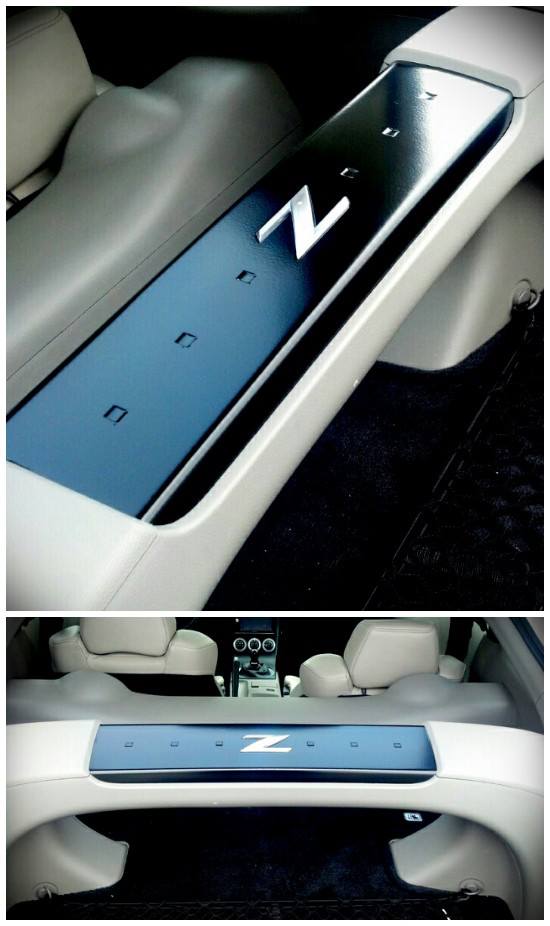
I did mine a few weeks ago when I painted some of my interior trim. The previous owners of my Z didn't care about scraping the strut bar, because that thing looked awful. The chrome plating on the Z in the center of the strut bar was wrinkling a bit too, so I figured I should do something about it. In the pics the bar looks white, but it's silver. It actually isn't as reflective as the stock silver that was on the strut bar either, which I like.


That's a really cool look- how difficult was the wrap to work with?


What cage setup is that?


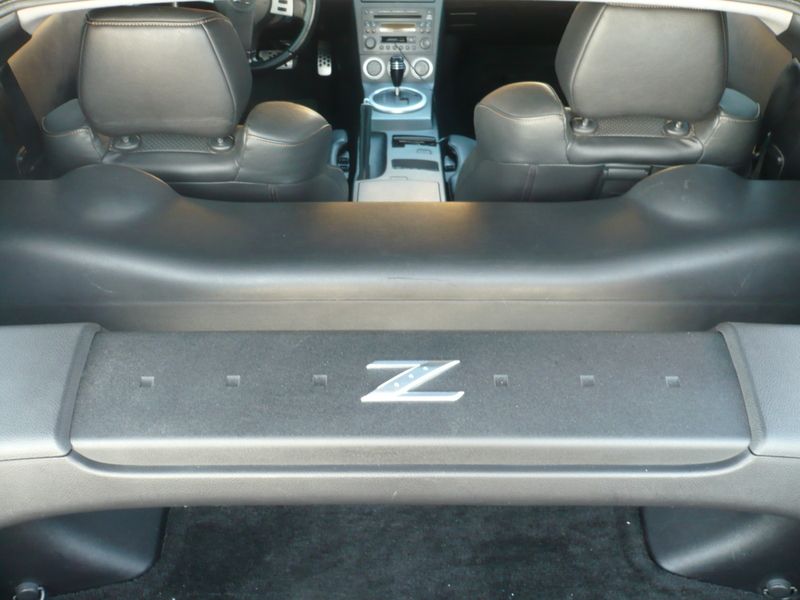
I did mine with something a little different. I used spray on bedliner. You guys will probably flame me for that but I think it looks really good. The texture is pretty subtle and matches the other interior plastics a bit better than gloss paint in my opinion. My pics aren't the greatest but here it is.


Registered User
Joined: Aug 2013
Posts: 91
Likes: 0
From: NC, USA
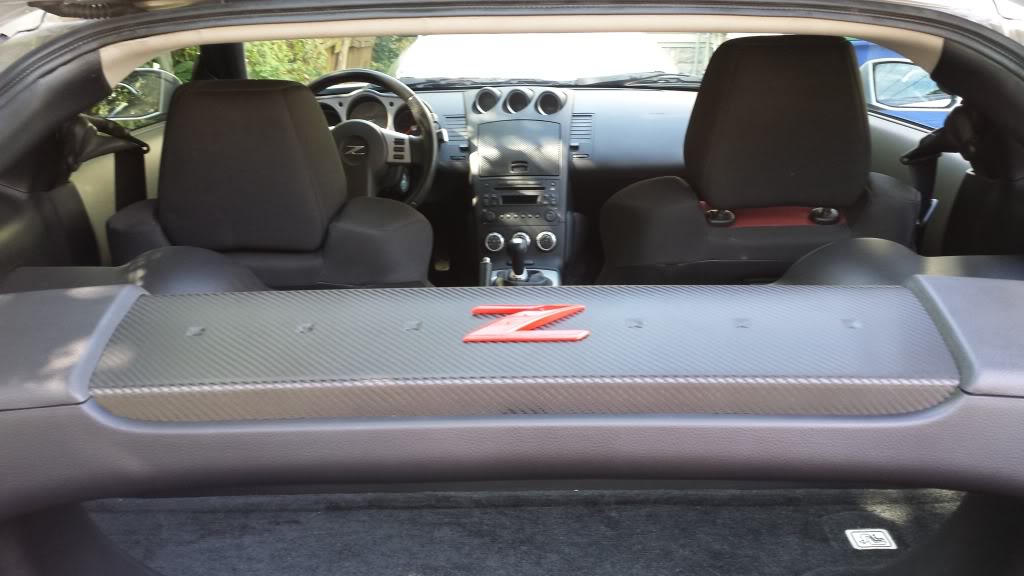
heres how i did mine, also going with the black/red scheme. i did a couple pieces under the hood but idk how i feel about it. lemme know what you guys think.


what its in incase anyone was wondering what the rest of the scheme looks like lol

what its in incase anyone was wondering what the rest of the scheme looks like lol

I did mine with something a little different. I used spray on bedliner. You guys will probably flame me for that but I think it looks really good. The texture is pretty subtle and matches the other interior plastics a bit better than gloss paint in my opinion. My pics aren't the greatest but here it is.

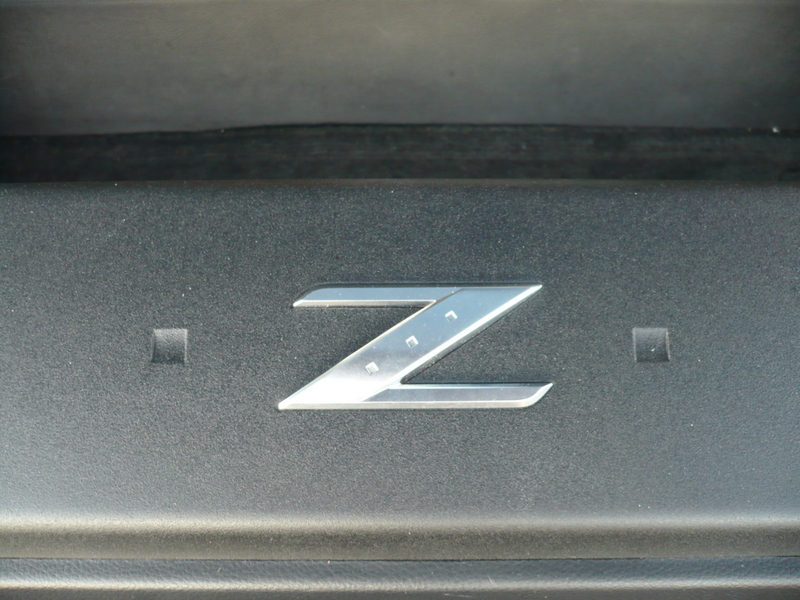
The emblem is actually covered with a thin metal coating. Too tough to sand off, but if you're careful you can chip/peel it away with a sharp blade. If you manage to do that without beating up the plastic underneath, you can repaint it as you please. I used a VW silver touch-up spay paint, which is fairly close to the original color and luster. Spray on maybe 6 or 8 thin coats and wet-sand it to get a smooth, glossy finish.
If you give a sharp tug backwards on the shifter surround panel, it will come loose from the center console. Then you can use vise grips, if needed, to hold the shift lever from twisting and unscrew the shift ****. Next, there is a ribbon cable connecting the A/C controls you need to unlip, and once that's done you can pull the shifter surround panel free. The A/C controls are held in place by a few screws, as is the metal trim around the shift boot.

Registered User
Joined: Apr 2012
Posts: 9
Likes: 0
From: Jacksonville, fl
What did you use to paint it under the hood? any specific paint?