DIY: Lower Control Arm and Radius Arm Removal/Install
#1
Banned
Thread Starter
iTrader: (6)
Join Date: Oct 2011
Location: South El Monte
Posts: 490
Likes: 0
Received 0 Likes
on
0 Posts
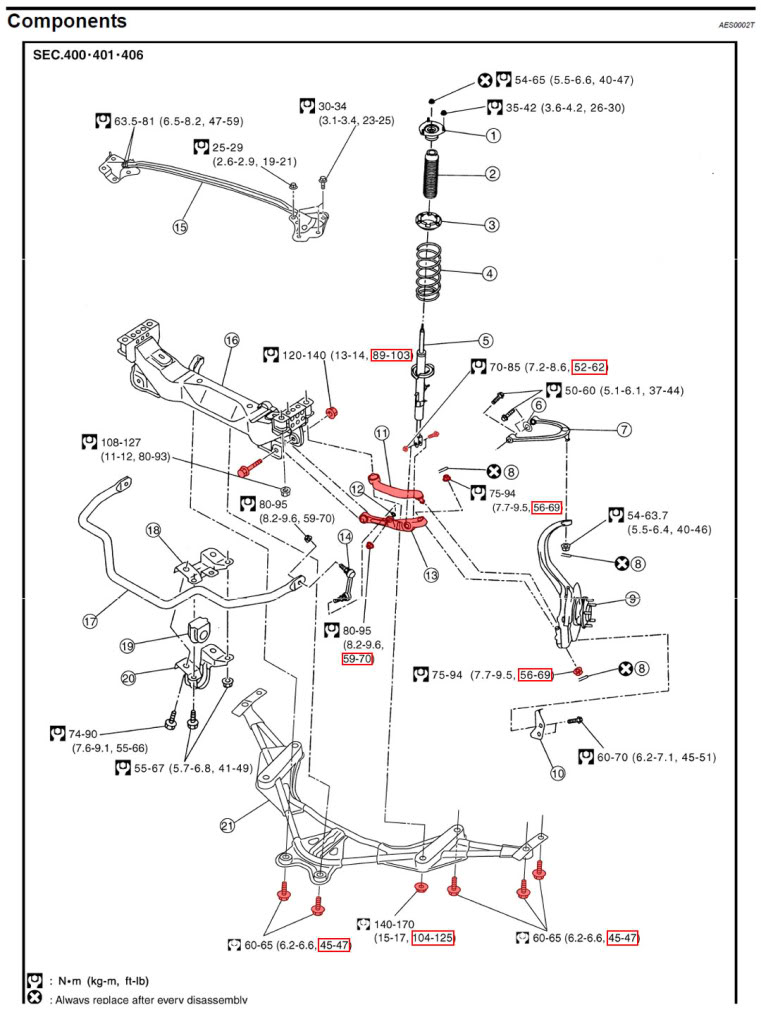
For anyone interested in swapping out their Front Suspension Bushings, below are the instructions for removing and reinstalling the Lower Control Arm [Transverse link] and the Radius Arm [Compression Rod].
LOWER CONTROL ARM [TRANSVERSE LINK]
REMOVAL
1. Remove tire
2. Remove undercover
3. Remove mounting nut and washer on lower portion of swaybar endlink
4. Remove mounting nut between transverse link and shock absorber on lower position.
5. Remove mounting nut between transverse link and steering knuckle
6. Remove transverse link from steering knuckle
7. Remove transverse link from vehicle.
INSTALL
1. Reverse of above
2. Tighten all nuts / bolts to specified torque
RADIUS ARM [COMPRESSION ROD]
REMOVAL
1. Remove tire
2. Remove undercover
3. Remove front cross bar from vehicle
4. Remove cotter pin of compression rod ball joint, and loosen nut.
5. Use a ball joint remover (suitable tool) to remove compression rod from steering knuckle. Be careful not to damage ball joint boot.
CAUTION:
Tighten temporarily mounting nut to prevent damage to threads and to prevent ball joint remover (suitable tool) from coming off.
6. Remove compression rod from vehicle.
INSTALL
1. Reverse of above
2. Tighten all nuts / bolts to specified torque

Thread
Thread Starter
Forum
Replies
Last Post
Lt_Ballzacki
Brakes & Suspension
39
08-06-2021 06:19 AM
ars88
Zs & Gs For Sale
18
04-04-2016 07:52 AM
350Z Project X
Suspension
9
10-10-2015 09:23 AM


