
How to Install: JWT Pop Charger. (Noob Proof Version) w/Pics


Okay..so yesterday I got my JWT pop charger in mail. I wasn't doing anything in the eve, so I thought why not install the pop charger. It came with decent instruction and good pics. I usually takes pics of ANY install I do. It's about 4 am and I can't sleep. So, I thought why not make a thread. You can disconnect the negative (-) side of the battery NOW and start your installation or if you wanna listen to radio/CD as you install your pop charger, you can disconnect the neg (-) side AFTER the install.
Pop Charger Installation
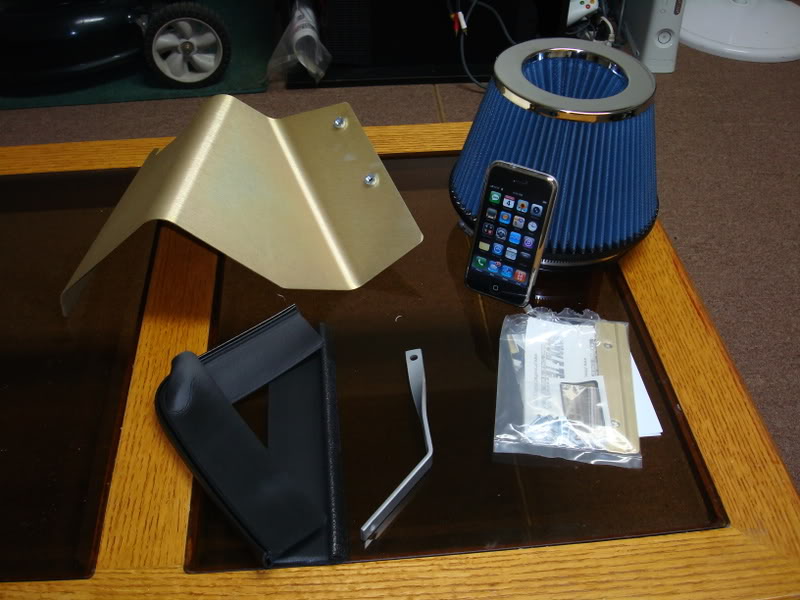
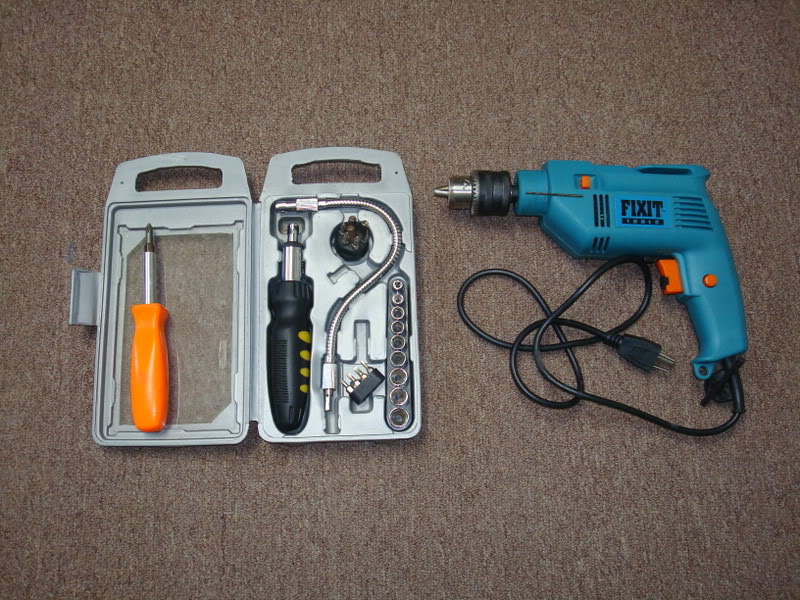
Tools needed:
a. Philips Screwdriver.
b. 10 mm wrench.
c. Drill gun with a very thin drill bit.
d. 1 hour of free time.
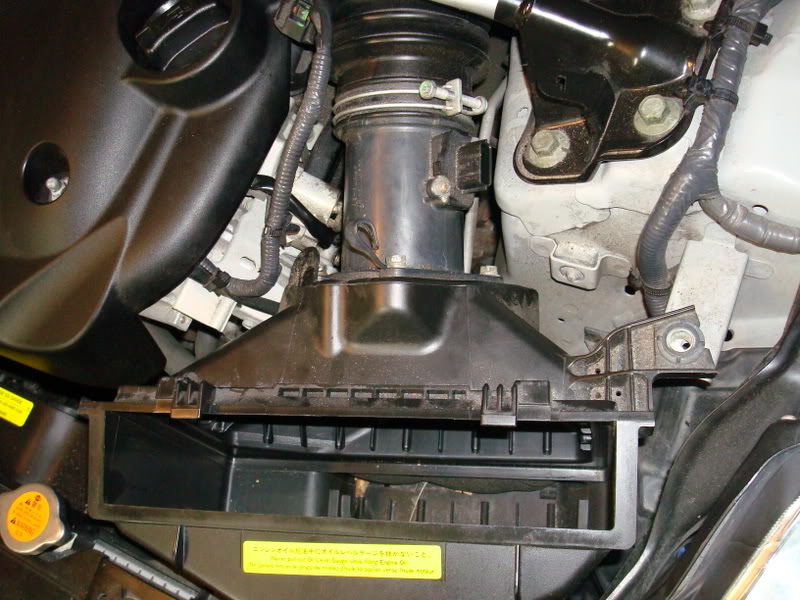
Step 1: Take old filter out.
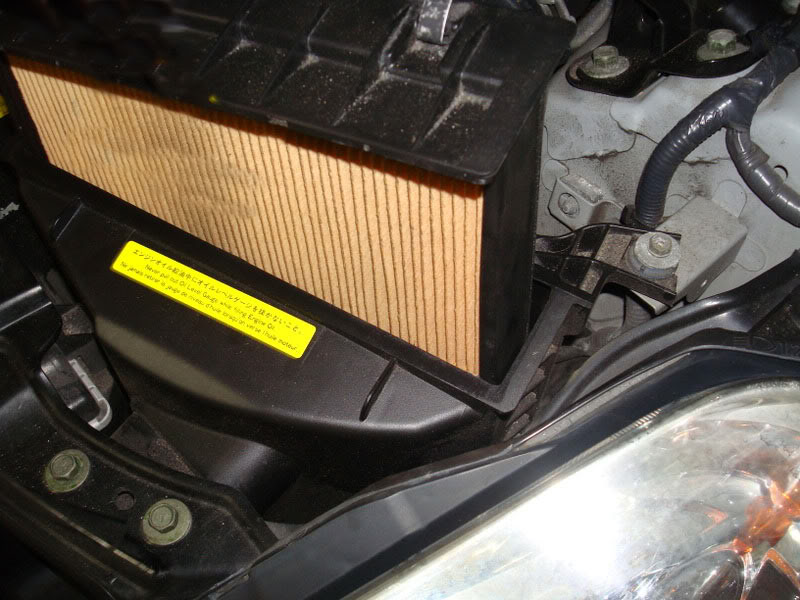
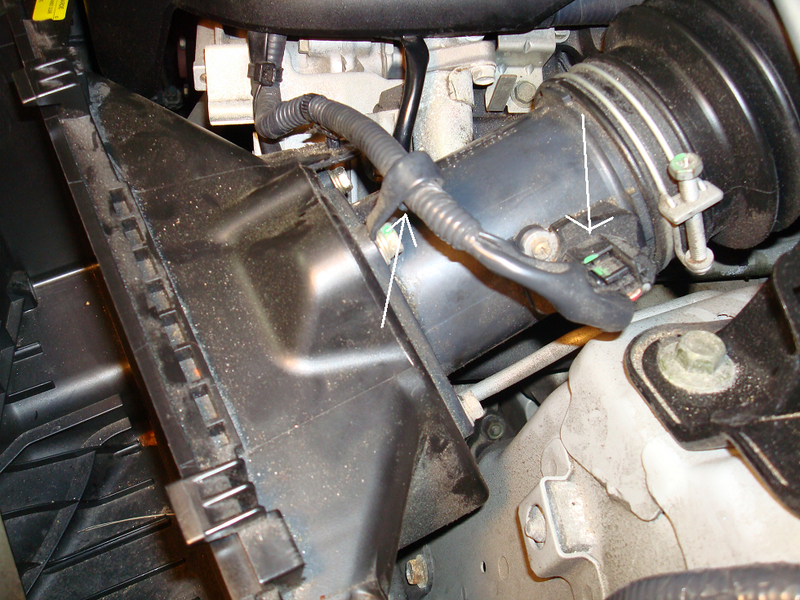
Step 2: Loosen the clip that's holding the MAF wire
Step 3: Un-plug MAF wire and take out the MAF wire loom from the bend
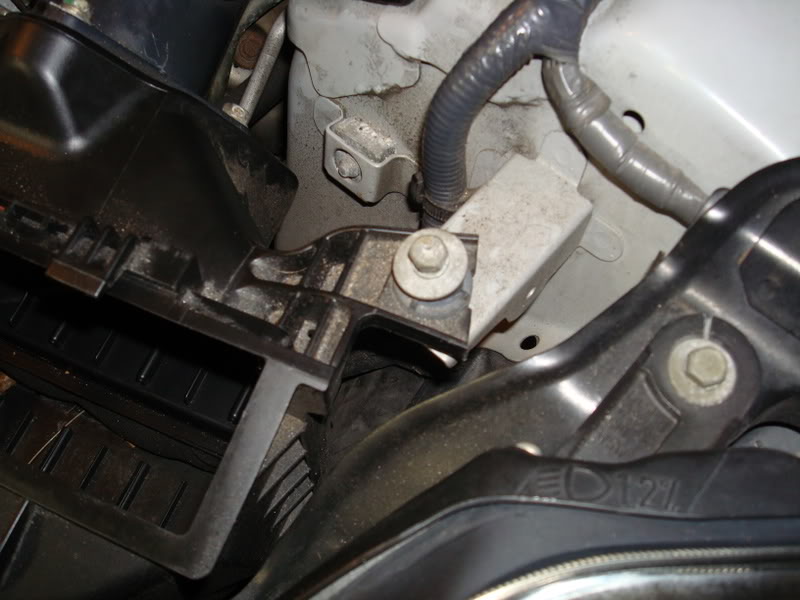
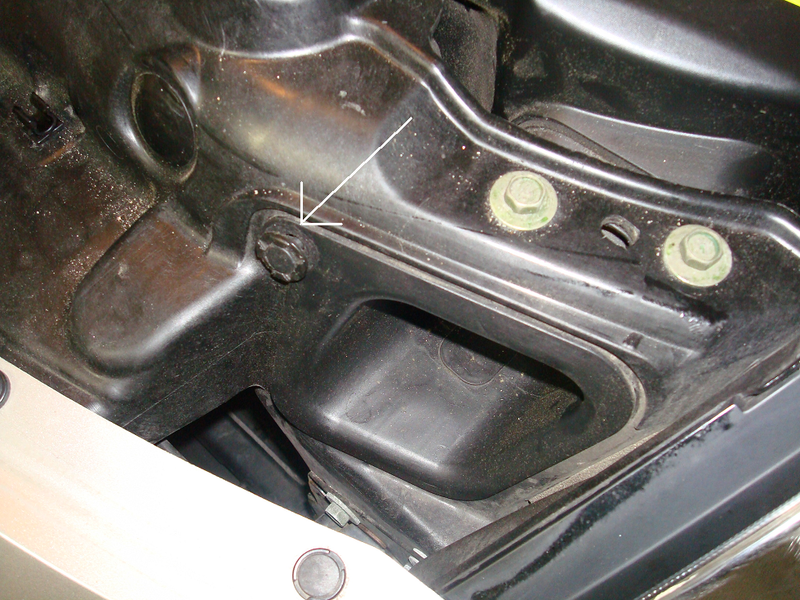
Step 4: Take out the bolt that's holding the Air box.
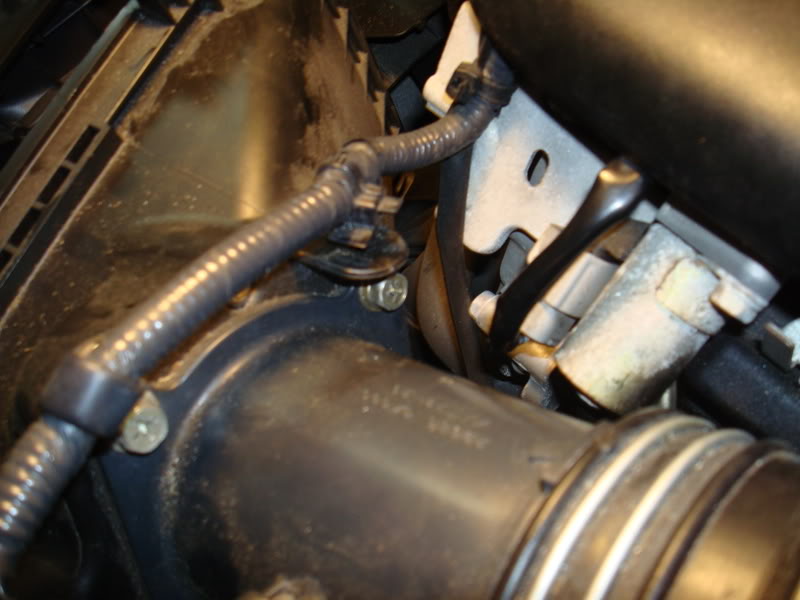
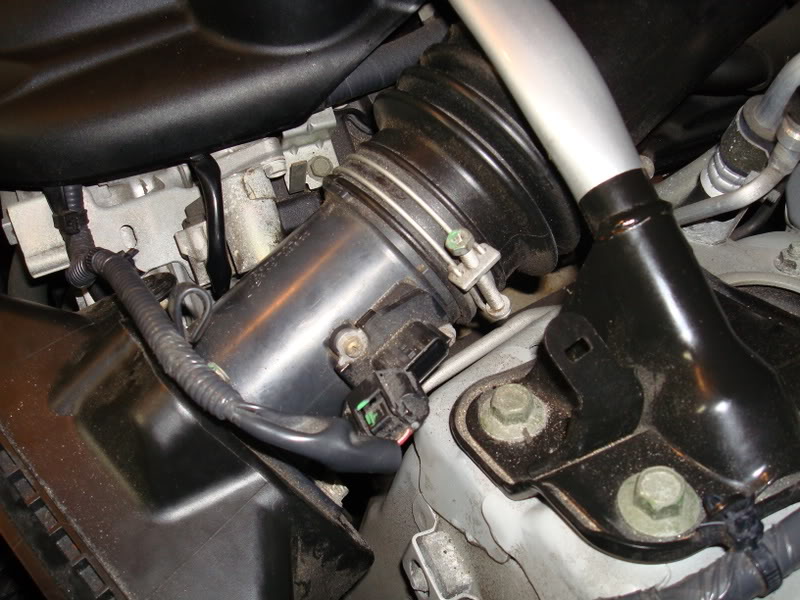
Step 5: Loosen the bolt that's holding the MAF tube.

Step 6: Loosen this clip and take it out. Now you can move the air duct.
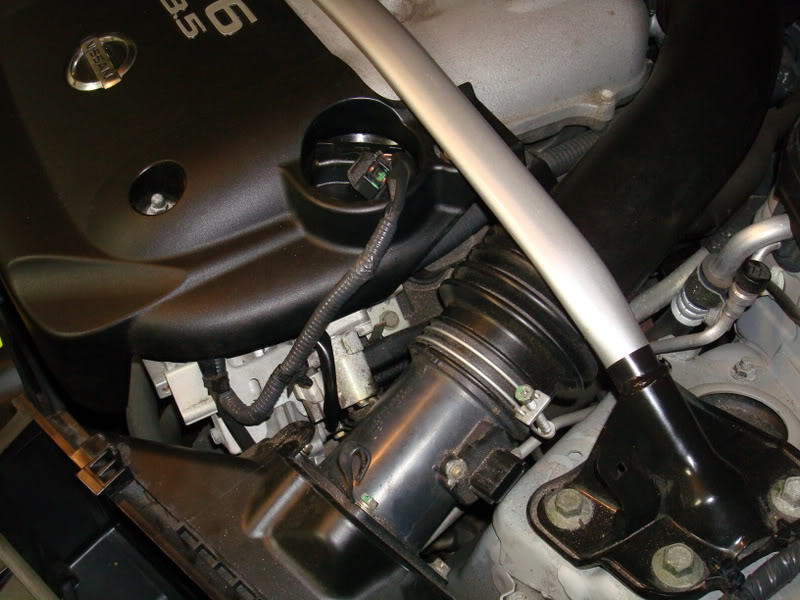
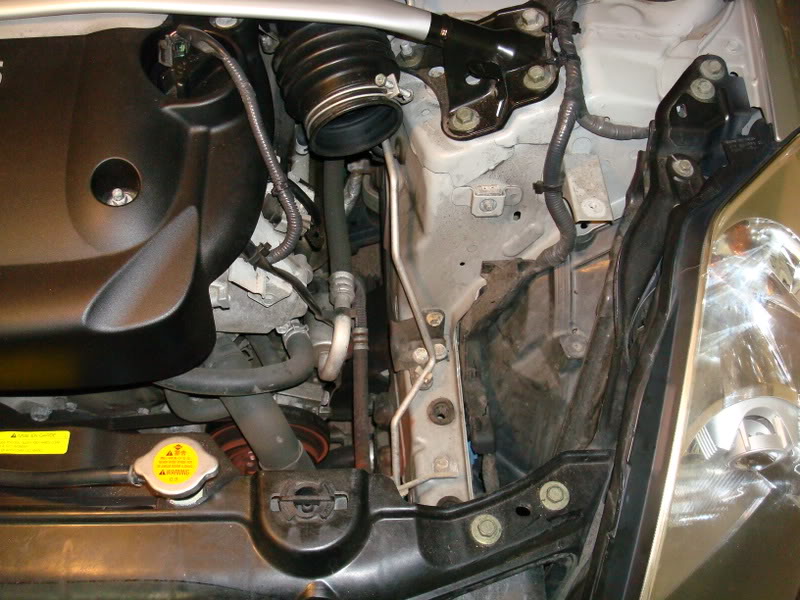
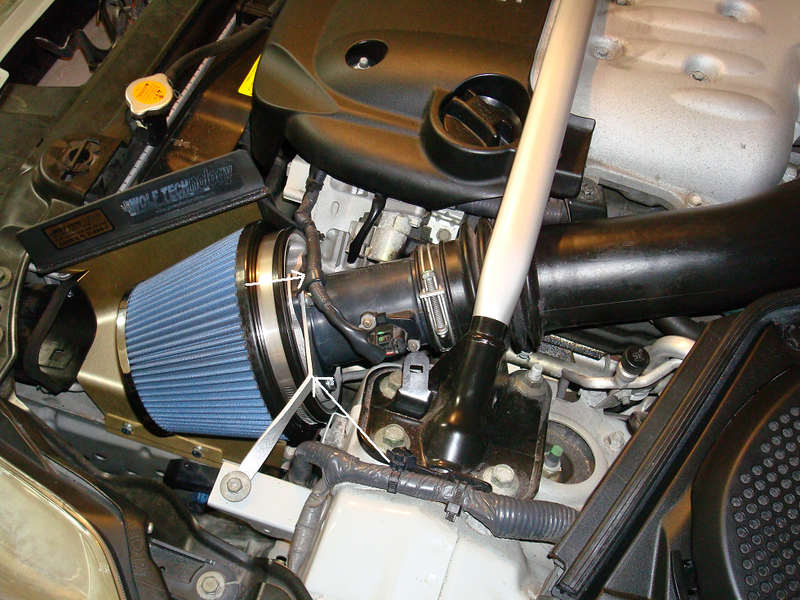
Step 7: PULL the whole airbox unit out upward. Nothing else is holding the box. Also, it's easier to unplug the MAF side first, then slide upward.
Tada!
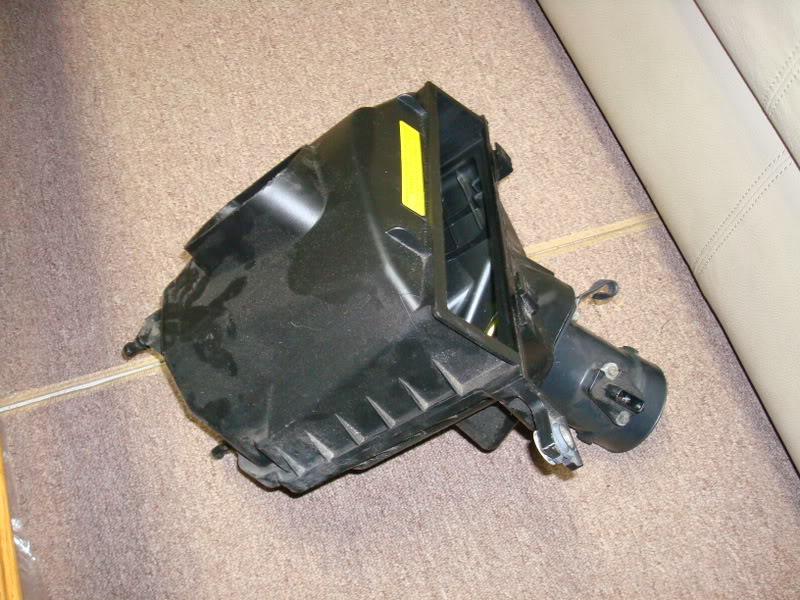
Step 8: Take out these 4 bolts to un-attach the MAF tube from the Air box.
Step 9: Attach the MAF tube to the new air filter. Even though the filter comes pretty tight from the factory but there were instances that it was loose. So, feel free to tighten up that clamp around the cone filter a little more with a flat head screw driver.

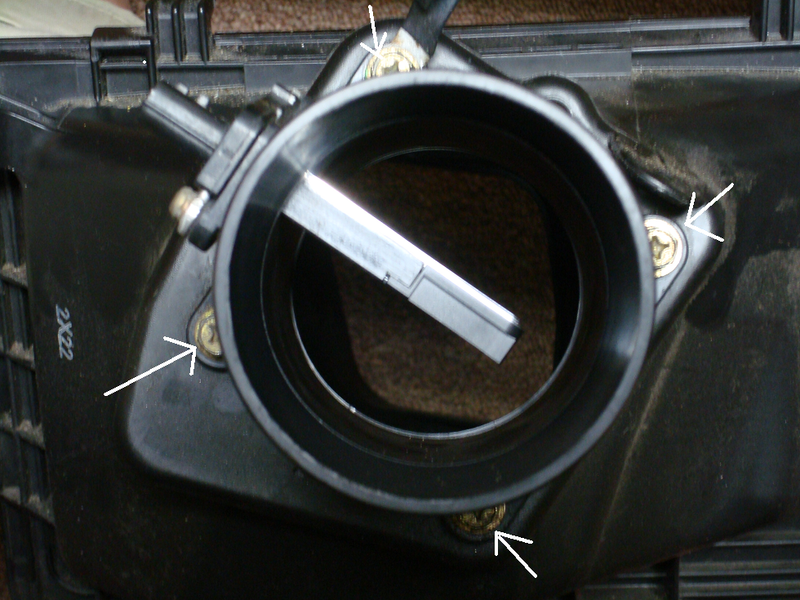
Step 10: Attach rubber guard on the heat shield.
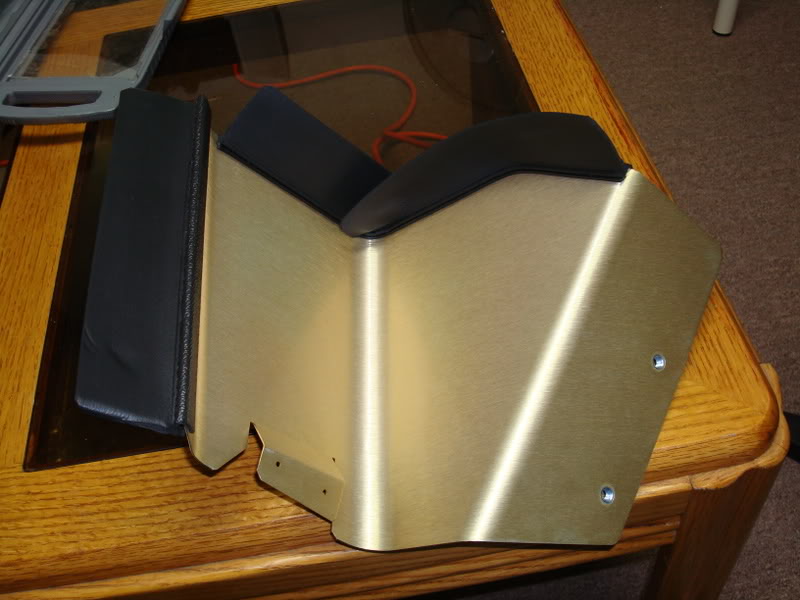
Step 11: Line up the heat shield and make a small hole on the black plastic to attach heat shield. I only used 1 screw since it's a PITA to do.
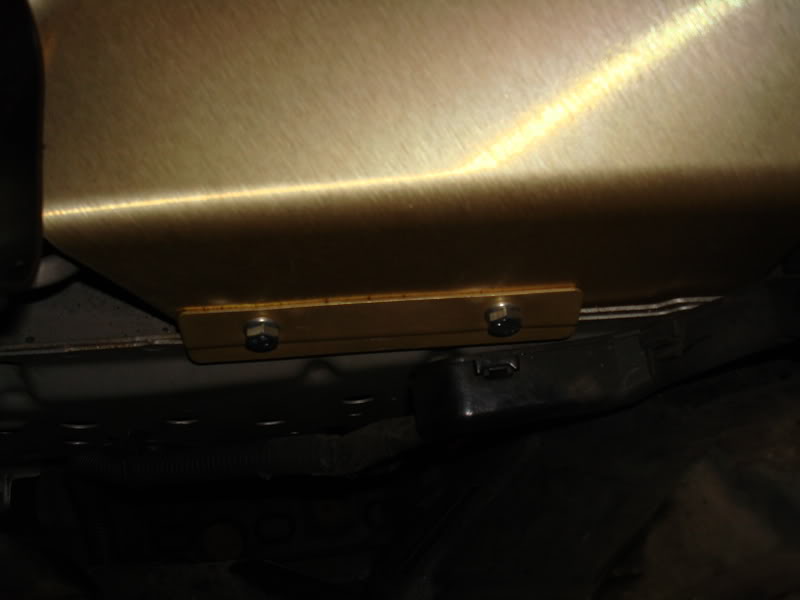
Step 12: Attach the bottom screws so that the heat shield stays secure.
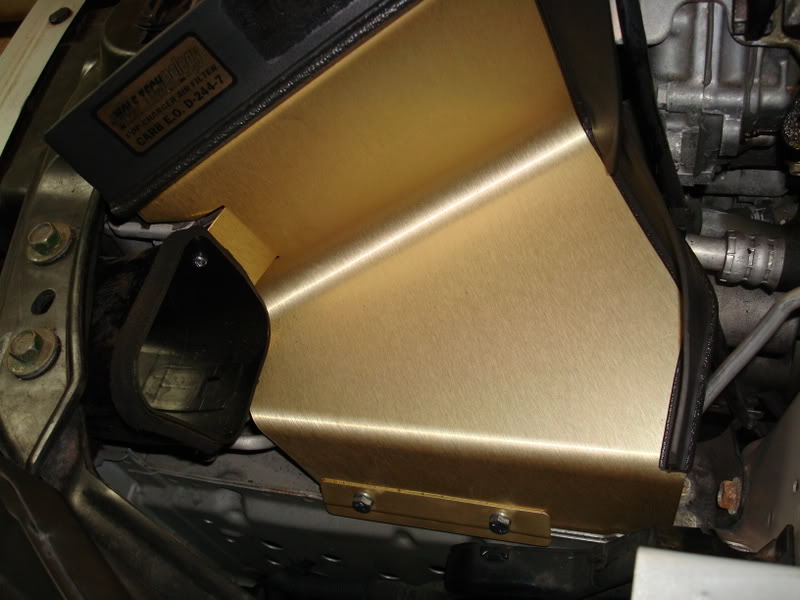
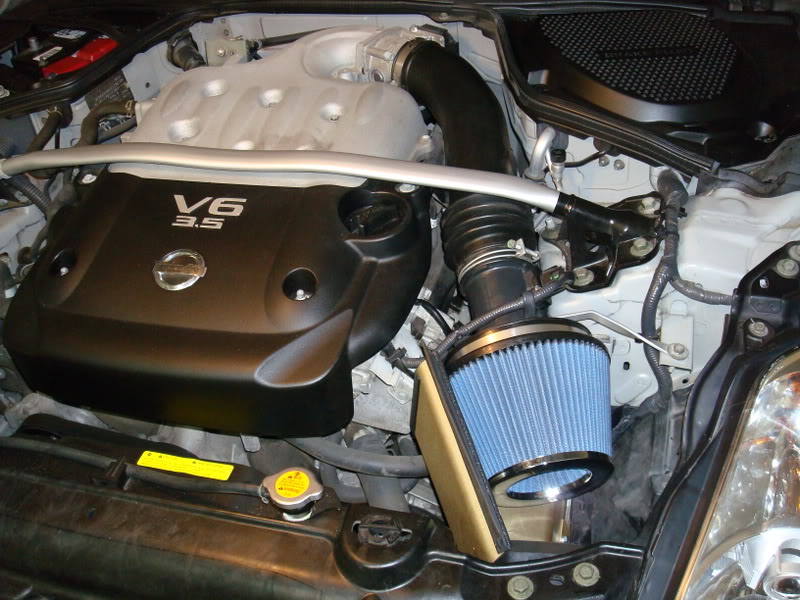
Step 13: Attach the new filter to your car. Unbolt the top screw and add the wire loom holder and filter holder in place. Tighten the MAF tube holder WELL.
Step 14: BAM! You're all done.
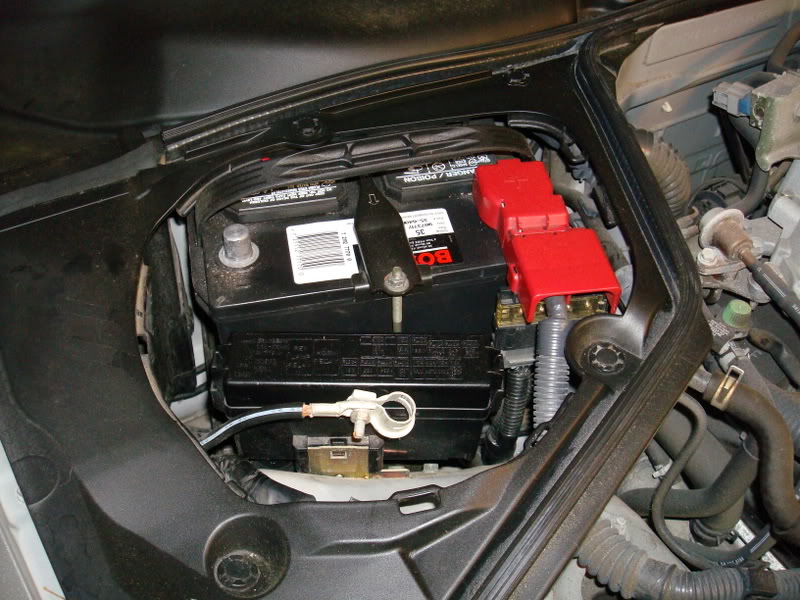
Step 15: Unplug the (-) terminal of your bettery. Keep it unplugged for like 30 mins (this will reset the ECU). If you're not gonna drive for the day, just unplug it (negative terminal) and plug it in the next day.
Here's the VID of idle + revving (up to 5K RPM)
Please click on the lower right corner "watch in High Quality", if you want to watch better quality

Pop Charger Installation
Tools needed:
a. Philips Screwdriver.
b. 10 mm wrench.
c. Drill gun with a very thin drill bit.
d. 1 hour of free time.
Step 1: Take old filter out.
Step 2: Loosen the clip that's holding the MAF wire
Step 3: Un-plug MAF wire and take out the MAF wire loom from the bend
Step 4: Take out the bolt that's holding the Air box.
Step 5: Loosen the bolt that's holding the MAF tube.
Step 6: Loosen this clip and take it out. Now you can move the air duct.
Step 7: PULL the whole airbox unit out upward. Nothing else is holding the box. Also, it's easier to unplug the MAF side first, then slide upward.
Tada!
Step 8: Take out these 4 bolts to un-attach the MAF tube from the Air box.
Step 9: Attach the MAF tube to the new air filter. Even though the filter comes pretty tight from the factory but there were instances that it was loose. So, feel free to tighten up that clamp around the cone filter a little more with a flat head screw driver.
Step 10: Attach rubber guard on the heat shield.
Step 11: Line up the heat shield and make a small hole on the black plastic to attach heat shield. I only used 1 screw since it's a PITA to do.
Step 12: Attach the bottom screws so that the heat shield stays secure.
Step 13: Attach the new filter to your car. Unbolt the top screw and add the wire loom holder and filter holder in place. Tighten the MAF tube holder WELL.
Step 14: BAM! You're all done.
Step 15: Unplug the (-) terminal of your bettery. Keep it unplugged for like 30 mins (this will reset the ECU). If you're not gonna drive for the day, just unplug it (negative terminal) and plug it in the next day.
Here's the VID of idle + revving (up to 5K RPM)
Please click on the lower right corner "watch in High Quality", if you want to watch better quality
Last edited by 350Zforlife; Nov 7, 2013 at 10:30 PM.

That's Bullsh!t. How come it's so easy to remove the stock air filter on a 350Z, and it's a PITA on a G35.
Oh nice write up, and great detailed pic's!!!!! Should help a few people out there.
Oh nice write up, and great detailed pic's!!!!! Should help a few people out there.
Last edited by citymunky; Sep 6, 2008 at 08:05 AM.
though the last step of the battery is optional ( i never did it and my car ran perfectly fine) nice write up. this will work with pretty much any short ram intake install as well.

Originally Posted by WhiskeyHotel
Oh by the by - either you have a coffee table in your garage or a lawnmower in your living room. 
 actually I have have a coffee table in the garage. I have tried to fit my Z in there but my car barely fit in there. So, me and my dad decided we are going to make the garage "chill" room. Here's are couple picture of my garage to clear any confusion.
 http://i49.photobucket.com/albums/f2...x/DSC00444.jpg
http://i49.photobucket.com/albums/f2...x/DSC00440.jpg
Originally Posted by 350Zenophile
This is a good DIY, but if you want to advocate disconnecting the battery, you might as well have them do that first so that it will have reset by the time they complete the install.
Originally Posted by Z04
though the last step of the battery is optional ( i never did it and my car ran perfectly fine) nice write up. this will work with pretty much any short ram intake install as well.
Nice write-up....wish this thread was around eons ago when I installed my JWT. I pulled the stock filter box out like a total savage!
Another thing I might add for the noobs:
Tighten up that clamp around the cone filter a little more with a flat head screw driver. I'm not sure what others have experienced but sometimes it doesn't ship too tight, so it'll tend to vibrate off through the years.
Another thing I might add for the noobs:
Tighten up that clamp around the cone filter a little more with a flat head screw driver. I'm not sure what others have experienced but sometimes it doesn't ship too tight, so it'll tend to vibrate off through the years.
Originally Posted by 35oZephyR
Another thing I might add for the noobs:
Tighten up that clamp around the cone filter a little more with a flat head screw driver. I'm not sure what others have experienced but sometimes it doesn't ship too tight, so it'll tend to vibrate off through the years.
Tighten up that clamp around the cone filter a little more with a flat head screw driver. I'm not sure what others have experienced but sometimes it doesn't ship too tight, so it'll tend to vibrate off through the years.
Originally Posted by 35oZephyR
Nice write-up....wish this thread was around eons ago when I installed my JWT. I pulled the stock filter box out like a total savage!

If I had a DIY to look at before install, that's wouldn't have happened.
Trending Topics


Registered User
Joined: Feb 2007
Posts: 148
Likes: 0
From: Lost Vegas
I felt more with the JWT pop charger then the Kinetix v+ plenum.
Instead of drilling the holes in the black plastic induction piece i heated up a little nail and pushed it through like butter.
Looks WAY cleaner too!
Instead of drilling the holes in the black plastic induction piece i heated up a little nail and pushed it through like butter.
Looks WAY cleaner too!
alright so i cleaned the JWT filter after 15k miles with the K&N filter cleaning kit.
The filter came out reddish just like any K&N filter, works great and sound amazing!
Saved me $60 from a brand new filter!
The filter came out reddish just like any K&N filter, works great and sound amazing!
Saved me $60 from a brand new filter!


You're welcome. I must apologize to all if I haven't replied to your pm on time. I barely sign on here since I no longer drive a 350Z. I traded in for a 370Z two months ago. Still if you have a question, feel free to email me montereybluez@live.com
Thank you!
Thank you!

Registered User
Joined: Nov 2008
Posts: 24
Likes: 0
From: Nj
awesome wright up, im gonna do mine later... Question for those who have put on a jwt popcharger, how much horsepower do you feel you got out of it? And do you only get the additional horses at 5000 rpms
I never dyno'ed the car afterward but car felt smoother. It was easier to rev than before and the sound was a lot better.
