
TrackPack's Turbo Fab Thread...


Registered User
Joined: Jan 2005
Posts: 1,176
Likes: 0
From: ATown, GA
fantastic build so far!!
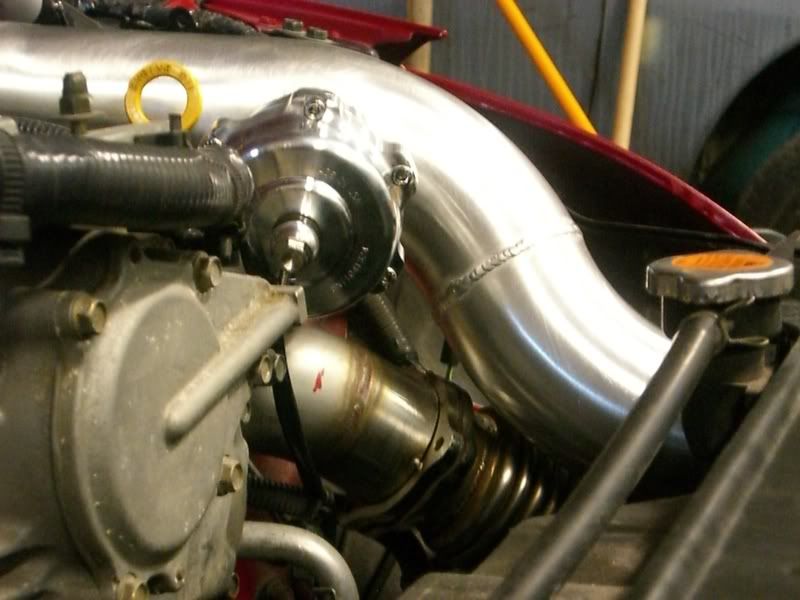
turbo location is great, its not close the the exhaust manifolds and gets encompassed with heat. there is a good location where it will stay cool and operate efficiently.
curious to see how you do the DP. ground clearance might become an issue if your going to route it how I think you might route it.
in for more results

Registered User
Joined: Jan 2005
Posts: 20
Likes: 0
From: Colorado Springs
well I thought about putting it there, but I have a t4 exhaust housing, and it doesn't fit too well. Mdeezy, there is plenty of ground clearance. There are two different ways you could run the dp both ways(that I know of) won't be a problem.

Thread Starter
Registered User
iTrader: (1)
Joined: Nov 2006
Posts: 143
Likes: 0
From: Winnipeg, Mb, Canada
hey guys, I havent updated in a while, dont really have any interesting pics, been kinda lazy lately, I'll try and answer a few questions.
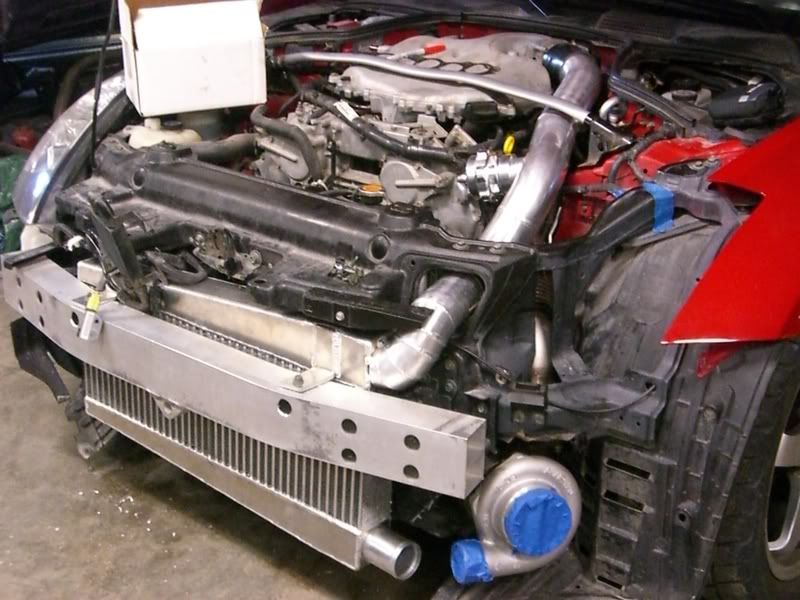
Smawg350- I went with this style cooler because it made the most sense, shortest charge pipes,largest amount of fins in the cooler, I wouldnt build it any other way.
anhkiet- I wouldnt rely on gravity to drain it at that height, I'm useing a turbowerx gear pump mounted between the turbo and the cooler.
thawk408- if it wasnt a "street" build I'd definitely put one on the other side! I think that would be soooo killer!!
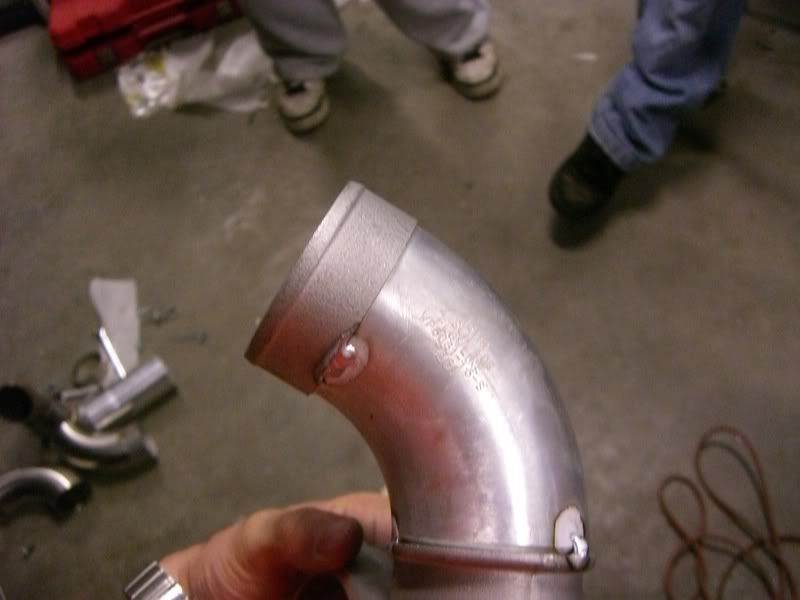
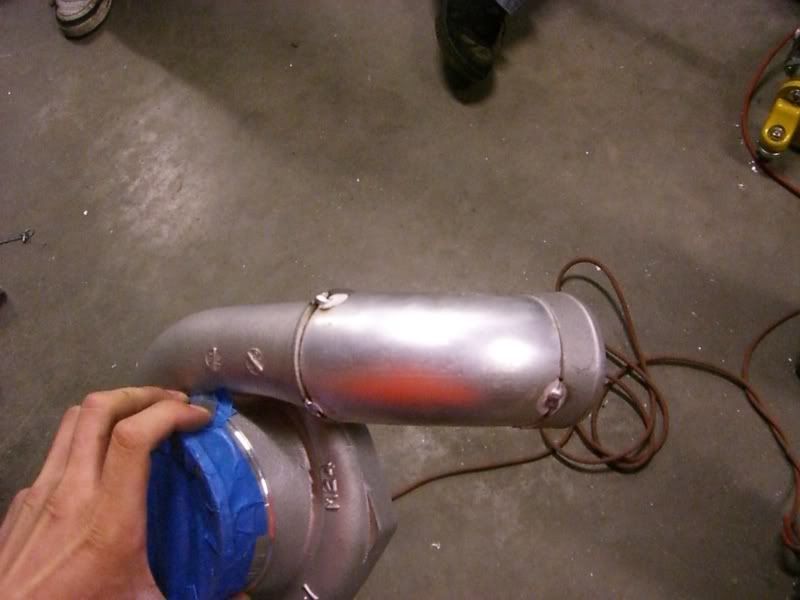
MDeezy- I'll have pics of the down pipe soon, its a 3" through the mount/block hole.
I kindof lost momentum on posting pics after some tool stole money from me here....
And to top it off, a forum sponsor that I was asking haltech questions too decided to stop talking to me around the time this thread came out.......
Very frustrating!
Anyways heres some pics....
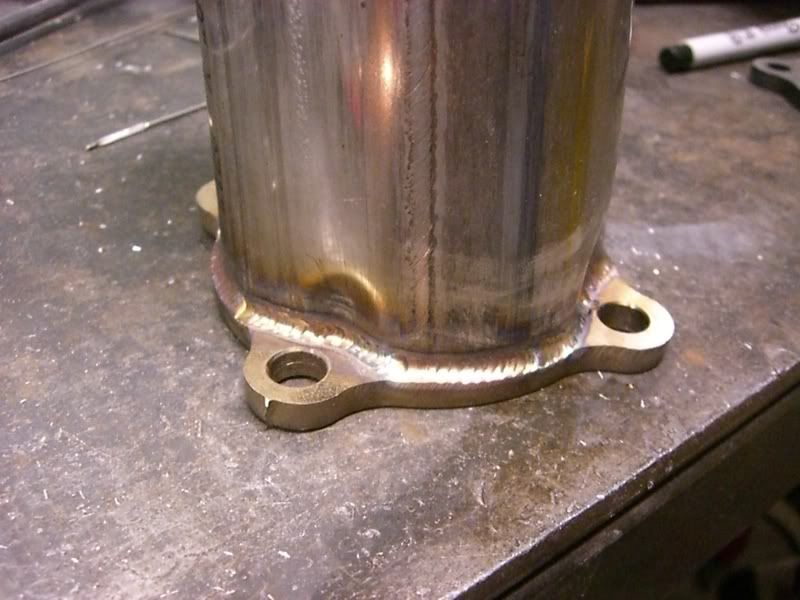
The start of the down pipe.....
Well Thanks for the kind works guy, if you have any questions ask away!
Smawg350- I went with this style cooler because it made the most sense, shortest charge pipes,largest amount of fins in the cooler, I wouldnt build it any other way.
anhkiet- I wouldnt rely on gravity to drain it at that height, I'm useing a turbowerx gear pump mounted between the turbo and the cooler.
thawk408- if it wasnt a "street" build I'd definitely put one on the other side! I think that would be soooo killer!!
MDeezy- I'll have pics of the down pipe soon, its a 3" through the mount/block hole.
I kindof lost momentum on posting pics after some tool stole money from me here....
And to top it off, a forum sponsor that I was asking haltech questions too decided to stop talking to me around the time this thread came out.......
Very frustrating!
Anyways heres some pics....
The start of the down pipe.....
Well Thanks for the kind works guy, if you have any questions ask away!
Originally Posted by TrackPack
And to top it off, a forum sponsor that I was asking haltech questions too decided to stop talking to me around the time this thread came out.......
Very frustrating!
Very frustrating!
Last edited by gothchick; Jul 23, 2008 at 06:11 AM.
Registered User
Joined: Jul 2007
Posts: 3,491
Likes: 0
From: Brantford, Ontario
Awesome ~!~!
You've got quite the pipes running in there, where exactly to the two manifolds come together? I read just before the flex pipe.. But I don’t see anything there.
SO the Drivers manifold goes towards the firewall, the passengers wraps around the back of the engine somewhere and meet in that top right corner then come back together forward and down the wheel well almost..
Interesting.. how does this design compare with lets say TN single turbo design?
Registered User
Joined: Jul 2007
Posts: 3,491
Likes: 0
From: Brantford, Ontario
Originally Posted by chopperman
Is that intake pipe all one pipe? I would imagine that it would be hard to take it off if you needed too.
I like how you retained the front cross beam though it looks like it is welded to the IC - no way to brace behind the IC? Or is it all getting destroyed by a front impact anyway? Is the turbo driven only by exhaust from one bank? (Sorry if I missed a cross over pipe discussion)
Thread Starter
Registered User
iTrader: (1)
Joined: Nov 2006
Posts: 143
Likes: 0
From: Winnipeg, Mb, Canada
Good morning to the few that actually look at this build! its getting closer to being finished but still very far away. starting to hate cars...
A few questions to answer.
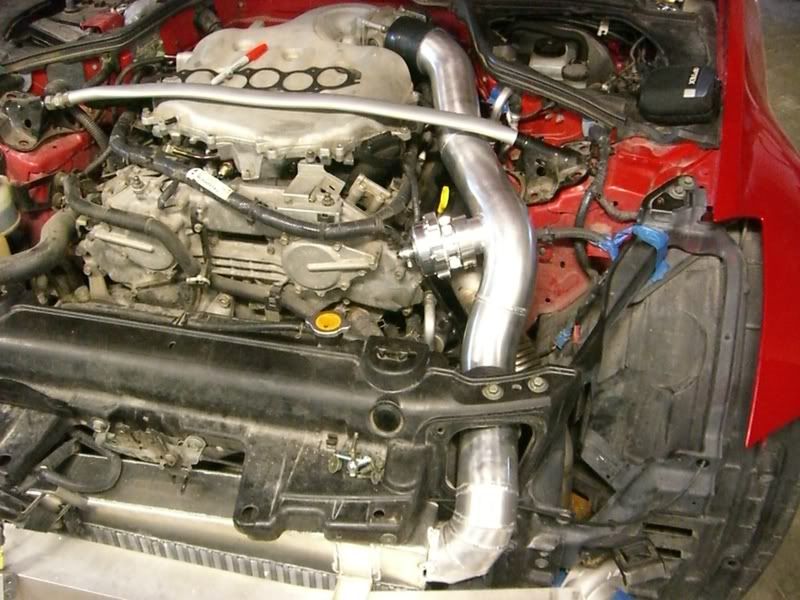
the upper charge pipe is 2 pieces, the coupler is in the rad cradle hole.
There is a cross over pipe and the turbo is driven off both banks, I just dont have pics of that portion yet, still waiting on a flex to finish the cross over.
Ohh and Doba- that is pretty much exactly how the exhaust runs, both banks meet at the shock tower area at a collector one above the other.
as for the turbonetics design, I'm not quite sure how it compares because I have never seen that kit up close(no one where I live has a turbo Z yet...)
But from pics, I honestly think I have the better design tubular manifolds(not stocky's) 3" down pipe(not 2.5) not having to mess with ac lines....plus its unique!
as for the intercooler, its bolted to the bumper but not welded on, I initially wanted to weld it to the bumper but then decided that one day I may need to remove it lol There isnt alot of room back there so this is as big as you can go while keeping the stock rebar, so any front impact and she's a goner..
Thanks again for the comments everyone, I'll try to answer all questions to the best of my ability, keep them coming!
"some of the vendors here won't help out if you're not part of their nut-hugging sac-swinging peanut gallery"
^ Thats Gold!! ..........
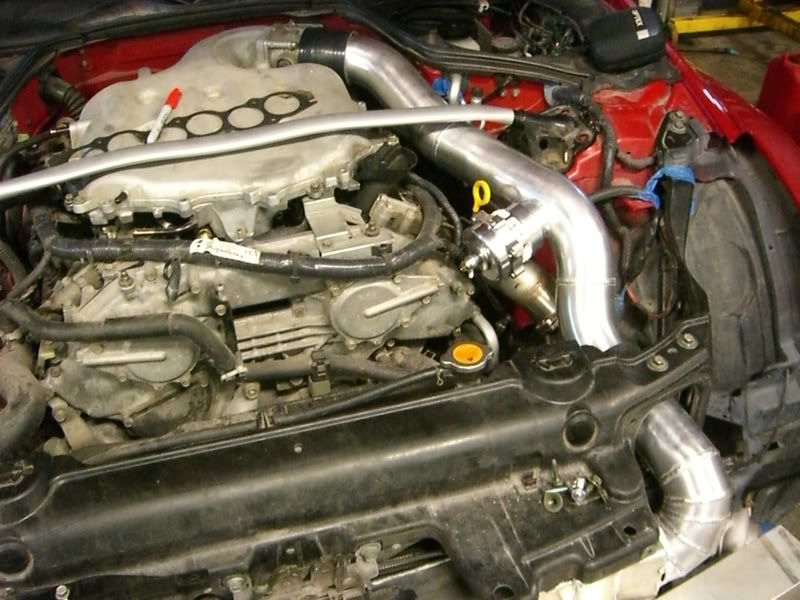
Heres some pics....
Chop!
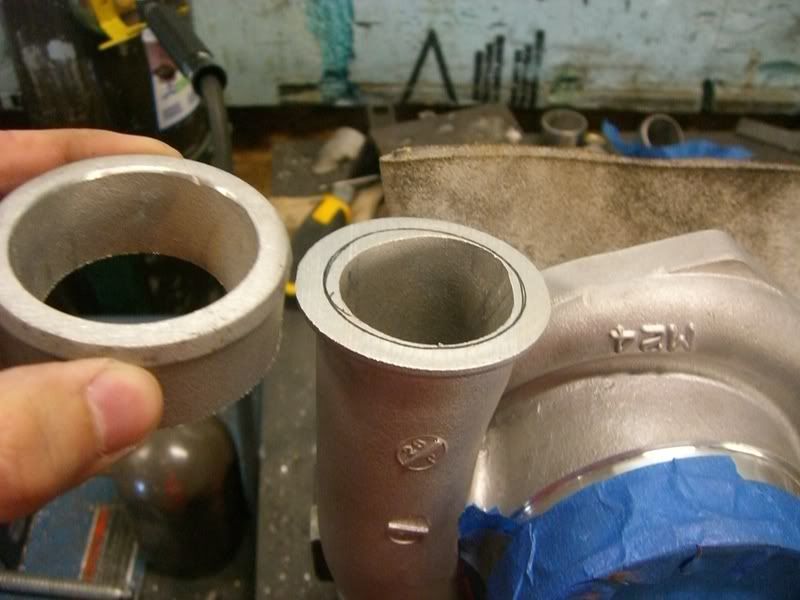
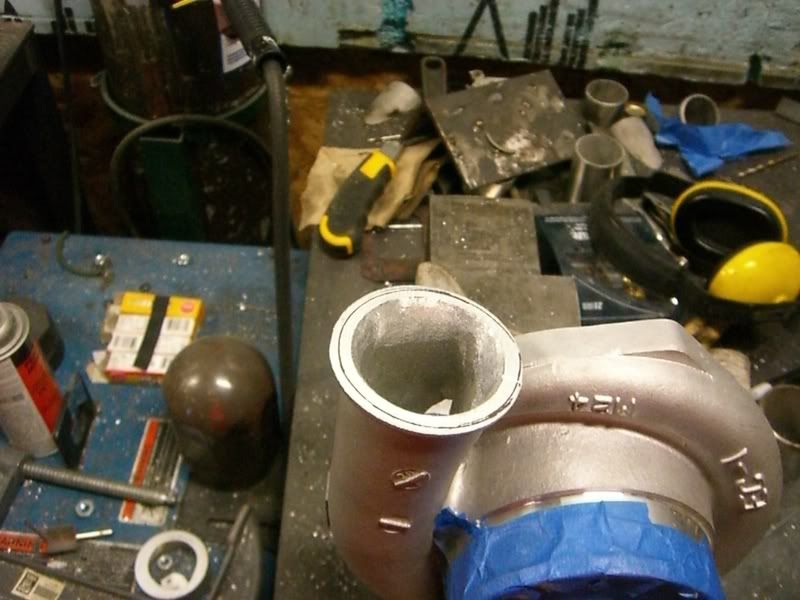
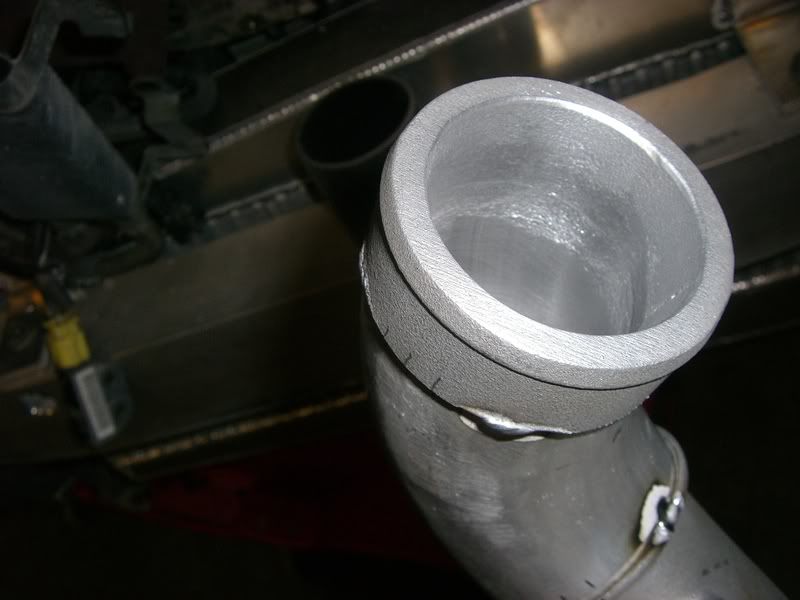
ported to mach sch40 aluminum 90*
Tacked up..
Ported to match the 90 on the other side..
Thats it for now, more to come.
starting to hate cars... A few questions to answer.
the upper charge pipe is 2 pieces, the coupler is in the rad cradle hole.
There is a cross over pipe and the turbo is driven off both banks, I just dont have pics of that portion yet, still waiting on a flex to finish the cross over.
Ohh and Doba- that is pretty much exactly how the exhaust runs, both banks meet at the shock tower area at a collector one above the other.
as for the turbonetics design, I'm not quite sure how it compares because I have never seen that kit up close(no one where I live has a turbo Z yet...)
But from pics, I honestly think I have the better design
tubular manifolds(not stocky's) 3" down pipe(not 2.5) not having to mess with ac lines....plus its unique! as for the intercooler, its bolted to the bumper but not welded on, I initially wanted to weld it to the bumper but then decided that one day I may need to remove it lol There isnt alot of room back there so this is as big as you can go while keeping the stock rebar, so any front impact and she's a goner..
Thanks again for the comments everyone, I'll try to answer all questions to the best of my ability, keep them coming!
"some of the vendors here won't help out if you're not part of their nut-hugging sac-swinging peanut gallery"
^ Thats Gold!!
..........Heres some pics....
Chop!
ported to mach sch40 aluminum 90*
Tacked up..
Ported to match the 90 on the other side..
Thats it for now, more to come.


I'v been looking at some turbo kits out there and just can't justify spending $5k on them.
I'm very close to diving in to something like this. Our winters here are nice and long (about 5 months) that should be enough time to do something like this. I'd just have to take all the aluminum to work and weld it there, don't have a high freq. welder at home.
Again, very nice fabricating. And it's funny how the vendors don't help because your not blowing your money their way.
I wish you were closer beacuse I'd be over every day to help out. lol
Thread Starter
Registered User
iTrader: (1)
Joined: Nov 2006
Posts: 143
Likes: 0
From: Winnipeg, Mb, Canada
Hey everyone, I guess it has been some time since the last update, I'll try and fill you in on a few things.
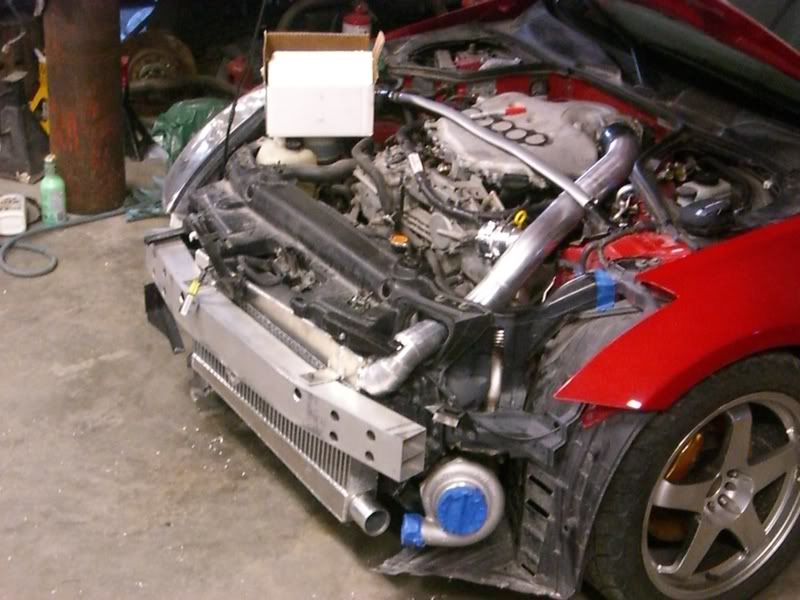
Smawg350- for the time being I will be on stock block, not because I want to but simply because I cant afford the cost and time right now.
QuadCam- 3 couplers total! could have been 2 but didnt want to weld the compressor to the cooler lol.
BoostedProbe- too bad your 15 hours away, I could use the help lol
as for starting a project like this, I think it would be awesome if more people did it, I would love to see more custom work. A few words of caution from what I've learned along the way, just because its DIY dosnt mean its cheap, no one believes me but in parts and materials alone(not factoring in mine and others time,beer,food,gas,ect...) I'm in to this for more than I'd like to admit. I might do a build cost total in the end, just the fuel system and ems is over 4g.....
well here is a more recent pic of the build.
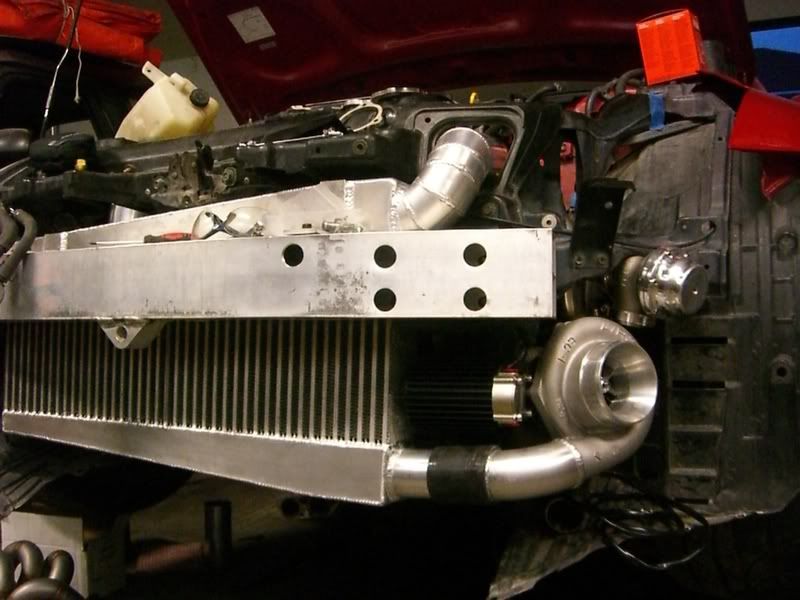

Thats pretty much where I am right now, its been a slow go lately.
Well since we are all automotive fans here and turbo fans I think some of you guys might appreciate the car that motivated me into this build.
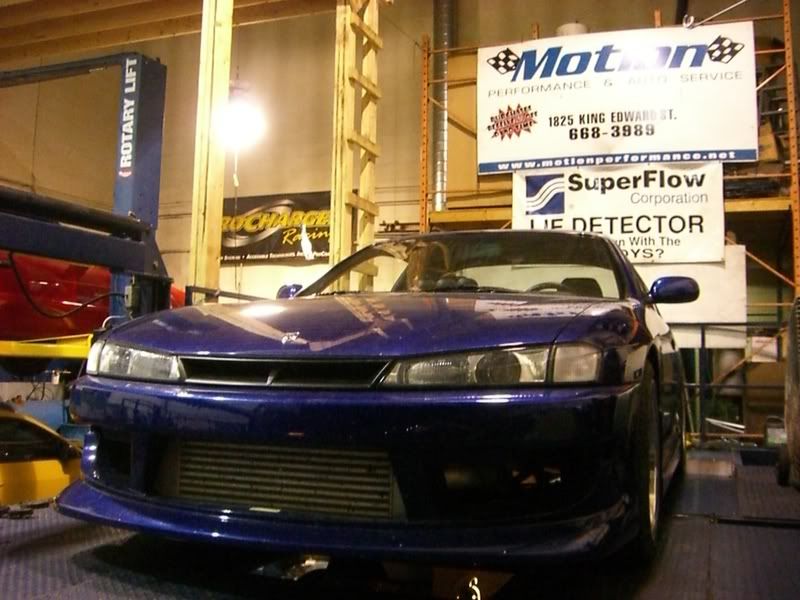
just got retuned, and setup the cams a little better, wow what a difference!
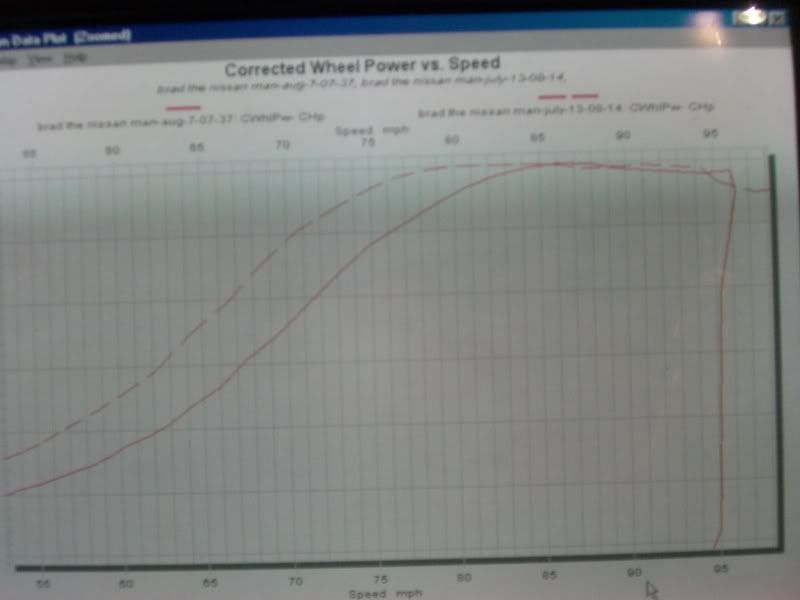
here is a video of it on the dyno going through 2nd and 3rd on the c4 to 150mph.
<object width="425" height="344"><param name="movie" value="http://www.youtube.com/v/Rf-4o2n6Reg&hl=en&fs=1"></param><param name="allowFullScreen" value="true"></param><embed src="http://www.youtube.com/v/Rf-4o2n6Reg&hl=en&fs=1" type="application/x-shockwave-flash" allowfullscreen="true" width="425" height="344"></embed></object>
That thing is the reason this build exists today lol love that car, and being 2800lbs it feels like a monster!
Well thats my update for the time being, thanks for looking and the kind words, keep those questions coming as well.
n.x.
Smawg350- for the time being I will be on stock block, not because I want to but simply because I cant afford the cost and time right now.
QuadCam- 3 couplers total!
could have been 2 but didnt want to weld the compressor to the cooler lol.BoostedProbe- too bad your 15 hours away, I could use the help lol
as for starting a project like this, I think it would be awesome if more people did it, I would love to see more custom work. A few words of caution from what I've learned along the way, just because its DIY dosnt mean its cheap, no one believes me but in parts and materials alone(not factoring in mine and others time,beer,food,gas,ect...) I'm in to this for more than I'd like to admit. I might do a build cost total in the end, just the fuel system and ems is over 4g.....
well here is a more recent pic of the build.
Thats pretty much where I am right now, its been a slow go lately.
Well since we are all automotive fans here and turbo fans I think some of you guys might appreciate the car that motivated me into this build.
just got retuned, and setup the cams a little better, wow what a difference!
here is a video of it on the dyno going through 2nd and 3rd on the c4 to 150mph.
<object width="425" height="344"><param name="movie" value="http://www.youtube.com/v/Rf-4o2n6Reg&hl=en&fs=1"></param><param name="allowFullScreen" value="true"></param><embed src="http://www.youtube.com/v/Rf-4o2n6Reg&hl=en&fs=1" type="application/x-shockwave-flash" allowfullscreen="true" width="425" height="344"></embed></object>
That thing is the reason this build exists today lol love that car, and being 2800lbs it feels like a monster!
Well thats my update for the time being, thanks for looking and the kind words, keep those questions coming as well.
n.x.
I have done one car where I built everything myself, it is supercharged though and I think I did post a link in this thread somewhere.
Supercharger is easier than turbo that's for sure, as the exaust work takes most of the time. I know how it can get expensive in a hurry especially if you are buying 304 stainless for the exhaust. My Ford Probe build cost about $2,500 with Megasquirt fuel and ignition controll. That too I could have built myself (I'm a electronics engineer) but chose to just buy a built unit.
I did it right too with wideband and all that other good stuff.
I was thinking the Z would be around $4,000 with everything. Keep in mind that I have a ton of stainless tubing at work that I can just take. It`s mostly .065 wall, so just the right size.
I might just do my own supercharger setup, that I`m very familiar with. I havn`t had a close look at the engine bay from underneath yet as the Z was a very recent purchase.
Last edited by BoostedProbe; Jul 30, 2008 at 04:30 PM.


bump for update/.....i love this...now from the pictures you've posted so far can you show of how you have the left and right side connecting points before the long pipe to where the turbo sits in the fender wheel well? thanks man...love work like this....makes me want to just learn how to weld lol