
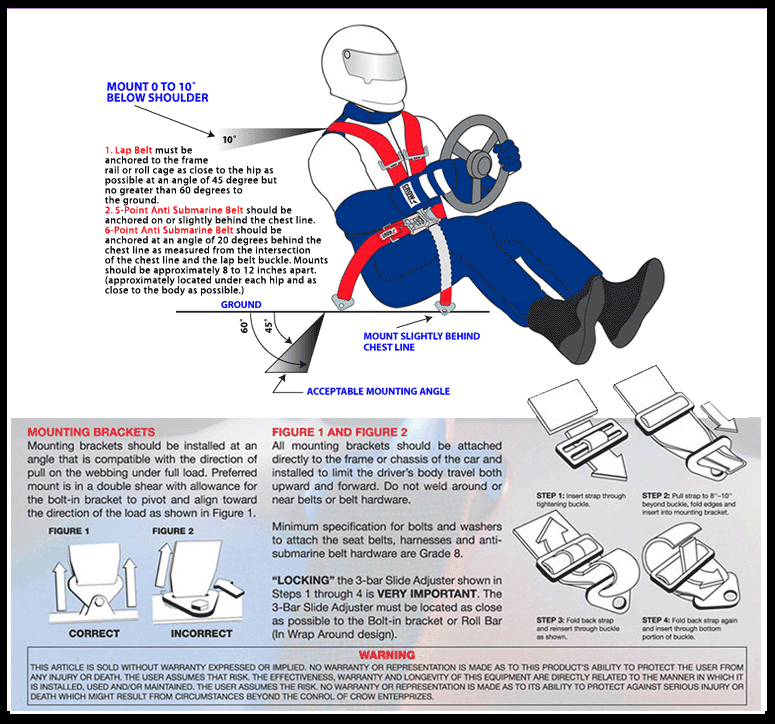
My multi-point rear roll cage thread!


Registered User
Joined: Sep 2009
Posts: 2,335
Likes: 5
From: Georgia
Rear down tubes need to go to the shock tower not the strut bar or those little vertical tubes you have going there. id have that fixed before you get too far along.
Not trying to be a dick by any means but it looks like you spent a lot of money and id hate for you to go through all that and it need to be re-done later.
Not trying to be a dick by any means but it looks like you spent a lot of money and id hate for you to go through all that and it need to be re-done later.
Is this the little vertical tube you're talking about? How would you have done it differently?

THIS.
that is ALOT of X support bracing for a roll bar...
why didn't you just go all the way and add the front hoops and A pillar support to finish off the full cage?
Also.. where you going to put the harness bar? or are you just going to loop back to the new rear strut tower brace?

Thread Starter
Registered User
Joined: Feb 2007
Posts: 908
Likes: 5
From: UK
Yes its a lot of X bracing as this is the rear section for the the full FIA race spec cage. I didn't want the full cage yet as i still use the car on the road a lot and don't fancy the chance of hitting my head (with no hemet) on the A pillar bars. Also huge door X's mean I would have to lose my door cards and makes getting in and out a PITA.
When the car becomes 95% track and 5% road ill convert to a full cage then.
Harness's can be fitted to the small tubes in the rear X or looped around the rear strut bar.
As for seats Im gonna be using stock leathers for a month until my kevlar buckets get here.
And yeah ok guys its a roll bar not a cage, Just thats what most people call these things! lol..
Thread Starter
Registered User
Joined: Feb 2007
Posts: 908
Likes: 5
From: UK
tarted finishing the last bits of colour this morning and just put the fist part of the clear coat on now.
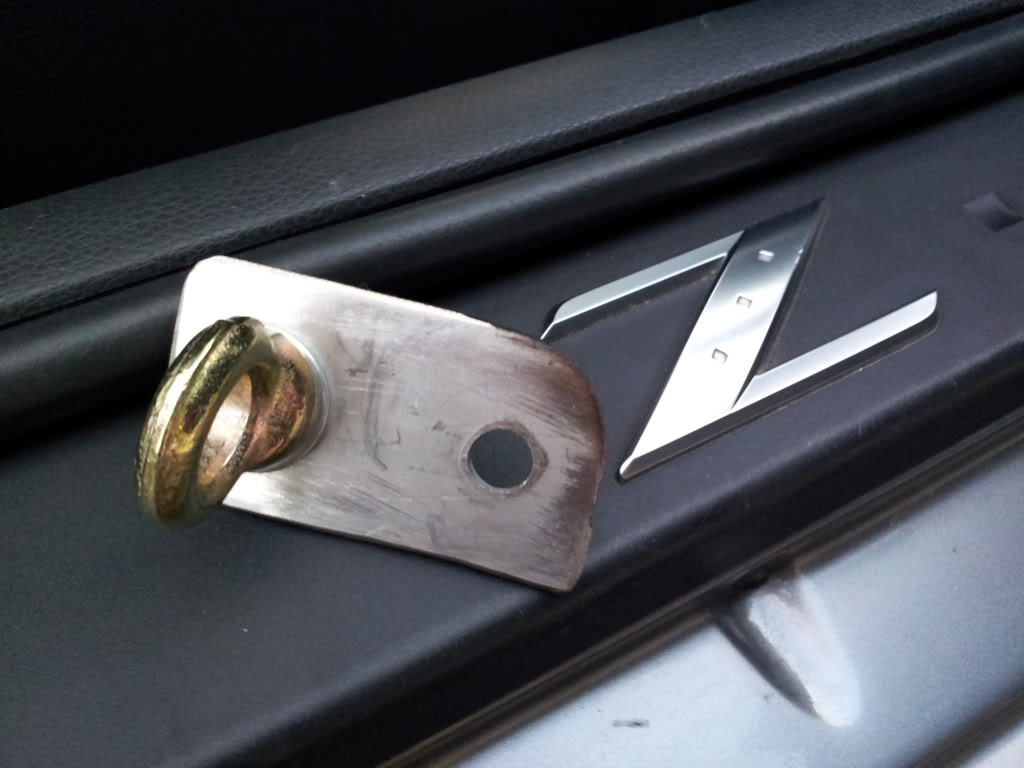
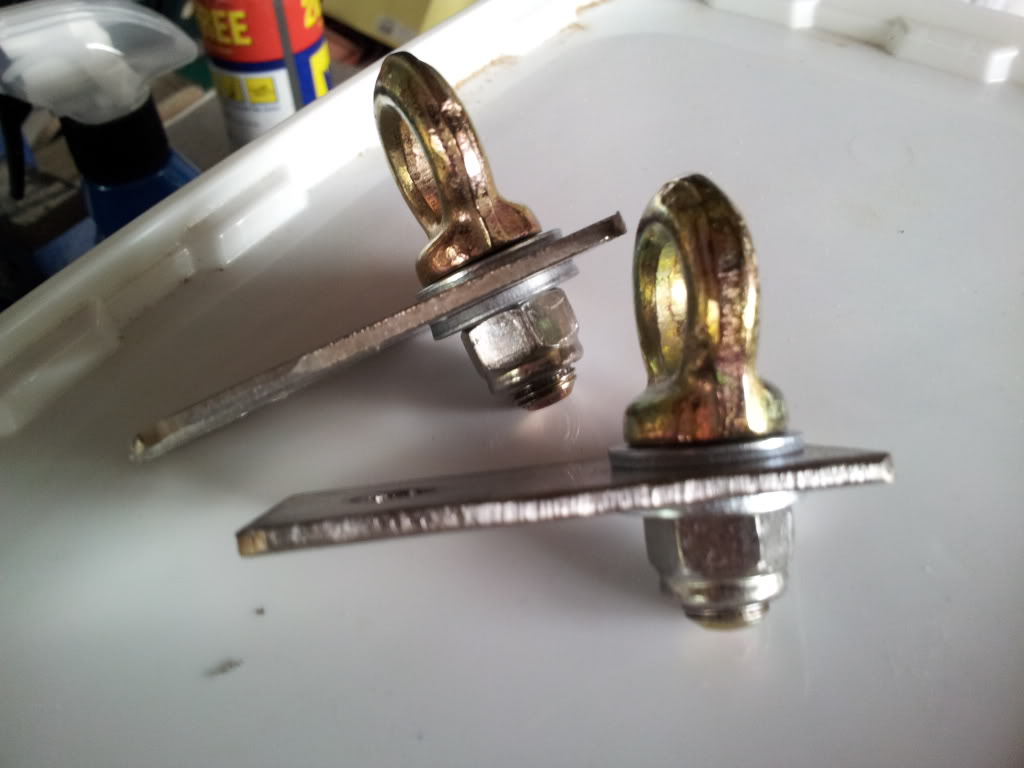
While the clear coat is drying out i've made some small brackets for the seat lap belt to screw to.
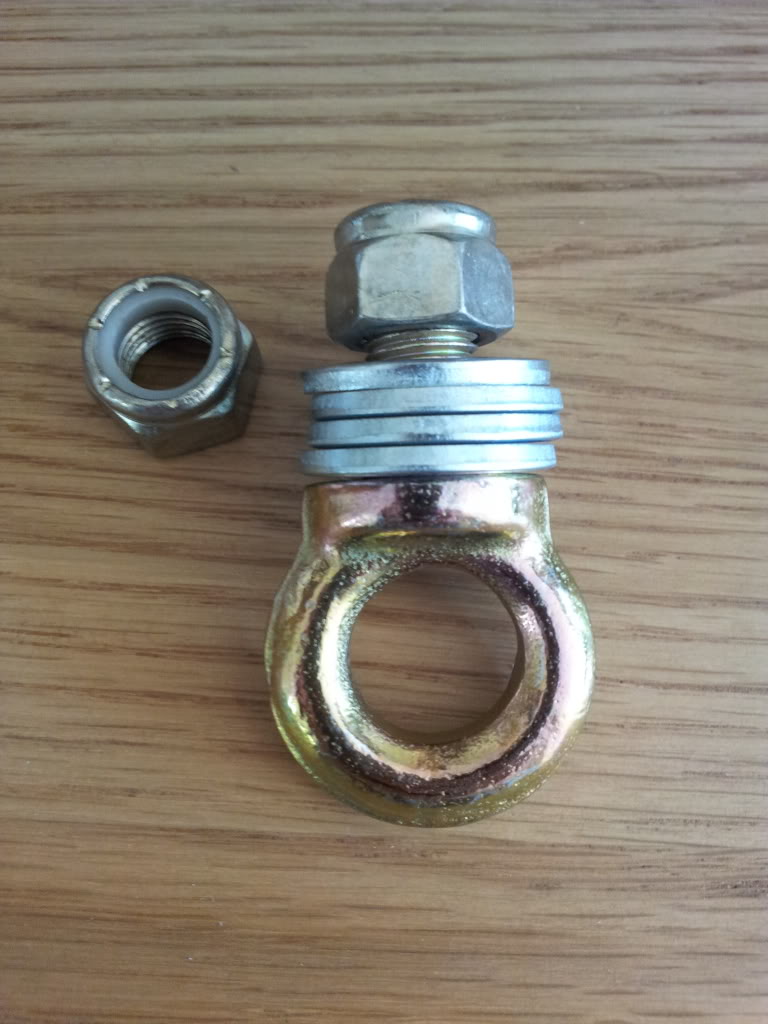
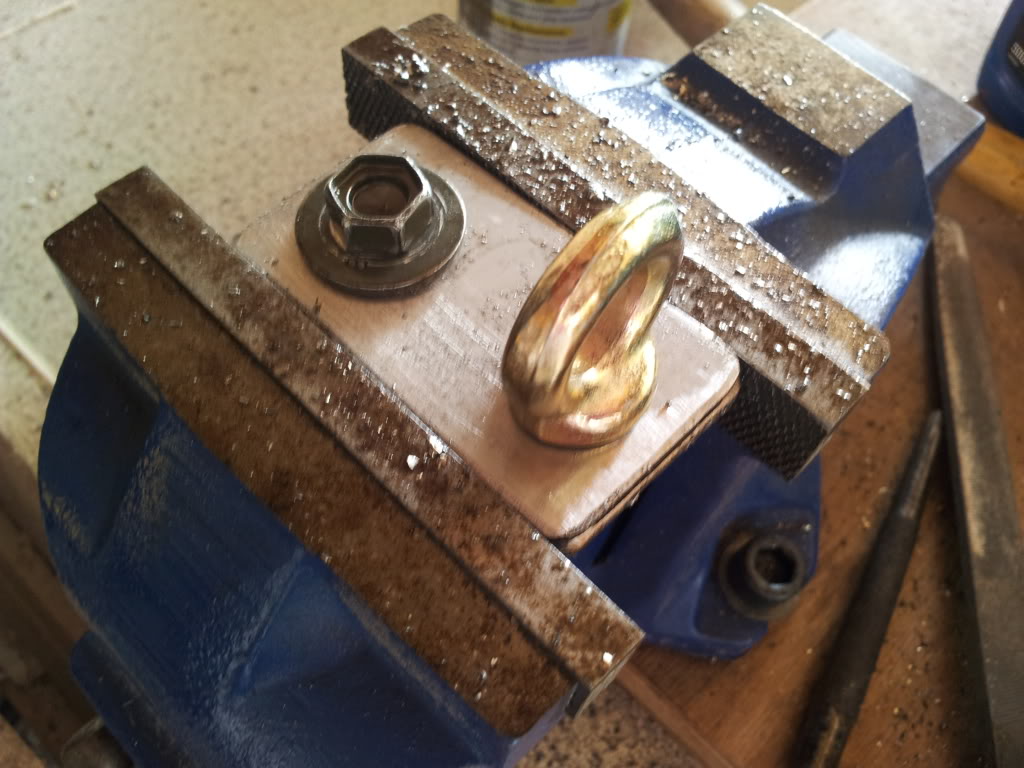
Eye bolt for the lap belt. with nylock nut.
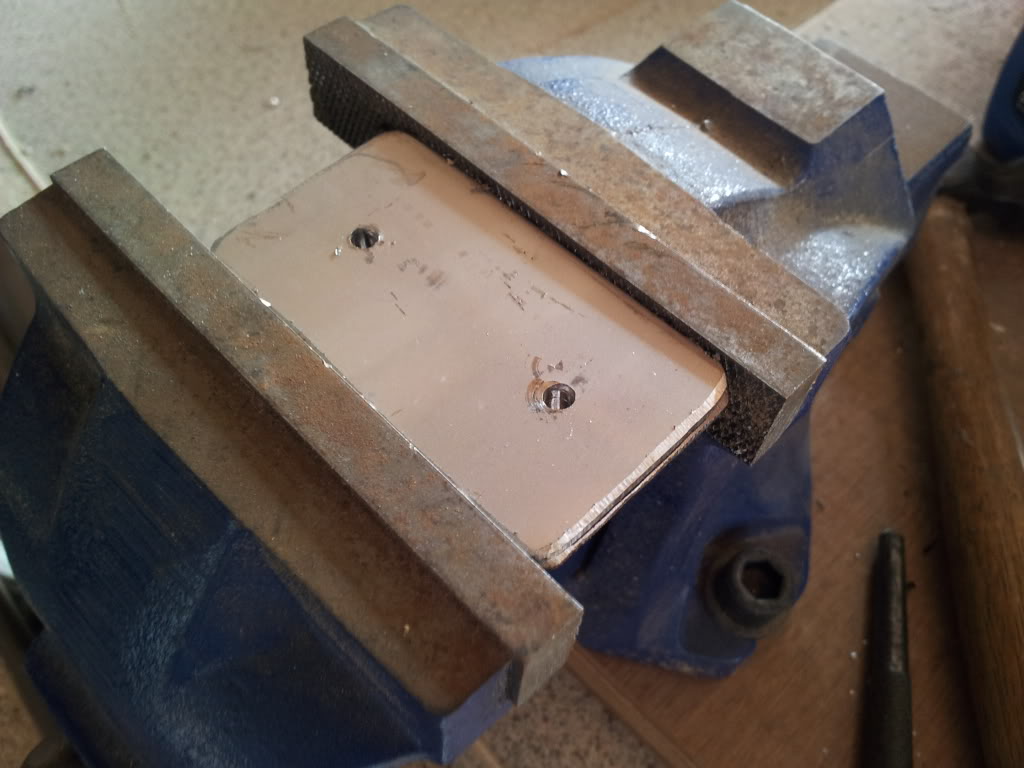
3mm stainless steel plates. Centre punched and drilled from 3mm up to 11mm for eyebolt and 10mm for the bolt to the chassis. This took me 30min to drill these little bloody things! SS is very hard to drill!
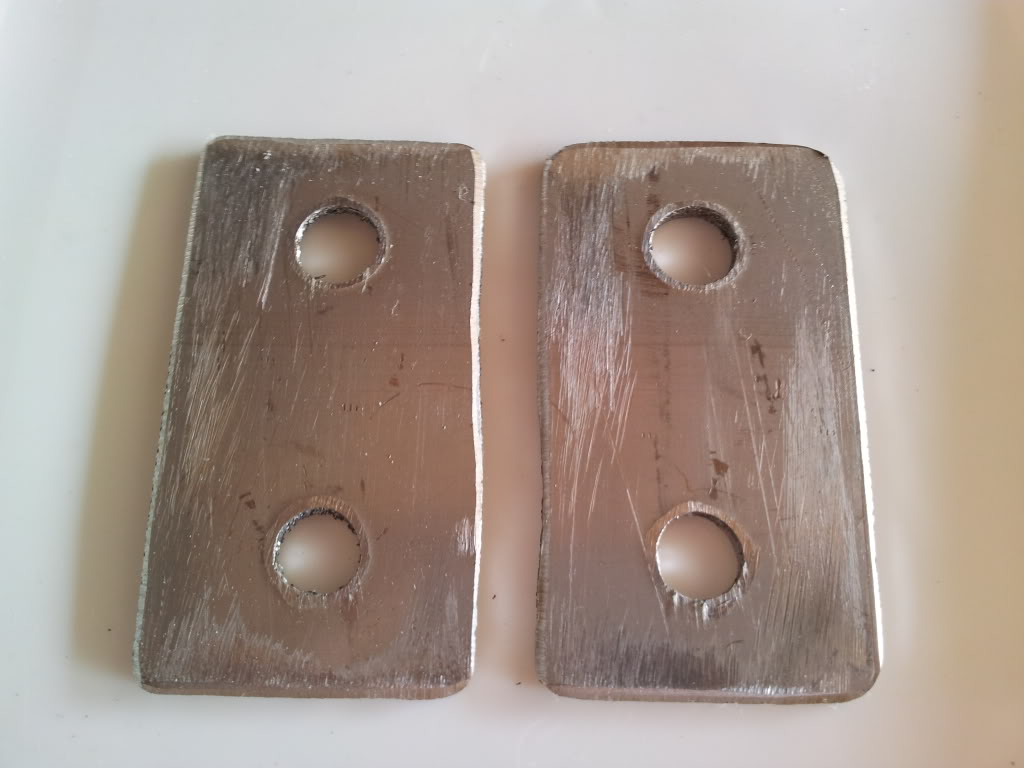
Cleaned up with a file. Yes I know there ruff! lol..
Back to work!
While the clear coat is drying out i've made some small brackets for the seat lap belt to screw to.
Eye bolt for the lap belt. with nylock nut.
3mm stainless steel plates. Centre punched and drilled from 3mm up to 11mm for eyebolt and 10mm for the bolt to the chassis. This took me 30min to drill these little bloody things! SS is very hard to drill!
Cleaned up with a file. Yes I know there ruff! lol..
Back to work!

are your eyelet SS plates mounting to a seperate location from the OE seat holes? or same?
i would suggest you mount independently from the seat's own mounting points...(i.e drill thru the floor independently)
i would suggest you mount independently from the seat's own mounting points...(i.e drill thru the floor independently)


Looks great man i like that your painting it body color really clean, i was also wondering about the harness bar but suspected you were going to use those small pieces connected to the rear downs. What size tubing is that?
Registered User
Joined: Sep 2009
Posts: 2,335
Likes: 5
From: Georgia
The fellow who did the welding must be quite a contortionist and a great welder. Getting into those tight places and still doing such a good job is impressive, even to someone who has done a fair amount of TIG welding. A tip of my welding helmet to him.

Thread Starter
Registered User
Joined: Feb 2007
Posts: 908
Likes: 5
From: UK
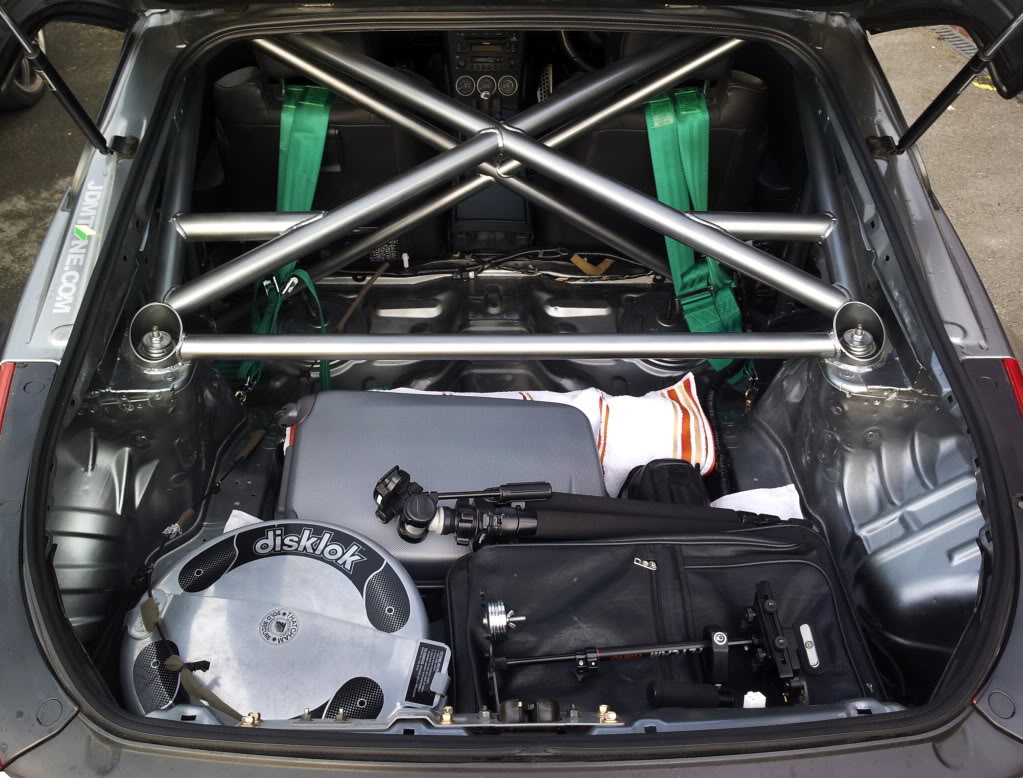
Well, after the mad rush to get the car painted ready for going to the britcar 24H race over here in the UK its sort of done! lol...The cage is done and floor is 95% done. I still need to finish the back rear panel but this will be easy to mask off and paint next week.
Some pic's I took before leaving to go to the brit car. (dont mind the harness mounts, these will go onto the roll bar when the extra scroth clips arive in the post) Ps. I need my new seats to hurry up too! lol..

Boot packed up ready to hit the road!

Some pic's I took before leaving to go to the brit car. (dont mind the harness mounts, these will go onto the roll bar when the extra scroth clips arive in the post) Ps. I need my new seats to hurry up too! lol..
Boot packed up ready to hit the road!


Thread Starter
Registered User
Joined: Feb 2007
Posts: 908
Likes: 5
From: UK
Mount the harnesses on the harness bar & get better seats! Awesome cage though, I really like your work. I agree on some of the comments about the mounting of the rear strut tower area but you did a great job.
Thread Starter
Registered User
Joined: Feb 2007
Posts: 908
Likes: 5
From: UK
Well Time for another little update!
Just a few more picks of the car going back together!
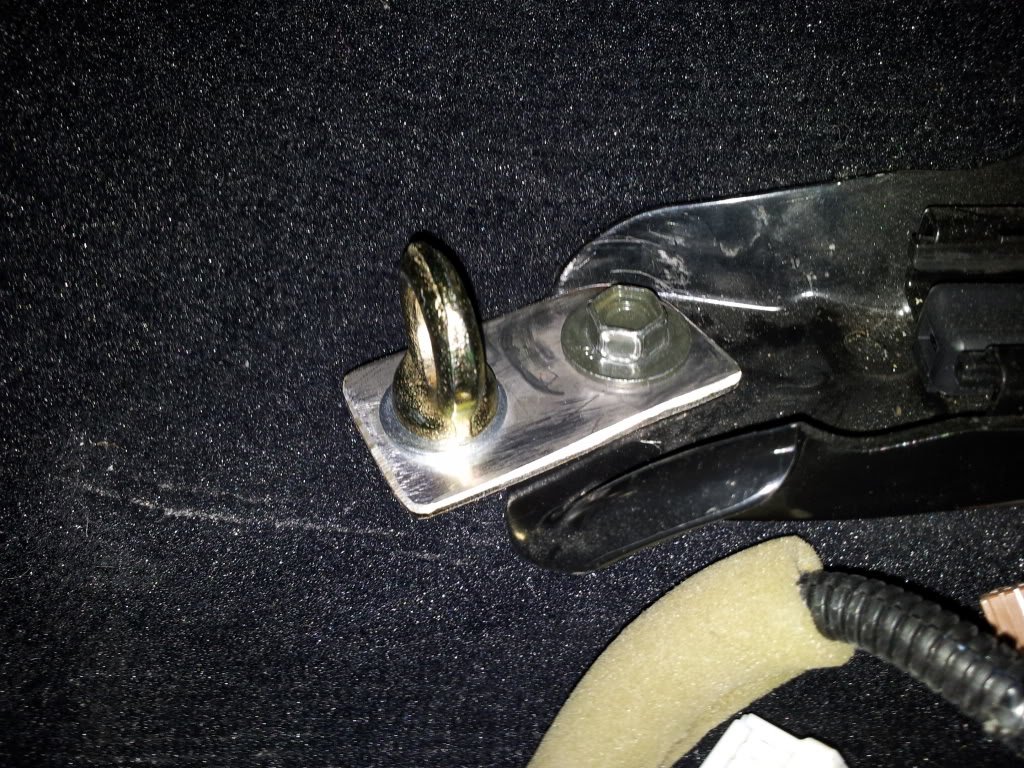
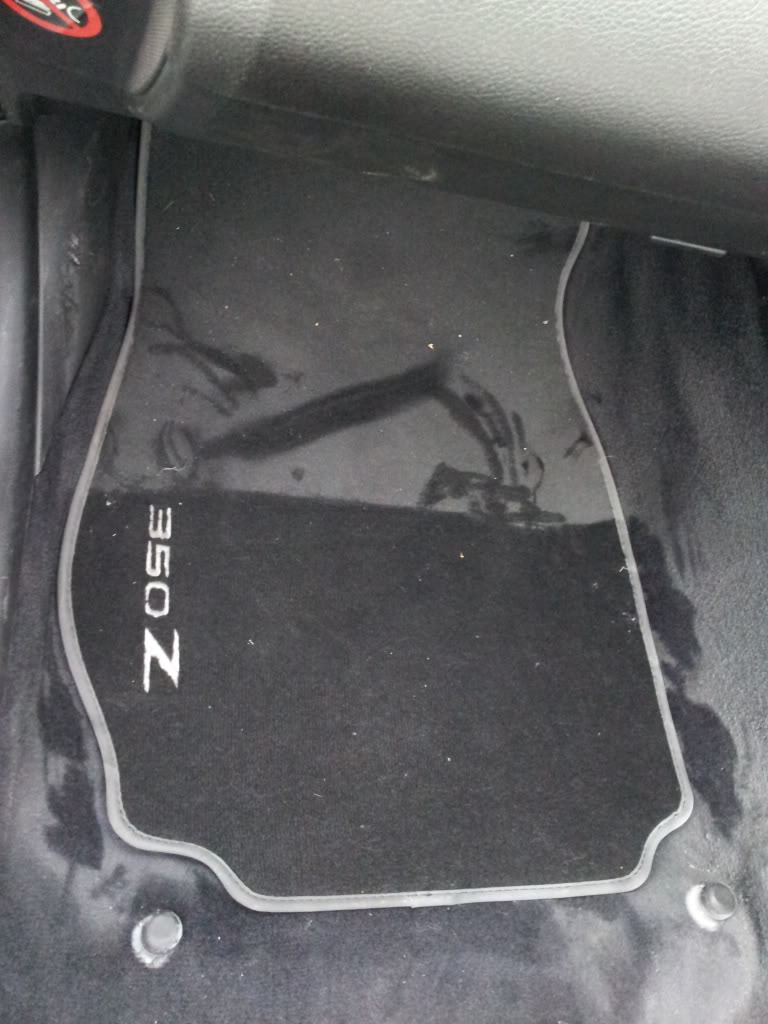
Rear mount point for the lap belts. (these are just being used untill I get my new seats)

Fitted.
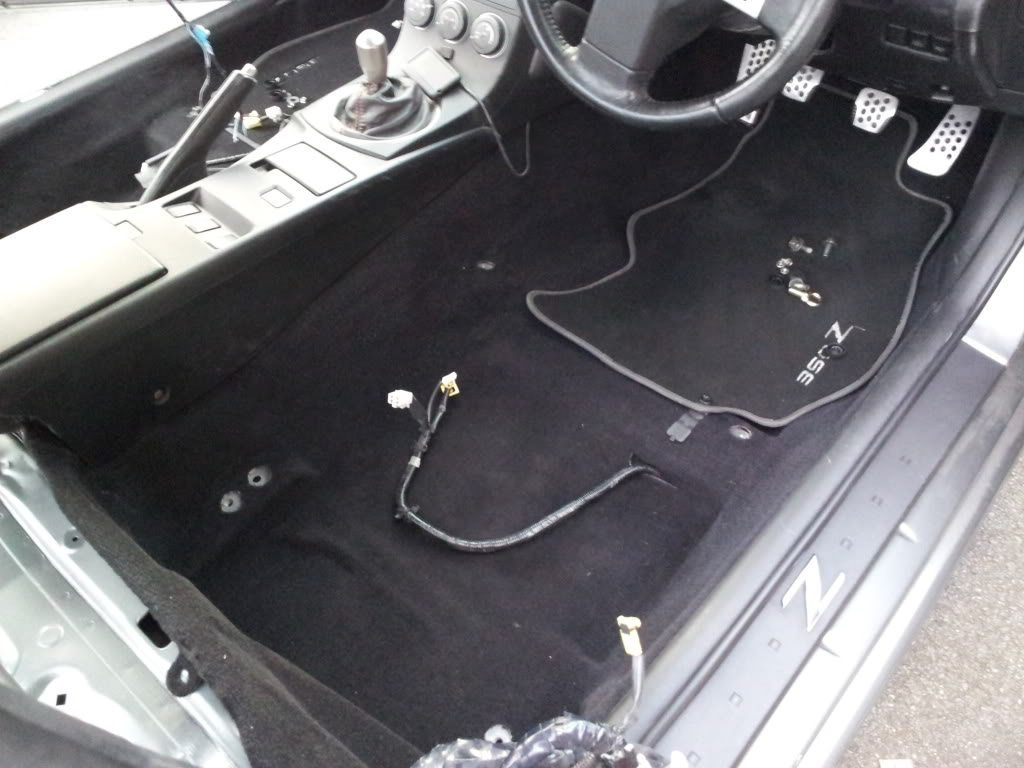
I also removed the rear boot vents and cleaned them up.
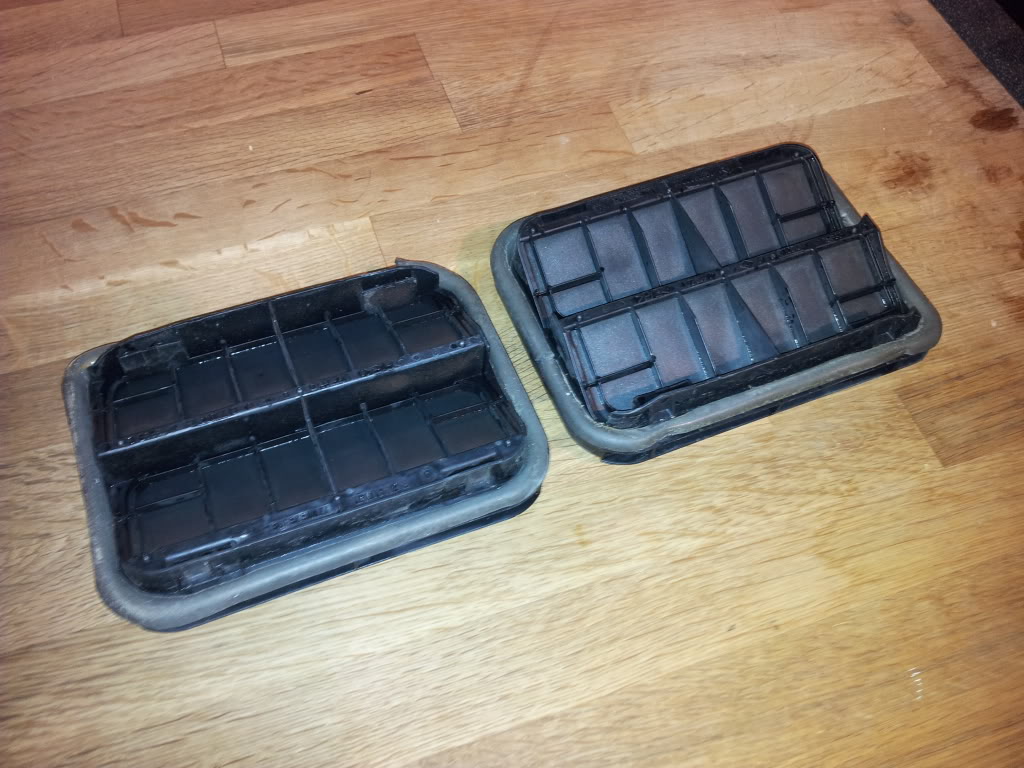
Still very dusty even though I had sheeted the inside out.
All hoovered out again! nice and clean!
The cage work is 95% complete. I just need to finish the very rear boot floor and rear bulk head area. the next job is getting the head line back in. the head liner will require mod's to get it to fit as the cage main hoop sits very close to the roof skin and the head liner will not fit through the gap. Im still not sure how im going to do this but Ill get it done some how :ninja:
Im going to make a rear boot mat from thick carpet thats a good sound deadener that can be thrown in and out quickly for long drives as the cars quite loud inside now! :P
These are the last pic's I have of the cage.
Car packed up ready for nissansportz national!

Just a few more picks of the car going back together!
Rear mount point for the lap belts. (these are just being used untill I get my new seats)
Fitted.
I also removed the rear boot vents and cleaned them up.
Still very dusty even though I had sheeted the inside out.
All hoovered out again! nice and clean!
The cage work is 95% complete. I just need to finish the very rear boot floor and rear bulk head area. the next job is getting the head line back in. the head liner will require mod's to get it to fit as the cage main hoop sits very close to the roof skin and the head liner will not fit through the gap. Im still not sure how im going to do this but Ill get it done some how :ninja:
Im going to make a rear boot mat from thick carpet thats a good sound deadener that can be thrown in and out quickly for long drives as the cars quite loud inside now! :P
These are the last pic's I have of the cage.
Car packed up ready for nissansportz national!

[QUOTE=djtimodj;9415868]
Rear mount point for the lap belts. (these are just being used untill I get my new seats)
.com/albums/l208/djtimodj/new%20album/2011-09-30195113-1.jpg[/img]
[QUOTE]
Can you make me like 6 of these..... or let me know where you picked them up at
Rear mount point for the lap belts. (these are just being used untill I get my new seats)
.com/albums/l208/djtimodj/new%20album/2011-09-30195113-1.jpg[/img]
[QUOTE]
Can you make me like 6 of these..... or let me know where you picked them up at

