Notices
Media Share Z Related Photos and Video

Another progress thread

Thread Tools
 
Search this Thread
 
Old 07-12-2016, 11:02 AM
  #1  
meanz
New Member
Thread Starter
iTrader: (23)
 
meanz's Avatar
 
Join Date: Jan 2010
Location: greenville, sc
Posts: 2,197
Received 56 Likes on 43 Posts
Default Another progress thread

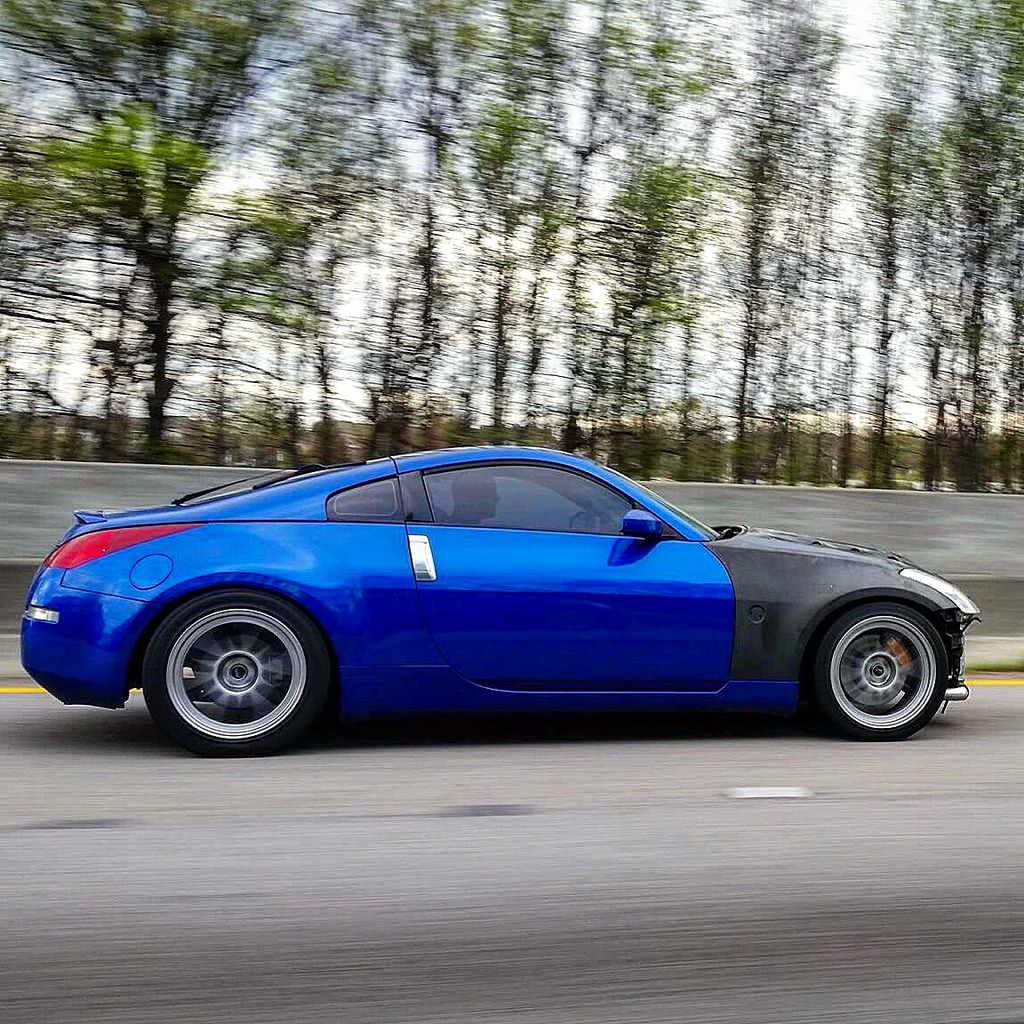
Time for another progress thread. I picked this Daytona blue z up with taywa in rockhill for a super low price. It was missing a ton of parts and had much more just thrown into the cabbin. We worked out a deal for me to take the shell and Tuan to get the built engine and miscellaneous things. This thing was sitting under a pine tree with crap piled around it.

Name:  BBE78377-DD84-4289-B5E7-F53D31069A31.jpg
Views: 88
Size:  236.8 KB

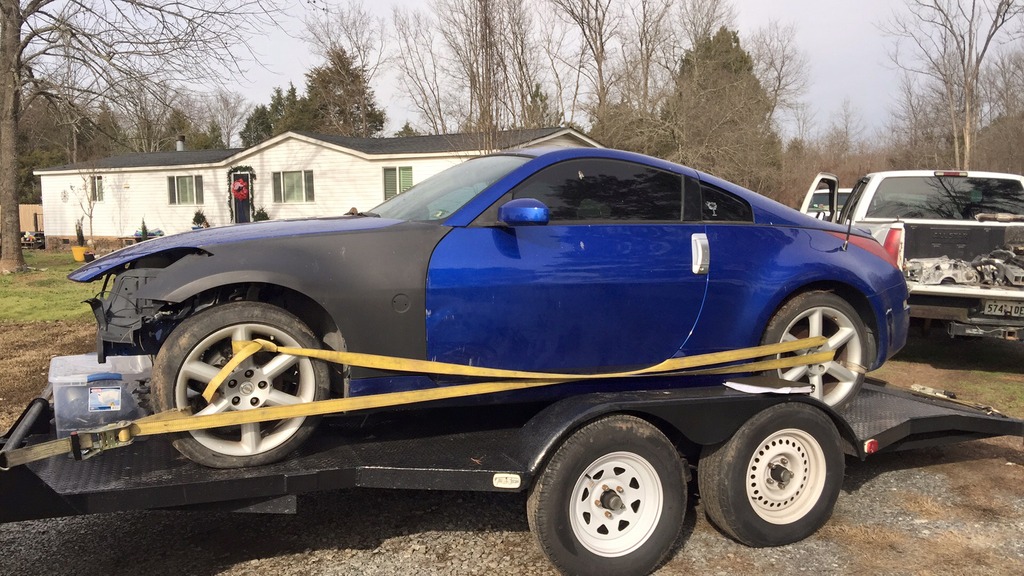
Got her home and snagged a few pics. I think I saved her from a life of amateur drifting. Different colored wheels and stickers everywhere. Interior was a wreck.

Name:  5F1CEBDE-04FD-4DCA-A108-B2ED57561922.jpg
Views: 85
Size:  173.9 KB

Name:  F7FBB3BE-9639-4B48-99C9-84B0B478B73C.jpg
Views: 94
Size:  225.8 KB
Old 07-12-2016, 11:06 AM
  #2  
meanz
New Member
Thread Starter
iTrader: (23)
 
meanz's Avatar
 
Join Date: Jan 2010
Location: greenville, sc
Posts: 2,197
Received 56 Likes on 43 Posts
Default

First we did was remove the wheels, suspension and brakes.

Name:  E5C0BD73-DBEE-4314-A6CB-C2C3F0663E53.jpg
Views: 56
Size:  189.3 KB

Put on some stance coils and hotchkis sways.

Name:  BD0E95FE-8744-48A0-939D-A3EC3B76CEE6.jpg
Views: 49
Size:  239.8 KB

Then put on some rpf1s with some brembos.

Name:  A71F3E2E-FE3E-47AE-B51E-5B0B43DD24B4.jpg
Views: 74
Size:  163.4 KB
Old 07-12-2016, 11:08 AM
  #3  
meanz
New Member
Thread Starter
iTrader: (23)
 
meanz's Avatar
 
Join Date: Jan 2010
Location: greenville, sc
Posts: 2,197
Received 56 Likes on 43 Posts
Default

Next up was the engine. Decided to put my built engine with AAM turbos into her.

Name:  62DC54FC-A7AD-40C4-B47F-D3ABEEE474CD.png
Views: 57
Size:  762.4 KB
Old 07-12-2016, 11:11 AM
  #4  
meanz
New Member
Thread Starter
iTrader: (23)
 
meanz's Avatar
 
Join Date: Jan 2010
Location: greenville, sc
Posts: 2,197
Received 56 Likes on 43 Posts
Default

After a little clean up, it's looking like an engine bay finally.

Name:  CA65A797-5F0B-4A83-AF1C-255450FDED95.jpg
Views: 47
Size:  281.7 KB
Old 07-12-2016, 11:17 AM
  #5  
meanz
New Member
Thread Starter
iTrader: (23)
 
meanz's Avatar
 
Join Date: Jan 2010
Location: greenville, sc
Posts: 2,197
Received 56 Likes on 43 Posts
Default

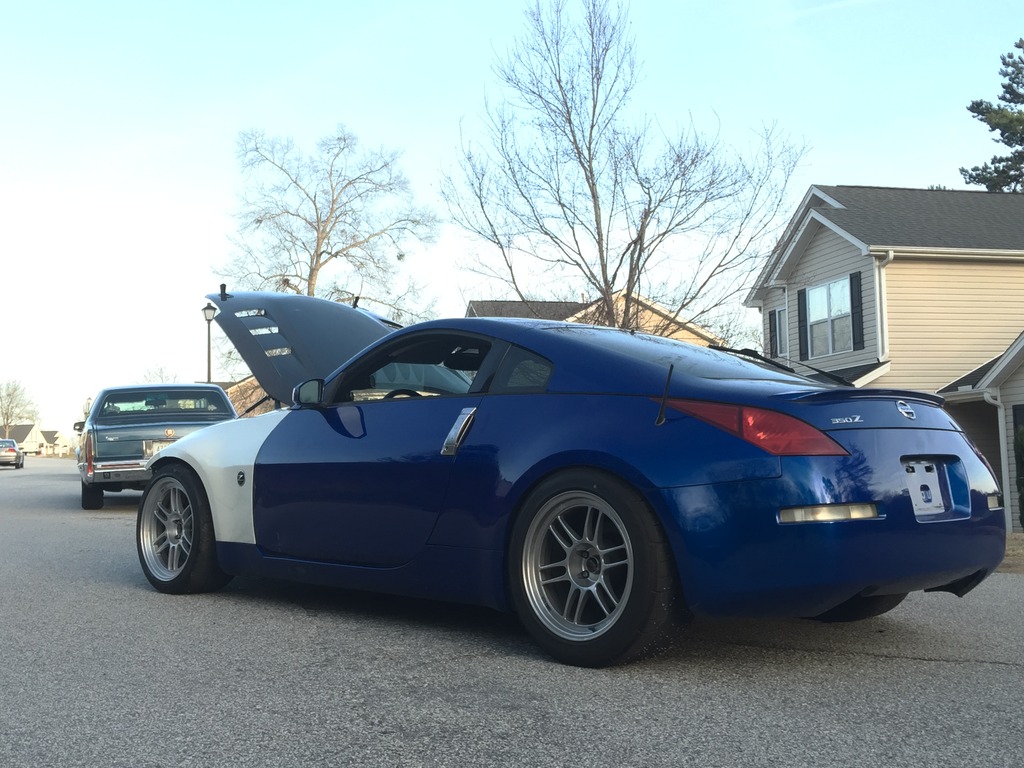
Next was exterior. On the tow back home. Some wind got under the fender and ripped it in half. So I had to install a white fender. Also didn't have a bumper ready yet so I went bumper less to get some miles on the new setup.

Name:  DF35A0DD-2990-4FED-850B-92DAC8B9AF69.jpg
Views: 69
Size:  284.0 KB

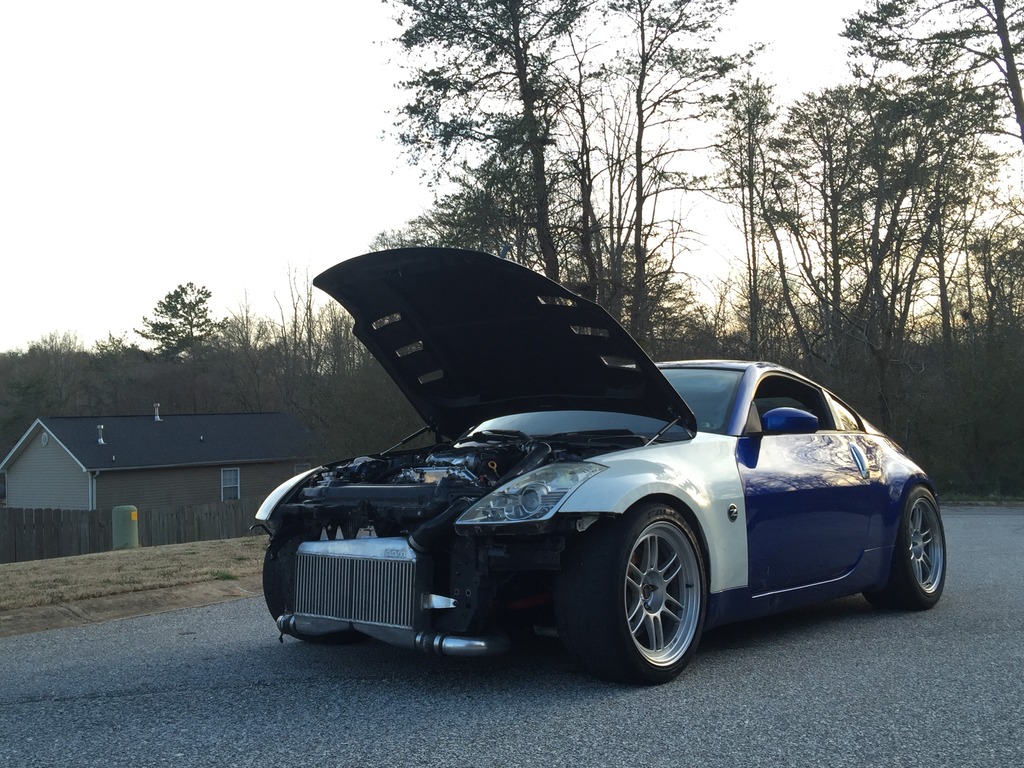
Still had a black fender on other side.

Name:  3EBD2FA8-C403-41E4-914B-5C876A16D276.jpg
Views: 56
Size:  220.8 KB
Name:  4B1F36CC-38E5-4A79-BD18-D14B00738436.jpg
Views: 62
Size:  404.5 KB
Old 07-14-2016, 05:20 AM
  #6  
meanz
New Member
Thread Starter
iTrader: (23)
 
meanz's Avatar
 
Join Date: Jan 2010
Location: greenville, sc
Posts: 2,197
Received 56 Likes on 43 Posts
Default

Took to the dyno. She made 600/540@18psi.

Name:  3D1C4F47-4081-42DF-9F05-48282A7A932B.png
Views: 86
Size:  517.4 KB
The following users liked this post:
rustyschopshop (07-14-2016)
Old 07-14-2016, 12:58 PM
  #7  
rustyschopshop
New Member
 
rustyschopshop's Avatar
 
Join Date: Mar 2014
Location: Watauga, Texas
Posts: 1,405
Received 373 Likes on 279 Posts
Default

Sounds like a fun new project. Congratz on the progress and nice numbers.
Old 07-18-2016, 06:18 AM
  #8  
NA&CH
General & Tech Senior Moderator
MY350Z.COM
iTrader: (74)
 
NA&CH's Avatar
 
Join Date: Jan 2004
Location: Florida
Posts: 7,175
Received 132 Likes on 96 Posts
Default

Very nice work. post those finished pics up...

Chris
Old 07-18-2016, 09:58 AM
  #9  
XM 1
New Member
iTrader: (5)
 
XM 1's Avatar
 
Join Date: Oct 2005
Location: Germany
Posts: 1,535
Received 33 Likes on 32 Posts
Default

awesome work! keep the pics coming
Old 07-18-2016, 10:50 AM
  #10  
meanz
New Member
Thread Starter
iTrader: (23)
 
meanz's Avatar
 
Join Date: Jan 2010
Location: greenville, sc
Posts: 2,197
Received 56 Likes on 43 Posts
Default

So after the tune, it was time for zdayz. Took her up there just as she is. Literally gave it all she had in the mountains and it was a blast.
Name:  BA50F507-AEEC-4071-8E50-0BE5AE298229.png
Views: 51
Size:  962.8 KB

Name:  8F46F872-AB56-42EC-A29C-9142B68FAFC4.jpg
Views: 61
Size:  246.2 KB

Name:  A1B1ABB5-7B18-491D-9E4F-ADD4DD67A2E5.png
Views: 47
Size:  998.2 KB
Old 07-18-2016, 10:53 AM
  #11  
meanz
New Member
Thread Starter
iTrader: (23)
 
meanz's Avatar
 
Join Date: Jan 2010
Location: greenville, sc
Posts: 2,197
Received 56 Likes on 43 Posts
Default

After all this. I decided it was time to make her 1 color.

Taywan mixed up some Daytona blue with something a little extra added. We painted the bumper first to see how the color was.

Name:  78DCAFC1-9668-47B7-AC5C-EBAB90D73196.jpg
Views: 62
Size:  348.9 KB

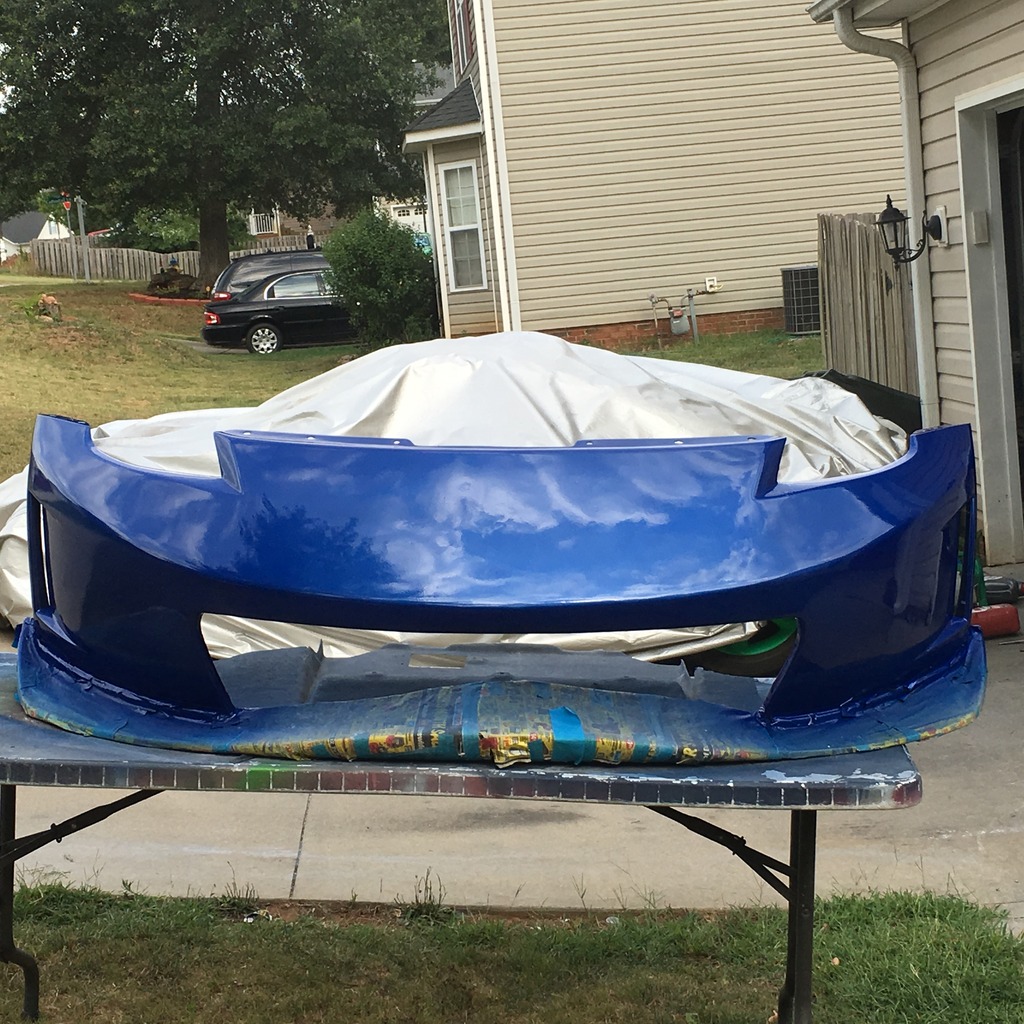
Look close and you can see a ton of pearl
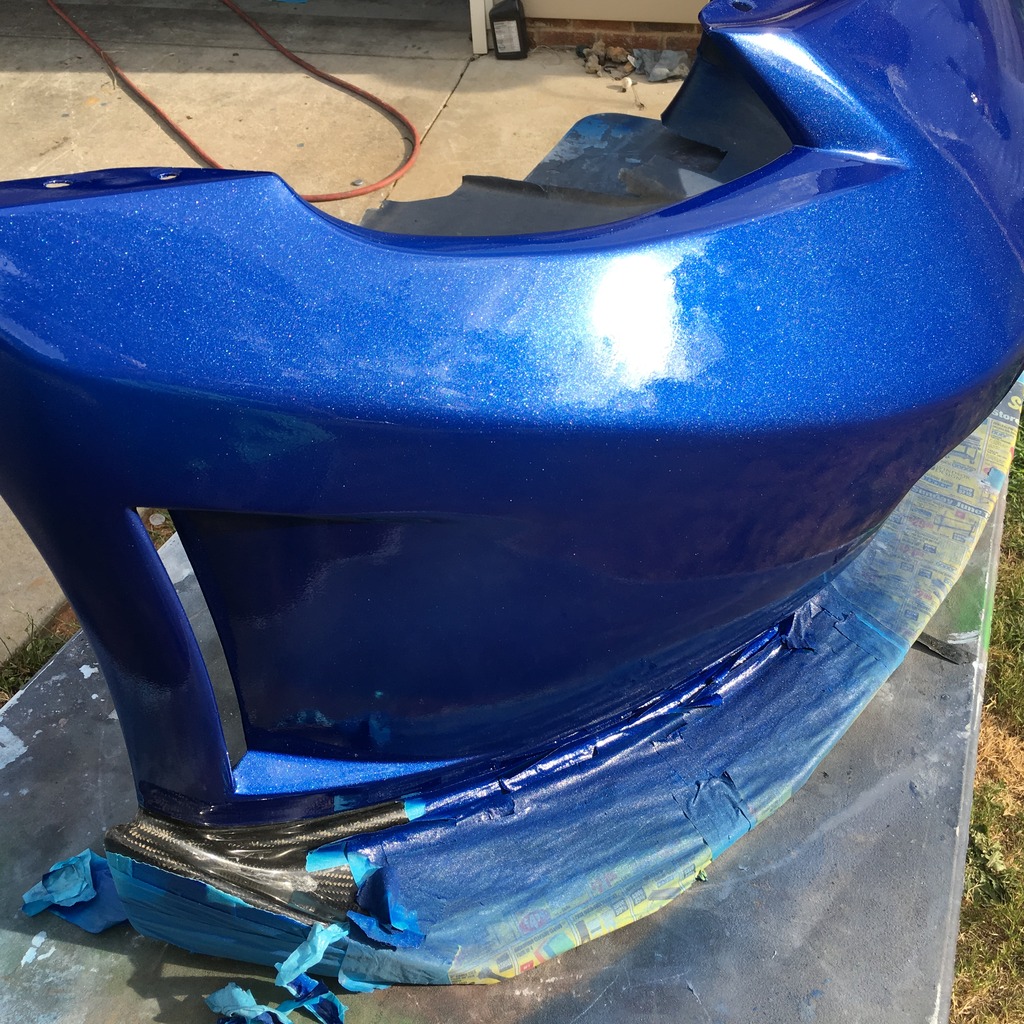
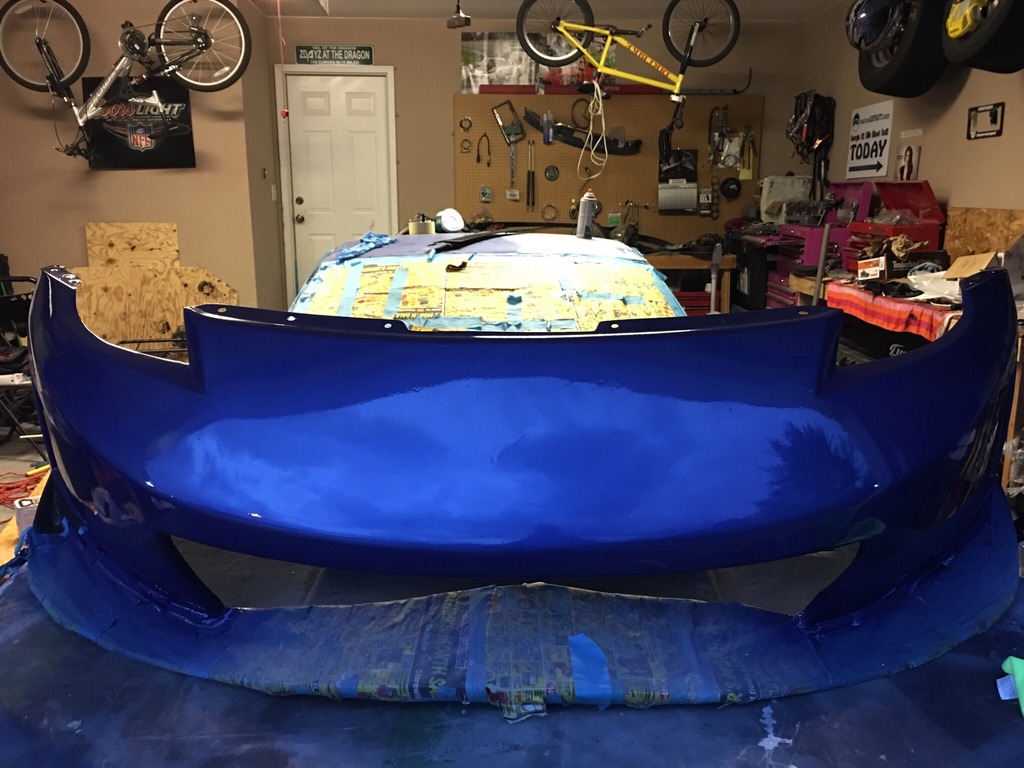
Name:  EFE82013-0B02-4AFD-B1EA-C0B50D02991C.jpg
Views: 51
Size:  379.4 KB

Name:  87010703-8C48-4622-8749-A1324117909E.jpg
Views: 62
Size:  226.3 KB

Name:  B69DF9A7-6AA2-4E82-A772-AF086934D451.jpg
Views: 45
Size:  186.0 KB
Old 07-18-2016, 10:55 AM
  #12  
meanz
New Member
Thread Starter
iTrader: (23)
 
meanz's Avatar
 
Join Date: Jan 2010
Location: greenville, sc
Posts: 2,197
Received 56 Likes on 43 Posts
Default

This turned out great so I prepped the rest of the car. Did a ton of sanding on it with a da at first. Then went back over by hand. I deleted the wiper hole. Fixed a couple areas with Bondo. There is still a dent in the door and little dings here and there. Point was to get it one color. Not a show car..
Old 07-18-2016, 10:59 AM
  #13  
meanz
New Member
Thread Starter
iTrader: (23)
 
meanz's Avatar
 
Join Date: Jan 2010
Location: greenville, sc
Posts: 2,197
Received 56 Likes on 43 Posts
Default

Name:  904097AB-C2A5-4342-8BB9-399B038CA01F.jpg
Views: 40
Size:  293.3 KB

Name:  7D0F93CE-9C81-46F9-8F32-9B9363818213.jpg
Views: 43
Size:  299.2 KB


Name:  112A94EC-E737-496B-94CE-1F50CEEE2BAB.jpg
Views: 52
Size:  175.5 KB

Wiper delete came out good

Name:  98F858AE-B5F7-43F5-9A76-084C4C02F2F3.png
Views: 54
Size:  714.4 KB
Old 07-18-2016, 11:04 AM
  #14  
meanz
New Member
Thread Starter
iTrader: (23)
 
meanz's Avatar
 
Join Date: Jan 2010
Location: greenville, sc
Posts: 2,197
Received 56 Likes on 43 Posts
Default

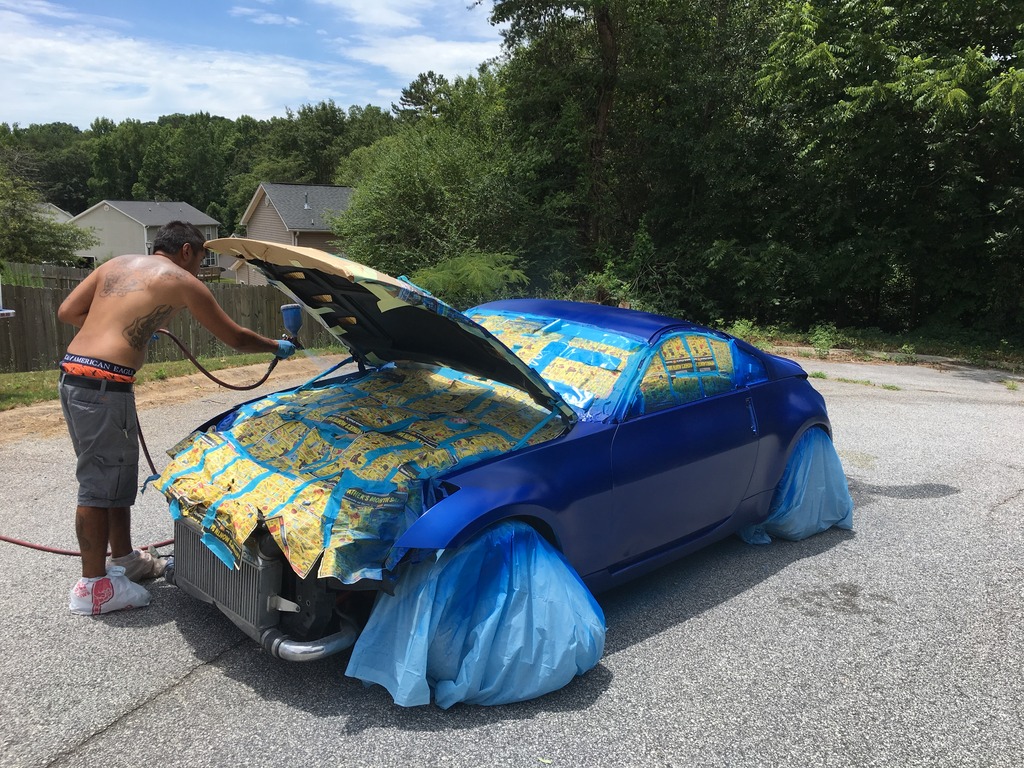
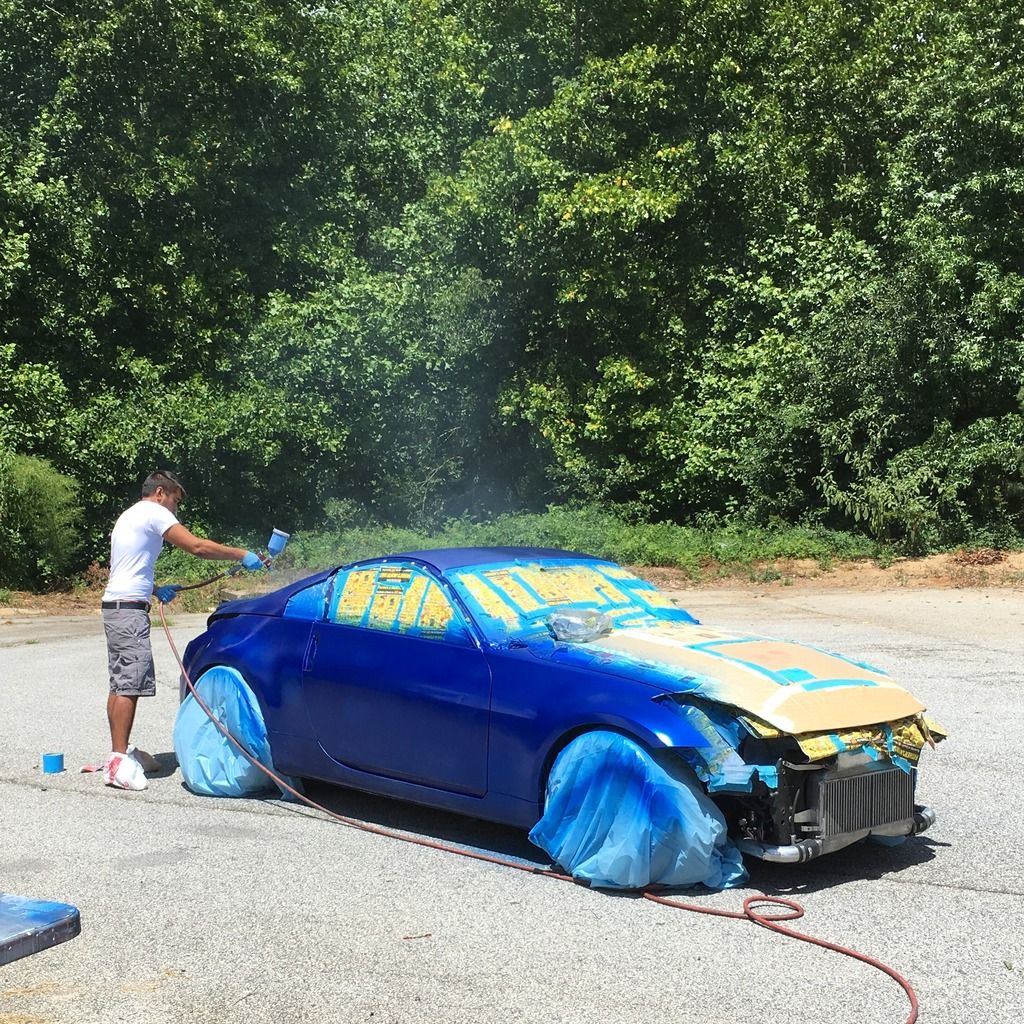
Ok most of you prolly gonna give me a bunch of sh*t but we ended up painting the z in the driveway. Why? Because I just wanted 1 color. This actually turned out pretty good. I did although have to do a lot of wet sanding by hand and polishing to get it smooth.

Name:  5EF5C701-DD99-4117-958B-2A58DB91DAFF.jpg
Views: 47
Size:  352.5 KB


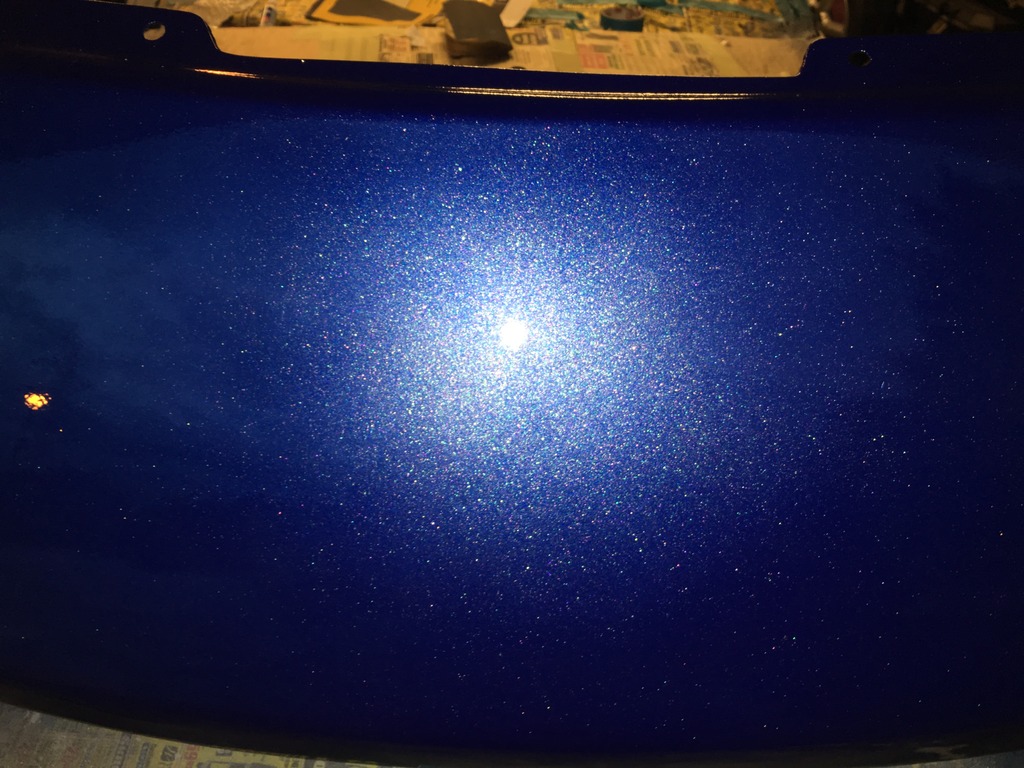
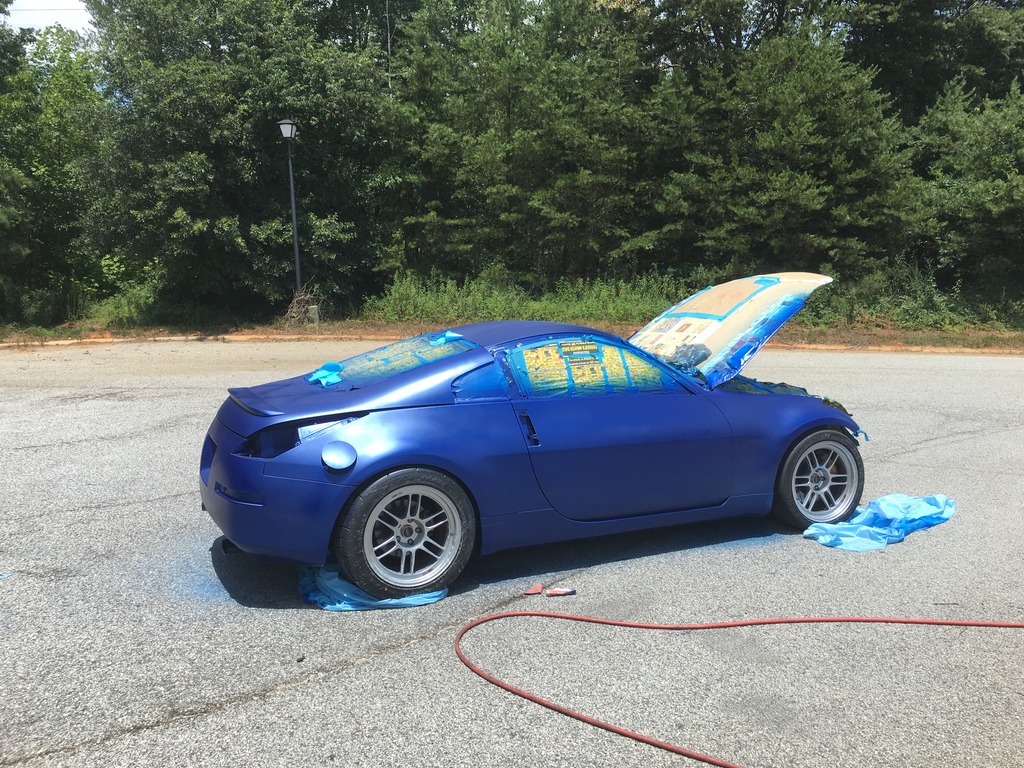
This is after a ton of pearl

Name:  D5DBA724-CEF2-4FF1-833C-590929578E28.jpg
Views: 45
Size:  374.5 KB
Old 07-18-2016, 11:07 AM
  #15  
meanz
New Member
Thread Starter
iTrader: (23)
 
meanz's Avatar
 
Join Date: Jan 2010
Location: greenville, sc
Posts: 2,197
Received 56 Likes on 43 Posts
Default

Name:  88926C6C-43C8-45D3-A7E2-F504052AD094.png
Views: 74
Size:  1,020.7 KB

Lots of work by hand to get it to look great. Had bloody finger tips

Name:  B73F2A7B-7AB6-49D0-B11C-330DB6020031.jpg
Views: 80
Size:  304.4 KB
Old 07-18-2016, 11:09 AM
  #16  
meanz
New Member
Thread Starter
iTrader: (23)
 
meanz's Avatar
 
Join Date: Jan 2010
Location: greenville, sc
Posts: 2,197
Received 56 Likes on 43 Posts
Default

Still not finished on the sanding and polishing. Will prolly get someone else to finish it for me.

Name:  1D128DA8-7856-4528-B00B-F500F6C44596.png
Views: 65
Size:  962.2 KB

Name:  50D30B09-72CF-4967-B723-E1F18CC8DF62.jpg
Views: 45
Size:  143.2 KB
Old 07-18-2016, 11:11 AM
  #17  
meanz
New Member
Thread Starter
iTrader: (23)
 
meanz's Avatar
 
Join Date: Jan 2010
Location: greenville, sc
Posts: 2,197
Received 56 Likes on 43 Posts
Default

Name:  57B31139-D45F-4742-9F32-38C948AC8A94.jpg
Views: 48
Size:  292.2 KB

And yes, a pillars not on yet. They need repaired first. So brittle they broke. But they will be on soon.

Name:  6A1F5824-9C28-4E42-A1EA-CB6193749C9B.jpg
Views: 50
Size:  210.6 KB

This is after working on the front bumper.

The following users liked this post:
KingBaby (08-05-2016)
Old 07-18-2016, 11:14 AM
  #18  
meanz
New Member
Thread Starter
iTrader: (23)
 
meanz's Avatar
 
Join Date: Jan 2010
Location: greenville, sc
Posts: 2,197
Received 56 Likes on 43 Posts
Default

Next thing, I found a Kirk roll bar local for a great price. Took some grinding and cutting to fit it.

Name:  FBE36E27-36B7-4C75-8E3E-BE1EECDC1D61.png
Views: 47
Size:  422.7 KB

Name:  32C55041-0DB4-4934-8591-935E44182B68.jpg
Views: 67
Size:  203.3 KB

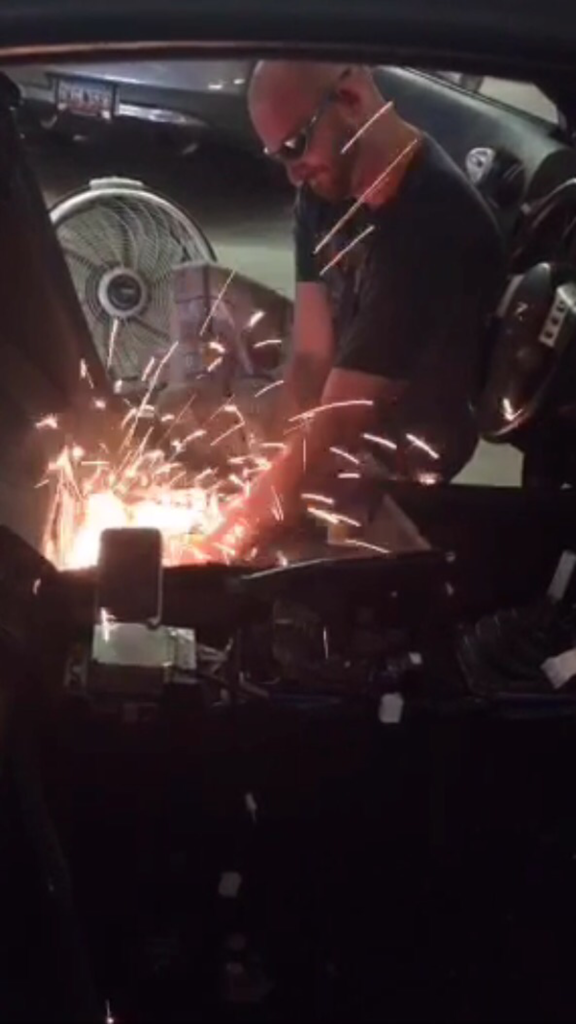
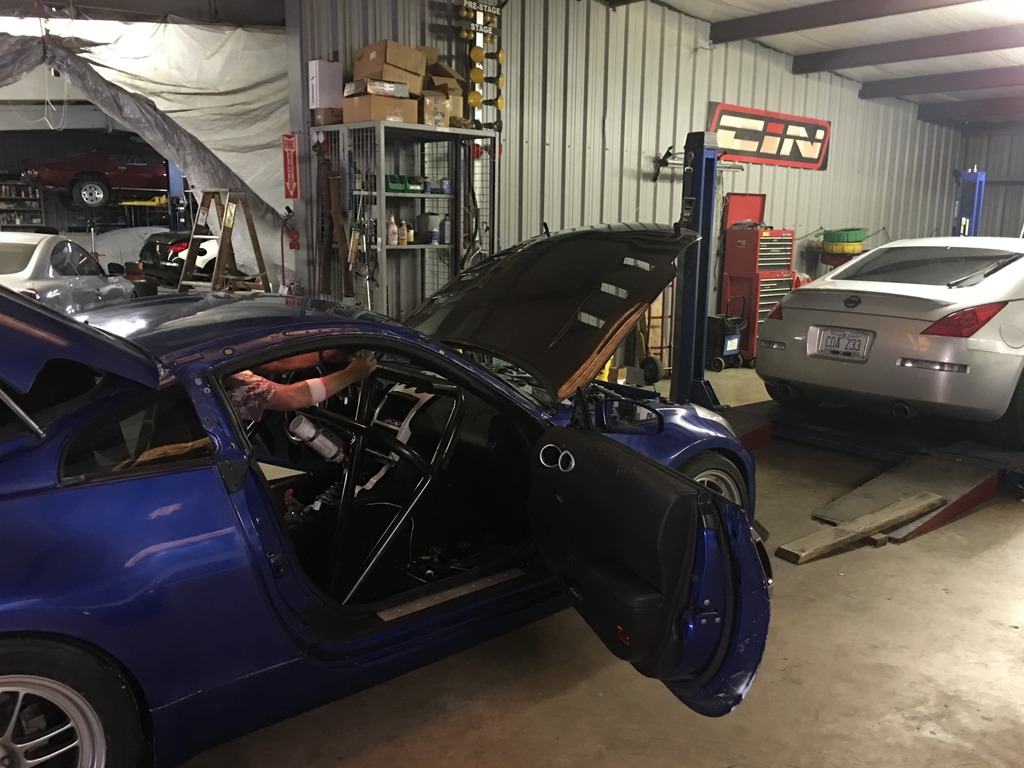
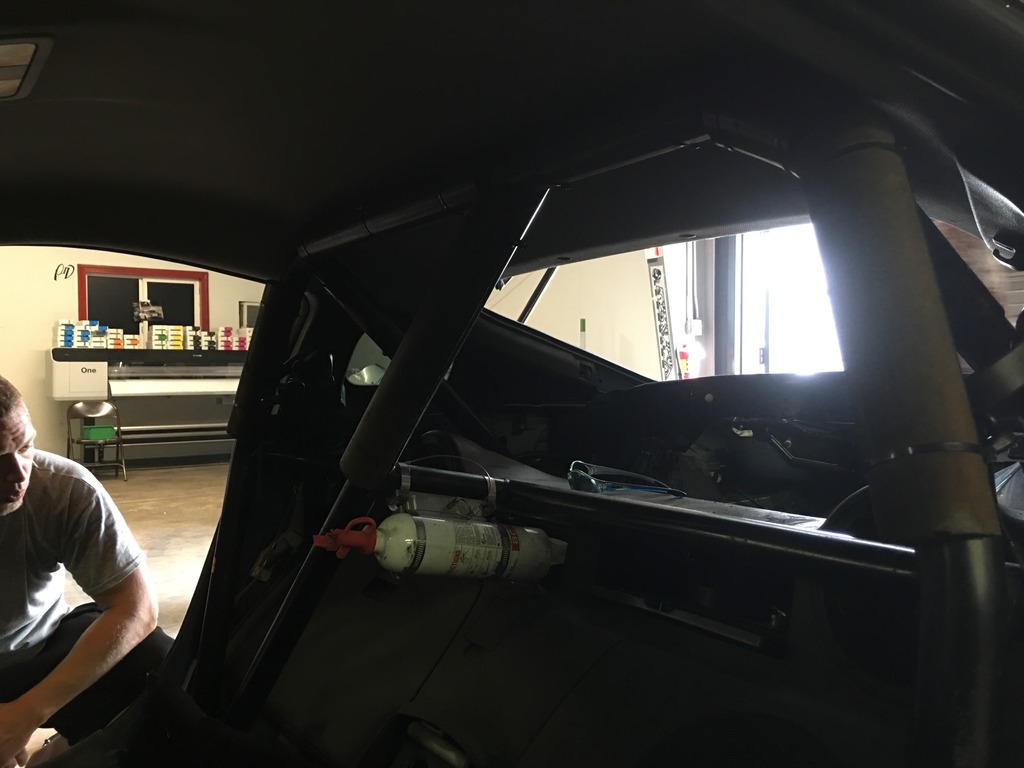
Tight fit for sure. I need to ditch the leather seats next.

Name:  F845BD19-BBBC-461E-8CD8-B92547F65FBA.jpg
Views: 45
Size:  118.0 KB
Old 07-20-2016, 05:11 AM
  #19  
NA&CH
General & Tech Senior Moderator
MY350Z.COM
iTrader: (74)
 
NA&CH's Avatar
 
Join Date: Jan 2004
Location: Florida
Posts: 7,175
Received 132 Likes on 96 Posts
Default

Very nice man. To have a painter in the "back" pocket(local) is nice! Mr Taywan does great work!

Now I will deff not be able to tell your cars apart.

Chris
Old 07-21-2016, 09:37 PM
  #20  
rustyschopshop
New Member
 
rustyschopshop's Avatar
 
Join Date: Mar 2014
Location: Watauga, Texas
Posts: 1,405
Received 373 Likes on 279 Posts
Default

I would never knock a decent painter doing an outside or barn paint. I have seen some awsome paint work done in harsh enviroments. Booth work save alot of color sanding though. Car is looking great. Awsome build.


Quick Reply: Another progress thread


All times are GMT -8. The time now is 11:03 AM.