Log In
Register
Forums
My350Z.com
Announcements
Feedback & Suggestions for Our Forum
Marketplace
Events
Upcoming Events
General
2009+ 370Z
2003-2009 Nissan 350Z
G35/G37
2009+ Nissan GT-R
Buying/Leasing
Media Share
Motorsports
350Z Tech Area
Engine & Drivetrain
Exterior & Interior
Wheels & Tires
Brakes & Suspension
Audio & Video
Maintenance & Repair
370Z Tech Area
370Z Engine & Drivetrain
370Z Exterior & Interior
370Z Wheels & Tires
370Z Brakes & Suspension
370Z Audio & Video
370Z Maintenance & Repair
Do It Yourself Guides
Engine, Drivetrain & Forced-Induction (DIY)
Brakes & Suspension (DIY)
Body, Interior, Exterior & Lighting (DIY)
Audio, Video & Electronics (DIY)
Marketplace
the *new* my350 Marketplace
Vendor Classifieds - Archive
Private Classifieds - Archive
Competition Items - Archive
Regions
North America
Other Regions
My350Z Group & Club Forum
News
Gallery
Tools
Car Payment Calculator
Tire Rim Calculator
Vin Decoder
Members List
Live Feed
Marketplace
Marketplace FAQs
Vendor Directory
Become a Vendor
the Z Marketplace
New Posts
View Dark Mode
Please register or login to enable Dark Mode.
Log In
Register
Threads
Google
Threads
Posts
Advanced
Dark Mode
Please register or login to enable Dark Mode.
Log In
Forgot your Password?
By logging into your account, you agree to our
Terms of Use
and
Privacy Policy
, and to the use of cookies as described therein.
or
Login with Facebook
Recent
Commented
Albums
My Pictures
My Post Pictures
KJFire4Life
February 10, 2016
483
0
Sort:
Default
Default
Most Recent
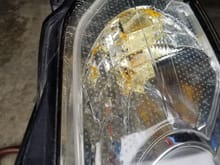
Glass, purty glass
0
2016/08/24 19:19:12
0
2016/08/24 20:05:31
0
2016/08/24 20:05:37
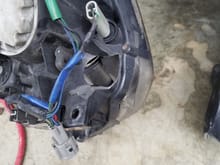
Bracket broken off shown here. Can be fixed pretty easily
0
2016/08/24 20:06:36
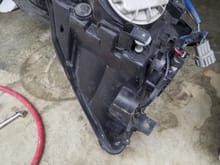
Same bracket, different angle
0
2016/08/24 20:06:42
0
2016/08/24 20:06:48
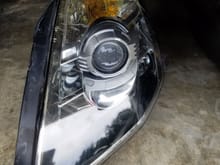
Small scracthes in lense. Nothing huge
0
2016/08/24 20:06:54
0
2016/08/24 20:06:59
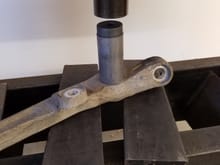
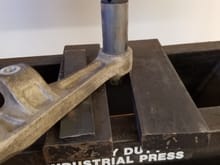
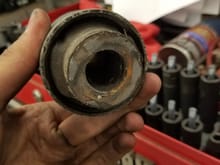
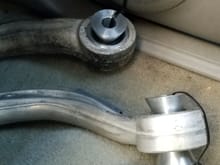
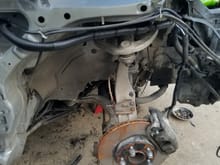
Use a 29mm impact socket, it fits PERFECTLY on both bushings. Here it is on the lower shock mount bushing
0
2016/08/25 18:05:17
Here it is on lower inner control arm bushing. Both sides push straight through in less then 5 minutes
0
2016/08/25 18:05:22
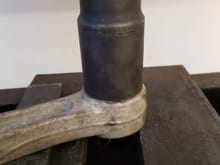
Then take the new bushings, and a 36mm socket and simply press the new bushing in, 30 seconds, easy as pie.
0
2016/08/25 18:05:27
Finished product, 20 minutes later.
0
2016/08/25 18:05:36
0
2016/08/25 18:05:41
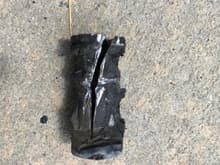
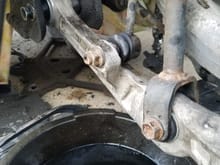
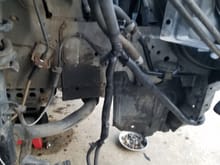
Old compression arm bushing driver side (came off frame with a little convincing)
0
2016/08/29 15:53:00
Old compression arm bushing passenger side (I spent 4 HOURS ON THIS SOB)
0
2016/08/29 15:53:21
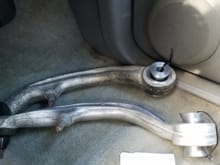
Shiny new bushings!
0
2016/08/29 15:53:28
<3 <3 <3
0
2016/08/29 15:53:34
Stoptech Stainless Brake Lines
0
2016/08/29 15:53:41
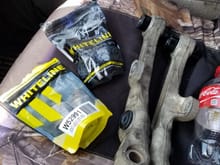
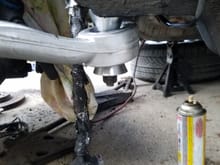
Good set of OEM shocks, tie rod ends, sway bar end links, and new whiteline filled trailing arms installed.
0
2016/08/29 15:53:48
Pre W brace install
0
2016/08/29 15:53:55
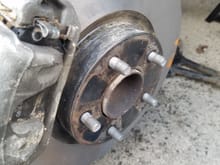
Rotors freshly cut (dirt cleaned off after this picture), rebuilt calipers, and new pads installed with new hardware (the dirt is from sitting on my old Z for a while)
0
2016/08/29 15:54:02
Stoptech Stainless Brake lines installed
0
2016/08/29 15:57:24
Fresh set of OEM sway bar links, shocks, tie rod ends, and whiteline filled trailing arms bolted into place!
0
2016/08/29 15:57:32
The new bling pre W brace installed
0
2016/08/29 15:57:37
Freshly cut rotors, new pads, rebuilt calipers, new hardware
0
2016/08/29 15:57:44
Finally RE-STABBED
0
2016/08/29 16:02:26
Shop closed down for the night
0
2016/08/29 16:02:31
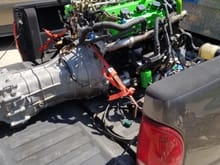
Transporting back over to the house
0
2016/08/29 16:02:38
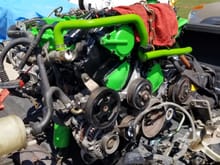
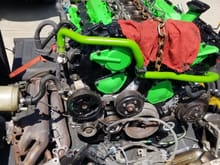
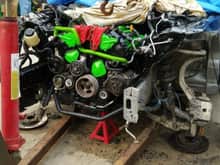
GREEN
0
2016/08/29 16:02:45
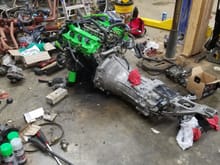
Mixed in with TONS of spare parts
0
2016/08/29 16:02:53
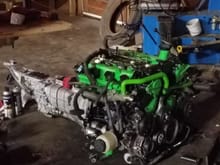
Late Sunday night......engine is installed with longtubes and transmission. all at once :)
0
2016/08/29 16:07:01
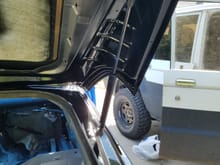
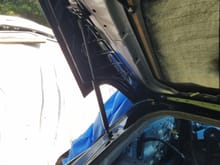
New hatch strut
0
2016/09/09 00:27:30
Another new hatch strut!!! It finally stays open!!
0
2016/09/09 00:27:34
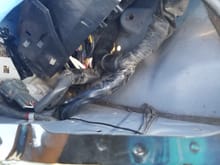
Okay, for reference, You start the passenger side by taking the whole harness and feeding it through this hole!
0
2016/09/09 00:27:40
De-loom as much as you want to. and pull it straight across with the wiper wash hoses. watch out for the little ground still stuck inside, it will stretch more then enough, just gotta be careful with it.
0
2016/09/09 00:27:46
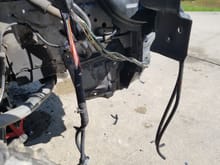
My new ground location for the fat ground on this harness. Under the headlight support
0
2016/09/09 00:27:50
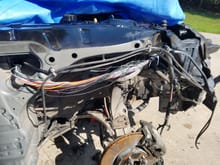
de-loomed, and run around the front of the core support (yes I got that installed to!
0
2016/09/09 00:27:56
Core support installed, radiator/Condensor/fans as well, wiring all hooked up and routed as I want it (out of the way) have to tape/loom/tape tomorrow! Then onto the drivers side!!! (easy side lol)
0
2016/09/09 00:28:02
0
2016/09/09 20:34:22
0
2016/09/09 20:34:54
First
Page
8 of 13
Last
Go To
Page
1
...
6
7
8
9
10
...
13
8 of 13
Go To
GO
Go to page
of 13
pages
1
...
6
7
8
9
10
...
13