How-To: Front Bumper Removal/L.E.D Clear Corners Install w/pix + Ares's '06 CCs!


 09-20-2012, 07:05 PM
#84

First, I'd like to say THANKS OP for this awesome write up!
also thanks to everyone that suggested that it could be done without removing the front fascia.
I found this guide in an attempt to remove, tint and replace my oem reflectors. I didn't want to remove the front fascia but I must say, it would've been much easier had I just done so.
That being said, here is my little picture guide to removing the markers without removing the fascia.
Starting with the driver's side, turn the wheel all the way(or just jack up and remove the wheel)
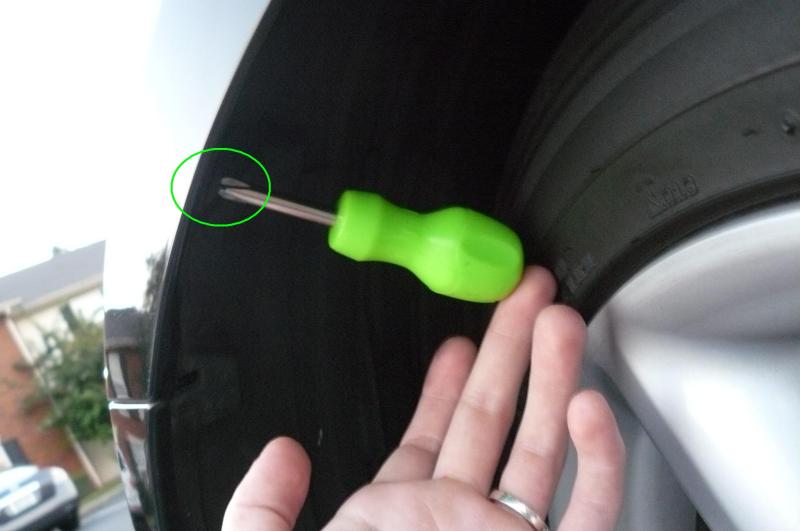
Now, like the OP said, remove the screw in the fender well toward the front.
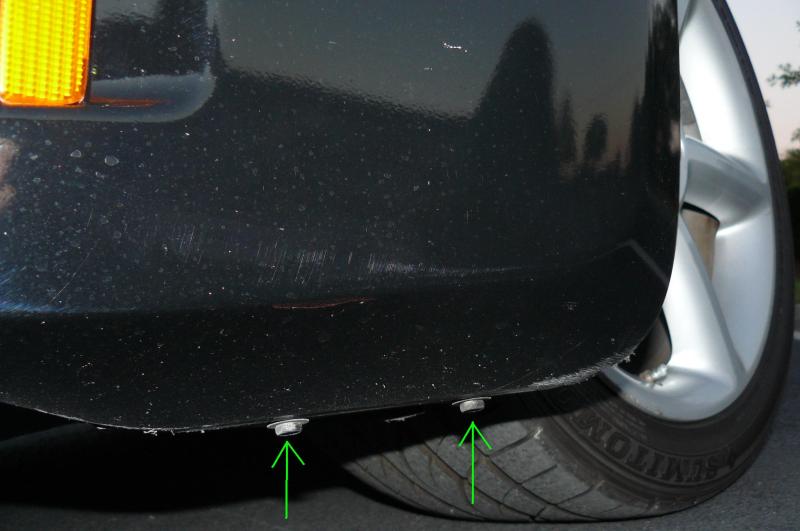
Then remove the bolts on the underside securing the fender well wall
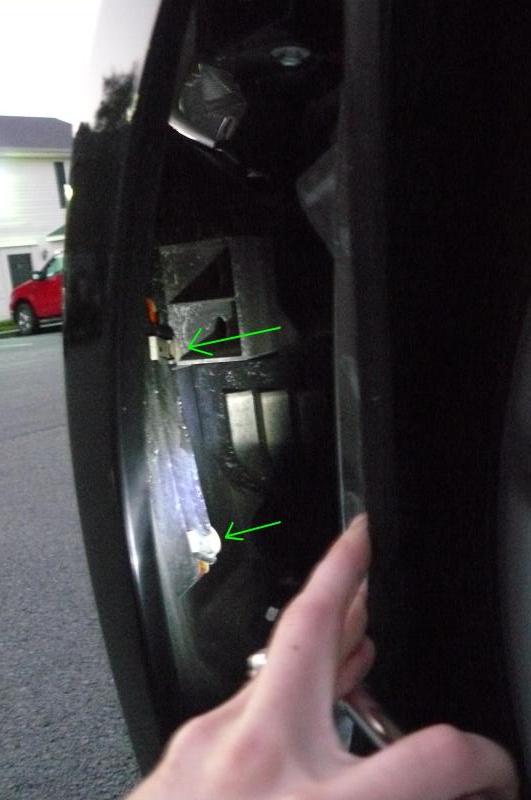
Now the fender well wall should come out enough for you to access the driver's side marker. Remove the two screws that secure the side marker.
Got it!
Now for the tricky part, (the part that after having done it makes me wish I'd just taken the fascia off) the psgr side.
Turn the wheel out of your way (or remove it) and remove the front screw in the fender well as well as the bottom bolts (like the first step)
Now, you'll notice that there is a fluid reservoir that is very much in your way... >_<
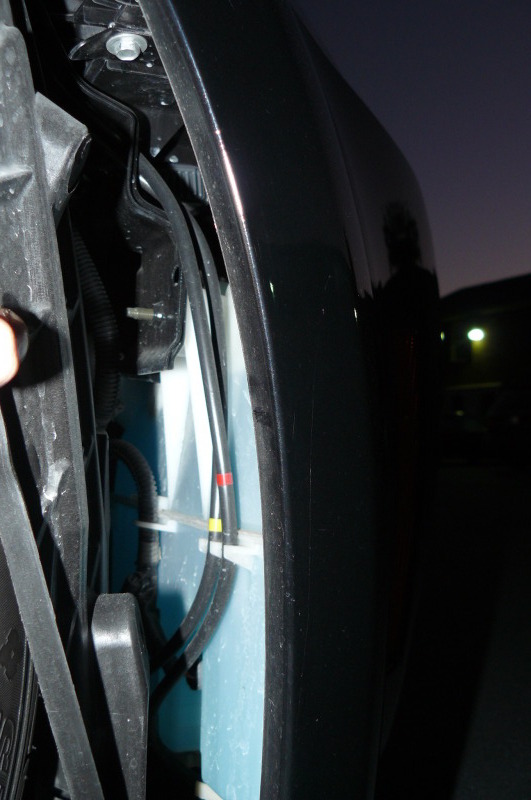
So, give up? I think not. Back under the bumper, remove three bolts securing the lower center panel.

All of the panels in your way should now be free (enough) to be moved out of your way.
From the middle of the front of the car looking toward the psgr wheel well, you can now access and remove the two screws securing the psgr side marker. This part is a bit easier said than done but it can be done.
NOTE: For this step, it really helps to have the car on jack stands.
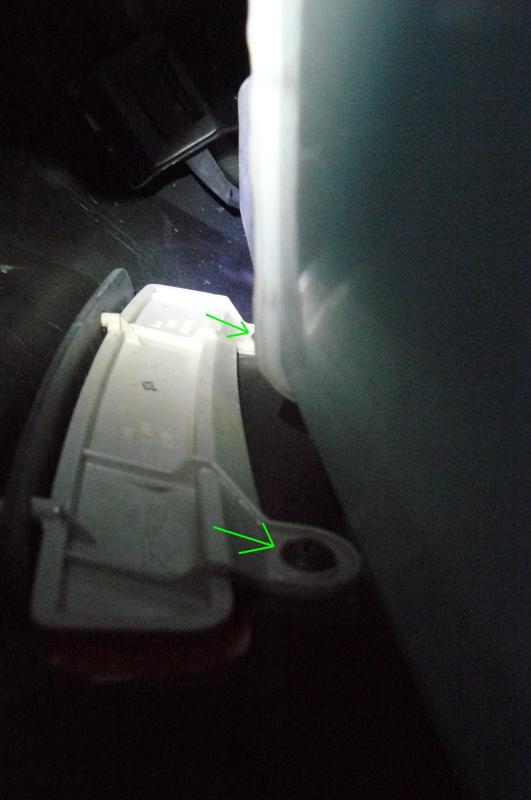
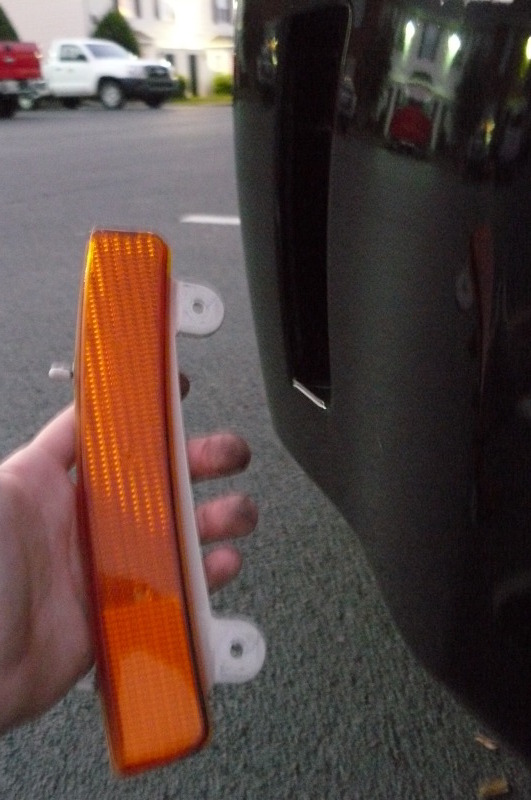
The passenger side marker should slide right out and you are now ready to replace (or in my case, tint and replace) the sidemarkers.
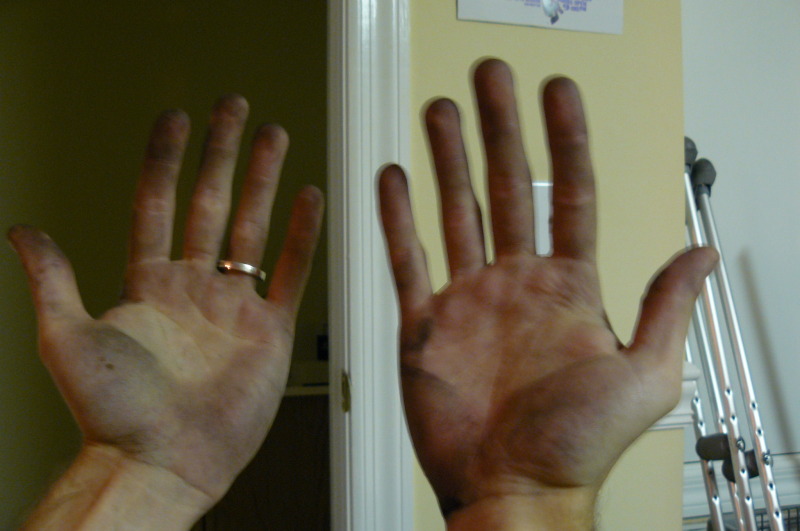
If your hands don't look like this, you did something wrong... or something right.
Thanks to all at my350z.com I love this site.
I hope this is at least minimally helpful to someone.
-Adam
also thanks to everyone that suggested that it could be done without removing the front fascia.
I found this guide in an attempt to remove, tint and replace my oem reflectors. I didn't want to remove the front fascia but I must say, it would've been much easier had I just done so.
That being said, here is my little picture guide to removing the markers without removing the fascia.
Starting with the driver's side, turn the wheel all the way(or just jack up and remove the wheel)
Now, like the OP said, remove the screw in the fender well toward the front.
Then remove the bolts on the underside securing the fender well wall
Now the fender well wall should come out enough for you to access the driver's side marker. Remove the two screws that secure the side marker.
Got it!
Now for the tricky part, (the part that after having done it makes me wish I'd just taken the fascia off) the psgr side.
Turn the wheel out of your way (or remove it) and remove the front screw in the fender well as well as the bottom bolts (like the first step)
Now, you'll notice that there is a fluid reservoir that is very much in your way... >_<
So, give up? I think not. Back under the bumper, remove three bolts securing the lower center panel.
All of the panels in your way should now be free (enough) to be moved out of your way.
From the middle of the front of the car looking toward the psgr wheel well, you can now access and remove the two screws securing the psgr side marker. This part is a bit easier said than done but it can be done.
NOTE: For this step, it really helps to have the car on jack stands.
The passenger side marker should slide right out and you are now ready to replace (or in my case, tint and replace) the sidemarkers.
If your hands don't look like this, you did something wrong... or something right.
Thanks to all at my350z.com I love this site.
I hope this is at least minimally helpful to someone.
-Adam

 12-26-2014, 08:47 AM
#87

No but after much complaining, the site managers re-worked the picture uploader which should keep the pics forever on their server going forward with future threads. But honestly, the dude with the black 350 included all the proper pix. He shows everything you need to know.
04-29-2015, 02:14 AM
#88
Registered User

Join Date: Apr 2015
Location: cressey, ca. USA
Posts: 2
Likes: 0
Received 0 Likes
on
0 Posts
Great write up, I'm a new member as of tonight. I need to take my front bumper off. I'm going to try and fix it myself. Your post would help me step by step but I can't for some reason see the pictures. I'm trying everything. Very Desperate, thank you, Scot
05-03-2015, 10:48 PM
#89
Registered User
Join Date: Apr 2015
Location: cressey, ca. USA
Posts: 2
Likes: 0
Received 0 Likes
on
0 Posts
Thank you so much. It was so easy removing the bumper cover. I thought maybe I could repair it. But that isn't going to happen. So now I'm looking for a new bumper cover. Your help is so appreciated.

Thread
Thread Starter
Forum
Replies
Last Post
ILoveDrifting
Upcoming Events
0
09-07-2015 03:15 PM